
Absolutely! Staining paint-grade wood is possible, but it demands proper preparation. Sand the surface to remove any existing paint or finish, allowing the stain to penetrate effectively for a stunning, enduring result.

So, gather your tools and your dreams, for we are about to unlock the hidden beauty of paint grade wood, one brushstroke at a time.
What Is Paint Grade Wood?
Paint grade wood refers to a category of wood that is specifically chosen and prepared for the purpose of being painted rather than left natural or stained.
This type of wood is typically of a lower quality and may have imperfections such as knots, blemishes, or uneven grain patterns that would be undesirable in a clear finish. However, it is structurally sound and suitable for painting, as the paint can effectively cover these imperfections.
The main advantage of paint grade wood is its cost-effectiveness, making it an economical choice for various applications, especially in projects where aesthetics are not a primary concern. It is commonly used in interior trim work, cabinetry, furniture, and other applications where the wood’s appearance is not the focal point. When properly prepared and painted, paint grade wood can provide a durable and attractive finish for a wide range of projects.
Can You Stain Paint Grade Wood?
Staining paint-grade wood is possible, but it may present some challenges compared to staining natural wood. The wood intended for painting rather than staining. So, certain factors must be taken into consideration.
It is crucial to understand that paint-grade wood, typically characterized by its lower quality and porous nature, may not absorb stain as uniformly or deeply as higher-grade wood. However, with proper preparation and techniques, satisfactory outcomes can be achieved.
Secondly, the success of staining paint-grade wood heavily relies on meticulous surface preparation. It is essential to sand the wood thoroughly, removing any existing paint or coatings, and ensuring a smooth, clean surface for the stain to penetrate evenly.
Due to the larger pores in paint-grade wood, which can lead to uneven stain absorption, using a wood grain filler or paste wood filler is recommended to create a more uniform surface for staining. Apply the filler according to the manufacturer’s instructions and sand it smooth after drying.
Furthermore, the choice of the right type of stain is paramount. Gel stains, oil-based stains, or penetrating stains are usually recommended for paint-grade wood due to their ability to seep into the wood fibers effectively.
In addition to the stain type, the selection of an appropriate wood conditioner is also pivotal. Pre-conditioning the wood can help create a more uniform stain application and prevent blotchiness on porous surfaces.
Lastly, conducting a test on a small, inconspicuous area before applying stain to the entire surface is a prudent approach. This test will provide insight into how the wood will react to the stain, helping to make necessary adjustments to achieve the desired outcome.
How to Stain Paint Grade Wood?
Staining paint-grade wood is a process that requires careful preparation and attention to detail to achieve the desired results. Follow these steps to successfully stain paint-grade wood:
Select the Right Stain: Choose an oil-based or water-based wood stain that complements the color and grain of your paint-grade wood. Oil-based stains tend to penetrate deeper and provide richer colors, while water-based stains are easier to clean up and have less odor.
Gather Materials and Tools: You’ll need the following items:
- Wood stain
- Drop cloths or plastic sheets
- Painter’s tape
- Sandpaper (multiple grits: coarse, medium, and fine)
- Clean cloth or rag
- Paintbrush or foam applicator
- Protective gloves and safety goggles
- Respirator mask (if working indoors or in a poorly ventilated area)
- Stir stick (if using oil-based stain)
- Clean water and soap (if using water-based stain)
Prepare the Work Area: Set up your work area in a well-ventilated space, preferably outdoors. If working indoors, ensure good ventilation by opening windows and using fans. Cover the surrounding surfaces with drop cloths or plastic sheets to protect them from accidental spills or drips.
Prepare the Wood Surface: If the paint-grade wood has any existing finish, such as paint or varnish, you need to remove it before staining. Use a paint stripper or sandpaper to strip off the old finish. Sanding is often the best approach, as it ensures a more even surface for staining.
Clean the wood surface to remove any dust, dirt, or debris that might interfere with the staining process. You can use a damp cloth or a vacuum cleaner to achieve this.
Sand the Wood: Sanding is essential to open up the wood pores and create a smooth, even surface for the stain to adhere to. Start with coarse-grit sandpaper to remove any imperfections, and then progress to medium-grit and finally fine-grit sandpaper to achieve a silky-smooth finish. Always sand along the wood grain to avoid scratches.
Test the Stain: Before applying the stain to the entire surface, it’s a good idea to test it on a small, inconspicuous area of the wood or on a scrap piece from the same batch. This allows you to see how the stain reacts with the wood and adjust the application if needed.
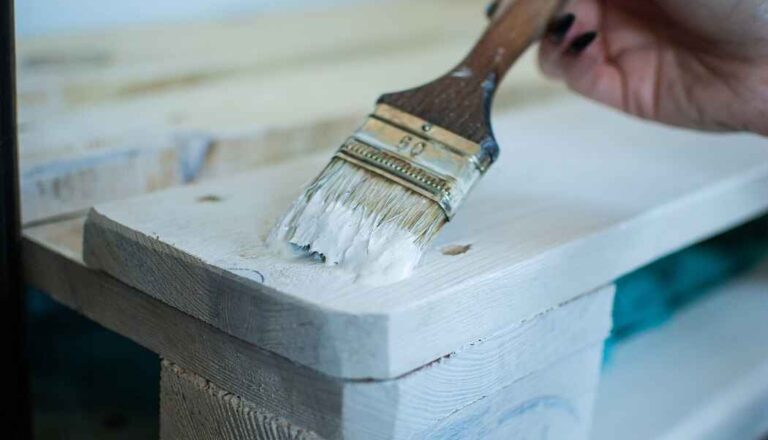
Apply the Stain: Wear protective gloves to avoid staining your hands, and a respirator mask to protect your lungs from fumes if working indoors. Stir the stain thoroughly if it’s oil-based. Dip the paintbrush or foam applicator into the stain and apply an even coat following the wood grain. Work in manageable sections to ensure a consistent finish.
Wipe Off Excess Stain: After applying the stain, wait for a few minutes to allow it to penetrate the wood. Then, using a clean cloth or rag, gently wipe off any excess stain that hasn’t been absorbed. This step helps prevent uneven coloring and blotching.
Allow the Stain to Dry: Let the first coat of stain dry according to the manufacturer’s instructions. This usually takes several hours, depending on the type of stain and environmental conditions.
Apply Additional Coats (Optional): If you desire a darker or richer color, you can apply additional coats of stain. Make sure to wipe off excess stain after each application and allow sufficient drying time between coats.
Apply a Topcoat (Optional): Once the final coat of stain has dried completely, you can apply a clear protective topcoat, such as polyurethane or lacquer, to enhance the wood’s appearance and protect it from wear and tear. Follow the manufacturer’s instructions for the topcoat application.
Inspect the Finish: After the stain and topcoat (if used) have dried, inspect the finish for any imperfections or spots that may need touch-ups. Carefully address these areas with additional stain or topcoat, if necessary.
Remember to always read and follow the instructions provided by the stain manufacturer for the best results. With proper preparation and application, you can achieve a beautiful and durable stained finish on your paint-grade wood.
Can You Stain Paint Grade Plywood?
Indeed, you can stain the bare wood of paint grade plywood without any issues.
However, it’s essential to be aware that paint grade plywood is not specifically designed for staining, so the results may not be as consistent or visually appealing as staining higher-grade hardwoods or specialized staining-grade plywood.
Paint grade plywood tends to have a more uneven surface and varying porosity due to its lower-grade wood composition. This can lead to a splotchy appearance when stained.
To improve the staining results, it is highly recommended to use a pre-stain wood conditioner before applying the stain. The wood conditioner helps to seal the surface and create a more even base for the stain to absorb, reducing the blotchiness and producing a more uniform color.
Keep in mind that while staining paint grade plywood is possible, the outcome may still not match the appearance achieved with higher-grade wood or staining-grade plywood. If a specific wood tone or grain appearance is essential, considering using a higher-grade plywood or solid hardwood specifically designed for staining.
Tips to Achieve Best Results while Staining Paint Grade Wood
If you’re looking for some exceptional tips to achieve unique and standout results while staining paint-grade wood, here are some creative and unconventional ideas:
Layer Different Stain Colors: Instead of sticking to a single stain color, consider layering multiple colors to create a custom and eye-catching effect. Apply one color as the base and then add accents of complementary or contrasting colors on top.
Use Stencils or Masks: Introduce intricate patterns or designs by using stencils or masks on the wood surface before staining. This technique allows you to create visually appealing motifs or even replicate the look of inlaid woodwork.
Combine Stain with Other Finishes: Experiment by combining stain with other finishes like paint, varnish, or even metallic accents. For instance, apply a colored stain as a base coat and then add metallic highlights for a luxurious touch.
Watercolor Staining: Dilute the wood stain with water to create a watercolor effect. This method allows the grain of the wood to show through while imparting a subtle wash of color.
Faux Aging or Weathering: Give your paint-grade wood an aged or weathered appearance by using a combination of stains and distressing techniques. This approach works particularly well for rustic or vintage-inspired projects.
Two-Tone Staining: Instead of staining the entire surface uniformly, try a two-tone approach. Stain different parts of the wood with varying intensities or colors, such as darker edges and a lighter center, to add dimension and visual interest.
Incorporate Textures: Experiment with adding textures to the wood surface before staining. Techniques like wire brushing or scorching can create intriguing patterns that interact with the stain in fascinating ways.
Blend with Wood Dyes: Combine traditional wood stains with wood dyes to achieve a broader spectrum of colors. Wood dyes penetrate deeply into the wood, allowing you to achieve vibrant or subtle hues.
Stain Artwork or Graphics: Use precision techniques like laser etching or hand carving to create intricate designs on the wood surface. Then, stain the artwork with various colors to make it pop.
Stain Gradient or Ombre Effect: Create a gradient effect by applying different shades of stain to the wood, transitioning from dark to light or vice versa. This technique can add a touch of modern elegance to your project.
Conclusion
Staining paint-grade wood requires careful consideration and preparation, it is indeed possible to achieve satisfying results with the right techniques and products. By adhering to the guidelines discussed and employing patience and diligence, you can easily enhance the appearance of paint-grade wood.