
Are you looking to add a touch of elegance to your next painting project? Why not try painting a champagne bottle? Painting a champagne bottle is a creative activity. It may seem daunting at first, but with the right tools and techniques, anyone can do it. That’s why you might want to know how to paint a champagne bottle.
To paint a champagne bottle, you’ll need a few basic supplies, including acrylic paints, paintbrushes, and a champagne bottle to paint. First, prepare the surface of the bottle, then apply a base coat of paint, and finally add the details and finishing touches.
In this complete guide, we will walk you through step-by-step how to paint a champagne bottle. So, grab a glass of bubbly, and let’s get started!
What Paint Do You Use to Paint Champagne Bottles?
When it comes to painting champagne bottles, there are a few options for the type of paint you can use. The most popular type of paint is acrylic paint, which is versatile and easy to work with.
Acrylic paint is water-based and dries quickly, making it a great option for painting on glass surfaces like champagne bottles. Acrylic paint comes in a wide range of colors and finishes, from matte to glossy, allowing you to customize your design.
Another option is enamel paint, which is oil-based and dries to a hard, glossy finish. Enamel paint is known for its durability and can withstand wear and tear. It is a good option if you plan to display your painted champagne bottle frequently. However, enamel paint requires special preparation and should only be used in a well-ventilated area due to its strong fumes.
If you are looking for a more temporary option, you can also use spray paint specifically designed for glass surfaces. This type of paint dries quickly and provides a smooth finish. But it may require multiple coats to achieve the desired opacity.
However, acrylic paint is the most common and easy-to-use option for painting champagne bottles. It is readily available at most art and craft stores and can be mixed to create custom colors.
How to Paint a Champagne Bottle?
Painting a champagne bottle is a fun and creative way to add a touch of elegance to your decor. Here’s a step-by-step guide on how to paint a champagne bottle.
Step 1: Gather Your Supplies
To paint a champagne bottle, you’ll need the following supplies:
- Champagne bottle
- Acrylic paint in your desired colors
- Paintbrushes (small and medium sizes)
- Painter’s tape
- Paper towel or cloth
- Palette or mixing tray
- Optional: spray varnish or clear coat
Step 2: Prepare the Surface
Clean the champagne bottle thoroughly to remove any dirt, dust, or residue. If necessary, you can use rubbing alcohol to clean the surface. Once the bottle is clean and dry, use painter’s tape to cover any areas you do not want to paint, such as the label or the bottom of the bottle.
Step 3: Apply a Base Coat
Choose a color for your base coat and apply it to the bottle with a paintbrush. Acrylic paint dries quickly, so work in small sections to avoid the paint drying before you can blend it.
Use a small paintbrush to paint any hard-to-reach areas, such as the neck of the bottle. Once you have applied the base coat, let it dry completely before moving on to the next step.
Step 4: Add Details
Using a smaller brush, add details to the bottle such as the champagne label, bubbles, or any design that you desire. Take your time and work in small sections, layering colors as necessary. If you make a mistake, don’t worry – you can always paint over it once the paint has dried.
Step 5: Add Finishing Touches
Once the paint is dry, remove the painter’s tape. If desired, you can add a layer of spray varnish or clear coat to protect the paint and give the bottle a shiny finish. Allow the varnish to dry completely before handling the bottle.
Step 6: Display Your Work of Art
Your painted champagne bottle is now ready to display! You can use it as a vase, or centerpiece, or simply display it on a shelf. You can also experiment with different colors and designs to create unique and personalized pieces.
Tips and Tricks:
- Use a variety of brush sizes to create different textures and details.
- Experiment with blending colors to create a unique design.
- If you are painting the bottle with multiple colors, allow each color to dry completely before painting over it with a different color.
- If you make a mistake, don’t worry – acrylic paint is forgiving and can be painted over once it has dried.
- Be patient and take your time – painting a champagne bottle can be time-consuming, but the result is worth it!
See How to Paint a champagne bottle With Acrylic:
How to Decorate a Champagne Bottle?
When you have an empty champagne bottle, you might think of decorating it. Here are some ideas on how to decorate a champagne bottle:
- Add a Ribbon or Bow
Tie a ribbon or bow around the neck of the bottle to give it a festive touch. You can choose a color that matches your decor or the occasion.
- Paint the Bottle
As we discussed earlier, painting a champagne bottle is an excellent way to create a unique and personalized decoration. You can use acrylic paint to create a design, add patterns, or customize the bottle with a message.
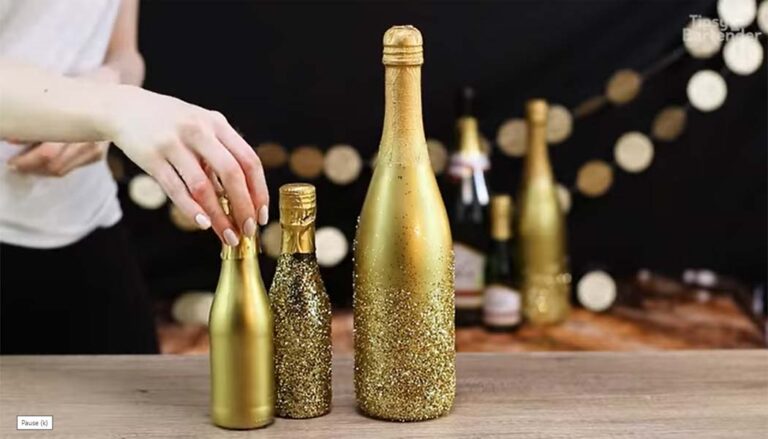
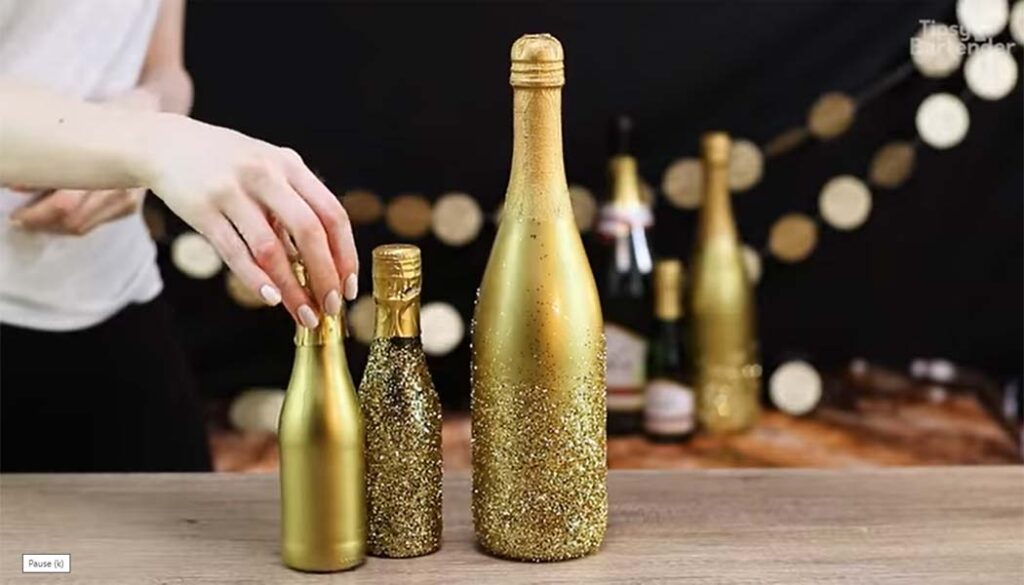
- Add Glitter
Coat the bottle with glue, then sprinkle glitter over it to add a shimmering effect. You can also use glitter glue or glitter spray to add a touch of sparkle.
- Apply Vinyl Decals
You can use vinyl decals or stickers to create a custom design on the bottle. Choose a design that matches the occasion or your decor.
- Wrap the Bottle
You can use wrapping paper, tissue paper, or fabric to wrap the bottle. Add a ribbon or bow to complete the look.
- Add Flowers
Use fresh or silk flowers to create a beautiful floral arrangement around the neck of the bottle.
Check This Video:
How Do You Glitter a Champagne Bottle?
Glittering a champagne bottle is an easy and fun way to add a touch of glam to your celebration or decor.
Step 1: Clean the Bottle
Make sure the champagne bottle is clean and dry before starting. Use rubbing alcohol to remove any residue or dirt.
Step 2: Apply Glue
Use a brush to apply a layer of glue to the bottle. You can use any clear glue such as Mod Podge or Elmer’s glue.
Step 3: Sprinkle Glitter
Sprinkle glitter over the glue. Use a paper plate or tray to catch the excess glitter.
Step 4: Shake Off Excess Glitter
Once the bottle is completely covered in glitter, shake off any excess glitter onto the plate.
Step 5: Let it Dry
Let the bottle dry for a few hours. If you want a more intense glitter effect, repeat steps 2-4 after the first layer has dried.
Step 6: Seal the Glitter
Once the glitter is dry, use a clear coat or varnish to seal the glitter in place. This will prevent the glitter from shedding or rubbing off.
Your glittered champagne bottle is now ready to use as a centerpiece or decoration. Enjoy your sparkling creation!
How to Spray Paint Champagne Bottles?
Spray painting a champagne bottle can be a quick and easy way to give it a new look. Here are the steps to spray paint a champagne bottle:
Step 1: Clean the Bottle
Make sure the champagne bottle is clean and dry before starting. Use rubbing alcohol to remove any residue or dirt.
Step 2: Prepare the Area
Choose a well-ventilated area to spray paint the bottle. Cover the surrounding area with a drop cloth or newspaper to protect from overspray.
Step 3: Prime the Bottle
Apply a coat of primer to the bottle. This will help the paint adhere to the surface and prevent chipping or peeling. Let the primer dry completely.
Step 4: Spray Paint the Bottle
Hold the spray paint can about 6-8 inches away from the bottle and spray in a sweeping motion. Apply multiple thin coats, allowing each coat to dry before applying the next.
Step 5: Let it Dry
Once you have achieved the desired coverage, let the bottle dry completely. Avoid touching the painted surface until it has fully dried.
Step 6: Seal the Paint
To protect the paint and prevent chipping, apply a clear coat or varnish over the painted surface. This will give the bottle a glossy finish and help the paint last longer.
You Can Check This Video:
How to Paint Champagne Bottle for Wedding?
Painting a champagne bottle for a wedding can be a beautiful and personalized way to add a special touch to the occasion. Here are some steps to paint a champagne bottle for a wedding:
Step 1: Choose a Color Scheme
Decide on a color scheme that matches the wedding theme or the couple’s preferences.
Step 2: Clean the Bottle
Make sure the champagne bottle is clean and dry before starting. Use rubbing alcohol to remove any residue or dirt.
Step 3: Apply a Base Coat
Use a brush to apply a base coat of paint to the bottle. Choose a color that matches your color scheme.
Step 4: Add Details
Once the base coat is dry, add details such as flowers, hearts, or the couple’s initials using a smaller brush.
Step 5: Customize the Bottle
You can customize the bottle by adding a message or quote with a stencil or by freehand painting.
Step 6: Let it Dry
Once you have finished painting, let the bottle dry completely before handling or adding any embellishments.
Step 7: Embellish the Bottle
Add embellishments such as ribbons, lace, or rhinestones to complete the look.
Final Thoughts
Painting or decorating a champagne bottle can be a creative way to add a personal touch to any occasion, whether it’s a wedding, anniversary, or just a special gathering.
From glittering to spray paint to hand painting, there are a variety of ways to transform a plain champagne bottle into a beautiful and unique centerpiece. By following some simple steps and using your creativity, you can create a stunning and memorable piece that will add to the ambiance of your celebration.