
To paint a plastic bathtub in a mobile home, start by thoroughly cleaning the surface. Sand the surface for better paint adhesion. Apply a primer designed for plastic. And finally, apply paint.
Today, we’re going to tackle a common challenge in mobile homes – the plastic bathtub. Don’t let its faded and worn appearance dampen your spirits. With a little creativity and some paint, we can turn it into a stunning centerpiece.

Get ready to discover the secrets of painting a plastic bathtub in your mobile home. Let’s dive in and transform your bathroom into a work of art.
Is It Safe to Paint the Plastic Bathtub in a Mobile Home?
Painting a plastic bathtub in a mobile home can be a viable option to refresh its appearance. In general, it is safe to paint the plastic bathtub. However, there are several factors to consider ensuring the process is much safer and effective. Here are some important points to keep in mind.
A. Surface preparation: Proper surface preparation is important for a successful paint job. Use a non-abrasive cleaner and a soft cloth to avoid scratching the surface. Rinse the tub thoroughly and allow it to dry completely.
B. Suitable paint: Look for a high-quality acrylic or epoxy paint manufactured for use on plastics. Avoid using regular latex or oil-based paints, as they may not bond properly.
C. Ventilation: Ensure proper ventilation in the bathroom area where you will be painting. Open windows to circulate the air and remove any fumes. This is particularly important when using epoxy-based paints, as they can emit strong odors and potentially harmful fumes.
How to Paint a Plastic Bathtub in a Mobile Home?
Transforming the appearance of a plastic bathtub in a mobile home can breathe new life into your bathroom. Using the right materials and proper techniques, you can successfully paint a plastic bathtub. Thus, you can give it a fresh and updated look. Check the painting method of a mobile home’s plastic bathtub below.
1. Preparing for the Project
A. Before starting the project, make sure you have all the required materials on hand. These may include:
- Paint
- Primer
- Sandpaper
- Masking tape
- Cleaning supplies
- Plastic sheets
- Paintbrushes or rollers
- Paint tray
B. When working with paint and chemicals, ensure proper ventilation in the area. Open windows or use fans to improve air circulation. Additionally, use appropriate safety measures such as wearing gloves, a mask, and goggles to protect you from fumes and chemical exposure.
C. Before painting the bathtub, remove any hardware or fixtures attached to it. This may include faucets, showerheads, handles, and drain covers. Use a screwdriver or appropriate tools to carefully detach these components. Keep all the components in a safe place for reinstallation later.
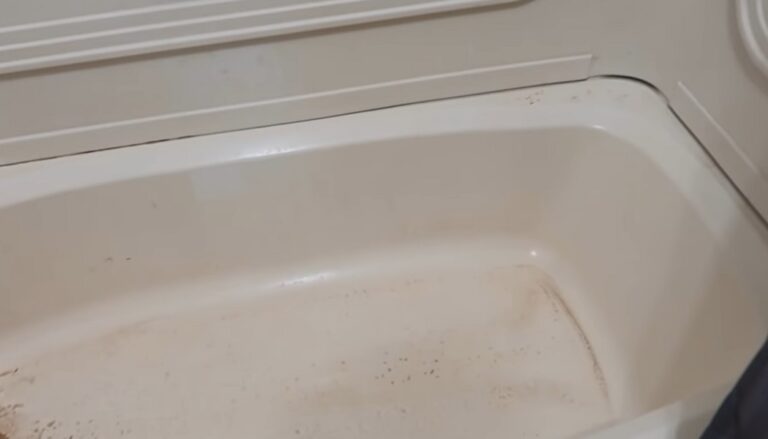
2. Cleaning and Sanding the Bathtub
A. Cleaning the surface is crucial as it ensures a smoother finish. Any dirt and soap scum left on the bathtub may interfere with the paint’s adhesion.
B. Check the following general process for cleaning the bathtub.
- Remove any loose debris from the bathtub, such as hair or soap residue.
- Fill the bathtub with warm water and add a mild detergent. You can also add a bathtub cleaner formulated for removing soap scum and grime.
- Use a sponge to thoroughly clean the surface. Carefully check the corners, edges, and hard-to-reach areas.
- Rinse the bathtub carefully with water to remove any cleaning residue.
- Now wait and make sure the bathtub is fully dried.
C. To enhance paint adhesion, it is beneficial to sand the surface of the bathtub, creating a textured surface.
- Start by lightly sanding the entire surface of the bathtub with sandpaper. Use sandpaper grit between 220 and 400 for plastic surfaces.
- Apply even pressure to generate a uniform roughness on the bathtub surface.
- Once you have finished sanding, take a wet cloth and use it to wipe down the bathtub. It aids in the elimination of any dust that may have been created during the sanding process.
- Make sure to dry the surface duly.
3. Applying Primer
A. When choosing a primer for plastic surfaces, look for one specifically designed for this purpose. Read product labels to ensure you’re selecting a primer right for plastic. Some primers may require specific curing times or preparation steps, so follow the manufacturer’s guidelines.
B. Follow these steps to apply the primer.
- Stir the primer thoroughly before applying. Use a paint mixing tool or paint stick to ensure it is well-mixed.
- Use the primer consistently to the entire surface of the bathtub with a roller. Follow the manufacturer’s recommended thickness and coverage.
- Apply evenly and avoid visible brush or roller marks.
- You will need to wait for some times to dry the primer before applying the paint.
4. Choosing and Applying Paint
A. There are various paints suitable for plastic bathtubs. Two commonly used options are epoxy paint and acrylic paint. Epoxy paint provides a highly durable and long-lasting finish, while acrylic paint offers versatility in color and finish options.
B. Choose a paint color and finish that aligns with your desired aesthetic for the bathroom. Consider the overall color scheme and design of the space. Select a paint designed for use on plastic surfaces and that is moisture-resistant.
C. To apply the paint evenly, follow these steps:
- Stir the paint thoroughly to ensure an even consistency.
- You can use a brush or roller to smear the paint onto the bathtub’s surface.
- For optimal results, apply several thin coats, ensuring that each coat is given enough time to dry properly.
- Take care to achieve an even application. Avoid drips, runs, or visible brush marks.
- Allow the final coat to dry and cure fully before using the bathtub. This may take several days. Check the guidelines provided by manufacturer.
5. Finishing Touches and Cleanup
A. When the paint has cured, carefully reinstall any component that was removed from the bathtub. Use the appropriate tools to securely attach them. Ensure they are tight but not over-tightened to avoid damaging the paint.
B. After completing the project, clean the brushes and any other painting tools. Dispose of any leftover paint or materials safely. Clean the work area, remove any protective coverings, and dispose of them responsibly as well.
Tips for Painting Bathtub in a Mobile Home
To maintain the painted bathtub’s appearance and durability, follow these tips.
1. Ensure that the paint has fully cured before using the bathtub. Follow the manufacturer’s instructions regarding drying time, which typically ranges from 24 to 72 hours.
2. Avoid using harsh cleaners that can damage the painted surface. Always test any new cleaner on an inconspicuous area before using it on the entire surface.
3. Be cautious when using sharp objects or tools in the painted bathtub. Scratches can damage the paint. Consider using a non-slip mat or soft rubber bath mat to protect the painted surface.
4. Wipe down the surface after each use to remove soap residue, dirt, or grime. This helps prevent buildup and keeps the painted surface looking fresh.
5. If you notice any minor scratches or chips, carefully apply the touch-up paint. This helps maintain the bathtub’s appearance and prevents the need for a full recoating.
How Much Does It Cost to Paint a Mobile Home’s Plastic Bathtub?
When it comes to adorning a plastic bathtub in a mobile home with paint, the cost can fluctuate depending on various factors. The size of the bathtub, the type of paint employed, and some other things can all influence the cost.
A. DIY Cost: If you decide to tackle the painting project yourself, you will need to purchase the necessary supplies. You will need primer, paint, sandpaper, brushes or rollers, and masking tape. The cost of these materials can range from $50 to $100 or more, depending on the quality you choose.
B. Professional Cost: Hiring a professional to paint your mobile home’s plastic bathtub will likely cost more. The cost can vary based on the professional’s experience, location, and other factors. It could range from $200 to $500 or more.
Keep in mind that these are just estimates, and the actual cost may differ. It’s better to consult with professional to get a more accurate estimate for painting a plastic bathtub in a mobile home.
Final Thoughts
Painting a plastic bathtub in a mobile home is not a permanent solution. Over time, the paint may show signs of wear and tear. If necessary, be prepared to repaint or consider other option such as refinishing the bathtub.
By following the guidelines above and exercising care throughout the process, you can bring a new appearance of your plastic bathtub. You can transform the look of your bathroom without breaking the bank.