
What Paint to Use for Hydro Dipping Shoes?

Looking to give your sneakers a unique and eye-catching makeover? Hydro dipping is a fun and creative way to customize your shoes and make them stand out from the crowd. As someone who has experimented with hydro-dipping shoes, I know firsthand the excitement and satisfaction of seeing a plain pair of shoes transform into a unique and eye-catching work of art.
But with so many different types of paints available, it can be hard to know what paint to use for hydro dipping shoes. Acrylic spray paints or specialized hydro-dipping paints work best for hydro-dipping shoes. They provide vibrant colors, good adhesion, and can withstand the wear and tear of daily use.
Here we’ll dive into the world of hydro dipping and explore the best paints to use for transforming your plain sneakers into one-of-a-kind works of art. So grab your paintbrush and let’s get started!
What is Hydro Dipping?
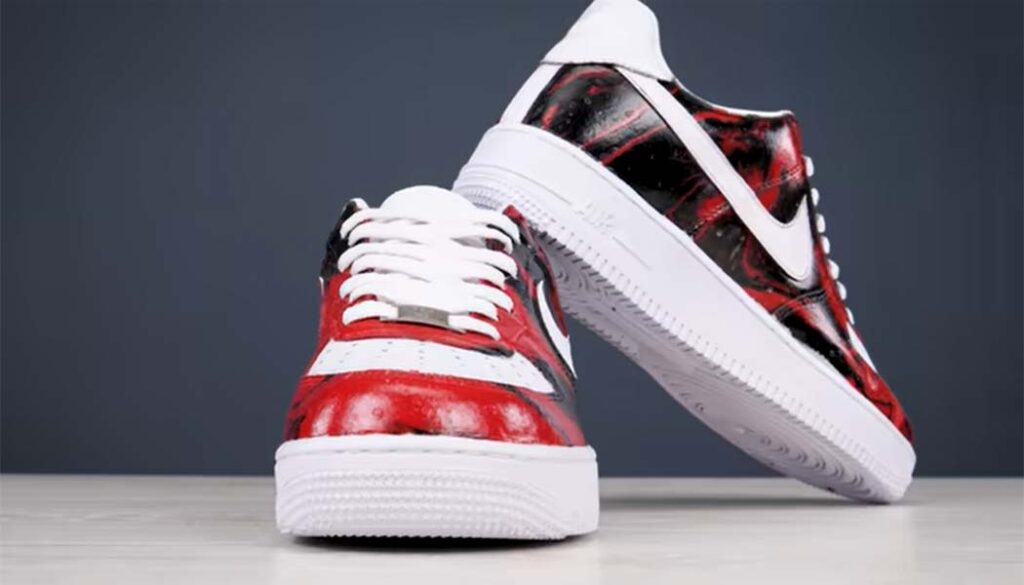
Hydro dipping, also known as water transfer printing or hydrographic printing, is a process used to apply a design or pattern to a three-dimensional object. The process involves placing a special film with the desired design on the surface of water and then dipping the object to be decorated into the water. The design is transferred onto the object as a thin film that adheres to its surface.
The process typically involves several steps, including preparing the object by cleaning and priming it, applying a base coat of paint, and then dipping it into the water with the film. After the film has been transferred, a clear coat is applied to protect the design.
Hydro dipping can be used to decorate a wide variety of objects, including car parts, helmets, sporting goods, and even fingernails. The process allows for a wide range of custom designs, and patterns and can create a unique, high-quality finish that is durable and long-lasting.
What kind of paint do you use to hydro dip shoes?
Choosing the right type of paint for hydro-dipping shoes is crucial to achieving the desired results. With so many options available, it’s important to select a paint that is specifically formulated for use in water and will adhere to the surface of the shoes. Some popular choices include acrylic paints, spray paints, and vinyl dye.
It is recommended to use water-based acrylic paint. This type of paint is easy to work with, dries quickly, and adheres well to the shoes. It also allows for good color saturation and creates a smooth, even finish.
Note: Not all acrylic paints are suitable for hydro dipping. Make sure to choose a paint that is specifically designed for use with water-based hydrographic films. Some popular brands of hydro-dipping paint include Angelus and Hydro-Vator.
Before painting, it is important to properly clean and prepare the shoes. Make sure they are free of any dirt, dust, or oils. Once the shoes are clean and dry, they are ready to be dipped in the paint and water mixture.
What materials do you need to hydro dip shoes?
To hydro-dip shoes, you will need the following materials:
Shoes:
The first thing you need is a pair of white shoes to customize ((canvas, leather, or vinyl works best).
Spray Paint:
This is the main material used for the dipping process. As mentioned earlier, it’s important to choose a paint that is specifically designed for use with water-based hydrographic films.
Hydrographic film:
This is the material that will transfer the pattern or design onto the shoes. There are many different designs and patterns available, so choose one that best suits your style and preference.
Hydrographic Activator:
Activator is used to dissolve the hydrographic film and allow it to adhere to the shoes. You will need a hydrographic activator for this process.
Container or Bucket:
You will need a container or bucket large enough to hold your shoes and deep enough to submerge them in water.
Water:
Clean tap water is needed to create the hydro dipping solution.
Protective Gear:
Protective gear like glove and face masks is important to protect you from the paint and chemicals.
Masking tape:
This is used to mask off areas of the shoes that you don’t want to get painted.
Stir stick:
A stir stick is needed to mix the paint and water together.
Prepping materials:
Sandpaper, primer, and degreaser are used to prepare the shoes for painting.
Clear coat:
A clear coat is optional but recommended to apply over the paint to protect the design and give the shoes a glossy finish.
Drying rack:
A drying rack is needed to allow the shoes to dry after the dipping process.
These are the basic materials required for hydro dipping shoes, but additional materials and tools may be needed depending on the specific design and process you choose.
How to Hydro Dip Shoes?
With a little patience and creativity, you can create a unique and personalized pair of hydro-dipped shoes. Just follow our tips and tricks on how to hydro-dip shoes:
Step 1: Prepare your shoes
Clean your shoes thoroughly with soap and water to remove any dirt, oils, or residue that may prevent the paint from adhering. Remove the laces also. Allow the shoes to dry completely before moving to the next step.
Step 2: Masking off
Cover any areas on your shoes that you don’t want to get painted on with painter’s tape. This includes areas like the sole, tongue, and shoelace holes. Be sure to press the tape down firmly to prevent any paint from seeping through.
Step 3: Fill the container with water
Fill the plastic container with water, leaving enough room at the top to allow for dipping the shoes. The water should be room temperature or slightly warmer.
Step 4: Spray the paint
Shake the spray paint can well and then spray your chosen colors of spray paint onto the surface of the water, creating a pattern of your choice. Use light and even strokes, spraying each color onto the water in a circular pattern. You can use multiple colors to create a marbled effect or just one color for a solid look. It is best to use spray paint that is specifically formulated for hydro dipping.
Step 5: Mix the colors
Use a toothpick or stick to gently mix the colors together in the water. Be careful not to over-mix, or the colors will become muddy.
Step 6: Dip the shoes
Put on your gloves to avoid staining your hands. Hold your shoes and dip them into the water at an angle, pushing them under the surface of the water. Make sure the entire shoe is submerged and then slowly lift it out of the water, allowing the excess paint to drip off. You can use the toothpick or stick to remove any excess paint on the surface of the water before dipping your shoes.
Step 7: Dry the shoes
Place the shoes on a paper towel or a drying rack to dry completely. Be sure to remove the painter’s tape once the shoes are dry.
Step 8: Seal the shoes
Apply a clear coat of sealant to protect the paint and make it more durable. This step is optional, but it will help your custom shoes last longer. Be sure to follow the manufacturer’s instructions for the sealant, including any recommended drying time.
That’s it!
What is the Best Spray Paint for Hydro Dipping Shoes?
The best spray paint for hydro-dipping shoes is one that is designed specifically for use on a variety of surfaces, including plastic, metal, and fabric. Rust-Oleum Specialty Camouflage spray paint is a great option as it has excellent adhesion and durability, dries quickly, and provides smooth and even coverage.
Additionally, it comes in a range of colors that work well for hydro-dipping projects. It’s important to choose a paint that is waterproof and won’t fade over time to ensure your hydro-dipped shoes last for as long as possible.
Can You Hydro Dip Shoes with Acrylic Paint?
Yes, acrylic paint can be used for hydro-dipping shoes. Acrylic paint is water-soluble and has good adhesion properties, making it a suitable choice for hydro dipping. However, the paint may need to be thinned down to the right consistency and proper surface preparation is important. This includes cleaning the shoes and applying a base coat of paint to help the design adhere better.
Hydro dipping with acrylic paint can be a fun and creative way to customize shoes, but proper safety precautions should be taken, such as working in a well-ventilated area and wearing protective gear.
Should I Use Primer Before Hydro Dipping?
Yes, it is highly recommended to use a primer before hydro-dipping shoes. Using a primer before hydro dipping can greatly improve the quality, durability, and longevity by providing a layer of protection against wear and tear of the final product.
The primer helps to create a clean, even surface for the hydrographic film to adhere to, which ensures a smooth and consistent finish. Without a primer, the hydro dip may not stick properly or may peel off easily, resulting in a poor-quality finish.
If You Miss a Spot on Shoes Can You Double Dip?
It’s generally safe to double-dip the shoes back into the water to try to apply the design to the missed area. But not recommended to double dip during the hydro dipping process, as this can result in uneven and clumpy patterns on the surface of the shoe.
If you miss a spot, it’s best to touch it up with a small brush or sponge to ensure that the pattern is consistent and even.
Make sure to follow the manufacturer’s instructions and use the recommended amount of dipping time and water temperature to achieve the best results.
Is Hydro Dipping Shoes Permanent?
The permanence of hydro dipping on shoes depends on several factors, such as the type of shoes, the quality of the hydro dipping process, and the care taken after the dipping. Generally, if the shoes are properly prepped and primed, and the hydro dipping is done professionally with high-quality materials, the result can be long-lasting and resistant to wear and tear.
However, if the shoes are not prepped correctly, the dipping is done poorly, or the shoes are not cared for properly after the dipping, the hydro dip may begin to peel or fade over time.
Final Words
Hydro dipping shoes is a popular DIY trend that involves using water and a special hydrographic film to transfer a pattern or design onto the shoes.
After researching and considering various factors, it’s clear that using acrylic paints with a hydrographic activator is the best choice for hydro-dipping shoes. This combination not only produces vibrant and long-lasting colors but also provides excellent adhesion and durability on shoe materials such as leather, rubber, and canvas.
It’s essential to properly prepare the shoes before painting, as well as follow the necessary safety precautions when working with chemicals.
What’s the delay? Let’s experience it!