What Type of Brush for Masonry Paint?

Are you planning to paint a masonry surface, such as a concrete wall or brick fireplace? If so, choosing the right type of brush is crucial for achieving a smooth finish. That’s why you might be curious about what type of brush for masonry paint?
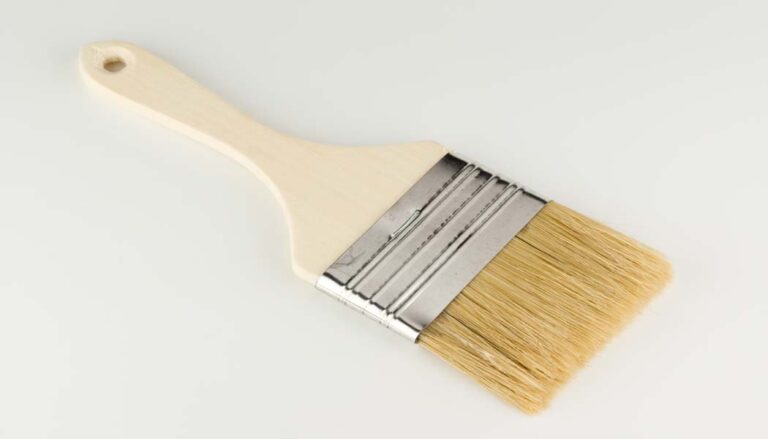
For masonry paint, it’s recommended to use a brush with synthetic bristles, such as nylon or polyester, and a thickness of at least 2 inches. A brush with a tapered or angled edge can help to reach tight spaces and corners, while a roller can be used for larger areas.
With so many types of brushes available, it can be overwhelming to choose the best one for your project. In this article, we’ll guide you through the process of selecting the perfect brush for masonry paint.
What Type of Brush for Masonry Paint?
When it comes to painting masonry surfaces such as concrete, brick, or stone, it is important to use the right type of brush for achieving a professional-looking finish. The surface of masonry can be rough and porous, so using the wrong type of brush can result in an uneven application.
Moreover, it can cause brush marks, and premature wear and tear of the bristles. Therefore, it’s important to choose a brush that is specifically designed for masonry paint. Now you can take a closer look at the different types of brushes available for masonry paint and choose the best one for your project.
- Bristle Material
You can use a brush with synthetic bristles, such as nylon or polyester. These types of bristles are more durable than natural bristles, which can break down more quickly on rough surfaces. They are also better able to hold their shape and maintain their stiffness over time, which is important for achieving an even application of paint.
- Brush Thickness
When choosing a brush for masonry paint, it is important to select one with a thickness of at least 2 inches. This will help to ensure that you are able to apply a generous amount of paint to the surface. It is necessary for achieving a smooth and even finish.
Brushes that are too thin may result in a streaky or uneven application. On the other hand, brushes that are too thick can be difficult to maneuver in tight spaces.
- Brush Shape:
A brush with a tapered or angled edge can help to reach tight spaces and corners. This is particularly important for masonry surfaces that may have irregular shapes or contours. An angled brush can also help to reduce the amount of paint that is wasted on areas that do not require coverage.
- Roller:
While brushes are the most common tool used for painting masonry surfaces, a roller can also be used for larger areas. A roller can help to cover a larger surface area more quickly and efficiently than a brush. But it will still provide a smooth and even application.
However, it is important to choose a roller with a nap (the length of the fibers on the roller) that is appropriate for the texture of the masonry surface. A shorter nap is better for smoother surfaces. On the other hand, a longer nap is better for rougher surfaces.
- Quality:
Finally, it is important to choose a high-quality brush that will provide long-lasting and durable performance. Cheaper brushes may seem like a more cost-effective option. But they may not hold up as well over time and may need to be replaced more frequently.
Look for brushes with well-constructed handles and firmly attached bristles. Moreover, consider investing in a brush with a warranty or guarantee.
In summary, choosing the right type of brush for masonry paint is essential for achieving a smooth finish. From the above-mentioned factors and types of brushes, you can decide the suitable one.
What Type of Brush Works Perfectly for Masonry Paint?
Choosing the right brush for masonry paint is essential to achieve an even finish on rough and porous surfaces. The wrong type of brush can result in different problems on the surface. For this, it is important to consider certain factors while choosing the perfect brush for masonry paint.
Nylon or polyester will be a good choice from synthetic bristles brush types. , is recommended for masonry paint. Synthetic bristles are more durable than natural bristles and can withstand the roughness of the masonry surface. They also maintain their stiffness and shape for a more even application of paint.
You can also consider the thickness of the brush. For example, a thickness of at least 2 inches is recommended. It will ensure a generous amount of paint is applied to the surface, resulting in a smooth finish. A thin brush can leave marks or unevenness on the surface. Contrarily a thick brush will be difficult to maneuver in tight spaces.
If you consider reaching tight spaces or corners, an angled or tapered edge on the brush can help. This is especially necessary for masonry surfaces that have irregular shapes or contours. If you use this type of brush, it will reduce the quantity of paint wasted on surfaces that don’t need to be painted.
A roller can also be utilized for bigger areas. So it’s important to choose a roller whose nap matches the roughness of the masonry surface. On smoother surfaces, a shorter nap is preferable, meanwhile, a longer nap is preferable for rougher surfaces.
A high-quality brush must be purchased if you want it to operate over time with regularity. Cheaper brushes could appear to be a good deal, but they might not last very long and might require replacement rather frequently. Hence, search for brushes with sturdy handles and tightly fastened bristles.
However, selecting the right brush for masonry paint involves considering these factors. You can go through the above-mentioned factors to find out a suitable brush.
What Is the Best Way to Apply Masonry Paint?
Masonry paint is a great way to protect and enhance the appearance of your home’s exterior. However, applying it can be a bit tricky, so it’s important to follow these steps for the best results.
Step-1: Clean the surface
Before applying masonry paint, you need to make sure the surface is clean and free of any loose or flaking paint, dirt, or debris. You can do this by pressure washing or scrubbing with a stiff-bristled brush and a mixture of water and mild detergent.
Step-2: Repair any damage
If there are any cracks or holes in the masonry, it’s important to repair them before applying the paint. You can use a filler or patching compound to fill in any gaps. Then smooth it out with a putty knife.
Step-3: Prime the surface
Once the surface is clean and dry, apply a masonry primer to help the paint adhere better and ensure a more even finish. Be sure to follow the manufacturer’s instructions for mixing and applying the primer.
Step-4: Apply the paint
When the primer is dry, it’s time to apply the masonry paint. You can use a brush, roller, or sprayer, depending on the size of the surface and your personal preference.
Make sure to apply the paint in thin and even coats. Work in small sections to avoid drips or runs. If you’re using a roller or sprayer, backroll or back brush the surface to ensure an even finish.
Step-5: Second coat
Once the first coat of paint has dried, a second coat should be applied. This will ensure the surface is completely covered. Moreover, it will provide better protection against the elements.
Step-6: Drying time
Masonry paint can take several hours to dry, depending on the weather conditions. It’s important to allow the paint to dry completely before applying a second coat or exposing the surface to any moisture.
Step-7: Clean up
After painting, it’s important to clean up any spills or splatters immediately. Masonry paint can be difficult to remove once it has dried. So it’s best to clean up while it’s still wet.
Can You Use Roller for Masonry Paint?
Yes, a roller can be used for applying masonry paint. In fact, using a roller can make the job easier and quicker, especially when covering large areas.
When using a roller for masonry paint, it’s important to choose the right roller sleeve. A roller sleeve with a medium or long pile is recommended. It will be able to hold more paint and provide better coverage. Here are some tips on how to use a roller for masonry paint.
- Preparation
As with any painting project, it’s important to prepare the surface properly before painting. The surface should be clean, dry, and free of any loose or flaking paint.
- Priming
If the surface has not been previously painted, it’s recommended to apply a suitable primer before painting. This will help the paint adhere better and provide better coverage.
- Pouring the paint
The masonry paint should be poured into a paint tray or bucket, depending on the size of the project.
- Dipping the roller
Dip the roller into the paint and roll it back and forth in the paint tray or bucket. It will distribute the paint on the roller sleeve evenly.
- Applying the paint
Start at the top of the surface and work downwards, using long, even strokes. Be sure to apply the paint evenly, without leaving any thick or thin spots.
- Second coat
Once the first coat of paint has dried, a second coat should be applied using the same technique.
- Drying time and cleaning
Depending on the weather, it may take several hours for masonry paint to dry. Dry the surface very well. After finishing the painting, clean the roller and tray properly. Otherwise, dried paint on the roller will not remove easily.
Final Thoughts
Whether you choose to use a roller or brush for masonry paint, the most important factors are proper preparation and technique. It’s essential to select the right brush to ensure an even finish.
A brush with stiff bristles is the best choice as it can handle the rough surface of masonry. Synthetic bristles are ideal as they hold up better than natural bristles against the harsh chemicals in masonry paint. However, choosing the right brush is important for achieving optimal results, making the process easier and more efficient.