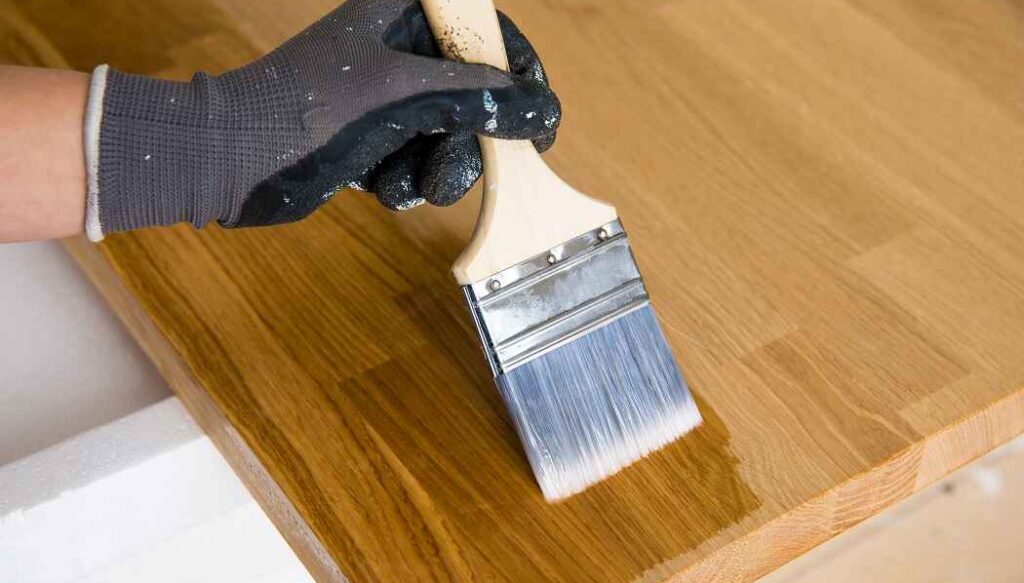
Absolutely! Staining paint-grade wood is possible, but it demands proper preparation. Sand the surface to remove any existing paint or finish, allowing the stain to penetrate effectively for a stunning, enduring result.

So, gather your tools and your dreams, for we are about to unlock the hidden beauty of paint grade wood, one brushstroke at a time.
What Is Paint Grade Wood?
Paint grade wood refers to a category of wood that is specifically chosen and prepared for the purpose of being painted rather than left natural or stained.
This type of wood is typically of a lower quality and may have imperfections such as knots, blemishes, or uneven grain patterns that would be undesirable in a clear finish. However, it is structurally sound and suitable for painting, as the paint can effectively cover these imperfections.
The main advantage of paint grade wood is its cost-effectiveness, making it an economical choice for various applications, especially in projects where aesthetics are not a primary concern. It is commonly used in interior trim work, cabinetry, furniture, and other applications where the wood’s appearance is not the focal point. When properly prepared and painted, paint grade wood can provide a durable and attractive finish for a wide range of projects.
Can You Stain Paint Grade Wood?
Staining paint-grade wood is possible, but it may present some challenges compared to staining natural wood. The wood intended for painting rather than staining. So, certain factors must be taken into consideration.
It is crucial to understand that paint-grade wood, typically characterized by its lower quality and porous nature, may not absorb stain as uniformly or deeply as higher-grade wood. However, with proper preparation and techniques, satisfactory outcomes can be achieved.
Secondly, the success of staining paint-grade wood heavily relies on meticulous surface preparation. It is essential to sand the wood thoroughly, removing any existing paint or coatings, and ensuring a smooth, clean surface for the stain to penetrate evenly.
Due to the larger pores in paint-grade wood, which can lead to uneven stain absorption, using a wood grain filler or paste wood filler is recommended to create a more uniform surface for staining. Apply the filler according to the manufacturer’s instructions and sand it smooth after drying.
Furthermore, the choice of the right type of stain is paramount. Gel stains, oil-based stains, or penetrating stains are usually recommended for paint-grade wood due to their ability to seep into the wood fibers effectively.
In addition to the stain type, the selection of an appropriate wood conditioner is also pivotal. Pre-conditioning the wood can help create a more uniform stain application and prevent blotchiness on porous surfaces.
Lastly, conducting a test on a small, inconspicuous area before applying stain to the entire surface is a prudent approach. This test will provide insight into how the wood will react to the stain, helping to make necessary adjustments to achieve the desired outcome.
How to Stain Paint Grade Wood?
Staining paint-grade wood is a process that requires careful preparation and attention to detail to achieve the desired results. Follow these steps to successfully stain paint-grade wood:
Select the Right Stain: Choose an oil-based or water-based wood stain that complements the color and grain of your paint-grade wood. Oil-based stains tend to penetrate deeper and provide richer colors, while water-based stains are easier to clean up and have less odor.
Gather Materials and Tools: You’ll need the following items:
- Wood stain
- Drop cloths or plastic sheets
- Painter’s tape
- Sandpaper (multiple grits: coarse, medium, and fine)
- Clean cloth or rag
- Paintbrush or foam applicator
- Protective gloves and safety goggles
- Respirator mask (if working indoors or in a poorly ventilated area)
- Stir stick (if using oil-based stain)
- Clean water and soap (if using water-based stain)
Prepare the Work Area: Set up your work area in a well-ventilated space, preferably outdoors. If working indoors, ensure good ventilation by opening windows and using fans. Cover the surrounding surfaces with drop cloths or plastic sheets to protect them from accidental spills or drips.
Prepare the Wood Surface: If the paint-grade wood has any existing finish, such as paint or varnish, you need to remove it before staining. Use a paint stripper or sandpaper to strip off the old finish. Sanding is often the best approach, as it ensures a more even surface for staining.
Clean the wood surface to remove any dust, dirt, or debris that might interfere with the staining process. You can use a damp cloth or a vacuum cleaner to achieve this.
Sand the Wood: Sanding is essential to open up the wood pores and create a smooth, even surface for the stain to adhere to. Start with coarse-grit sandpaper to remove any imperfections, and then progress to medium-grit and finally fine-grit sandpaper to achieve a silky-smooth finish. Always sand along the wood grain to avoid scratches.
Test the Stain: Before applying the stain to the entire surface, it’s a good idea to test it on a small, inconspicuous area of the wood or on a scrap piece from the same batch. This allows you to see how the stain reacts with the wood and adjust the application if needed.
Apply the Stain: Wear protective gloves to avoid staining your hands, and a respirator mask to protect your lungs from fumes if working indoors. Stir the stain thoroughly if it’s oil-based. Dip the paintbrush or foam applicator into the stain and apply an even coat following the wood grain. Work in manageable sections to ensure a consistent finish.
Wipe Off Excess Stain: After applying the stain, wait for a few minutes to allow it to penetrate the wood. Then, using a clean cloth or rag, gently wipe off any excess stain that hasn’t been absorbed. This step helps prevent uneven coloring and blotching.
Allow the Stain to Dry: Let the first coat of stain dry according to the manufacturer’s instructions. This usually takes several hours, depending on the type of stain and environmental conditions.
Apply Additional Coats (Optional): If you desire a darker or richer color, you can apply additional coats of stain. Make sure to wipe off excess stain after each application and allow sufficient drying time between coats.
Apply a Topcoat (Optional): Once the final coat of stain has dried completely, you can apply a clear protective topcoat, such as polyurethane or lacquer, to enhance the wood’s appearance and protect it from wear and tear. Follow the manufacturer’s instructions for the topcoat application.
Inspect the Finish: After the stain and topcoat (if used) have dried, inspect the finish for any imperfections or spots that may need touch-ups. Carefully address these areas with additional stain or topcoat, if necessary.
Remember to always read and follow the instructions provided by the stain manufacturer for the best results. With proper preparation and application, you can achieve a beautiful and durable stained finish on your paint-grade wood.
Can You Stain Paint Grade Plywood?
Indeed, you can stain the bare wood of paint grade plywood without any issues.
However, it’s essential to be aware that paint grade plywood is not specifically designed for staining, so the results may not be as consistent or visually appealing as staining higher-grade hardwoods or specialized staining-grade plywood.
Paint grade plywood tends to have a more uneven surface and varying porosity due to its lower-grade wood composition. This can lead to a splotchy appearance when stained.
To improve the staining results, it is highly recommended to use a pre-stain wood conditioner before applying the stain. The wood conditioner helps to seal the surface and create a more even base for the stain to absorb, reducing the blotchiness and producing a more uniform color.
Keep in mind that while staining paint grade plywood is possible, the outcome may still not match the appearance achieved with higher-grade wood or staining-grade plywood. If a specific wood tone or grain appearance is essential, considering using a higher-grade plywood or solid hardwood specifically designed for staining.
Tips to Achieve Best Results while Staining Paint Grade Wood
If you’re looking for some exceptional tips to achieve unique and standout results while staining paint-grade wood, here are some creative and unconventional ideas:
Layer Different Stain Colors: Instead of sticking to a single stain color, consider layering multiple colors to create a custom and eye-catching effect. Apply one color as the base and then add accents of complementary or contrasting colors on top.
Use Stencils or Masks: Introduce intricate patterns or designs by using stencils or masks on the wood surface before staining. This technique allows you to create visually appealing motifs or even replicate the look of inlaid woodwork.
Combine Stain with Other Finishes: Experiment by combining stain with other finishes like paint, varnish, or even metallic accents. For instance, apply a colored stain as a base coat and then add metallic highlights for a luxurious touch.
Watercolor Staining: Dilute the wood stain with water to create a watercolor effect. This method allows the grain of the wood to show through while imparting a subtle wash of color.
Faux Aging or Weathering: Give your paint-grade wood an aged or weathered appearance by using a combination of stains and distressing techniques. This approach works particularly well for rustic or vintage-inspired projects.
Two-Tone Staining: Instead of staining the entire surface uniformly, try a two-tone approach. Stain different parts of the wood with varying intensities or colors, such as darker edges and a lighter center, to add dimension and visual interest.
Incorporate Textures: Experiment with adding textures to the wood surface before staining. Techniques like wire brushing or scorching can create intriguing patterns that interact with the stain in fascinating ways.
Blend with Wood Dyes: Combine traditional wood stains with wood dyes to achieve a broader spectrum of colors. Wood dyes penetrate deeply into the wood, allowing you to achieve vibrant or subtle hues.
Stain Artwork or Graphics: Use precision techniques like laser etching or hand carving to create intricate designs on the wood surface. Then, stain the artwork with various colors to make it pop.
Stain Gradient or Ombre Effect: Create a gradient effect by applying different shades of stain to the wood, transitioning from dark to light or vice versa. This technique can add a touch of modern elegance to your project.
Conclusion
Staining paint-grade wood requires careful consideration and preparation, it is indeed possible to achieve satisfying results with the right techniques and products. By adhering to the guidelines discussed and employing patience and diligence, you can easily enhance the appearance of paint-grade wood.
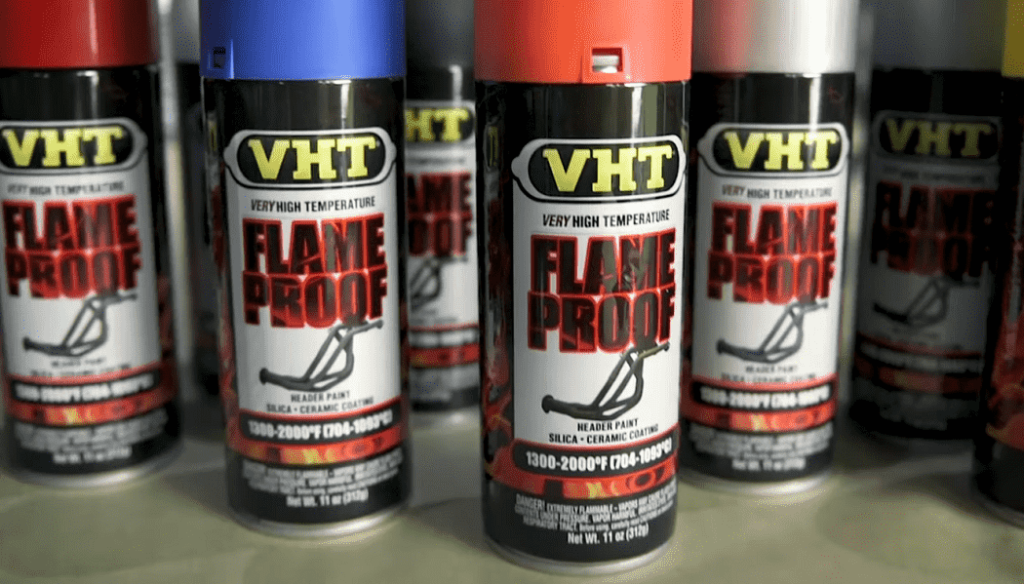
If VHT (Very High Temperature) paint is not properly cured, it may lead to poor adhesion, reduced durability, and compromised heat resistance. The paint may peel, flake, or discolor when exposed to high temperatures, making it less effective in protecting the surface it is applied to.
Read on to know about the proper curing techniques and the long-lasting benefits they bestow upon your prized possession.
What Happens If You Don’t Cure VHT Paint?
VHT (Very High Temperature) paint is a specialized type of paint designed to withstand extremely high temperatures, often used for automotive parts, grills, exhaust systems, and other high-temperature applications.
It is evident that neglecting to cure VHT paint can have significant consequences for both the paint’s longevity and the overall quality of the finished project.
Let’s find out what would happen if you don’t cure VHT paint:
Inadequate adhesion: Proper curing allows the VHT paint to form a strong bond with the surface it’s applied to. Without adequate adhesion, the paint may start to peel, flake, or chip off, resulting in an uneven and unsightly finish.
Reduced temperature resistance: VHT paint relies on the curing process to develop its ability to withstand high temperatures. If not cured correctly, the paint may not reach its full temperature resistance potential, leading to premature discoloration, cracking, or even burning off when exposed to high heat.
Uneven finish: Improper curing can cause the VHT paint to dry unevenly, leading to inconsistencies in color and texture across the painted surface. This can result in a patchy appearance and compromise the aesthetic appeal of the painted item.
Vulnerable to chemicals and solvents: Curing is essential for the paint to fully harden and form a protective barrier against various chemicals and solvents. If the paint is not cured properly, it may remain vulnerable to these substances, leading to stains, discoloration, or deterioration of the paint layer.
Reduced durability and longevity: Proper curing enhances the paint’s durability, making it more resistant to wear, weathering, and other environmental factors. Inadequate curing can significantly shorten the lifespan of the paint, leading to more frequent touch-ups or complete repainting.
Toxic fumes: During the curing process, VHT paint releases certain volatile compounds and fumes. If the paint is not cured in a well-ventilated area or according to the manufacturer’s instructions, these fumes may not disperse properly, leading to potential health hazards for individuals in the vicinity.
What to Do if VHT Paint Isn’t Cured Properly?
If you find that your VHT paint hasn’t cured properly, follow these steps to address the issue:
Identify the problem: Before taking any corrective actions, it’s crucial to understand what went wrong. Examine the surface to determine if the paint has not adhered well, if it is soft or tacky to the touch, or if there are any visible imperfections.
Check curing conditions: Review the curing conditions during the painting process. Ensure that the temperature and humidity were within the manufacturer’s recommended range. Improper environmental conditions can significantly impact paint curing.
Give it more time: If you’ve recently painted the surface and it doesn’t appear to be cured, be patient and allow more time for the paint to dry and cure. Some paints, especially automotive VHT paints, may require more extended curing times.
Remove uncured paint: If the paint is still wet or tacky after a considerable amount of time has passed, you may need to remove it. Use a paint scraper or sandpaper to gently remove the uncured paint from the surface. Be careful not to damage the substrate underneath.
Clean the surface: After removing the uncured paint, clean the surface thoroughly to remove any paint residues, dust, grease, oil, or contaminants. Use a mild soap and water solution or a suitable cleaning solvent for the surface type. For automotive exhaust parts, you can use a degreaser or brake cleaner.
Sand the surface: Lightly sand the area where the paint didn’t cure properly. Sanding helps create a rougher surface for the new paint to adhere to. Use a fine-grit sandpaper (around 220 to 320 grit) and sand in a circular motion until the surface feels smooth and even.
Repaint the surface: Once the area is properly cleaned and sanded, apply a new coat of VHT paint following the manufacturer’s instructions. Apply the paint in thin, even coats, holding the can about 10-12 inches away from the surface. Avoid heavy application, as it may lead to runs and uneven curing. Spray the paint in a well-ventilated area or use a paint booth to control environmental factors.
Proper curing conditions: After repainting, ensure that the newly painted surface is exposed to the recommended curing conditions. Follow the VHT paint manufacturer’s instructions regarding temperature, humidity, and curing time. Creating the right curing environment is crucial for achieving a durable finish.
Test the paint: Once the paint has cured according to the manufacturer’s instructions, test its adhesion and durability. Gently press your fingernail against the painted surface to check for any soft spots or lifting edges. If the paint seems properly cured and adhered, you’ve successfully resolved the issue.
Note: Each paint type and brand may have specific curing requirements, so always refer to the product’s technical data sheet and instructions for the best results.
How to Cure VHT Paint?
Curing VHT paint properly is crucial to achieve its maximum performance and durability. Below are the detailed steps on how to cure VHT paint:
1. Initial Curing:
After applying the VHT paint and once the paint has dried, it needs to undergo an initial curing process. This can be achieved by exposing the painted object to moderate heat. The ideal method for initial curing is using an oven or a heat gun.
Oven Curing: Place the painted object in an oven, ensuring there is enough space around it for proper air circulation. Set the oven temperature according to the manufacturer’s instructions, typically between 250°F to 400°F (120°C to 200°C). Leave the object in the oven for the recommended curing time, usually around 30 minutes to an hour.
Heat Gun Curing: If using a heat gun, hold it about 2-3 inches away from the painted surface. Move the heat gun in a back-and-forth motion to distribute the heat evenly. Keep the heat gun moving to avoid overheating any specific area. Continue this process for the recommended curing time.
Note: If the painted object is not suitable for oven or heat gun curing, consult the manufacturer for alternative curing methods.
2. Full Curing (Heat Cycling):
To achieve the highest level of durability and performance, it’s best to subject the painted object to a full curing process known as heat cycling. This involves exposing the painted surface to progressively increasing temperatures and then allowing it to cool down between cycles.
Heat Cycling Procedure:
- Start by placing the object in a room-temperature environment.
- Gradually increase the temperature to about 200°F to 300°F (93°C to 150°C) and maintain this temperature for about 20-30 minutes.
- Turn off the heat source and allow the object to cool down to room temperature naturally.
- Repeat the heating and cooling cycles two or three more times.
3. Final Drying:
After completing the heat cycling process, allow the object to cool down to room temperature before handling or reinstalling it. This will ensure that the paint has fully cured and bonded to the surface.
4. Curing Time and Temperature Variation:
The curing time and temperature may vary based on the specific VHT paint product being used. Always refer to the manufacturer’s instructions for the recommended curing process for the particular paint you are using, as different VHT paint formulations may have slightly different curing requirements.
How Long Does It Take for VHT Paint to Cure?
VHT (Very High Temperature) paint typically takes around 24 hours to cure completely. During this curing process, the paint undergoes chemical changes, allowing it to reach its maximum durability and heat resistance. Follow the manufacturer’s instructions for the specific product being used, as curing times may vary depending on the type and application method.
Final Words
Neglecting to cure VHT paint is a risk not worth taking. Throughout our discussion, we have explored the crucial role that the curing process plays in maximizing the paint’s adhesion, durability, and resistance to extreme temperatures and chemicals.
So, take the extra steps, follow the guidelines, and enjoy the benefits of a well-cured VHT paint job. Your project will thank you for it.
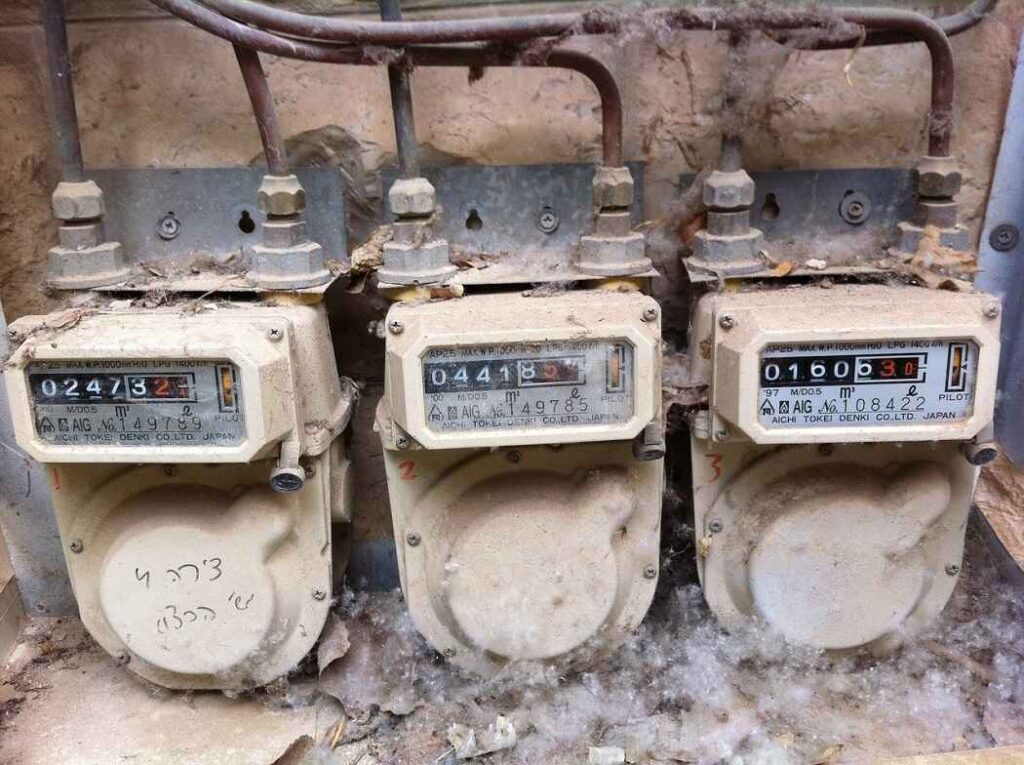
Gone are the days when gas meters were solely functional objects relegated to the corners of our homes. Today, homeowners are embracing a new perspective, viewing these inconspicuous devices as a canvas for creative expression. The question lingers in the minds of many:
What color can I paint my gas meter? Typically, gas meters should be painted in a light color, such as white or light gray, to reflect sunlight and prevent excessive heat absorption.
Read on to learn more.
Can I Paint My Rusting Gas Meter?
Yes, you can paint your gas meter, but it’s essential to proceed with caution and adhere to specific guidelines to ensure safety and functionality.
First and foremost, contact your gas provider to inquire about their policies on painting gas meters, as they may have specific rules or restrictions. Once you have the green light, choose a high-quality, weather-resistant paint suitable for metal surfaces, such as acrylic or enamel paint.
Ensure the selected paint is non-flammable and does not produce toxic fumes. Before painting, thoroughly clean the gas meter to remove any dust, dirt, or debris, and make sure it is completely dry before applying the paint. When painting the gas meter, be careful to avoid covering critical components like vents, dials, or safety labels. Use painter’s tape or other protective materials to shield these parts.
Maintain visibility of the meter’s identification numbers and readings after painting, as this information is crucial for gas company personnel during inspections. Periodically inspect the painted gas meter for any signs of peeling or damage, and perform touch-ups as needed to maintain its appearance and protect the metal surface.
Always prioritize safety and consult professionals if you have any doubts or concerns throughout the process. By following these steps and guidelines, you can successfully paint your gas meter without compromising its functionality and while complying with your gas provider’s regulations.
What Kind of Paint Should Be Used to Protect Gas Meter?
To protect a gas meter, it is essential to use the appropriate paint that can endure outdoor conditions and provide optimal protection. The most suitable paint for protecting gas meters is an outdoor-grade enamel paint. Enamel paints are well-known for their durability and resistance to weathering, making them ideal for use on outdoor surfaces.
When selecting paint, here are some key factors and considerations to keep in mind:
Non-Flammable and Non-Toxic: Safety is of utmost importance when dealing with gas meters. Ensure that the paint you use is non-flammable and non-toxic to prevent any potential hazards, especially considering the flammable nature of the gas.
Heat Resistance: Gas meters can be exposed to varying temperatures, so the paint should be heat resistant to prevent it from deteriorating or melting over time.
Corrosion Resistance: Protect the gas meter from corrosion caused by moisture, chemicals, or environmental factors. Rust or corrosion could compromise the integrity of the meter and lead to leaks or inaccurate readings.
UV Resistance: If the gas meter is installed outdoors or in an area exposed to sunlight, UV-resistant paint should be used to prevent fading and degradation caused by ultraviolet rays.
What Color Can I Paint My Gas Meter?
When it comes to painting your gas meter, it’s essential to choose a color that not only looks appealing but also complies with safety regulations and guidelines. Take a look at our few suggested colors-
Safety yellow or caution yellow: In many regions, gas meters are required to have a specific color or finish for identification and safety purposes. The most common color for gas meters is “safety yellow” or “caution yellow.” This vibrant yellow color helps make the meter easily recognizable and alerts people to the presence of a gas supply point.
Neutral Colors: Many gas utility companies recommend using neutral colors to paint gas meters. Neutral colors blend well with most surroundings and are less likely to attract attention, making the meter less conspicuous. Colors like beige, light gray, or muted green are often good options.
Camouflage: Camouflage-themed colors involve patterns that mimic natural elements like foliage, rocks, or bark. These patterns can be applied as wraps or coatings to the gas meter, making it blend in with its surroundings effectively.
If your gas meter is located in a prominent spot and you find its appearance bothersome, consider painting it to blend in with the surroundings. Using colors that match the exterior of your house or the surrounding landscape can help camouflage the gas meter.
Bright and Vibrant Colors: Using brighter colors for gas meters allows for artistic expression, potentially turning them into eye-catching elements rather than mere functional devices. It can make gas meters more noticeable, which could be helpful in emergency situations or for utility workers locating them easily. This approach could involve vibrant colors like red, blue, green, or even artistic designs or murals.
Avoid Dark Colors: Dark colors, such as black or dark blue, should be avoided, as they tend to absorb heat and may cause the gas meter to overheat, affecting its accuracy or functionality.
Reflective Paint: Some utility companies recommend using reflective paint for safety purposes. This type of paint enhances visibility during low-light conditions, making it easier for utility workers and emergency personnel to locate the meter if needed.
How to Paint Gas Meter Safely?
Painting your gas meter can be a simple and satisfying project, but it’s essential to approach it safely and responsibly. The gas meter is an important part of your home’s infrastructure, so it’s crucial to follow these steps to ensure you don’t cause any damage and maintain safety standards:
Choose the right paint: Select a high-quality, weather-resistant paint suitable for outdoor use. Look for paints labeled as “exterior” or “outdoor” paints that can withstand various weather conditions. Acrylic or enamel paints are often good choices as they adhere well to metal surfaces.
Gather Necessary Materials:
- Safety gear (including gloves and eye protection)
- Paint suitable for outdoor use and approved for metal surfaces.
- Paintbrushes or paint rollers.
- Painter’s tape or masking tape.
- Drop cloths or plastic sheets to protect surrounding areas.
- Cleaning supplies (water, mild soap) to clean the meter surface.
Prepare the Gas Meter Surface:
- Before starting, make sure to turn off the gas supply to the meter. Safety should always come first, and working on an active gas meter can be extremely dangerous.
- Clean the surface of the gas meter thoroughly to remove any dirt, dust, or grease that could interfere with the paint adhesion. Use a mild soap and water solution and allow it to dry completely.
Apply the Paint:
- Once the surface is clean and dry, use painter’s tape or masking tape to cover any areas you want to avoid painting, such as the gas meter’s gauge or any labels.
- Begin applying the paint using a brush or paint roller. Follow the manufacturer’s instructions for the paint application to achieve the best results.
- Apply the paint in thin, even coats to ensure proper coverage. Avoid drips or pooling of paint as it can affect the meter’s functionality.
Allow Sufficient Drying Time:
- After painting, allow the first coat to dry completely before applying additional coats. Follow the drying time specified on the paint can, as it may vary depending on the type of paint used.
- If necessary, apply a second coat to achieve the desired finish.
Inspect for Safety and Touch-ups:
- Once the paint has dried thoroughly, inspect the gas meter carefully to ensure that no critical parts or safety features are covered or obstructed by the paint.
- Check for any touch-ups needed to improve the paint’s appearance and fix any areas with uneven coverage.
Safety precautions:
- Never paint over vents, ports, or any operational components of the gas meter.
- Avoid painting the meter’s serial numbers, safety warnings, or any essential labels.
- If you’re uncomfortable working around gas meters or unsure about the process, consider hiring a professional painter.
Is It Safe to Paint a Gas Meter?
It is safe to paint a gas meter when you have obtained approval from the gas utility company, use paint suitable for outdoor metal surfaces, and ensure critical components and safety markings are not covered.
Professional application is recommended. Otherwise, amateur painting may lead to damage and safety hazards. Incorrectly painted meters can pose risks of gas leaks and accidents.
Is It Legal to Paint My Gas Meter?
Laws regarding painting gas meters vary by jurisdiction. It is essential to consult your local gas utility company or relevant authorities to determine whether painting your gas meter is permitted. In some areas, painting gas meters might be prohibited due to safety concerns or obstruction of identification.
Final Words
It’s crucial to remember that gas meters are important safety devices that need to be easily identifiable and accessible in case of emergencies. So, safety should never be compromised for aesthetics.
By following the appropriate guidelines, you can strike a balance between enhancing your property’s visual appeal and ensuring the reliable and safe operation of your gas meter.
The cost to paint a Ford F150 can range from $500 to $4,000 or more, depending on the quality of the paint and complexity of the job.
So, are you a proud owner of a Ford F150 seeking to give your truck a fresh, eye-catching look? Perhaps you’ve been curious about the cost of painting your beloved vehicle, but navigating through the sea of information can be overwhelming.

Read this guide as it will be your indispensable companion in discovering the true cost of painting your Ford F150.
How Much Does It Cost to Paint a Ford F150?
The cost of painting a Ford F-150 can range from a few hundred dollars for a basic single-stage paint job to several thousand dollars for a high-quality base coat/clear coat finish in a custom color. The cost may have changed since then, and costs can vary from one region to another. Here’s a breakdown of the main components that contribute to the painting cost:
Preparation and Labor: Before painting can begin, the vehicle needs to be properly prepped. This involves washing, sanding, and possibly repairing any dents, scratches, or rust spots on the body. Skilled labor is required for these tasks, and the cost will depend on the shop’s hourly rates.
Labor costs can vary from $50 to $100 or more per hour, depending on the location and the shop’s expertise.
Type of Paint: The type of paint you choose will significantly impact the cost. There are three main types of automotive paint: single-stage, base coat/clear coat, and tri-coat.
A basic single-stage enamel paint job is the most affordable and might cost around $500 to $1,000. But it may not provide the same depth and durability as base coat/clear coat or tri-coat options. A high-quality basecoat-clearcoat paint job can range from $1,000 to $3,500 or more.
Paint Quantity: The amount of paint required for a Ford F-150 will depend on its size, the number of coats applied, and the color being used. Larger trucks will naturally require more paint, and intricate colors or custom paint jobs might need extra coats. An experienced painter can estimate the amount of paint needed based on the vehicle’s surface area.
Paint Color and Finish: Certain paint colors, especially metallic or pearl finishes, can be more expensive than standard colors due to the additional materials required for their production. Additionally, custom paint jobs with unique designs or graphics will come at a premium cost.
Body Shop Reputation: Reputable body shops with experienced painters and state-of-the-art equipment tend to charge more for their services. However, the higher cost often comes with the assurance of a quality paint job.
Additional Services: Some body shops may offer additional services, such as paint protection coatings, ceramic coatings, or clear bra installation. These services will add to the overall cost but can provide added protection for your vehicle’s paint.
DIY vs. Professional Job: While painting your truck yourself may seem like a cost-saving option, it can be a complex and time-consuming task, requiring specialized equipment and expertise. A professional paint job ensures a better finish and can be a more convenient option.
Taking all these factors into account, a basic paint job for a Ford F150 in a single-stage enamel paint could range from $500 to $1,500. A higher-quality basecoat-clearcoat paint job may cost between $1,000 and $4,000 or more. Custom paint jobs or premium finishes can reach higher price points, depending on the complexity of the work and the chosen paint type.
For the most current and accurate information, I recommend contacting local body shops or automotive paint specialists to get quotes for painting a Ford F-150. By doing so, you can obtain a personalized estimate based on your specific requirements and the latest pricing in your area.
Factors that Influence the Cost of Painting a Ford F150
The cost of painting a Ford F150 can be influenced by several factors, ranging from the type of paint used to the size and condition of the vehicle. Each of these factors plays a crucial role in determining the overall cost of the painting process. Let’s delve into these details:
Paint Type: The choice of paint type significantly impacts the cost of painting a Ford F150. There are different types of paints available, such as single-stage enamel, basecoat-clearcoat, and water-based paints. Single-stage enamel is the least expensive but might lack the durability and shine of other options. Basecoat-clearcoat paints offer better protection and a more refined finish, making them relatively costlier. Water-based paints are eco-friendly but can also be more expensive due to their advanced technology and compliance with environmental regulations.
Quality of Paint: Within each type of paint, there are various quality levels available. High-quality paints tend to be more expensive, but they often provide better color retention, resistance to fading, and overall longevity. The price difference between low-quality and high-quality paints can be significant, but investing in a premium paint can pay off in the long run by preserving the appearance of the vehicle.
Vehicle Size and Condition: The size of the Ford F150 plays a direct role in the cost of painting. Larger vehicles require more paint, materials, and labor hours, contributing to higher expenses. Additionally, the condition of the vehicle’s surface also affects the cost. If there are significant dents, scratches, or rust, additional preparatory work will be needed, which can add to the overall painting cost.
Color Selection: The color chosen for the Ford F150 can influence the cost of painting. Standard colors and popular choices may be readily available and less expensive due to higher demand and easier matching processes. However, custom or rare colors might require special ordering and custom mixing, resulting in higher costs for materials and labor.
Surface Preparation: Proper surface preparation is crucial for achieving a smooth and flawless paint finish. The vehicle must be thoroughly cleaned, sanded, and primed before applying the paint. The more preparation work required, especially if there are extensive damages or imperfections, the more labor hours will be needed, impacting the overall cost.
Painting Method: The method used for painting the Ford F150 can also influence the cost. Traditional hand-painting by skilled professionals may be more expensive but can provide better precision and quality. On the other hand, automated spray booths can be more cost-effective for large-scale production but might not offer the same level of attention to detail.
Single Factor: One of the single most significant factors that can influence the cost of painting a Ford F150 is the presence of prior paint damage or layers. If the vehicle has existing paint that is chipping, peeling, or showing signs of deterioration, it will require additional steps for paint removal and surface preparation. Removing old paint can be a time-consuming and labor-intensive process, increasing the overall cost of the painting job. Therefore, it is essential to consider the condition of the existing paintwork when estimating the cost of a new paint job.
How Much Does It Cost to Paint a Ford F150 with Insurance?
Typically, auto insurance policies do not cover the cost of repainting a vehicle for purely cosmetic reasons. Auto insurance is primarily designed to cover damages resulting from accidents or other covered events, not regular maintenance or cosmetic upgrades.
If your Ford F150 is damaged in an accident or incident covered by your insurance policy (such as a collision, vandalism, or theft), the insurance company may cover the cost of repainting as part of the overall repair process. However, this would still be subject to your deductible and policy limits.
If the cost of repainting your vehicle is lower than your deductible, it would be more cost-effective to pay for the painting out of pocket without involving the insurance company. Insurance claims for minor repairs can sometimes result in higher premiums, so it’s essential to consider the potential impact on your future insurance costs before making a claim.
As always, it’s essential to review your specific insurance policy or contact your insurance provider directly to understand the extent of your coverage and any potential implications for making claims.
But yes, having an insurance policy can be a smart way to save some money on the overall cost of painting your Ford F150. By reaching out to the manufacturing company and requesting insurance cards, you may be eligible for an excellent discount on the painting process, reducing the average cost from approximately $600 to $700.
How Much Does It Cost to Wrap a F150?
The cost of wrapping a Ford F150 can vary based on several factors. Generally, a professional vehicle wrap for an F150 can cost between $1,500 to $5,000.
The key cost-affecting factors include the size of the truck, the complexity of the design, the type and quality of the vinyl wrap material, and the expertise of the installer. A full wrap that covers the entire vehicle will be more expensive than a partial wrap.
The design intricacy and customizations like textures, special finishes, or branding elements will also impact the cost. High-quality vinyl materials are more durable and may cost more upfront, but they offer better longevity. Additionally, geographical location and local market trends can influence prices.
Opting for a vehicle wrap is still more cost-effective than a full custom paint job, as wraps can be removed without damaging the original paint, preserving the vehicle’s resale value.
How Much Paint Does It Take to Paint a Ford F150?
On average, a Ford F-150 has a total surface area of around 400 square feet. To achieve a proper paint job, multiple coats are indeed necessary. Assuming you are applying two coats of paint, you might need approximately 2 to 4 gallons of paint.
However, the total surface area of the truck, as well as the paint’s thickness, color, and coverage per gallon, will all play a role in determining the amount of paint required.
For a precise calculation, it’s best to consult the specific paint manufacturer’s guidelines or seek advice from a professional painter. Proper surface preparation, including sanding, priming, and masking, is essential for optimal paint adhesion and longevity, so it’s crucial not to overlook these steps.
Is Ford F150 Expensive to Maintain?
The maintenance costs for a Ford F-150 can vary depending on the model year, usage, and local labor rates. Generally, the F-150 is not considered overly expensive to maintain compared to some luxury vehicles or high-performance trucks. Its popularity and wide availability of replacement parts can keep repair costs reasonable.
Routine maintenance for a Ford F-150 typically includes oil changes, tire rotations, brake pad replacements, air filter changes, and other minor services. These routine tasks can range from $100 to $300 per visit, depending on the service center.
However, larger expenses may arise if major components such as the transmission, suspension components, or engine require repairs. The cost potentially ranges from $500 to several thousand dollars, depending on the extent of the repair and whether new or used parts are used. Regular maintenance and timely addressing of issues can help minimize unexpected costs.
Moreover, certain trim levels or optional features might involve higher maintenance costs. Additionally, factors such as driving habits and road conditions can influence maintenance expenses. Consider budgeting for routine maintenance and having an emergency fund for unexpected repairs to keep your Ford F-150 running smoothly. Overall, when properly cared for and serviced, the Ford F-150 can be reasonably affordable to maintain over its lifespan.
Does Ford F150 Last Long?
Yes, the Ford F-150 is known for its durability and longevity. With proper maintenance and care, these trucks can last for many years and high mileage.
Regular servicing, following recommended maintenance schedules, and addressing any issues promptly can significantly extend the lifespan of the F-150.
Final Words
Investing in a quality paint job can significantly enhance the aesthetic appeal and value of your Ford F150. It also provides to be a worthwhile investment in the long run by increasing its resale value. Always prioritize the use of genuine automotive paints and materials and opt for experienced professionals who take pride in their craftsmanship.
Among the diverse range of paint types available, one particular term that has been making waves in the industry is “Deep Base Paint.” But what exactly is Deep Base Paint used for, and why has it become a popular choice for many homeowners and professionals alike?
Read on to learn about Deep Base Paint and how it can elevate the aesthetics of your living spaces to new heights.
What is Deep Base Paint?
Deep base paint is a type of paint formulation designed to achieve darker and more saturated colors. It serves as the foundation for creating rich and intense hues by offering a higher concentration of pigments compared to regular base paints.
It is typically used when the desired color falls within the darker end of the spectrum. Its high pigment content provides better coverage and opacity, reducing the number of coats needed for proper color depth.
Due to the increased pigmentation, deep base paint may have a thicker consistency than other bases, necessitating occasional stirring during application. When selecting a paint color, it is crucial to choose the appropriate base type to achieve the desired end result effectively.
What Is Deep Base Paint Used for?
Deep base paint’s versatility and unique properties enable it to be used for a wide range of indoor and outdoor applications in both residential and commercial settings. Let’s find out the uses in detail:
1. Interior Applications:
Walls and Ceilings: Deep base paint is frequently used for painting interior walls and ceilings. Its high pigment concentration ensures that the color appears bold and intense, providing a striking look to any room.
Furniture and Cabinetry: Deep base paint is often chosen for refinishing furniture and cabinetry. It can add a touch of elegance and sophistication to these pieces, giving them a fresh and updated appearance.
Decorative Elements: For accent walls or specific decorative elements like moldings, trims, and feature designs, deep base paint can be an excellent choice. It helps create a focal point and adds visual interest to the interior space.
2. Exterior Applications:
Facades and Siding: Deep base paint is suitable for painting the exterior facades and siding of buildings. It offers enhanced UV resistance and durability, ensuring that the color remains vivid and vibrant over time despite exposure to the elements.
Trim and Accents: When contrasting elements are desired on the exterior of a building, deep base paint can be applied to trims, accents, or architectural details. It helps highlight and complement the overall color scheme, enhancing the curb appeal of the property.
3. Custom Color Mixing:
Deep base paint serves as a base for creating a wide range of custom colors. Painters and homeowners can add tinting agents to the deep base paint to achieve specific shades that are not readily available in pre-mixed paint options. This makes it a popular choice for those seeking unique and personalized color schemes.
4. Suitable for Dark Colors:
When you require deep, dark, or bold hues, deep base paint is the go-to option. Regular paint may struggle to provide even coverage for these colors due to lower pigment concentration, but deep base paint ensures a smoother and more uniform finish.
5. Artistic Projects:
Artists and craftspeople often use deep base paint for their projects due to its exceptional color intensity. Whether it’s canvas paintings, murals, or DIY crafts, deep base paint provides a brilliant palette for creative expression.
6. Highlighting Architectural Details:
Deep base paint is often used to highlight architectural details like moldings, cornices, and other intricate features. By applying deep base paint to these elements, they stand out more prominently, accentuating the architecture and adding a touch of elegance to the interior or exterior design.
7. Specialized Finishes:
Deep base paint can be used to create specialized finishes, such as faux finishes, textured effects, or metallic effects. The higher pigment content allows these finishes to appear more pronounced and captivating.
8. Commercial and Residential Projects:
Deep base paint finds its applications in both commercial and residential projects. From office spaces and retail stores to homes and apartments, the versatility of deep base paint makes it a valuable choice for various settings.
Advantages and Disadvantages of Deep Base Paint
Advantages of Deep Base Paint:
Deep base paint’s advantages make it an attractive option for projects where rich, vibrant colors are desired, and where superior coverage and flexibility in color selection are essential. Take a look at the key advantages-
1. Enhanced color depth and richness:
Intense colors: Deep base paint contains a higher concentration of pigments, resulting in more vibrant and intense colors compared to standard paints.
Luxurious appearance: The rich and deep hues lend an elegant and luxurious look to any space, enhancing the overall aesthetic appeal.
2. Improved coverage and hiding capabilities:
Concealing imperfections: The high pigment content in deep base paint allows it to cover flaws and imperfections on the surface effectively, offering better hiding capabilities.
Fewer coats required: Due to the increased opacity of the paint, it often requires fewer coats to achieve full coverage, saving time and effort during the painting process.
3. Flexibility for customization:
Tinting options: Deep base paint serves as an excellent base for custom color mixing. By adding tints, it becomes easier to create a wide array of shades and hues, giving homeowners and decorators greater flexibility in their color choices.
Color matching: Deep base paints are more conducive to matching specific colors, enabling seamless integration with existing color schemes in a home or commercial space.
4. Suitable for various surfaces:
Interior and exterior use: Deep base paint is suitable for both interior and exterior applications, offering consistent and beautiful color results for different areas of a building.
Different materials: It adheres well to various surfaces, including drywall, wood, masonry, and metal, providing a smooth and durable finish on different substrates.
Potential limitations or challenges:
While deep base paint offers numerous advantages, it also comes with a few limitations and challenges. Below are some potential drawbacks associated with deep base paint.
Mixing complexities: Precise and consistent color mixing is crucial with deep base paint to achieve the desired shade, and any miscalculation or inconsistency can lead to color variations between batches.
Susceptibility to fading: Intense colorants in deep base paint are more susceptible to fading when exposed to sunlight or harsh weather conditions, leading to a loss of vibrancy over time.
Consistency issues: Achieving consistent color coverage can be problematic, especially when multiple batches of deep base paint are used. Slight variations in pigment or base composition can lead to color variations on the painted surface.
Higher cost: Deep base paints are often more expensive than standard paints due to their higher pigment concentration.
How to Use Deep Base Paint?
Below is a step-by-step guide on how to use deep base paint effectively:
Materials Needed:
- Deep base paint of your desired color.
- Paint rollers and brushes (high-quality synthetic brushes work well).
- Drop cloths or plastic sheets to protect surfaces from spills and splatters.
- Painter’s tape to protect trim, edges, and fixtures.
- Stir sticks for mixing the paint.
- Paint tray or bucket.
Step-by-Step Guide:
Prepare the Room: Clear the room of furniture and any items that may obstruct your painting process. Cover the floor with drop cloths or plastic sheets to protect it from paint spills.
Clean and Prime: Ensure that the walls are clean and free from dirt, dust, and grease. If the walls are new or have not been painted before, apply a primer suitable for the surface. Primer helps the paint adhere better and promotes even coverage.
Tape Off Edges: Use painter’s tape to protect baseboards, trims, edges, and fixtures that you don’t want to paint. Apply the tape carefully, ensuring it’s straight and fully adhered to the surface to prevent paint bleed.
Stir the Paint: Open the deep base paint can and thoroughly stir the paint using a stir stick. The pigments in deep base paints can settle over time, so stirring ensures an even distribution of color.
Cut in the Edges: Use a high-quality paintbrush to “cut in” along the edges of the walls, where the roller cannot reach easily. Apply a straight line of paint along the corners, edges, and near the ceiling. This will create a clean border for the roller to follow.
Roll the Paint: Pour the deep base paint into a paint tray or bucket. Load the paint roller with paint, but avoid overloading it to prevent drips. Start rolling the paint onto the wall in a “W” or “M” pattern for even distribution. Work in small sections, about 3×3 feet, to maintain a wet edge and avoid visible seams.
Maintain a Wet Edge: Deep base paint can dry quickly, so it’s essential to maintain a wet edge while working. This means overlapping the new strokes with the previous ones before they dry. This technique helps to prevent visible lines and streaks.
Apply Additional Coats: Depending on the paint’s quality and the wall’s condition, you might need to apply multiple coats of deep base paint to achieve the desired color depth and coverage. Allow each coat to dry completely before applying the next one.
Inspect for Evenness: Once the final coat is applied and dried, inspect the painted surface for evenness and uniformity. Check for any missed spots or uneven patches.
Remove Painter’s Tape: After the paint has fully dried, carefully remove the painter’s tape at a 45-degree angle. This prevents any accidental paint removal or damage to the freshly painted surface.
Clean Up: Clean your brushes, rollers, and paint tray thoroughly with soap and water, or according to the paint manufacturer’s recommendations.
By following these steps, you’ll be able to effectively use deep base paint to create a stunning and vibrant finish for your walls or accent features. Remember to choose high-quality paint and tools, as they will significantly impact the final result.
Can Deep Base Paint Be Used as White Paint?
No, Deep Base paint is not suitable as a white paint substitute.
Deep Base paint is formulated with a high concentration of colorants, intended to be tinted with specific colors. It lacks the necessary pigment to achieve a pure white hue.
For white paint, one should use a paint specifically labeled as “White Base” or “White Paint” that already contains the proper white pigment. Mixing Deep Base paint with white may result in a lightened color but won’t produce a true white shade.
Can I Use Deep Base Paint Without Tinting?
Yes, you can use deep base paint without tinting. The deep base paint already contains a high level of pigments, giving it a strong color without the need for additional tinting.
So, if you prefer the original deep base color, you can use it as is without any tinting. But, if you want a specific shade, tinting may be necessary. Tinting allows you to achieve a wide range of custom colors by adjusting the amount and type of colorants mixed into the base paint.
Always follow the manufacturer’s guidelines for the proper use and tinting instructions for the best results.
Final Words
Deep base paint serves as a fundamental and versatile component in the world of painting. Throughout our discussion, we have uncovered the various applications and advantages of this type of paint.
So, embrace the richness of colors and the ease of application, and let your imagination run wild with this exceptional paint choice. Remember, with deep base paint in your toolkit, the possibilities are truly limitless.
If you’ve ever come across a piece of wood furniture or an interior feature and wondered whether it was stained or painted, you’re not the only one. The subtle differences between these two finishes can sometimes be challenging to identify. But no worries, we’re here to guide you through the process of unraveling this intriguing mystery.
Let’s disclose the secrets behind these two popular wood treatments.
Understanding the Difference between Stained and Painted Wood
Wood finishing is a crucial aspect of woodworking, and two common methods of finishing wood are staining and painting. Both techniques enhance the appearance and protect the wood, but they differ significantly in their application and final results.
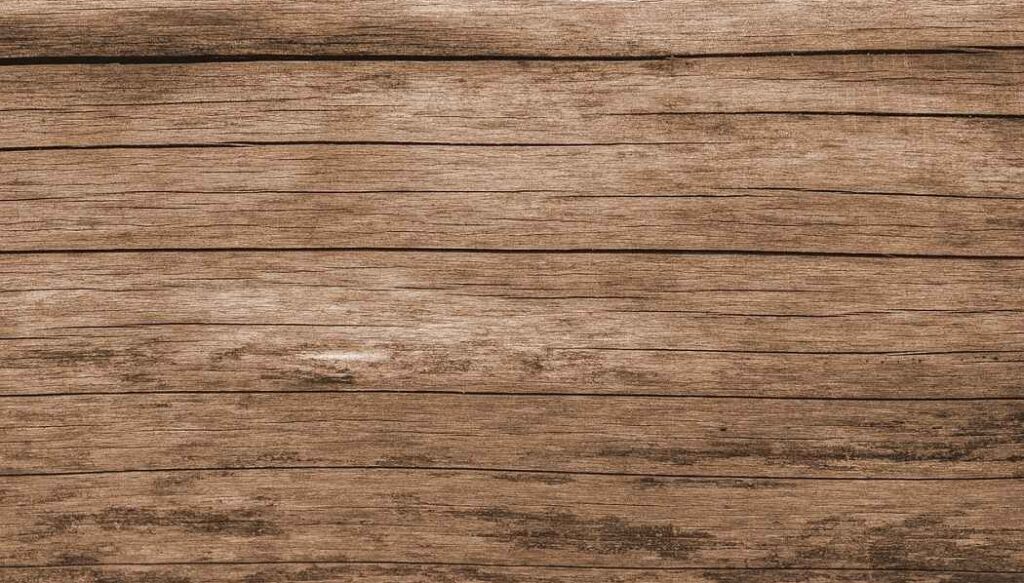
Stained Wood
Stained wood refers to the process of applying a semi-transparent or transparent colorant to the surface of the wood. The primary purpose of staining is to enhance the natural beauty of the wood by accentuating its grain and texture while preserving its inherent characteristics. Stains are available in various colors, allowing woodworkers to choose the shade that best complements the wood’s appearance.
Characteristics of Stained Wood
Natural grain visibility: Staining allows the natural grain patterns of the wood to remain visible, giving it a more organic and textured look.
Penetrates the wood fibers: Stains are designed to penetrate into the wood fibers, rather than just forming a surface layer, ensuring lasting color retention.
Variations in color depth and tone: The depth and tone of the stained wood can vary depending on factors such as the wood’s species, its porosity, and the number of coats applied.
Enhances wood’s natural beauty: By enriching the wood’s color and grain, staining enhances its inherent beauty, making it visually appealing.
May have a clear protective finish: In some cases, stained wood may also have a clear protective finish, such as varnish or polyurethane, which provides additional protection against moisture, UV rays, and general wear.
Painted Wood
Painted wood refers to wood surfaces that have been coated with pigmented paint, creating a solid, opaque color layer that conceals the natural grain of the wood. The purpose of painting wood varies from providing decorative finishes to offering enhanced protection against weathering and wear.
Characteristics of Painted Wood
Solid, opaque color covering the wood surface: Unlike staining, which allows the wood grain to show through, painting completely covers the wood with a solid, uniform color.
No visible wood grain: Painting obscures the natural grain patterns of the wood, providing a smooth, consistent appearance.
Can have various finishes (matte, satin, glossy): Painted wood can be finished with different sheens, including matte, satin, or glossy, allowing for diverse visual effects.
Often used for decorative purposes: Painted wood is commonly used for decorative and aesthetic purposes, allowing for a wide range of color options and creative designs.
May offer better protection against weather and wear: As paint forms a protective barrier on the wood’s surface, it can offer increased resistance to moisture, UV rays, and general wear and tear compared to stained wood.
How to Tell if Wood Is Stained or Painted?
Determining whether wood is stained or painted can be essential for various reasons, such as refinishing or restoring furniture, choosing the right method for stripping or cleaning the wood, or matching new pieces with existing ones. Here’s a guide to help you identify whether wood has been stained or painted:
1. Visual Clues to Identify Stained or Painted Wood
Observe the surface texture:
Stained wood: It will have a rough texture with visible wood grain.
Painted wood: The surface will be smooth without visible wood grain.
Inspect the color:
Stained wood: It will display natural wood colors with variations.
Painted wood: It will have a solid and consistent color, often different from natural wood shades.
Check for any signs of chipping or peeling:
Stained wood: There will be minimal to no chipping or peeling.
Painted wood: Chipping or peeling paint may be evident, especially on older surfaces.
2. Additional Techniques for Identification:
Sanding test:
Stained wood: Sanding will reveal the natural wood color below the surface.
Painted wood: The surface color will remain unchanged due to the paint layer.
Chemical test (solvent application):
Stained wood: The solvent may slightly darken the wood but won’t remove color.
Painted wood: The solvent may dissolve or remove the paint layer.
Other Techniques to Identify Wood Is Stained or Painted:
Scratching test:
Stained wood: When lightly scratched, stained wood will still show the natural wood color beneath the surface.
Painted wood: Scratching painted wood may reveal a different color or the bare wood, indicating it is painted.
UV light test:
Stained wood: Under UV light, the natural wood colors in the stain may appear slightly darker or more pronounced.
Painted wood: UV light will not significantly alter the appearance of painted wood.
Examination of edges and corners:
Stained wood: Check the edges and corners of the wood piece; stained wood will show consistent wood color throughout, including in these areas.
Painted wood: The paint on the edges might appear thicker and may obscure the natural wood grain.
Wood grain inspection:
Stained wood: Wood grain will be visible and show variations in color and texture, reflecting the natural appearance of the wood.
Painted wood: Even with a smooth finish, you might still see faint wood grain impressions, but they will not be as pronounced as in stained wood.
Examination of joints and recesses:
Stained wood: In joints and recesses, the wood’s natural color will be apparent, even if they are hard to reach or hidden areas.
Painted wood: Paint tends to build up in joints and recesses, often leaving noticeable thickened or inconsistent coloration.
Peeling or stripping test:
Stained wood: Attempting to peel or strip stained wood will not remove any color but may reveal a deeper layer of the same or similar wood tone.
Painted wood: Peeling or stripping painted wood will remove the paint layer, exposing the original wood or primer underneath.
Age and wear assessment:
Stained wood: Over time, stained wood develops a slightly weathered patina, but the color and grain remain visible.
Painted wood: Painted surfaces, especially if old and worn, may show signs of cracking, peeling, or flaking.
Look for brush strokes or drip marks:
Stained wood: Stains are typically applied more evenly, and you won’t see brush strokes or drip marks on the surface.
Painted wood: Visible brush strokes or drip marks may indicate that the wood is painted.
Backside inspection:
Stained wood: Flip the wood piece and examine the backside; the stain should penetrate through the wood, and the color will be consistent on both sides.
Painted wood: The paint layer will be evident on the backside, and you may notice a clear distinction between painted and unpainted areas.
Look for Absorption:
Stained wood: To check for absorption, find an inconspicuous spot on the wood, such as the back or underside, and place a few drops of water. If the water is absorbed and darkens the wood, it’s likely stained.
Painted wood: If the water beads up and does not penetrate, it may be painted.
Note: Some furniture or wood items may have a combination of staining and painting, such as stained wood with painted accents or vice versa. Also, aged or weathered wood can sometimes make it harder to differentiate between staining and painting. But by carefully observing the wood’s characteristics and using these tips, you should be able to determine whether the wood is stained or painted with reasonable confidence.
Does Paint Last Longer than Stain?
Paint generally lasts longer than stain as it creates a protective barrier on the surface, shielding it from UV rays, moisture, and other elements.
Stain, while enhancing the natural beauty of wood, tends to require more frequent reapplication due to its lower durability. However, the longevity of both paint and stain depends on factors such as surface preparation, quality of products used, and maintenance.
Conclusion
Knowing the differences between stained and painted wood opens up endless creative opportunities while keeping the wood’s natural beauty intact. Next time you encounter wood, you’ll be able to spot the distinctions and admire its special allure.
When it comes to selecting the right product to protect and enhance the appearance of wooden surfaces, the choices can seem overwhelming. Among the various options available, two popular choices are solid stain and paint.
Although both solid stain and paint share some similarities in their application and purpose, they are not quite the same. Understanding the differences between these two products is vital for DIY enthusiasts seeking the ideal solution to achieve their desired results.
In this exploration of solid stain versus paint, we will dig into the distinctive characteristics, applications, and benefits of each product. By the end, you will gain valuable insights into which option best suits your project, be it a deck, fence, siding, or other wooden structures.
What Is Solid Stain Used For?
Solid stain is used primarily as a protective and decorative finish for exterior wood surfaces. It is a type of wood stain that contains a high concentration of pigments and offers a thicker consistency than semi-transparent or transparent stains.
The main purpose of using solid stain is to enhance the appearance of the wood while also providing durable protection against the elements. It effectively covers the natural grain and texture of the wood. Moreover, it gives the wood a more uniform color and a painted-like finish. Solid stain works well on weathered or aged wood, as it can help hide imperfections and provide a fresh look.
Solid stain penetrates the wood, allowing it to breathe and preventing the risk of peeling or cracking. It’s an excellent choice for those seeking a long-lasting solution to preserve and beautify their exterior wood structures.
Is Solid Stain the Same as Paint?
Solid stain and paint are similar in that they both add color to a surface, but they are not the same. The key difference between the two lies in their transparency and how they interact with the underlying material.
Solid stain is designed to penetrate the surface, bonding with the wood or other materials. It provides a semi-opaque finish, allowing some of the natural texture and grain to show through while still providing a uniform color. This makes solid stain a popular choice for outdoor applications, such as decks and fences, where the wood’s natural beauty is desirable. Solid stains also tend to be more durable than paint, as they are less likely to peel or crack, making them a practical choice for surfaces exposed to the elements.
Paint, on the other hand, is more opaque and forms a thicker, more protective layer on the surface. It completely covers the underlying material, obscuring its texture and grain. While paint offers a wide range of colors and finishes, it is typically less suited for outdoor wood surfaces due to its tendency to peel or chip over time when exposed to moisture and UV rays.
In summary, solid stain and paint are not the same. Solid stain is a semi-opaque finish that penetrates and bonds with the surface, allowing some of the natural material to show through. It is a preferred choice for outdoor wood surfaces due to its durability. Paint, in contrast, is more opaque, completely covering the surface, but is better suited for indoor applications or surfaces less exposed to the elements due to its tendency to deteriorate over time when exposed to moisture and UV rays.
Does Solid Stain Cover like Paint?
Solid stain functions similarly to paint in terms of providing a covering layer over the surface of wood. However, the key difference lies in their transparency. Solid stain, as the name suggests, offers more opacity than regular semi-transparent or transparent stains. It still allows the texture of the material to show through, but it covers the underlying color or imperfections more effectively.
Solid stain provides better coverage for concealing blemishes, discolorations, and previous coatings. It is ideal for weathered surfaces, where paint might not adhere well due to peeling or flaking. Solid stain is also commonly used to change the color of wood without completely hiding the grain pattern.
Key Similarities between Solid Stain and Paint
While solid stain and paint both have distinct characteristics and purposes, there are key similarities between them.
Protective Qualities: Both solid stain and paint offer protection against environmental elements. They form a protective barrier over the surface, preventing water penetration and reducing the risk of rot and decay.
Hiding Imperfections: Both finishes are effective at concealing imperfections in the wood, such as knots and discolorations. The opaque nature of solid stains and paints makes them ideal for hiding surface blemishes.
Application Methods: Solid stains and paints are applied in similar ways using brushes, rollers, or sprayers. They require surface preparation, such as cleaning and sanding, to ensure proper adhesion and longevity of the finish.
Longevity: When properly applied and maintained, solid stains and paints can have similar lifespans. They both offer good durability and can last several years before requiring recoating.
Different Formulations: Both solid stains and paints are available in water-based and oil-based formulations. Water-based options are generally more environmentally friendly and dry faster. Oil-based products may provide better penetration and adhesion on certain wood types.
Clean-up: Cleaning up after application is similar for solid stains and paints. Tools and brushes can be cleaned with soap and water for water-based products, while mineral spirits or paint thinner are used for oil-based products.
Key Differences between Solid Stain and Paint
Despite some similarities, they have significant differences that make them suitable for different applications.
Transparency and Texture: Solid stain allows the texture and grain of the wood to be visible. It imparts color to the wood while maintaining a more natural appearance. Paint creates an opaque film over the surface. It provides a uniform and smooth finish with no visible wood characteristics.
Color Opacity: As the name suggests, solid stains offer solid, consistent color opacity. They provide excellent coverage, hiding imperfections throughout the surface. Paint comes in a wide range of opacity levels, including various levels of coverage from semi-transparent to fully opaque.
Durability: Solid stains penetrate the wood and provide a strong bond with the surface. But it may show signs of wear and fading more gradually over time. Paint provides excellent durability to various environmental elements, typically lasting longer without significant signs of wear.
Maintenance: Solid stains require less maintenance compared painting, as they tend to wear more gracefully. Painted surfaces may require more frequent maintenance, as the paint film can chip, crack, or peel over time.
Breathability: Solid stains allow the wood to breathe to some extent since they penetrate the surface. Paint forms a non-breathable barrier on the wood’s surface. It can lead to trapping moisture within the wood.
Check This Video:
Factors to Consider while Choosing between Solid Stain and Paint
Choosing between solid stain and paint depends on many factors like the surface you’re working on, the desired appearance, and environmental considerations. Here are some factors to consider for each option.
1. Surface Material:
- Consider the material you’re working with. Solid stain is typically best for wood, while paint can be used on various surfaces, including wood, metal, and concrete.
2. Aesthetics:
- Determine the desired finish. Solid stain allows the wood grain to show through, offering a more natural appearance. Paint, on the other hand, provides a smooth, opaque finish.
3. Color Options:
- Both solid stain and paint offer a wide range of color options. Decide if you want a specific color or if you prefer the natural color of the material with solid stain.
4. Longevity:
- Solid stain tends to penetrate the wood and can offer better protection against moisture and UV damage. Paint can also protect, but it may require more maintenance to keep it looking good over time.
5. Maintenance:
- Consider how much maintenance you’re willing to perform. Solid stain is generally easier to maintain than paint because it doesn’t peel. Paint may require scraping and repainting as it ages.
6. Weather Resistance:
- Think about the climate in your area. If you live in a region with extreme weather conditions, solid stain may be more durable and resistant to cracking and peeling.
7. Application and Preparation:
- Assess the condition of the surface. Paint often requires more preparation, such as priming, sanding, and filling cracks, whereas solid stain is more forgiving of imperfections.
8. Coverage:
- Solid stain typically allows the wood’s texture to show through, while paint provides a completely uniform finish. Consider if you want to hide imperfections or highlight the texture of the material.
9. Cost:
- Compare the cost of materials and labor for both options. Solid stain is often less expensive and easier to apply.
10. Environmental Impact:
- Consider the environmental implications. Some paints may contain harmful chemicals, while water-based options and low-VOC (volatile organic compound) products are more eco-friendly.
11. Local Regulations:
- Check for any local regulations or restrictions on the use of certain paints or stains, especially in terms of environmental impact.
12. Personal Preferences:
- Your personal taste and style play a significant role. Some people prefer the look and feel of natural wood, while others prefer the uniform appearance of paint.
13. Application Method:
- Consider your preferred application method. Paint is typically applied with brushes, rollers, or sprayers, while solid stain can be applied similarly but with different effects.
14. Durability:
- Think about the level of wear and tear your surface will endure. Solid stain may hold up better on high-traffic areas, while paint may be better for areas where you want a smooth, easily washable surface.
15. Project Size:
- The size and scope of your project can influence your decision. Larger projects may be more cost-effective with one option over the other.
Take the time to weigh these factors carefully, and if you’re unsure, consider consulting with a professional or seeking advice from a local paint or home improvement store.
You Can Also Check This Video:
Final Words
The decision between solid stain and paint ultimately depends on the specific requirements of the project. Careful consideration of these factors will help determine which option is most suitable.
Solid stain and paint have their unique characteristics, advantages, and applications. Understanding their differences allows for informed decision-making and ensures the best results for any surface treatment project.
To remove paint from ABS plastic, gently scrub the plastic using a mixture of warm water and mild soap. If needed, use a plastic-safe paint remover or isopropyl alcohol for stubborn paint stains.
Offs accidentally spilled paint on your ABS plastic surface or need to refurbish an old project? We’ve got the perfect solution for you! Get ready to explore a series of highly effective and secure methods that will address this challenge without inflicting any harm upon the precious plastic itself.
Can You Remove Paint from ABS Plastic?
Yes, you can remove paint from ABS plastic. But it’s essential to do so with care to avoid damaging the plastic.
ABS (Acrylonitrile Butadiene Styrene) is a commonly used thermoplastic polymer known for its strength, rigidity, and impact resistance. It finds widespread applications in various industries, including automotive parts, electronics, consumer goods, and household items.
At times, accidental spills, oversprays, or old and flaking paint can mar the appearance of ABS plastic. To restore its original look, it’s essential to remove paint from the surface. The main goal in removing paint from ABS plastic surfaces is to achieve a clean and blemish-free finish without damaging the underlying plastic material. Several methods can be employed to accomplish this task effectively.
One commonly used method is sanding, where fine-grit sandpaper is used to gently remove the paint layer from the ABS surface. Care must be taken not to apply excessive pressure, which could scratch or mar the plastic.
Chemical solvents can also be employed to strip paint from ABS plastic. It is essential to choose a solvent that does not react adversely with the plastic.
It’s crucial to avoid harsh chemicals or aggressive scraping, as ABS plastic is sensitive to certain substances and mechanical abrasion. Using improper methods can lead to discoloration, cracks, or a loss of structural integrity in the plastic. To maintain the aesthetic and functional properties of ABS plastic, it’s essential to employ appropriate paint removal methods.
How to Remove Paint from ABS Plastic?
Removing paint from ABS plastic requires careful consideration and gentle methods to avoid damaging the plastic surface. Take a look at the safer and more accessible ways to remove paint from ABS plastic.
Preparing for Paint Removal:
- Identifying the type of paint on ABS plastic:
Before starting the paint removal process, it’s crucial to identify the type of paint on the ABS plastic surface. Different paints may require specific methods for safe and effective removal. Common types of paint include acrylic, enamel, latex, or oil-based paints.
- Choosing the right paint removal method based on paint type:
Once you’ve identified the paint type, select the appropriate removal method. For example, water-based paints might be removed with mild solutions, while oil-based paints may need stronger solvents. Ensure the chosen method is compatible with ABS plastic to prevent damage.
- Gathering necessary tools and materials:
Before starting, gather all the necessary tools and materials for the paint removal process. This may include isopropyl alcohol, warm soapy water, soft cloth, non-acetone nail polish remover, commercial paint removers (if suitable for ABS plastic), cotton balls, and a plastic scraper or soft brush.
Method 1: Using Isopropyl Alcohol:
Isopropyl alcohol is effective for removing some types of paint from ABS plastic. It acts as a solvent, breaking down the paint’s bond with the surface.
Safety precautions:
Wear gloves and work in a well-ventilated area to avoid inhaling fumes. Isopropyl alcohol is flammable, so keep it away from open flames or heat sources.
Step-by-step instructions:
- Dampen a cotton ball or soft cloth with isopropyl alcohol.
- Gently rub the paint-covered area in a circular motion.
- Repeat until the paint starts to dissolve or come off.
- Wipe the area clean with a separate clean cloth.
Method 2: Warm Soapy Water and Soft Cloth:
For water-based paints or less stubborn stains, warm soapy water can be effective without the need for harsh chemicals.
Safety precautions:
Use a mild soap and avoid using abrasive cloths that could scratch the ABS plastic.
Step-by-step instructions:
- Prepare a solution of warm water and mild dish soap.
- Dip a soft cloth into the soapy water and gently rub the painted surface.
- Continue rubbing until the paint begins to lift.
- Rinse the cloth and wipe away any remaining soapy residue.
Method 3: Non-Acetone Nail Polish Remover:
Non-acetone nail polish remover can work well on certain types of paint without damaging ABS plastic.
Safety precautions:
Ensure proper ventilation, use gloves, and avoid contact with eyes or prolonged skin exposure.
Step-by-step instructions:
- Apply a small amount of non-acetone nail polish remover to a cotton ball.
- Gently rub the painted area, applying slight pressure.
- Check the paint’s response, and if it starts dissolving, continue rubbing until it comes off.
- Wipe the area clean with a separate clean cloth.
Method 4: Commercial Paint Removers (if applicable):
Commercial paint removers are available, specifically designed for removing paint from various surfaces. Ensure the product is suitable for use on ABS plastic.
Safety precautions:
Follow the manufacturer’s instructions carefully, wear appropriate protective gear, and work in a well-ventilated area.
Step-by-step instructions:
- Apply the commercial paint remover to the painted surface as per the instructions.
- Let it sit for the recommended time.
- Gently scrape off the softened paint using a plastic scraper or soft brush.
- Wipe away any residual paint and paint remover with a clean cloth.
Method 5: Sandpaper (as a last resort)
- If the above methods fail, you can try using a very fine-grit sandpaper (around 800 to 1000 grit) as a last resort.
- Gently sand the painted area in a circular motion until the paint is removed, being cautious not to over-sand and damage the plastic.
- Afterward, buff the area with a plastic polish or rubbing compound to restore the shine.
Remember to test any paint removal method on a small, inconspicuous area of the ABS plastic first to ensure it does not cause damage or discoloration. Always prioritize safety and caution during the paint removal process.
How to Remove Spray Paint from ABS Plastic?
Using a specialized plastic-safe paint remover is generally considered a safe and effective method to remove spray paint from ABS plastic, especially when following the manufacturer’s instructions. Follow the below steps:
Choose a plastic-safe paint remover: Look for a paint remover specifically designed for use on ABS plastic. You can find these products at automotive or hardware stores. Make sure to read the product label to confirm its compatibility with ABS plastic.
Prepare the area: Work in a well-ventilated area. Cover surrounding surfaces with drop cloths or plastic sheets to protect them from any accidental spills.
Test a small area: Before applying the paint remover to the entire surface, test it on a small, inconspicuous area of the ABS plastic. Follow the product instructions for this test. If there’s no adverse reaction, proceed with the full application.
Apply the paint remover: Wear appropriate protective gear, such as gloves and safety goggles. Apply the paint remover to the spray-painted area according to the manufacturer’s instructions. It usually involves brushing or spraying the product onto the surface.
Allow dwell time: Let the paint remover sit on the ABS plastic for the recommended dwell time. This allows the remover to break down the spray paint effectively.
Remove the paint: After the dwell time has passed, use a soft brush or cloth to gently scrub the spray-painted area. The paint should start to lift off. Avoid using abrasive materials that could scratch the plastic.
Wipe clean: Once the paint is removed, use a clean cloth or sponge and warm, soapy water to wipe away any remaining paint residue and paint remover.
Rinse and dry: Thoroughly rinse the ABS plastic with clean water to remove any traces of paint remover or soap. Dry the surface with a clean, dry cloth.
Apply automotive wax (optional): If desired, apply automotive wax to restore shine and protect the ABS plastic surface.
Note: In particularly challenging cases, seeking professional assistance may be the best course of action to ensure optimal results without risking damage to the ABS plastic.
How Do You Remove Acrylic Paint from ABS Plastic?
Here’s a detailed explanation of how to remove acrylic paint from ABS plastic, ensuring that your project or item looks as good as new:
Easy Lift Off (ELO) by Testors:
ELO is a paint remover designed for model and hobbyists, and it works well for removing acrylic paint from ABS plastic. Follow the manufacturer’s instructions on the ELO product label, as application methods can vary.
- Generally, you would apply ELO to the painted surface and allow it to sit for a few minutes to soften the paint.
- Use a soft brush or toothbrush to gently scrub the paint away.
- You may need to repeat the process for stubborn or multiple layers of paint.
When using chemical products like ELO or commercial degreasers, ensure proper ventilation in your workspace to avoid inhaling fumes.
Commercial Degreaser (e.g., Zep):
Certain commercial degreasers can also work for removing acrylic paint from ABS plastic. Make sure to use a degreaser that is safe for use on plastics, and always follow the manufacturer’s instructions.
- Generally, you would apply the degreaser to the painted surface and allow it to sit for a few minutes.
- Use a soft brush or toothbrush to scrub away the softened paint.
Plastic Razor Blade or Plastic Scraper:
- If the paint is thick and peeling, you can use a plastic razor blade or scraper to carefully lift and scrape off the paint without scratching the ABS surface.
Will Vinegar Remove Paint from ABS Plastic?
Vinegar works well to remove certain types of water-based or latex paints from ABS plastic if the paint is relatively fresh or not fully cured. In such situations, the mild acidity of vinegar might help to soften and loosen the paint. It makes it easier to scrape or wipe off with gentle abrasion.
However, vinegar is not a powerful paint remover, and its effectiveness on ABS plastic will vary depending on factors like the type of paint, the age of the paint, and the specific ABS plastic formulation.
You can also check this video:
Final Words
The key to successful paint removal from ABS plastic lies in careful planning, patience, and the use of appropriate materials and techniques. While the process may require some trial and error, following the guidelines we’ve discussed should set you on the right path.
Best of luck with your paint removal endeavor, and may your ABS plastic items be restored to their original beauty!
Searching for the Perfect Palette? Doubting What Color Paint Goes with Beige Tile? Look No Further! We’ve got the ultimate guide to help you transform your living space into a haven of harmony and charm.
When it comes to pairing paint colors with the classic neutrality of beige tile, the possibilities are endless. So keep reading to find out the perfect paint colors that will breathe new life into your home!
Basics of the Beige Tile and Its Undertones
The beige tile is a popular choice for interior design due to its versatility and timeless appeal. Its neutral hue complements various color schemes and decor styles, making it a go-to option for both residential and commercial spaces. Beige, as a color, sits between white and light brown, offering a warm and inviting ambiance to any room.
One of the essential aspects of beige tiles is their undertones. Undertones are subtle hints of other colors that can be present within the beige hue, making it lean towards different shades. The two primary undertones in beige tiles are warm and cool. Warm undertones tend to have hints of yellow, gold, or red, creating a cozy and welcoming atmosphere. These tiles pair beautifully with earthy tones and complement wooden furnishings. On the other hand, cool undertones in beige tiles may have traces of gray, blue, or green, lending a more modern and calming vibe to the space. Cool beige tiles work harmoniously with contemporary interiors and cooler color palettes.
When choosing a beige tile, it’s crucial to consider its undertones to ensure it aligns with your design vision. Testing tile samples under various lighting conditions can help identify the dominant undertone. Whether you’re aiming for a classic, elegant, or contemporary look, the beige tile with its diverse undertones is sure to add a touch of sophistication and timelessness to any space.
What Color Paint Goes with Beige Tile?
When it comes to selecting the right paint color to complement beige tiles, the options are vast and exciting. Beige tiles serve as a versatile and neutral backdrop, making them an excellent canvas for various color schemes. Let’s explore some popular color choices that harmonize perfectly with beige tiles.
Exploring Monochromatic Color Schemes:
When working with beige tiles, one of the easiest and most harmonious approaches is to opt for a monochromatic color scheme. In this scheme, various shades and tones of the same color family are used, creating a visually cohesive and relaxing atmosphere. For beige tiles, you can choose from different shades of warm neutrals, such as cream, ivory, and light tan. These colors will complement the beige tiles without overpowering them, allowing the room to maintain a sense of unity and elegance.
Contrasting with Neutrals:
If you prefer a more contrasting look while still maintaining a sense of neutrality, neutral colors can be an excellent choice. Grays and greiges (a combination of gray and beige) are perfect options to consider. Light or medium shades of gray can create a subtle contrast with the beige tiles, adding depth and sophistication to the space. Additionally, greige tones can strike a balance between warm and cool undertones, providing an appealing visual contrast that complements the beige tiles beautifully.
Introducing Warm Color Palettes:
For a cozy and inviting ambiance, warm colors are the way to go. Warm browns, ranging from light sandy tones to rich caramel hues, can pair exceptionally well with beige tiles. These colors create a welcoming and comforting atmosphere that suits various spaces, from living rooms to bedrooms and kitchens. Consider using terracotta-inspired colors as well, as they can add a touch of Mediterranean charm and earthy warmth to your surroundings.
Embracing Rustic Reds and Oranges:
If you desire a more adventurous and bold approach, rustic reds and oranges can make a stunning statement alongside beige tiles. Deep terra-cotta, burnt sienna, or spicy orange tones can inject energy and vibrancy into the space, creating a warm and inviting environment. However, it’s essential to use these colors sparingly as accent walls or in decor elements, as they can be overpowering if used excessively.
Embracing Cool Color Combinations:
To achieve a calming and serene ambiance, consider embracing soft blues and greens. Pale aqua, seafoam green, or muted teal can create a refreshing and coastal-inspired vibe when combined with beige tiles. This combination is particularly well-suited for bathrooms and kitchens, as it evokes a sense of tranquility and natural harmony.
Modernizing with Grays:
Gray is a versatile and contemporary paint color that pairs exceptionally well with beige tiles. From light silvery grays to deep charcoal tones, this color family offers a broad spectrum of options to suit your preferences. Gray can add a modern touch to your space while providing a neutral backdrop that allows the beige tiles to stand out.
Bold and Vibrant Choices:
For those who prefer a daring and lively environment, consider bold and vibrant color options. Jewel tones like emerald green, sapphire blue, or amethyst purple can create a striking contrast against beige tiles, infusing the space with a sense of opulence and luxury. However, exercise caution when using these intense colors, as they can be visually dominant. Consider using them as accents through furnishings, artwork, or accessories to balance the overall look.
What Color Should I Paint My Bathroom With Beige Tile?
For a bathroom with beige tiles, the key is to choose a color that complements the warm, neutral tones of the tiles while adding a sense of balance and style. Several colors work well in this context, but one of the best suggestions is to consider a soft, soothing shade of blue or green.
Blue and green colors evoke a sense of tranquility, making them perfect for a bathroom, a space meant for relaxation and rejuvenation. Light or pastel shades of these colors, such as seafoam green or powder blue, can create a harmonious and fresh ambiance when paired with beige tiles. This combination mimics nature’s colors, like sand and sea, which often evoke a calming and spa-like feel.
Another option is to opt for a pale gray or greige (a blend of gray and beige) color. These neutral hues can create a serene backdrop that allows the beige tiles to shine while giving your bathroom a modern and sophisticated touch.
Remember to test paint samples in your bathroom’s lighting conditions to see how they interact with your tiles before making a final decision. Ultimately, your choice should reflect your personal style and preferences while maintaining a cohesive and inviting atmosphere.
Conclusion
Ultimately, finding the perfect paint color to go with the beige tile is a creative and enjoyable process. The right paint color will transform your space into a harmonious and visually stunning haven. Embrace your personal style, experiment with different hues, and let your creativity guide you in crafting the perfect color scheme for your home.
Yes, you can paint over crackled paint. But ensure the existing paint is stable. Remove loose paint and address underlying issues before painting for optimal results.
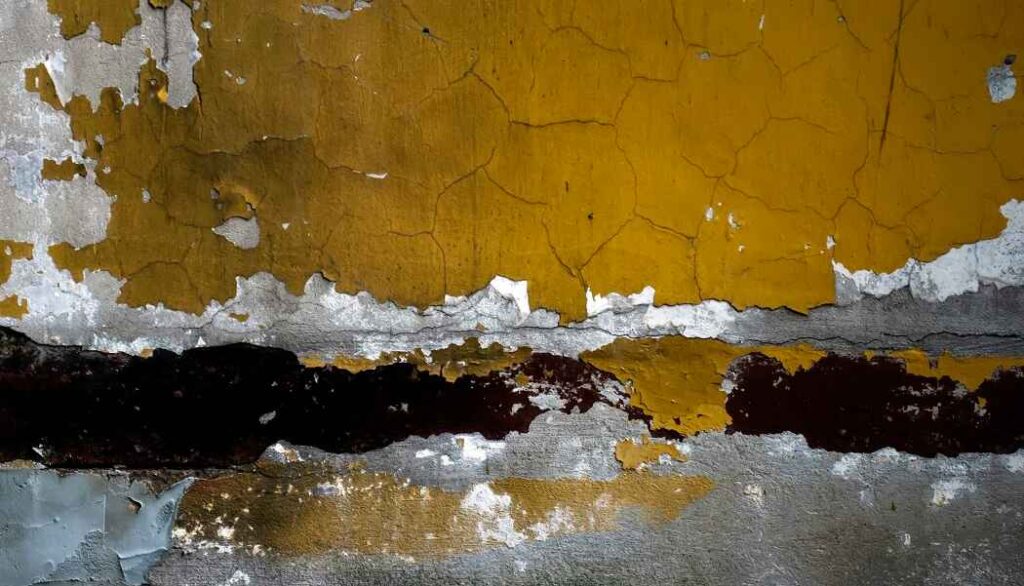
We are here to discuss about the causes of crackled paint, the importance of proper surface preparation, and the best practices for successfully painting over crackled surfaces.
So, Grab your brushes, and let’s take your DIY projects to new heights.
Can You Paint over Crackled Paint?
Absolutely, it is indeed possible to paint over crackled paint. But careful preparation and consideration of the underlying causes of cracking are essential to achieve a successful outcome.
Before painting over crackled paint, it’s essential to assess the condition and stability of the existing paint layers. If the crackled paint is loose, flaking, or peeling, it is necessary to remove it entirely to ensure proper adhesion of the new paint. Additionally, consider the type of paint used previously and its compatibility with the new paint. Incompatible paint layers may result in adhesion problems or an uneven appearance.
Begin by determining the extent of the crackling and evaluating the overall condition of the surface. If the crackling is minimal and limited to a few isolated areas, it may be feasible to proceed with painting over the crackled paint. If the crackling is extensive and covers a large portion of the surface, it might be necessary to consider other options, such as removing the existing paint and starting with a fresh surface.
Before painting, carefully inspect the existing surface for any underlying issues or damage. This includes examining the substrate for moisture damage, structural problems, or other signs of deterioration. Addressing these underlying issues is crucial before proceeding with any painting project, as they can significantly affect the durability and appearance of the new paint.
Once you’ve ensured that the surface is stable and in good condition, you can proceed with the painting process. Start by cleaning the surface thoroughly and sanding any rough or uneven areas. If there are remaining cracks or imperfections, consider using a suitable primer to create a smooth and uniform base for the new paint.
Choosing the right paint type is also vital for a successful outcome. Acrylic latex paints are generally recommended for painting over crackled paint, as they have good adhesion properties and flexibility, which can help prevent future cracking. Always follow the manufacturer’s instructions for the paint application, and consider applying multiple thin coats instead of a single thick coat.
How Do You Paint over Crackle Paint?
The process of painting over crackle paint, involves several steps to ensure a smooth and even finish. Here’s a detailed guide on how to paint over crackle paint:
1. Preparing the necessary materials:
- Drop cloths or plastic sheets
- Painter’s tape
- Sandpaper (medium grit)
- Tack cloth or a clean, lint-free cloth
- Primer
- Paint (latex or oil-based, depending on your preference)
- Paintbrushes or rollers
- Paint tray or bucket
- Stir sticks
- Optional: Paint sprayer
2. Protecting surrounding surfaces:
Remove any furniture or objects from the area you’ll be working on.
Cover the floor with drop cloths or plastic sheets to protect it from paint spills.
Use painter’s tape to mask off any adjacent surfaces or areas you don’t want to paint.
3. Cleaning the surface to remove dirt, dust, and loose paint chips:
- Start by preparing a bucket of warm water and mild detergent.
- After soaking a sponge or cloth in the soapy water, proceed to delicately scrub the crackled surface to ensure the removal of any dirt or grime.
- Pay special attention to areas with loose paint chips. Use a scraper or putty knife to carefully remove any flaking or peeling paint.
4. Repairing any major cracks, holes, or damage:
- Inspect the surface for any significant cracks, holes, or damage. Use a putty knife or a suitable filler compound to repair these areas.
- Follow the manufacturer’s instructions for the filler compound, ensuring proper application and drying time.
- Once the repairs have dried and cured, use sandpaper to smooth out the patched areas, making them flush with the surrounding surface.
5. Sanding the surface to create a smooth and even base for repainting:
- Use medium-grit sandpaper (around 120-150 grit) to sand the entire surface, including the crackled paint and repaired areas.
- Sand in a circular motion or back and forth, applying even pressure. This helps create a smooth and even base for the new paint to adhere to.
- After sanding, use a damp cloth to wipe away the dust generated during the sanding process. Allow the surface to dry completely before proceeding.
6. Priming the surface to improve adhesion and promote a consistent finish:
- Choose a high-quality primer (e.g., latex-based primer for latex paint, oil-based primer for oil-based paint) suitable for the type of surface you are working with (e.g., wood, metal, or plaster).
- Apply the primer evenly using a brush or roller, following the manufacturer’s instructions for drying time and coverage.
- Allow the primer to dry thoroughly before moving on to the next steps.
7. Painting over Crackled Paint
- Consider the type of surface you are painting (e.g., wood, metal, or drywall) and choose a paint that is suitable for that surface.
- If you want to replicate the crackling effect, consider using a crackle glaze or texture mediums specifically designed for this purpose. Otherwise, choose a regular paint for a smooth finish.
8. Applying the paint in thin, even coats to minimize the risk of crackling:
- Stir the paint thoroughly to ensure a consistent color and texture.
- Using a brush or roller, apply the paint in thin and even coats. Avoid overloading the brush or roller with paint, as this can lead to excessive thickness and potential crackling.
- Allow each coat to dry completely before applying the next one.
9. Considering the use of crackle glaze or texture mediums for intentional crackling effects:
- If you want to create intentional crackling effects, follow the manufacturer’s instructions for the crackle glaze or texture mediums.
- Apply the glaze or texture medium according to the instructions, and allow it to dry for the recommended time before proceeding with the next steps.
10. Allowing sufficient drying time between coats:
- Remove the painter’s tape carefully while the paint is still slightly tacky to avoid peeling.
- Allow the final coat of paint to dry completely before placing any objects back or using the painted surface.
If the crackle paint is in good condition and you want to maintain the crackling effect, you may choose to skip the repair and sanding steps mentioned in the preparation stage. Instead, you can focus on cleaning the surface and applying a suitable paint or glaze to enhance or refresh the crackling effect.
On the other hand, if the crackle paint is extensively damaged or if you want a smooth and even finish, following the detailed preparation steps, including repairing, sanding, and priming, will help create a solid foundation for the new paint.
Can You Paint over Cracked Chalk Paint?
Yes, you can paint over cracked chalk paint. Before proceeding, there are several important points to consider.
First, assess the extent of the cracking to determine the severity. Minor and shallow cracks can often be repaired, while deep or extensive cracking may require stripping the old paint entirely. Additionally, identifying the cause of the cracking is crucial in preventing similar issues in the future. Factors such as inadequate surface preparation, excessive paint layer thickness, or environmental conditions should be evaluated and addressed before repainting.
Choosing the right repair method is essential. Small cracks can be filled with a suitable filler, while larger cracks may require a patching compound or joint compound. Follow the instructions provided by the manufacturer of the chosen repair product for best results. To minimize the risk of future cracking, consider adding a flexible paint additive to the paint. These additives enhance the paint’s elasticity. It allows it to expand and contract with temperature and humidity changes without cracking.
Proper surface preparation is vital before repainting. Ensure that the surface is clean, dry, and free from any loose or flaking paint. Wash the surface to remove dust, dirt, or grease and allow it to dry completely before proceeding.
Conduct a small test patch in an inconspicuous area to test the paint compatibility. This helps ensure that the new paint adheres well and does not cause any adverse reactions or further cracking.
What Happens if You Paint over Cracking Paint?
If you paint over cracking paint without addressing the underlying issues, you may experience several problems that can affect the durability and appearance of the new paint job. Here’s what can happen:
Adhesion issues: Cracking paint indicates that the existing paint film is compromised and no longer adhering properly to the surface. When you paint over cracking paint, the new paint may not adhere well to the cracked surface, leading to poor adhesion. As a result, the new paint may begin to peel or flake off over time.
Visible cracks: Even with a fresh coat of paint, the underlying cracks are likely to reappear over time. The new paint may temporarily hide the cracks, but as the underlying layers continue to shift or expand, the cracks will eventually show through the new paint. It creates an unsightly appearance.
Uneven texture: Cracking paint can create an uneven surface with ridges and valleys. Painting over this uneven texture can highlight the imperfections, making the new paint job look uneven or bumpy. The cracks can also affect the smoothness of the finished surface, leading to an undesirable aesthetic result.
Trapped moisture: It can be an indication of moisture-related issues such as leaks, high humidity, or water damage. If you paint over cracking paint without addressing the moisture problem, the trapped moisture can continue to cause damage beneath the new paint. This can lead to further cracking, peeling, and even mold or mildew growth.
Worsened structural damage: Cracking paint can sometimes be a symptom of underlying structural issues such as settling, foundation problems, or excessive movement. Ignoring these underlying problems and simply painting over the cracking paint can allow the structural damage to worsen over time. The cracks may reappear and expand. It causes more significant issues with the paint and potentially affects the stability of the surface.
Final Words
Always take the time to diagnose and resolve any structural issues, coupled with meticulous preparation and quality materials. It will result in a successful transformation. So, with the right knowledge and techniques, you can confidently embark on your painting project.
You definitely want your car to look better so that you can resale it at a higher range or you can just slay by keeping it to you. Hence, you must be thinking of repainting the Mustang. But the question is how much does it cost to paint a Mustang?
It may cost around 2 thousand dollars to 3 thousand dollars. However, a complete job may cost more than that even 10 thousand dollars.

Then again, the range varies depending on the region and the body shop you are choosing. Moreover, choosing cheap paint may ruin your Mustang. Therefore, you need to make a clear decision.
So, to guide you in this particular aspect, read out the article till the last.
How Much Does It Cost to Paint a Mustang?
Now, to think about that, there are two ways you can paint your Mustang. Either you can take it to a body shop and leave it on to a professional hand or you can simply do it yourself. Both these two ways will cost differently.
If you want to repaint the Mustang all by yourself then you will have flexibility according to your time. Also, you can save the bucks by not sending it to a shop. But if you don’t own the tools for it then for buying them you may have to pay a hefty amount. Now, that is a drawback.
Again, you can cut down some costs by sanding and prepping your Mustang. But you must acknowledge how far down you can do it while sanding. Also, know how smooth you want it. For prepping purposes like removing plaques, taping, or emblems, you have to be a bit careful. Because once you damage them it will cost you more.
Nonetheless, professionals suggest not painting your precious Mustang until you are a pro at this. It may reduce the cost of the car. Again, as we mentioned, to make it done in a body shop, it will cost around $2000 to $3000. The price range will be decided on the grounds that I am pointing down below.
- If you want one coat of primer and three coats of paint along with a topcoat then it will likely cost you 2 thousand dollars. However, this service will also include some bodywork refinishing like removing dents and rust or sanding the bare metals down.
- If you want some of the great shades of your paint then it will cost higher. For instance, the deluxe paint with pearlized shades or metal flakes will cost you up to 3 thousand dollars. Repainting your Fox Body Mustang will also cause 3 to 5 thousand dollars.
- Also, tree-stage candy paint on your Mustang may cause you to spend around 5 thousand dollars.
- For slight damage repairing and prepping and painting your classic Mustang with high-quality paint – a complete job – will cost 5 to 10 thousand dollars.
- However, to make your Ford Mustang show-quality, the task will cost 5000 dollars or more.
So, according to the basic, standard, and showroom quality service, the actual charge will be decided for painting Mustang. Again, in terms of paint quality, the price range for painting Mustang also varies; high-quality American Morpho butterfly or Nouvelle Blue Pearly will cost around 6000 dollars.
How Much Paint Does It Take to Paint a Mustang?
The amount of paint mainly depends on the quality of the paintand also on the panels of your Mustang where you want to paint. However, generally, it takes around 2 gallons of primer for the base of your Mustang. However, for the base purpose, many choose to mix reducer as well in a 1:1 ratio.
Now, for the main paint, it depends on the number of coats that you are going to apply to achieve your desired color. If yours is a Mustang Convertible, then it will also take 2 gallons of paint for 3 to 4 coats.
Moreover, the roof panels of a Mustang Convertible are removed, so there are chances to add personalization with paint to your vehicle. Nonetheless, it is better to choose an overall color scheme for your Mustang so that it compliments the vehicle top.
What Factors Influence the Cost of Painting a Mustang?
There are several factors that affect the cost of painting a Mustang. They are given below.
- Size
The size of your Mustang impacts the painting cost greatly. To exemplify, a Ford Mustang comes in a smaller size. Hence, its painting will cost less compared to other Mustang models.
- Paint Type
We have already mentioned paint type is a significant factor. For choosing enamel paint for your Mustang, you may have to pay from 300 to 800 dollars. But the case is different when you choose high-quality paint. They can even range from several thousand dollars.
- Paint Color
Not all paint comes with some great color. Moreover, for your Mustang, you need to pick a great color scheme. Going for a basic color like black or white, will certainly cost you less. But to get a great pallet, you have to be willing to pay money according to that as well. More shades of color will cost more.
- Paint Finish
Again, not all paint will provide you with a smooth and long-lasting finish. Moreover, it also depends on your desire for the finish type. The price range is different for matte, gloss, or semi-gloss finishes. Furthermore, if you want an additional seal or wax then it will cost extra.
- Number of Coats
It is another factor that influences the cost of painting a Mustang. The more the number of coats, the more it will cost as well.
- Efficiency of Body Shop
There are body shops that will offer you top-tier service only when you do not bargain with the price. Bargaining about this fact might cause you less quality painting job.
How to Reduce the Cost of Painting a Mustang?
Well, there are several ways that you can follow to reduce the cost of painting a Mustang. First of all, you must consult with a professional who will first assess your Mustang and find out the specific needs. It will help you with the estimating total cost. A professional will also offer you a detailed quote.
Secondly, you can take it as a DIY job as we have mentioned earlier. You can adapt the prep tasks to reduce the cost. However, you have to be a bit careful because even sanding needs expertise. Do not become overwhelmed while sanding. Moreover, make sure you have the necessary equipment and materials.
Moreover, regular maintenance of your Mustang will reduce the cost when you want to repaint it. So, take care of it.
Conclusion
Now you know how much it costs to paint a Mustang, you must consider the mentioned factors as well. However, it is important to get a proper estimation before jumping into the task. Hence, a bit of homework and research is needed.
However, investing a big amount of money in a professional body shop will certainly ensure a smooth and high-quality finish and aesthetic appeal along with the increased value of your Mustang.
Chalk paint can crack due to several reasons, including applying it too thickly, using an incompatible surface or paint underneath, not allowing proper drying time, or environmental factors.
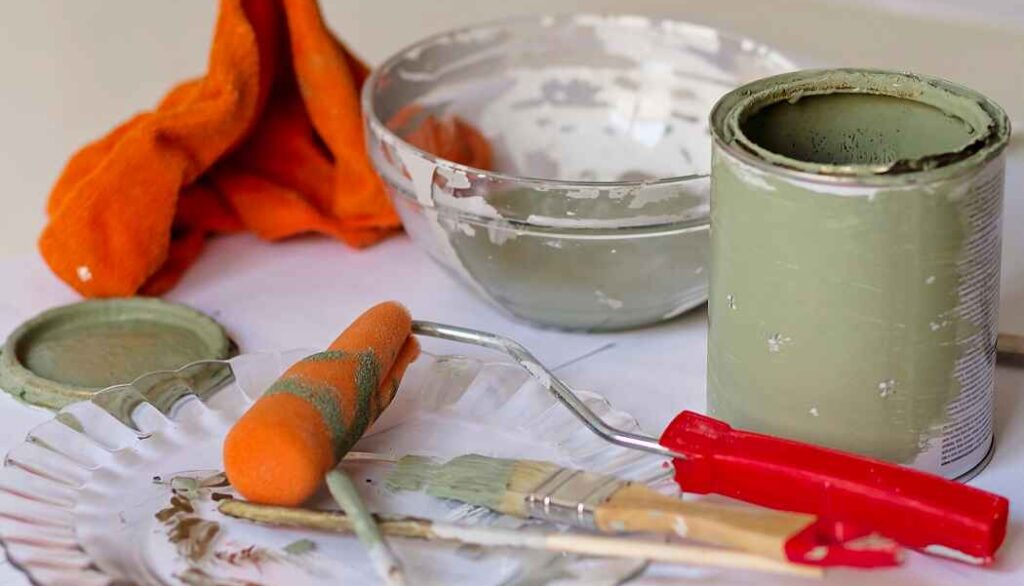
Are you frustrated by the cracking of your chalk paint? Don’t worry. In this comprehensive guide, we’ll explore the reasons behind why chalk paint cracks, helping you understand and troubleshoot this common issue.
Let’s unlock the mystery of chalk paint cracking together!
Why Is My Chalk Paint Cracking?
There can be several reasons why your chalk paint is cracking. Here are some possible explanations:
Inadequate surface preparation: Proper surface preparation is essential for ensuring optimal adhesion of chalk paint. When the surface is not thoroughly sanded, cleaned, or primed, the paint may struggle to adhere effectively. It leads to potential cracking issues as time goes on.
Insufficient drying time between coats: Chalk paint typically dries quickly, but it still needs sufficient time to cure between coats. If you apply subsequent coats of paint before the previous one has dried completely, the layers may not bond properly, leading to cracking.
Application of thick layers: Applying excessively thick layers of chalk paint can result in cracking. When thick layers dry, they tend to shrink and create tension on the surface, causing cracks to form.
Extreme temperature or humidity changes: Fluctuations in temperature and humidity can impact the drying process of chalk paint. If the paint dries too quickly or too slowly due to these environmental factors, it can lead to cracking.
Low-quality or expired paint: The quality of the paint you’re using can also affect its performance. Low-quality or expired chalk paint may not have the proper composition or consistency, leading to cracking issues.
Incompatible or incorrect surface materials: Chalk paint may not adhere well to certain surfaces or materials, such as laminate or shiny finishes. If you apply chalk paint to an incompatible surface without proper preparation or priming, it can result in cracking.
Inadequate sealing or topcoat: Chalk paint generally requires a protective topcoat or sealer to enhance durability and prevent cracking. If you skip this step or use an inappropriate sealer, the paint may be more susceptible to cracking.
Movement or flexing of the painted surface: If the painted surface experiences frequent movement or flexing, such as on furniture joints or wooden doors, it can cause stress on the paint layer, leading to cracking over time.
Why Is My Chalk Paint Cracking When It Dries?
The primary culprit behind this conundrum lies within the composition of the paint itself. Chalk paint is typically crafted by combining pigments, calcium carbonate (also known as chalk), water, and a binder, such as acrylic. During the drying process, water gradually evaporates, causing the paint to solidify and adhere to the surface. However, should the delicate balance of these components be disrupted, cracks may emerge as a distressing consequence.
Another possible cause of cracking is an excessive application of the paint. If the paint is applied over a sealed or non-porous surface, it lacks the necessary grip to firmly adhere, which can also contribute to cracking.
Another plausible culprit resides within the environmental realm. Temperature and humidity play a pivotal role in the paint’s drying process. If conditions are too chilly or excessively humid, the water content in the paint may evaporate at an uneven rate. It can cause the surface to contract prematurely and form unsightly crevices.
Furthermore, the passage of time may be a contributing factor. Overly aged or expired chalk paint can lose its effectiveness, resulting in compromised binding properties. As a result, the paint’s ability to maintain its integrity while drying diminishes, making cracks a more probable outcome.
How to Fix Chalk Paint Cracking?
If you’re experiencing cracking with your chalk paint, there are several steps you can take to address the issue. Follow these detailed instructions to fix chalk paint cracking:
Identify the cause: Before proceeding with any fixes, it’s crucial to determine the underlying cause of the cracking. Several factors can contribute to this issue, including improper surface preparation, incorrect paint application techniques, or environmental conditions.
Evaluate the surface: Inspect the painted surface to assess the severity of the cracking. If the cracks are small and superficial, you may be able to fix them without stripping the entire piece. However, if the cracking is extensive or deep, it might be necessary to remove the existing paint and start fresh.
Remove the cracked paint (if necessary): If the cracking is severe or widespread, you’ll need to strip the existing paint before proceeding. Use a paint stripper or sandpaper to remove the cracked paint layers until you reach a stable base.
Clean the surface: Once the paint is removed, clean the surface thoroughly to eliminate any dust, dirt, or residue. Use a mild detergent and water solution, and wipe it down with a clean cloth. Allow the surface to dry completely before proceeding.
Sand the surface: Lightly sand the entire surface with fine-grit sandpaper (around 220-320 grit). This step helps create a smooth and porous surface for the new paint to adhere to. Sanding also helps remove any remaining paint or imperfections that may have been missed during the stripping process.
Prime the surface (if needed): Depending on the type of surface and the paint you’re using, it may be necessary to apply a primer before painting. This step ensures proper adhesion and helps prevent future cracking. Choose a primer that is compatible with chalk paint and follow the manufacturer’s instructions for application.
Apply a new coat of chalk paint: Once the surface is properly prepared, apply a fresh coat of chalk paint. Make sure to use a high-quality chalk paint that is suitable for your project. Follow the manufacturer’s instructions regarding drying time and the number of recommended coats.
Apply thin coats: When applying the chalk paint, avoid heavy or thick coats, as they can lead to cracking. Instead, apply thin and even coats, allowing each coat to dry completely before adding another layer. Multiple thin coats are better than a single heavy coat.
Sand between coats (optional): For an extra smooth finish, you can lightly sand the surface between coats of chalk paint. Use a fine-grit sandpaper and gently sand the dried paint to create a smooth surface. Wipe away any dust before applying the next coat.
Seal the paint: Once you are satisfied with the coverage and finish of the chalk paint, consider sealing it with a clear wax or a water-based polyurethane. This protective layer helps prevent future cracking and adds durability to the painted surface. Follow the manufacturer’s instructions for applying the sealer and allow it to cure properly.
By following these detailed steps, you should be able to fix chalk paint cracking and achieve a smooth and flawless finish on your project. Remember to take your time, be patient, and ensure proper surface preparation and paint application for the best results.
Final Thoughts
By taking these precautions and implementing the techniques we discussed, you can significantly minimize the chances of encountering cracking issues in your chalk paint projects. With attention to detail and a thorough understanding of the process, you’ll be well on your way to achieving crack-free finishes that will stand the test of time.