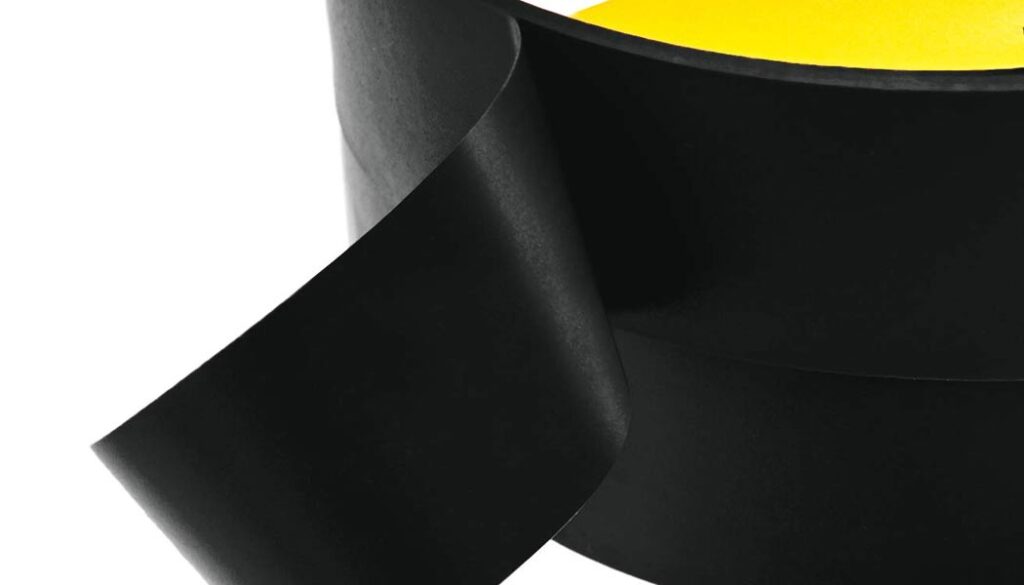
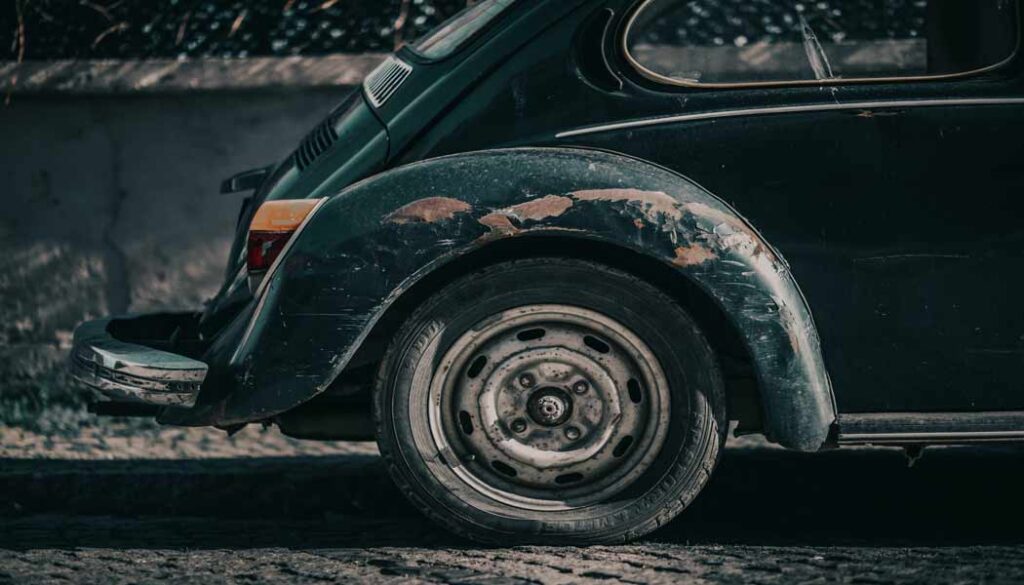
Electrical tape is generally safe for car paint if applied and removed carefully. But it’s important to follow best practices to prevent any potential damage.
Protecting the car’s pristine paint job is a top priority for any automobile enthusiast. Whether you’re a DIY enthusiast or a professional mechanic, there may come a time when you need to use tape on your car’s surface.
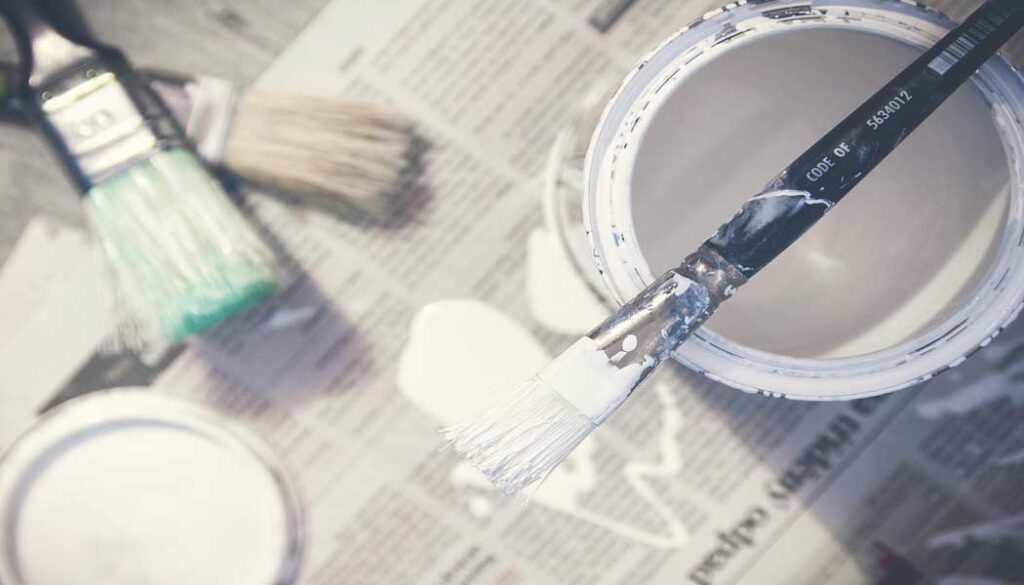
Image Via Youtube
One common type of tape used for various automotive tasks is electrical tape. But will electrical tape damage car paint? In this blog, we will explain the impact of electrical tape on your car and whether it can really damage the paint. So, “stick” with us.
What Does Tape Do to Car Paint?
Before we specifically address electrical tape, it’s essential to understand what any type of tape can potentially do to your car’s paint. When tape is applied to your car’s surface, it serves several purposes.
Protection: Tape can be used to mask off areas that you don’t want to be painted or treated, such as when performing touch-up paint. It acts as a barrier against overspray to help you achieve clean and precise results.
Marking: In various automotive repair and maintenance tasks, tape is used for marking measurements, alignment points, or areas of interest.
Will Electrical Tape Damage Car Paint?
When used correctly and with care, electrical tape is generally safe to use on your car’s paint. It should not cause damage if applied to clean, well-prepared surfaces and removed gently. You need to keep a few things in mind about electrical tape, though:
Adhesive Strength: Electrical tape typically has a moderate adhesive strength, which means it can stick firmly to various surfaces, including your car’s paint. However, it’s not as aggressive as some other tapes, like duct tape, which can leave a more noticeable residue. When removed correctly, electrical tape should not leave behind a significant amount of adhesive residue.
Paint Type: The type of paint on your car can influence how tape interacts with it. Modern automotive paints are typically more durable and less prone to damage from adhesives compared to older paint formulations. However, if you have a vintage car with older paint, it may be more susceptible to damage.
Surface Preparation: The condition of your car’s paint and its preparation before applying tape are crucial factors. Ensure the surface is clean, dry, and free from contaminants like dirt or wax. This will help the tape adhere properly without causing paint damage during application or removal.
Temperature Consideration: Extreme temperatures can affect the adhesive properties of electrical tape. In very hot conditions, the adhesive may become softer, potentially increasing the chances of residue transfer. In cold weather, the adhesive can become less pliable, which can make removal trickier. It’s advisable to apply and remove tape at moderate temperatures whenever possible.
Will Electrical Vinyl Tape Mess Up a Car’s Paint Job?
Electrical vinyl tape is a variation of electrical tape. It is commonly used for electrical insulation purposes. It differs slightly from traditional electrical tape, mainly in its composition. While electrical tape is typically made of PVC (Polyvinyl Chloride), electrical vinyl tape is made of vinyl.
Electrical vinyl tape is generally considered a safer option for use on a car’s paint job compared to traditional electrical tape. It tends to be less likely to leave adhesive residue on your car’s paint.
However, as mentioned earlier, the type and condition of your car’s paint play a significant role in how any tape affects it. Modern automotive paints are more resilient. But if you have a vintage car with older paint, I suggest you take extra caution when using vinyl tape.
Can Electrical Tape Be Used on Car Windows without Damage?
Using electrical tape on car windows is a common practice for various purposes, such as temporarily covering broken glass, creating outlines for tinting, or securing window visors.When used correctly, electrical tape can be used on car windows without causing damage.Here’s why:
Compatibility with Glass: Electrical tape is designed to adhere to various surfaces, including glass. It adheres well to glass without causing any immediate damage.
Temporary Solutions: Electrical tape is an excellent choice for temporary solutions, like covering a broken window until it can be properly repaired or securing a cracked window. It can effectively prevent debris, moisture, and drafts from entering the vehicle.
Tinting and Outlining: Some car enthusiasts use electrical tape as a guide when applying window tint or creating decorative designs. When applying tape on the exterior of the window, it’s less likely to affect the glass itself.
Best Practices for Safely Using Electrical Tape on a Car
While electrical tape is generally safe to use on a car’s paint and windows, it’s essential to follow best practices to ensure damage-free results. You can follow the tips below.
Prepare the Surface: Before applying any tape, ensure the car’s surface is clean, dry, and free from contaminants like dirt, dust, or wax. Proper surface preparation helps the tape adhere better and minimizes the risk of paint damage during application and removal.
Apply Carefully: When applying tape, make sure it adheres smoothly. Avoid stretching the tape excessively, as this can lead to uneven application and increased adhesive residue.
Remove Promptly: Remove the tape as soon as it’s no longer needed. Delayed removal can make it more challenging to take off without damaging the surface. When removing the tape, avoid abrupt or forceful removal, as this can increase the risk of paint damage.
Clean Residue Properly: If adhesive residue remains after tape removal, use a mild adhesive remover or a mixture of warm soapy water to clean the area. Ensure the remover is safe for automotive surfaces and follow the manufacturer’s instructions.
Test on a Small Area: If you’re unsure about using tape on a specific surface, consider testing it on a small, inconspicuous area to gauge its impact before applying it more broadly.
Final Words
Electrical tape and electrical vinyl tape can be valuable tools for various automotive tasks when used correctly and with care. They are generally safe for use on car paint and windows, provided you follow best practices and consider the type and condition of the surface. Remember to prioritize the safe and gentle removal of tape to prevent any potential damage.
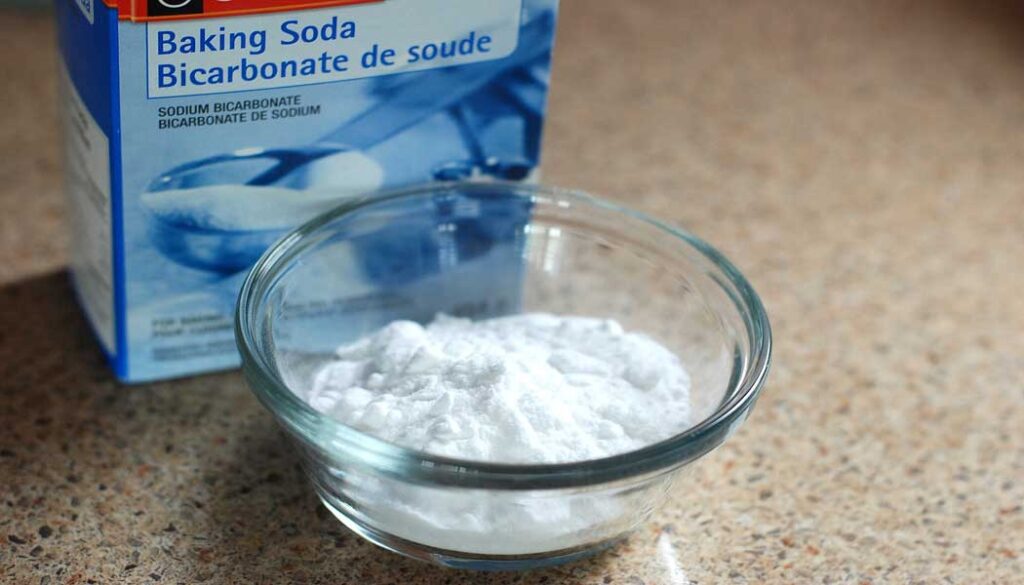
Baking soda is abrasive and can potentially scratch car paint if not used correctly. It’s essential to dilute it in water and apply it gently to minimize any potential damage.
Every car owner knows the joy of a gleaming, spotless vehicle – the envy of the neighborhood. But in the quest for automotive perfection, the question inevitably arises: can baking soda do more harm than good?
Image by NatureFriend from Pixabay
In the world of automotive care, myths and misconceptions abound. In this article, we embark on a journey to unravel the truth behind the enigma of baking soda and its potential impact on your car’s pristine paint job. Buckle up as we navigate the twists and turns of this oft-debated topic, ensuring you have the knowledge you need to keep your car looking its absolute best.
Will Baking Soda Damage Car Paint?
The question of whether baking soda will damage car paint is a common concern among car owners who seek cost-effective ways to maintain the appearance of their vehicles.
Baking soda is scientifically known as sodium bicarbonate. It is a versatile household item known for its cleaning and abrasive properties. While it can be a useful tool in cleaning various surfaces, including cars, there are important factors to consider when using baking soda on car paint.
Baking soda’s abrasive nature is a double-edged sword. On one hand, it can effectively remove surface contaminants like dirt, grime, and even some light stains. On the other hand, its abrasive particles can potentially harm the car’s paint finish if not used correctly.
The key to safely using baking soda on car paint lies in proper technique and precautions. In essence, while baking soda can be safe and effective for cleaning car paint when used correctly, there is a risk of damage if precautions aren’t taken. It’s important for car owners to exercise caution, adhere to best practices, and conduct small tests to determine the suitability of baking soda for their specific car’s paint.
Ultimately, the choice of using baking soda for car paint maintenance depends on an individual’s willingness to follow proper procedures and their commitment to regular car care. When used with care, baking soda can be a useful addition to a car owner’s toolkit for maintaining the appearance of their vehicle.
How to Identify If Baking Soda Has Harmed Car Paint?
Identifying whether baking soda has harmed your car’s paint is crucial to taking appropriate corrective actions promptly. Here are some steps to help you determine if baking soda has had a detrimental effect on your car’s paint.
1. Inspect the Paint Surface: Begin by closely examining the entire surface of your car’s paint. Look for any noticeable changes in the paint’s appearance, such as dull spots, discoloration, or scratches.
2. Feel for Texture Changes: Run your fingers gently over the painted surface. If you notice any roughness, unevenness, or textural changes that weren’t there before using baking soda, it could be a sign of damage.
3. Check for Swirl Marks: Swirl marks may appear as fine, circular scratches on the paint’s surface. Use a strong light source and inspect the paint from various angles to detect these marks.
4. Examine Edges and Joints: Pay special attention to the edges of panels and joints between different parts of the car. These areas are more susceptible to damage, and any signs of harm may be more pronounced there.
5. Compare to Untreated Areas: Test baking soda on a small, inconspicuous area of your car before using it more broadly. Then compare that area to the surrounding untreated paint. If you see a noticeable difference, it could indicate damage.
6. Consult a Professional: If you are unsure about the condition of your car’s paint or suspect damage, it’s advisable to consult a professional auto detailer or body shop. They can assess the paint’s condition and recommend appropriate measures to rectify any harm.
Remember that prevention is the best approach when it comes to maintaining your car’s paint. To minimize the risk of damage, always use baking soda sparingly, dilute it properly, apply it gently, and follow up with thorough rinsing and waxing to protect the paint. Regular maintenance and care can help preserve your car’s appearance and minimize the chances of any harm caused by baking soda.
How Do You Use Baking Soda on Car Paint Safely?
Using baking soda on car paint can be a safe and effective cleaning method when done correctly. Here’s how to use baking soda on car paint safely:
Mix baking soda with water to create a paste or a mild cleaning solution. This dilution reduces its abrasive properties, making it safer for the paint. Apply the baking soda mixture gently using a soft microfiber cloth or sponge. Avoid using abrasive materials like steel wool or scrub brushes.
Before applying baking soda to the entire car, it’s advisable to test it on a small, inconspicuous area. This test helps ensure that the baking soda doesn’t cause any adverse effects, such as scratching or dulling of the paint.
After cleaning with baking soda, rinse the car thoroughly with clean water to remove any residue. Residue left on the paint could potentially harm the finish over time. To restore the shine and protect the paint, consider applying a quality car wax or polish after cleaning.
If you suspect that baking soda or any other cleaning method has caused damage to your car’s paint, here are the steps to take:
Stop Using the Suspected Cleaner: Discontinue the use of any cleaning agent that you suspect has caused damage to your car’s paint to prevent further harm.
Inspect the Damage: Carefully examine the affected areas. Look for changes in the paint’s appearance, such as scratches, discoloration, or texture changes.
Consult a Professional: If the damage is significant or if you’re uncertain about how to address it, consult a professional auto detailer or body shop. They can assess the extent of the damage and recommend appropriate corrective measures.
Consider Repairs: Depending on the severity of the damage, repairs may be necessary. This could involve paint touch-ups, polishing, or even repainting the affected areas.
Learn from the Experience: Use the incident as an opportunity to learn about proper car care techniques and products. Understanding how to prevent similar damage in the future is essential.
Should I Leave Baking Soda in My Car?
Leaving an open container of baking soda in your car can be a useful way to help absorb odors and moisture. Baking soda is known for its odor-neutralizing properties, and it can help reduce musty or unpleasant smells in your car. Additionally, it can absorb excess moisture, which can be beneficial for preventing mold and mildew growth. However, there are a few things to keep in mind.
Place the baking soda in a container or a small, breathable bag to prevent it from spilling or creating a mess in your car. Baking soda can lose its effectiveness over time. Replace it periodically, perhaps every few months, to ensure it continues to absorb odors and moisture effectively.
Check the container regularly to ensure that the baking soda hasn’t spilled or created a mess in your car.
While baking soda can help manage odors, it’s essential to address the root cause of any persistent smells in your car, such as cleaning up spills or addressing any underlying issues.
In summary, leaving baking soda in your car can be a practical way to manage odors and moisture, but it should be used in a controlled manner and periodically replaced for maximum effectiveness.
Learn How to Use Baking Soda on Car Paint:
Final Words
The question of whether baking soda will damage car paint boils down to one’s approach and diligence in its application. Baking soda, with its mild abrasive properties, can be a valuable tool for car owners seeking cost-effective cleaning solutions.
However, it can pose a risk to the paint’s finish if not used carefully. In the end, while baking soda can be a useful addition to your car cleaning toolkit, it’s essential to use it judiciously and follow best practices to ensure that your vehicle’s paint remains in top condition.
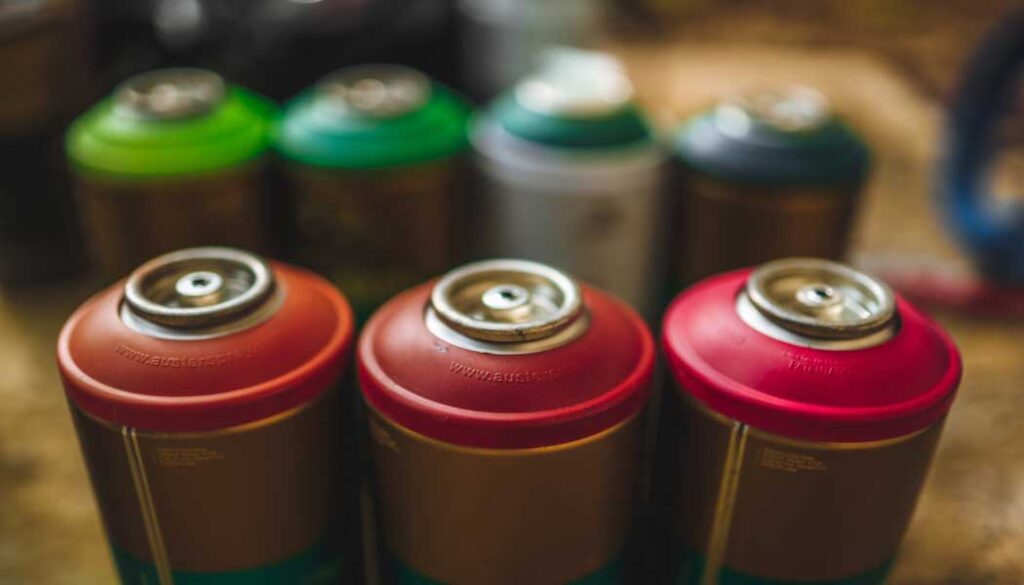
In a spray paint can, the ball agitates and mixes the paint to ensure an even and consistent application.
When you pick up a spray paint can, you might not give much thought to what’s inside. Spray paint makes it so easy to transform surfaces or create art.
Photo by Luis Quintero from Pexels
However, have you ever wondered why there’s a ball inside a spray paint can? What purpose does it serve, and why do some spray paint cans contain multiple balls? In this blog, we’ll take a deep look inside the spray paint can and find out the answers.
Why Is There a Ball in a Spray Paint Can?
The presence of a ball inside a spray paint may seem peculiar, but it plays a crucial role in ensuring the effectiveness of the spray mechanism. It serves various purposes such as:
Mixing the Contents: If we look at spray paint, we will see that it is a suspension of pigment particles in a liquid medium. Over time, these components can settle or separate. When the can is shaken, the ball helps break up clumps of pigment and ensures an even distribution of the paint’s components.
Preventing Clogging: If the ball doesn’t agitate, the pigment particles and other solids might settle at the bottom of the can and lead to clogs and uneven spraying. This could result in splatters or an inconsistent finish.
Improving Paint Quality: Proper mixing also ensures that the pigments remain suspended in the liquid medium. This helps achieve a smooth and uniform coat of paint on the intended surface.
In a nutshell, this small ball serves as an agitator. Its primary purpose is to thoroughly mix the paint or other contents within the can before they are expelled as a fine mist.
Why Do Some Spray Paint Cans Have Multiple Balls?
You may have noticed that not all spray paint cans contain just one ball. Some have two or even more. The reason for multiple balls is directly related to the size and volume of the can, as well as the nature of the paint or coating inside. Let’s take a look at some reasons to find out the answer:
Larger Cans: Larger spray paint cans contain more paint. They often have multiple balls to ensure that the contents are thoroughly mixed. This is because a single ball might not provide adequate agitation for a larger volume of paint. Multiple balls distribute the shaking force more evenly throughout the can and ensure better mixing.
Different Formulations: Some paints or coatings may have thicker or denser formulations. This makes it necessary to have multiple agitator balls to effectively break up clumps and maintain homogeneity.
Specialized Applications: Industrial or automotive spray paint cans are known for precision and consistency. So, multiple balls are typically used to guarantee that the paint or coating is perfectly mixed before application.
Are There Different Types of Balls in Spray Paint Cans?
Yes, there are different types of balls used in spray paint cans, and the choice of the ball depends on various factors. Some types you may find are:
Steel Balls: Steel balls are the most common type found in spray paint cans. They are sturdy and durable, and do an excellent job of agitating and mixing the contents. Steel balls are ideal for most standard spray paints and coatings.
Glass Balls: Some high-end or specialty spray paint products may contain glass balls. Glass balls are less likely to corrode or react with certain chemical formulations than steel balls. They are often used in paints with corrosive or reactive ingredients.
Plastic Balls: Plastic balls are used in certain spray paint formulations, where metal balls might cause a reaction or contamination. Plastic balls are non-reactive and lightweight, making them suitable for specific paint and coating types.
Nylon Balls: Nylon balls are sometimes used for paints that require a gentler agitation, such as delicate or low-viscosity coatings. They are less likely to cause damage to the container and are resistant to corrosion.
Why Does the Ball Rattle Inside the Spray Paint Can?
As mentioned earlier, the primary role of the ball is to agitate and mix the paint or coating inside the can. When you shake the can, the ball moves around, hitting the sides and bottom of the container.
This action effectively breaks up any settled pigment particles or solids and ensures uniform consistency. Also, the rattling noise indicates that the paint components are being thoroughly mixed. If the ball doesn’t rattle, it could be a sign that the paint has separated or deteriorated, and it may not perform as expected.
What Happens If the Ball Gets Stuck or Broken?
Though the ball inside a spray paint can is designed to move freely and serve its purpose, sometimes it might get stuck or even break. If the ball gets stuck, you may not hear the familiar rattling sound when shaking the can.
This could indicate that the paint inside is no longer well-mixed. To resolve this, try tapping the bottom of the can gently against a hard surface to free the ball. If the ball inside the spray paint can breaks, it could cause clogs or uneven spraying. However, this is relatively rare.
Can I Remove the Ball from a Spray Paint Can?
Removing the ball from a spray paint can is not recommended, and it’s generally unnecessary. The ball serves a vital purpose in ensuring the paint remains well-mixed and ready for use. Attempting to remove it could result in several issues like impaired paint quality, potential damage to the can, and even safety hazards.
Without the ball, the components may not work properly. Trying to remove the ball can be challenging and may require drilling or puncturing the can. It can be dangerous and may result in leaked can or health injuries.
Tips on Safe Handling and Disposal of Spray Paint Cans
Proper handling and disposal of spray paint cans are essential for your safety and environmental protection. You can follow the tips below to ensure you use and dispose of these cans responsibly.
Use in Well-ventilated Areas: Use spray paint in a well-ventilated space or outdoors to minimize exposure to fumes and ensure adequate airflow.
Wear Protective Gear: If needed, wear appropriate personal protective equipment, such as goggles, gloves, and a mask, to protect yourself from inhaling fumes and contact with paint.
Follow Instructions: Always read and follow the manufacturer’s instructions on the spray paint can for usage, safety, and disposal guidelines.
Dispose of Empty Cans Properly: Empty or spent spray paint cans should be treated as hazardous waste and disposed of according to local regulations. Most places have recycling programs or hazardous waste disposal facilities that can handle aerosol cans. If you have partially full cans, check with your local waste disposal authority for guidance on how to dispose of them safely. Do not puncture or crush empty cans.
Store Cans Securely:Store spray paint cans in a cool, dry place away from direct sunlight, heat sources, and open flames. Make sure the caps are tightly sealed to prevent leakage.
Never Incinerate or Burn: Never attempt to burn or incinerate spray paint cans, even when empty. This can be extremely dangerous and may release harmful chemicals.
Final Words
The small ball inside a spray paint can may seem inconspicuous, but it plays a crucial role in ensuring the quality and consistency of the color you use for your projects. It’s natural to be curious about its purpose. But remember that it’s best to leave it inside the can and let it serve its intended function.
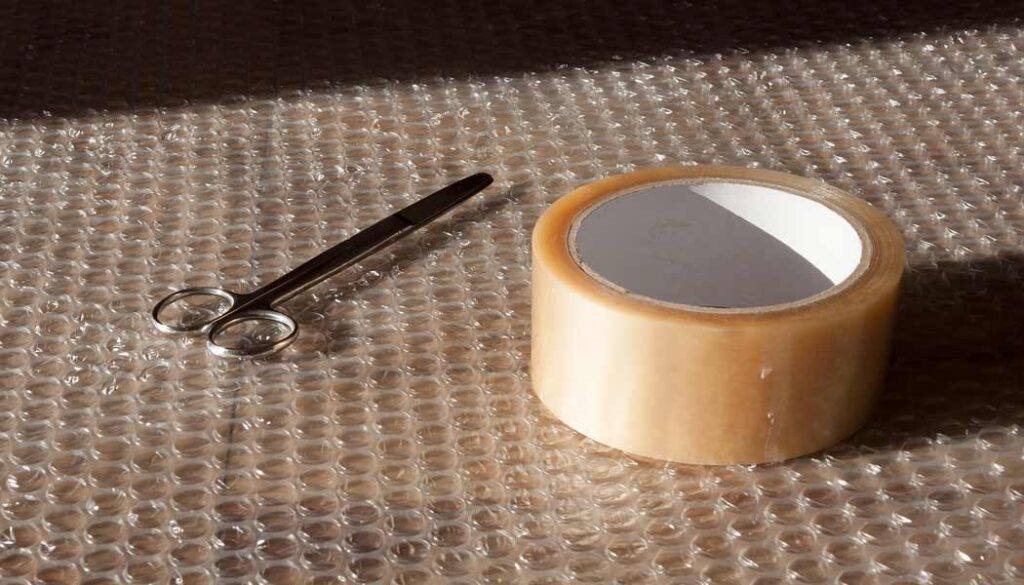
Yes, packing tape can potentially damage car paint if left on for an extended period or removed improperly. Its adhesive can bond strongly and, when removed, may peel off paint or leave residue.
Image by Stefan Schweihofer from Pixabay
Imagine you’re moving house. In a brilliant moment of resourcefulness, you decide to use packing tape to secure some items to your car. But hold on a minute! Could this cost you more than just your neighbor’s raised eyebrows? Let’s peel back the mystery on whether packing tape is a menace to your car’s pristine paint job.
Will Packing Tape Damage Car Paint?
Packing tape is a ubiquitous household item. It becomes a double-edged sword while encountering the glossy canvas of your car’s paintwork. Though it excels in securing boxes and bundling items, its adhesive properties can spell trouble when improperly handled around your vehicle.
When packing tape adheres to your car for an extended duration, it establishes a firm grip that can lead to a vexing scenario: peeling paint. As the tape’s adhesive cures, it forms an intimate bond with the paint. It makes separation a daunting task. Attempts to remove the tape may result in bits of paint coming off. This will leave unsightly blemishes and expose your car’s vulnerable metal beneath.
Even if the tape is removed successfully, it may leave behind a stubborn residue. This residue, composed of adhesive remnants and possibly dirt and debris trapped in the sticky substance, clings tenaciously to your car’s finish. Not only does it mar the appearance of your vehicle, but it can also be a magnet for dust and other contaminants, compounding the damage over time.
At the end of the day, packing tape is a helpful tool for various tasks. But it should be handled with care around your car’s delicate paintwork. Vigilance, caution, and the use of automotive-specific alternatives can help safeguard your vehicle’s aesthetic appeal from the potential harm of this adhesive wonder.
What Tape Will Not Damage Car Paint?
When it comes to preserving your car’s pristine paint finish, not all tapes are created equal. To safeguard your vehicle’s appearance while still effectively using tape for various purposes, consider these options that are less likely to damage car paint.
1. Painter’s Tape: This blue or green masking tape is designed for use in painting. It provides a secure bond without leaving residue or harming your car’s paint. It’s a safe choice for temporary applications like securing a car cover or marking areas for touch-up painting.
2. Automotive Masking Tape: Specifically designed for automotive use, this tape is engineered to adhere well during painting and detailing tasks. It will also ensure clean and residue-free removal.
3. Vinyl Wrap Tape: This tape is used for vinyl wrapping vehicles. It’s gentle on paint and designed for temporary applications. It provides a secure hold without leaving behind adhesive residue.
4. Double-Sided Foam Tape: Ideal for mounting accessories or trim pieces, foam tape offers a reliable hold without causing paint damage. It cushions against vibrations and won’t harm the paint’s finish.
5. Velcro Strips: Hook-and-loop fasteners like Velcro are perfect for attaching lightweight items or accessories to your car’s interior or exterior. They can be easily removed without harming the paint.
So, it’s clear from the discussion that if you choose the right tape for the task, you can protect your car’s paint while accomplishing your intended goals.
Tips and Techniques for Safe Use of Packing Tape on Cars
The mighty packing tape is a versatile tool in the hands of a mover or a prankster. Here are some tips and techniques to use packing tape on your car without unleashing chaos:
The 24-Hour Rule: Packing tape doesn’t age well on cars. If you must use it, don’t make it a long-term relationship. Remove it within 24 hours to prevent it from bonding like a bad marriage.
Clean Canvas: Before you even think about tape, ensure your car’s surface is clean and free of debris. Think of it as giving your car a spa day before taping it up.
Warm It Up: If you’ve already crossed the line and your car is tangled in packing tape, don’t panic. Gently heat the tape with a hairdryer to soften the adhesive – a little car spa treatment can go a long way.
Use the Right Tape: If you’re dead-set on taping your car, consider using painter’s tape or automotive-specific alternatives. They’re like the professionals of the tape world, less prone to causing chaos.
What Should I Do if My Car’s Paint Is Damaged by Packing Tape?
1. Examine the extent of the damage. Note any peeling paint, scratches, or adhesive residue.
2. Gently clean the affected area with soapy water and a soft cloth to remove any dirt or debris.
3. For significant paint damage, consult a professional auto body shop. They can assess the damage and provide repair options.
4. For minor damage, you can attempt DIY fixes like using a touch-up paint kit or automotive polishing compound to minimize the appearance of scratches.
5. Use automotive-friendly tapes in the future and avoid leaving tape on your car for extended periods.
1. Use a hairdryer on low heat to warm the tape’s adhesive. This softens it, making removal easier.
2. Carefully peel the tape at a low angle, pulling it back on itself. Avoid quick, forceful pulls.
3. Apply a dedicated adhesive remover or rubbing alcohol to any residue left behind. Gently rub with a soft cloth.
4. Use a microfiber cloth for residue removal to prevent scratching.
5. After tape removal, consider applying car polish and wax to restore shine and protect the paint.
Always proceed with caution to prevent paint damage during tape removal.
Final Words
While packing tape and your car’s paint might not be best friends, they can coexist with a bit of care. Just be gentle, use the right tape, and don’t leave it on for too long. And if things get sticky, remember, it’s just another quirky chapter in your car’s adventure!
Baking soda can be effective for minor car scratches, but it may not work well for deep or severe damage.
Car scratches can be a frustrating sight for any vehicle owner. Scratches can detract from the overall appearance of your car, whether they’re the result of a minor fender bender, parking mishaps, or just the wear and tear of everyday driving.
Photo by Tahir Osman from Pexels
One DIY remedy that has gained popularity over the years is the use of baking soda to address these scratches. But is baking soda really effective in this regard, and can it handle deep car scratches? In this blog, we will find out whether baking soda can truly work wonders on your car’s scratches.
Is Baking Soda Good for Car Scratches?
Baking soda, or sodium bicarbonate, is a versatile household item known for its cleaning and abrasive properties. It’s often used in various cleaning and DIY projects, which makes it a tempting choice for car enthusiasts looking to tackle minor scratches. Let’s check out the potential benefits and limitations of using baking soda for car scratches.
Mild Abrasiveness: Baking soda is mildly abrasive, which means it can help remove surface-level contaminants and imperfections. This property makes it suitable for addressing light scratches and scuffs on your car’s paint.
Cost-Effective: One of the advantages of using baking soda is its affordability. For those who are looking to improve their car’s appearance, baking soda can be a budget-friendly option compared to professional detailing services.
Minimal Harm: Baking soda is generally safe for your car’s paint when used correctly. Unlike some harsh chemical compounds, it’s less likely to cause further damage if applied with care.
Ease of Use: Baking soda is readily available and easy to use. You can create a baking soda paste with water and apply it directly to the scratched area, making it a convenient choice for DIY enthusiasts.
So, considering all of these, baking soda is a handy option to remove some car scratches.
Can Baking Soda Remove Deep Car Scratches?
Baking soda can be a helpful DIY remedy for addressing light car scratches and surface imperfections. It’s a cost-effective and easy-to-use option that may improve the appearance of your car’s paint. Though it can be effective for dealing with minor scratches and scuffs, it may not be the ideal solution for deep car scratches.Here are some reasons why:
Limited Abrasiveness: Baking soda has mild abrasiveness, which is advantageous for minor imperfections. However, it may not be sufficient to remove deep scratches that have penetrated several layers of paint. Deep scratches often require more aggressive methods or professional intervention.
Surface-Level Improvement: Baking soda can improve the appearance of deep scratches by reducing their visibility, but it may not completely eliminate them. The results can be inconsistent, and the scratch might reappear over time.
Risk of Further Damage: If not used properly, baking soda can potentially cause more harm than good. Excessive rubbing or using abrasive materials can lead to paint damage or even dull the car’s finish.
What Happens if You Put Baking Soda on Car Scratches?
When you put baking soda on car scratches, several things can occur. It depends on the nature and depth of the scratches, as well as the way you apply the baking soda.
Surface Cleaning: Baking soda’s mild abrasive properties can effectively remove dirt, grime, and light surface imperfections. This means that applying baking soda to your car scratches can clean the area, making the scratch more visible for assessment and potentially reducing its overall appearance.
Reduction in Scratch Visibility: Baking soda can have a mild smoothing effect on the scratch’s edges, making it less noticeable to the naked eye. For shallow and minor scratches, this can lead to an improved appearance.
Risk of Paint Damage: While baking soda is generally considered safe for car paint, there is a risk of causing unintended damage if not used correctly. Overly aggressive rubbing or the use of abrasive materials can lead to paint abrasions, which might worsen the scratch.
How Does Baking Soda Repair Car Scratches?
Understanding the mechanics of how baking soda interacts with car scratches can provide insight into its repair process:
Chemical Properties: Baking soda’s chemical properties can also contribute to its cleaning and abrasive effects. It can react with acidic or stubborn substances, which makes it effective at removing surface contaminants and minor imperfections.
Addressing Surface-level Issues: To use baking soda for scratch repair, you typically create a paste by mixing it with water. This paste is applied to the scratched area and rubbed gently in circular motions using a sponge. The paste’s abrasiveness, combined with its chemical properties, works to deal with surface-level issues.
Temporary Improvement: Though baking soda can improve the appearance of car scratches, especially minor ones, the results may not meet your expectations. The improvement is often temporary, and the scratch may become more visible again after some time.
In a nutshell, baking soda can temporarily improve the appearance of car scratches by cleaning the affected area and reducing scratch visibility. However, it’s not a long-term solution for deep or significant scratches.
Steps to Use Baking Soda for Car Scratches
You need to follow a systematic approach when using baking soda to fix car scratches.
Step 1: Gather Your Supplies
Baking soda
Clean water
Soft microfiber cloth or sponge
A small bowl for mixing
Car wash soap
Optional: Clear nail polish (for deep scratches)
Step 2: Clean the Affected Area
Make sure to eliminate any dirt or contaminants. Rinse and dry it completely.
Step 3: Prepare the Paste
In a bowl, create a thick paste by mixing baking soda with water. The consistency should be similar to that of toothpaste.
Step 4: Apply the Baking Soda Paste
Dip your soft cloth or sponge into the soda paste and gently put it on the scratched spot. Use circular motions to work the paste into the scratch and the surrounding area.
Step 5: Rub Gently
Be cautious not to use excessive pressure, as this can cause unintended paint damage. Focus on gently buffing the scratched area for a few minutes.
Step 6: Rinse and Assess
After gently rubbing the area, rinse it with clean water to abolish any residue. Allow it to dry, and then assess the scratch’s appearance. You may notice an improvement in visibility.
Step 7: Repeat if Necessary
For deeper or more stubborn scratches, repeat the method but always be cautious to avoid excessive abrasion.
Step 8 (Optional): Apply Clear Nail Polish (for deep scratches)
If you have deep scratches that are beyond the scope of baking soda, you can apply clear nail polish to seal the area temporarily and prevent further damage. However, it should be addressed professionally for a lasting repair.
Step 9: Final Touch-Up
Finish by waxing and polishing the entire car’s surface to maintain a consistent appearance.
Final Words
Baking soda can be a cost-effective and accessible option for minor car scratch repair. It should be considered a temporary fix that can make scratches less visible, but it may not provide a permanent solution.
For deep or severe scratches, or if you want a long-lasting and professional repair, it’s best to use professional-grade tools.
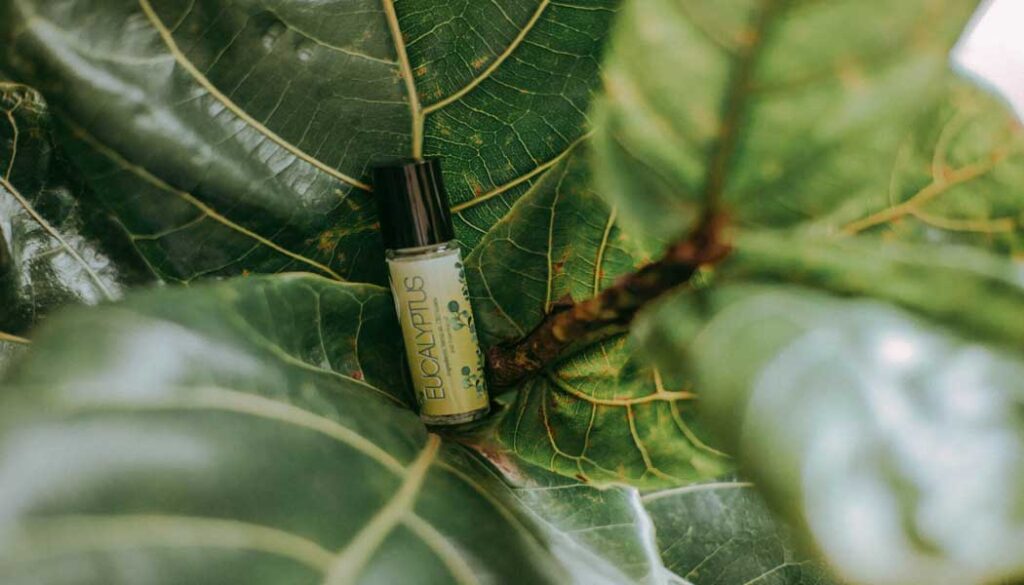
Eucalyptus oil is unlikely to damage car paint if you use it correctly and with caution.
Cars are more than just vehicles. They are an extension of our personalities and often one of our most significant investments. Maintaining their appearance is a top priority for many car owners.
Photo by Laryssa Suaid from Pexels
However, accidents happen. When sticky substances or unsightly stains cling to your car’s exterior, it becomes essential to find safe and effective solutions for it. Eucalyptus oil is known for its natural cleaning properties and has gained popularity as a potential remedy. But before you reach for that bottle of eucalyptus oil, let’s explore whether it can damage your car’s paint.
Will Eucalyptus Oil Damage Car Paint?
Eucalyptus oil is derived from the leaves of the eucalyptus tree. It is renowned for its versatility. It’s commonly used as a natural cleaner, insect repellent, and even for its soothing aromatherapeutic benefits.
But, can it be safely used to remove stubborn substances from your car’s surface without causing any harm? The good news is that eucalyptus oil is generally considered safe for car paint. However, it’s essential to take precautions and follow proper guidelines when using it.
Eucalyptus oil is a natural solvent, which means it can help break down and dissolve sticky residues, such as tree sap, tar, or adhesive residues, without damaging the paint. Its gentle yet effective properties make it a great choice for car owners looking to tackle these common challenges.
Will Eucalyptus Oil Harm Car’s Clear Coat?
Car clear coat is a transparent layer applied over the base paint to protect it from environmental factors, such as UV rays, dirt, and contaminants. Damage to this clear coat can result in a dull, weathered appearance. Car owners often worry about whether eucalyptus oil might harm this essential protective layer.
When used correctly and in moderation, eucalyptus oil is unlikely to harm your car’s clear coat. The diluted mixture and gentle application process help minimize the risk of any adverse effects. However, it’s crucial to remember a few key points:
Moderation: Avoid using excessive amounts of eucalyptus oil, as prolonged or repeated use could potentially weaken the clear coat over time.
Rinse Thoroughly: After using eucalyptus oil to remove sticky residues, ensure that you thoroughly rinse the treated area with clean water to remove any remaining oil.
Regular Maintenance: To preserve your car’s clear coat, engage in regular car maintenance, such as washing, waxing, and protecting it from harsh environmental conditions.
How to Safely Use Eucalyptus Oil on Cars?
To use eucalyptus oil safely on your car, you need to take a few steps, so you don’t damage the finish. Here’s a step-by-step guide on how to safely use eucalyptus oil on cars:
Gather Your Supplies: You will need eucalyptus oil, water, a clean, soft cloth, and a bucket.
Dilution: Mix the eucalyptus oil with water in a bucket. A common ratio is one part eucalyptus oil to three parts water. This dilution helps prevent the oil from being too harsh on your car’s paint.
Patch Test: Before applying the mixture to the affected area, perform a patch test on a tiny spot on your car’s surface. Wait a few minutes to ensure there is no adverse reaction.
Application: Use the diluted eucalyptus oil to the sticky residue. Keep it on the surface for some moments. Make sure the oil is not fully dried on the car.
Gentle Removal: Take help from a cloth to gently wipe away the residue. Avoid using excessive pressure, as this could potentially damage the paint.
Rinse Thoroughly: After removing the residue, rinse the area thoroughly with clean water to ensure that no eucalyptus oil residue remains.
Finish with Wax: To protect your car’s paint and clear coat, consider applying a layer of car wax to the treated area. This will help restore shine and provide an additional layer of protection.
Factors to Consider When Using Eucalyptus Oil on Cars
Though eucalyptus oil can be a helpful tool for maintaining your car’s appearance, there are some important factors to keep in mind when using it:
Paint Type: Different car paints may react differently to eucalyptus oil. If you have concerns or are unsure about your car’s paint type, you can talk to a professional detailer for guidance.
Frequency: Avoid using eucalyptus oil too frequently. Overuse may weaken the clear coat or paint over time, so only use it when necessary.
Environmental Conditions: Be cautious when using eucalyptus oil in extreme temperatures. Extreme heat or cold can affect the oil’s effectiveness and potentially harm the paint.
Immediate Cleanup: Do not let the eucalyptus oil sit on your car’s surface for an extended period. Promptly clean and rinse the area after application.
Wear Gloves: When handling eucalyptus oil, it’s a good idea to wear gloves to protect your skin.
To sum it up, eucalyptus oil is a useful item in maintaining your car’s exterior, provided you use it correctly and with care. By considering the factors mentioned, you can effectively remove sticky residues while preserving the beauty and integrity of your vehicle.
How to Fix Car Paint Damage Caused by Eucalyptus Oil?
Though eucalyptus oil is generally safe for car paint when used correctly, accidents can still happen. If you have accidentally caused damage to your car’s paint while using eucalyptus oil or if you’ve noticed any adverse effects, here are steps to help fix the damage:
Assess the Damage: First, carefully examine the affected area to determine the extent of the damage. Look for any discoloration, peeling, or irregularities in the paint or clear coat.
Isolate the Area: If the damage is localized to a specific spot, it’s crucial to isolate the affected area to prevent further damage. Use masking tape or painter’s tape to create a border around the damaged area. Then use plastic sheeting or a plastic drop cloth to cover the nearby surfaces.
Paint Touch-Up: For minor damage like small scratches or chips, you may be able to use a paint touch-up kit to repair the affected area. These kits are readily available and can help restore the appearance of your car’s paint.
Clear Coat Repair: If the clear coat has been damaged, it may need to be repaired or reapplied. Professional auto body shops have the expertise and tools to properly repair clear coat damage.
Repainting: In cases of severe damage where the paint itself has been affected, repainting may be necessary.
Consult a Professional: If the damage is extensive or if you’re unsure about how to proceed, it’s advisable to consult a professional auto body shop or a paint specialist. They can assess the damage and recommend the appropriate repair options.
Regular Maintenance: After repairing any damage, it’s essential to maintain your car’s appearance by regularly washing, waxing, and protecting the paint and clear coat. This will help prevent future damage and keep your car looking its best.
Final Words
Maintaining the pristine appearance of your car is a labor of love. Using eucalyptus oil as a cleaning solution can be a safe and effective choice when done correctly. Always prioritize caution, proper dilution, and gentle application to prevent any potential damage. Remember to conduct patch tests before applying on a large area.
Lastly, we can say that eucalyptus oil can be a great tool in your car cleaning arsenal. It will help you remove stubborn residues without harming your vehicle’s paint or clear coat if you do it properly. With the right techniques and care, you can enjoy a sparkling clean car that looks as good as new.
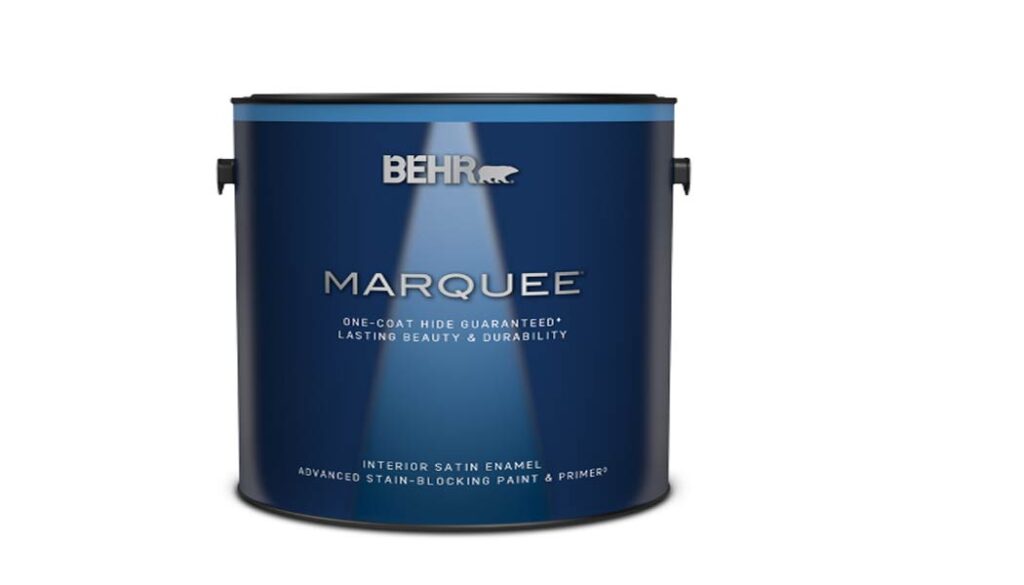
To answer the question in a single line, we would say, Behr Marquee paint is latex-based.
When it comes to choosing the right paint for your home improvement project, understanding the type of paint you’re working with is crucial. Behr Marquee is a popular choice among homeowners and professional painters alike, due to its beautiful finish and wide range of colors.
Image via behr.com
But whether you’re looking for a high-quality latex paint or oil paint, can Behr Marquee meet your needs? In this comprehensive blog, we’ll delve into the composition of Behr Marquee paint, its suitability for different surfaces, and how to determine whether it’s latex or oil-based.
What Is Behr Marquee Paint Made Of?
Before we can determine whether Behr Marquee paint is latex or oil-based, it’s essential to understand what this paint is made of. Behr Marquee is an acrylic paint, which means it is primarily composed of water, acrylic resins, and pigments. This water-based formulation sets it apart from traditional oil-based paints, making it easier to clean up and more environmentally friendly.
Here is a quick note though, in the context of paint, the terms “acrylic” and “latex-based” are often used interchangeably. Both refer to water-based paints that use acrylic resins as a key component in their formulation.
So, while there may be slight variations in terminology, they are generally used to describe the same type of paint. Therefore, in most cases, when you hear “acrylic paint” or “latex-based paint,” it refers to a water-based paint that uses acrylic resins as a binder.
Acrylic paints like Behr Marquee are known for their quick drying time, low odor, and excellent color retention. They also adhere well to a variety of surfaces, making them a versatile choice for both interior and exterior painting projects.
Is Behr Marquee Paint Latex or Oil-Based?
Behr Marquee paint is not oil-based; it is a latex or water-based paint. These paints use water as the primary solvent instead of harsh chemicals like those found in oil-based paints.
Latex paints have gained popularity due to their ease of use and environmentally friendly properties. They emit fewer volatile organic compounds (VOCs), making them a safer option for indoor painting projects. Additionally, latex paints are known for their durability and resistance to cracking, fading, and yellowing over time.
How to Determine If Behr Marquee Paint Is Latex or Oil-Based?
If you’re unsure whether the Behr Marquee paint is latex or oil-based, there are a few methods to help you identify it.
Check the Label: Behr Marquee paint containers typically have labels that clearly indicate it is a water-based or latex paint. Look for terms like “acrylic,” “water-based,” or “latex” on the label.
Read the Technical Data Sheet: Behr provides detailed technical data sheets for their products on their website. You can search for the specific product and review the information to confirm whether it’s latex or oil-based. You may find some geeky scientific jargon on the sheet, but I felt it’s a great way to clarify what consumers are getting.
What Is Behr Marquee Paint Used For?
Behr Marquee Paint is a versatile and high-quality option, suitable for a wide range of applications. Knowing where to use Behr Marquee can help you achieve outstanding results, whether you’re doing it yourself or hiring a professional.
Interior Walls: Behr Marquee Paint excels at providing excellent coverage and a long-lasting finish for interior walls. Whether you are refreshing your living room, bedroom, or kitchen, this paint can transform your space with ease.
Exterior Siding: Its durability and resistance to the elements make Behr Marquee a smart choice for painting the exterior of your home. With its extensive color palette, you can give your house a fresh look that will endure for years.
Trim and Molding: When it comes to detailing work such as trim, crown molding, and baseboards, Behr Marquee Paint’s smooth finish and high-quality coverage make it an ideal candidate. It allows for precision and enhances the overall aesthetics of your space.
Furniture: Behr Marquee Paint can also be a top choice for old furniture pieces. Be it a vintage dresser or a wooden table, this paint can give your furniture a fresh and durable finish that complements your decor.
Ceilings: Behr Marquee Paint isn’t just limited to walls and doors; it’s also a fantastic choice for transforming your ceilings.
In essence, Behr Marquee Paint is your trusted partner for a wide variety of surfaces. This paint offers quality, durability, and a spectrum of colors to cater to your specific needs.
Can Behr Marquee Paint Be Used on Ceilings?
Yes, Behr Marquee paint can be used on ceilings. Its low VOC content and smooth application makes it suitable for painting both textured and smooth ceilings. Whether you’re refreshing the look of your living room ceiling or adding a pop of color to a bedroom, Behr Marquee provides an excellent finish.
When painting ceilings, it’s essential to use the right tools and techniques to ensure an even application and minimize drips. A high-quality roller and extension pole can make the job much more manageable.
Is Behr Marquee Good for Cabinets?
Behr Marquee paint can be used on cabinets, but whether it’s the best choice depends on your specific needs and preferences. While it offers excellent durability and a smooth finish, there are some considerations to keep in mind.
Preparation: Proper surface preparation is crucial for painting cabinets. Ensure that the cabinet surfaces are clean, smooth, and free of any grease or grime before applying Behr Marquee paint.
Primer: Some experts recommend using a high-quality primer specifically designed for cabinets before applying Behr Marquee. This can help improve adhesion and durability.
Finish: Behr Marquee paint is available in various sheen levels, from flat to semi-gloss. The choice of finish for your cabinets depends on your aesthetic preferences and the level of durability you desire.
Usage: Consider the level of wear and tear your cabinets will endure. Though Behr Marquee is durable, you may consider a specialized cabinet paint for cabinets in high-traffic areas.
Is Behr Marquee Paint Durable?
Yes, Behr Marquee paint is known for its durability. It offers excellent resistance to fading, cracking, and peeling, which is essential for maintaining the appearance of your painted surfaces over time. This durability is especially important for exterior applications, where the paint is exposed to harsh weather conditions.
The high-quality acrylic resins in Behr Marquee paint contribute to its long-lasting finish. Additionally, its low VOC content and low odor make it a practical and safe choice for interior painting projects, so you can return to your freshly painted space sooner.
Tips for Using Behr Marquee Paint
To ensure the best results when using Behr Marquee paint, consider the following tips:
Surface Preparation: Properly prepare the surface by cleaning, sanding, and priming as needed.
Use the Right Tools: Invest in high-quality brushes, rollers, and painter’s tape to achieve professional-looking results.
Ventilate the Area: Ensure proper ventilation, especially when painting indoors. Open windows and doors to allow fresh air to circulate.
Clean Up Promptly: Since Behr Marquee is a water-based paint, clean your brushes and rollers with water immediately after use.
Store Properly: Seal the paint can tightly and store it in a cool, dry place to extend its shelf life.
Final Words
In conclusion, Behr Marquee paint is a latex or water-based acrylic paint, not oil-based. Its composition, durability, and ease of use make it a popular choice for a wide range of applications, both indoors and outdoors. When selecting Behr Marquee paint for your project, consider the surface type, desired finish, and color options available to ensure the best results.
Homeowners and paint enthusiasts love Behr Marquee paint for its low VOC content, ease of use, and excellent color retention. Whether you’re painting walls, ceilings, cabinets, or furniture, Behr Marquee paint is a reliable choice to help you achieve a beautiful, long-lasting finish for your home improvement projects.
Behr Enamel Paint is not latex-based. It is an oil-based paint, which differentiates it from latex paint, which is water-based.
Selecting the right paint is pivotal for any painting project’s success. Among the diverse options available, Behr Enamel Paint is celebrated for its resilience and adaptability. Yet, as we stand before the colorful array of paint cans, one question often lingers: Is Behr Enamel Paint latex-based?
Image via behr.com
To embark on a painting project with confidence, it’s imperative to grasp the essence of the paint at hand. In this article, we’ll discuss the true nature of Behr Enamel Paint, whether it aligns with latex-based paints or stands independently as an oil-based masterpiece.
By the end of this exploration, you’ll have a crystal-clear understanding of Behr Enamel Paint’s composition. It’ll pave the way for well-informed decisions in your painting endeavors.
What Kind of Paint Is Behr Enamel?
When it comes to giving life to our creative visions, paint becomes an indispensable tool. In this context, Behr Enamel Paint emerges as a prominent choice. It’s like a trusted companion on an artistic journey, but before we embark on that path, let’s understand its essence.
Behr Enamel Paint, renowned for its resilience and adaptability, falls under the category of oil-based paint. These oils bestow a distinct character to Behr Enamel Paint, manifesting in its glossy finish and robust nature. This remarkable glossiness makes it an ideal candidate for projects demanding enduring and visually appealing outcomes.
This distinction is vital in understanding its unique properties and applications. Oil-based paints, including Behr Enamel Paint, differ from their water-based counterparts, commonly known as latex paints, in several key aspects.
The defining characteristic of Behr Enamel Paint is its use of oils as solvents to carry the paint’s pigments. These oils, which can include linseed oil or mineral spirits, endow the paint with distinct features that set it apart. One prominent attribute is its glossy finish, which adds a luxurious sheen to surfaces. This high gloss is prized for its ability to create a durable, polished appearance.
Furthermore, the oil-based nature of Behr Enamel Paint contributes to its exceptional durability and resilience. This type of paint is well-suited for projects where longevity is paramount, such as painting trim, doors, or furniture. Its ability to withstand wear and tear makes it an excellent choice for surfaces that will see frequent use or exposure to the elements.
Shortly, it is an oil-based paint renowned for its glossy finish, durability, and versatility. Its distinctive properties make it a preferred choice for various projects, providing a lasting and visually appealing finish. Understanding its oil-based composition is essential for using it effectively in different applications.
Is Behr Enamel Paint Latex?
Among a vast number of kinds of paint, latex and enamel represent two distinct realms. Each comes with its own characteristics and applications. To clarify any misconceptions, let’s be unequivocal: Behr Enamel Paint is not latex-based. It stands apart from the latex paint family by virtue of its composition.
To appreciate this distinction, we must grasp the fundamental divergence between latex and enamel paints. Latex paint, also referred to as water-based paint, employs water as its solvent to carry the pigment.
Conversely, enamel paint employs oil or solvent-based carriers. Behr Enamel Paint aligns with the latter category, utilizing oil as its base, thus clearly differentiating it from latex paint.
Behr Enamel Paint employs oils, typically linseed oil or mineral spirits, as the solvent, imparting a glossy finish and remarkable durability to the paint. The use of oil-based solvents sets it apart from latex paint, which relies on water as its primary solvent.
This differentiation is crucial to understand because it impacts how the paint behaves. So, if you’re working with Behr Enamel Paint, rest assured that it is not latex-based, and you should follow the appropriate techniques for oil-based paints in your projects.
How to Determine If Behr Enamel Paint is Latex?
The essence of DIY projects often hinges on understanding the materials we employ. So, what if you find yourself in a situation where the paint type isn’t explicitly labeled? How can you discern whether the Behr Enamel Paint you possess is, indeed, not latex-based?
A. Check the Label: Commence your investigation by scrutinizing the label adorning the paint can or container. Behr is renowned for its transparent labeling practices. Inspect for any mentions specifying the paint type. If it’s enamel, it will be clearly stated, eliminating any ambiguity regarding its latex composition.
B. Smell Test: Oftentimes, the sensory approach can offer valuable insights. Enamel paints tend to emanate a stronger, more pungent odor in comparison to latex paints. This happens due to their oil-based nature. Give the can a brief sniff test. If the odor strikes you as robust and chemical-like, it’s a telltale sign of enamel paint.
C. Consistency Assessment: Another avenue to explore involves assessing the paint’s consistency. Generally, latex paints exhibit a thinner, more liquid nature, while enamel paints, including Behr Enamel Paint, possess a denser, more viscous texture.
D. Cleanup Protocol: Cleaning brushes or tools post-painting often reveals the paint’s true identity. Enamel paints necessitate the use of a solvent such as paint thinner or mineral spirits for effective cleanup. In contrast, latex paints can be easily cleansed with water.
One can easily determine if a Behr Enamel Paint is latex or not.
How to Use Behr Enamel Paint If It Is Latex?
Now that we’ve established the oil-based nature of Behr Enamel Paint let’s delve into the practical aspect of its utilization, especially when one initially intended to work with latex paint. Fear not, for adaptation is the key to creative triumph.
A. Surface Preparation: Regardless of the paint type, the initial step remains consistent: prepare the canvas. Ensure the surface is devoid of any debris, dirt, or loose particles. If necessary, employ light sanding to attain a smooth and uniform foundation for the paint.
B. Adequate Ventilation: Whether you’re engaging with latex or enamel paint, one aspect should never be compromised – ventilation. Enamel paints, in particular, have a propensity for emitting potent fumes. Thus, it’s imperative to work in a well-ventilated environment, safeguarding your health.
C. Application Technique: The application process remains a pivotal aspect of achieving the desired results. Apply Behr Enamel Paint evenly using a top-tier brush or roller. Adhere to the manufacturer’s recommendations concerning drying intervals between successive coats.
D. Cleanup Routine: As emphasized earlier, Behr Enamel Paint necessitates the use of a solvent, such as paint thinner, for effective cleanup. Promptly clean your brushes and tools post-application to maintain their longevity and performance.
E. Drying Time Patience: One significant deviation between latex and enamel paints lies in their drying duration. Enamel paints typically mandate a lengthier drying period. Exercise patience and allocate ample time for each coat to fully dry before considering additional layers.
Final Words
Behr Enamel Paint stands as a testament to versatility and durability, emerging as an indispensable ally in the realm of creative projects. Clearing the confusion, we reiterate that Behr Enamel Paint is unequivocally not latex-based; rather, it thrives on an oil-based foundation, fostering its unique properties.
In our artistic endeavors, should we find ourselves with Behr Enamel Paint when the intention was latex, adaptability becomes our greatest asset. Although we can check if Behr Enamel Paint and if it is latex, we can still make use of it spontaneously.
Water-based paint is generally not flammable. Water-based paint is often hailed for its eco-friendliness and ease of use. This paint has become a popular choice for countless home improvement and artistic projects.
However, when it comes to safety, understanding the flammability of materials is paramount. While it may seem counterintuitive to think that a substance largely composed of water could ignite, there are important nuances to consider.
Photo by Felicity Tai
Let’s see a comprehensive overview of the flammability of water-based paint. Moreover, let’s know about factors that influence its combustibility and offer valuable insights for those seeking a safer and more informed approach to their painting endeavors.
Is Water Based Paint Flammable?
Water-based paint, also known as latex or acrylic paint, is primarily composed of water, pigments, and a binder. This formulation is generally considered non-flammable when compared to traditional oil-based paints. But it’s important to understand the reasons behind this and the potential fire risks associated with it.
Unlike oil-based paints, water-based paints have minimal or no flammable solvents. Oil-based paints contain volatile organic compounds (VOCs), which are flammable and can emit harmful fumes. Water-based paints, on the other hand, use water as the primary solvent, greatly reducing the risk of flammability.
High Water Content
Water-based paints contain a substantial amount of water, often making up around 80-90% of their composition. Water, as a fire suppressant, can absorb heat and cool down surfaces. Also, water makes it challenging for a fire to ignite and spread.
Lower Flashpoint
The flashpoint of a substance is the temperature at which it can ignite when exposed to an open flame or spark. Water-based paints typically have a much higher flashpoint than oil-based paints, further decreasing their flammability.
During the drying process, water-based paint releases water vapor into the air. If the area where the paint is drying is poorly ventilated, this vapor can accumulate and potentially lead to a fire hazard.
Substrates and Primers
The materials on which water-based paint is applied, such as wood or paper, can be flammable. Additionally, the primers used before applying water-based paint may contain flammable components. It’s important to consider the flammability of the surface and any coatings applied to it.
Storage and Disposal
Even though water-based paint is less flammable than its oil-based counterparts, improper storage or disposal can still result in fire risks. Storing paint cans near heat sources or open flames is dangerous, and disposing of paint materials improperly can harm the environment and pose fire hazards.
However, water-based paint is generally considered non-flammable due to its low solvent content, high water content, and elevated flashpoint. The potential for fire hazards exists in certain scenarios, such as poor ventilation during drying, flammable substrates, and improper storage or disposal practices.
To ensure safety, always follow manufacturer instructions, exercise caution, and take appropriate measures when working with any type of paint.
Is Water-Based Paint Flammable or Combustible?
Water-based paint is not considered flammable but is classified as combustible. The key distinction lies in the terminology and the properties of the materials:
Flammable vs. Combustible
Flammable materials have a flashpoint below 100°F (37.8°C) and can easily ignite at normal temperatures. Combustible materials have a flashpoint above 100°F (37.8°C) but can still burn when exposed to an open flame or heat source.
Water-Based Paint
Water-based paint primarily consists of water, pigments, and a binder. It has a high water content, which raises its flashpoint significantly above 100°F. The presence of water makes it difficult for water-based paint to ignite at normal room temperatures. This feature makes it combustible rather than flammable.
Fire Risks
While water-based paint is not highly flammable, it can still contribute to a fire under certain conditions. For instance, during the drying process, it releases water vapor into the air.
Accumulation of this vapor in a poorly ventilated area could potentially create a fire hazard. Additionally, the materials being painted, such as wood, paper, or fabrics, may be combustible, adding to the overall fire risk.
Generally, water-based paint is combustible due to its composition and high flashpoint. These features make it less prone to ignition compared to flammable materials with lower flashpoints.
However, it is essential to exercise caution during its use, particularly regarding proper ventilation during the drying process and considering the flammability of the surfaces being painted.
Is Water-based Emulsion Paint Flammable?
Water-based emulsion paint, known as latex paint, is frequently regarded as combustible rather than flammable. The flashpoints of these materials make a difference. A flashpoint for flammable materials is below 100°F (37.8°C). They are more likely to catch fire at or below room temperature because of this property. Contrarily, flammable substances can still burn when exposed to an open flame or other heat source while having flashpoints exceeding 100°F (37.8°C).
Due to its high water content, water-based emulsion paint has a flashpoint that is significantly higher than 100°F. It is less likely to catch fire while inside a conventional room because of this property.
However, it’s important to use this paint with caution. There is still a risk of fire due to things like paint fume accumulation, poor ventilation, and painting combustible surfaces.
Due to its composition and high flashpoint, water-based emulsion paint is classified as flammable. This lessens its flammability at standard room temperatures.
To reduce the risk of a fire, safety precautions including adequate ventilation and surface flammability consideration should always be followed.
Final Words
Water-based paint is generally considered non-flammable. Regarding fire risks, it is a safer option than conventional oil-based paints. Although the paint itself might not be very flammable, it’s important to keep in mind about the other elements.
For example, the presence of volatile solvents in the paint or the materials it’s applied on might still offer a fire danger. To reduce fire risks and guarantee a secure painting experience, always use caution while dealing with any sort of paint, abide by safety regulations, and store and dispose of paint products safely.
Yes, oil paint is flammable. It contains flammable solvents and oils that can ignite if exposed to an open flame or high heat source.
Image by Free Photos from Pixabay
Oil paint can go from Van Gogh to “Van Gosh, it’s on fire!” if exposed to flames or heat. Those artsy oils and solvents can get fiery. So, keep those masterpieces away from any blazing drama!
Are There Any Flammable Components in Oil Paint?
Oil paint typically contains flammable components. The primary flammable elements are the solvents and drying oils used in the paint’s formulation. These solvents, like mineral spirits or turpentine, are volatile and highly flammable.
They are added to the paint to thin its consistency and aid in drying. Additionally, linseed oil, a common drying oil in oil paints, can also combust when exposed to heat or flame.
When working with oil paints, it’s essential to be cautious near open flames, sparks, or any potential sources of ignition. Proper ventilation in your workspace helps dissipate fumes, reducing the risk of fire hazards. Always store your oil paints and solvents in a safe and well-ventilated area away from heat sources.
Is Oil Paint Flammable?
Oil paint, the artist’s beloved medium for centuries, has a hidden fiery secret. It’s flammable!
Imagine yourself in an artist’s studio – the aroma of creativity in the air, brushes dancing on canvases, and a palette of vibrant oil paints ready to bring your masterpiece to life. But wait, there’s a fiery twist to this artistic tale – oil paint, despite its serene appearance, has a hidden penchant for playing with fire. Yes, you read that right; it’s flammable!
The culprits in this combustible drama are the solvents and drying oils that make up the core of oil paint. These solvents, much like overexcited performers, are highly volatile and prone to turning into an artistic inferno if exposed to an open flame or even just a spark.
Now, let’s talk about drying oils, the unsung heroes of oil painting. They help your artwork dry beautifully, but they also harbor a secret desire to be the stars of a fiery show. One of the most common drying oils, linseed oil, can indeed turn into quite the firestarter if it encounters heat or an open flame.
So, here’s the deal: while you’re busy crafting your next masterpiece, be sure to keep your oil paints and their flammable companions at a safe distance from any potential pyrotechnics. That means no romantic candle-lit painting sessions or impromptu artistry near the stove.
In a nutshell, oil paint is like that talented artist friend who’s also a bit of a daredevil. It’s stunningly beautiful on canvas but with a fiery potential if you don’t handle it with care. So, remember, keep the flames in your artwork, not around it!
Are All Oil-based Paints Flammable?
Indeed, most oil-based paints share a flammable nature due to their common composition. These paints typically consist of pigments, binders, and solvents. It’s the solvents, usually mineral spirits or turpentine, which give oil-based paints their flammable characteristics.
Mineral spirits, for instance, have a flashpoint – the temperature at which they can ignite – around 105 to 162 degrees Fahrenheit (40 to 72 degrees Celsius). Turpentine’s flash point is even lower, ranging from 95 to 105 degrees Fahrenheit (35 to 40 degrees Celsius). These flashpoints fall well within the range of typical room temperatures. That means if exposed to heat sources or open flames, these solvents can easily catch fire.
However, not all oil-based paints are created equal, and some may have lower levels of flammability depending on their formulation. Manufacturers often design specific paints for different purposes, so it’s essential to check product labels for safety information and follow recommended handling and storage instructions.
To summarize, most oil-based paints contain flammable solvents. These solvents make them prone to combustion when exposed to heat or flames. There might be variations in flammability between different oil-based paints. So, it’s crucial to exercise caution when working with them and store them properly to prevent fire hazards.
Is Oil Paint Flammable when Dry?
You might think that once oil paint dries, it would behave like a responsible adult and stop being flammable. But alas, even in its seemingly solid, dried state, oil paint retains a cheeky streak of flammability.
When oil paint dries, it undergoes a chemical transformation called oxidation. This process involves the absorption of oxygen from the air, causing the paint to harden and form a solid film. Sounds innocent enough, right? Well, not entirely.
While the paint dries, it can still contain residual solvents or drying oils trapped within the layers. These remnants can remain volatile and flammable even after the paint appears dry. Imagine it as the art world’s version of a lingering party guest who just won’t leave!
So, if you decide to test the fire-resistant qualities of your dried oil painting by introducing it to an open flame, you might be in for a surprise. Those residual solvents or oils can catch fire, which leads to a smoky and definitely unplanned art performance.
In conclusion, dried oil paint retains a touch of flammability due to lingering solvents and oils. It’s like the art world’s way of saying, “I might look dry, but I still know how to party with fire!”
Can Oil Paint Spontaneously Combust?
Oil paint doesn’t exactly have a wild party trick of spontaneously combusting. But it can pose a risk under certain circumstances. The key here is heat and improper storage.
Spontaneous combustion is when a substance catches fire without any external ignition source. This typically happens when a material undergoes a slow chemical oxidation process that generates enough heat to ignite itself. Now, oil paint can’t spontaneously combust on its own just by sitting on your canvas.
However, it can become a fire hazard if it’s stored improperly or if rags or materials soaked in oil paint are left in a crumpled heap. When oil-soaked materials are tightly bunched up, they can generate heat through oxidation. If there’s no way for that heat to escape, it can lead to a smoldering fire.
To prevent this, always dispose of oil-soaked materials properly. Such as in a metal container with a tight-fitting lid or by spreading them out flat to dry before disposal. Ensure good ventilation in your workspace to disperse any fumes. And store your oil paints away from heat sources like stoves or open flames.
In essence, oil paint itself doesn’t spontaneously combust. But improper storage or handling of materials soaked in oil paint can create the conditions for a fire to start. So, keep things tidy and well-ventilated to enjoy your artistic pursuits without any fiery surprises!
Final Words
Oil paint can be as fiery as a dragon at a barbecue! Those tubes of artistry contain flammable solvents and oils. Those are not spontaneously combusting. But those can get up to some fiery business when exposed to heat or flames.
So, keep your oil paints away from anything sparky and let your art sizzle on the canvas, not in unexpected bonfires!
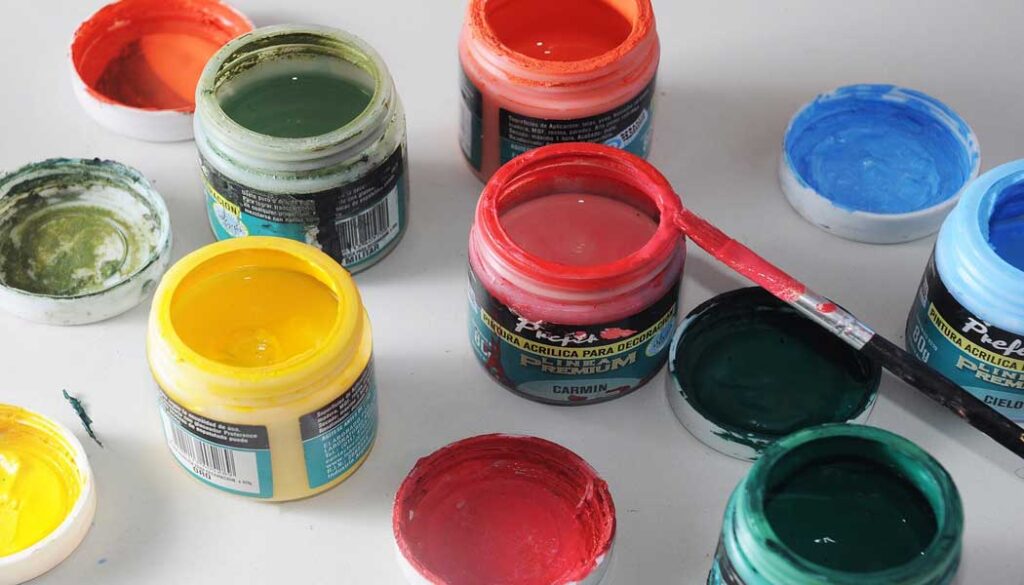
Tempera paint is not flammable for being a water-based paint. Tempera paint is a popular choice for artists and educators. This paint is known for its vibrant colors and ease of use.
However, when it comes to safety, understanding its flammability characteristics is essential. Let’s learn about the flammability of tempera paint and explore its ingredients and potential risks associated with its use.
Image by paula bassi from Pixabay
Whether you’re an art enthusiast, a teacher, or a concerned parent, knowing whether tempera paint is flammable will help ensure a safe and enjoyable creative experience.
What Is Tempera Paint?
Tempera paint is a type of water-based paint widely used in the world of art and education. It consists of pigments (color particles) mixed with a water-soluble binder, often egg yolk, though modern variations may use other binders like gum Arabic or synthetic compounds.
Tempera paint is known for its quick drying time, vibrant colors, and opaque finish. These features make it a popular choice for various artistic applications. It can be used on a variety of surfaces, including paper, cardboard, wood, and canvas.
This type of paint is favored by artists and educators for its ease of use and versatility in creating beautiful, long-lasting artwork.
Is Tempera Paint Flammable?
Tempera paint is generally considered non-flammable because it is water-based. Moreover, it does not contain highly flammable ingredients like solvents or oils found in some other types of paint.
Its primary components are pigments and a water-soluble binder, traditionally made from egg yolk. But this paint is more commonly using synthetic binders like gum Arabic today. These components make tempera paint inherently less prone to combustion.
However, it’s essential to understand that the flammability of a material can depend on various factors, including the context in which it is used. Here are some important considerations regarding the flammability of tempera paint:
Paint Drying Process
Tempera paint dries by the evaporation of water. While the paint itself is not flammable, the drying process involves the release of water vapor. In certain conditions, this vapor can contribute to fire hazards.
For example, if there are open flames, sparks, or extremely high temperatures in the vicinity, the water vapor might enhance the combustibility of other materials nearby.
Surface Flammability
The flammability risk associated with tempera paint depends on the surface it is applied. If tempera paint is used on a flammable surface like untreated wood, paper, or fabric, there is a potential fire hazard.
Over time, the water in the paint can be absorbed by these materials and leaves behind dry, flammable residues that can ignite more easily.
Aerosol Sprays
When tempera paint is used in aerosol spray form, there may be additional flammability concerns. The propellants used in aerosol paints can be flammable, and they can pose a fire risk if not handled properly.
Users should take precautions when working with aerosol paints and avoid using them near open flames or ignition sources.
However, tempera paint itself is not classified as flammable due to its water-based composition. Its flammability risk can be influenced by the surface it is applied to and the drying process, which involves water vapor.
When using tempera paint, it’s essential to exercise caution and follow standard safety practices, such as avoiding open flames and ensuring proper ventilation, to minimize any potential fire hazards.
Flammability of Tempera Paint Components
Understanding the flammability of tempera paint components is essential to assess the fire risk associated with this type of paint. Tempera paint primarily consists of pigments and a water-soluble binder, and each component has its flammability characteristics:
Pigments
Pigments are color particles that provide the paint’s color. These are typically not flammable on their own. They are solid substances and do not readily ignite. However, certain pigments may contain trace amounts of flammable materials as impurities. However, these levels are usually very low and do not contribute significantly to flammability.
Binder
The binder in tempera paint is responsible for holding the pigments together and adhering them to the painting surface. Traditionally, egg yolk was used as a binder. But modern tempera paints often use synthetic binders like gum Arabic.
Binders in tempera paint are water-soluble and non-flammable. They do not contain volatile organic compounds or oils that can ignite.
Water
Water is a significant component of tempera paint, as it serves as the solvent that makes the paint workable and helps it adhere to surfaces. Water itself is not flammable. It has a high heat capacity, which means it can absorb heat without getting hot enough to ignite.
Additives
Some tempera paints may contain additives like preservatives or thickeners. These additives are generally not flammable, as they are chosen for their compatibility with water-based formulations and non-flammability.
The key components of tempera paint—pigments, binder, water, and additives—are not inherently flammable. Their composition and properties make tempera paint one of the safer options among art materials in terms of fire risk.
However, as mentioned earlier, the flammability risk associated with tempera paint can be influenced by factors like the surface it is applied to and the drying process, as water is evaporated during drying, which could potentially contribute to fire hazards in specific circumstances.
Is Tempera Paint Hazardous?
Tempera paint is generally considered safe for most users when handled properly. However, there are some potential hazards associated with its use that should be taken into consideration.
Inhalation Risk
Inhaling the fumes of tempera paint for extended periods in poorly ventilated areas can lead to respiratory discomfort or irritation. While tempera paint is not as harmful as some other paints, it’s still advisable to use it in well-ventilated spaces.
Skin and Eye Irritation
Some individuals may experience skin or eye irritation when in direct contact with tempera paint. This can occur due to sensitivity or allergies to certain paint components. To mitigate this risk, users should wear protective clothing and goggles when necessary.
Ingestion Hazard
Tempera paint is not intended to be ingested, especially for children. Ingesting paint can be harmful, and some paints may contain toxic chemicals if swallowed. Always supervise children when using tempera paint and discourage them from putting paint-covered objects or fingers in their mouths.
Allergies
As with any art material, there’s a possibility of allergic reactions to specific components in tempera paint, such as pigments or binders. Individuals with known allergies or sensitivities should use caution or consider alternative paints.
Is Tempera Paint Heat Resistant?
Tempera paint is not particularly heat-resistant, especially when compared to some other types of paints. It is primarily a water-based paint, and its composition includes water as a solvent.
When exposed to heat, the water in tempera paint will evaporate and cause the paint to dry and potentially crack or become brittle.
The temperature at which tempera paint can start to show signs of heat-related damage varies depending on factors like the thickness of the paint layer and the specific formulation of the paint. Generally, temperatures above 150°F (65°C) can begin to affect tempera paint’s integrity.
This lack of heat resistance makes tempera paint unsuitable for applications where high temperatures are involved. For example, painting objects that will be exposed to direct sunlight, used near heat sources, or subjected to extreme temperature fluctuations.
For heat-resistant applications, other types of paints like oil-based or acrylic paints are often more suitable due to their ability to withstand higher temperatures without significant damage.
Final Words
Tempera paint is not flammable, and its vulnerability to heat-induced damage makes it unsuitable for applications exposed to elevated temperatures. The water-based nature of tempera paint makes it susceptible to drying, cracking, and becoming brittle when subjected to heat above 150°F (65°C).
Artists and users should be mindful of this limitation when choosing their paint medium and consider alternative paints, such as acrylics or oil-based paints, for projects requiring heat resistance.
Understanding the characteristics of tempera paint and its limitations is essential for achieving the best results and ensuring the longevity of artworks or projects in various environmental conditions.
Gloss paint can be flammable. But the flammability depends on various things. Gloss paint is known for its high sheen finish and durability. This paint is a common choice for enhancing the aesthetics of surfaces indoors and outdoors.
Image by tookapic from Pixabay
However, beyond its decorative and protective qualities, it’s essential to understand its safety characteristics. So, let’s see the flammability of gloss paint and explore the factors that influence its potential to ignite and burn.
Is Gloss Paint Flammable?
Gloss paint, like many other paint varieties, can indeed be flammable. However, its flammability depends on several factors. These factors include its composition and the conditions in which it’s used or stored. Here’s a closer look at these considerations:
Composition
Gloss paint typically consists of a combination of solvents, resins, and pigments. Some of these solvents are flammable. The level of flammability varies based on the type and amount of solvents used in the paint formulation.
Oil-based gloss paints often contain more flammable solvents than water-based alternatives. This feature makes them more prone to catching fire.
Volatile Organic Compounds (VOCs)
Gloss paints, especially oil-based ones, can contain high levels of VOC. These VOCs are volatile and can release harmful fumes into the air. These VOCs can become flammable when exposed to open flames or high temperatures. Proper ventilation during painting and drying is crucial to dissipate these fumes safely.
Drying and Curing
Gloss paint needs time to dry and cure fully. During this process, it may release flammable vapors. It’s essential to ensure proper ventilation during this period to prevent the accumulation of these vapors. This can create a flammable atmosphere.
Storage
Safely storing gloss paint is critical to minimizing fire risks. Keep paint containers tightly sealed to prevent solvent evaporation. Moreover, store them in a cool, dry place away from heat sources, open flames, or electrical equipment that could generate sparks.
Application
When applying gloss paint, especially with brushes, rollers, or spray equipment, there is always a potential for static electricity buildup, which could ignite flammable vapors. Grounding the equipment and following recommended safety procedures can mitigate this risk.
While gloss paint does have the potential to be flammable, the degree of flammability largely depends on its specific formulation, VOC content, and the conditions in which it’s used or stored.
To ensure safety, always read and follow the manufacturer’s safety guidelines. Also, take appropriate precautions, such as proper ventilation, when working with gloss paint. Additionally, be cautious about storing and disposing of any leftover paint to prevent fire hazards.
Is Gloss Paint Flammable when Dry?
Gloss paint is typically not flammable once it has fully dried and cured. During the drying and curing process, the solvents in the paint evaporate. They leave behind a solid and non-flammable film of paint on the surface. This film is generally inert and does not pose a fire risk.
However, it’s important to note that the drying and curing process can take some time. During this period, there may still be residual flammable vapors present in the vicinity of the freshly painted surface.
Proper ventilation is essential during this phase to dissipate any remaining volatile organic compounds (VOCs) and solvent fumes to prevent the accumulation of flammable atmospheres.
Once gloss paint has thoroughly dried and cured, it becomes a stable and non-flammable surface coating. However, always exercise caution and follow safety recommendations while painting. Moreover, allow adequate time for the paint to dry completely to ensure a safe environment and avoid any fire risks.
Is Acrylic Gloss Flammable?
Acrylic gloss paint is generally considered non-flammable when it has fully dried and cured. Acrylic gloss paint, unlike some other paint types, is water-based. Water-based paint contains minimal to no flammable solvents or volatile organic compounds (VOCs).
As the water in acrylic paint evaporates during the drying process, it leaves behind a solid, non-combustible acrylic polymer film on the surface.
However, it’s essential to remember that the paint itself may not be flammable once dry. However, some precautions should still be taken during the painting process. When acrylic paint is wet, it can be mixed with other flammable materials or solvents, so it’s crucial to keep these away from open flames or ignition sources.
Proper ventilation during painting is also necessary. Once acrylic gloss paint has dried and cured, it becomes a safe and stable surface coating. Always follow safety guidelines and manufacturer recommendations when working with any type of paint to ensure a safe environment.
Final Words
Gloss paint can indeed be flammable due to the presence of flammable solvents in some formulations, primarily in oil-based gloss paints. However, the level of flammability varies based on the paint’s composition and the conditions in which it’s used or stored.
Proper handling, ventilation, and storage are essential to minimize fire risks when working with gloss paint. Once the paint has fully dried and cured, it typically becomes non-flammable. Moreover, it provides a safe and attractive surface finish. Always follow safety guidelines and take precautions to ensure a secure environment when working with gloss paint.