The regular acrylic paint is inherently heavier, so you can’t simply introduce it into the hydro dipping process as is. The solution is to combine the paint with water to achieve the desired consistency. To enhance the water’s density for better results, you can consider mixing in some borax along with the water.
In the world of crafting, immersion painting is a common leading name. Whether you want to decorate your helmet, ATV’s, gaming controller, shoes or any 3-dimensional object with acrylic paint dipping, you have to know the basics of immersion painting.
Here you will get to know everything about it starting from the best paint for hydro dipping to how to hydro dip with acrylic paint. So, let’s explore it out.
Also Read: What You Need to Know about Sanding Acrylic Paint
What Paint to Use for Hydro Dipping?
You can have variant design on your favorite guitar or shoes by hydro dipping. And, in order to try this exciting craft at home, the indoor-friendly acrylic paint will be safe.
We generally see people doing Hydrographic with spray paint. It is our mind-set that immersion painting is only possible with spray paint. While the reality is that you can get the same amazing result by following this method.
Moreover, using spray paint may cause some problems like improper adhering, not-enough coverage, and even exfoliation. You can avoid wearing extra gears like respiratory masks and gloves while evolved in water transfer printing. So, hydro imaging with acrylic paint is comparably safe for the kids to use indoors.
So, if you want, follow a safe and normal method for cubic paint, water marbling, or water transfer imaging, acrylic paint is one of the most go for types of paint. This paint is specially engineered to easily stick on the object you submerge in it.
Can You Hydro Dip with Acrylic Craft Paint?
Why not? But as the regular acrylic paint is heavier in nature, you cannot just add the paint into the process the way itself. All you need is to mix water with this paint to make it thin.
Additionally, to increase the density of water in the paint, you might need to mix some borax or cornstarch with the water.
How it works great? To find it out, here we’re going to discuss on different methods for hydro dipping with acrylic non-spray paint.
How to Hydro Dip with Acrylic Paint?
You know that acrylic paint is heavier and needs to add water into it to make it thinner. Now you must be thinking, does acrylic paint float on water? While you are about to do marble crafts by using acrylic craft paint, it should be floated on water lightly.
And one of the best ways to make it floating on water is to use liquid starch. You can purchase any liquid starch from your nearer grocery store, or can make it at home.
To make liquid starch you should use flat, thin wood scraps or cornstarch (1 tbs), cold water (1/4 cup), tap water (3 ¾), and lemon juice or essential fragrant oil if you want (2-3 drops).
Now follow the steps below to make liquid starch at home:
- Take the tap water to boil.
- Mix the cornstarch or wood scraps into the cold water.
- Whip the mixture constantly until it liquefies completely.
- Steadily stir 3-ounce boiled water in the mixture.
- Continue stirring it for more one minute after mixing lemon juice or essential oil.
- Take out from the heat and let it be cool, store in a bottle and use ample quantity of this liquid starch for acrylic paint.
Next Read: Learn More about Leather Sealing with Acrylic Paint
Swirl Dripping with Acrylic Paint
It is one of the amazingly easy art techniques using acrylic paint. The pouring technique of this method is a bit controlled. But you will love to do it again and again.
If you are a beginner, you can start trying this technique on a canvas first. Then you can go for a larger scale, applying this process on a wide piece of cardboard.
What Would You Need:
- Acrylic paints of your desire
- Pouring medium
- Plastic cups
- Painting surface
- Wooden sticks for stirring
- Paper towel
- Measurement cup
The other name of this process is “dirty pour”, so are you ready to get a bit messy?
- In a ratio of 2:1, pour paint and medium into the cup and cause to move. You can add variant of colors of your desire.
- Steadily slop the color in the measurement cup. Remember, the very first color that you pour into the cup will be the last one in the canvas. So, slop paint along the cup’s side; one at a time.
- Using the lip of the measurement cup, pour the paints at a slow circular motion onto the canvas. This slow motion will create the outstanding rings.
- To spread the paint all over the surface, slope the canvas.
- Wait till the paint sets on the canvas. See the amazing play of colors on the surface.
- It will take 24-48 hours to dry the surface completely.
Hydro Dip Tumbler with Acrylic Paint
Do you know what the best part of hydro dipping is? You can use this super cool method on various things, including tumblers, hats, lamps, sneakers, toys and so many.
Except any surface that comes in touch with drinkable or eatable stuff, Hydrographic literally works on different items such as skateboards, acrylic pieces, wooden spoon handles, pencils, most metal, plastic and glass etc.
Here we are going to discuss how to do water dip paint tumblers using acrylic paint.
Step 1
Choose any color tumbler that you would like to have the basecoat or you can prepare the basecoat with any color you want.
Step 2
Wipe down the tumbler with a dust-free cloth using rubbing alcohol. Make sure you remove all the spots like adhesive leftover package-level, fingerprints etc. from the tumbler.
Step 3
Make sure you twist the lid wrapped with grocery sack, otherwise color spot may get onto it. To have a straight and clean border, tape off your tumbler’s top part and bottom side with an electrical tape. If you want, you can tape off more electrical tape around the cup lip and bagged lip, just to avoid paint spreading inside the tumbler.
Step 4
Choose colors according to your desire. As every color has particular consistency, take each one into separate measurement cups to mix with liquid starch. Make sure the color should be not too thick or not too thin.
Step 5
Now start to lay the paints on the cooled water one after another with accurate consistency.
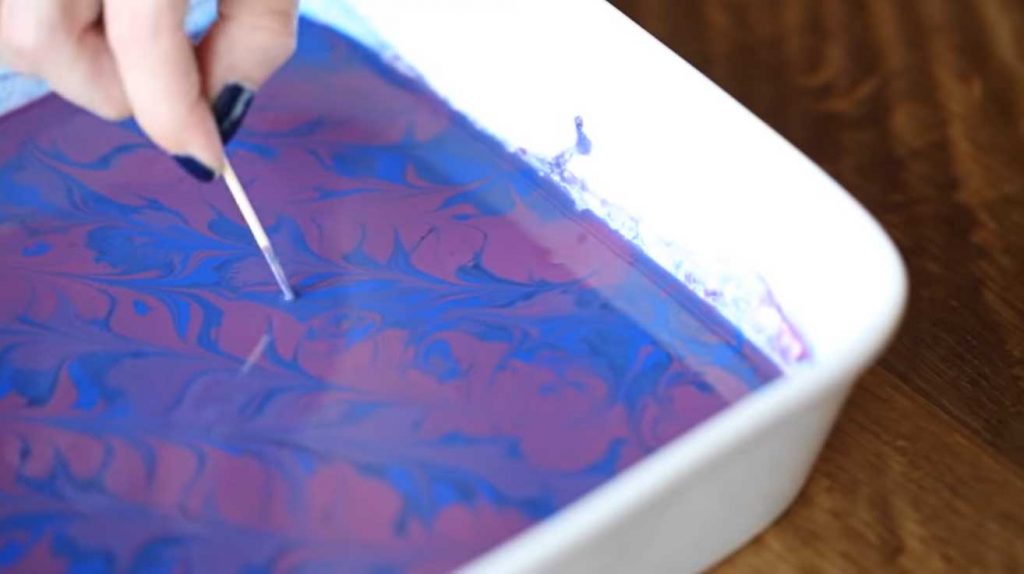
Step 6
Make sure the acrylic paints are floating on the water. Swirl the paint gently using a toothpick. But don’t distort it too much; otherwise the color would start to look muddy forming clumps on your cup.
Step 7
Now you’re all set to dip the tumbler. Wear on your gloves; take the tumbler holding the taped edge of it. Start to submerge it in the center of the paint mixing container.
Slowly keep the tumblers rotating from one angle to other. Try not to mangle the paint too much while you dip your cup in it.
Step 8
Make sure you dip all through the cup and once it is done lift out it quickly of water. Keep it in a safe place to dry out. It will take one day or two completely dry. If you want, you can use an epoxy on it once dry.
Learn Dipping Techniques With Acrylic Paint:
Hydro Dipping Shoes with Acrylic Paint
You must have tried tie-dying your shirts or shoes, but what if you create a unique design by hydro dipping shoes with acrylic paint. It will be fun, right?
Just follow the steps bellow:
- It’s a DIY hydro-dipped shoes process of total 1 day and 30 minutes including 10 minutes of preparing time, 20 minutes of active time, and 1 day of drying time.
- Tools that you would need – plastic tub and gloves.
- You can use any color of fabric shoes, but white color will be most suitable.
- Be ready with painter tape, silicone or metal stir stick, shopping bags and acrylic colors of your choice.
- Before starting the process, take off the laces of your shoes.
- Tape off the exterior plastic parts, soles and tongue of the shoes.
- Prepare your acrylic colors of your desire with accurate consistency in a plastic tub.
- Now swirl your paint with a stir stick to bring a classic pattern form.
- Dip the shoe into the water holding it by the sole and carefully take it out.
- Do the full process slowly, so that the paint gets enough time to adhere. But don’t keep the shoes for longer time in the water. Just dip it and out straightly.
- Keep the shoes on a box to let it dry overnight.
Read Our Detailed Guide on How to Hydro Dip Shoes.
Yet, there are far advanced hydrographic methods that can be done with acrylic non-spray paint. Hydrographic film method, Nail polish method, Enamel paint with borax – these are some amazing hydro dipping painting techniques. We will cover these techniques in our next segment. To know more fun techniques of water dip paint stay tuned with us.
Conclusion
Hydro dipping with acrylic paint is an innovative technique that offers an exciting way to transform ordinary objects into extraordinary works of art.
The versatility of acrylic paint, with its quick-drying nature and wide range of pigments, lends itself well to hydro dipping. This technique opens up endless possibilities for personal expression, allowing individuals to customize items such as home decor, automotive parts, accessories, and more. Moreover, hydro dipping’s unpredictable nature adds an element of surprise to each piece, making every creation unique and truly one-of-a-kind.
While hydro dipping with acrylic paint offers remarkable results, it’s important to note that achieving mastery in this technique requires practice and experimentation. With dedication and patience, artists can refine their skills to consistently produce stunning outcomes.