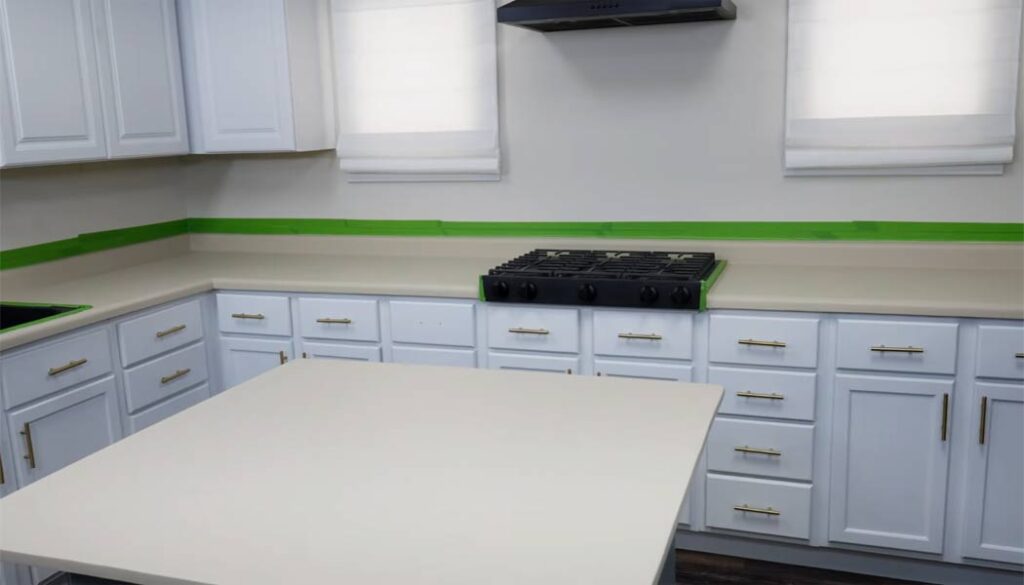
Are you tired of staring at your once beautiful countertop? Which now looks like it survived a wild paintball party gone wrong. Well, fear not, because today, we’re about to embark on a journey filled with more paint puns and messes than a kindergartener’s art class! Get ready to learn how to remove countertop paint disaster like a seasoned pro.
Or at least like someone who’s watched a few too many DIY videos on the internet. So, put on your goggles, and let’s dive into the colorful world of countertop renovation!
How to Remove Countertop Paint?
Removing countertop paint may seem challenging, but with the right approach, it’s a manageable task. In this guide, we’ll walk you through the process step by step to restore your countertops to their original beauty.
Step 1: Prepare for Battle
– Don your trusty “paint-ervention” gear: gloves, goggles, and a cape (okay, maybe skip the cape).
– Clear the countertop of any appliances, dishes, or clutter. You don’t want to accidentally turn your blender into an abstract art piece.
Step 2: Identify the Enemy
– Determine the type of paint on your countertop. Is it water-based or oil-based? This will dictate your removal strategy. If you’re not sure, just give it a stern look and hope it confesses.
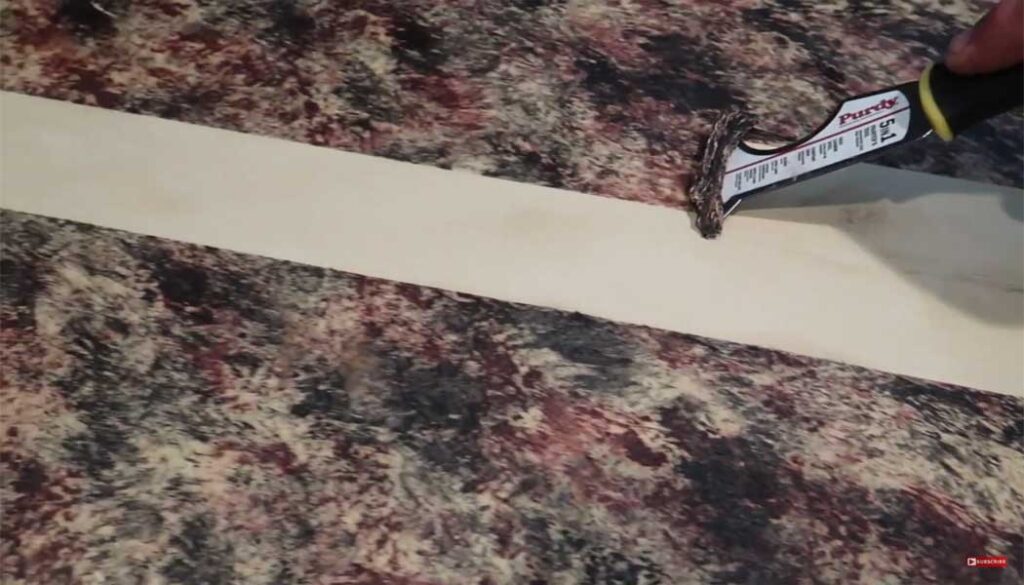
Step 3: The Scraper Showdown
– Armed with a paint scraper, approach the countertop like a fearless warrior. Gently start scraping off the paint, but be careful not to gouge the surface. Pretend the paint is your arch-nemesis and you’re exacting your revenge, one chip at a time.
Step 4: Unleash the Chemical Allies
– If scraping alone doesn’t cut it, enlist the help of paint strippers. Apply the chosen paint stripper, step back, and watch it bubble up like a cauldron of trouble. This is where things get “chemi-cool.”
Step 5: The Waiting Game
– Patience is key. Let the paint stripper do its magic for the recommended time. Use this moment to practice your “waiting-for-paint-to-soften” dance. It’s a real crowd-pleaser.
Step 6: Scrub-a-dub-dub
– Armed with a scrub brush, scrub away the softened paint. Pretend you’re in a vigorous arm-wrestling match with your countertop, and victory is a paint-free surface.
Step 7: Rinse and Repeat
– Rinse the countertop thoroughly to remove any residue. Repeat steps 3 to 6 if stubborn paint patches refuse to surrender. Remember, perseverance is key!
Step 8: Sanding Shenanigans
– For a smooth finish, grab some sandpaper and give your countertop a gentle once-over. Think of it as giving your countertop a spa day.
Step 9: Cleanup, the Unfun Part
– Dispose of the paint-stripper-soaked rags and debris responsibly. You’re not dumping it in your neighbor’s yard, are you?
Step 10: A Toast to Your Triumph
– Admire your paint-free countertop with pride. You’ve conquered the colorful chaos! Reward yourself with a glass of your favorite beverage and a pat on the back. You’ve earned it, countertop conqueror!
And there you have it – a countertop makeover that’s both functional and entertaining! Remember, even though the process can be a bit of a “paint” (pun intended), your countertop will thank you in the end. Happy DIY-ing!
How to Remove Paint Drips from a Granite Countertop?
To rid your granite countertop of those pesky paint drips, think of yourself as a paint superhero on a mission. Grab your trusty plastic scraper or razor blade. Now approach the scene with the determination of someone trying to outsmart a cunning cartoon villain!
For water-based paint, create a soapy potion by mixing warm water and mild dish soap. Dip a cloth in this magical elixir and gently rub away the paint, pretending you’re engaging in a friendly wrestling match with the countertop.
If the paint is feeling particularly stubborn, you might have to call upon the superhero known as “Paint Thinner” (or just use a bit of it). Afterward, give your countertop a refreshing shower with clean water to wash away any lingering villainous residue.
Now, for oil-based paint, proceed with caution – this is the supervillain of paint drips. Utilize a stone-specific paint remover, your secret weapon, to defeat the stubborn stain. Remember, the fate of your granite surface rests on your shoulders, so tread carefully, hero!
And if the whole situation feels like it’s spiraling into a comic book plot, don’t hesitate to summon professional help, the equivalent of calling in reinforcements. They’ll swoop in to save the day, ensuring your granite countertop remains as pristine as a superhero’s cape!
How to Remove Countertop Paint from Concrete?
Removing paint from a concrete countertop is a straightforward process, but it requires some elbow grease. Here’s a concise guide:
1. Gather Supplies: Start by assembling your tools. You will need a paint scraper or putty knife, a wire brush, paint stripper or acetone, gloves, safety goggles, and a mask. Ensure proper ventilation in your workspace to avoid inhaling fumes.
2. The Removal Process: First, use the scraper or putty knife to gently lift off any loose paint. Next, apply a commercial paint stripper or acetone to the painted area, following the product’s instructions. Allow it to sit for the recommended time to soften the paint.
Use the wire brush to scrub away the paint while wearing gloves and safety goggles. Rinse the concrete thoroughly with water once you’ve removed all the paint, and voilà – your concrete countertop is paint-free!
How Do You Get Paint Off of Quartz Countertops?
Removing paint from quartz countertops requires a delicate touch to protect their surface. Here’s a brief expert guide:
Gentle Approach: Quartz is a resilient material, but harsh chemicals or abrasive methods can harm it. Begin by using a plastic scraper or putty knife to gently remove any loose or raised paint. Avoid using metal tools, which may scratch the quartz.
Solvent-Based Paint Remover: For stubborn paint stains, consider a solvent-based paint remover, specifically designed for quartz surfaces. Apply it as directed by the product label, allowing it to sit for the recommended time. Use a non-abrasive cloth or sponge to gently lift the softened paint.
Avoid Abrasives: Do not resort to abrasive scrubbers, harsh chemicals, or abrasive pads, as they can dull or scratch the quartz surface. Always opt for gentle methods to preserve the quartz’s appearance.
Rinse and Dry: After paint removal, thoroughly rinse the quartz countertop with clean water to remove any residue. Dry it with a soft cloth to prevent water spots.
Professional Help: If the paint persists or you’re uncertain about the removal process, consult a professional with expertise in quartz countertop maintenance to ensure the safe removal of paint while preserving the beauty of your surface.
How to Remove Paint from Formica Countertops?
Removing paint from Formica countertops can be as satisfying as adding a fresh coat to a canvas.
1. Gentle Start: Begin by gently scraping off any loose or raised paint using a plastic scraper or putty knife. Don’t go Picasso on it; a light touch will do.
2. Mild Soap Magic: Mix warm water with a few drops of mild dish soap. Dip a cloth or sponge into this concoction, and give your Formica a gentle rubdown. Imagine you’re washing away layers of colors from your canvas.
3. Persistence Pays: If some paint spots are stubborn, try rubbing alcohol or acetone. Use a soft cloth, dampened with one of these, and gently blot the area. Keep your strokes delicate, like you’re fine-tuning the details in your masterpiece.
4. Rinse and Shine: Rinse your Formica countertop with clean water to remove any residue, and then pat it dry with a soft cloth. Admire your paint-free creation!
Remember, Formica is durable but sensitive, so avoid abrasive tools or harsh chemicals. Think of it as preserving the canvas while restoring its original beauty.
Final Thoughts
The endeavor of paint removal from countertops resembles orchestrating a whimsical art exhibition within your kitchen. While it may lead you to contemplate your choices, the endeavor ultimately culminates in the restoration of a pristine countertop canvas.
Whether you’re gently scrubbing with the discernment of an art critic or applying paint stripper with the finesse of a maestro, the final masterpiece is a kitchen reborn. And that will be an elegant transformation that whispers of the culinary possibilities that await.
Acrylic paint is water-based, so it can handle contact with water to some extent. In normal cases, water will not damage acrylic paint. But excessive use can dilute it and impact its texture and bonding.
Does Water Destroy Acrylic Paint?
Acrylic paint and water share a symbiotic relationship as they embark on a creative journey across the canvas. Imagine that when we introduce a touch of water to acrylics, it is akin to a heartfelt handshake. And that is a sign of solidarity. It is also an agreement to cooperate seamlessly.
Water acts as the choreographer, guiding the paint’s graceful movements. It encourages it to flow like a river and blend harmoniously, much like the elegant mixing of colors on an artist’s palette. Yet, we must tread carefully, for too much water is similar to inviting a wild partygoer to our art exhibition. The paint loses its grip on the canvas, leaving us with a messy and unruly masterpiece. That is far from our creative intentions.
Mastering the art of using water with acrylics is a delicate dance – a quest to discover that elusive equilibrium. It is about finding the sweet spot, like a perfectly choreographed ballet. In this balance, neither excess nor scarcity plays a part. This allows the artist to achieve the desired fluidity and control in their work.
So, fellow artists, let us waltz through our creative endeavors. Together, we can ensure that the water-acrylic partnership remains in harmonious balance, allowing us to create art that is just right!
Are Acrylic Paints Washable with Water?
Yes, acrylic paints are water-soluble to some extent. It means you can clean them up with water. It is better while they are still wet. This characteristic makes acrylics beginner-friendly and suitable for a variety of art projects.
While the paint is wet, a damp cloth or sponge can effortlessly remove accidental spills or errors. This water-solubility also facilitates blending and layering techniques. Because water can be used to thin the paint, producing translucent effects or seamless color transitions on your canvas.
Also, it is crucial to note that once acrylic paint dries, its water solubility decreases significantly. Once the paint has dried, it forms a water-resistant and flexible film on the surface. This makes it somewhat challenging to remove with water alone. So, for efficient cleanup, always attend to spills. Or you can clean your brushes promptly while the paint is still wet.
Can You Keep Acrylic Paint Wet?
Yes, you can keep acrylic paint wet for an extended period if you use various techniques and products designed for this purpose. There are acrylic retarders and blending mediums available in art stores that can be mixed with your acrylic paint. These additives slow down the drying process. This allows you more time to work with your colors on the canvas.
When you keep acrylic paint wet, it grants you greater control over blending, shading, and creating complex details in your artwork. However, it’s important to keep in mind that the extended drying time can also make the paint more prone to smudging.
Additionally, accidental mixing of colors can occur if you are not careful. So, while keeping acrylic paint wet can be a valuable tool for artists, it is essential to experiment and practice. This way, you can find the right balance between workability and maintaining the integrity of your painting.
Does Water Destroy Acrylic Paint on Canvas?
Water itself does not typically destroy acrylic paint on canvas. But excessive exposure to water can cause issues. When acrylic paint gets wet, it can rehydrate and become workable. This can be a useful technique for blending or correcting mistakes when the paint is still wet.
Once acrylic paint dries, it forms a stable film on the canvas. However, soaking it in water or exposing it to prolonged moisture can soften the paint film. This can result in adhesion loss and possible peeling.
To avoid this, apply varnish once your acrylic paintings are completely dry. Varnish adds a protective layer that shields the paint from moisture, dust, and other risks. So, while water can be useful for acrylic artists, use it cautiously. Especially when it is being used with dried acrylic artworks.
Final Words
On our canvas stage, the artists dance as star-crossed lovers. Water, the mischievous matchmaker, adds drama to our romantic masterpiece. But afraid not, dear artists, love prevails, even amidst watery antics. Embrace this artistic journey with humor, creating an epic love story that would make the paint blush!
Welcome, curious readers, to a colorful journey through the world of latex paint! If you’ve ever picked up a can of this versatile substance, you’ve probably wondered: is latex paint flammable? Well, you’re in for a treat because we’re about to dive deep into the fascinating world of latex paint and discover the truth about its flammability.
In this article, we’ll discuss latex paint and its potential fire hazards. We’ll explore its composition, and share some essential tips. These tips will keep you safe while wielding that paintbrush.
So, join us on this illuminating journey as we answer the burning question if latex paint flammable or not.
Is Latex Paint Flammable?
Latex paint, also known as water-based paint, is generally considered non-flammable. Unlike solvent-based paints that use highly flammable solvents, latex paint uses water as its primary solvent. This property significantly reduces its flammability and combustibility.
When latex paint is applied and dried, it releases water vapor as the water content evaporates. This water vapor is not flammable. In addition to water, latex paint contains small amounts of other non-flammable additives, such as pigments and binders.
While latex paint itself is not considered flammable, it’s important to note that some components in latex paints may be combustible when they are in a concentrated liquid or wet state. However, once the paint has fully dried and cured, it forms a stable and non-flammable coating on the surface.
Therefore, latex paint is generally non-flammable. It is a safer option compared to solvent-based paints in terms of fire risk. However, as with any paint, it’s important to follow safety guidelines during application and drying and ensure proper ventilation to minimize exposure to any fumes or emissions.
Is Latex Paint Combustible Or Flammable?
Latex paint is typically non-combustible and non-flammable once it has fully dried and cured. This type of paint primarily uses water as its solvent, which significantly reduces its flammability and combustibility.
During the application and drying process, latex paint releases water vapor as the water content evaporates. This water vapor is not flammable. Additionally, latex paint contains very small amounts of other non-flammable additives.
Certain components in latex paints may be combustible in their concentrated liquid or wet state. They become stable and non-combustible once the paint has dried and cured to form a solid coating.
It is a safer option in terms of fire risk compared to solvent-based paints, which use highly flammable solvents. However, it’s always a good practice to handle any type of paint with care and follow safety guidelines.
Is Latex Paint Flammable when Dry?
Dried latex paint is considered non-flammable. The primary solvent in latex paint is water. It evaporates during the drying process, leaving behind a stable and non-flammable paint film on the surface.
Once the paint has completely dried, it no longer contains flammable components. So, that can’t ignite or support combustion. This makes latex paint a safe option in terms of fire risk when it has reached its cured state.
It’s important to note that while latex paint itself is not flammable when dry, other substances around it may be flammable. Always exercise proper fire safety precautions and keep all flammable materials away from any potential sources of ignition.
Is Wet Latex Paint Flammable?
Wet latex paint is not highly flammable. But it contains small amounts of flammable materials which can be combustible under certain conditions. These VOCs are present in the liquid form of latex paint to aid in the paint’s application and drying process.
VOCs in wet latex paint can potentially be ignited by an open flame or a spark. Their low flash point makes them need to reach a relatively high temperature before they can ignite. The likelihood of wet latex paint catching fire under normal conditions is quite low.
It’s essential to handle wet latex paint with care. Avoid open flames and store them properly to prevent any fire hazards. Always follow the manufacturer’s safety recommendations provided on the paint container.
So, wet latex paint is not highly flammable, but it does contain small amounts of combustible VOCs. While the risk of fire is relatively low, it’s crucial to exercise caution and follow safety guidelines when working with wet paint to minimize any potential fire hazards.
Can Latex Paint Catch Fire?
Latex paint, both in its wet and dry forms, can technically catch fire. The conditions required for it to ignite are not typical in everyday use.
Wet Latex Paint: While wet latex paint contains some flammable components, it has a relatively low flash point. This means it would need to be exposed to high temperatures, open flames, or sparks to ignite. In typical storage and application conditions, wet latex paint is not considered highly flammable.
Dry Latex Paint: Once latex paint has fully dried and cured, it becomes a stable, non-flammable material. The water in the paint has evaporated, leaving behind a solid and inert coating. Under normal circumstances, dry latex paint does not pose a fire risk.
It’s important to emphasize that while latex paint can potentially catch fire under certain conditions, these conditions are unlikely to occur during typical use and storage. However, it’s still crucial to handle and store any flammable materials, including paint, with care and follow safety guidelines to minimize any potential fire hazards.
What Happens If Latex Paint Gets Hot?
When latex paint gets hot, several things can happen. It depends on the extent and duration of the heat exposure. Some probable things that might happen in such situations are-
1. Thickening: Latex paint can start to thicken or become more viscous when exposed to higher temperatures. This is often noticeable when the paint is stored in a hot environment or left in direct sunlight. The heat can cause some of the water content to evaporate, making the paint thicker and potentially more challenging to work with.
2. Separation: Prolonged exposure to heat can cause latex paint to separate. The different components of the paint can settle or separate from the water. This can result in an uneven color and consistency when you try to use the paint.
3. Reduced Shelf Life: Heat can accelerate the aging process of latex paint. Paint exposed to high temperatures may not last long. It should be stored in a cool, dry place. This can affect its performance when applied either.
4. Off-gassing: At higher temperatures, latex paint can release more VOCs into the air. This can lead to stronger odors and potentially affect indoor air quality. It’s important to ensure proper ventilation if you’re working with latex paint in a hot environment.
5. Skin Formation: When latex paint is exposed to heat, a skin or film can form on the surface of the paint in the container. This skin should be removed before using the paint to avoid any lumps or inconsistencies in the paint’s texture.
In summary, exposure to heat can affect the consistency, shelf life, and quality of latex paint. It’s important to store latex paint in a cool, dry place away from direct sunlight and excessive heat to maintain its integrity. If you suspect that your latex paint has been exposed to high temperatures for an extended period, it’s a good idea to check its quality before use to ensure it performs as expected.
Can Latex Paint Withstand Heat?
Latex paint is generally not well-suited to withstand high heat. It is excellent for interior and exterior surfaces. Although there are limitations when exposed to excessive heat.
The main issue with latex paint and heat is that the high temperatures can cause the water content to evaporate. This can lead to several problems like- bubbling and peeling, discoloration, softening, and reduced durability.
To avoid these issues, select the right type of paint for areas that experience high temperatures. For heat-prone areas like kitchens, fireplaces, or radiators, it’s better to use heat-resistant or heat-tolerant paints. These paints are typically oil-based or formulated with special heat-resistant additives.
Although latex paint is versatile, it’s not the best choice for surfaces exposed to high heat. In such cases, opting for heat-resistant paint is a more suitable solution to ensure the longevity and appearance of the painted surface.
Final Words
As we wrap up our discussion on latex paint, we can summarize our lessons. This versatile liquid treasure is not gonna ring fire alarms. In fact, it’s about as non-flammable as your morning cup of water!
So, whether you’re crafting a masterpiece or just satisfying your curiosity, rest assured that latex paint is on your side. As you start your creative attempts, may your brush strokes be steady.
You’re now all set to paint the town without fear of fiery surprises!
Whether you should add water to Acrylic paint or not depends on your artistic goals. Introducing water to acrylic paint is a common practice among artists. But it’s not always straightforward. The decision to add water to your acrylic paints can significantly impact your artwork’s outcome.
You might be a seasoned artist or just starting. However, understanding when and how to add water to acrylic paint is essential for achieving the desired effects in your creations.
Let’s explore the reasons behind adding water, the benefits it can bring to your acrylic painting process, and the precautions you should take to ensure your artistic vision comes to life.
Should You Add Water to Acrylic Paint?
Adding water to acrylic paint is a technique that can significantly affect your artwork. It can offer both advantages and potential challenges. Your creative objectives and the effects you wish to produce will determine whether or not you should dilute acrylic paint with water. Let’s see what you need to know about adding water to acrylic paint.
Advantages of Adding Water to Acrylic Paint
- Translucency and Layering
One of the primary benefits of adding water is the ability to create translucent layers. By diluting acrylic paint with water, you can achieve a more transparent and delicate appearance. This is particularly useful for glazing and creating subtle transitions in your artwork.
- Blending
Water makes it easier to blend colors smoothly. You can use a wet-on-wet technique to achieve smooth transitions and gradients. This is especially valuable for portraits, landscapes, and other subjects that require seamless color transitions.
- Extended Drying Time
Adding water can slow down the drying time of acrylic paint. This extended working time allows for more complex and detailed work. Moreover, it reduces the pressure to work quickly.
- Cost-Efficiency
By adding water, you can stretch your acrylic paint supply. This can be particularly advantageous for artists on a budget, as you use less paint while still achieving desired effects.
Considerations When Adding Water to Acrylic Paint
- Over-Dilution
Be cautious not to over-dilute your acrylic paint, as this can result in a loss of vibrancy and adhesion. Start with small amounts of water and gradually increase if needed.
- Surface Compatibility
Different surfaces may react differently to water-diluted acrylics. It’s essential to test how your chosen surface responds to the paint-water mixture before starting your artwork.
- Quality of Pigments
The quality of your acrylic paints matters. Lower-quality paints may not respond well to dilution and could result in poor adhesion or color shifts.
- Acrylic Mediums
In addition to water, you can use acrylic mediums to alter the consistency and drying time of your paint without compromising its adhesion or vibrancy. Experiment with various mediums to achieve your desired effects.
Keep in Mind: The decision to add water to acrylic paint should align with your artistic intentions and the specific properties you want to achieve. While water can offer advantages like translucency, blending, and extended working time, it’s essential to strike a balance and be mindful of potential drawbacks.
Experimentation is key to mastering this technique. This will allow you to harness the full creative potential of acrylic paints in your artwork.
What Happens When You Add Water to Acrylic Paint?
When you add water to acrylic paint, several changes occur in the paint’s characteristics and behavior. These can significantly affect your painting process and the final result. Here’s what happens when water is introduced to acrylic paint:
- Dilution of Pigment Concentration
The most immediate effect of adding water to acrylic paint is a reduction in pigment concentration. This dilution makes the paint appear more translucent and less intense in color. The more water you add, the more transparent the paint becomes.
- Increased Fluidity
Water thins out the paint, making it more fluid and easier to spread across the canvas or other surfaces. This increased fluidity is especially useful for creating smooth washes, blending colors, and achieving fine details.
- Increased Drying Time
By its very nature, acrylic paint dries rapidly, but adding water might make it take longer. You will have more time to work with the paint and modify your artwork as a result. However, keep in mind that using too much water might drastically lengthen the drying process.
- Enhanced Blending
Acrylic color mixing is made easier by water. It is simpler to create subtle gradients and transitions between colors when water is added. This is very useful for producing realistic highlights and shadows.
- Textural Changes
Depending on the amount of water added, acrylic paint’s texture can change. With more water, the paint becomes smoother and can even resemble watercolors. Conversely, using less water retains the paint’s thicker consistency. It allows for impasto techniques and textured brushstrokes.
- Adhesion and Surface Interaction
The addition of water can affect how the paint adheres to the surface. Some surfaces may absorb water. These will alter the paint’s behavior and make it more challenging to achieve certain effects. Testing different surfaces and their reactions to water-diluted acrylics is essential.
- Color Shifts
In some cases, especially with lower-quality acrylic paints, adding water might lead to color shifts or uneven drying. This can result in unexpected changes in the paint’s hue or finish.
- Layering and Glazing
Water-diluted acrylics are excellent for layering and glazing techniques. You can build up transparent layers of color. It will allow underlying layers to show through, creating depth and complexity in your artwork.
- Priming Effects
Water can affect the priming layer on the canvas or surface. It may cause the surface to absorb more paint. It can also affect how the paint interacts with the support.
Does Water Activate Acrylic?
Water does not “activate” acrylic paint in the same way it does with watercolors or gouache. Acrylic paint consists of pigments suspended in an acrylic polymer emulsion. It dries through the evaporation of water.
When you apply water to acrylic paint, it thins the paint, increases its flow, and extends drying time. However, unlike watercolors, the chemical bond within acrylics is not reversible once the paint dries.
Acrylic paint permanently adheres to surfaces. It also makes the surfaces suitable for a wide range of applications, from canvas painting to murals, without reactivating or smudging once dry.
Should You Add Water to Acrylic Paint on Canvas?
Adding water to acrylic paint on canvas can be possible. But the decision depends on your artistic intentions. Water can be added to acrylics to achieve effects like translucent washes, smoother blending, and extended drying time.
It’s especially useful for techniques such as glazing and fine detailing. However, be cautious not to over-dilute the paint, as it can affect color intensity and adhesion. It’s essential to strike the right balance based on your desired outcome and the specific project. Experimentation with water-to-paint ratios on a test surface can help you achieve the desired effects on your canvas.
Should You Add Water to Acrylic Wall Paint?
Adding water to acrylic wall paint is generally not recommended. Unlike artists’ acrylic paints, which are designed to be thinned with water, commercial acrylic wall paints come pre-formulated for wall applications.
Diluting them with water can compromise their adhesive properties, coverage, and durability, potentially leading to issues like poor adhesion, streaking, or an uneven finish.
If you need to adjust the consistency or coverage of your wall paint, it’s advisable to use a paint conditioner or a compatible acrylic wall paint extender. Because these products are specifically designed to maintain the paint’s performance and longevity on walls.
Does Adding Water to Acrylic Paint Make It Transparent?
Adding water to acrylic paint can make it more transparent. The extent of transparency depends on the amount of water added. Diluting acrylic paint with water reduces the concentration of pigment, resulting in a more translucent appearance.
This transparency can be advantageous for techniques like glazing, creating soft transitions, or achieving watercolor-like effects. However, it’s crucial to find the right balance, as excessive water can make the paint too thin and less vibrant. Acrylic artists may alter the degree of transparency and produce the desired visual effects in their works by experimenting with water-to-paint ratios.
Final Words
Adding water to acrylic paint can indeed enhance its transparency, providing artists with a versatile tool for creating various visual effects, from delicate washes to subtle blending.
This technique allows for the exploration of new dimensions within acrylic painting. This also offers artists the means to achieve depth, luminosity, and nuanced color transitions.
However, mastering this process requires a delicate balance, as excessive water can diminish color vibrancy and adhesion. Therefore, understanding when and how to employ water in acrylic painting is a valuable skill that empowers artists to harness the full expressive potential of this versatile medium.
In the world of painting, curiosity often unfolds like a brushstroke on a blank canvas. One such query emerges: can you paint oil based paint over latex? It’s a question that resonates with both the artistic spirit and the practical hand, like a harmonious duet between tradition and innovation. Join us as we explore this delicate dance of pigments and possibilities.

Can You Paint Oil Based Paint over Latex?
When you’re thinking about whether you can use oil-based paint over latex paint, it’s important to consider the compatibility between these two types of paints. This compatibility plays a significant role in the success of your painting project. They have different bases and characteristics, which can affect how well they work together.
Oil-based paint is made with oil-based solvents, while latex paint is water-based, with its pigments mixed in water. This fundamental difference can lead to problems if not handled correctly.
The main issue when painting oil-based paint over latex is getting the paint to stick properly. Since oil-based paint doesn’t naturally bond well with water-based surfaces, applying it directly over latex paint can result in issues like peeling, flaking, or an uneven finish over time.
To address this challenge, it’s crucial to utilize a bonding primer. A bonding primer is designed to create a bridge between these different types of paint, allowing for better adhesion and preventing potential problems. It acts as a middle layer that helps the oil-based paint sticks securely to the latex-painted surface.
Another thing to keep in mind is that oil-based paint has a tendency to turn yellow over time. This yellowing effect can be more noticeable when applied over white or light-colored latex paint. To counteract this, it’s a good idea to apply a stain-blocking primer before applying the oil-based paint. This primer can help reduce or even prevent the yellowing effect and maintain the desired paint color.
It’s important to note that while painting oil-based paint over latex can be done successfully. The reverse, which involves applying latex paint over oil-based paint, is generally easier and less likely to encounter problems with adhesion or yellowing. This is because latex paint is more flexible and tends to adhere better to various surfaces, including those previously painted with oil-based paint.
In short, painting oil-based paint over latex is possible. However, you’ll need to prepare the surface well, use a bonding primer, and consider the potential for yellowing. Keep in mind that in many cases, it’s easier and more reliable to use latex paint over oil-based paint for better adhesion and fewer compatibility issues.
What Happens if You Apply Oil-Based Paint over Latex?
When you use oil-based paint over latex paint, here’s what might happen:
Adhesion Problems: When you use oil-based paint over latex, one of the main issues is adhesion. Think of it like trying to glue something without the right type of glue – it just won’t stick as well.
Oil-based paint doesn’t naturally bond with latex surfaces. So, over time, you might notice the paint peeling or flaking off. It’s like when a sticker doesn’t stick to a surface, and it starts coming off at the edges. That’s what can happen when oil-based paint isn’t properly bonded to a latex-painted surface.
Yellowing Effect: Now, let’s talk about the yellowing effect. Oil-based paint has this peculiar habit of turning yellow as it gets older. It’s a bit like how some old photos can start looking yellowed and aged.
When you use oil-based paint over latex, especially on lighter-colored surfaces, this yellowing effect can become more noticeable. It’s like painting a wall white, but then it slowly starts to take on a faint yellowish tint.
This effect is similar to how white clothes can become a bit dingy over time. This yellowing can change the appearance of your paint job over the years, and it’s something to keep in mind when deciding on your painting project.
How to Paint over Latex with Oil-based Paint?
Here’s a straightforward step-by-step guide on painting over latex with oil-based paint.
Step 1: Surface Preparation
– Begin by cleaning the latex-painted surface thoroughly using a mixture of mild detergent and water. This removes any dirt, dust, or grease.
– After cleaning, lightly sand the surface to create a slightly textured finish, which helps the oil-based paint adhere better.
– Make sure to wear safety gear like a mask and goggles, especially when sanding.
Step 2: Apply a Bonding Primer
– Select a high-quality bonding primer that’s compatible with both latex and oil-based paints.
– Apply a thin, even coat of the bonding primer over the latex surface. This primer helps the oil-based paint adhere securely.
– Allow the primer to dry according to the manufacturer’s instructions before proceeding.
Step 3: Paint Application
– Start applying the oil-based paint when you see the primer is dried.
– Use thin, even coats of paint to achieve the best results. Avoid applying thick layers to prevent drips or uneven finishes.
– Allow each coat to dry completely before adding the next one. Follow the drying times recommended by the paint manufacturer.
Step 4: Clean Up and Maintenance
– After finishing the painting, clean your brushes, rollers, and other tools promptly with paint thinner or mineral spirits. Dispose of any waste materials responsibly.
– Regularly inspect the painted surface to detect any issues like peeling or cracking. Address these problems promptly to maintain the paint’s integrity.
Remember, painting with oil-based paint over latex can be done successfully with the right preparation. Using a bonding primer is crucial to ensure good adhesion. Follow these steps carefully, and you’ll achieve a durable and professional finish for your project.
What Paints Can Be Used over Latex Paint?
You can use various types of paint over latex paint to give your surfaces a fresh look or different texture. Here are some common options.
1. Latex Paint (Water-Based): Using another coat of latex paint over existing latex paint is the easiest and most common choice. It sticks well to itself, so it usually doesn’t require any special primers or treatments. This is great if you want to change colors or touch up your existing latex-painted walls.
2. Oil-Based Paint: You can paint over latex with oil-based paint, but it may need a bonding primer to help it adhere properly. Oil-based paint is durable and can give a smooth, glossy finish. Just be aware that it might yellow over time.
3. Acrylic Paint: Acrylic paint, which is similar to latex but has some differences, can also go over latex. It’s known for drying quickly and being flexible, making it a good choice for artistic or craft projects.
4. Chalk Paint: If you want a vintage or shabby-chic look, chalk paint is a trendy option. It adheres well to latex and doesn’t usually require priming. It’s often used for furniture makeovers.
5. Epoxy Paint: For floors or surfaces that need extra durability, epoxy paint is an excellent choice. It creates a tough, glossy finish and is suitable for garages, basements, and even countertops.
Tips: Before you start painting, remember to clean the surface thoroughly. If necessary, use an appropriate primer to ensure good adhesion. Also, consider any potential issues, like yellowing with oil-based paint. Choose the best type of paint for your specific project.
Can You Paint Oil Paint over Acrylic Latex?
Absolutely, you can mix oil paint with acrylic latex! It’s like having a fancy dinner party with people from different worlds. But to keep the peace, use a primer that acts like the ultimate mediator. It helps them get along, so your walls don’t turn into a battleground of peeling paint. Just remember, preparation is the key to a harmonious paint job!
Can You Put Oil-based Paint over Latex Primer?
Obviously, the realm of paint compatibility offers versatile options. You have the green light to apply oil-based paint over a latex primer. It’s a harmonious partnership where latex primes the canvas for the opulent strokes of oil-based artistry.
The key here is ensuring the primer has fully embraced its role, drying patiently before the oil-based masterpiece takes center stage. It’s akin to a well-orchestrated performance. The primer sets the stage, and the oil-based paint steps into the spotlight with its radiant brilliance!
Final Words
Oh, the joys of painting! So, can you put oil-based paint over latex? Well, it’s like trying to teach a cat to bark – technically possible, but not the easiest route. Remember your bonding primer, and maybe you’ll have more luck than a cat at a dog show. Happy painting, Picasso!
Removing paint from a laminate countertop can seem like a daunting task. But with the right approach, it can be effectively accomplished without causing damage to the surface.
Whether it’s accidental spills or a creative mishap, you can follow step-by-step instructions and recommended techniques to safely and efficiently remove paint from your laminate countertop. Moreover, you can restore the pristine appearance of your countertop and ensure its longevity.
Does Paint Stick to Laminate Countertops?
Paint generally does not adhere well to laminate countertops. Laminate surfaces are designed to be smooth and non-porous. These surfaces make it difficult for paint to bond effectively. The glossy finish of laminate countertops repels paint and forms a weak bond that is prone to chipping, peeling, or scratching.
In some cases, if the laminate surface has not been properly prepared or cleaned before painting, the paint might appear to stick initially. But over time, it is likely to degrade and become unsightly.
Moreover, the flexible nature of laminate can lead to further challenges. It can expand and contract with temperature changes and cause the paint to crack and flake.
For those seeking to update the look of their laminate countertops, it is advisable to explore alternative methods. For example, they can try using adhesive films specifically designed for countertops or seek professional refinishing services.
If paint has accidentally spilled or splattered onto a laminate countertop, prompt removal is recommended to prevent any potential adhesion and aesthetic issues.
However, while paint might adhere temporarily to laminate countertops, its long-term durability is compromised due to the surface’s properties. It’s better to explore alternative solutions that are better suited to laminate materials to ensure a lasting and attractive result.
How to Remove Paint from Laminate Countertop?
Removing paint from a laminate countertop requires careful attention to prevent damaging the surface. Let’s see a step-by-step guide to safely and effectively remove paint.
Step-1: Act Quickly
The sooner you address the paint spill, the easier it will be to remove. Fresh paint is easier to lift than dried or cured paint.
Step-2: Gather Supplies
You’ll need a few items, including a plastic scraper, clean white cloths, warm water, mild dish soap, rubbing alcohol, and a non-abrasive cleaning solution.
Step-3: Test in an Inconspicuous Area
Before proceeding, test your chosen method on a small, hidden area of the countertop. Ensure it doesn’t cause damage or discoloration.
Step-4: Scrape Excess Paint
Gently use a plastic scraper to lift away any excess paint. Be careful not to scratch the laminate surface.
Step-5: Warm Soapy Water
Mix warm water with a few drops of mild dish soap. Dampen a clean white cloth in the soapy water and gently blot the paint stain. Avoid rubbing, as this could spread the paint.
Step-6: Rubbing Alcohol
Moisten a different white cloth with rubbing alcohol. Blot the paint stain, gently rubbing it in a circular motion. This can help break down and lift the paint. Rinse the area with clean water afterward.
Step-7: Non-Abrasive Cleaner
If the paint persists, use a non-abrasive cleaning solution designed for laminate surfaces. Apply a small amount to a cloth and gently rub the stained area.
Step-8: Rinse and Dry
After using any cleaning solutions, rinse the countertop thoroughly with clean water. Wipe the area dry with a clean cloth.
Step-9: Repeat if Necessary
Stubborn paint stains may require multiple attempts. Always be patient and gentle to avoid damaging the countertop.
Step-10: Finishing Touches
Once the paint is removed, clean the entire countertop with a mild cleaner to ensure a consistent appearance. Polish the surface if necessary to restore its shine.
Step-11: Preventive Measures
To avoid future paint spills, consider using protective coverings or painter’s tape when working on projects near the countertop.
Remember, each laminate countertop can have different properties, so it’s essential to use caution and test any cleaning method in an inconspicuous area first. If the paint stain persists or if you’re unsure about how to proceed. Consult a professional cleaner or laminate countertop manufacturer who can provide additional guidance.
Is Acetone Safe on Laminate Countertops?
Acetone can be effective in removing certain types of paint and stains from laminate countertops. But it must be used with caution due to its potential to damage the surface.
Acetone is a strong solvent that can dissolve adhesives and break down some paints. Acetone also makes it useful for removing stubborn marks.
However, acetone is also known to be harsh and can potentially cause harm to laminate surfaces. It has the potential to strip away the protective layer of the laminate. It also leads to discoloration, dullness, or even warping of the countertop. Before using acetone on a laminate countertop, it’s crucial to consider the following:
- Test in a Hidden Area
Always perform a test on an inconspicuous area of the countertop to see how the acetone affects the laminate surface. This will help you determine if it causes any adverse reactions.
- Limited Use
If you choose to use acetone, do so sparingly and only for targeted spot cleaning. Avoid applying it excessively or allowing it to sit on the surface for an extended period.
- Dilution
You can dilute acetone with water to reduce its strength and minimize potential damage. However, this may also reduce its effectiveness.
- Ventilation
When using acetone, ensure proper ventilation in the area to avoid inhaling fumes.
- Wipe and Rinse
After using acetone, promptly wipe the area with a clean cloth dampened in water to remove any residue. Dry the surface thoroughly.
Given the potential risks associated with acetone, it’s often recommended to try milder alternatives. For example, it can be rubbing alcohol or non-abrasive cleaning solutions, before resorting to acetone.
If you’re uncertain about using acetone on your specific laminate countertop, you can seek guidance from the countertop manufacturer or a professional cleaner.
What Paint Remover Works on Laminate Countertops?
When selecting a paint remover for laminate countertops, it’s essential to look for a product that is safe for the material while effectively tackling paint stains. Here are key points to consider:
- Non-Abrasive Formulation
Choose a paint remover specifically labeled as safe for laminate surfaces to prevent scratching or damaging the countertop’s finish.
- Water-Based Removers
Water-based paint removers are generally safer for laminate surfaces than harsh solvents. They are less likely to cause discoloration or damage.
- Mild Solvents
If necessary, select a mild solvent-based paint remover designed for laminate surfaces. Ensure the product explicitly mentions suitability for laminate countertops.
- Test in an Inconspicuous Area
Before applying the paint remover to the stained area, test in an inconspicuous spot to verify that it won’t cause any adverse reactions.
- Follow the Manufacturer’s Instructions
Always adhere to the instructions provided by the paint remover manufacturer. Apply the product as directed and avoid leaving it on the surface for longer than recommended.
- Gentle Application
Use a soft cloth or sponge to apply the paint remover. Gently blot or rub the stained area rather than aggressively scrubbing, which could damage the surface.
- Prompt Wiping and Rinsing
After using the paint remover, wipe the area clean with a damp cloth or sponge. Rinse the countertop thoroughly with clean water to remove any residue.
- Neutralizing and Drying
After rinsing, wipe the area dry with a clean cloth. Follow up with a neutral pH cleaner to ensure any remaining residue is removed.
- Avoid Excessive Use
Use paint remover sparingly and only on the affected areas. Overuse could potentially lead to damage or discoloration.
- Professional Advice
If you’re unsure about using a specific paint remover, consult the countertop manufacturer or a professional cleaner for recommendations tailored to your laminate countertop.
Remember that prevention is key, using protective barriers like plastic sheets or painter’s tape when working on projects near the countertop can help avoid paint spills and the need for paint remover altogether.
Final Thoughts
Choosing the right paint remover for laminate countertops requires a balance between effectiveness and safety. Search for non-abrasive, water-based, or mild solvent-based options specifically designed for laminate surfaces.
Always test in an inconspicuous area before applying and follow manufacturer instructions diligently. Gently apply the remover, promptly wipe, rinse, and neutralize the area to prevent damage. While these removers can be helpful, prevention through protective measures remains the best approach.
When uncertain, seeking guidance from professionals or countertop manufacturers ensures the longevity and pristine appearance of your laminate countertops.
Emulsion paint is generally not considered flammable. It is water-based and typically does not contain volatile solvents that can catch fire easily.
Welcome to the colorful world of home improvement and painting! One question that often arises in a painter’s mind is, “Is emulsion paint flammable?” It’s like the flicker of curiosity that brightens up the canvas of your thoughts.
This article isn’t just about providing answers; it’s about empowering you with knowledge. We’ve discussed the ingredients that make up this versatile paint and the science behind its reaction to heat. So, grab your favorite inspiration mug, settle in, and let’s explore the fire of curiosity together. After all, when it comes to your artistic haven, knowing is painting!
Is There Any Combustible Component in Emulsion Paint?
Emulsion paint sets itself apart from its solvent-based counterparts. It embraces a water-based formulation, significantly reducing its combustibility. Unlike solvent-heavy paints, emulsion paint does not contain any combustible component. It relies on water as its primary solvent. That’s why it’s a safer option in terms of fire risk.
Emulsion paint’s core composition revolves around water. Therefore it is far less likely to ignite compared to traditional solvent-laden paints. This leads to a substantially lower risk of combustion.
However, navigating the drying process with care remains crucial. Although the paint itself is not inherently flammable, the water content needs to evaporate during drying. This could potentially create a humid environment around the drying paint. If this moist atmosphere is exposed to open flames, sparks, or high heat, there’s an increased risk of fire.
To work safely with emulsion paint, you need to consider some things. Firstly, ensure that you maintain a safe distance from open flames. Sparks or heat sources should not be around while the paint is drying. Even though the paint isn’t prone to combustion, the presence of moisture requires cautious handling.
Work in a well-ventilated area to allow any fumes to disperse naturally. This prevents any buildup of potentially flammable conditions. Give the emulsion paint ample time to dry thoroughly. The drying period can vary depending on the thickness of the paint and environmental conditions.
While the paint is in its drying phase, there’s potential for airborne particles. Wearing proper protective gear such as gloves, goggles, and a mask helps prevent any contact with the drying paint. Responsibly dispose of any materials that come into contact with wet emulsion paint. This is to avoid any risk of unintentional ignition from paint-covered materials.
The distinguishing feature of emulsion paint lies in its water-based composition. Nonetheless, exercising vigilance during the drying process remains important to mitigate any potential fire risks. By adhering to these safety guidelines, you can create with confidence while keeping safety at the forefront of your creative journey.
Is Emulsion Paint Flammable?
Emulsion paint is generally considered non-flammable once it has fully dried and cured. Emulsion paint, also known as water-based paint, contains water as its primary solvent. Unlike solvent-based paints that use highly flammable solvents like turpentine or mineral spirits. Emulsion paint’s water-based nature significantly reduces its flammability.
During the application and drying process, emulsion paint releases water vapor as the water content evaporates. It’s important to note that the presence of high humidity can affect fire risks in certain situations. However, when the paint is fully dry, it forms a solid and stable coating that is not prone to catching fire or igniting.
Emulsion paint is generally considered non-flammable once it has dried and cured. It is a safer option compared to solvent-based paints when it comes to fire risk. However, it’s always a good practice to handle any type of paint with care and follow safety guidelines during application and drying.
Is Water-based Emulsion Flammable?
Water-based emulsions are commonly referred to as water-based paints. This paint is generally considered to be non-flammable or minimally flammable. This is due to their primary ingredient – water.
Solvent-based paints contain VOCs and flammable solvents. Conversely, water-based emulsions use water as their primary solvent and carrier. Water-based emulsions consist of pigments, binders, and additives suspended in water. When these paints are applied, the water evaporates, leaving behind a solid coating of pigments and binders.
Because water is the primary solvent, the risk of flammability is significantly reduced. However, it’s important to note that while water-based emulsions themselves are not highly flammable, precautions should still be taken. Precautions are more important during their application and drying process.
While the paint is drying, the water content evaporates into the air. If the drying process takes place in an enclosed space with poor ventilation, it’s possible for a high concentration of water vapor to accumulate. This could potentially affect the humidity levels in the area and might cause other issues, but it doesn’t pose a flammability risk.
Although the paints themselves are not easily flammable, they might contain small amounts of flammable additives or binders. Additionally, combustible materials near the drying paint could still pose a fire hazard.
When applying water-based emulsion paints, it’s a good practice to turn off electrical equipment like heaters. It might generate heat or sparks that could inadvertently ignite any fumes or residue from the paint. Although the risk of such ignition is much lower than with solvent-based paints.
Personal protective equipment (PPE) such as gloves, goggles, and masks should be used as recommended on the paint can’s label. While the paint is in its container, it should be stored according to the manufacturer’s instructions. Usually, steps like storing the paint in a cool, dry place away from direct sunlight and heat sources are included.
Are Emulsion Paint Fumes Explosive?
Generally, emulsion paint fumes are not typically explosive. Emulsion paint’s primary element is water as its solvent. This fact greatly reduces the flammability and combustibility of the paint itself as well as its fumes.
As paint dries, water vapor and trace amounts of VOCs are produced. These VOCs are significantly less volatile and flammable compared to the solvents found in solvent-based paints. Consequently, the fumes produced by emulsion paint are not considered explosive under normal conditions.
However, it’s important to ensure proper ventilation when using emulsion paint. This is to allow any fumes to disperse. While the fumes from emulsion paint are not explosive, proper ventilation helps maintain healthy indoor air quality. It also minimizes potential discomfort from paint odors.
Hence, emulsion paint fumes are not explosive due to the water-based nature of the paint. Nevertheless, it’s a good practice to ensure adequate ventilation when using any type of paint to create a comfortable and safe working environment.
Final Words
In conclusion, emulsion paint boasts water as a major component. It has higher flashpoints than solvent-based paints. So it isn’t entirely devoid of flammability due to its minor flammable solvent content.
While it’s less flammable, maintaining careful vigilance remains crucial. Minimizing potential fire hazards is always an important thing to consider. Balancing creativity with safety allows individuals to safely enjoy emulsion paint’s benefits!
Have a happy and safe painting!
Enamel paint can be flammable due to volatile solvents, igniting when near flames, sparks, or high heat. Use in well-ventilated areas, away from ignition sources. Read the manufacturer’s safety instructions before use.
Greetings, home decorators and painting aficionados! If you’ve ever turned tired furniture into exquisite pieces of art, chances are you’re familiar with enamel paint. It’s a quiet champion in the painting world, celebrated for its glossy finish and enduring durability.
Yet, amidst the excitement of revitalizing your surroundings, a crucial question often arises: Is enamel paint flammable? This article aims to illuminate this burning question and provide you with a comprehensive understanding of enamel paint’s flammability.
Join us as we start a journey to uncover the truth behind potential flames. Let’s delve in and extinguish the misconceptions surrounding this vivid realm of colors and gloss!
Is Enamel Paint Flammable?
Imagine you’re working on giving an old piece of furniture a vibrant new look. You may be adding a personal touch to your crafts too. You’ve got your enamel paint ready, the color is exciting, and you’re all set to dive in.
Enamel paint is fantastic for achieving that smooth and durable finish you’re aiming for. But, here’s the thing – enamel paint can be a bit of a firecracker when it comes to flammability.
Yes, enamel paint is flammable due to the presence of volatile solvents in its composition.
These solvents can easily ignite when exposed to flames, sparks, or heat sources. It’s important to handle and store enamel paint with caution and follow proper safety guidelines to minimize the risk of fire.
Enamel paint contains these little things called volatile solvents. They’re like the spirited dancers of the paint world, giving it its texture and shine. However, they also happen to be quite sensitive to heat, flames, and sparks. Imagine them as being a tad too eager to join the party if things get a little too hot around them.
So if you’re planning to work with enamel paint, make sure you’re doing it in a well-ventilated area. You want those fumes to have some space to groove out and not build up. And speaking of heat, let’s keep a safe distance from open flames and anything that radiates heat – stoves, heaters, you name it.
Storing your enamel paint is also like giving it a cozy place to chill. Keep it in a cool, dry spot away from sunlight and heat sources. When you’re done, be sure to dispose of any used paint containers and rags properly. We’re talking about safety here, after all.
Remember, water-based enamel paints are more chilled out on the flammability scale, even if they have a little spark in them. So, no matter what kind of enamel paint you’re working with, follow these friendly guidelines to ensure your creative journey is smooth and safe. Happy painting!
Is Enamel Paint Still Flammable after Drying?
Enamel paint typically contains solvents that evaporate as the paint dries. It leaves behind a protective coating. Once the paint has completely dried, the solvents have generally evaporated, and the paint has undergone a chemical transformation to become solid.
This process reduces the flammability of the paint compared to its wet state. Consequently, enamel paint is no more flammable after drying! Fully dried enamel paint is generally less flammable than when it was in its liquid, wet state. The absence of volatile solvents reduces the risk of combustion.
However, it’s important to note that even dry enamel paint could still be flammable under certain extreme conditions, such as exposure to high heat or an open flame. So, it’s advisable to handle and store painted objects away from sources of heat or flames. Extreme heat could potentially affect the paint’s composition and increase its flammability risk.
Is Enamel Paint Flammable to the Touch?
Enamel paint itself is not typically flammable to the touch once it has dried and cured. However, during the painting process, when the paint is still wet and contains solvents, it can be flammable. While enamel paint dries, it releases some funky fumes. These fumes are like the early bird at the party, and they’re quite flammable.
If you introduce open flames, sparks, or heat sources to these fumes, things could get a little fiery. So, while the paint is still wet or in the process of drying, it’s important to keep your distance from anything that goes sizzle.
Now, patience is key. Let the paint take its sweet time to fully dry and cure. Depending on the type of paint and the environment, this could be anywhere from a few hours to a few days. Once it’s all set and dry, it’s like the fumes have said their goodbyes and you’re left with a stable, non-flammable work of art.
When it comes to working with wet enamel paint, think safety first. Make sure your workspace is well-ventilated – let those fumes dance away! And absolutely no sparks or open flames allowed nearby. Oh, and those brushes, rags, and other tools that get cozy with the wet paint? Toss ’em safely to prevent any unexpected fume-fueled shenanigans.
So, there you have it. Enamel paint can be quite the chameleon – going from flammable fumes to a stable, non-flammable finish. As long as you follow these safety tips and give the paint its time to dry and cure, you’re all set to create a masterpiece without any unexpected fireworks!
Is Enamel Paint Explosive?
Enamel paint is not inherently explosive under normal circumstances. Enamel paint consists of pigments suspended in a solvent-based carrier. It is commonly used for its durability and glossy finish. The solvents in enamel paint are volatile and can be flammable in their liquid state.
Explosiveness is a property typically associated with volatile substances. These substances can rapidly release a large amount of energy. Enamel paint, once it has dried, does not have the characteristics necessary for an explosive reaction. It becomes a solid film adhering to the surface it was applied to.
While using enamel paint, work in ventilated areas, and avoid heat or flames. The paint’s volatile solvents pose flammability risks, especially when in the liquid state. Always store and handle paints responsibly to ensure your safety.
Final Words
As we conclude, it’s clear that knowledge is a potent asset in home improvement and safety. Enamel paint has rightly established itself in our creative endeavors. While apprehensions about flammability hold merit, armed with accurate information, you can confidently engage with your paintbrush and roller.
Remember, awareness is key to a successful and secure painting project. Always read labels, grasp product details, and follow application guidelines. Whether reviving furniture or brightening walls, understanding your materials ensures pleasing results and a safe environment.
So, fellow painters, fret not! Enamel paint, used responsibly, poses minimal flammability risk. With the insights from our journey, you’re ready to make informed choices and approach projects with newfound confidence.
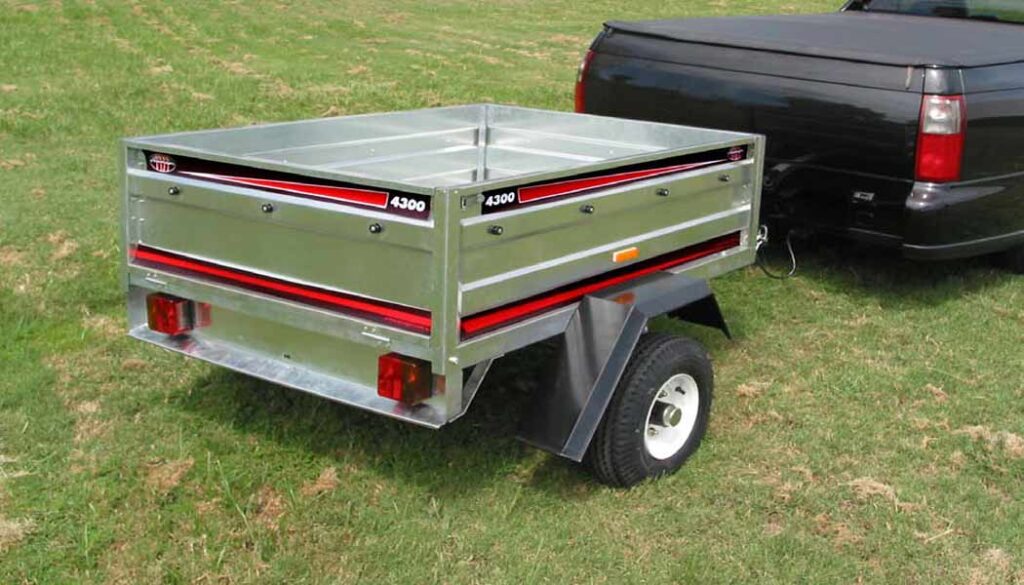
You can paint a galvanized trailer. Painting a galvanized trailer can greatly enhance its appearance and extend its lifespan. Painting will also provide protection against corrosion and wear.
While galvanized trailers are designed to resist rust due to their zinc-coated surfaces, over time, they may still show signs of weathering. So, knowing about the painting methods and necessary preparation is essential.
If you’re looking to refresh the trailer’s aesthetics or provide an added layer of defence against the elements, understanding the proper methods for painting a galvanized trailer is essential.
Can You Paint a Galvanized Trailer?
Painting a galvanized trailer is possible. However, the process requires careful preparation and the right techniques to ensure a long-lasting and aesthetically pleasing result. Galvanized trailers are coated with a layer of zinc that helps protect them from rust and corrosion.
However, this coating can weather and lose its visual appeal gradually. Painting a galvanized trailer not only improves its appearance but also adds an extra layer of protection against the elements.
The key to successfully painting a galvanized trailer lies in proper preparation. The zinc coating on galvanized surfaces is difficult to paint directly. Because of its resistance to adhesion.
Therefore, the surface needs to be properly cleaned and treated to promote paint adherence. This involves degreasing the trailer to remove any oil, dirt, or contaminants. Then rinsing and drying thoroughly is also necessary.
After cleaning, the next step is applying a special primer. This primer provides a suitable base for the paint to adhere to. Once the primer is applied and dried, you can proceed with your chosen paint.
It’s recommended to use a high-quality, rust-resistant paint that is suitable for outdoor use and compatible with galvanized surfaces.
Proper painting techniques are crucial for a smooth and even finish. Apply the paint evenly, using brushes, rollers, or spray equipment. Multiple thin coats are preferable to a single thick coat, as they ensure better adhesion and durability. Allow each coat to dry completely before applying the next.
However, painting a galvanized trailer is indeed possible and can enhance both its appearance and longevity. Success hinges on meticulous preparation, appropriate priming, and using the right type of paint. Taking the time to follow these steps carefully will result in a beautifully painted trailer that stands up to the challenges of the road and the elements.
How to Paint a Galvanized Trailer?
Painting a galvanized trailer requires specific preparation and techniques. Here’s a step-by-step guide to help you through the process.
1. Preparation
Start by cleaning the entire surface of the trailer using a mild detergent or a specialized degreaser. Remove dirt, oil, and any other contaminants that could hinder paint adhesion.
Rinse the trailer thoroughly with water to remove any residue from the cleaning process.
Allow the trailer to dry completely before proceeding to the next step.
2. Surface Etching
Galvanized surfaces need to be etched to promote better paint adhesion. Use a solution of vinegar or a commercial etching solution designed for galvanized metal.
Apply the etching solution using a brush or cloth and let it sit for the recommended time, usually around 15-20 minutes.
Rinse the surface with clean water to neutralize the etching solution and prevent further reaction.
3. Priming
Apply a galvanized metal primer that is specifically designed to bond with galvanized surfaces. This primer prepares the surface for the topcoat and enhances paint adhesion.
Follow the manufacturer’s instructions for application and drying times. Usually, you’ll need to apply a thin, even coat and allow it to dry completely.
4. Painting
Choose high-quality paint suitable for galvanized metal and outdoor use. Acrylic or epoxy-based paints work well.
Apply the paint using a brush, roller, or spray equipment. Begin with a thin, even coat, covering the entire surface.
Allow the first coat to dry according to the paint manufacturer’s instructions before applying additional coats. Multiple thin coats are preferred over a single thick coat for better adhesion and durability.
5. Drying and Curing
After applying the final coat, allow the paint to dry and cure for the recommended time. This ensures that the paint sets properly and becomes resistant to environmental factors.
Remember, patience and attention to detail are crucial when painting a galvanized trailer. Proper preparation, suitable priming, and the right choice of paint will result in a finished product. This not only looks great but also provides protection against rust and weathering.
Can You Paint a Galvanized Trailer White?
You can paint a galvanized trailer white. To do so effectively, follow these steps. Clean the surface thoroughly to remove contaminants. Etch the galvanized surface with a suitable solution to enhance paint adhesion.
Apply a primer and once the primer is dry, paint the trailer with a high-quality white paint formulated for metal surfaces.
Apply multiple thin coats for better coverage and durability. Allow each coat to dry before adding the next. White paint not only gives the trailer’s appearance but also provides protection against corrosion. Proper preparation and the right paint choice ensure a long-lasting and professional-looking result.
Can You Paint a Galvanized Trailer Black?
Painting a galvanized trailer black can be a feasible option. However, specific steps must be followed for a successful outcome. Begin by cleaning the surface thoroughly to remove any dirt or contaminants.
Apply an appropriate etching solution to promote paint adhesion on the galvanized surface. Once the surface is ready, use a primer formulated for galvanized metal. After the primer dries, apply multiple coats of high-quality black paint suitable for metal surfaces.
Allow each coat to dry before adding the next for optimal coverage and durability. Painting the trailer black enhances its visual appeal and provides protection.
What Paint Will Stick to Galvanized Metal?
Painting galvanized metal requires the use of paints that are specifically formulated to adhere to the unique properties of the zinc-coated surface. Let’s see what paint will stick to galvanized metal.
- Galvanized Metal Primer
Begin with a high-quality galvanized metal primer. This primer is designed to create a suitable base for paint adhesion on the zinc-coated surface.
- Acrylic-based Paints
Acrylic-based paints are often recommended for galvanized metal due to their excellent adhesion and durability. Look for paints labeled as suitable for metal surfaces.
- Epoxy-based Paints
Epoxy paints are another great option, known for their strong bond and resistance to corrosion. They offer long-lasting protection and adhere well to galvanized surfaces.
- Oil-based Enamel Paints
Oil-based enamel paints can also work effectively on galvanized metal. They provide a smooth and durable finish, ideal for outdoor applications.
- Rust-inhibitive Paints
Choose paints with rust-inhibitive properties. These paints add an extra layer of protection against corrosion, which is particularly important for galvanized surfaces.
- Outdoor and All-weather Paints
Search for paints that are specifically designed for outdoor use and can withstand various weather conditions. This ensures the paint’s longevity on your galvanized trailer.
However, ensure that the chosen paint is compatible with the primer you’ve applied. Using products from the same brand or product line can help guarantee compatibility.
Tips for Painting a Galvanized Trailer
Here are some essential tips that you can follow while painting a galvanized trailer.
- Clean the trailer thoroughly to remove dirt and contaminants.
- Use an etching solution to enhance paint adhesion on the galvanized surface.
- Apply a primer suitable for galvanized metal.
- Choose acrylic, epoxy, or enamel paint formulated for outdoor and metal use.
- Apply several thin coats of paint and allow each coat to dry for a sufficient time.
- Look for paints that offer additional protection against corrosion.
- Follow the manufacturer’s instructions for paint application and drying times.
- Paint in a well-ventilated area to ensure safety and proper curing.
- Wear appropriate safety gear, including gloves and a mask.
- Apply a clear sealant for added protection and a polished look.
Final Words
Painting a galvanized trailer demands meticulous preparation. Moreover, the use of specialized paints to ensure a durable and visually appealing result is essential. By adhering to proper cleaning, etching, and priming steps, followed by the application of suitable paint, you can transform your trailer’s appearance while safeguarding it against rust and corrosion.
Remember, attention to detail, proper technique and the right choice of materials are vital for achieving a professional finish that enhances both aesthetics and longevity.
Almost all automotive paints are flammable. Generally, automotive paint is a vital component of vehicle aesthetics and protection. But its flammability is a critical consideration.
Understanding the potential risks associated with flammable automotive paint is essential for both safety and proper handling. To know about the flammability of automotive paint in detail, we must know about its causes, preventive measures, and guidelines to ensure safe usage.
By grasping these key points, individuals can make informed decisions when dealing with automotive paint. Moreover, minimizing risks and promoting safe practices in various settings will be possible.
Is Automotive Paint Flammable?
Automotive paint is indeed flammable. Most automotive paints are solvent-based. That means they contain volatile organic compounds (VOCs) and other chemicals. These chemicals can easily catch fire when exposed to a spark, open flame, or other sources of ignition.
These volatile components are necessary for achieving the desired properties of the paint. For example, quick-drying, smooth application, and a durable finish are some of the good properties. However, they also contribute to the paint’s flammability.
The risk of flammability is particularly high when the paint is in its liquid state. So, during the painting process or when stored in containers, they are the most flammable.
Proper handling and storage are crucial to minimize the potential for fires. Paint booths and areas with good ventilation are often used to control the buildup of flammable fumes and reduce the risk of ignition.
To ensure safety, it’s important to follow guidelines provided by paint manufacturers and regulatory agencies. This includes wearing appropriate personal protective equipment (PPE), using spark-resistant tools, and working in well-ventilated areas to disperse flammable fumes. Also, avoiding smoking and open flames in painting areas is essential.
However, automotive paint is flammable due to its solvent-based composition. Understanding its flammability and taking necessary precautions are paramount to prevent accidents. Moreover, protecting individuals working with the paint, and maintaining a safe environment in automotive painting facilities are also essential.
What Automotive Paint Components Can Be Flammable?
Several components found in automotive paint can be responsible for its flammability. These components provide desired paint properties but can pose fire risks if not handled properly. Let’s see some of the key components that make automotive paint flammable:
- Solvents
Automotive paint contains solvents that help dissolve the pigments, binders, and additives. Moreover, these solvents create a consistent and easy-to-apply mixture. These solvents are generally volatile organic compounds (VOCs), such as toluene, xylene, and acetone. While they aid in paint application and drying, they are highly flammable and can emit flammable vapors.
- Binders and Resins
Binders and resins provide the paint with its durability, adhesion, and glossiness. These materials are often derived from petrochemical sources and can be flammable.
They create a film as the solvent evaporates during the drying process. If exposed to an ignition source before drying completely, the flammable binders and resins can catch fire.
- Additives
Automotive paint includes various additives that enhance properties like color, texture, UV resistance, and viscosity. Especially, some organic compound-based additives can be flammable. While they are added in smaller quantities compared to solvents and binders, they still contribute to the overall flammability of the paint.
- Pigments
Pigments provide color to the paint and can be either organic or inorganic. Organic pigments, which are composed of carbon-based molecules, can be flammable if exposed to ignition sources. Inorganic pigments are less likely to be flammable.
- Aerosols
Aerosol automotive paints can also be flammable. These paints are commonly used for touch-ups and small projects. They can be especially flammable due to the presence of propellants that help spray the paint evenly. These propellants are often highly flammable gases like butane or propane.
- Drying Accelerants
Some paints may contain additives that accelerate the drying process. These additives can help reduce paint drying time. They might increase the release of flammable fumes during application.
Given these flammable components, it’s crucial to handle automotive paint with care. Proper storage, adequate ventilation, and following safety guidelines are essential to minimize the risk of fire.
Moreover, using designated paint booths or well-ventilated areas, wearing appropriate protective gear, and refraining from smoking or using open flames near paint workspaces are vital practices to ensure safety while working with flammable automotive paint.
At What Temperature Can Automotive Paint Burn?
Automotive paint can begin to burn and release flammable vapors at temperatures as low as around 100 to 200 degrees Celsius (212 to 392 degrees Fahrenheit). The exact temperature at which paint starts to burn can vary based on factors such as the specific composition of the paint, the presence of volatile organic compounds (VOCs), and the rate of heat transfer.
Solvent-based paints have lower flash points. Flash point means the temperature at which they emit enough vapors to ignite in the presence of an open flame or spark. It’s important to note that while the paint itself may not sustain a flame, the release of flammable vapors can lead to a fire when combined with an ignition source.
This emphasizes the necessity of careful handling, proper ventilation, and adherence to safety precautions when working with automotive paint.
Does Automotive Paint Burn in a Fire?
Automotive paint can burn in a fire. The flammable components present in automotive paint make it susceptible to ignition and combustion. Especially, when they are exposed to high temperatures in a fire.
While the paint itself may not sustain a continuous flame like a piece of wood, it can release flammable vapors as it heats up. These vapors can mix with oxygen in the air and ignite. It will create a fire hazard.
In a fire, the surrounding heat can cause the volatile compounds in the paint to evaporate rapidly. It produces a mixture of flammable gases. If these gases come into contact with an open flame, spark, or another ignition source, they can catch fire and contribute to the intensity of the fire.
The risk of automotive paint contributing to a fire is higher in environments where a significant amount of paint is stored, applied, or used near potential ignition sources.
It’s worth noting that while automotive paint can contribute to the overall fire risk, it is just one of many factors that can influence the behavior of a fire. Other flammable materials, the presence of accelerants, and the overall fire conditions will also determine the extent to which automotive paint plays a role in a fire situation.
Final Words
The flammable nature of automotive paint underscores the importance of cautious handling and proper storage. The potential for paint to ignite and contribute to fires is a real concern, given its volatile components. While automotive paint may not burn like traditional fuel, its release of flammable vapors can amplify fire risks.
Maintaining strict safety measures, such as using well-ventilated areas, wearing appropriate gear, and avoiding ignition sources, is paramount. By understanding the complexities of paint flammability and adhering to safety protocols, we can mitigate the dangers associated with automotive paint in fire scenarios.
It will cost from $1000 to $5000 to paint a Jeep Cherokee. The cost depends on various parameters. However, painting a Jeep Cherokee can be a transformative process.

The cost of such a venture varies significantly based on a multitude of factors. These include the type of paint, the extent of surface preparation required, the complexity of the design, and whether professional assistance is sought. Whether aiming for a factory-fresh look or a customized finish, understanding the elements that influence the cost of painting a Jeep Cherokee is essential.
Is It Worth Painting a Jeep Cherokee?
Deciding whether it’s worth painting a Jeep Cherokee depends on several factors. For example, it will depend on your vehicle’s current condition, your aesthetic preferences, and your long-term plans for the vehicle.
If your Jeep’s paint is faded, chipped, or showing signs of significant wear, a fresh coat of paint will be needed. It will dramatically improve the appearance and potentially increase its resale value. However, it’s important to weigh this against the cost of the paint job itself. If the purpose is fulfilled, it will be worth painting a Jeep Cherokee.
Consider the age of your Jeep and its overall mechanical condition. If the vehicle is relatively old or in need of extensive repairs, a high-cost paint job will not be worth it. Because the value added might not outweigh the expenses. On the other hand, if your Jeep holds sentimental value, a well-executed paint job could make it a source of pride.
Moreover, if you plan to keep the Jeep for several more years, quality paint can protect the body from rust and corrosion. It will also save you money on future repairs. If you’re considering selling shortly, research the market value of painted vs. unpainted models to gauge the potential return on investment.
However, the decision to paint a Jeep Cherokee should align with your attachment to the vehicle, your budget, and your long-term goals. You can also consult with professionals and weigh the costs against the benefits. It will help you make an informed choice that suits your circumstances.
How Much Does It Cost to Paint a Jeep Cherokee?
The cost of painting a Jeep Cherokee can vary widely based on different factors. On average, a basic single-color paint job for a Jeep Cherokee might cost anywhere from $1000 to $3,000. This price range typically covers a standard paint job with minimal surface preparation. Sometimes, the cost can be up to $5000 if you prefer customization.
For a more detailed breakdown, here’s a rough estimate of the potential costs involved in painting a Jeep Cherokee:
- Preparation
Surface preparation is crucial for a quality paint job. This includes cleaning, sanding, and potentially addressing any rust or damage. This step can cost around $100 to $500, depending on the extent of work required.
- Paint Quality
The quality of the paint greatly affects the final result and longevity of the paint job. High-quality paints can range from $300 to $1,000 or more.
- Labor Costs
If you’re not painting the Jeep yourself, you’ll need to consider labor costs. Professional painters usually charge by the hour or offer package deals. Labor costs can range from $500 to $2,000 or more. This cost depends on the complexity of the job and the reputation of the shop.
- Additional Services
If you’re interested in custom designs, decals, or multiple colors, these factors will add to the cost. Intricate designs could increase the price by several hundred dollars.
- Clear Coat and Finish
Applying a clear coat adds shine and protection to the paint job. Expect to pay around $100 to $300 for a clear coat application.
- Location
Prices can vary based on location due to differences in labor rates and cost of living. Urban areas tend to have higher prices than rural ones.
- DIY vs. Professional
Doing it yourself might save on labor costs but requires specialized equipment and skills. A professional shop ensures a higher quality finish but comes at a higher price.
Note: It’s important to note that these estimates can vary significantly and might not cover all scenarios. Obtaining quotes from multiple auto body shops and discussing your specific needs will give you a clearer idea of the cost of painting your Jeep Cherokee. Keep in mind that investing in a high-quality paint job can add value to your vehicle and provide long-lasting satisfaction.
Factors Affecting the Cost of Painting a Cherokee
The cost of painting a Cherokee is influenced by several factors that collectively determine the final price. The quality of the paint itself is a significant consideration, as higher-grade paints tend to be more expensive. The extent of surface preparation required before painting is another key factor.
If significant sanding, priming, or rust removal is necessary, it can increase costs. The complexity of the design or color scheme will also affect the cost. For example, if you need custom graphics or multiple colors, it can also escalate expenses.
Labor costs play a vital role, varying based on the expertise and reputation of the chosen auto body shop. Location matters too, as prices tend to be higher in urban areas with higher living costs. Additional services like clear coat application, which enhances the finish and durability of the paint, contribute to the overall expense.
It’s important to consider the value of professional work versus a DIY approach. These two types of approaches will make the cost difference. If you do the job yourself, it will save on labor costs.
Finally, the vehicle’s age and overall condition are crucial factors. Investing in a high-cost paint job for an older or mechanically troubled vehicle might not yield a proportional increase in value.
How to Save Money on Painting Your Jeep Cherokee?
Saving money on painting your Jeep Cherokee requires a strategic approach. This approach balances cost-cutting measures with the desired quality of the paint job.
Research and Compare: Obtain quotes from multiple auto body shops. Comparing prices and services will give you a better idea of the average cost. It will also help you identify cost-effective options.
Prioritize Necessary Repairs: Address any mechanical or bodywork issues before painting. Fixing these issues beforehand can reduce the need for extensive surface preparation and potentially lower the overall cost of the paint job.
Choose Standard Colors: Searching for standard colors rather than custom shades can save on paint costs. Custom colors and intricate designs often come with additional charges.
DIY Preparation: If you have the skills and tools, consider doing some of the preparation work yourself. Sanding and cleaning the surface can reduce labor costs.
Partial Paint Job: Instead of painting the entire vehicle, consider a partial paint job. This involves focusing on specific areas that need attention.
Local vs. Premium Shops: Depending on your budget and expectations, consider choosing a reputable local shop rather than a high-end, premium one. Local shops might offer competitive rates while still providing quality work.
Reuse Existing Parts: If certain parts of your vehicle don’t need painting, such as plastic trim or moldings, consider leaving them as is to save on painting costs.
Avoid Unnecessary Features: Skip unnecessary features like pinstripes, decals, or intricate designs that can add to the cost.
Regular Maintenance: Keeping your Jeep well-maintained can prevent paint damage from factors like rust or corrosion. These will reduce the likelihood of needing a full repaint.
Longevity vs. Short-Term Savings: While it’s tempting to cut costs, remember that a high-quality paint job can last longer and provide better value over time. Balancing immediate savings with long-term satisfaction is crucial.
Final Words
Achieving a cost-effective paint job for your Jeep Cherokee involves a thoughtful blend of research. Moreover, smart choices and a balance between short-term savings and long-term value are also necessary. By considering factors like surface preparation, paint quality, and labor costs, you can navigate the process while minimizing expenses.
However, it’s essential to remember that while saving money is important, maintaining the integrity and aesthetic appeal of your vehicle is also essential. You can achieve both through a well-executed paint job that ultimately enhances its overall worth and satisfaction in the years to come.
Acrylic paint can be used on a wood table. It provides good adhesion and durability when properly prepared and sealed with a clear finish.
Hey there, art enthusiast! Ever looked at a plain wooden table and thought about turning it into a colorful masterpiece? Let’s explore using acrylic paints on wood tables in this guide.
Acrylics are like magic for artists – they dry fast, offer rich pigments, and stick to various surfaces. But what happens when acrylic paint meets a wooden table? Can you create something amazing?

In this article, we’ll uncover the secrets of using acrylic paint on wood tables. We’ll check out the steps, materials you’ll need, and tips to make your painted table a true work of art. Whether you’re a seasoned painter or just starting, get ready to transform your space with acrylics and wood.
Can You Use Acrylic Paint on Wood Table?
You can use acrylic paint on a wood table. It’s a fantastic way to add color and creativity to your table while enjoying the benefits of acrylic’s fast-drying and adhesive properties. Just follow some basic steps to ensure a successful and durable outcome.
You might have a wooden table that’s begging for a fresh look, in that case, you can use acrylic paint to give it a colorful makeover! Acrylic paint isn’t just for canvases at all. It’s a versatile medium that can work wonders on wood too.
Acrylic paints’ magic lies in its ability to adhere to various surfaces. Wood is no exception. With a little bit of prep and a whole lot of creativity, you can transform that table into a unique piece of functional art. First things first, though – make sure the table’s surface is clean and smooth. Light sanding can do wonders by creating a paint-friendly texture.
Now, onto the fun part! Pick your acrylic paints in all the shades that speak to your style. Whether you’re into bold and bright or subtle pastels, the choice is yours. Express yourself! Feel free to sketch out your design lightly if you’re feeling a bit cautious.
As you apply the paint, watch the magic unfold. Acrylics dry relatively quickly, so you won’t be left twiddling your thumbs for long. Layer the colors, blend them, or let them stand out independently – it’s your artistic playground.
Once your masterpiece is dry, you might want to consider adding an extra layer of protection. You can do it with a clear acrylic sealer. This not only preserves your artwork but also gives it a glossy, professional look.
So, there you have it – a wooden table turned into a canvas for your creative spirit. Get ready to impress your guests with a piece of functional art that reflects your style and flair. With acrylic paint and a little imagination, the possibilities are limitless!
Also read: Acrylic Paint Washable: What’s the Truth
How to Use Acrylic Paint on Wooden Table?
Before starting to paint, you need to prepare the paint in the following way. After having done so, seal your artwork with clear acrylic sealer. It will increase its durability.
Using acrylic paint on a wooden table is a fun and creative project. Here’s how to do it:
1. Prepare the Surface: Start by cleaning the table surface and sanding it lightly to create a smooth and even texture. This helps the paint adhere better.
2. Gather Supplies: Get high-quality acrylic paints, brushes, water, mixing palette and painter’s tape if you want to create clean edges.
3. Prime if Necessary: If the wood is porous or has a strong grain pattern, consider applying an acrylic primer to create an even base for the paint.
4. Apply Base Coat: Apply a thin, even layer of acrylic paint as a base coat. This can be a solid color or a background for your design. Let it dry completely.
5. Painting: Now, unleash your creativity! Apply your chosen acrylic colors with brushes, sponges, or other tools. Layer the paint for depth and richness.
6. Drying Time: Acrylics dry relatively quickly, but it’s best to wait between layers to prevent smudging. Follow the paint manufacturer’s recommendations.
7. Sealing: Once the painting is dry, consider sealing it with a clear acrylic sealer or varnish. This protects the paint and gives a professional finish.
8. Caring for Your Artwork: While acrylics are durable, use coasters for hot or wet items, and avoid using abrasive cleaners.
Remember, your wooden table can become a stunning canvas for your artistic expression. Have fun and experiment with different techniques to achieve the desired effect.
Is Acrylic Paint Waterproof on Wood?
Yes, acrylic paint is water-resistant on wood, but not entirely water-proof. So it’s wise to seal it with a clear varnish for added protection.
Acrylic paint exhibits water-resistant properties when applied to wood surfaces. It is mostly due to its polymer-based composition. This means that while it can endure light exposure to moisture, it’s not entirely waterproof.
Acrylics form a flexible and durable film as they dry, which helps them withstand damp cloth. However, prolonged exposure to water, heavy rain, or constant humidity could eventually lead to paint degradation. Warping of the wood is also seen in such cases.
To ensure the longevity of your painted wood, it’s advisable to take extra precautions. Applying a clear sealant adds a layer of protection. This sealant creates a barrier between the painted surface and external elements. That is how the paint’s ability to resist water damage is enhanced. As a result, the paint provides a longer-lasting finish.
Can You Use 100% Acrylic Paint on Wood?
Absolutely! You can use 100% acrylic paint on wood with great results. Its strong adhesion and fast-drying nature make it a perfect match for wooden surfaces.
Acrylic paint, renowned for its versatility and vibrant color range, adheres splendidly to wood. Its water-based formulation makes it ideal for transforming wooden objects into eye-catching artworks.
Acrylic paint’s remarkable adhesion ensures that your masterpiece won’t easily chip or peel off the wood. It grants it durability and longevity. The fast-drying nature of acrylics enables you to build layers, blend colors, and work swiftly on your wooden canvas.
The beauty of using 100% acrylic paint on wood lies in its compatibility with a variety of wood surfaces. Additionally, you can apply various techniques to achieve the desired textures and effects.
Remember to seal your artwork with a protective finish. A clear varnish is advisable. This step enhances the colors and shields your creation from potential environmental factors. Thus you can protect your art’s longevity!
In essence, embracing 100% acrylic paint for your wooden projects opens the door to a world of creative possibilities. It’s a dynamic and accessible medium that lets you infuse your wooden surfaces resulting in captivating pieces.
Will Acrylic Paint Stay on Wood?
Certainly! Acrylic paint sticks to wood effectively, offering lasting results. Applying a clear coat can enhance its durability and appearance over time.
Acrylic paint is a fantastic choice for wood surfaces and tends to adhere well. It offers enduring results. The reason behind its impressive staying power lies in its adhesive properties. Acrylic paint creates a robust bond with wood, which helps it maintain its vibrant presence over time.
Acrylic paint forms a flexible yet durable layer that resists chipping and peeling. This quality is especially valuable for surfaces that might experience some wear and tear. Whether you’re crafting intricate designs or applying bold brushstrokes, you can count on acrylic paint to maintain its visual impact.
In essence, acrylic paint’s steadfastness on wood surfaces makes it an artist’s backer. It transforms plain wood into a canvas for your creativity, allowing you to express yourself in a durable and visually pleasing manner. With proper preparation, mindful application, and a protective finish, your projects can become enduring showcases of your artistic skill.
Final Words
In conclusion, using acrylic paint on a wooden table is a definite yes! Acrylics’ adhesion, color range, and quick drying make them perfect for transforming a wooden table into a unique work of art.
Acrylic paint indeed has so many features that make it suitable for wood painting. But you need to perform some procedures. Preparing the paint, and putting it requires your distinct skill. Finally, you are suggested to add sealer to ensure its durability.
Whether you’re a seasoned artist or a beginner, acrylics offer a fulfilling and visually rewarding experience. So, grab your brushes, embrace the colors, and let your table tell a story of creativity for years to come!