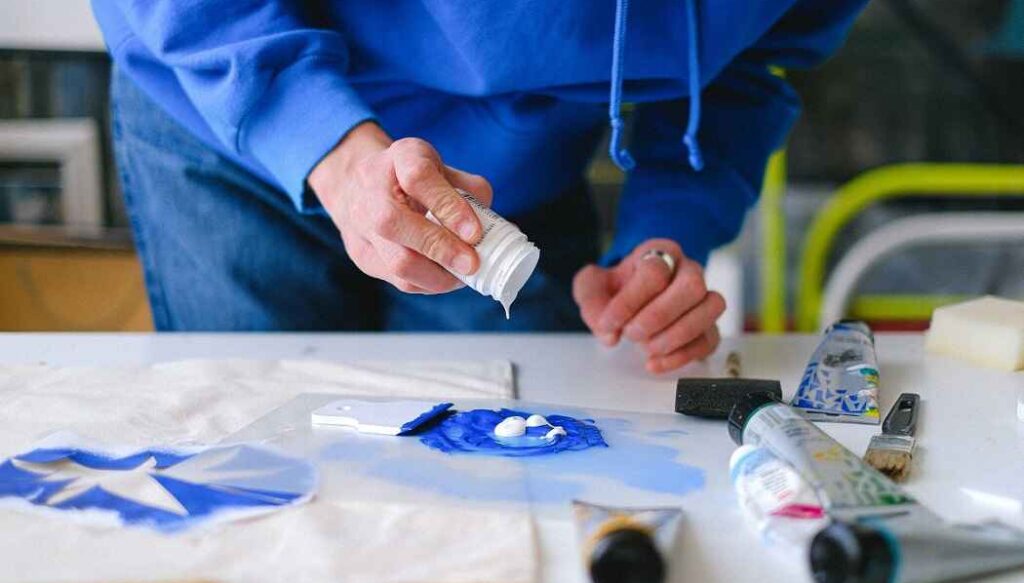
Generally, it will cost between $1000 and $4000 to paint a Honda Odyssey on average. Painting a Honda Odyssey can breathe new life into the vehicle. Moreover, it will transform its appearance and preserve its value.

The cost of painting a Honda Odyssey varies based on multiple factors, such as the paint type, quality, labor charges, and the extent of surface preparation required. Whether you’re aiming for a factory-fresh look or a custom finish, you have to understand the influence of the components. Thus, you will achieve the desired results for your beloved Odyssey.
How Much Does It Cost to Paint a Honda Odyssey?
The painting cost of a Honda Odyssey, or any vehicle, can vary widely based on several certain factors. These factors will make the cost different. On average, you can expect to pay anywhere from $1,000 to $4,000 or more for a professional paint job on a Honda Odyssey.
The breakdown of these costs typically includes:
Paint Quality: The type and quality of paint you choose play a significant role in the overall cost. Basic single-stage paints are more affordable, starting around $1,000. On the other hand, higher-quality paints like two-stage or custom finishes can range from $2,000 to $4,000 or beyond.
Labor Costs: Labor charges encompass the time and effort put in by the professionals. Usually, they prep the surface, apply the paint, and ensure a flawless finish. Labor costs can range from $500 to $2,000. The cost will depend on the complexity of the job and the expertise of the paint shop.
Surface Preparation: Properly preparing the vehicle’s surface is essential for a long-lasting and smooth paint job. If there are dents, scratches, or rust that need to be addressed, these repairs will add to the charge. Surface preparation costs can range from $200 to $1,000 or more.
Additional Customization: If you’re considering additional customization such as unique paint colors, graphics, or special effects, these will add to the overall expense. Custom work requires extra time and expertise. This can lead to an increase in labor charges.
Location: The cost of services can also vary based on your geographical location. Urban areas or regions with a higher cost of living may have higher labor and material costs.
Size of the Vehicle: The larger the vehicle, the more paint and labor it will require. Since the Honda Odyssey is a minivan, it might be larger than the average car. So, it will contribute to slightly higher costs.
Shop Reputation: A reputable and experienced paint shop might charge more due to their expertise and the quality of their work.
What Determines the Cost of Painting a Honda Odyssey?
Some factors are responsible for varying the cost of painting a vehicle. Understanding these factors can help you estimate the expenses more accurately and make informed decisions about your paint job. Let’s see some factors that determine the cost of painting a Honda Odyssey.
- Paint Type and Quality
Basic single-stage paints are generally more affordable, while two-stage paints, which include a clear coat for added protection and shine, can be more expensive. Premium and custom paint options further increase the cost for their unique finishes and improved durability.
- Cost of labor
Labor costs include the skilled work performed by auto body technicians. The labor required for surface preparation, sanding, masking, painting, and finishing significantly affects the overall cost.
- Preparing the surface
Dents, rust, or other imperfections have to be addressed before painting. These will increase the cost. Extensive surface preparation takes more time and expertise. So, the cost will further increase.
- Material Costs
The quality of the paint materials, including primers, paints, clear coats, and other products impact the overall cost. Higher-quality materials generally come at a premium.
- Time Frame
If you need a quicker turnaround, some shops might offer expedited services for an additional fee. Conversely, longer time frames might result in more affordable options.
- Complexity of Design
Elaborate designs, intricate patterns, or multi-color schemes require more time and effort, thus raising the cost.
How to Save Money on Painting Your Odyssey?
If you want to paint your Odyssey satisfactorily, you have to spend a bit more. Still, you can save money on painting your Odyssey considering various aspects.
- DIY Prep Work
Handle surface cleaning, sanding, and masking yourself. Properly prepped surfaces can reduce labor costs at the auto body shop.
- Choose Basic Paint
Look for standard, single-stage paints instead of premium or custom options. Basic paints are more budget-friendly.
- Shop Around
Obtain estimates from multiple reputable auto body shops. Compare prices, services, and reviews to find the best value.
- Bundle Repairs
If your Odyssey requires dent or rust repairs, get them done simultaneously with the paint job to minimize additional labor charges.
- Limit Customization
Intricate designs and special effects can significantly increase vehicle painting costs. Choose a simpler design or color to save money.
- Consider Vinyl Wraps
Vinyl wraps offer a cost-effective alternative to traditional paint and can be removed or changed easily.
- Choose Local Shops
Avoid shops in high-cost areas to reduce labor and material expenses.
- Avoid Rush Jobs
Planning ahead and allowing ample time for the paint job can prevent rush charges.
- Negotiate
Discuss discounts or package deals with the auto body shop, especially if you’re bundling multiple services.
- Prioritize Necessary Repairs
Focus on fixing essential issues rather than pursuing purely cosmetic changes, saving on unnecessary expenses.
Is It Worth Painting a Honda Odyssey?
Deciding whether it’s worth painting your Honda Odyssey depends on some key considerations.
If the vehicle is older or has high mileage, a new paint job might not significantly impact its resale value. However, if the existing paint is faded, chipped, or worn, a fresh coat of paint can substantially enhance the vehicle’s appearance.
Consider whether the vehicle has rust or substantial body damage. In cases where repainting is part of a more comprehensive repair process, it could help prevent further deterioration and extend the vehicle’s lifespan.
Emotional attachment to the vehicle can also influence your decision. If the Honda Odyssey holds sentimental value as a family car or for other reasons, you might prioritize investing in its appearance.
It’s worth noting that while a new paint job can improve the aesthetics, it might not lead to a proportional increase in resale value. Other factors like mechanical condition, mileage, and interior state also impact the vehicle’s overall worth.
If you intend to keep the Honda Odyssey for a long time and it’s in good condition apart from its appearance, repainting could be a reasonable investment. Conversely, if you’re contemplating selling or trading it in the near future, the return on investment might be limited.
Conclusion
The decision to paint a Honda Odyssey depends on a careful evaluation of factors like value, mechanical condition, and market worth. If the minivan is in good shape, holds personal significance, or can benefit from an enhanced appearance, painting can be a valuable investment.
However, practical considerations, such as existing issues and budget constraints, should not be overlooked. Balancing these factors will guide you towards a choice that aligns with your priorities and makes the endeavor truly worthwhile.
Yes, you can mix water with acrylic paint for pouring. Gradually add water to achieve desired consistency, ensuring smooth flow and proper adhesion. Experiment to find the right balance for your project.
So, whether you’re a budding artist or just someone who loves to get their hands dirty with paint, let’s embark on this creative adventure together!
Can You Mix Water with Acrylic Paint for Pouring?
Yes, mixing water with acrylic paint for pouring is a common technique used to achieve captivating fluid art effects. When done properly, it can create mesmerizing patterns and stunning color combinations. However, it’s important to approach this technique with care and understanding.
Water can be added to acrylic paint to thin its consistency, making it more suitable for pouring and allowing it to flow smoothly across the canvas. The addition of water can help create the desired viscosity, allowing the paint to easily mix and interact, resulting in beautiful marbling and cell formation.
It’s recommended to use a pouring medium along with water, as pouring mediums are specifically designed to maintain the paint’s color vibrancy, adhesion, and durability.
The mixture of water, acrylic paint, and pouring medium should be well-balanced, ensuring that the paint retains its integrity while still achieving the desired fluidity. Overly diluting the paint with water can result in a loss of color intensity and adhesion, leading to a less desirable outcome.
Experiment with different ratios of water, pouring medium, and acrylic paint to find the right balance that suits your creative vision and desired effects.
How Much Water Do You Put in Acrylic Paint to Pour?
There is no one-size-fits-all answer when it comes to acrylic pouring. The right ratios can vary based on factors such as the brand of paint, the desired consistency, the pouring technique being used, and personal preferences.
For a starting point, you can use a ratio of 1 part water to 5 parts acrylic paint. This means for every 1 unit (it could be grams, ounces, etc.) of paint, you would add 0.2 units of water. Here’s how it breaks down:
- 1 part acrylic paint
- 0.2 parts water
For example, if you have 100 grams of acrylic paint, you would add 20 grams of water (100 * 0.2 = 20). This easy calculation allows you to adjust the amounts according to the volume of paint you have.
Adding too much water can result in paint that becomes too transparent, loses vibrancy, and might not adhere well to the canvas. It’s recommended to gradually add water in small increments, mix thoroughly, and test the consistency before adding more.
Ultimately, the right amount of water to add to acrylic paint for pouring is a matter of experimentation. It’s a good idea to create small test batches using different ratios of water and paint to see how they interact and flow. This way, you can achieve the desired fluidity while retaining the color intensity and adhesion that acrylic paint is known for.
How Do You Thin Acrylic Paint for Pouring with Water?
Thinning acrylic paint for pouring with water involves a specific process to achieve the right consistency for fluid art. Here’s a step-by-step guide to help you achieve the best results:
Materials You’ll Need:
- Acrylic paint
- Pouring medium
- Water
- Mixing containers
- Stirring sticks or palette knives
- Protective surface or drop cloth
- Canvas or surface for pouring
- Plastic cups or squeeze bottles
- Gloves (optional)
- Torch or heat gun (optional, for removing air bubbles)
Step-by-Step Guide:
Prepare Your Workspace: Set up your workspace on a protected surface, as acrylic pouring can get messy. Place your canvas or surface on a raised platform or rack to catch excess paint and allow it to drip off.
Mixing Containers: Use separate mixing containers for each color you plan to use. Disposable plastic cups work well. The size of the container will depend on the amount of paint you need.
Acrylic Paint: Squeeze your desired acrylic paint colors into the mixing containers. Start with a small amount, as you can always add more paint if needed.
Pouring Medium: Add pouring medium to each container. The pouring medium helps to increase the flow of the paint and prevents cracking when the paint dries. The ratio of pouring medium to paint varies.
Water: Gradually add water to the paint and pouring medium mixture. Start with a small amount of water, as you can always add more if needed. The water helps to further thin the mixture and achieve the desired consistency for pouring.
Mix Thoroughly: Use a stirring stick or palette knife to mix the paint, pouring medium, and water thoroughly. Stir until you achieve a smooth, even consistency. Lift the stirring tool to check the paint’s consistency as it drips off – it should flow smoothly and not be too thick.
Consistency Test: Perform a consistency test by lifting the stirring stick or palette knife out of the mixture. The paint should flow off the tool in a continuous stream and quickly meld back into the mixture.
Adjust as Needed: If the mixture is too thick, add a little more water and mix again. If it’s too thin, you can add a touch more paint and/or pouring medium. Finding the right consistency may require some experimentation.
Repeat for Each Color: Repeat the mixing process for each color you plan to use in your pour.
Pouring: Once you have the desired consistency for each color, you can start pouring. There are various pouring techniques you can use, such as the “dirty pour,” “flip cup,” or “swipe.” Experiment to create your desired effects.
Tilt and Spread: Tilt your canvas in different directions to spread the paint and create interesting patterns. You can use palette knives or other tools to guide the paint as it flows across the surface.
Finishing Touches: Once you’re satisfied with the paint coverage, use a torch or heat gun (carefully) to remove any air bubbles that may have formed during the pouring process.
Drying: Allow your poured piece to dry completely. The drying time can vary based on factors like humidity and the thickness of the paint layers.
Remember that acrylic pouring is an art form that involves experimentation and creativity. Don’t be afraid to try different ratios and techniques to achieve the results you desire.
Final Words
While water can be used to thin acrylic paint and create different pouring effects, it’s essential to strike the right balance. Adding too much water can dilute the paint’s color intensity and binding properties, potentially affecting the final result.
It’s recommended to conduct experiments and find the right water-to-paint ratio that aligns with your artistic vision. Additionally, using specialized pouring mediums designed for acrylics can offer more consistent and predictable outcomes compared to relying solely on water.
The color of your garage floor depends on your preference. Still, choosing the right color for your garage floor is a decision that goes beyond aesthetics. It can significantly impact the functionality and ambiance of the space. Looking for light or dark color of garage floor involves various factors, such as practicality, maintenance, and overall design goals.

Light-colored garage floors, such as shades of beige or gray, can create a sense of openness. Moreover, they enhance visibility, and make the area feel larger than it actually is. They also tend to reflect more light. On the other hand, darker garage floors, like deep grays or charcoal, can offer a sleek and contemporary look. However, if you want to balance these contrasting attributes, you need to follow a guideline. Let’s see whether garage floor should be light or dark.
Should Garage Floor Be Light or Dark?
The decision between a light or dark garage floor involves a balance of practicality and style. Both light and dark colors have advantages and disadvantages. For example, light colored floor will enhance the sense of space and visibility within the garage. But dark colored garage provide a sophisticated appearance and mask masking stains and tire marks potentially.
Consider factors like your garage’s lighting, the frequency of use, and your desired aesthetic when making this choice. Ultimately, the decision between light and dark garage floors rests on your preferences. It also depends on the overall vibe you wish to create in this functional yet often overlooked space.
What Is the Best Color Type for a Garage Floor?
While selecting the ideal color for your garage floor, you should consider various factors that contribute to both functionality and aesthetics. Let’s see some color types for a garage floor.
Light-Colored Floors
- Enhanced Visibility
Light-colored garage floors, such as soft grays, beige, or even white, reflect more light. This can improve visibility within the garage. It also makes it easier to find tools, navigate around obstacles, and perform tasks.
- Sense of Space
Light colors create an illusion of spaciousness. If your garage is on the smaller side, a light floor can make it feel larger and more open.
- Clean Aesthetic
Light floors tend to convey cleanliness and tidiness. They also give your garage a fresh appearance.
Dark-Colored Floors
- Sleek and Stylish
Dark garage floors, like deep charcoal or rich browns, can lend a modern and sophisticated look to the space. This can be particularly appealing if you’re using your garage as a workshop or a creative space.
- Camouflaging Stains
Dark floors have the advantage of hiding stains, oil drips, and tire marks more effectively than light floors. This can make maintenance easier and keep your garage looking better for longer.
- Warmer Atmosphere
Dark floors can create a cozy and inviting ambiance, which might be desirable if you plan to use your garage as a multipurpose area.
Considerations for Both
- Lighting
The natural and artificial lighting in your garage plays a significant role in how colors appear. Consider the intensity and direction of light when deciding on the color type.
- Functionality
Think about how you’ll use your garage. If it’s primarily a workspace for automotive repairs or DIY projects, a dark floor might be more forgiving. If you use it for storage or as an extension of your home, a light floor might be more appropriate.
- Personal Preference
Ultimately, the choice between light and dark garage floors comes down to your personal style and preferences. Consider the overall aesthetic you want to achieve and how it aligns with the rest of your home’s design.
How to Choose the Right Color between Light or Dark for a Garage Floor?
Choosing the right color between light and dark for your garage floor can be difficult. You must consider various factors before applying the color. Here is a guide to help you make an informed decision:
Step-1: Assess the Purpose
- Functionality
Consider how you primarily use your garage. If it’s a workshop for automotive repairs or DIY projects, a dark floor might better mask stains and spills. If it’s used for storage or as an extension of your home, a light floor might provide a cleaner and more spacious appearance.
Step-2: Evaluate Lighting Conditions
- Natural Light
Take note of the amount of natural light that enters your garage. Light-colored floors work well in spaces with ample natural light as they enhance brightness and openness.
- Artificial Lighting
Consider the type and placement of your garage’s artificial lighting. Proper lighting can mitigate the potential drawbacks of a dark floor, such as reduced visibility.
Step-3: Maintenance Considerations
- Stains and Dirt
Dark floors tend to hide stains and dirt better than light ones. If you anticipate frequent spills or the garage serving as a high-traffic area, a dark floor might require less upkeep in terms of cleaning and maintenance.
Step-4: Aesthetic Preferences
- Overall Style
Think about the overall style you want to achieve. Light floors lend a clean and airy feel, while dark floors exude modernity and sophistication. Consider how the chosen color aligns with your personal preferences and the rest of your home’s design.
Step-5: Perceived Space
- Illusion of Space
Light-colored floors can make a smaller garage appear larger due to their ability to reflect light. If you’re aiming for a more expansive feel, a light floor might be the better choice.
Step-6: Ambiance
- Atmosphere
Consider the atmosphere you want to create in your garage. Light floors contribute to a bright and energetic vibe, while dark floors can offer a cozier and intimate ambiance.
Step-7: Long-Term Vision
- Resale Value
If you’re concerned about resale value, consider what potential buyers in your area might prefer. Neutral tones often have broader appeal.
Step-8: Sample Testing
- Test Swatches
Before making a final decision, obtain small samples of both light and dark floor colors and place them in your garage. Observe how they look under various lighting conditions and how they complement the space’s surroundings.
Conclusion
In the quest to determine the ideal color for your garage floor, a nuanced approach emerges. The choice between light and dark is an interplay of functionality, aesthetics, and personal preferences. Assessing your garage’s purpose, lighting conditions, maintenance expectations, and the desired ambiance helps guide this decision.
Whether you search for the bright expansiveness of a light floor or the sophisticated coziness of a dark one, the ultimate goal is to create a garage space that aligns with your practical needs and visual aspirations. By carefully considering these elements, you can confidently select the color that transforms your garage into a harmonious blend of utility and style.
Painting polypropylene is not that difficult if you know the appropriate process. Sometimes, it can be notoriously challenging material due to its low surface energy and resistance to adhesion. But if you execute the process carefully, you can paint over polypropylene.
Achieving a successful paint job requires specific techniques and materials tailored to this unique plastic. Proper surface preparation, cleaning, sanding, application of specialized adhesion primers and compatible paints, etc. are key components of paining polypropylene. Let’s see details about this process for a lasting and visually pleasing finish.
Can You Paint Over Polypropylene?
You can paint over polypropylene. Painting over polypropylene requires proper preparation for adhesion. Cleaning the surface thoroughly, removing dirt and grease, and lightly sanding it for better paint adherence are the initial steps before painting.
If you apply a plastic adhesion primer designed for polypropylene, it will promote paint bonding. Applying multiple thin coats will enhance the finish. Moreover, sufficient drying times between coats should be given. However, results can vary due to polypropylene’s resistance to adhesion. But following these steps, you can paint over polypropylene.
How to Paint Polypropylene?
Painting polypropylene is possible but it can be a challenging task due to its resistance to adhesion. However, with the right approach and materials, you can achieve satisfactory results. Let’s see a step-by-step guide on how to paint polypropylene.
- Step-1: Surface Preparation
Begin by cleaning the polypropylene surface thoroughly. Use a mild detergent or soap and water to remove any dirt, dust, grease, or contaminants that might hinder paint adhesion.
Rinse the surface with clean water and allow it to dry completely. A clean and dry surface is crucial for proper paint bonding.
- Step-2: Sand the Surface
Lightly sand the polypropylene surface using fine-grit sandpaper (around 220 grit). Sanding creates a slightly rough texture. This texture will improve the paint’s ability to adhere to the surface.
Wipe away any sanding dust with a clean, damp cloth.
- Step-3: Apply an Adhesion Primer
Choose a plastic adhesion primer that is specifically suitable for polypropylene or similar plastics. This primer helps create a bond between the surface and the paint.
Apply the primer according to the manufacturer’s instructions. Generally, you can use a brush or spray for application. Allow the primer to dry thoroughly.
- Step-4: Select the Right Paint
Search for paints that are designed for use on plastics. Look for labels like “plastic spray paint” or “plastic bonding paint.”
Acrylic or enamel paints are often recommended for their flexibility and durability on plastic surfaces.
- Step-5: Paint Application
Apply the paint in thin, even coats. Multiple thin coats provide better coverage and adhesion than one thick coat.
Follow the recommended drying times between coats. This helps prevent paint from lifting or peeling due to inadequate drying.
Step-6: Curing Time
After applying the final coat of paint, allow it to cure for the duration recommended by the paint manufacturer. Curing time ensures the paint fully bonds to the surface.
- Step-7: Optional Sealer
For added protection and longevity, apply a clear acrylic sealer after the paint has dried and cured. The sealer helps shield the paint from scratches and environmental factors.
- Step-8: Test and Monitor
Before painting the entire surface, test the process on a small, inconspicuous area. This allows you to ensure the desired adhesion and appearance before committing to the full project.
What Paint Can You Use on Polypropylene?
Choosing the right type of paint for polypropylene surfaces is essential to ensure proper adhesion and durability. While polypropylene’s low surface energy can make adhesion difficult, there are specific paints formulated to adhere to plastics effectively. You can see the guide on the types of paint you can use on polypropylene below.
- Acrylic Paint
Acrylic paints are versatile and can adhere well to polypropylene surfaces with proper surface preparation.
Look for acrylic paints labeled as suitable for plastics or designed for multi-surface use.
- Enamel Paint
Enamel paints are known for their durability and strong adhesion. This paint is also a good option for polypropylene.
Choose enamel paints formulated for plastics, as they are designed to bond effectively to low-energy surfaces.
- Spray Paint for Plastics
Many manufacturers offer spray paints specifically designed for use on plastic surfaces, including polypropylene.
These paints usually contain adhesion promoters that enhance their ability to bond to plastic materials.
- Vinyl Dye
Vinyl dyes are formulated to penetrate the surface of plastics. This paint creates a bond that can resist peeling and chipping.
Vinyl dyes are often used in automotive applications for plastic interior components.
- Specialty Plastic Paint
These paints often have adhesion-promoting additives to overcome the challenges of painting on low-energy surfaces.
What Is the Best Way to Paint Polypropylene?
To paint polypropylene effectively, the best way is to prepare surface and apply paint with brush. Cleaning the surface is a must before applying paint. For enhancing adhesion, sanding is also necessary. Moreover, applying a suitable primer will increase adhesion.
Then, applying a suitable paint acrylic or enamel with brush is convenient. After that, applying multiple thin coats of paint is essential for better adhesion and coverage. You should allow each coat to dry properly before applying the next. This process is the best way to paint polypropylene.
Is Polypropylene Easy to Paint?
Polypropylene is not easy to paint due to its low surface energy and resistance to adhesion. Its smooth and non-porous surface makes it challenging for paint to stick effectively. However, with proper surface preparation, including cleaning, sanding, and using adhesion-promoting primers, it is possible to achieve satisfactory results. Using paints formulated for plastics and following careful application techniques will help enhance adhesion and durability. Despite these efforts, achieving a long-lasting and flawless finish on polypropylene can still be more challenging compared to other surfaces.
Final Words
Proper preparation and the right techniques can lead to successful results to paint polypropylene. Adhering to thorough cleaning, sanding, and utilizing plastic adhesion primers are key steps to improving paint adhesion.
Choosing suitable paint formulations and applying multiple thin coats enhances the chances of a durable finish. Nevertheless, it’s important to acknowledge that achieving ideal results on polypropylene requires patience, testing, and vigilance in maintaining the painted surface over time.
Have you ever found yourself staring at a shelf full of art supplies, wondering about the possibilities that lie within their colorful containers? That moment when you consider combining two seemingly ordinary materials to create something extraordinary, one such intriguing duo that often catches the eye is glue and paint. But what happens if you mix glue and paint?
Let’s uncover the potential reactions, effects, and innovative outcomes of mixing glue and paint!
Can You Mix Glue with Paint?
Of course! Mixing glue with paint is a neat way to make your artwork more interesting. When you mix them, you can create textures that stand out and even make your art look 3D. This is cool because you can feel the textures with your fingers.
Also, when you mix glue and paint, it helps the paint stick better to surfaces like glass or plastic. So, if you want to paint on something tricky, this combo can help your paint stay put.
Remember that cool crackly look some old things have? You can make that with glue and paint! When the mix dries, it shrinks and cracks, revealing the layer underneath. It’s like your artwork has secrets under the surface.
If you’re putting together different things like paper, fabric, or other materials, mixing glue and paint helps them stick together really well. This is super helpful if you’re making a collage.
And guess what? When you mix glue with paint and put it on your art, it can also protect it from things like rain and sun if you want to show it outside.
So, mixing glue and paint isn’t just for fun textures, it’s also a smart way to make your art stick, look cool, and last longer!
Can You Mix Paint with White Glue?
Yes, you can mix paint with white glue, but the results may vary depending on the type of paint and the intended use.
Mixing acrylic paint with white glue can create a textured and opaque consistency suitable for crafts, collages, and some types of artwork. The mixture can be applied to surfaces like paper, cardboard, or canvas.
However, the adhesive properties of the glue might affect the overall durability and flexibility of the paint layer. The resulting mixture may not behave like traditional paint in terms of blending, layering, or smooth application.
For best results, it’s advisable to experiment on a small scale first and test the mixture on the desired surface. Additionally, this mixture is not recommended for projects that require a long-lasting, professional finish, as the glue’s adhesive properties might not provide the same longevity as traditional paint mediums.
Always consider the specific project and purpose before deciding to mix paint with white glue, and be prepared for potential differences in texture, appearance, and performance.
Can You Mix Acrylic Paint and Glue?
Yes, you can mix acrylic paint and glue, and it’s often done for various artistic and craft purposes.
The mixture of acrylic paint and glue can create interesting textures, adhesion properties, and effects. Adding glue to acrylic paint can make the paint thicker and more suitable for techniques like impasto or creating raised textures. This mixture can also be used for collage work, adhering different materials to a surface.
When mixing acrylic paint and glue, it’s important to keep a few things in mind. First, use a clear-drying, acid-free glue to prevent any discoloration or damage over time. Second, the ratio of paint to glue will impact the consistency and transparency of the mixture. Experiment with small amounts to achieve the desired effect. Lastly, be cautious when mixing excessive amounts of glue, as it might affect the paint’s color intensity and drying time.
What Happens if You Mix Glue and Paint?
When you mix glue and paint, the outcome will depend on the specific types of glue and paint you’re using. Let’s explore a few scenarios:
Acrylic Paint and White Glue (PVA):
Acrylic paint is water-based and can be mixed with white glue (also known as PVA – polyvinyl acetate) without causing any significant chemical reactions. The resulting mixture might have a thicker consistency due to the glue, but it will generally retain its color and opacity. This mixture is often used in crafts and art projects to create texture or adhere materials together.
Oil Paint and Glue:
Oil paint is oil-based and doesn’t mix well with water-based substances like glue. Mixing oil paint with glue might result in a separated or curdled appearance, and the paint might not adhere properly to the surface. It’s not recommended to mix these two substances.
Other Types of Paint and Glue:
The compatibility of other types of paint (such as watercolors, tempera, or gouache) with glue depends on their chemical compositions. Watercolors and tempera are water-based like acrylics, so they might mix decently with glue. Gouache, which is similar to watercolor but more opaque, may also work with glue to some extent. However, it’s still important to test the mixture on a small scale before using it in a project.
What Happens if You Put Glue Over Paint?
If you put glue over paint, the outcome will depend on various factors such as the type of glue and paint you’re using, as well as the intended purpose. Here are a few scenarios that could occur:
Adhesion: Depending on the type of glue and paint, the glue might adhere to the paint and create a bond. Some glues are formulated to bond well with painted surfaces, while others might not adhere effectively.
Texture and Appearance: Applying glue over paint could alter the texture and appearance of the painted surface. The glue might dry differently than the paint, leading to a noticeable difference in texture or shine.
Transparency: Some glues dry clear or translucent. If you apply a clear glue over paint, it could potentially create a glossy or shiny finish that might be desirable in certain artistic or craft projects.
Compatibility: Compatibility between the glue and paint is crucial. Some glues might not bond well with certain types of paints, leading to poor adhesion and possible peeling or flaking.
Drying Time: Glue and paint have different drying times. Applying glue over paint could extend the overall drying time, affecting the time it takes for the entire surface to be ready for further handling.
Intended Purpose: The reason for applying glue over paint matters. If you’re using glue to seal and protect the painted surface, you’ll want to ensure that the glue adheres well without causing any undesirable effects. On the other hand, if you’re using glue for artistic effects, it might create interesting textures and patterns.
How to Mix Glue and Paint Safely?
Here’s a step-by-step guide on how to mix glue and paint safely:
Materials You’ll Need:
- Paint: Acrylic paint is commonly used for this purpose, as it’s water-based and easy to work with.
- Glue: White school glue or acrylic gel medium are often used for mixing with paint.
- Mixing Surface: A palette or mixing tray made of non-absorbent material.
- Mixing Tools: Brushes, palette knives, or stir sticks.
- Protective Gear: Disposable gloves, apron, and eye protection (if necessary).
Steps to Follow:
Choose the Right Glue and Paint: Ensure the glue and paint you’re using are compatible. Acrylic paint and white school glue or acrylic gel medium are generally safe to mix. Always read the labels on the products to confirm compatibility and safety information.
Prepare Your Workspace: Work in a well-ventilated area with good air circulation. Cover your work surface with plastic or a disposable drop cloth to protect it from any spills or splatters.
Wear Protective Gear: Put on disposable gloves and an apron to protect your skin and clothing from potential spills or splashes. If you’re concerned about eye contact, wear protective eyewear as well.
Measure the Amounts: Decide on the amount of paint and glue you want to mix. Start with a small amount until you’re familiar with the process.
Mixing: Squeeze the desired amount of paint onto your mixing surface.
- Add a small amount of glue (or acrylic gel medium) to the paint. The ratio can vary depending on the effect you want, but a common starting point is around 1 part glue to 3 parts paint. Adjust as needed.
- Use a brush, palette knife, or stir stick to blend the paint and glue together. Mix thoroughly until you achieve a smooth and consistent mixture. Make sure there are no lumps or streaks.
Test the Mixture: Before applying the mixture to your actual project, it’s a good idea to test it on a separate surface or canvas. This way, you can observe how the paint adheres and dries with the added glue.
Application: Apply the mixed paint and glue mixture to your project using brushes, palette knives, or other appropriate tools. Experiment with different application techniques to achieve the desired texture or effect.
Drying and Cleaning: Allow your project to dry thoroughly according to the drying time recommended for the paint you used. Clean your tools and workspace promptly with water before any residues have a chance to dry.
Disposal: Dispose of any leftover mixture and empty containers according to your local waste disposal regulations.
If you’re unsure about the compatibility of the glue and paint or have concerns about any potential hazards, consider consulting the product labels or seeking advice from experts in the field.
Final Words
The combination of glue and paint can lead to intriguing visual effects in art projects, creating texture and dimension that might not be achievable through separate applications. However, it’s crucial to bear in mind that not all glues and paints are compatible, and certain combinations can result in undesirable outcomes such as cracking, peeling, or a compromised adhesive bond.
To remove paint from carbon fiber, gently sand the area using fine-grit sandpaper or use a paint stripper suitable for carbon fiber surfaces.
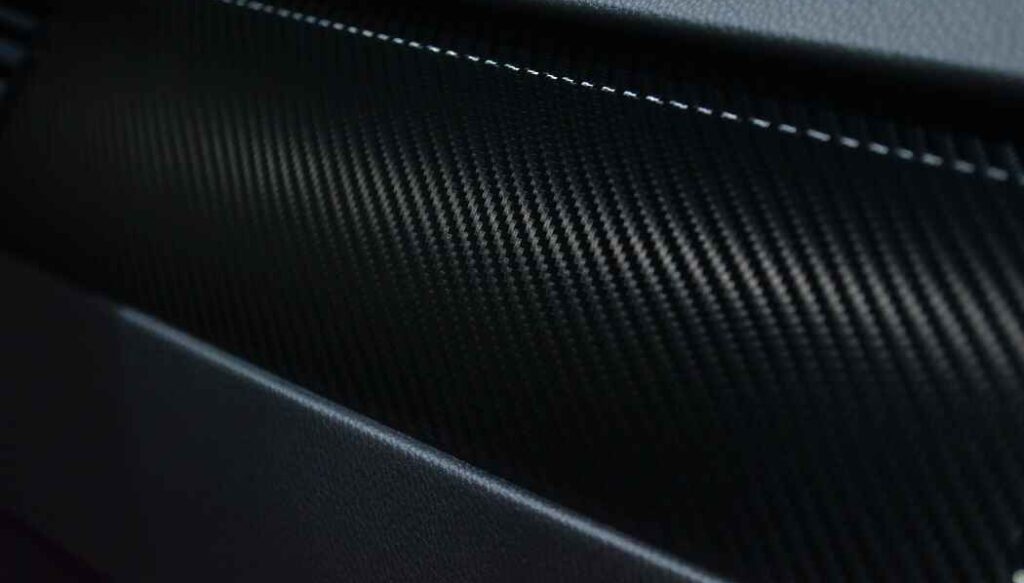
This guide dives into the meticulous process, providing you with insights and techniques to safely and effectively remove paint, unveiling the pristine beauty beneath while preserving the inherent strength and aesthetics of carbon fiber.
Can You Remove Paint Off of Carbon Fiber?
Yes, removing paint from carbon fiber surfaces can be achieved. Carbon fiber is a lightweight, strong, and often expensive material commonly used in various applications such as automotive parts, bicycles, and sporting equipment.
Removing paint from carbon fiber surfaces requires a delicate approach with care and precision to avoid damaging the underlying material. The unique properties of carbon fiber, including its lightweight and strong composition, demand a gentle touch to avoid causing damage. Using non-abrasive techniques like chemical paint strippers or heat guns set at low temperatures seems to be the most suitable approach.
Regardless of the method you choose, be patient and gentle throughout the process. Avoid aggressive scraping, as this can damage the carbon fiber weave or the underlying resin. Use soft cloths, non-abrasive materials, and a light touch to prevent unintended harm.
However, the success of paint removal from carbon fiber heavily relies on individual factors such as the type of paint, the condition of the carbon fiber, and the level of expertise one possesses.
It’s always recommended to proceed with caution and, if possible, seek advice from professionals who have experience working with carbon fiber materials. If you’re unsure or concerned about potential damage, consulting experts in the field would be the best course of action.
How to Remove Paint from Carbon Fiber?
Removing paint from carbon fiber requires careful handling to avoid damaging the carbon fiber material itself. Here’s a detailed step-by-step guide on how to effectively remove paint from carbon fiber:
Preparation:
Gather Supplies:
- Safety goggles and gloves
- Respirator mask (if working in a confined area)
- Masking tape and plastic sheets (to protect surrounding areas)
- Paint remover or stripper (make sure it’s safe for use on carbon fiber)
- Soft, non-abrasive cloth or sponge
- Plastic scraper or putty knife (preferably with rounded edges)
- Isopropyl alcohol or acetone
- Mild soap or detergent
- Water
- Microfiber towels
- Wax or polish (for finishing)
Choose a Suitable Location: Find a well-ventilated area to work in. Ideally, work outdoors to avoid inhaling fumes from the paint remover.
Wear Protective Gear: Put on safety goggles, gloves, and if needed, a respirator mask to protect yourself from chemicals and fumes.
Prepare the Carbon Fiber Surface: If possible, remove any detachable parts or components from the carbon fiber item. Clean the surface with a mild soap or detergent and water to remove any dirt or debris. Dry the surface completely.
Paint Removal Process:
Test Paint Remover: Before applying the paint remover to the entire area, test it on a small, inconspicuous section of the carbon fiber to ensure it doesn’t damage or discolor the material.
Apply Paint Remover: Using a soft cloth or sponge, apply a small amount of paint remover to the painted area. Follow the manufacturer’s instructions for application and safety precautions.
Let It Sit: Allow the paint remover to sit on the paint for the recommended amount of time. This typically ranges from a few minutes to an hour, depending on the product.
Gently Scrape the Paint: After the recommended time has passed, use a plastic scraper or putty knife with rounded edges to gently scrape off the softened paint. Be careful not to apply too much pressure to avoid damaging the carbon fiber.
Repeat if Necessary: If there are multiple layers of paint or if the paint isn’t fully coming off, you may need to repeat the application and scraping process.
Clean the Surface: Once the paint is removed, clean the carbon fiber surface using a clean cloth or sponge dampened with isopropyl alcohol or acetone. This will help remove any residue from the paint remover.
Rinse and Dry: Rinse the area with clean water to remove any remaining traces of the paint remover or residue. Dry the surface thoroughly with a microfiber towel.
Final Cleaning: Clean the entire carbon fiber item with a mild soap and water solution to ensure it’s completely free of any chemicals. Dry it thoroughly.
Polish and Protect: Apply a suitable wax or polish to the cleaned area to restore the shine and protect the carbon fiber surface. Follow the product instructions for application.
Reassemble: If you removed any parts or components, reassemble the carbon fiber item according to its original configuration.
Disposal:
Dispose of used paint remover, paint scraps, and cleaning materials according to your local regulations. Some paint removers and materials may be considered hazardous waste and need to be disposed of properly.
Check This Video:
How Do You Remove Clear Coat from Carbon Fiber?
Here’s a brief step-by-step method on removing clear coat from carbon fiber:
Gather Supplies:
- Safety gear (gloves, safety glasses, mask)
- Paint stripper or automotive clear coat remover (ensure it’s safe for use on carbon fiber)
- Plastic scraper or soft bristle brush
- Clean rags or paper towels
- Isopropyl alcohol or automotive wax and grease remover
- Fine-grit sandpaper (800 to 1500 grit)
- Water and mild soap
- Clear water-based gel coat or clear coat finish (optional, for re-finishing)
Safety Precautions: Work in a well-ventilated area or outdoors. Wear appropriate safety gear to protect your skin, eyes, and respiratory system.
Test in an Inconspicuous Area: Apply a small amount of the clear coat remover to a small, hidden section of the carbon fiber to ensure it doesn’t damage the material.
Apply Clear Coat Remover:
Apply the clear coat remover to the clear-coated surface according to the manufacturer’s instructions. Let it sit for the recommended time to soften the clear coat.
Remove Clear Coat: Gently scrape off the softened clear coat using a plastic scraper or soft bristle brush. Be cautious not to scratch or damage the underlying carbon fiber.
Repeat if Necessary: If the clear coat doesn’t come off completely, repeat the process until all clear coat is removed.
Clean the Surface: Wipe down the carbon fiber surface with clean rags or paper towels to remove any residue from the clear coat remover.
Surface Preparation: If there are any remaining traces of clear coat or imperfections, you can use fine-grit sandpaper (800 to 1500 grit) to gently sand the surface. Sand lightly and evenly to avoid damaging the carbon fiber.
Clean the Surface Again: Clean the sanded surface using isopropyl alcohol or automotive wax and grease remover to eliminate any contaminants.
Finish and Protect: You can leave the carbon fiber bare if you like the exposed look, or apply a clear water-based gel coat or clear coat finish to protect and enhance the appearance of the carbon fiber.
Remember that this process requires a delicate touch to avoid damaging the carbon fiber. If you’re uncertain about any step, it’s advisable to consult with professionals who are experienced with working on carbon fiber materials.
Tips to Follow to Remove Paint from Carbon Fiber Successfully
Following the right steps is crucial to achieve a successful paint removal process without harming the integrity of the carbon fiber. Here are some tips to guide you through the process:
- Opt for a paint removal method that’s gentle on carbon fiber to prevent damage. Avoid aggressive techniques like abrasive chemicals or rough scraping.
- Prior to starting the paint removal process, test your chosen method on a small hidden section of the carbon fiber to ensure it doesn’t cause any negative reactions.
- Stick to mild solvents like isopropyl alcohol, which is less likely to harm the carbon fiber while effectively breaking down paint.
- Refrain from using abrasive tools or harsh chemicals that could scratch or degrade the carbon fiber’s finish.
- Take your time during the removal process. Rushing could lead to accidental damage.
- If scrubbing is necessary, use a soft cloth or sponge to gently work on the painted area. Avoid excessive pressure.
- Frequently check your progress to avoid overworking the carbon fiber and to prevent any potential damage.
- If you’re uncertain about the process or concerned about potential risks, seek advice from professionals who have experience with carbon fiber restoration.
- While working on paint removal, ensure that the surrounding carbon fiber surfaces are covered or protected to prevent accidental contact.
- Once the paint is removed, consider applying a clear coat or wax specifically designed for carbon fiber to provide protection and restore its finish.
- Work in a clean, dust-free area to prevent particles from adhering to the carbon fiber surface during the removal process.
- If the carbon fiber item is valuable or the paint removal is part of an insurance claim, document the process with photos and notes.
Conclusion
Patience and a meticulous approach are key when working with carbon fiber, as rushing the process can lead to unintended damage. By following the insights shared in our discussion and tailoring them to your specific situation, you can confidently restore the pristine appearance of your carbon fiber while maintaining its structural integrity for years to come.
Kelly Moore has a special program that takes old paint. You might know that Kelly Moore is a company specializing in paint products and solutions.
In an era of heightened environmental awareness, the responsible disposal of old paint has become a pressing concern.
Kelly-Moore Paints Company is renowned for its exceptional paint products and for its commitment to sustainable practices. With the aim of minimizing the environmental impact of discarded paint, Kelly Moore offers a PaintCare program. Under this program, old paint is taken care of.
Does Kelly Moore Take Old Paint?
The aim of Kelly Moore Paints is to simplify old paint disposal through sustainable solutions. Nowadays, the responsible disposal of old paint has emerged as a critical concern for both individuals and communities alike.
Recognizing this need, Kelly-Moore has stepped up to the plate with an innovative approach. This approach underscores their commitment to both quality products and sustainable practices.
Kelly Moore Paints has established itself as a trusted name in the industry. This brand is renowned not only for its extensive range of paints but also for its dedication to environmental stewardship.
Their PaintCare program exemplifies this commitment by providing customers with a convenient and eco-friendly solution for handling old paint. The PaintCare program offers customers a hassle-free way to part ways with leftover paint. This ensures that it doesn’t end up in landfills or harm the environment.
By collaborating with local communities and adhering to state regulations, Kelly Moore Paints facilitates the collection and proper management of old paints. This program is an illustration of their environmental responsibility. Moreover, it is also a demonstration of their support for the communities they serve.
To participate in the PaintCare program, customers can visit designated drop-off locations where old paint is accepted. This initiative aids in waste reduction. Moreover, it contributes to the sustainable cycle of paint production and disposal.
By making it convenient for customers to dispose of old paint responsibly; Kelly Moore Paints empowers individuals to make environmentally conscious choices.
Kelly-Moore sets an example by offering customers more than just paint products. They provide an avenue for making a positive impact on the environment. So, the next time you find yourself wondering about the fate of that old can of paint in your garage, remember about Kelly Moore. The company will take your old paint.
What You Can Recycle at Kelly-Moore Paints?
Kelly-Moore offers their recycling program, known as PaintCare. This program provides a convenient and responsible way to dispose of certain paint products. Let’s see what you can recycle at Kelly-Moore Paints.
- Accepted Paint Types
The PaintCare program primarily accepts old latex paint and oil-based paint for recycling.
- Original Containers
Paint cans must be in their original containers with the original label intact. This helps in identifying the paint type and ensuring proper handling.
- Liquid State
Paint should be in a liquid state and not solidified or dried out. This ensures that the paint can be properly processed and recycled.
- Limitations on Quantity
There might be limitations on the amount of paint you can drop off per visit. It’s recommended to check with your local Kelly Moore Paints store or their website for specific guidelines.
- Proper Sealing
To ensure safety during transportation, make sure the paint cans are properly sealed to prevent leaks. Transporting them upright is also advisable.
- Local Regulations
It’s important to be aware of any local regulations regarding the disposal and recycling of paint. The PaintCare program complies with state regulations to ensure environmentally responsible practices.
What Are the Conditions if Kelly-Moore Takes Old Paints?
Kelly-Moore Paints offers a proper disposal and recycling of old paints through their PaintCare program. However, there are certain conditions and guidelines to ensure the process is efficient and effective.
Firstly, the program generally accepts latex paint and oil-based paint. The paint must be in the exact same container with the initial label attached. Additionally, the paint must be liquid and not hardened or dried off.
The program may also place limitations on the quantity of paint that may be delivered in a single visit. For particular information on permitted amounts and any applicable costs, it is advised to contact your neighborhood Kelly-Moore Paints store or visit their official website.
It is advised that paint cans be securely sealed and stored upright to ensure safety during travel. Bringing in paint that satisfies these requirements promotes a quick and eco-friendly recycling procedure.
Additionally, it supports the business’s dedication to environmental responsibility and safe paint disposal. Before attempting to recycle your old paint, always double-check the most recent instructions straight from Kelly Moore Paints.
Final Words
The PaintCare program from Kelly-Moore Paints is a prime example of their commitment to both quality and sustainability. They enable consumers to contribute to a cleaner future by providing a simple method for recycling used latex and oil-based paints.
The success of the program is ensured by following rules about the original container and liquid condition. By making these efforts, Kelly-Moore Paints promotes ethical paint disposal and emphasizes their dedication to environment approaches. Moreover, by these efforts they are having a beneficial influence on both the local community and the globe as a whole.
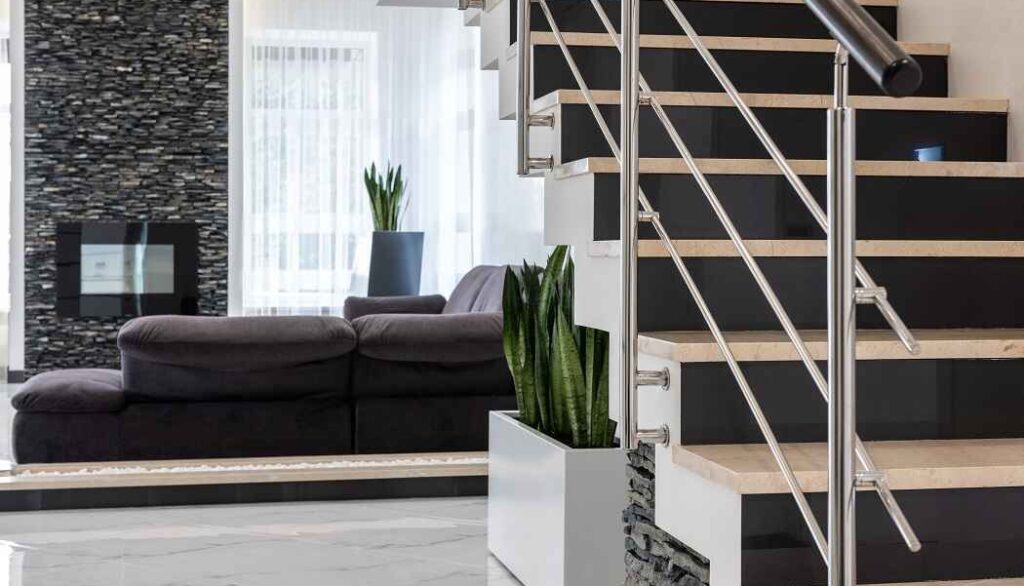
When it comes to transforming your garage space, selecting the right flooring solution can make all the difference.
Here we discuss the merits of two popular coatings: poly aspartic and epoxy. We’ll compare their features and benefits to help you make an informed choice for your garage floor.

Whether you’re seeking enhanced durability, a polished aesthetic, or quick installation, understanding the attributes of these coatings will empower you to choose the ideal solution that aligns with your preferences and functional needs.
Is Polyaspartic Better than Epoxy for Garage Floor?
Polyaspartic emerges as the superior choice between Polyaspartic and epoxy. While Epoxy has its merits, including durability and cost-effectiveness, Polyaspartic surpasses it in several key aspects.
The remarkable speed of application and rapid curing time of Polyaspartic coatings significantly reduce inconvenience to homeowners during the installation process. Moreover, its exceptional resistance to UV rays, chemicals, abrasions, and hot tire marks ensures a longer-lasting and more resilient surface, making it a reliable option for high-traffic garage floors.
Additionally, Polyaspartic’s flexibility to be applied over a wide range of temperatures and its ability to create a seamless finish add to its appeal. The reduced risk of bubbling, peeling, or yellowing, which can sometimes be associated with Epoxy coatings, further solidifies Polyaspartic’s position as the preferred choice.
Considering these factors, it is evident that Polyaspartic outperforms Epoxy in terms of durability, efficiency, and overall performance. Homeowners seeking a garage floor coating that offers a harmonious blend of longevity, aesthetic appeal, and low maintenance requirements should unquestionably lean towards Polyaspartic.
When aiming for a garage floor that not only enhances the space but also withstands the test of time, the resounding answer is a definitive yes – Polyaspartic is indeed the superior option.
Looking for the Best Garage Floor Paint? Check here.
Why Polyaspartic Is Better than Epoxy for Garage Floor Coating?
Polyaspartic and epoxy are both popular options for garage floor coatings, each with their own set of advantages and disadvantages. While both coatings provide durability and protection to the garage floor, there are several key points that highlight why polyaspartic can be considered better than epoxy in certain scenarios:
Faster Installation and Cure Time:
Polyaspartic: One of the most significant advantages of polyaspartic coatings is their curing time. They can be applied and cured within a single day, often in just a few hours. This is a huge benefit for homeowners who want to minimize downtime and get their garage back in use quickly.
Epoxy: Epoxy coatings typically require a longer installation and curing process, often spanning multiple days. This can be inconvenient and disruptive, especially for those who rely heavily on their garage space.
Temperature Tolerance and Outdoor Use:
Polyaspartic: Polyaspartic coatings have superior temperature tolerance, making them ideal for outdoor applications as well. They can withstand extreme temperature fluctuations without cracking, yellowing, or deteriorating. This makes them a great choice for regions with diverse weather conditions.
Epoxy: Epoxy coatings can be sensitive to temperature changes and UV exposure. They might not perform as well when exposed to direct sunlight or drastic temperature shifts, which limits their suitability for outdoor use.
Chemical Resistance:
Polyaspartic: Polyaspartic coatings offer excellent resistance to chemicals such as gasoline, oils, and solvents. This is particularly beneficial for garage floors, which are often exposed to spills and leaks from vehicles and equipment.
Epoxy: While epoxy coatings also provide chemical resistance, polyaspartic coatings tend to outperform epoxies in terms of resistance to certain chemicals and stains.
Durability and Impact Resistance:
Polyaspartic: Polyaspartic coatings are known for their exceptional durability and impact resistance. They are less likely to chip, peel, or scratch, even when subjected to heavy use, dropped tools, or vehicle traffic.
Epoxy: Epoxy coatings are durable, but they can be more susceptible to chipping and scratching, especially over time and under significant stress.
Minimal Disruption and Longevity:
Polyaspartic: The fast curing time of polyaspartic coatings means less disruption to your daily routine. Additionally, their longevity and resistance to wear ensure that you won’t need to reapply or repair the coating as frequently as epoxy.
Epoxy: While epoxy coatings are durable, they might require recoating or touch-ups over the years, leading to additional maintenance and inconvenience.
UV Stability and Color Retention:
Polyaspartic: Polyaspartic coatings are UV stable, meaning they won’t yellow or degrade when exposed to sunlight. They also retain their color vibrancy over time.
Epoxy: Epoxy coatings can experience color fading and yellowing when exposed to UV rays, which might impact the aesthetic appeal of the garage floor.
In summary, while both polyaspartic and epoxy coatings have their merits, polyaspartic coatings generally offer faster installation, superior temperature tolerance, exceptional chemical resistance, greater durability, and reduced maintenance requirements.
These advantages can make polyaspartic a better choice for those looking for a high-performance garage floor coating that withstands the rigors of daily use and varying environmental conditions.
Disadvantages of Polyaspartic Coatings for Garage Floor
Like any material, Polyaspartic coatings also come with certain disadvantages. Here are some potential drawbacks of polyaspartic coatings for garage floors:
Cost: Polyaspartic coatings can be more expensive than other types of garage floor coatings, such as epoxy. The materials themselves are costlier, and the application process might require specialized equipment and expertise, adding to the overall expense.
Application Complexity: Applying polyaspartic coatings can be more complex than traditional coatings. They have a short working time, often requiring skilled professionals to apply them properly. Inadequate application can lead to uneven surfaces, bubbles, or other imperfections.
Limited DIY Application: Due to the fast curing times and precise application requirements, polyaspartic coatings are not well-suited for DIY projects unless the person has experience working with similar materials and has access to the necessary equipment.
Temperature and Humidity Sensitivity: The curing process of polyaspartic coatings can be affected by temperature and humidity variations. Extreme heat or cold, as well as high humidity, can potentially lead to improper curing and adhesion issues.
Odor and Ventilation: Polyaspartic coatings can emit strong odors during application, which may require proper ventilation to ensure a safe and comfortable working environment. This can be a concern if the garage is attached to the house or if there are sensitivities to chemical odors.
Slipperiness: While polyaspartic coatings can provide a durable and glossy finish, the high gloss can also make the surface slippery, especially when wet. This can be a safety concern, particularly in a garage where spills are common.
Limited Repair Options: If a polyaspartic-coated floor gets damaged, repairing the affected area can be challenging. It’s not as straightforward as patching or touching up as with some other coatings. The whole floor might need to be re-coated for consistency.
Surface Imperfections: Since polyaspartic coatings cure quickly, there is less time for self-leveling properties to work on the floor. If the surface has imperfections, they might be trapped under the coating, leading to an uneven finish.
Despite these disadvantages, polyaspartic coatings still offer many benefits for garage floors. It’s essential to carefully consider your needs, budget, and the specific conditions of your garage before deciding on the type of coating to use.
Disadvantages of Epoxy Coatings for Garage Floor
Epoxy coatings come with a few disadvantages with lots of advantages that homeowners should consider before making a decision.
Durability Concerns: While epoxy coatings are generally durable, they can still chip or crack under heavy impact or from the movement of vehicles and heavy equipment in a garage.
Surface Preparation: Proper surface preparation is crucial for a successful epoxy application. Any moisture, oil, or contaminants on the concrete surface can lead to adhesion issues and premature coating failure.
Slippery When Wet: Epoxy-coated floors can become slippery when wet, potentially increasing the risk of accidents, especially in a garage where water, oil, and other fluids might spill.
UV Sensitivity: Epoxy coatings can degrade and discolor when exposed to direct sunlight for extended periods, which might be a concern if your garage receives a lot of sunlight.
Time-Consuming Application: Applying epoxy coatings involves multiple steps, including surface preparation, primer application, coating application, and curing. This process can be time-consuming and may require the garage to be out of use for several days.
Limited Reparability: Once epoxy coatings are damaged or worn out, repairing or re-coating specific areas can be challenging to achieve seamlessly. It might require recoating the entire floor.
Temperature Sensitivity: Epoxy coatings can be sensitive to temperature during the application process. Improper temperature conditions can affect the curing process and overall performance.
Chemical Sensitivity: Certain chemicals and automotive fluids can react with epoxy coatings, causing them to degrade or stain over time.
Cost: Epoxy coatings can be relatively expensive, especially if you opt for high-quality formulations. This cost might not be justifiable for all garage owners.
DIY Challenges: While DIY epoxy kits are available, achieving a professional-quality application can be challenging for individuals without prior experience, potentially leading to subpar results.
Longevity Variability: The longevity of epoxy coatings can vary based on factors like usage, preparation, and maintenance. Some coatings might not last as long as expected.
Preparation and Fumes: The process of preparing the garage floor, including grinding or etching, can generate dust and strong fumes that require appropriate protective measures and ventilation.
Conclusion
Opting for Polyaspartic is undoubtedly the superior choice to enhance your garage floor. Its impressive performance, combined with its aesthetic appeal and practical benefits, positions Polyaspartic as the ultimate solution for achieving a high-quality, enduring, and visually stunning garage floor. Embrace the future of garage floor coatings with Polyaspartic – the clear winner in this comparison.
The cost to paint a stair railing typically ranges from $150 to $600, depending on factors like railing length, complexity, paint type, and labor charges.
Let’s learn the details factors that influence the cost of painting a stair railing, helping you gain a clearer understanding of the investment required to achieve that desired polished look for your home.
How Much Does It Cost to Paint Stair Railing?
Painting a stair railing is a transformative process that can breathe new life into a space. Whether it’s a traditional wooden railing or a modern metal design, a fresh coat of paint can revitalize its appearance, enhance the overall aesthetic of your home, and protect the railing from wear and tear.
On average, you can expect to pay around $150 to $600 for painting a standard residential stair railing. This estimate is based on a simple one-flight staircase with a straightforward railing design and a standard paint finish.
Here’s a breakdown of the generalized costs:
Labor Costs: Labor is a significant portion of the overall cost. Professional painters typically charge by the hour or by the project. The hourly rates can vary, but on average, you might expect to pay around $25 to $50 per hour for a skilled painter. For a simple stair railing, the labor cost could range from $75 to $200 or more.
Paint and Supplies: The cost of paint and supplies will depend on the type of paint you choose, the brand, and the amount needed. A gallon of quality paint can cost anywhere from $25 to $50 or more. You’ll also need brushes, rollers, drop cloths, and other supplies, which could add another $20 to $50 to the cost.
Preparation and Cleaning: Proper surface preparation is crucial for achieving a smooth and long-lasting finish. This might involve cleaning, sanding, and priming the railing. The cost for these preparatory steps could range from $50 to $100.
Finishing and Detailing: Achieving a professional finish requires attention to detail, including careful application of the paint, ensuring even coverage, and addressing any imperfections. This process might cost around $30 to $80.
Additional Services: If you’re looking for special finishes, intricate designs, or specific color patterns, the cost will increase accordingly. For decorative finishes or complex designs, you could be looking at an additional $100 to $300 or more.
Keep in mind that these are generalized estimates and the actual cost could be higher or lower depending on your specific circumstances. It’s recommended to obtain quotes from professional painters in your area for a more accurate assessment.
How Much Does It Cost to Paint Metal Stair Rails?
Painting metal stair rails is a common way to update the look of your staircase and provide protection against rust and wear. The process involves cleaning, sanding, priming, and applying paint to the metal surface. The cost can vary based on factors such as the size and complexity of the railing, labor rates in your area, and the quality of materials used.
For a typical metal stair railing, the cost of painting can range from $200 to $500 or more. This includes the cost of paint, primer, sandpaper, brushes or spray equipment, and any labor charges if you hire a professional painter.
Painting metal stair rails involves several steps to ensure a smooth and lasting finish. Here’s a more detailed breakdown of the associated costs:
Materials Cost: The cost of materials, including paint, primer, sandpaper, brushes/rollers, and any other supplies, can range from $50 to $150 or more, depending on the quality of products chosen.
Labor Cost: Labor costs can vary widely based on your location and the complexity of the railing. Professional painters might charge an hourly rate or provide a fixed quote for the entire project. Labor costs could range from $100 to $300 or more.
What Is the Cost to Paint Wood Stair Railings?
The cost of painting wood stair railings can vary based on factors such as the length of the railing, the complexity of the design, the type of paint used, and whether you hire a professional or do it yourself.
The cost to paint wood stair railings can vary widely. If you decide to do it yourself, the expenses will primarily include the cost of paint, primer, sandpaper, brushes or rollers, and other supplies. The price of these materials can range from $50 to $150, depending on the quality and brand.
If you choose to hire a professional painter, the cost will include labor and materials. Professional painters may charge on an hourly basis or provide a fixed project quote. The average cost for hiring a professional painter to paint stair railings can range from $300 to $1000 or more, depending on the complexity of the railing design and the local labor rates.
What Are the Factors Affecting the Cost of Painting Stair Railing?
The cost of painting a stair railing can vary widely based on several factors. These factors include the size and length of the railing, the material it’s made from, the complexity of the design, the condition of the existing paint or finish, labor costs in your area, and whether you plan to do the painting yourself or hire professionals.
Materials: The material of the stair railing can greatly impact the cost. Wood, metal, and other materials have different requirements for preparation and painting, which can affect the cost of labor and materials. For instance, painting a wooden railing might require sanding and priming, while a metal railing might need additional steps like rust removal and primer application.
Labor: If you’re hiring professionals to paint the stair railing, labor costs will play a significant role. Labor costs can vary depending on the complexity of the design, the number of coats needed, and the time required for preparation and finishing. Some professionals charge per hour, while others provide a flat project-based fee.
Preparation: Proper preparation is crucial for a quality paint job. This might involve cleaning, sanding, filling in any holes or imperfections, and applying primer. If the existing paint is peeling or chipping, additional preparation steps will be necessary, potentially increasing the cost.
Paint and Supplies: The type and quality of paint you choose can also affect the cost. Higher quality paints may have a higher upfront cost but can provide better coverage, durability, and longevity. You’ll also need brushes, rollers, painter’s tape, drop cloths, and other supplies, which can contribute to the overall cost.
Location: Labor costs can vary significantly based on your location. Larger cities and areas with a higher cost of living generally have higher labor rates. It’s a good idea to get multiple quotes from local professionals to get an accurate estimate for your specific location.
DIY vs. Professional: Doing the painting yourself can save money on labor costs, but you should consider your own skill level and the time it will take to complete the project. If the railing is intricate or requires specialized techniques, hiring professionals might result in a better finish.
Additional Factors: Additional factors that can impact the cost include the number of coats needed, the colors you choose (dark colors might require more coats for full coverage), and any extra features like decorative elements or balusters.
DIY Vs. Professional Stair Railing Painting: Pros and Cons
Painting a stair railing is a task that can be approached in two ways: doing it yourself (DIY) or hiring a professional. Each approach has its own set of pros and cons, and the decision depends on factors such as your skill level, time availability, budget, and the quality of the results you’re aiming for. Let’s break down the pros and cons of both options:
DIY Stair Railing Painting:
Pros:
Cost Savings: Doing the painting yourself can save you money on labor costs, as you won’t need to hire a professional.
Flexibility: You have complete control over the process, from selecting the paint color to the technique used.
Personal Satisfaction: Successfully completing a DIY project can be very rewarding and give you a sense of accomplishment.
Customization: You can experiment with different finishes, colors, and styles to achieve the exact look you want.
Convenience: You can work on the project at your own pace, scheduling it around your availability.
Cons:
Skill and Experience: Painting stair railings can be more challenging than it seems, especially if you lack experience. Achieving a smooth and even finish can be difficult.
Time-Consuming: DIY projects often take longer, especially if you’re not experienced with painting techniques. It may disrupt your daily routine for an extended period.
Materials and Tools: You’ll need to invest in brushes, paint, drop cloths, painter’s tape, and other supplies, which can add to the overall cost.
Professional Stair Railing Painting:
Pros:
Expertise: Professionals have the training and experience to achieve high-quality, even finishes.
Time Savings: Professionals can complete the job more quickly and efficiently, minimizing disruption to your daily life.
Quality Results: A professional painter is more likely to achieve a flawless finish with smooth surfaces and even coats.
Safety: Professionals are trained to work at heights and on tricky surfaces safely.
Warranty or Guarantee: Many professional painters offer warranties or guarantees on their work, providing peace of mind.
Cons:
Cost: Hiring a professional painter will likely cost more than doing it yourself due to labor expenses.
Less Control: While you can provide input, you may have less creative control over the process and final result.
Cost Saving Tips while Painting Your Stair Railing
Let me provide you with a more focused list of cost-saving tips specifically for painting your stair railing:
Minimalistic Color Scheme: Opt for a color scheme that requires fewer coats of paint. Lighter colors often provide better coverage and might require fewer applications compared to darker shades.
Spot Painting: If your railing is in relatively good condition with only a few worn or chipped areas, consider spot painting those areas instead of repainting the entire railing.
DIY Sanding: Sanding the railing to create a smooth surface can improve paint adhesion. Doing this yourself instead of hiring someone can save on labor costs.
Reuse Supplies: If you’ve previously painted other parts of your home, reuse leftover paint and supplies rather than purchasing new ones. This can significantly cut down on expenses.
Group Tasks: If you have multiple painting projects, complete them together to avoid repeated setup costs for tools and supplies.
Skip Primer: If your existing paint is in good condition and you’re using a paint with built-in primer, you might be able to skip the primer step.
Economical Brushes and Rollers: While investing in quality tools is advisable, you can still find affordable brushes and rollers that offer decent performance without breaking the bank.
Bulk Purchase: If you have a large railing or multiple railings to paint, buying paint in bulk can often be more cost-effective per unit.
Paint Exchange or Sharing: Check with friends, family, or local community groups to see if anyone has leftover paint you can use or exchange. This can save you from buying a full can of paint.
DIY Tape: Instead of buying expensive painter’s tape, use regular masking tape in a narrower width. Be careful when removing it to avoid any damage to the painted surface.
Thin Coats and Layering: Apply thin coats of paint and build up the color gradually. This not only saves paint but also helps achieve a smoother finish.
Local Paint Sales: Keep an eye out for local paint store sales, clearance events, or promotions that can offer quality paint at a lower cost.
Loyalty Programs and Coupons: Sign up for loyality programs at home improvement stores or use coupons to get discounts on paint and painting supplies.
Virtual Color Testing: Use online color visualization tools to see how different paint colors would look on your railing. This can help you make an informed choice and avoid costly mistakes.
Remember, the most effective cost-saving approach often involves a combination of these tips tailored to your specific situation. While investing in quality materials and tools is important for a satisfactory result, there are certainly ways to minimize expenses while painting your stair railing.
Final Words
As you move forward with your project, take time to evaluate your specific needs and budget, and don’t hesitate to consult experts to ensure that your stair railing painting endeavor results in a beautiful and cost-effective transformation.
Yes, you can paint over gel coat. Before painting over gel coat, you should know about the fascinating world of gel coat and its versatility in the realm of painting. Gel coat is a durable and glossy material. People typically use this coat to protect the surfaces of fiberglass-reinforced composite materials.
However, with the desire for customization and artistic expression, the question arises: can you paint over gel coat? So, let’s dive into the process of painting over gel coat, the necessary steps, and potential considerations to elevate the appearance of gel coat surfaces.
Can You Paint Over Gel Coat?
Gel coat surfaces are often used in fiberglass-reinforced materials for its protective and glossy finish. Moreover, this coat can be customized with paint. To achieve a successful paint job, thorough surface preparation is crucial.
Cleaning, sanding, and using an appropriate primer are essential steps to ensure the paint adheres properly. Once prepped, you can unleash your creativity and add a personal touch with various paint types, colors, and designs. This will transform the gel coat surface to your desired look.
What Paint to Use Over Gel Coat?
When painting over gel coat, it’s essential to choose the right type of paint to ensure proper adhesion and a long-lasting finish. Let’s see some paint options you can consider to paint over gel coat.
- Marine-Grade Polyurethane Paint
Marine-grade polyurethane paint is a popular choice for painting over gel coat surfaces. It offers excellent durability, UV resistance, and superior protection against saltwater. It also makes it ideal for marine applications and outdoor use.
- Two-Part Epoxy Paint
Epoxy paints are known for their exceptional adhesion and chemical resistance. When applied correctly, they form a strong bond with the gel coat. Moreover, this paint provides a durable and long-lasting finish. Two-part epoxy paints require mixing a resin with a hardener before application.
- Acrylic Enamel Paint
Acrylic enamel paints are another option for painting over gel coat. They are easy to apply and dry to a hard, glossy finish. This paint may not be as durable as polyurethane or epoxy paints. However, they still offer good protection and are suitable for non-marine applications.
- Gel Coat-specific Paints
Some manufacturers produce paint specifically designed for painting over gel coat surfaces. These paints are formulated to adhere well to gel coat and provide a seamless finish.
How to Paint Over Gel Coat?
Painting over gel coat requires proper surface preparation and careful application. A careful application will help to achieve a smooth and durable finish. Here’s a step-by-step guide to help you through the process.
Step-1: Clean the Surface
Thoroughly clean the gel coat surface to remove any dirt, dust, grease, or wax. Use a mild detergent and water solution, and rinse it well. Allow the surface to dry fully before proceeding.
Step-2: Sand the Surface
Use fine-grit sandpaper (around 220-320 grit) to lightly sand the gel coat surface. The goal is to create a rough texture for better paint adhesion. Be gentle and avoid sanding too aggressively to prevent damaging the gel coat.
Step-3: Remove Sanding Residue
After sanding, wipe the surface with a clean and damp cloth to get rid of any sanding residue. Let it dry before moving on.
Step-4: Choose the Paint Type
Select the appropriate paint type based on your intended use and preferences. Marine-grade polyurethane paint, two-part epoxy paint, acrylic enamel paint, or gel coat-specific paint is common options.
Step-5: Apply Primer
Some paint types may require a primer for optimal adhesion. Check the paint manufacturer’s recommendations to determine if a primer is necessary. If needed, apply thin coats of primer and allow it to dry.
Step-6: Stir the Paint
If you’re using a two-part epoxy or gel coat-specific paint, thoroughly mix the components according to the instructions. Stir the paint well to ensure a consistent and homogenous mixture.
Step-7: Apply the Paint
Use a paintbrush or paint sprayer to put the paint over the gel coat surface. Start from one end and work your way systematically to ensure complete coverage. For best results, you should use multiple even layers than a single thick layer. Wait until every coat is properly dried before applying the new coat.
Step-8: Let the Paint Cure
Follow the paint manufacturer’s recommended curing time. This ensures the paint fully sets and provides a durable finish.
Can You Paint Directly Over Gelcoat?
Properly cleaning and sanding the gel coat surface is a must to ensure good paint adhesion. Once the gel coat is clean and lightly sanded to create a rough texture, you can apply the paint of your choice directly onto the gel coat.
However, some paint will require good adhesion. So, it’s essential to check the paint manufacturer’s guidelines to determine if a primer is necessary for the specific paint you’re using.
Can You Spray Paint Over Gel Coat?
Spray paint is one of the special types of paint. But you can apply it over gel coat. Before spray painting, you should clean the gel coat surface thoroughly. Then sanding the surface will make the texture rough and suitable for another paint.
However, spray painting provides a professional finish. Using a paint sprayer can be efficient and ideal for covering large gel coat surfaces or achieving a uniform coat. Ensure to choose paint well-suited with your sprayer. Properly ventilate the area and wear appropriate safety gear during the spray painting process.
How to Paint Over Gelcoat Fiberglass?
You can exert a gelcoat-specific paint designed explicitly for painting over gelcoat fiberglass surfaces. These paints are formulated to adhere well and provide a seamless finish. So, let’s see how to successfully paint over gelcoat fiberglass.
Step-1: Surface Preparation
Clean the gelcoat fiberglass thoroughly to eliminate any contaminants, dirt, or wax. Use a fiberglass cleaner or acetone for more stubborn residue. Rinse with water and let it dry entirely.
Step-2: Masking
Use painter’s tape and plastic sheeting to mask off any areas you don’t want to paint. For example, you can mask off hardware or nearby surfaces.
Step-3: Primer
Some gel coat-specific paints do not require a primer. But if recommended by the manufacturer, use a thin coat of compatible primer to enhance adhesion.
Step-4: Apply the Paint
Thoroughly stir the gelcoat-specific paint to ensure an even consistency. Use a high-quality paintbrush or paint sprayer to apply the gelcoat-specific paint uniformly over the surface. Work in small sections and maintain a consistent application.
Step-5: Multiple Coats
Apply multiple thin coats and allow each coat to dry according to the paint manufacturer’s instructions. Avoid applying thick coats, as they may lead to uneven drying and potential drips.
Step-6: Curing Time
Follow the paint’s manual for curing time. Allow the paint to dry and cure properly to achieve optimal durability.
Step-7: Sealant
For added protection, consider applying a clear gelcoat sealer or wax to preserve the painted surface and enhance its longevity.
Final Words
Painting over gel coat is a rewarding process that allows for personalization and protection of surfaces. Whether using marine-grade polyurethane, epoxy, acrylic enamel, or gelcoat-specific paints, the key lies in meticulous surface preparation and careful application.
By cleaning, sanding, and selecting the appropriate paint, one can achieve a durable finish. From enhancing the appearance of marine vessels to revitalizing fiberglass structures, painting over gelcoat fiberglass unlocks endless possibilities for creative expression.
Is your freshly painted car at risk from rain showers? We understand the excitement and emotions that come with giving your beloved vehicle a fresh coat of paint. After all, there’s nothing quite like the feeling of cruising around town in a pristine, eye-catching ride.

But as car enthusiasts ourselves, we know that unpredictable weather can put a damper on even the most thrilling experiences. That’s why we’re here to address your concerns and provide valuable insights into how rain might affect your newly painted car.
Stay with us as we share essential tips and precautions to ensure your car’s paint job remains flawless, rain or shine!
Will Rain Damage a Freshly Painted Car?
Rain can pose certain risks to a freshly painted car. While modern automotive paints are designed to withstand environmental conditions, heavy downpours or extended exposure to water can still lead to adverse consequences.
When a car’s paint is freshly applied, it needs time to fully cure. Different types of paints have varying drying and curing times, but usually, it takes a few weeks to reach its maximum hardness and resistance.
During this crucial curing period, rainwater can pose a risk to the paint’s integrity. Rainwater can introduce moisture to the freshly painted surface, which may interfere with the curing process. This interference can result in issues such as improper bonding, surface imperfections, or a compromised finish.
To ensure the best outcome for the freshly painted car, it is advisable to follow the manufacturer’s recommendations regarding curing time and avoid exposing the vehicle to rain or other moisture sources during this critical period.
A high-quality paint job is more likely to withstand rain and environmental elements better than a subpar one. Professional paint jobs with proper surface preparation, primer application, and clear coat layers tend to be more resilient.
Light rain is less likely to cause significant damage to fresh paint compared to heavy rain or hailstorms. Light rain usually won’t harm a well-dried, cured paint job, but more intense precipitation may pose a risk.
In summary, rain might not cause immediate damage to a freshly painted car, but it can affect the paint’s curing process, potentially leading to long-term issues if not handled properly. Proper attention to the curing process and protecting the vehicle from moisture during this time will help maintain the paint’s integrity and ensure a lasting, beautiful finish.
What Happens If It Rains on Fresh Paint?
If it rains on fresh paint, it can have several negative consequences depending on the type of paint, the stage of drying, and the intensity of the rain. Here’s what typically happens:
Dilution and Smearing: If the rain comes down shortly after the paint is applied, it can cause the paint to become diluted and may lead to streaks and smears on the surface. The rainwater mixes with the paint, causing it to lose its consistency and potentially spreading the color unevenly.
Blotching and Water Spots: Raindrops can create blotches and water spots on the freshly painted surface. As the rainwater evaporates, it may leave behind mineral deposits or other impurities that mar the smooth finish of the paint.
Uneven Drying: Rain can interfere with the drying process of the paint. The moisture from the rain can slow down the evaporation of solvents in the paint, leading to uneven drying and potential cracking or peeling of the paint film.
Color and Finish Issues: Water can affect the pigments and binders in the paint, causing color distortion and altering the paint’s finish. This may result in a patchy appearance and inconsistent sheen.
Loss of Adhesion: Rainwater can compromise the adhesion of the paint to the surface. This can lead to the paint peeling or flaking off over time, leaving the surface vulnerable to damage and requiring re-painting.
Extended Drying Time: If the rain is prolonged, the paint’s drying time will be significantly extended. In some cases, the paint may never fully dry, and the surface will remain tacky or sticky.
To prevent these issues, it’s essential to check the weather forecast before painting and choose a time when there’s little to no chance of rain. If rain is expected, it’s best to postpone the painting until the weather conditions are suitable. If it starts raining unexpectedly during the painting process, it’s crucial to protect the painted surface immediately by covering it with waterproof tarps or moving the painting indoors if possible.
How Rain can Damage Your Car’s Paint?
Rain can damage your car’s paint in several ways:
Acid Rain: Acid rain is a type of rain that contains higher-than-normal levels of acidic compounds like sulfuric and nitric acids. When acid rain falls on your car’s paint, it can react with the protective clear coat and paint layers, causing them to deteriorate. This leads to a loss of gloss and the appearance of dull spots on the surface.
Water Spots: Rainwater often contains impurities, minerals, and pollutants that can create water spots on your car’s paint. These water spots are essentially dried mineral deposits that can etch into the paint, leaving behind unsightly marks that can be difficult to remove.
Increased Humidity: Frequent exposure to rain and high humidity levels can create a moist environment around your car. This can promote the growth of mold, mildew, and algae, which can adhere to the paint surface and potentially cause long-term damage if not properly cleaned and maintained.
Rust Formation: Rainwater can seep into small scratches or chips in the paint, reaching the metal surface of your car. If left untreated, this can lead to rust formation, which can spread and corrode the metal, causing serious damage to your car’s body.
Fading and Oxidation: Continuous exposure to rain and UV rays can cause the paint’s pigments to break down, resulting in fading and oxidation of the paint. This not only affects the appearance but also reduces the overall protection of the paint against environmental factors.
How Do I Protect My Car Paint from Rain?
protecting your car paint from rain is essential to maintain its appearance and prevent potential damage. Here are some effective strategies to safeguard your car’s paint from rain:
Wax your car regularly: Applying a high-quality wax creates a protective barrier that repels water and prevents rainwater from directly coming into contact with the paint.
Use a paint sealant or ceramic coating: These products provide long-lasting protection against rainwater and other environmental elements, keeping your car’s paint shielded.
Park in covered areas: Whenever possible, park your car in a covered garage, carport, or under a canopy to shield it from direct exposure to rain.
Avoid parking under trees or power lines: Tree sap, bird droppings, and sap from power lines can mix with rainwater and damage your car’s paint. Park away from these potential hazards.
Dry your car after rain: After driving in the rain, dry your car thoroughly using a soft microfiber towel to prevent water spots and minimize the time rainwater has to react with contaminants on the paint surface.
Use a car cover: If you can’t park in a covered area, use a high-quality car cover designed to protect against rain and other weather elements.
How Can I Paint A Car While Raining?
Painting a car while it’s raining is not recommended and generally not a good idea due to several reasons. It’s challenging to achieve a high-quality paint job under such conditions, and you might end up with an unsatisfactory outcome. It’s best to wait for suitable weather conditions or find an indoor facility to ensure the best results for your car’s paint job.
However, if you find yourself in a situation where you still choose to proceed, here are some instructions to follow:
Prepare the Car Surface: Clean the car thoroughly to remove any dirt, grime, or contaminants. Dry the surface as much as possible before starting the painting process.
Choose Quick-Drying Paint: Opt for a quick-drying automotive paint that is designed to withstand adverse conditions, including high humidity and moisture.
Set Up Temporary Shelter: Assemble a temporary shelter or tent to protect the car from rain during the painting process. Make sure the shelter is sturdy and provides adequate coverage for the entire car.
Ventilation: Ensure proper ventilation inside the shelter to prevent a buildup of fumes and to allow the paint to dry effectively.
Monitor Weather Conditions: Continuously monitor the weather forecast during the painting process. If the rain intensifies or there’s a risk of heavy rain, stop immediately and move the car to a dry location.
Paint in Thin Coats: Apply thin coats of paint to minimize the risk of the paint running or dripping due to rainwater.
Dry Between Coats: Allow each coat of paint to dry thoroughly before applying the next one. This step will help prevent water from getting trapped between the layers.
Keep the Car Covered: After each coat, cover the car again to protect it from rain while waiting for it to dry.
Be Patient: Painting a car in the rain will likely take longer than painting under ideal conditions. Be patient and allow sufficient time for the paint to dry between coats.
Post-Painting Care: Once you’ve completed the paint job, keep the car in a dry environment for an extended period to allow the paint to cure properly.
Final Words
While rain can potentially damage a freshly painted car, the extent of the damage largely depends on factors such as the paint’s curing state, the intensity of the rain, and the protective measures taken. Being mindful of these factors and taking proactive steps to shield the paintwork will ensure that your newly painted car remains in pristine condition for years to come.
You can paint over Plasti Dip. Plasti Dip is one of the popular rubberized coatings. This coating has gained widespread recognition for its versatility and ease of use. Generally, it is often applied to vehicles and various objects for added protection and unique finishes.
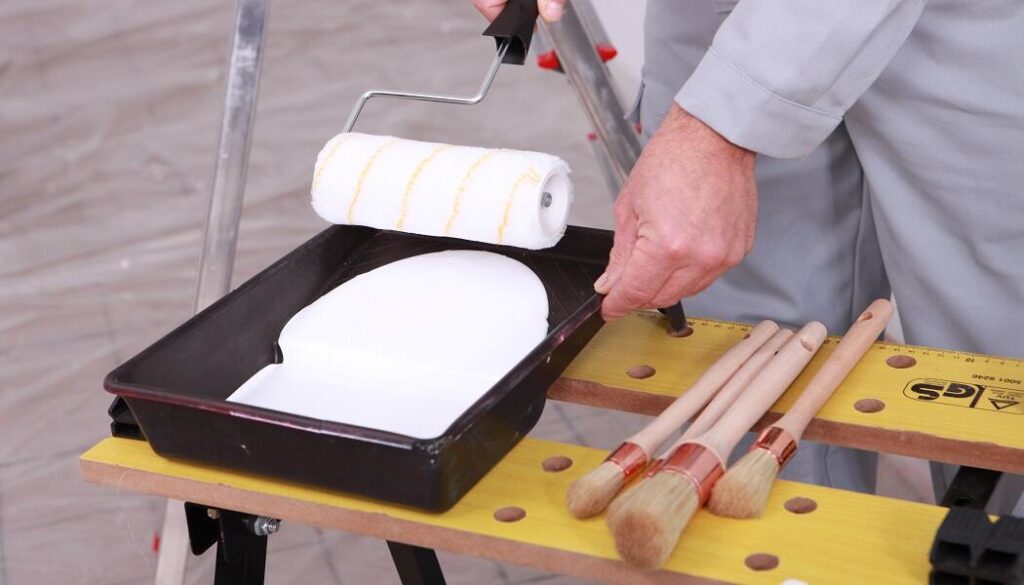
However, while using paint over Plasti Dip, you might think about the adherence of these two coatings. But following some essential steps, you can paint over Plasti Dip. Whether you’re a DIY enthusiast or an automotive aficionado seeking a change, let’s see the combination of Plasti Dip and paint harmoniously.
Can You Paint Over Plasti Dip?
Plasti Dip is a flexible, rubber-like coating that adheres well to various surfaces. This coating is an excellent choice for enhancing the appearance and protection of objects, particularly vehicles. However, there may come a time when you wish to change the color or add a different finish to your Plasti Dip-coated item.
Since Plasti Dip is one type of coating, people think paint will not stick to the surface. But technically, you can make the Plasti Dip surface suitable for another type of coating. But preparing the surface is the crucial part.
While painting over Plasti Dip, you need to follow some specific steps. For example, cleaning the surface before applying paint is very essential. For cleaning, you can use a regular soap. Moreover, sanding the surface lightly is also necessary.
Before applying paint, it’s essential to test a small inconspicuous area to check for compatibility and adhesion. Choose paint suitable for the surface you are working on, and make sure it is compatible with Plasti Dip.
Once the compatibility is confirmed, apply the paint in thin and even coats. Moreover, allow each coat to dry before applying the next. So, painting over Plasti Dip is possible if you follow the suitable process.
Can You Spray Over Plasti Dip?
Plasti Dip is compatible with various types of paints. Spray paint is also one of them. You can use spray paint to achieve different colors or finishes on Plasti Dip-coated surfaces. Before spraying, make sure the Plasti Dip surface is clean and free from contaminants.
Moreover, lightly sanding the surface can improve paint adhesion. You can test a small area first for compatibility. After confirmation, apply the spray paint in thin and even coats. Dry the surface for a sufficient time before adding more layers. This process will enable you to create a new and customized look on your Plasti Dip-coated item.
How Do You Paint Plasti Dip?
If you want to change the color of a Plasti dip coating or add a different finish, you can paint over the Plasti dip. Here you can see a step-by-step guide.
Step-1: Clean the Surface
Ensure the Plasti Dip surface is clean and free from dirt, grease, and contaminants. Wash it with soap and water, and let it dry completely before proceeding.
Step-2: Sand the Surface
Use fine-grit sandpaper (around 400-600 grit) to lightly sand the Plasti Dip surface. This will create a rough texture and allow the new paint to adhere better. Be gentle to avoid damaging the Plasti Dip layer.
Step-3: Clean Again
After sanding, clean the surface again to remove any sanding dust or debris.
Step-4: Use Primer
If you want extra adhesion and a smoother finish, you can apply a primer designed for use on Plasti Dip. You should follow the manufacturer’s instructions for proper application and drying times.
Step-5: Test Spray
Before applying the paint to the entire surface, do a test spray on a small, inconspicuous area. This will ensure compatibility and adhesion with the Plasti Dip layer.
Step-6: Spray Paint
Hold the spray paint can about 6-8 inches away from the surface and apply light, even coats. Avoid heavy application, as it can cause drips and affect the finish. Allow the paint to dry for the recommended time between coats.
Step-7: Multiple Coats
Apply 2-3 coats of paint for an even and consistent finish. Follow the drying time specified on the paint can between each coat.
Step-8: Clear Coat
If you desire additional protection and shine, apply a clear coat designed for use with the type of paint you’ve chosen. Let it dry according to the manufacturer’s instructions.
Step-9: Cure Completely
Allow the painted surface to cure for the recommended time before exposing it to any harsh conditions or washing.
Step-10: Maintain Proper Care
Once the paint is fully cured, treat the surface as you would any other painted surface. Avoid using abrasive cleaners or harsh chemicals to preserve the finish.
What Paint Can You Use Over Plasti Dip?
When painting over Plasti Dip, it’s essential to use the right type of paint. Otherwise, the finish will not be durable and the surface will not get proper adhesion. Let’s see different types of paints that you can use over Plasti Dip.
- Acrylic Enamel Paint
Acrylic enamel paint is a popular choice for painting over Plasti Dip. It offers good adhesion and durability, and it’s easy to apply.
- Automotive Paint
Automotive paint, including basecoat and clear coat, can be used over Plasti Dip. Ensure the paint is designed for the specific surface you’re painting, such as metal, plastic, or fiberglass.
- Spray Paint
Various types of spray paint can be used over Plasti Dip. Look for spray paint that is suitable for the material you’re painting and offers good adhesion to Plasti Dip.
- Latex Paint
Latex paint can be used on certain Plasti Dip surfaces. Particularly, if you’re painting indoor items or surfaces that won’t be exposed to harsh weather conditions. However, it may not be as durable as other types of paint.
- Acrylic Paint
Acrylic paint can be used on smaller Plasti Dip surfaces or art projects. It is essential to choose a paint that adheres well to the rubbery texture of Plasti Dip.
Does Paint Hold onto Plasti Dip?
Yes, paint can hold onto Plasti Dip if the surface is properly prepared. It is essential to clean the Plasti Dip surface thoroughly. Moreover, sanding is necessary to create a rough texture for better adhesion.
Using compatible paints like acrylic enamel, automotive paint, or vinyl dye will ensure that the paint bonds effectively with the Plasti Dip. Also, it will result in a durable and long-lasting finish. Doing a test spray or patch test beforehand is recommended to check the compatibility and adhesion of the paint on the Plasti Dip surface.
Is Painted Plasti Dip Permanent?
Painted Plasti Dip is not permanent. Plasti Dip itself can be considered a semi-permanent coating. But the painted layer on top can be removed or peeled off if desired.
This feature makes it a flexible option for those who want to change colors without damaging the underlying surface. However, proper application and curing can provide a durable and long-lasting painted Plasti Dip finish until you decide to remove it.
Final Words
Plasti dip is one of the special types of coating. Generally, this coating is not permanent. That’s why people often get confused about whether they can paint over Plasi Dip or not. Well, painting over Plasti Dip is absolutely okay.
If you want to paint over this flexible coating, you need to follow some basic steps. If you can prepare the Plasi Dip surface well and allow a sufficient curing time, the final finish will be excellent.