To get rid of tiger strips in paint, sand the affected area and repaint using a roller or brush, making sure to feather the edges for a smooth blend.
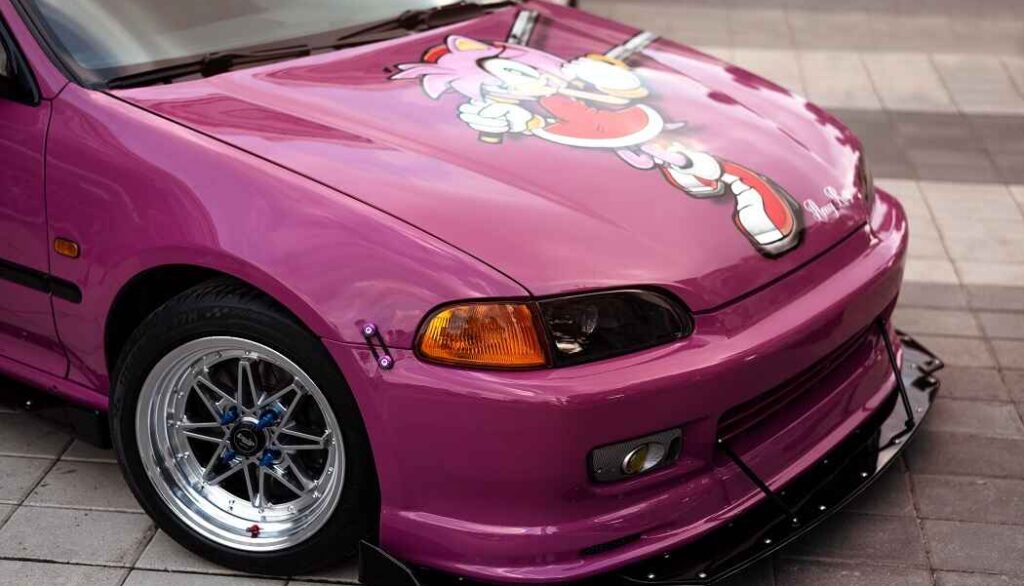
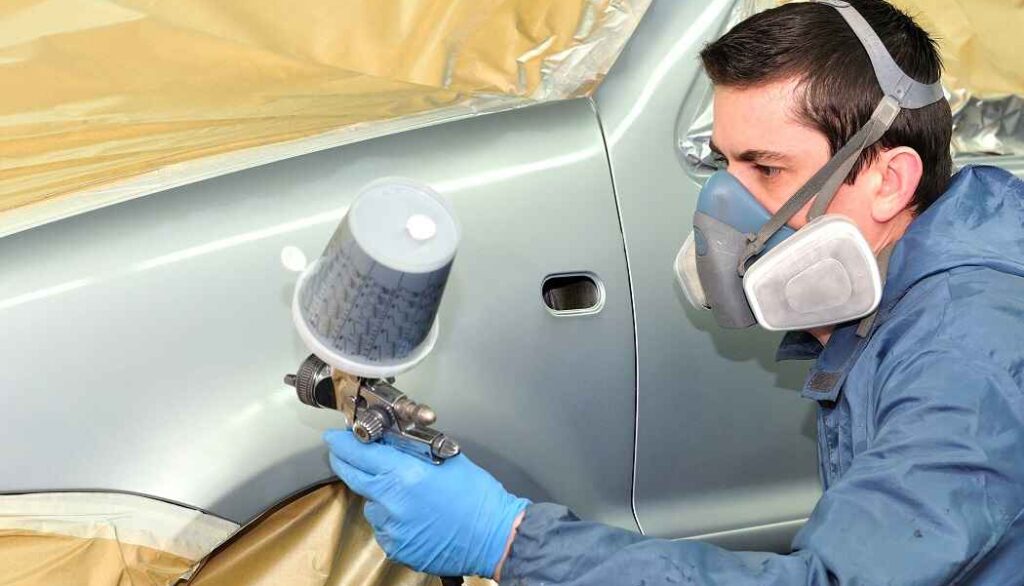
Photo by Vitali Adutskevich
Have you ever encountered the dreaded issue of tiger stripes marring the perfection of your freshly painted vehicles? Don’t worry, we’ve got you covered! In this comprehensive guide, we’ll unveil the secrets to banishing those unsightly streaks and achieving a flawlessly smooth paint finish.
Ready to learn the tricks of the trade? Let’s delve into the world of painting perfection!
What Tiger Stripes in Paint are?
Tiger stripes refer to a specific type of visual defect that can occur on painted surfaces, particularly on automobiles. They are characterized by thin, parallel lines or streaks that resemble the stripes found on a tiger’s coat. These stripes often appear on the horizontal surfaces of a vehicle, such as the hood, roof, or trunk.
It can vary in length, width, and intensity, but they generally follow the contours of the surface and have a consistent spacing between them. The lines are typically lighter or darker than the surrounding paint, creating a noticeable contrast.
Ignoring or neglecting tiger stripes can have various risks and drawbacks. The presence of stripes can make the paintwork look uneven and poorly maintained. It negatively impacts the overall appearance and potentially reduces the value of the object.
Moreover, ignoring tiger stripes can be indicative of a lack of attention to detail in the overall maintenance of the painted surface. It might lead to further problems down the line. Therefore, it is advisable to promptly address and rectify any tiger stripes to maintain the quality and aesthetics of the painted surface.
What Causes Tiger Stripes in Paint?
Tiger stripes are typically caused by a combination of factors related to the application of the paint and the characteristics of the surface being painted. Here are some of the common causes of tiger stripes in paint:
Uneven surface preparation: If the surface being painted is not properly prepared, such as having uneven patches, rough spots, or areas with different levels of smoothness, it can contribute to the formation of tiger stripes. When paint is applied over such surfaces, it may not adhere uniformly. It leads to variations in the thickness of the paint film and results in visible stripes.
Inconsistent application technique: Tiger stripes can also occur if the paint is applied inconsistently or with an uneven technique. Factors such as variations in pressure, speed, or angle during the application process can result in the paint being laid down in an uneven manner. It leads to streaks or stripes.
Improper mixing or thinning of paint: Paint is typically mixed or thinned before application to achieve the desired consistency. If the paint is not mixed thoroughly or is improperly thinned, it can lead to variations in pigment dispersion or viscosity. These inconsistencies can result in visible differences in color or glossiness, contributing to the appearance of tiger stripes.
Drying conditions: The environment in which the paint dries can have an impact on the formation of tiger stripes. Factors such as temperature, humidity, and air circulation can affect the drying process. Uneven drying conditions can cause the paint to dry at different rates, resulting in variations in sheen or texture and leading to the formation of stripes.
Low-quality paint or tools: The quality of the paint and painting tools used can also contribute to the formation of tiger stripes. Inferior quality paint may have inconsistent pigmentation or flow characteristics, making it more prone to streaking. Similarly, using low-quality brushes or rollers with uneven fibers or poor absorption properties can result in an uneven application and the appearance of stripes.
Overlapping paint edges: When applying multiple coats of paint, it is important to maintain consistent overlap patterns to ensure a smooth and even finish. If the edges of the paint overlap inconsistently or are not feathered properly, it can create visible lines or stripes where the paint layers meet.
How to Get Rid of Tiger Stripes in Paint?
First, carefully examine the affected area to determine the extent of the tiger stripes. Identify whether the issue is localized or spread across a larger surface. This assessment will help you plan the appropriate course of action. Then you can try the below tips to get rid of tiger strips-
Buffing and Polishing:
Start by washing the vehicle thoroughly to remove any dirt or debris.
Use a high-quality automotive polish and a soft microfiber cloth to gently buff the affected area in circular motions.
Continue buffing until the tiger stripes are less noticeable or completely removed.
Follow up with a polishing compound to restore shine and smoothness to the paint surface.
Waxing:
After buffing and polishing, apply a coat of high-quality automotive wax to protect the paint and enhance its appearance.
Use a clean, soft applicator pad or cloth to evenly spread the wax in a thin layer.
Allow the wax to dry as per the manufacturer’s instructions.
Once dry, use a clean microfiber cloth to gently buff the waxed surface in circular motions, revealing a smooth, glossy finish.
Repainting:
If the tiger stripes on your paint are deep or extensive and cannot be removed through buffing, polishing, or waxing, repainting may be necessary.
Start by thoroughly cleaning and preparing the surface, removing any loose paint or contaminants.
Apply a primer to ensure proper adhesion of the new paint.
Choose a high-quality automotive paint that matches the original color.
Apply the paint in thin and uniform layers. Allow sufficient drying time between each coat before proceeding to the next one.
Finish with a clear coat to provide protection and a glossy finish.
If the tiger stripes still persist and you’re unable to resolve the issue yourself, consider taking your vehicle to a professional detailer. They have the expertise and specialized tools to tackle paint imperfections, such as tiger stripes, and restore the finish to its original condition.
What Causes Tiger Stripes in Spray Paint?
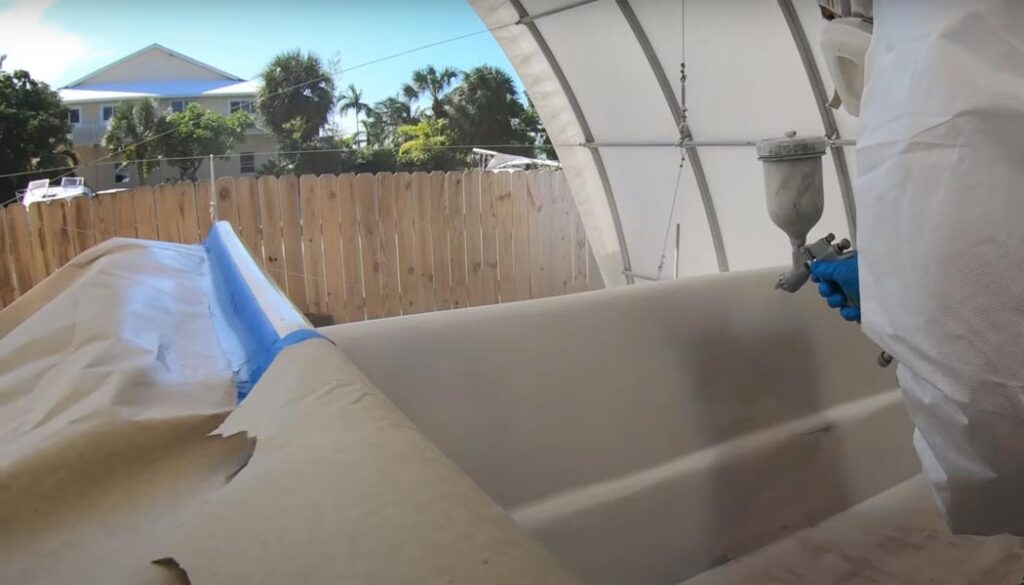
Tiger stripes in spray paint, also known as “striping” or “banding,” can occur due to various factors in the painting process.
It can result from an inconsistent or improper spraying technique. If the spray gun is held too close or too far from the surface, or if the painter moves at an inconsistent speed, it can lead to uneven paint distribution and create stripes.
Spray guns have adjustable controls for pressure and nozzle size, which determine the paint flow and pattern. If the pressure is too high or the nozzle is not properly adjusted, it can cause uneven paint application, resulting in tiger stripes. Moreover, a clogged or damaged nozzle can disrupt the even flow of paint, leading to irregular patterns and stripes.
It can also occur due to environmental factors (temperature, humidity, airflow), inadequate surface preparation, poor-quality paint or incorrect mixing, and overlapping coats without sufficient drying time between layers.
How to Avoid Tiger Stripes When Spray Painting?
Follow the bellow tips to increase your chances of achieving a flawless spray paint finish without the presence of tiger stripes-
Optimal spraying distance: To achieve optimal results without creating uneven patterns, it is recommended to maintain a steady gap between the spray gun and the painted surface. Usually, holding the gun at a distance of approximately 6 to 8 inches will ensure sufficient coverage while avoiding the formation of streaks.
Smooth and even strokes: Move the spray gun in smooth, even strokes across the surface. Avoid starting or stopping abruptly, as it can lead to uneven paint distribution and create stripes.
Proper pressure and nozzle adjustment: Adjust the spray gun’s pressure and nozzle settings according to the manufacturer’s recommendations. This ensures an appropriate paint flow and pattern, reducing the likelihood of tiger stripes.
Thin and multiple coats: Apply thin coats of paint rather than thick ones. Multiple thin coats allow for better control and even coverage, minimizing the chances of tiger stripes.
Allow proper drying time: Allow each coat of paint to dry completely before applying the next layer. Rushing the process can cause solvents to mix, resulting in uneven drying and potential tiger stripes.
Maintain a clean environment: Paint in a clean and well-ventilated area to avoid dust particles or other contaminants settling on the surface. A clean environment helps achieve a smoother finish without unwanted stripes.
Test on a sample surface: Before starting the actual painting project, it’s a good practice to test the spray technique on a sample surface. This allows you to identify any potential issues, adjust settings, and practice achieving an even application.
You Can Check This Video:
Will Clear Coat Hide Tiger Stripes?
Clear coat will not hide tiger stripes.
The clear coat is a transparent layer applied over the base coat to provide gloss and protection, but it does not have the ability to conceal or eliminate underlying imperfections. Proper surface preparation and even application of the base coat are essential to minimize or avoid tiger stripes.
Can You Sand Out Tiger Stripes?
Yes, it is possible to sand out tiger stripes in spray paint. Sanding helps to smooth out the surface and reduce the visibility of the stripes.
Using fine-grit sandpaper or a sanding block, gently sand the affected area, focusing on the stripes. Be cautious not to sand too aggressively, as it can damage the underlying layers. After sanding, clean the area thoroughly to remove any dust or debris.
Will Wet Sanding Remove Tiger Stripes?
Yes, wet sanding can help remove tiger stripes.
Wet sanding involves using water and sandpaper to gently sand the surface, which helps to level out the imperfections and remove the tiger stripes. By carefully sanding the affected areas, you can achieve a smoother and more uniform finish. Remember to use the appropriate grit sandpaper and follow proper techniques to avoid damaging the underlying surface.
Final Words
With the right preparation, proper technique, and persistence, you can overcome tiger stripes and achieve a professional-looking paint job that will leave your walls smooth, vibrant, and free from any unwanted streaks. Happy painting!
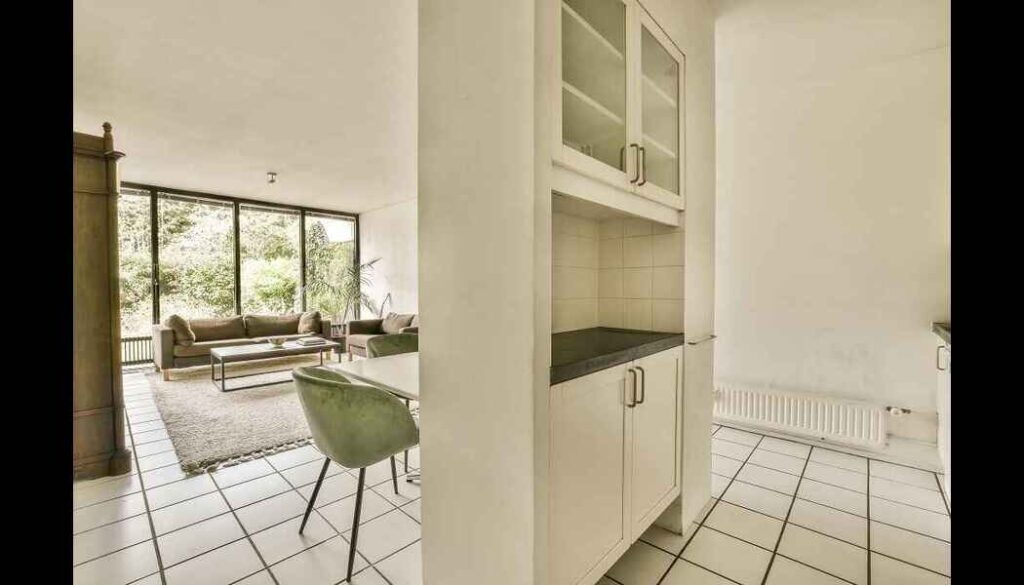
Are you ready to unlock the secret to adding a pop of personality and style to your dining room? Wondering, “What color should I paint my china cabinet?”
Well, get ready to embark on a colorful adventure that will transform your space and leave your guests in awe. Whether you’re a fan of vibrant hues or crave the elegance of muted tones, we’ve got you covered. So, buckle up, and let’s dive into the captivating world of china cabinet makeovers!
Can a China Cabinet Be Painted?
Yes, a china cabinet can be painted. Painting a china cabinet can be a great way to update its appearance and give it a fresh new look. It can also be a cost-effective alternative to buying a new cabinet.
Whether your china cabinet is made of wood, metal, or any other material, it can generally be painted as long as the surface is properly prepared. The success of the painting project will depend on proper surface preparation, quality of paint used, and the technique employed during the painting process.
Before painting, clean the surface thoroughly and remove any dirt, grease, or old paint. This can be done by sanding or using a suitable cleaning agent. It is also essential to prime the surface before applying the paint to ensure better adhesion and durability of the new paint.
When selecting paint, consider the material of the cabinet and the desired finish. There are various types of paint available, such as latex, oil-based, or chalk paint, each with its own characteristics. Choosing a paint that is specifically designed for the type of material and finish you want will help achieve the best results.
What Color Should I Paint My China Cabinet?
When choosing a color for your china cabinet, consider the overall aesthetic of your space, your personal preferences, and the existing color scheme in the room. While I cannot see your specific space or know your exact tastes, I can offer some suggestions based on popular color choices and their potential effects.
Shelves Blue: Shelves Blue is a captivating hue for your china cabinet. With its vibrant energy, coastal vibes, and versatile style, it adds personality to your space. Complementary pairings with whites and metallic accents enhance its appeal, making it a unique and expressive choice.
Classic White: White is a timeless and versatile color choice for a china cabinet. It can create a clean and sophisticated look. It allows the focus to be on the items displayed inside the cabinet rather than the cabinet itself. White also tends to blend well with various color schemes, making it a safe and elegant option.
Soft Gray: Gray is a neutral color that adds a touch of sophistication and modernity to any space. It pairs well with a variety of other colors and can create a subtle, understated look. Soft gray can be an excellent choice if you want your china cabinet to have a contemporary feel while maintaining a sense of elegance.
Bold Blue: If you’re looking to make a statement or add a pop of color, consider painting your china cabinet in a bold blue shade. Blue is known for its calming and soothing effect. It can add character and personality to your space. Depending on your style and the room’s color scheme, you can choose from vibrant royal blues, deep navy tones, or even softer pastel blues.
Rich Espresso: If you prefer a darker and more traditional look, consider painting in a rich espresso color. This deep brown shade adds warmth and depth to the room while exuding a sense of elegance and sophistication. It can complement various wood tones and create a classic and timeless appearance.
Refreshing Mint Green: For a fresh and cheerful look, mint green can be a great choice. It brings a sense of tranquility and can brighten up the space. Mint green works well in both vintage and contemporary settings and can add a touch of playfulness to your china cabinet.
Consider creating a mood board or gathering samples of different colors to see how they work with the rest of your décor and furniture. Or you can consult with an interior designer or seek inspiration from home décor magazines and websites to help you make a confident decision.
What Color Looks Best on China Cabinets?
While there isn’t a universally agreed-upon “best” color for china cabinets, one color that often complements China cabinets and enhances their visual appeal is white.
White is a versatile and timeless color that can create a sense of elegance, and a classic look that stands the test of time. It exudes purity, cleanliness, and sophistication that make it an excellent choice to showcase your china and other decorative items. The neutral nature of white allows the cabinet to seamlessly blend with various interior design styles, whether traditional or modern.
The clean and bright background of a white cabinet enhances the displayed items. It creates a striking contrast and draws attention to their intricate details and vibrant colors. It also provides a visually pleasing backdrop that allows your china and other items to shine.
Furthermore, white has the ability to create an illusion of space, making smaller rooms appear more open and airy. It also pairs well with different colors and materials, allowing for cohesive and visually appealing compositions.
How to Choose the Right Color for China Cabinet?
Choosing the right color for a China cabinet can greatly enhance the overall aesthetic appeal of your space. Here are some tips to consider when selecting a color for your China cabinet:
Room Style and Décor: Consider the existing style and décor of the room where the China cabinet will be placed. The color of the cabinet should complement the overall design scheme and blend harmoniously with the other furniture and accessories in the room.
Cabinet Material: Take into account the material of the China cabinet. Different materials, such as wood, metal, or glass, can have specific color considerations. For example, wooden cabinets can be stained or painted in various colors, while metal or glass cabinets may have limited color options.
Focal Point or Blend-in: Decide whether you want the China cabinet to be a focal point in the room or blend in with the surroundings. If you want it to stand out, opt for a color that contrasts with the wall color or surrounding furniture. For a more subtle look, choose a color that complements the existing color palette.
Light and Space: Consider the lighting conditions and available space in the room. Lighter colors have the ability to create an illusion of a larger and brighter space in a small room, whereas darker colors can add depth and evoke a cozy atmosphere. Take into account the natural light sources and artificial lighting in the room to determine the impact of color.
Personal Preferences: Your personal taste and preferences matter. Choose a color that resonates with your style and brings you joy. You can opt for classic neutrals like white, cream, or black, or explore bolder hues that reflect your personality.
Consider the China Collection: Think about the colors and patterns of the china or glassware that will be displayed in the cabinet. You can choose a cabinet color that complements or contrasts with the items, creating a visually appealing display.
Timelessness: If you’re looking for a color that will stand the test of time, consider neutral or classic shades. These colors are less likely to go out of style, and you can easily update the room’s look by changing the accessories or surrounding elements.
Test and Samples: Before committing to a color, obtain paint or stain samples and test them on a small area of the cabinet or on a similar material to see how they look in the room’s lighting conditions. This will help you visualize the final result and make an informed decision.
Use these tips as a starting point, and trust your instincts to find the perfect color for your China cabinet.
How to Paint a China Cabinet?
To paint a china cabinet, follow these general steps:
Preparation:
Remove all items from the cabinet and set them aside.
Clean the cabinet thoroughly to remove any dirt, grease, or residue.
If there are any hardware or accessories (such as knobs or handles), remove them.
Sanding:
Lightly sand the cabinet’s surfaces with fine-grit sandpaper. This step helps create a smooth surface and promotes better paint adhesion.
After sanding, use a clean, damp cloth to wipe away any lingering dust.
Priming:
Apply a coat of primer to the entire cabinet, including the doors, sides, and interior. Use a brush or roller for larger areas and a small brush for detailed parts.
Let the primer dry completely according to the manufacturer’s instructions.
Painting:
Choose your desired paint color and type (latex, oil-based, etc.).
Apply the first coat of paint evenly over the primed surface, using smooth brush strokes or a roller.
Allow the first coat to dry completely before applying subsequent coats. Depending on the paint and desired coverage, you may need to apply multiple coats.
Finishing touches:
Once the final coat is dry, inspect the cabinet for any uneven spots or drips. Sand them lightly if necessary.
Reattach any hardware or accessories that were removed earlier, or replace them with new ones if desired.
Remember to consult the specific instructions provided by the paint and primer manufacturers for drying times and application techniques.
Check this Video:
You can also check this:
Conclusion
The decision of what color to paint your China cabinet ultimately rests on your personal taste, the overall aesthetic of your space, and the desired effect you wish to achieve. Throughout our discussion, we have explored various factors that can influence this decision, such as the style of your home, the existing color palette, and your individual preferences.
So go ahead, choose the color that resonates with you, and enjoy the process of transforming your China cabinet into a stunning focal point that brings delight to both you and your guests.
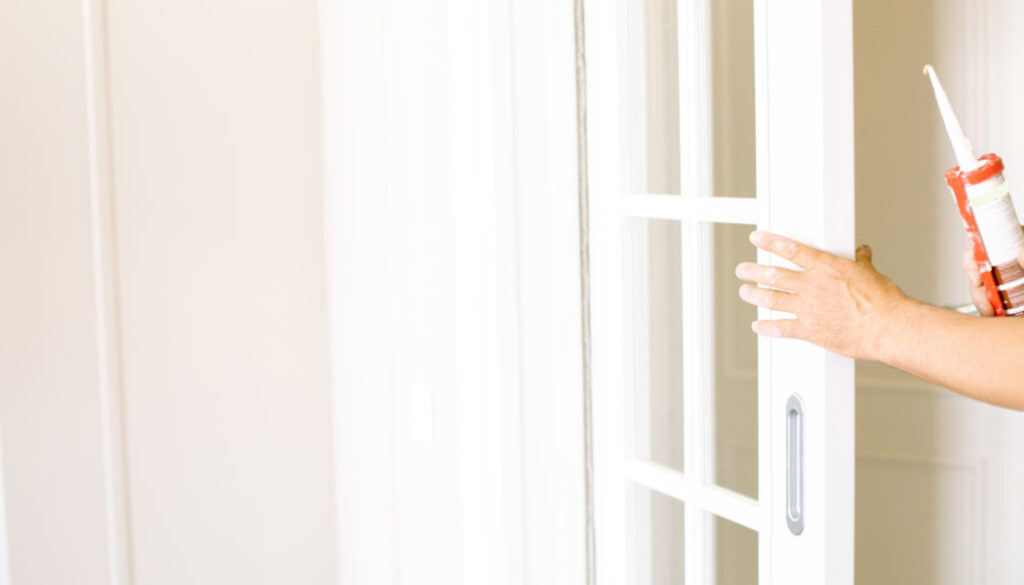
No, wax and grease remover is specifically designed to clean surfaces and remove contaminants without damaging the paint.
By understanding the mechanics behind these removers and following the right practices, you can confidently maintain your vehicle’s pristine finish without compromising its integrity.
Photo by La Miko (pexels.com)
So, unravel the truth about wax and grease remover’s impact on paint!
How Wax And Grease Remover Works?
Wax and grease removers are products designed to remove wax, grease, oil, and other contaminants from surfaces. It is primarily used in the automotive and paint industries. These removers work through a combination of solvents and cleaning agents that break down and dissolve the unwanted substances.
The solvents used in wax and grease removers are typically strong organic compounds such as acetone, toluene, or mineral spirits. They have a high affinity for oils and waxes, making them effective at dissolving and loosening these substances from the surface.
When applied to a contaminated surface, this remover penetrates the layers of wax, grease, or oil. The solvents in the remover interact with the molecules of the contaminants, causing them to break apart and become suspended in the liquid. This process is known as solvation.
The cleaning agents in the remover aid in lifting and suspending the dissolved contaminants. It makes them easier to remove. These agents can include surfactants or detergents that help to emulsify the oils and greases. It allows them to mix with the remover and be wiped away.
Will Wax and Grease Remover Damage Paint?
When used properly, Wax and grease removers should not damage paint.Always follow the manufacturer’s instructions and use the product as directed.
Wax and grease removers are formulated with solvents that can dissolve and remove stubborn residues without harming the underlying paint. They are commonly used in automotive detailing, painting, and other industries where clean surfaces are essential for proper adhesion and finishing.
Leaving the remover on the surface for an extended period may have adverse effects on the paint. Or if used excessively or applied too forcefully, they could potentially harm. To minimize the risk of damage, it’s advisable to use a lint-free cloth or sponge to apply the wax and grease remover gently. Avoid excessive rubbing or scrubbing, as this could potentially abrade the paint surface.
Moreover, some removers may contain strong chemicals that could potentially damage certain types of paint or finishes. Apart from this, different paint types and finishes may have different sensitivities. Therefore, it’s always a good idea to test the wax and grease remover on a small, inconspicuous area of the paintwork first to ensure compatibility and prevent any unexpected reactions.
Can You Use Wax and Grease Remover on Paint Safely?
Absolutely! Wax and grease remover is designed to be a safe and effective product for removing unwanted substances from painted surfaces.
When applied correctly, it helps eliminate contaminants without causing any harm to the paint. The formulation of wax and grease removers ensures that they work gently yet effectively, dissolving and lifting away the undesirable substances while leaving the paint intact.
By utilizing a wax and grease remover, you can maintain the pristine appearance of your paintwork, restoring its original shine and luster. The product’s composition is specifically engineered to minimize any potential risks or adverse effects on the paint, providing a reliable solution for removing stubborn residues.
Rest assured, when used according to the instructions, wax and grease removers offer a safe and reliable method for keeping your painted surfaces clean and free from unwanted substances.
How to Use Wax and Grease Remover on Paint?
Using a wax and grease remover is an important step in preparing a surface for painting, as it helps to remove any residual contaminants that can interfere with paint adhesion. Here’s a step-by-step guide on how to use wax and grease remover effectively:
Gather the necessary materials: You will need-
a wax and grease remover product
lint-free cloths or towels
rubber gloves, and safety goggles
Ensure you have adequate ventilation in the area where you’ll be working.
Prep the surface: Begin by thoroughly cleaning the surface you intend to paint. Remove any loose dirt, dust, or debris using a mild detergent or soap and water. Rinse the area and allow it to dry completely before proceeding.
Put on protective gear: Wear rubber gloves and safety goggles to protect your skin and eyes from the chemicals present in the wax and grease remover.
Test in an inconspicuous area: Before applying the wax and grease remover to the entire surface, it’s wise to test it in a small, inconspicuous area to ensure it doesn’t damage the paint or finish. Choose a hidden spot or an area that won’t be easily noticeable.
Apply the wax and grease remover: Dip a clean, lint-free cloth or towel into the wax and grease remover solution. Saturate the cloth without soaking it excessively. Start applying the solution to the surface in a small, manageable section.
Wipe the surface: Using the saturated cloth, gently wipe the surface in a circular motion. Ensure that you cover the entire area thoroughly.
Use fresh clothes as needed: As you work, you may need to switch to clean, fresh cloths or towels if the one you’re using becomes saturated with contaminants. This helps prevent transferring the dissolved contaminants back onto the surface.
Repeat if necessary: If the surface is heavily contaminated, you may need to repeat the process to ensure all the wax and grease are removed. Remember to use fresh cloths and apply the wax and grease remover solution as needed.
Allow drying time: Once you have finished cleaning the surface, allow it to air dry completely. Avoid touching the surface or introducing any new contaminants during the drying process.
Inspect the surface: After the surface is dry, inspect it for any remaining contaminants. If you notice any stubborn areas or residue, repeat the process in those specific areas until the surface is completely clean.
Proceed with painting: Once you are satisfied with the cleanliness of the surface, you can proceed with your painting project according to the manufacturer’s instructions for the paint you are using.
Does Wax and Grease Remover Remove Paint?
Yes, wax and grease removers can effectively remove paint. They work by utilizing solvents that dissolve contaminants on the surface. These solvents break down the paint’s adhesion to the substrate, allowing it to be wiped away.
The active ingredients in wax and grease removers typically include strong organic solvents such as acetone, methyl ethyl ketone (MEK), or toluene. But their effectiveness in removing paint may vary depending on the type and condition of the paint as well as the surface material.
Does Wax and Grease Remover Leave Residue?
No, wax and grease remover is specifically designed to leave little to no residue. It is formulated to effectively remove contaminants from surfaces without leaving behind any noticeable residue.
Thoroughly wipe the surface after using the remover to ensure complete removal of any remaining residue. This will help ensure a clean and residue-free surface for further treatments or applications.
Conclusion
While it’s essential to exercise care when using wax and grease removers, they can be utilized effectively without causing damage to your paint. Following the manufacturer’s instructions, conducting patch tests, and using gentle techniques will help ensure a successful and safe paint-cleaning process. By taking these precautions, you can enjoy a beautifully maintained vehicle while safeguarding its paintwork for years to come.
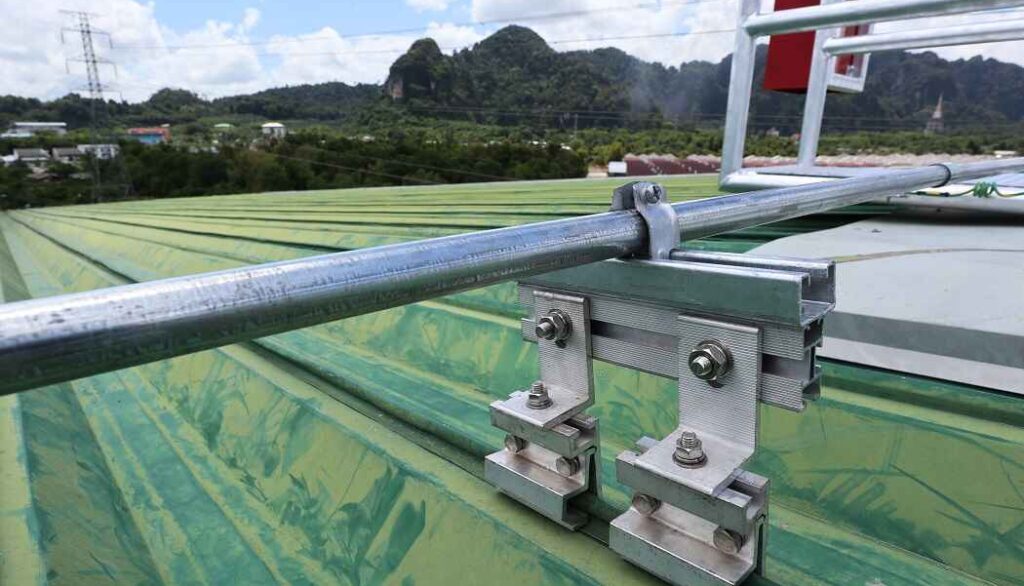
Yes, painting EMT conduit is permissible as long as you adhere to NEC regulations and take precautions to maintain grounding continuity. Proper surface preparation, the choice of appropriate paint, and careful installation are essential to ensure the safety and longevity of the electrical system.
So, are you ready to add a splash of color to your electrical installations? Discover how you can transform an ordinary EMT conduit into a vibrant statement with a few strokes of paint.
Can You Paint EMT Conduit?
Yes, you can paint EMT (Electrical Metallic Tubing) conduit. But, there are some important considerations to keep in mind when deciding to paint EMT conduit, primarily centered around maintaining grounding continuity and ensuring the safety and functionality of the electrical system.
The National Electrical Code (NEC) does not explicitly prohibit painting EMT conduit, but it does have strict guidelines to maintain electrical safety.
EMT conduit is commonly used in electrical installations to protect and route electrical wiring. Painting EMT conduit can serve both aesthetic and protective purposes. It can help blend the conduit with its surroundings, making it less conspicuous, and also protect it from environmental factors such as corrosion and rust. However, it’s crucial to follow specific guidelines to ensure that painting does not compromise the electrical system’s integrity.
The most critical consideration when painting EMT conduit is maintaining grounding continuity. Grounding is a fundamental safety aspect in electrical systems, and any interruption in the grounding path can lead to electrical hazards. To preserve grounding continuity, it is recommended to paint the conduit after it has been installed and connected properly. This way, you can avoid any issues related to paint interfering with grounding connections during installation.
EMT conduit is made of galvanized steel, which has a protective zinc coating to prevent corrosion. This galvanized surface can be more challenging to paint than bare metal. It can interfere with paint adhesion, so proper preparation is necessary to ensure a successful paint job.
choose a paint that is compatible with galvanized surfaces and can adhere effectively. It is imperative to ensure that the chosen paint does not interfere with the grounding or bonding requirements of the electrical installation. Consulting a paint specialist or the conduit manufacturer for suitable paint options is advisable.
While painting EMT conduit is not prohibited, it’s essential to be aware of any local building codes or regulations that may have specific requirements or restrictions regarding conduit painting. Always consult with a qualified electrician or electrical inspector to ensure that your painting process complies with local regulations and safety standards.
How to Paint EMT Conduit?
Painting EMT conduit can be a simple and rewarding DIY project. By following a few essential steps, you can achieve a professional-looking finish that not only improves the conduit’s aesthetics but also prolongs its lifespan. Here’s a step-by-step guide to painting EMT conduit:
Materials and Tools You’ll Need:
EMT conduit
Sandpaper (medium grit, around 120-150)
Wire brush or steel wool
Cleaning solvent or degreaser
Painter’s tape
Drop cloths or plastic sheeting
Rust inhibiting primer (optional)
Spray paint or paintbrush and paint
Safety goggles and gloves
Respirator mask (if working indoors or in a poorly-ventilated area)
Ladder (if needed)
Rags or paper towels
Grounding clamps or connectors
Grounding bushings or grounding locknuts
Step-by-Step Guide:
Step 1: Prepare Your Workspace
Choose a well-ventilated area for painting. If you’re indoors, ensure proper ventilation and consider using a respirator mask. Lay down drop cloths or plastic sheeting to protect the surrounding area from paint splatter. Safety Precautions:
Wear safety goggles and gloves to protect your eyes and hands.
Step 2: Prepare the Conduit
If the EMT conduit is new, you may need to remove any oil or grease residues. Use a cleaning solvent or degreaser to clean the conduit thoroughly. Allow it to dry completely.
If the conduit is old or has rust, use a wire brush or steel wool to remove rust and loose debris. Sand the surface with medium-grit sandpaper (around 120-150) until it feels smooth to the touch. Wipe off any dust or debris with a rag.
Step 3: Mask Off Areas
Use painter’s tape to mask off any areas or components of the conduit that you don’t want to paint, such as threaded ends or connectors.
Step 4: Priming
If you want to provide extra protection against rust, you can apply a rust-inhibiting primer. Follow the manufacturer’s instructions for application and drying times. This step is especially important if the conduit will be exposed to outdoor elements or damp environments.
Step 5: Grounding Considerations
Avoid painting the threads at both ends of the conduit to ensure secure attachment of fittings and connectors.
Leave a small, unpainted section near the grounding clamps or connectors to ensure a direct metal-to-metal contact for grounding.
Use grounding bushings or grounding locknuts that are designed to make direct contact with the conduit and provide a path for grounding continuity.
Step 6: Painting
Shake the spray paint can vigorously for at least one minute (if using spray paint).
Hold the spray paint can or paintbrush about 6-8 inches away from the conduit.
Apply an even coat of paint, moving the can or brush in a steady, sweeping motion. Overlap each pass slightly to ensure complete coverage.
Wait for the first coat to dry according to the manufacturer’s instructions, usually about 20-30 minutes. You may need to apply multiple coats for full coverage.
If using a paintbrush, use long, even strokes to apply the paint. Allow each coat to dry before applying the next one.
Step 7: Drying
Let the painted conduit dry completely. This can take several hours to a full day, depending on the type of paint and environmental conditions.
Step 8: Inspect and Touch Up
Inspect the conduit for any missed spots or imperfections. Touch up these areas as needed.
Step 9: Clean Up
Dispose of used materials, such as paint cans or brushes, according to local regulations.
Remove painter’s tape carefully while the paint is still slightly tacky to avoid peeling.
Step 10: Final Check
Once the paint is fully dry, inspect the conduit one last time to ensure it is evenly coated and there are no defects.
By following these steps, you can effectively paint EMT conduit while maintaining grounding continuity, which is crucial for the safety and functionality of your electrical system. Proper surface preparation, grounding considerations, and paint application are essential for a durable and safe finish.
Check this Video:
Tips for Best Painting EMT Conduit
Take a look at some useful tips to help you achieve the best painting results for your EMT conduit, ensuring a durable and visually appealing finish.
Clean the conduit thoroughly before painting.
Use a primer designed for metal surfaces.
Choose high-quality paint for metal with corrosion resistance.
Decide between using a brush or spray for application.
Apply multiple thin coats of paint, allowing each coat to dry completely.
Allow sufficient drying time between coats and after the final coat.
Protect surrounding areas from paint splatters or drips.
Check weather conditions for optimal drying conditions.
Regularly inspect and touch up any damaged or chipped areas.
What Kind of Paint Do You Use on Conduit?
When selecting a paint for conduit, it’s crucial to consider factors such as the material of the conduit, whether it’s indoor or outdoor, and any special requirements such as heat resistance or electrical insulation. While specific brand names may vary, here are some commonly known paint brands that offer suitable options:
Rust-Oleum enamel spray paint: Rust-Oleum is a well-known brand that offers a range of paints suitable for metal surfaces, including conduit made of steel or aluminum.
Specifically, for painting conduit, you can consider using Rust-Oleum enamel spray paint. It provides excellent adhesion and protection against rust and corrosion. When selecting a specific Rust-Oleum enamel spray paint, look for options labeled for use on metal and ensure they provide rust-inhibiting properties.
Sherwin-Williams: Sherwin-Williams is a reputable brand offering a range of paints suitable for both indoor and outdoor conduit applications. They have options specifically formulated for metal surfaces and PVC.
Behr: Behr is another well-known brand that offers various paint options for different surfaces. They have paints suitable for metal and PVC conduits.
Can You Powder Coat EMT Conduit?
Yes, EMT (Electrical Metallic Tubing) conduit can be powder coated.
Powder coating is a durable and decorative finish that is commonly applied to metal surfaces, including EMT conduit. The process involves applying a dry powder to the conduit and then baking it to create a tough, smooth, and attractive coating. Powder coating provides excellent protection against corrosion and can enhance the appearance of the conduit while maintaining its electrical properties.
Can You Paint Electrical Metal Conduit?
Yes, you can paint electrical metal conduit for aesthetic purposes and corrosion protection.
Use paint and primer products that are specifically designed for use on metal surfaces and suitable for outdoor or electrical applications. These products are typically labeled as such and can provide the necessary protection and adhesion for the conduit.
But, there may be certain regulations or guidelines that need to be followed when painting conduit in specific situations. It’s always a good idea to consult with a qualified electrician or check with local building codes to ensure compliance with any applicable regulations.
Conclusion
In conclusion, painting EMT conduit can be done to enhance its appearance and protect it from corrosion, but it must be done carefully to maintain grounding continuity and comply with relevant codes and standards. Painting should occur after installation to avoid any interference with grounding connections and to ensure the safety and functionality of the electrical system. Proper surface preparation, choice of suitable paint, and adherence to local regulations are essential aspects of this process.
So, go forth and paint with passion!
From sailboats to yachts, there is an age-old question that has crossed the minds of many maritime enthusiasts: “can you paint starboard?” Of course, you can.
Image via YoutTube video
In this article, we will uncover the secrets behind painting starboard, and discover the endless creative possibilities that lie ahead. So, let’s set sail on this artistic journey together and discover the answers you seek.
What Is Starboard?
Starboard refers to the nautical term used to describe the right-hand side of a ship or boat when facing forward. It is the opposite of the port side, which is the left-hand side. The term “starboard” originated from the Old English word “steorbord,” which means “steering side.”
The use of starboard and port dates back to ancient times when ships were steered using oars. The steering oar was positioned on the right-hand side of the vessel. This positioning made it easier for right-handed sailors to control the ship’s direction. Over time, as ships evolved and the use of rudders became widespread. The term starboard continued to be used to indicate the right side.
Today, starboard remains an essential term in maritime navigation and is used to give clear and consistent directions aboard a ship. It is particularly crucial during maneuvers, docking, and communication between crew members. Understanding and using starboard and port correctly helps ensure safe and efficient navigation on the water.
What Type of Plastic Is Starboard?
Starboard is an exceptional form of plastic specifically crafted from high-density polyethylene (HDPE). This particular variant of plastic is sourced from petroleum.
This versatile and durable plastic is commonly used in various applications, including marine and outdoor settings. It is renowned for its excellent resistance to chemicals, moisture, and UV radiation. It’s also greatly known for its strength, stiffness, and exceptional water and weather resistance.
The key advantage of Starboard and HDPE plastics in general is their ability to resist corrosion, rot, and degradation over time. This makes them ideal for marine and outdoor applications where exposure to moisture and environmental elements is a concern.
Can You Paint Starboard?
Yes, you can paint starboard with the appropriate materials and proper preparation.
Painting starboard can offer several benefits, including a fresh and appealing appearance, protection against UV rays, corrosion prevention, and enhanced durability. A well-maintained and visually pleasing boat can leave a positive impression and potentially increase its value. Moreover, painting can help in identifying the starboard side more easily especially in low visibility or congested waterways.
When considering painting starboard, it is essential to select a marine-grade paint specifically designed to withstand the harsh conditions of the marine environment. These paints are formulated to resist fading, chipping, and peeling caused by exposure to sunlight, saltwater, and other environmental factors.
Choosing a suitable color scheme and design is important. Opt for colors that complement the overall look of your boat and adhere to any regulations or guidelines set by relevant authorities. Certain jurisdictions may require specific colors for different types of vessels to ensure visibility and safety.
One significant challenge when painting starboard is ensuring a dry surface before applying the paint. Moisture can have a negative impact on the paint’s adhesion and durability. This can result in premature peeling or fading of the painted surface. Therefore, it is crucial to plan the painting process when the vessel can be adequately dried and protected from water exposure.
Note: Different types of starboard, such as King Starboard or other high-density polyethylene (HDPE) materials, may have specific paint requirements and preparation techniques. Consulting the manufacturer’s guidelines for painting recommendations specific to the type of starboard you are working with is advisable.
How to Paint Starboard?
To paint starboard, you will need a few essential materials and follow a systematic process. The following is a detailed step-by-step guide on how to paint starboard:
Materials needed:
Starboard surface to be painted
Sandpaper (150-grit and 220-grit)
Tack cloth
Primer suitable for starboard (check with the manufacturer’s recommendations)
Marine-grade paint suitable for starboard (check with the manufacturer’s recommendations)
Paint roller or brush
Paint tray
Painter’s tape
Drop cloth or plastic sheeting
Safety goggles
Dust mask
Clean cloth or sponge
Water
Mild detergent (optional)
Step 1: Preparation
Begin by ensuring that the starboard surface is clean and free of any dirt, dust, or contaminants. Wipe it down with a clean cloth or sponge dampened with water or a mild detergent solution if needed.
Use painter’s tape to cover any areas adjacent to the starboard surface that you do not want to paint, such as metal or wooden trims.
Lay down a drop cloth or plastic sheeting to protect the surrounding area from paint splatters or spills.
Step 2: Sanding
Sand the starboard surface lightly using 150-grit sandpaper. Sand in a circular motion, applying even pressure. Make sure to cover the entire surface evenly.
Once you have sanded the entire surface, switch to 220-grit sandpaper and repeat the process. This finer grit will further smooth out the surface and ensure better paint adhesion.
After sanding, wipe away any sanding dust using a tack cloth. Make sure the surface is clean and smooth before proceeding to the next step.
Step 3: Priming
Apply a suitable primer for starboard according to the manufacturer’s instructions. Use a paint roller or brush to apply an even coat of primer to the starboard surface.
Start priming from one edge and work your way across the surface, ensuring complete coverage. Use long, smooth strokes for a consistent finish.
Allow the primer to dry completely as per the manufacturer’s recommended drying time. This usually takes a few hours but can vary depending on the product and environmental conditions.
Step 4: Painting
Once the primer is dry, it’s time to apply the paint. Stir the marine-grade paint thoroughly to ensure it is well mixed.
Pour the paint into a paint tray and load your paint roller or brush with an appropriate amount of paint.
Begin painting from one edge of the starboard surface. Work your way across the surface in smooth, overlapping strokes. Apply an even coat of paint to achieve uniform coverage.
If needed, apply a second coat of paint after allowing the first coat to dry completely. Follow the manufacturer’s instructions regarding drying times between coats.
Pay attention to any specific instructions regarding temperature or humidity conditions for optimal paint application and drying.
Step 5: Finishing touches
After applying the final coat of paint, carefully remove the painter’s tape while the paint is still slightly wet to avoid peeling.
Allow the paint to dry completely. This can take anywhere from a few hours to a few days, depending on the paint and environmental conditions.
Once the paint is dry, inspect the starboard surface for any imperfections or unevenness. If necessary, lightly sand any rough areas with fine-grit sandpaper and touch up with additional paint.
Clean up your work area and properly dispose of any leftover paint or materials according to local regulations.
Can Starboard Be Sanded?
Yes, StarBoard can be sanded. When sanding StarBoard, use a fine-grit sandpaper, such as 220-grit or higher. Start with a coarser grit if necessary and gradually move to a finer grit to achieve the desired smoothness. Always sand in a circular or back-and-forth motion, following the grain of the material.
What Sealant Will Stick to Starboard?
One of the most suitable sealant for Starboard is 3M 5200 Fast Cure Marine Adhesive Sealant. It is a high-performance polyurethane sealant that provides excellent adhesion to a variety of materials, including HDPE.
It forms a strong, waterproof bond that is resistant to weathering, saltwater, and UV radiation. The fast-curing formulation allows for quicker results, making it a reliable choice for sealing Starboard.
Other reliable options are Sudbury Elastomeric Marine Sealant and Sikaflex 291.
What Epoxy Will Stick to Starboard?
Marine-Tex Epoxy is a suitable adhesive for bonding to Starboard. It is specifically formulated for use in marine environments and is known for its excellent adhesion to various materials, including Starboard.
It is strongly resistance to water that make it an ideal choice for repairing, reinforcing, or bonding starboard surfaces in marine applications.
Is Starboard Waterproof?
Yes, Starboard is an inherently waterproof option designed specifically for water-related applications. This feature makes it suitable for use in wet environments such as boats, docks, and outdoor furniture.
There are different brands and variations of waterproof starboard available, such as King StarBoard® and TACO Marine Starboard.
Is Starboard Flammable?
No, starboard itself is not flammable. It is commonly constructed of sturdy materials such as steel, aluminum, or fiberglass, which are not easily flammable. However, the objects or materials stored on or near the starboard side may be flammable. It depends on their individual composition and properties.
Final Words
By following the recommended steps and using the right materials, you can transform the appearance of starboard while maintaining its durability and functionality. Always remember to consult with professionals or specialists in marine coatings for specific advice tailored to your unique requirements.
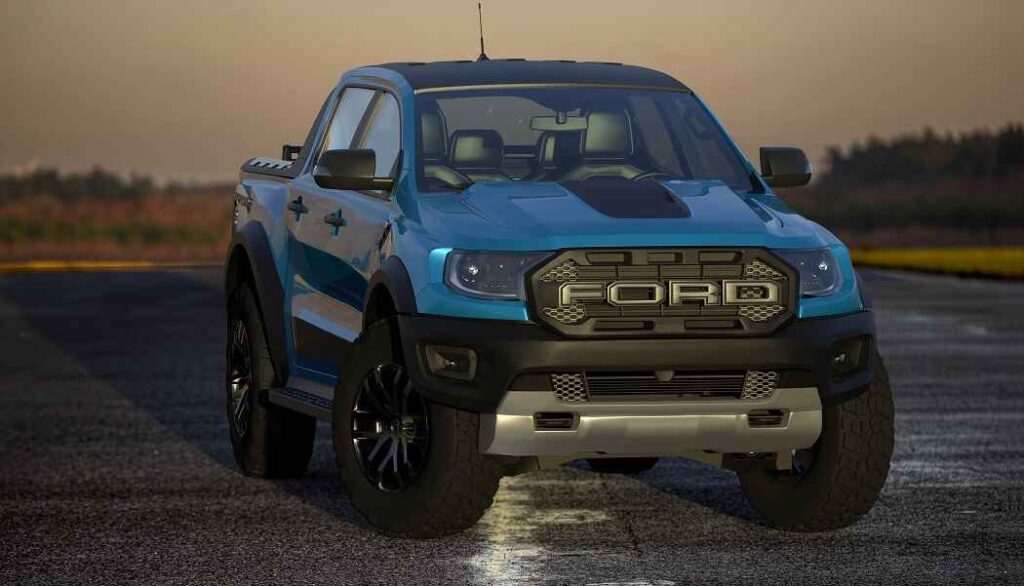
The cost of painting a Ford Ranger can range from $300 to $10,000 or more.
By examining different variables that affect the overall expense, we’ll help you gain a better understanding of what to expect and how to plan for this exciting upgrade to your beloved truck. So, let’s dive in and discover the potential costs of giving your Ford Ranger a fresh and eye-catching look.
Factors That Affect the Cost of Painting a Ford Ranger
Whether you are planning to repaint the entire vehicle or just specific areas, it is important to understand the various factors that can influence the cost of the paint job. By taking into account these below factors, you can better estimate the cost and make informed decisions about painting your Ford Ranger.
Size of the Vehicle: Larger vehicles generally require more paint and materials, leading to higher costs. Factors such as the number of doors, the size of the truck bed, and any additional accessories or trim can also influence the overall cost.
Type of Paint: There are different types of automotive paints available, including acrylic, enamel, and urethane. Urethane paints are typically more expensive than acrylic or enamel due to their durability and longevity. Additionally, custom or specialized paint finishes, such as metallic or pearl coats, may also increase the overall cost.
Quality of Materials: Using high-quality paint and materials will contribute to a more professional and long-lasting finish. The cost of paint can vary depending on its brand, quality, and reputation. High-quality paints often have better color retention, resistance to fading, and improved durability. While they may come at a higher price, they can offer better protection and a more appealing appearance.
Labor Costs: Professional auto body shops typically charge an hourly rate for labor. This can vary depending on the geographical location and the reputation of the shop. Additionally, if extensive customization or detailing work is required, it can add to the labor costs.
Additional Customization: If you plan to add any custom features or details to your Ford Ranger during the painting process, it will increase the overall cost. These additional customization options often require skilled craftsmanship and may involve more time and effort.
How Much to Paint a Ford Ranger?
Typically, the cost of painting a vehicle like the Ford Ranger can range from a few hundred dollars to a few thousand dollars. Here are some cost estimates for different types of paint jobs.
Partial Paint Job
If you only need to paint specific areas of your Ford Ranger, such as a few panels or the hood, the cost will be relatively lower. On average, a partial paint job can be from $300 to $1,000. It depends on the complexity of the work and the quality of paint used.
Full Body Paint Job
For a complete repaint of the entire Ford Ranger, the cost will be higher. A basic single-stage paint job using cheaper paint materials can start around $1,000 to $3,000. This option provides a solid color finish. However, the result can’t be similar as top-quality paint.
High-Quality Paint Job
If you’re looking for a long-lasting, high-quality paint job, you can opt for a two-stage or three-stage paint process. It includes a clear coat for added protection and shine. This type of paint job can require from $3,000 to $8,000 or more. You may need to get this service from a reputed paint shop.
Custom Paint Job
If you want a custom paint job with intricate designs, graphics, or special effects, the cost can significantly increase. Custom paint jobs require skilled labor and additional time for design and execution. Prices for custom paint jobs can vary greatly. You may need to spend from $5,000 to $10,000 or more. It depends mostly on the artistry involved.
DIY Vs. Professional Painting Cost for a Ford Ranger
When it comes to painting your Ford Ranger, you have the option of either tackling the project yourself or hiring a professional. DIY painting involves purchasing the necessary supplies and taking on the task of painting the vehicle on your own.
A basic DIY paint job typically ranges from $100 to $500, which includes materials such as paint, primer, sandpaper, masking tape, brushes, and spray gun. Additionally, you may end up incurring additional expenses.
On the other hand, hiring a professional painter will generally result in a higher cost due to labor charges. The cost of a professional paint job for your vehicle will depend on the reputation and experience of the painter.
On average, a full professional paint job for a Ford Ranger can be from $1,000 to $4,000 or more. This cost typically covers labor, high-quality materials, surface preparation, and multiple coats of paint.
If you require more extensive repairs or custom designs, the overall cost may increase accordingly.
How Much Paint Do You Need to Paint a Ford Ranger?
The amount of paint needed to paint a Ford Ranger would be approximately 1 gallon (3.8 liters) of paint for a single coat. However, for a more durable and professional-looking finish, you need to apply at least two coats of paint. Therefore, a safe estimate would be around 2-3 gallons (7.6-11.4 liters) of paint.
This estimate may not account for additional paint needed for areas such as the bed of the truck or custom designs. For a more accurate estimate, refer to the specific paint manufacturer’s guidelines.
Tips for Saving Money on Painting a Ford Ranger
When it comes to painting a Ford Ranger on a budget, here are a few tips to help you save money.
DIY Preparation: Instead of paying for professional prep work, take the time to do it yourself. This includes sanding, cleaning, and removing any imperfections before applying paint. Proper preparation can make a significant difference in the final result.
Choose Cost-Effective Paint: Look for affordable paint options that still offer good quality. Consider using acrylic enamel or single-stage urethane paints. These are less expensive than high-end options but can still provide a durable finish.
Opt for Spray Cans: If you’re confident in your painting skills, you can save money by using spray cans instead of investing in expensive paint guns. Spray cans are readily available and cost-effective, especially for smaller touch-ups or small areas of the vehicle.
Limit Color Changes: If you’re on a tight budget, sticking to the original color of your Ford Ranger can save you money. Changing the color requires additional prep work and can be more costly due to the need for extra paint and materials.
Shop Around for Deals: Take the time to research and compare prices at different auto paint suppliers. Look for discounts, promotions, or clearance sales to find the best prices for the paint, primer, and other necessary materials.
Remember, these tips can help you save money on painting your Ford Ranger. Always prioritize quality and ensure proper application to achieve a satisfactory result.
Final Words
Investing in a well-executed paint job can rejuvenate the appearance of your vehicle. To ensure a satisfactory outcome and minimize the risk of subpar workmanship, opt for a reputable and experienced paint shop. Always strike a balance between quality and affordability.
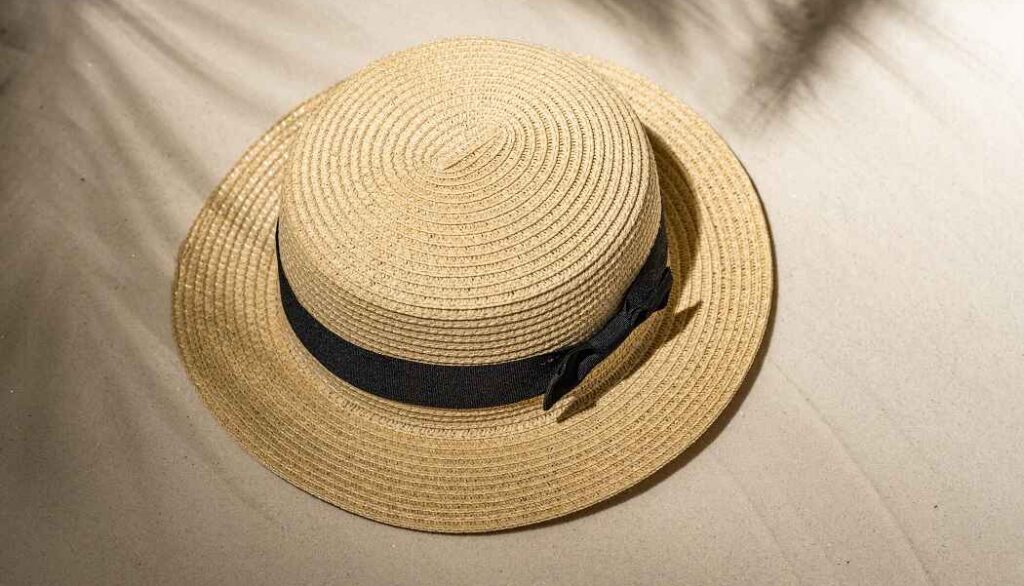
Spray painting a straw hat can benefit you in several ways. So, you can do it without any hesitation.
Painting item like hat is not a quite easy task. If you fail to do it properly, you can simply damage your hat. Therefore, it’s important to know how to paint a straw hat.
Well, we’ll discuss all these relevant things in this guide. You’ll know the benefits and drawbacks as well of painting your straw hat and all other things that will help you to make a right decision.
Can You Spray Paint a Straw Hat?
Yes, you can spray paint your straw hat. Spray painting a straw hat allows you to customize and transform its appearance according to your preferences. By using spray paint, you can achieve various effects such as solid colors, gradients, or even intricate designs. This opens up a wide range of creative possibilities to make your straw hat personalized.
One of the key benefits of spray painting a straw hat is the ability to revitalize an old or worn-out hat. If your straw hat has lost its original vibrancy, spray painting can give it a fresh and vibrant look. It allows you to breathe new life into your hat. Spray painting makes it stylish and eye-catching once again.
Additionally, spray painting provides a protective layer to the straw hat’s surface. It can help extend its lifespan. The paint acts as a barrier. It will shield the hat from potential damage caused by exposure to many external elements. It can also make the hat more resistant to stains and fading over time.
When spray painting a straw hat, it’s essential to choose the right type of paint. Look for particular paints designed for use on natural fibers like straw. These paints are typically flexible, breathable, and durable. Ensure that they adhere well to the straw material and withstand regular use.
Is It Safe to Spray Paint a Hat?
By taking necessary precautions, spray painting a hat can be a safe and enjoyable project.
Of course, proper ventilation is a must during the painting process. Spray paint fumes can be harmful when inhaled. So, choose a well-ventilated area or outdoors to do this task. It ensures proper airflow and prevents the inhalation of harmful chemicals.
Wearing a mask or respirator can also provide additional protection. Additionally, it is advisable to protect your skin and eyes by wearing gloves and safety goggles.
There are a few risks to be aware of when spray painting a hat. Improper use of spray paint can lead to overexposure to toxic chemicals. It may cause respiratory problems, skin irritation, or allergic reactions.
Check How to Spray Paint a Straw Hat:
How to Paint a Straw Hat?
No matter what’s the reason you want to paint your straw hat. But you must be cautious to follow a proper guideline. Check this guide for a satisfying result.
Materials you need:
Straw hat
Fabric paints
Paintbrushes
Palette
Water
Paper towels
Step 1: Prepare your work area
Choose a well-ventilated space with a flat surface to work on. Cover the surface with newspapers or a plastic sheet to protect it from paint spills.
Step 2: Clean the hat
Use a soft brush or cloth to remove any debris from the hat. This will ensure a smooth painting surface.
Step 3: Plan your design
Decide on the design you want to paint on your straw hat. You can draw your design on a piece of paper first to have a visual reference.
Step 4: Mix your paints (if necessary)
If you want to create specific colors, mix the acrylic paints on your palette until you achieve the desired shades. If you’re using fabric paints, they are usually ready to use out of the bottle.
Step 5: Start painting
Dip your paintbrush into the desired color and start applying it to the hat. Use smooth brushstrokes. If you’re working with multiple colors, start with the base color. Let it dry before adding additional colors.
Step 6: Allow the paint to dry
Give your painted hat sufficient time to dry completely. This may take a few hours, depending on the type of paint used. Refer to the instructions on the paint’s packaging for this.
Once the paint is dry, your painted straw hat is ready to be worn or displayed!
Check This Video:
What Paint Can I Use on a Straw Hat?
One suitable option for painting a straw hat is acrylic paint. Acrylic paint is known for its versatility and strong adhesion properties. It’s an excellent choice for painting on various surfaces, including straw.
Another option is fabric paint. This is amazing when working on straw hat. So, you can choose any of these paints.
Acrylic paint dries quickly and forms a water-resistant and flexible coating. This type of paint offers good coverage and excellent color retention over time. Acrylic paint allows you to unleash your creativity and achieve the desired look for your straw hat.
Can You Change the Color of a Straw Hat?
Yes, it is possible to change the color of a straw hat. The process of changing the color of a straw hat typically involves dyeing or painting it.
If you want to dye a straw hat, you can use fabric dyes or natural dyes that are suitable for straw materials. For dyeing, you need just a liquid dye in the color you want, a color fixative (to make the color stay), and latex gloves.
To dye a straw hat, clean it first. Prepare the dye by mixing fabric or natural dyes with water and a color fixative. Wear gloves and fully submerge the hat in the dye, leaving it for the recommended time. Rinse gently, then allow it dry.
Alternatively, you can also paint a straw hat using fabric paints or acrylic paints. Simply choose the desired color and apply the paint evenly on the hat’s surface. Allow the paint to dried out according to the product’s instructions.
And voila! Your straw hat now has a brand-new color.
How Do You Preserve a Painted Straw Hat?
To preserve a newly painted straw hat –
Handle it with care. Avoid any rough handling or bending that could cause damage.
Clean the hat by gently brushing off dirt and dust with a soft brush or cloth. Don’t use water.
Protect the hat from moisture and humidity. Keep it away from rain or excessive sweating.
Shield it from harsh sunlight to prevent fading and weakening of the straw.
Avoid placing anything on top of the hat to prevent deformities.
Can I Wet My Straw Hat?
No, it’s not a good idea to wet a straw hat. Straw hats are typically made from natural materials such as straw or reeds. These materials can lose their shape, warp, or become misshapen when exposed to water.
Wetting a straw hat can cause it to shrink, stretch, or develop stains and mold. It is best to avoid getting a straw hat wet.
How Long Will a Straw Hat Last?
The longevity of a straw hat largely depends on the quality of craftsmanship and how it is cared for. A meticulously crafted and well-maintained straw hat can endure for several years, potentially even up to five years.
However, factors like frequent exposure to moisture and rough handling can accelerate wear and tear. To maximize its lifespan, store the hat in a dry place, shield it from extreme conditions.
Can Straw Hat Be Ironed?
Straw hats can be easily damaged by heat. Ironing can cause the straw fibers to become brittle. If your straw hat has become misshapen, it’s better to try reshaping it by using steam or water. You can also consult a professional hat cleaner for advice.
Still, if you decide to use an iron on a straw hat, proceed with caution. Set the iron to low heat. Cover the hat with a damp cloth, gently press without sliding. Allow the hat to cool and dry thoroughly.
The Bottom Line
Spray painting a straw hat can have several effects. The paint may not adhere well to the straw surface. Moreover, the paint may seep into the straw, potentially causing it to become stiff. Additionally, the added weight of the paint may change the hat’s structure and fit. After painting, it can be uncomfortable to wear.
However, if you need to paint your straw hat, consider using fabric dyes or fabric-safe paints. These options are generally more suitable for straw hats as they allow for better color absorption and flexibility.
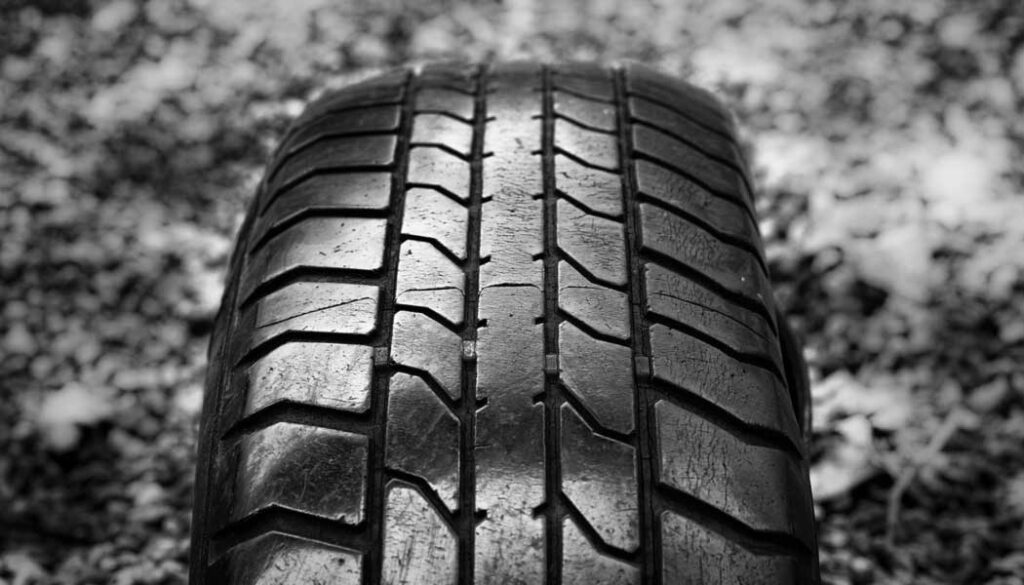
Whether you’re dealing with accidental paint splatters or looking to revamp an old rubber surface, it’s crucial to have the right product in hand. We understand that navigating through numerous options can be overwhelming, which is why we’ve done the research for you.
Image by Maaark from Pixabay
In this article, we’ll present our top picks for the best paint remover for rubber surfaces. Additionally, we’ll bring in-depth reviews to help you make an informed decision. So, let’s dive in and discover the most effective paint removers that will restore your rubber items to their former glory!
5 Best Paint Remover for Rubber Reviews
Say goodbye to unsightly paint marks and hello to a clean, rejuvenated rubber surface with these highly recommended paint removers.
1. Krud Kutter 336249 Latex Paint Remover
To clean out paint from rubber, we see Krud Kutter 336249 as the best ideal option for its effective formula and result. This remover can pull out the most stubborn particle of latex paint from a rubbery surface without doing any damage.
As rubber deeply absorbs paint in it, not all types of paint removers have the capacity to stand its way of cleaning. From fresh to dried-out paint, you can deeply rely on this amazing paint remover. Not only on rubber but Krud Kutter Latex Paint remover can also work with other surfaces like wood, carpet, fabric, tile, concrete, ceramic, and so on.
Besides, you will face no toxic fumes, emission of harsh chemicals, or any irritating odor coming out of this paint remover. That’s because it has low VOC and that saves your skin and lungs from having any irritation or chemical allergy.
This amazing paint remover also has biodegradable components in it. Because of this feature, your environment remains safe and you can apply it on both the interior and exterior surfaces of your territory.
In addition, the application of this product is easy as you just have to spray it on the surface and let it soak the remover for some moments and then the paint will come right off. However, you should not use it on leather as it is not leather-friendly.
Pros:
Works as an efficient remover.
Has biodegradable agents in it.
Works on versatile types of surfaces.
Cons:
Not leather-friendly.
Our Verdict: Krud Kutter 336249 paint remover has a great ability to satisfy the rubbery surface by pulling out the old or fresh dried paint within a few minutes. Its quick action makes the customers fall in love with this environment-friendly product.
2. Goof Off Professional Strength Remover
The second best remover for rubber is the Goof Off professional strength remover for its best actual power of removing any adhesive paints. Not only for paint but this versatile remover can also even clean grease, tar, asphalt, and stubborn sticky residue with great effort.
Its capacity to deal with tough stains surpasses all the other ordinary removers. That’s why a major number of people can trust this product by closing their eyes. With its professional removal agents, this remover can work on several surfaces on any stuck messes.
This Goof Off paint remover offers safety as it does not ruin the surface no matter how fragile or delicate the material is. Apart from applying to rubber, you can use this remover on fiberglass, car, RV surfaces, and other many common material-based surfaces.
Besides, its liquid formula does not require much during the application. Use a cloth and soak it in this remover and with it start rubbing the place where you need to clear away paint or stuck messes. From stickers and caulk to road grimes and tree sap, this remover easily fights with adhesion.
Pros:
Comes with professional cleaning agents.
Works on varieties of surfaces.
Pulls out stubborn stickers to latex paint and everything.
Cons:
Can create eye irritation, so must wear an eye goggles.
Our Verdict: We love how professionally this Goof Off strength remover can help you in your direst situation in cleaning an adhesive paint. It does not make any mess in cleaning stubborn messes and that’s what is pretty impressive.
3. Floquil – Testor Corp. ELO Remover Plastics Paint Acrylic
This Testor Corp. ELO Remover has the best way to remove almost all kinds of paints. Its versatile quality works on rubbers, metals, and plastic mainly. But in some cases, you can make it work on concrete and glass materials too.
It has a tremendous ability to fight with decals apart from paints. Therefore, for extensive use, this remover serves as an effective service. It comes in a large square-shaped bottle which is handy.
The best fact about this paint remover is, it not only clears away paint but also prepares the surface for the next new paint. That means it works as a primer as well with its renewed base. A great combo within a bottle of remover is what most people ask for.
Also, it comes with a good amount and an affordable price range. Many people have changed their former removers to strip off paint after getting introduced to this fruitful product. Just a little bit of scrubbing and you get your rubber or metal surface cleaned again.
But you must take caution against eye irritation as the chemicals in it might cause terrible problems in the eyes. For a better way of dealing with the remover, read the labels and caution section instructed on the bottle.
Pros:
Works best on metal, rubber, and plastic surfaces.
Fights many kinds of paints with effective results.
Leaves a fine base after stripping off paints.
Cons:
Causes eye irritation.
Our Verdict: We find Testor Corp. ELO Remover highly effective and impressive for its performance on particular material-based surfaces. Also, the affordable price range makes the product more welcoming.
Even though it’s our fourth pick, this Smart Strip Advanced Paint Remover is no less than the strongest paint stripper for its intensive pulling-out skill. It can literally pull out 15 layers of paint without leaving a single mark of damage on the surface in just one application.
Besides, you can make it work on several types of paints, stains, coating, and varnishes. As rubber is a surface that might get affected after a serious stripping of the paints, not all type of remover is suitable for it. But the Smart Strip paint remover knows its assignment very well.
It can even serve properly on surfaces like terra cotta, terrazzo, wood, brick, and whatnot. However, this remover is not an ordinary one as it takes up almost a full day to do its job. But in the end, it assures you a mess-free surface. There are also no serious chemicals like Methylene Chloride or NMP present on the remover.
On top of that, you can do alternative things with this remover as it is a DIY-friendly remover. For your DIY projects, you can prepare the surface using this remover. However, don’t overuse this product as you can already assume its effectiveness in just one application.
Pros:
Can strip off multiple layers of paints quickly.
Amazingly works on a wide range of surfaces.
Carries no serious chemicals to cause irritation.
Cons:
Takes up a whole day to do its job.
Our Verdict: For its non-toxic powerful formula, we have become a great fan of Smart Strip Advanced Paint Remover. Besides, a single application of this product brings forth an impressive result of rubber surfaces.
5. Motsenbocker’s Lift Off 41301 Paint Remover Spray
Our last but authentic and ideal pick is this Motsenbocker’s Lift Off paint remover spray. It has a qualitative way of stripping off paints from rubber. Besides, the feature of spraying is the easiest and most handy way of cleaning off paints.
It safely works within the stubborn bonds of paint and loosens the bonds leaving a damage-free surface. Not only that but it also has environment-friendly ingredients which is why it is biodegradable as well. Paints like latex, enamel, acrylic, stencil, and others cannot stand with this sprayer.
It works as a bulldozer on the surface yet doesn’t emit any cruel or toxic fumes in the air. Use it on different surfaces including fiberglass, clothing, or vehicles, and still watch it work like magic. With low VOCs, this spray remover has the safest agents in it.
It also cleans the surface and you can use it as a cleaner as well. For repainting your rubber surface, this product has the safest play to offer. However, on oil-based paints, this spray remover might show some negative indications. Otherwise, it can be your go-to paint remover.
Pros:
Comes with the easiest way as a sprayer.
Creates no harm to the environment.
On most surfaces works like magic.
Cons:
Hardly works on oil-based paints.
Our Verdict: From spray paint to spray remover, we know how maneuverable it is to use and this Motsenbocker’s Lift Off latex remover spray is no exception. Besides, its non-toxic feature makes this product more acceptable to users.
How to Choose the Right Paint Remover for Rubber?
Choosing the right paint remover for rubber surfaces requires diligent consideration. You should ensure that the remover effectively removes the paint without causing damage to the rubber. Here are some detailed steps to help you choose the appropriate paint remover for rubber.
Identify the type of rubber: Determine the specific type of rubber you are working with. Rubber can be natural or synthetic, and different types may have varying levels of resistance to chemicals. Knowing the type of rubber will help you choose a paint remover that is compatible with it.
Consider the paint type: Different paint types may require specific paint removers. For example, solvent-based paints may require stronger chemical removers. Water-based paints may be removed with milder options. Ensure that the paint remover you choose is appropriate for the type of paint.
Research paint remover options: Look for paint removers that are formulated for use on rubber surfaces. These products are designed to be effective for removing paint without damaging the rubber. Check online, or visit hardware stores to find suitable options.
Read product labels: Once you have identified potential paint removers, carefully read the product labels and instructions. Pay attention to any warnings or precautions mentioned. Look for information regarding compatibility with rubber surfaces. Ensure that the product is suitable for the type of rubber you have.
Evaluate safety precautions: Take into account the safety precautions associated with each paint remover option. Some removers may emit strong fumes or require the use of protective equipment. Assess your comfort level and follow the recommended safety guidelines to protect yourself and the rubber surface.
Seek professional advice: If you are unsure about which paint remover to choose, consider consulting with professionals. They can provide expert advice tailored to your specific situation and guide you towards the most suitable paint remover.
Certainly! It is safe to use paint remover on rubber surfaces. Paint remover contains chemicals that break down and dissolve paint. It can be effective in removing paint from rubber materials.
Use a soft brush or cloth to gently scrub the affected area, and then rinse thoroughly with water. Afterward, it is advisable to apply a rubber conditioner to restore and maintain the rubber’s original appearance and integrity.
If you are dealing with a delicate rubber item, it may be wise to seek professional assistance to ensure proper paint removal.
What Takes Dried Paint Off of Rubber?
Rubbing alcohol or acetone can effectively remove dried paint from rubber surfaces. Moisten a cloth or sponge with either of these solvents and gently rub the affected area until the paint starts to dissolve.
Take care not to scrub too hard, as it may damage the rubber. Rinse the area with water afterward to remove any residue, and pat it dry.
Will Paint Remover Damage Rubber?
Paint remover can potentially damage rubber surfaces. Paint removers often contain harsh chemicals that can cause the rubber to deteriorate. It is important to check the instructions of the specific paint remover you are using to determine its compatibility with rubber.
Using a gentle and specialized rubber cleaner may be a safer option for removing paint from rubber surfaces.
Will Paint Thinner Destroy Rubber?
While it is theoretically possible for paint thinner to damage rubber, it rarely happens under normal circumstances.
Paint thinners often contain solvents, which can deteriorate and dissolve rubber materials. When exposed to these chemicals, rubber can become swell, crack, or even disintegrate. It is important to avoid contact between paint thinners and rubber surfaces to prevent damage.
Final Thoughts
Paint remover is an essential item but if you use it wrongly it can be harmful. So, you need to be careful in some cases. While choosing paint remover for rubber, be cautious and read the above writing again. Better choose any of the recommended products in this article.
However, you can also spend some times and pick your own choice if that meets our ‘how to choose’ section. Also, product label can give you a clear idea if the product is ideal for rubber or not.
Yes, you can paint lug nuts. Just ensure that the paint used is heat-resistant and specifically designed for automotive applications.
Have you ever wondered if you can paint lug nuts? Join us on a journey to discover how this simple modification can breathe new life into your wheels. Find out how painting lug nuts can set your vehicle apart from the rest. Prepare to unlock your wheel’s true potential as we delve into the realm of lug nut painting.
Can You Paint Lug Nuts?
Painting lug nuts is a viable option to enhance the appearance of your car’s wheels. It provides some protection against rust and corrosion.
It is a common practice among car enthusiasts. By choosing a color that complements or contrasts with the vehicle’s paint job, you can create a more customized and personalized look. Whether you opt for a sleek black or chrome finish, a vibrant color, or even a unique design, painted lug nuts can add a touch of style to your vehicle.
But the benefits of painting lug nuts go beyond just visual appeal. Over time, lug nuts can become exposed to various environmental factors, such as moisture, dirt, and road salt. All of these can lead to corrosion. By applying a coat of paint, you create a barrier that helps shield the lug nuts from these elements. It also potentially prolongs their lifespan and preserves their functionality.
Of course, use high-temperature paint specifically designed for automotive applications. This type of paint is formulated to withstand the extreme heat generated by the brakes and wheels, ensuring durability and longevity.
Furthermore, consider the legal implications of painting lug nuts. In some regions, altering the appearance of lug nuts may violate road safety regulations. Therefore, it is advisable to consult local traffic laws or seek guidance from relevant authorities to ensure compliance.
While painting lug nuts can be a relatively simple DIY project, it’s important to exercise caution and take proper steps to ensure a clean and professional-looking finish.
It’s worth noting that some people prefer using lug nut covers or buying colored lug nuts instead of painting them. These options can also provide a durable and professional-looking finish.
Can You Spray Paint Lug Nuts?
Yes, it is possible to spray paint lug nuts. Lug nuts are the fasteners that secure the wheels to a vehicle’s axle, and they are typically made of metal. Spray painting them can be done to achieve a desired aesthetic look or to provide a protective coating.
Remember to consider a few factors before proceeding with spray painting lug nuts. Firstly, it is crucial to ensure that the lug nuts are thoroughly cleaned and free of any dirt, grease, or rust before applying the spray paint. This can be done by using a degreaser or a suitable cleaning solution and a brush or cloth. Proper cleaning will help the paint adhere to the surface effectively.
Secondly, using a high-quality spray paint specifically designed for metal surfaces is recommended. Look for a paint that is durable, resistant to chipping, and provides good adhesion. It is also advisable to use a primer designed for metal surfaces before applying the actual paint. The primer helps the paint bond better with the metal and enhances the overall finish.
When painting the lug nuts, ensure even coverage and avoid excessive build-up of paint. Applying thin, even coats. Allow sufficient drying time between each coat is essential to achieve a smooth and professional-looking finish.
Additionally, lug nuts are subject to significant forces and stresses while driving, so the paint may wear off or chip over time. Regular inspection and touch-up painting may be necessary to maintain the desired appearance.
How to Properly Paint Lug Nuts?
Attention to detail and proper technique are crucial for durability and aesthetics when painting lug nuts. Take a look at the process of properly painting lug nuts and transforming your wheels with a custom touch.
Gather the necessary materials: You’ll need a few items to complete the task, including masking tape, sandpaper (in various grits), a degreaser, a primer suitable for metal surfaces, automotive paint in your desired color, clear coat spray, and a set of lug nut covers (optional).
Prepare the lug nuts: Start by removing the lug nuts from the wheel using a lug wrench or socket wrench. Clean the lug nuts thoroughly using a degreaser to remove any dirt, grease, or residue. This step ensures proper adhesion of the paint.
Sand the lug nuts: Use sandpaper to lightly sand the surface of each lug nut. This step helps to roughen up the surface and promote better paint adhesion. Start with a lower grit sandpaper (around 200 or 300) and gradually move to a finer grit (800 or higher) for a smoother finish.
Mask off the wheel: To prevent overspray or accidental paint application on the wheel, use masking tape to cover the surrounding area of each lug nut. Ensure the tape adheres firmly and covers the entire wheel surface around the lug nut.
Apply a primer: Apply a thin coat of primer specifically designed for metal surfaces to each lug nut. The primer helps the paint adhere better and provides an even base. Follow the manufacturer’s instructions regarding drying time.
Apply the paint: Once the primer is dry, apply automotive paint in your desired color to each lug nut. Hold the spray can about 6-8 inches away from the surface and apply light, even coats. Allow each coat to dry before applying the next, usually around 10-15 minutes.
Apply a clear coat: After the paint has fully dried, apply a clear coat spray to protect the paint and provide a glossy finish. Clear coat also helps prevent chipping and fading. Follow the manufacturer’s instructions for drying time and number of coats to apply.
Reinstall the lug nuts: Once the clear coat has dried, carefully remove the masking tape from the wheel. Reinstall the painted lug nuts onto the wheel using the lug wrench or socket wrench. Ensure they are tightened to the recommended torque specifications.
Optional: Lug nut covers: If you prefer a different style or color, you can use lug nut covers or caps. Simply slide them over the painted lug nuts for added protection and aesthetics.
What Do You Spray Lug Nuts With?
In some cases, lug nuts can become rusty or corroded over time. It will make them difficult to remove or causing them to seize. If you encounter this issue, there are a few things you can do. Spraying lug nuts is a good option. But you typically do not spray them with any specific substance, right?
Firstly, you can use a penetrating oil like WD-40, PB Blaster, Liquid Wrench, or similar product to help loosen the rust or corrosion. Apply the penetrating oil to the lug nuts and allow it to soak in for a few minutes before attempting to remove them.
Alternatively, if you are concerned about future corrosion, you can apply a thin layer of anti-seize compound to the threads of the lug nuts before installing them. This can help prevent rust and make it easier to remove the lug nuts in the future.
However, applying excessive amounts of lubricants or coatings to the lug nuts may lead to over-tightening or loosening of the nuts. Such issues can compromise the integrity of the wheel attachment and pose safety risks. Therefore, follow the manufacturer’s guidelines and use a torque wrench for proper installation and maintenance of lug nuts.
What is the Best Coating for Lug Nuts?
Chrome plating and Dacromet-coating are the most effective coatings for lug nuts.
If you prioritize an attractive, high-shine appearance and are willing to invest in maintenance to keep the lug nuts looking pristine, chrome plating would be a good choice. It offers excellent corrosion resistance and durability while providing an appealing aesthetic.
On the other hand, if corrosion resistance is your primary concern, especially in harsh environments or for off-road and marine applications, you can choose Dacromet-coating. It is known for its exceptional rust and wear protection. It is a popular choice for its reliability and durability in challenging conditions.
Zinc plating and powder coating are also popular choices, which also offer good corrosion resistance and durability.
Final Words
To sum up, painting lug nuts is possible, but it requires careful consideration of several factors. Proper surface preparation, using high-quality paint, complying with local regulations, and ensuring the functionality of the lug nuts are all important aspects to consider before undertaking this project. By striking a balance between aesthetics, safety, and functionality, painting lug nuts can offer a unique and personalized enhancement to your vehicle’s overall appearance.
Maintaining the glossy exterior of your beloved vehicle is undoubtedly a top priority for any car owner. But, understanding the do’s and don’ts of car care is essential. One common question that arises when tackling tough grease and grime is,
“Can I use degreaser on car paint?” The answer to this query requires a careful consideration of various factors. While degreasers are commonly used in many industrial and household applications, their usage on car paint demands caution.
In this comprehensive guide, we will delve into the intricacies of degreasers and explore their compatibility with car paint. So, buckle up and get ready to explore the fascinating realm of degreasers and their role in car care.
What is Degreaser?
A degreaser is a cleaning agent specifically formulated to remove grease, oil, and stubborn stains from various surfaces. It is commonly used in industrial, commercial, and household settings. It is also effective for cleaning automotive parts and equipment, such as car engines, drivetrains, and tools.
Degreasers work by breaking down the molecular structure of grease and oil, allowing them to be easily wiped away or rinsed off. They are typically formulated with solvents, surfactants, and emulsifiers that facilitate the dissolution and suspension of greasy substances.
They come in different forms, such as sprays, liquids, gels, or powders, and can be water-based or solvent-based depending on the intended use and the type of grease or oil to be removed. They are valuable tools for effectively cleaning and degreasing machinery, engines, kitchen appliances, and various surfaces that encounter greasy build-up.
Can I Use Degreaser on Car Paint?
Using a degreaser on car paint can be done, it requires cautious attention to product selection, testing, and proper application techniques to avoid potential damage. However, there are a few drawbacks to consider.
Firstly, it is crucial to choose a degreaser that is specifically formulated for automotive use. Using household or industrial degreasers may contain harsh chemicals that can damage the car’s paint. It will lead to discoloration or fading. Look for a degreaser that is labeled as safe for automotive paint or recommended by the manufacturer.
Secondly, before applying the degreaser, it is advisable to test it on a small, inconspicuous area of the car’s paint. This will help determine any adverse reactions or potential damage. Apply a small amount of the degreaser, let it sit for a short time, and then rinse it off. If there are no negative effects, it should be safe to proceed with using the degreaser on the rest of the car.
Furthermore, when using a degreaser, follow the instructions provided by the manufacturer carefully. Some degreasers may require dilution with water, while others can be used directly. It is crucial not to leave the degreaser on the car’s paint for an extended period as it may cause damage. Always rinse the degreaser off thoroughly and dry the surface to prevent any residue from affecting the paint.
Lastly, keep in mind that using a degreaser on car paint should be reserved for specific situations where regular car washes or cleaning methods have not been effective in removing stubborn stains or grime. Overusing degreasers or applying them too frequently can strip away the car’s protective wax or clear coat, leaving the paint vulnerable to further damage and fading.
Can I Clean My Car with Degreaser?
Yes, you can clean your car with degreaser, but caution should be exercised. Degreasers are designed to remove oil, grease, and other stubborn stains from surfaces, making them useful for cleaning car engines, wheels, and heavily soiled areas. However, not all degreasers are suitable for cleaning the exterior or interior surfaces of your car.
When using a degreaser on your car’s paintwork or interior, it’s crucial to choose a degreaser specifically formulated for automotive use. Automotive degreasers are generally milder and safer for car surfaces. It minimizes the risk of damage or discoloration.
Dilute the degreaser according to the instructions and use a soft sponge or microfiber cloth to apply it to the targeted areas. Gently scrub the surface in a circular motion, paying attention to stubborn stains or grease buildup. Rinse thoroughly with clean water after cleaning to remove any residue.
Remember to avoid using degreasers on sensitive areas such as the car’s upholstery, leather seats, or electronic components, as these may require specialized cleaning products. In those cases, it’s best to consult the manufacturer’s recommendations or seek professional assistance.
What Happens If You Put Degreaser on Car Paint?
Applying degreaser directly to car paint can have detrimental effects and may cause damage to the paint finish. Here are some details on what can happen if you put degreaser on car paint:
Fading or discoloration: Many degreasers contain strong chemicals and solvents that can strip away the protective layers of clear coat on the car’s paint. This can lead to fading or discoloration of the paint, making it appear dull or patchy.
Paint damage: The harsh chemicals in degreasers can cause the paint to bubble, crack, or peel. This is particularly true if the paint is already compromised, such as having scratches or chips. The degreaser can seep into these areas and exacerbate the damage, resulting in the need for repainting or touch-up work.
Stain formation: Certain degreasers can leave behind stubborn stains on the paint surface. These stains can be difficult to remove and may require professional intervention to restore the original appearance of the paint.
Loss of gloss and shine: Degreasers can strip away the protective wax or sealant layer on the paint, which is responsible for providing the glossy finish and shine. As a result, the paint can lose its luster and appear dull.
Corrosion of metal parts: If the degreaser comes into contact with metal components such as chrome trim or aluminum accents, it can cause corrosion or etching on the metal surface. This can be particularly problematic if the degreaser is not rinsed off thoroughly.
Difference Between Safe and Harmful Degreasers for Car Paint
When it comes to maintaining the shine and integrity of your car’s paint, choosing the right degreaser is crucial. Understanding these differences can help you make an informed decision and protect your car’s prized finish. Let’s explore the contrasting features of safe and harmful degreasers for car paint.
Safe Degreasers for Car Paint:
Water-based degreasers: These degreasers are considered safe for car paint as they are non-toxic and environmentally friendly. They are typically made from natural ingredients and do not contain harsh chemicals that can damage the paint. Water-based degreasers are effective at removing dirt, grease, and oil without harming the paint surface.
pH-neutral degreasers: pH-neutral degreasers have a balanced pH level, usually around 7, which is neither acidic nor alkaline. They are specifically formulated to be gentle on car paint while still being effective at removing tough stains and grime. pH-neutral degreasers help maintain the integrity of the paint and prevent any discoloration or fading.
Citrus-based degreasers: These degreasers are derived from citrus fruits and contain natural solvents like d-limonene. They are effective in breaking down grease and grime without causing harm to the car’s paint. Citrus-based degreasers are non-toxic, biodegradable, and do not leave behind any residue or streaks.
Non-abrasive degreasers: Safe degreasers for car paint should be non-abrasive, meaning they do not contain any harsh scrubbing particles or chemicals that can scratch or dull the paint surface. They should have a smooth texture and should be applied gently using a soft cloth or sponge.
Tested and Approved: Look for degreasers that have been tested and approved by reputable automotive organizations or manufacturers. This indicates that the product has undergone rigorous testing and is considered safe for use on car paint.
Harmful Degreasers for Car Paint:
Petroleum-based degreasers: Petroleum-based degreasers, such as kerosene or gasoline, can be extremely harmful to car paint. They contain harsh solvents that can strip away the protective clear coat, fade the color, and cause long-term damage to the paintwork. It is crucial to avoid using these types of degreasers on car paint.
Acidic degreasers: Degreasers with high acidity, such as some wheel cleaners or heavy-duty engine degreasers, can be detrimental to car paint. Acidic compounds can eat away at the clear coat, causing it to break down and exposing the paint to damage. These degreasers should be avoided for car paint applications.
Harsh chemicals: Any degreaser that contains harsh chemicals like bleach, ammonia, or chlorine can be harmful to car paint. These chemicals can cause paint discoloration, fading, and even corrosion if left on the surface for an extended period. It is essential to read the product labels and avoid any degreasers with such ingredients.
Abrasive degreasers: Degreasers with abrasive particles or components can scratch or mar the car’s paint surface. These products are not suitable for delicate finishes and can cause irreversible damage. Avoid degreasers that claim to offer scrubbing or heavy-duty cleaning capabilities, as they may contain abrasive properties.
Unknown or Unreliable Brands: Be cautious of degreasers from unknown or unreliable brands. Stick to products that have a proven track record or are recommended by reputable automotive experts to minimize the risk of damaging your car’s paint.
Will Degreaser Damage Clear Coat?
The majority of degreasers are generally safe for clear coat finishes. But certain types damage clear coat finishes, especially if they are harsh or contain strong chemicals.
Clear coat is a protective layer applied to automotive paint to enhance its gloss and protect the underlying color coat. While clear coat is designed to be durable, it is still susceptible to damage from certain substances.
Choose a degreaser specifically formulated for automotive use and that is safe for clear coat surfaces. Look for products labeled as “clear coat safe” or “paint-safe” to minimize the risk of damage.
Is Degreaser Safe for Car Paint?
Using a degreaser on car paint is safe or risky; it largely depends on the specific product and the condition of your car’s paint.
As we mentioned earlier, some degreasers are designed specifically for automotive use and are formulated to be safe for car paint. On the other hand, harsh or abrasive degreasers can damage the paint and remove the protective clear coat.
Final Words
While degreasers are widely employed in various industrial and household applications, their compatibility with car paint requires careful consideration.
It is always advisable to consult the vehicle’s manufacturer guidelines or seek professional advice to ensure the appropriate products and methods are employed.
Are unsightly tape lines marring the flawless finish of your newly painted car? Don’t fret! We understand the frustration of spending hours meticulously painting your vehicle, only to be left with the telltale marks of tape lines.
Thankfully, there are effective techniques and tricks that can help you bid farewell to those unwanted tape lines and achieve a smooth, professional-looking paint job.
In this guide, we will walk you through the step-by-step process of getting rid of tape lines after painting your car. This will ensure that your vehicle looks as good as new.
What Are Tape Lines in Car Painting?
Tape lines in car painting refer to the visible marks left behind when automotive masking tape is removed after a paint job. These lines occur due to a contrast in paint texture and finish between the masked and unmasked areas.
When painting a car, tape is applied to protect certain sections, such as windows, trim, or panels. This keeps those parts safe from being coated with paint. While the tape effectively creates boundaries, it also creates a noticeable transition between the masked and painted areas.
These tape lines can be unattractive and detract from the overall appearance of the vehicle’s finish. Removing tape lines requires specific techniques to blend the paint seamlessly and achieve a uniform surface.
How to Get Rid of Tape Lines after Painting Car?
Getting rid of tape lines after painting a car requires a systematic approach. By following these step-by-step instructions, you can achieve a flawless finish and eliminate any visible tape lines.
The Necessary Supplies
Microfiber towels
Rubbing alcohol
Fine-grit sandpaper (2000 or higher)
Automotive polishing compound
Water spray bottle
Masking tape
Assess the Tape Lines
Carefully inspect the areas where tape lines are visible. Identify the extent and severity of the lines to determine the appropriate method for removal.
Clean the Affected Areas
Use rubbing alcohol on a microfiber towel to clean the tape lines and the surrounding painted surface. This step ensures that no dirt or debris residue interferes with the removal process.
Wet Sanding (If Necessary)
For more pronounced tape lines, wet sanding can help smoothen the transition. Soak the fine-grit sandpaper in water for a few minutes. Gently sand the tape lines using a circular motion. Be careful not to apply excessive pressure. Keep the surface wet and periodically rinse the sandpaper to prevent clogging. Once the lines begin to fade, stop sanding and clean the area.
Polish the Affected Areas
Apply a small amount of automotive polishing compound to a clean microfiber towel. Work the compound into the tape lines using gentle, circular motions. The polishing compound helps blend the paint and remove any remaining tape line marks. Continue polishing until the lines become less visible or disappear entirely.
Clean and Inspect
Wipe the polished areas with a clean microfiber towel to remove any residue. Inspect the surface under different lighting conditions to ensure the tape lines are no longer visible. If needed, repeat the polishing process until the lines are completely eliminated.
Final Touches
After removing the tape lines, apply a protective wax or sealant to the painted surface. This step enhances the shine and provides an additional layer of protection.
When Can I Remove Tape after Painting My Car?
After painting your car, it’s essential to remove the tape at the right time to ensure a clean and professional finish. The timing for tape removal depends on several factors.
Some paints may be dry to the touch within 6 to 8 hours; it is wise to wait longer for the paint to fully cure before removing tape. To provide a more accurate guideline, it is recommended to wait at least 24 to 48 hours before removing tape from a freshly painted car.
This allows sufficient time for the paint to dry, harden, and reach a more durable state. Waiting for this duration helps minimize the risk of damaging the paint job when removing the tape, as the paint will have had more time to fully cure. In this regard, you can follow some tips.
Refer to the right instructions for recommended drying times.
Lightly touch the painted surface in an ulterior area to check for dryness without tackiness or sticking.
Take into account the ambient temperature and humidity, as they can affect drying time.
Perform a test pull by slowly and carefully peeling back a small section of the tape to check for any paint lifting.
If the paint is dry to the touch and shows no signs of damage during the test pull, it is safe to proceed with complete tape removal.
Tips to Ensure Straight and Smooth Tape Lines
If you’re taping off car’s sections for specific paint purposes, following a few key tips can help you ensure precision and consistency. Here they are –
Clean the surface: Make sure the surface where you plan to apply the tape is clean, dry, and free of any debris.
Use painter’s tape: Invest in good-quality painter’s tape that is specifically designed for clean lines. Cheaper tapes may not adhere as well or may leave behind residue.
Mark the desired line: Use a measuring tape or a ruler to mark the exact position of the line you want to create.
Apply the tape slowly: Start at one end of the marked line and slowly unroll the tape along the marked path. Apply light pressure with your fingers or a putty knife to ensure the tape adheres well.
Seal the tape edges: To prevent paint from bleeding under the tape, use a putty knife or a similar tool to press down the edges of the tape firmly.
Paint with care: When painting, avoid applying too much pressure near the taped edges. This can cause the paint to seep under the tape.
Final Words
We have explored here various tips that can effectively address this issue. The key to successfully eliminating tape lines lies in patience, precision, and practice. With the right techniques, combined with a meticulous approach, you can achieve a tape-line-free finish on your car.
Whether you decide to tackle this task yourself or seek professional assistance, the end result will be a flawlessly painted vehicle that you can be proud of.
You can expect to pay between $200 and $600 for a tailgate paint job. You may need to pay more if you want some special customizations.
From materials and labor costs to paint quality and additional services, we’ll guide you through the intricacies of tailgate painting expenses. It allows you to make an ideal decision when it comes to transforming the look of your vehicle.
So, if you’re eager to revitalize your vehicle’s appearance and give your tailgate a stunning makeover, read on.
Factors Affecting the Cost of Painting a Tailgate
When it comes to painting a tailgate, several factors can influence the overall cost. It’s important to consider these factors before getting a tailgate painted to ensure that you have a realistic expectation of the expenses involved.
Size and complexity: Larger tailgates require more paint, which increases the overall expense. Moreover, if your tailgate has intricate designs, body lines, or requires custom masking for special effects, the complexity of the job will affect the cost.
Paint type and quality: High-quality automotive paints tend to be more expensive but can provide better durability and a superior finish. Custom paint colors or specialized finishes may also come at a premium. It tends to be more expensive than standard ones.
Color matching: If you’re changing the color of your tailgate, it may require multiple coats to achieve the desired hue. Color matching, involves matching the existing color of the vehicle, which can be challenging. Both color change and color matching processes can increase the cost.
Surface area coverage: The amount of surface area that needs to be covered with paint will affect the cost. If only a small portion of the tailgate requires painting, the cost will be lower compared to a complete repaint of the entire tailgate.
Additional services: If you require additional services alongside the tailgate painting, such as clear coating or graphic designs, they will add to the cost. These services may require specialized skills or materials, contributing to the increased expense.
Insurance or warranty: Some shops may offer insurance or warranty on their paintwork, which can come at an additional cost. This factor is worth considering when comparing quotes from different shops.
How Much Does It Cost to Paint a Tailgate?
The cost to paint a tailgate can be influenced by the location, shop reputation, customization requests, and the tailgate materials involved. Generally, the cost range for painting a tailgate falls between $200 and $600. For more customization, the cost can reach up to $2000.
Breakdown of Costs
Labor: The labor costs typically include the time and effort required for surface preparation, priming, painting, and finishing. This can range from 2 to 6 hours, depending on the condition of the tailgate and the complexity of the paint job. Labor costs can vary widely based on geographical location and the reputation of the shop. On average, labor costs can range from $50 to $150 per hour.
Materials: The materials required for painting a tailgate include paint, primer, clear coat, and other supplies. The cost of these materials can vary based on the quality and brand chosen. On average, the cost of materials for a tailgate paint job can range from $50 to $200.
Additional Fees: Some shops may charge additional fees for specific customization requests. For example, if you want special effects like metallic paint or pearl finishes, there may be extra charges involved. These additional fees can vary greatly depending on the complexity of the request and the shop’s pricing structure.
Low-end Estimate: Considering a lower-end scenario where labor costs are at the lower end of the spectrum (e.g., $50 per hour) and using more affordable materials, the total cost for painting a tailgate may be around $200.
High-end Estimate: On the higher end, if a reputable shop with experienced technicians is selected, labor costs are at the higher end (e.g., $150 per hour). In that shop, higher-quality materials are used, the total cost for painting a tailgate can reach around $600 or more.
Cost Variations
Vehicle Types: Different vehicle types can affect the overall cost due to variations in tailgate sizes, complexities, and design choices. For example, painting the tailgate of a compact car may cost less compared to a large pickup truck or an SUV.
Tailgate Materials: The material of the tailgate can also impact the cost. If the tailgate is made of metal, it may require more preparation work. Rust removal or dent repairs cost will be included, which can increase the overall cost compared to a tailgate made of fiberglass or plastic.
Additional Factors
Location: The cost of services can vary based on the region. Areas with higher living costs or greater demand for automotive services might have higher prices.
Shop Reputation: Established and reputable shops may charge higher rates due to their experience and quality of work.
Customization Requests: If you have specific customization requests, the cost will likely increase as it requires more time and skill from the painters.
Cost-saving Tips for Painting a Tailgate
Painting a tailgate is not a cheap way. It requires some expenses. However, you can follow some rules to reduce your spending.
Plan and prepare: Before starting the painting process, make sure you plan and prepare everything properly. This includes selecting the right paint, brushes, and any necessary equipment. By being prepared, you can avoid wasting money on unnecessary materials.
Research and compare prices: Before purchasing paint and supplies, take the time to research different brands and compare prices. Look for sales, discounts, or bulk deals to get the best value for your money.
DIY approach: Instead of hiring a professional painter, consider painting the tailgate yourself. It will save you a significant amount of money on labor costs.
Opt for lower-cost paint: High-quality automotive paint can be quite expensive. If you’re on a budget, consider using lower-cost paint options that still provide good coverage and durability.
Use primer: Applying a primer before painting can help improve the adhesion of the paint. It can also reduce the number of coats of paint needed, saving you money in the long run.
Avoid excessive coats: Applying too many coats of paint can be wasteful and unnecessary. Follow the proper guidelines and aim for a sufficient number of coats to achieve the desired finish.
Avoid overspending: While high-quality tools can make the painting process easier, it’s not always necessary to invest in expensive equipment. Assess your needs and purchase tools that are suitable for your specific project to avoid unnecessary expenses.
How Much Paint for a Tailgate?
As a general guideline, a standard 12-ounce (340 grams) aerosol can of spray paint is typically sufficient to cover a small to medium-sized tailgate.
If you are using brush-on paint, a quart-sized can (32 fluid ounces or approximately 946 milliliters) is usually enough for a single coat on a medium-sized tailgate. But it may require additional paint if you plan to apply multiple coats or if your tailgate is larger than average.
To estimate the accurate amount of paint you would need for a tailgate, keep in mind the factors like tailgate size, paint type, and the desired coverage.
First, you need to measure the length and width of the tailgate in inches or centimeters. Multiply these two measurements to calculate the surface area of the tailgate that needs to be covered.
Next, you’ll need to determine the coverage rate of the paint. The coverage rate is typically listed on the paint can. It indicates the area that can be covered with a certain volume of paint. It is usually given in square feet or square meters.
To calculate the amount of paint required, divide the surface area of the tailgate by the coverage rate of the paint. This will give you an approximation of the volume of paint needed to cover the tailgate.
It’s a good idea to purchase slightly more paint than the calculated amount to account for any touch-ups. Additionally, if you’re using a paint primer, make sure to factor those into your calculations as well.
How Much Does It Cost to Get a New Tailgate?
The cost of a new tailgate for a vehicle is not fixed. It can be varied based on the make, model, and year of the vehicle, as well as where you purchase the tailgate. On average, a new tailgate can range from $200 to $1,000 or more. Additional costs may include installation fees if you’re not doing the installation yourself.
Final Thoughts
The cost of painting a tailgate can vary. Taking into account the factors we have discussed and making an informed decision can lead to a satisfactory outcome.
Remember, painting a tailgate is not just about the cost, but also the value it adds to your vehicle. A freshly painted tailgate can enhance the overall appearance. Therefore, investing in a professional paint job is often a worthwhile decision.