Yes, it is possible to safely paint asbestos siding, but it is essential to approach the task with caution and follow specific guidelines to minimize any potential health risks.
While we strive to provide you with valuable information about this, it is essential to note that we are not advocating for any particular action regarding asbestos siding. Your safety and the safety of those around you should always be a top priority. Therefore, it is crucial to thoroughly understand the risks and consult with professionals before making any decisions related to asbestos-containing materials.
What Is Asbestos?
Asbestos is a mineral fiber that has been extensively used in various industries for its heat resistance, durability, and insulating properties.
Asbestos siding refers to its use in constructing exterior walls of buildings. It was popular in the mid-20th century due to its fire resistance, weather durability, and affordability. Asbestos siding typically took the form of cement sheets or shingles installed on the exterior of houses.
Asbestos siding has several properties that made it desirable for construction purposes. It is highly resistant to heat, making it effective in preventing fires from spreading. It is also resistant to rot, insects, and harsh weather conditions, making it a durable choice for exterior applications. Furthermore, asbestos siding provides good insulation, helping to regulate temperature and reduce energy costs.
While asbestos has desirable properties for construction, it poses significant health risks. When asbestos-containing materials are disturbed or damaged, tiny fibers can become airborne and easily inhaled. Prolonged inhalation or ingestion of these fibers can lead to various health issues, including lung diseases such as asbestosis, lung cancer, and mesothelioma (a rare and aggressive form of cancer).
Due to these severe health risks, asbestos use has been heavily regulated or banned in many countries. Proper handling, removal, and disposal of asbestos-containing materials are crucial to minimize exposure risks. If you suspect the presence of asbestos in your home, it is recommended to consult professionals for assessment and safe remediation.
Can You Paint Asbestos Siding?
Yes, you can paint asbestos siding. However, it is important to note that dealing with asbestos requires caution and adherence to safety guidelines. If the siding is in good condition and not crumbling or damaged, painting it can be a viable option to refresh its appearance.
To safely paint asbestos siding, it is crucial to follow specific precautions. Before beginning, consult with a professional who has experience working with asbestos. They can provide guidance and ensure that all safety measures are taken. It is essential to wear protective clothing, including a respirator and disposable coveralls, to minimize exposure to asbestos fibers.
Prior to painting, thoroughly clean the siding to remove any dirt or loose particles. Use a mild detergent and a soft brush or sponge to avoid damaging the siding. Allow the siding to dry completely before proceeding. Choose a high-quality paint specifically designed for exterior surfaces. Apply the paint evenly, following the manufacturer’s instructions.
Remember, handling and disposing of asbestos-containing materials require strict adherence to safety regulations and guidelines established by local authorities or environmental agencies.
Painting Asbestos Siding Vs Replacing It: What to Do
When deciding between painting asbestos siding and replacing it, several factors come into play. it’s important to weigh the pros and cons of each option. It’s crucial to note that asbestos is a hazardous material, and its handling and disposal should be done following appropriate safety regulations. Here are the pros and cons of both painting asbestos siding and replacing it:
Painting Asbestos Siding:
Pros:
Cost-effective
Aesthetically pleasing
Preservation of asbestos fibers
Minimal disruption during the process
Cons:
Temporary solution
Safety concerns for damaged siding
Potential regulatory restrictions
Replacing Asbestos Siding:
Pros:
Eliminates health risks
Improved energy efficiency
Durability
Reduced maintenance
Cons:
Higher cost
Disruption during construction
Potential structural alterations
Final Suggestion:
If the asbestos siding is in good condition, undamaged, and not at risk of being disturbed, painting can be a cost-effective option to improve its appearance. However, it’s important to remember that painting is a temporary solution and does not address the asbestos hazard.
If the asbestos siding is damaged, deteriorating, or poses a potential risk, it is advisable to opt for complete replacement. This ensures the elimination of asbestos-related health hazards, provides a long-term solution, and allows for the installation of more energy-efficient and visually appealing materials.
Factors to Consider Before Painting Asbestos Siding
Before painting asbestos siding, there are several factors to consider in order to ensure safety and compliance with legal regulations. Here are the key points to keep in mind:
Legal regulations regarding asbestos:
Familiarize yourself with local and national regulations: Research and understand the legal requirements and regulations regarding asbestos in your region. These regulations may include guidelines for handling, abatement, and painting of asbestos-containing materials (ACMs).
Verify permissible activities: Determine whether painting asbestos siding is allowed under the applicable regulations. Some jurisdictions may prohibit certain activities, such as disturbing or encapsulating asbestos.
Consult with local authorities: Contact local environmental or health agencies to seek guidance on the specific requirements and regulations governing asbestos in your area. They can provide valuable information and direct you to relevant resources.
Assessing the condition of asbestos siding:
Visual inspection: Evaluate the current condition of the asbestos siding. Look for signs of damage, such as cracks, chips, or deterioration. Ensure that the siding is in stable condition and not friable (easily crumbled or damaged).
Consider the age of the siding: The age of the asbestos siding can affect its stability. Older materials may be more prone to damage or deterioration.
Assess potential risks: Determine whether the siding poses any immediate risks, such as releasing asbestos fibers into the air. If the siding is significantly damaged, it may require professional abatement rather than painting.
Hiring a professional for inspection and testing:
Engage a certified asbestos professional: Seek the expertise of a qualified professional who specializes in asbestos inspection and testing. They will assess the condition of the siding, conduct proper sampling, and analyze the presence of asbestos fibers.
Testing for asbestos content: Asbestos cannot be identified through visual inspection alone. A professional can collect samples from the siding and have them analyzed in a laboratory to determine the asbestos content.
Professional recommendations: Based on their findings, the professional will provide recommendations on whether painting is a suitable option or if other measures, such as encapsulation or abatement, are necessary.
Abiding by professional advice: It is crucial to follow the recommendations of the certified professional to ensure the safe handling and management of asbestos-containing materials.
How to Paint Over Asbestos Siding?
If you have verified that it is permissible to paint over asbestos siding in your area and have taken the necessary precautions, here is a general step-by-step guide for painting over asbestos siding. Please note that it is crucial to consult with professionals or experts in asbestos abatement to ensure the safety of yourself and others.
Safety Precautions:
Wear personal protective equipment (PPE) such as disposable coveralls, gloves, goggles, and a respirator with appropriate filters.
Set up a containment area around the work area using plastic sheeting and duct tape to prevent the spread of asbestos fibers.
Seal off all windows, doors, and vents in the area to prevent cross-contamination.
Surface Preparation:
Inspect the asbestos siding for any damage or deterioration. If there are significant issues, it may be necessary to hire professionals to repair or replace the siding.
Clean the surface of the siding thoroughly to remove dirt, dust, and any loose debris. Use a mild detergent and a soft brush, avoiding aggressive scrubbing that can damage the siding.
Priming:
Apply a high-quality primer specifically designed for asbestos siding. Choose a primer that is compatible with the type of paint you intend to use.
Follow the manufacturer’s instructions for application, including recommended drying times between coats if multiple coats are required.
Painting:
Once the primer has dried, apply the paint using a brush, roller, or sprayer, according to your preference and the manufacturer’s recommendations.
Start at the top and work your way down, applying an even coat of paint to the siding.
Allow the first coat to dry completely before applying additional coats, if necessary. Follow the manufacturer’s instructions for drying times.
Cleanup:
Clean up all debris and materials used during the painting process, following proper asbestos waste disposal guidelines provided by your local authorities.
Remove the plastic sheeting used for containment and dispose of it properly.
Thoroughly clean any PPE used, or if disposable, dispose of it as hazardous waste.
Again, it is crucial to emphasize that working with asbestos can be extremely dangerous, and it is strongly recommended to consult with professionals who are trained in asbestos abatement before attempting any work involving asbestos materials. They can provide specific guidance and ensure that all necessary safety measures are followed to protect yourself and others from asbestos exposure.
What Paint to Use Over Asbestos?
Latex or acrylic-based encapsulation paints can be used over asbestos-containing materials in some situations.
These paints are designed to create a sealant barrier, preventing the release of asbestos fibers. However, it is crucial to follow the guidelines and recommendations of the specific paint manufacturer and consult with local experts to ensure compliance with regulations and safety standards in your area. Proper containment and handling of asbestos materials should always be a priority.
What Primer to Use on Asbestos Siding?
When working with asbestos siding, it is advisable to use a latex-based primer designed for encapsulating asbestos fibers.
Another recommended primer is “Fiberlock LBC (Lead Barrier Compound) Asbestos Encapsulant.” This primer is specifically designed to adhere to asbestos surfaces and provide a protective barrier to prevent the release of asbestos fibers.
Of course always look for a primer labeled for use on asbestos-containing materials, as it will provide a strong bond and help prevent the release of hazardous fibers.
How Much Does It Cost to Paint Asbestos Siding?
The cost to paint asbestos siding can vary depending on various factors such as the size of the project, the condition of the siding, and the location.
On average, homeowners can expect to spend between $2,000 and $5,000 for a professional paint job on asbestos siding.
Disturbing asbestos-containing materials can be hazardous. Make sure to consult with asbestos remediation experts for proper handling and painting procedures.
Final Thoughts
With proper safety measures and careful consideration, painting asbestos siding can be a feasible option.
By following our guidelines and taking the necessary precautions, revitalize the appearance of your home. It is necessary to consult professionals for asbestos abatement. Experts can ensure compliance with local regulations. Seek specific advice for your situation.
To paint a plastic bathtub in a mobile home, start by thoroughly cleaning the surface. Sand the surface for better paint adhesion. Apply a primer designed for plastic. And finally, apply paint.
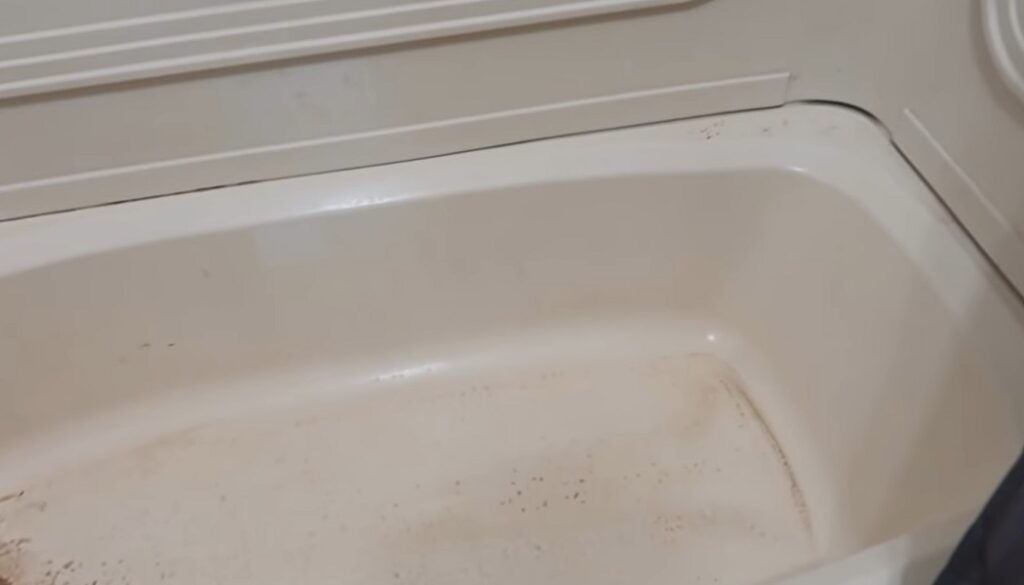
Today, we’re going to tackle a common challenge in mobile homes – the plastic bathtub. Don’t let its faded and worn appearance dampen your spirits. With a little creativity and some paint, we can turn it into a stunning centerpiece.
Image via YouTube video
Get ready to discover the secrets of painting a plastic bathtub in your mobile home. Let’s dive in and transform your bathroom into a work of art.
Is It Safe to Paint the Plastic Bathtub in a Mobile Home?
Painting a plastic bathtub in a mobile home can be a viable option to refresh its appearance. In general, it is safe to paint the plastic bathtub. However, there are several factors to consider ensuring the process is much safer and effective. Here are some important points to keep in mind.
A. Surface preparation: Proper surface preparation is important for a successful paint job. Use a non-abrasive cleaner and a soft cloth to avoid scratching the surface. Rinse the tub thoroughly and allow it to dry completely.
B. Suitable paint: Look for a high-quality acrylic or epoxy paint manufactured for use on plastics. Avoid using regular latex or oil-based paints, as they may not bond properly.
C. Ventilation: Ensure proper ventilation in the bathroom area where you will be painting. Open windows to circulate the air and remove any fumes. This is particularly important when using epoxy-based paints, as they can emit strong odors and potentially harmful fumes.
How to Paint a Plastic Bathtub in a Mobile Home?
Transforming the appearance of a plastic bathtub in a mobile home can breathe new life into your bathroom. Using the right materials and proper techniques, you can successfully paint a plastic bathtub. Thus, you can give it a fresh and updated look. Check the painting method of a mobile home’s plastic bathtub below.
1. Preparing for the Project
A. Before starting the project, make sure you have all the required materials on hand. These may include:
Paint
Primer
Sandpaper
Masking tape
Cleaning supplies
Plastic sheets
Paintbrushes or rollers
Paint tray
B. When working with paint and chemicals, ensure proper ventilation in the area. Open windows or use fans to improve air circulation. Additionally, use appropriate safety measures such as wearing gloves, a mask, and goggles to protect you from fumes and chemical exposure.
C. Before painting the bathtub, remove any hardware or fixtures attached to it. This may include faucets, showerheads, handles, and drain covers. Use a screwdriver or appropriate tools to carefully detach these components. Keep all the components in a safe place for reinstallation later.
2. Cleaning and Sanding the Bathtub
A. Cleaning the surface is crucial as it ensures a smoother finish. Any dirt and soap scum left on the bathtub may interfere with the paint’s adhesion.
B. Check the following general process for cleaning the bathtub.
Remove any loose debris from the bathtub, such as hair or soap residue.
Fill the bathtub with warm water and add a mild detergent. You can also add a bathtub cleaner formulated for removing soap scum and grime.
Use a sponge to thoroughly clean the surface. Carefully check the corners, edges, and hard-to-reach areas.
Rinse the bathtub carefully with water to remove any cleaning residue.
Now wait and make sure the bathtub is fully dried.
C. To enhance paint adhesion, it is beneficial to sand the surface of the bathtub, creating a textured surface.
Start by lightly sanding the entire surface of the bathtub with sandpaper. Use sandpaper grit between 220 and 400 for plastic surfaces.
Apply even pressure to generate a uniform roughness on the bathtub surface.
Once you have finished sanding, take a wet cloth and use it to wipe down the bathtub. It aids in the elimination of any dust that may have been created during the sanding process.
Make sure to dry the surface duly.
3. Applying Primer
A. When choosing a primer for plastic surfaces, look for one specifically designed for this purpose. Read product labels to ensure you’re selecting a primer right for plastic. Some primers may require specific curing times or preparation steps, so follow the manufacturer’s guidelines.
B. Follow these steps to apply the primer.
Stir the primer thoroughly before applying. Use a paint mixing tool or paint stick to ensure it is well-mixed.
Use the primer consistently to the entire surface of the bathtub with a roller. Follow the manufacturer’s recommended thickness and coverage.
Apply evenly and avoid visible brush or roller marks.
You will need to wait for some times to dry the primer before applying the paint.
4. Choosing and Applying Paint
A. There are various paints suitable for plastic bathtubs. Two commonly used options are epoxy paint and acrylic paint. Epoxy paint provides a highly durable and long-lasting finish, while acrylic paint offers versatility in color and finish options.
B. Choose a paint color and finish that aligns with your desired aesthetic for the bathroom. Consider the overall color scheme and design of the space. Select a paint designed for use on plastic surfaces and that is moisture-resistant.
C. To apply the paint evenly, follow these steps:
Stir the paint thoroughly to ensure an even consistency.
You can use a brush or roller to smear the paint onto the bathtub’s surface.
For optimal results, apply several thin coats, ensuring that each coat is given enough time to dry properly.
Take care to achieve an even application. Avoid drips, runs, or visible brush marks.
Allow the final coat to dry and cure fully before using the bathtub. This may take several days. Check the guidelines provided by manufacturer.
5. Finishing Touches and Cleanup
A. When the paint has cured, carefully reinstall any component that was removed from the bathtub. Use the appropriate tools to securely attach them. Ensure they are tight but not over-tightened to avoid damaging the paint.
B. After completing the project, clean the brushes and any other painting tools. Dispose of any leftover paint or materials safely. Clean the work area, remove any protective coverings, and dispose of them responsibly as well.
Tips for Painting Bathtub in a Mobile Home
To maintain the painted bathtub’s appearance and durability, follow these tips.
1. Ensure that the paint has fully cured before using the bathtub. Follow the manufacturer’s instructions regarding drying time, which typically ranges from 24 to 72 hours.
2. Avoid using harsh cleaners that can damage the painted surface. Always test any new cleaner on an inconspicuous area before using it on the entire surface.
3. Be cautious when using sharp objects or tools in the painted bathtub. Scratches can damage the paint. Consider using a non-slip mat or soft rubber bath mat to protect the painted surface.
4. Wipe down the surface after each use to remove soap residue, dirt, or grime. This helps prevent buildup and keeps the painted surface looking fresh.
5. If you notice any minor scratches or chips, carefully apply the touch-up paint. This helps maintain the bathtub’s appearance and prevents the need for a full recoating.
How Much Does It Cost to Paint a Mobile Home’s Plastic Bathtub?
When it comes to adorning a plastic bathtub in a mobile home with paint, the cost can fluctuate depending on various factors. The size of the bathtub, the type of paint employed, and some other things can all influence the cost.
A. DIY Cost: If you decide to tackle the painting project yourself, you will need to purchase the necessary supplies. You will need primer, paint, sandpaper, brushes or rollers, and masking tape. The cost of these materials can range from $50 to $100 or more, depending on the quality you choose.
B. Professional Cost: Hiring a professional to paint your mobile home’s plastic bathtub will likely cost more. The cost can vary based on the professional’s experience, location, and other factors. It could range from $200 to $500 or more.
Keep in mind that these are just estimates, and the actual cost may differ. It’s better to consult with professional to get a more accurate estimate for painting a plastic bathtub in a mobile home.
Final Thoughts
Painting a plastic bathtub in a mobile home is not a permanent solution. Over time, the paint may show signs of wear and tear. If necessary, be prepared to repaint or consider other option such as refinishing the bathtub.
By following the guidelines above and exercising care throughout the process, you can bring a new appearance of your plastic bathtub. You can transform the look of your bathroom without breaking the bank.
You can paint a pool cage. If you’re looking to spruce up your outdoor living space or give your pool area a fresh new look, painting your pool cage can be a fantastic way to achieve that.
A pool cage, also known as a screen enclosure keeps bugs and debris out of your pool. It also serves as a decorative element in your backyard. By adding a fresh coat of paint, you can enhance the overall aesthetics of your pool area. Moreover, you can create a more inviting atmosphere for relaxation and entertainment.
Image via www.pxfuel.com
In this guide, we will explore the possibilities of painting a pool cage, from the preparation stage to the actual painting process. We will discuss the benefits, considerations, and techniques involved. This will help you make an informed decision about enhancing your pool cage’s appearance.
Can You Paint a Pool Cage?
Yes, it is possible to paint a pool cage, and many homeowners choose to do so for various reasons. Painting a pool cage can have both positive and negative aspects, so it’s essential to consider them before proceeding.
Reasons to Paint a Pool Cage
1. Aesthetic Enhancement: Painting a pool cage can greatly enhance the overall appearance of your outdoor space. It allows you to customize the color to match your personal style or blend in with the surroundings. A fresh coat of paint can give your pool cage a revitalized and appealing look.
2. Protection against Corrosion: Over time, pool cages can be exposed to harsh weather conditions, including rain and sun. These elements can lead to corrosion and deterioration of the structure. Painting the pool cage can create a barrier that helps prevent rust and extends its lifespan.
3. Easy Maintenance: Paint can make it easier to clean and maintain a pool cage. Depending on the type of paint used, it can repel dirt, dust, and grime. Regular maintenance can help prolong its life and maintain its appearance.
4. Reduced Heat Absorption: Dark-colored pool cages have a tendency to absorb heat, which can make the enclosed area warmer. By choosing a lighter color, you can reduce the amount of heat absorbed. Thus, you can ultimately create a more comfortable environment around the pool.
Reasons to Consider Not Painting a Pool Cage
1. Additional Maintenance: While paint can protect a pool cage from corrosion and enhance its appearance, it also requires ongoing maintenance. The paint may chip, fade, or peel over time. And you need to ensure regular touch-ups or a complete repaint. This regular upkeep can be time-consuming and may require additional expenses.
2. Incompatibility with Materials: Some pool cages are constructed using materials that may not be suitable for painting. For instance, if your pool cage is made of aluminum or vinyl, it may not hold paint well. In such cases, it’s best to consult with a professional to determine if painting is a viable option.
3. Cost Considerations: Painting a pool cage can involve expenses for paint, brushes, and other necessary equipment. If you’re on a tight budget, you should weigh the cost of painting against other potential improvements for your pool area.
How to Paint a Pool Cage?
Painting a pool cage can be a great way to refresh its appearance. Take a look on this step-by-step guide on how to paint a pool cage.
Materials You Need:
Paint (for metal surfaces)
Paint roller and tray
Paintbrushes (small and large)
Painter’s tape
Drop cloths
Extension pole
Sandpaper (medium grit)
Wire brush or scraper
Clean cloth
Rust converter
Primer
Safety goggles
Dust mask
Protective gloves
Ladder (if needed)
Step 1: Prepare the Pool Cage
– Remove any furniture, potted plants, or other items from the pool cage area. Cover the pool or any nearby surfaces with drop cloths to protect them from paint splatters.
– If there are any signs of rust on the pool cage, use a wire brush or scraper to remove the loose rust. You can also use sandpaper to smooth out any rough areas.
– Clean the pool cage thoroughly using a clean cloth and water. Remove any dirt, dust, or debris that may interfere with the paint adhesion.
Step 2: Tape and Protect
– Use painter’s tape to cover any areas you don’t want to paint. Make sure the tape is securely applied to prevent paint from bleeding onto these surfaces.
– If there are any gaps in the pool cage, use tape to cover them and protect the surrounding areas.
Step 3: Apply Rust Converter (if necessary)
– If you’ve noticed signs of rust on the pool cage, apply a rust converter. This will help neutralize the rust and prevent further corrosion. Allow it to dry completely before proceeding.
Step 4: Apply Primer (optional)
– If the paint you’ve chosen requires a primer, apply it properly. This step helps improve paint adhesion and durability. Allow the primer to dry completely before moving on to the next step.
– Use a paint roller to apply the paint onto larger, flat surfaces of the pool cage. Start from the top and work your way down. Apply an even and thin coat. Make sure not to overload the roller with paint to avoid drips.
– Use a paintbrush to reach into corners and edges that the roller cannot reach. Use smooth strokes to apply the paint correctly.
– If there are any decorative details on the pool cage, use a smaller brush to carefully paint them.
– Continue painting in sections until you’ve covered the entire pool cage. Allow the first coat to dry. Apply a second coat if required, following the same process as before.
Step 6: Clean Up and Finishing Touches
– Once you’ve finished painting, carefully remove the painter’s tape before the paint dries completely. This will help prevent peeling or tearing of the tape and ensure clean lines.
– Let the new paint dry before removing any drop cloths and returning furniture or plants to the pool cage.
Tips to Follow:
1. Avoid painting on windy or rainy days to ensure proper drying and adhesion.
3. If your pool cage is made of aluminum, make sure to choose a paint specifically designed for metal surfaces.
4. Consider using a paint with UV protection to help prevent fading caused by sun exposure.
By following these steps and tips, you should be able to successfully paint your pool cage and give it a renewed appearance.
Painting a Pool Cage: Hiring Professional Painters vs. DIY Approach
A pool cage is typically constructed with aluminum or steel materials, which can fade, chip, or corrode over time. Repainting the pool cage protects it from further damage. When it comes to painting your pool cage, you have two options: hiring professional painters or taking a DIY approach.
Hiring professional painters can offer several benefits. Firstly, professionals have the necessary experience and expertise in handling various painting projects. They are familiar with the specific techniques required for painting pool cages.
Professionals also possess the right tools and equipment to complete the job efficiently. This can save you time and effort compared to doing it yourself, especially if you’re not experienced in painting.
Additionally, professional painters often have access to a wider range of paint options. They can help you choose the right type of paint that provides excellent durability, weather resistance, and UV protection. Their service can ensure that your pool cage looks great and stays protected for years to come.
Another advantage of hiring professionals is that they typically offer warranties on their work. This means that if any issues arise after the painting is done, they will come back and fix it at no additional cost to you. This provides peace of mind and ensures that you get a satisfactory result.
On the other hand, taking the DIY approach can have its own advantages. One of the main benefits is cost savings. Painting a pool cage yourself eliminates the need to pay for professional labor. DIY also allows you to have full control over the process, from choosing the paint to scheduling the work at your convenience.
However, there are some considerations to keep in mind with the DIY approach. Painting a pool cage can be a labor-intensive task, especially if it’s a large structure. It may require extensive preparation work before the actual painting can take place. If you’re not experienced of handling such tasks, it could result in subpar results or even damage to the pool cage.
Furthermore, DIY painting may not offer the same level of durability as professional work. Without proper knowledge of application techniques, the finish may not hold up well against the harsh pool environment. It can lead to premature deterioration and the need for repainting sooner than expected.
Maintenance Tips for a Newly Painted Pool Cage
Congratulations on your newly painted pool cage! To ensure that it remains in excellent condition for a longer time, it’s essential to follow proper maintenance practices.
Clean the pool cage regularly to remove dirt, dust, and debris that can accumulate on the surfaces.
Routinely inspect the pool cage for any signs of damage, such as chipped paint, rust, or corrosion.
Promptly address any issues by touching up the paint or repairing the damaged areas to prevent further deterioration.
If you notice any minor surface imperfections, consider using touch-up paint to maintain the appearance and protect the underlying metal.
Refrain from using harsh tools such as steel wool or abrasive sponges, as they can damage the painted surfaces.
Ensure that water does not accumulate on the cage surfaces for extended periods.
Be cautious when using chemicals such as chlorine near the pool cage. Avoid direct contact with the painted surfaces and promptly clean any accidental spills to prevent potential damage.
Consider scheduling periodic repainting to maintain the appearance and protect the metal surfaces.
Frequently Asked Questions on Painting Pool Cage
Can I Change the Color of My Pool Cage?
Yes, you can change the color of your pool cage. Pool cages are typically made of aluminum, which can be painted to alter its appearance. The color of your pool cage can have a significant impact on the overall appearance and ambiance of the area.
A new color allows you to personalize the look and feel to match your preferences and complement your home’s style. Different colors evoke different moods and create distinct atmospheres. For example, lighter colors like white or pastels can create a bright and airy feel. Darker colors can add depth and create a cozy ambiance. Choosing a color that aligns with the atmosphere can enhance your overall enjoyment and relaxation.
The color of your pool cage can impact the temperature inside the enclosure. Darker colors tend to absorb more heat, which can make the space warmer. Lighter colors reflect more heat and can help keep the area cooler.
Keep in mind that the color you choose should also be durable and resistant to fading. Selecting a high-quality paint can ensure that the color change lasts and requires minimal maintenance.
Can You Paint a Pool Cage without Removing the Screen?
Yes, it is okay to paint a pool cage without removing the screen. However, painting the cage without removing the screen can result in a few potential issues.
1. If the screen is not adequately protected or covered during the painting process, there is a risk of staining the screen material. This can affect the appearance of the screen and potentially make it more difficult to see through.
2. Painting over the screen can lead to the screen material becoming stiffer and less flexible. If the screen is not properly cleaned before painting, the paint may not adhere well and could peel or chip off easily.
3. Depending on the type of paint used and the thickness of the applied coat can affect ventilation and the overall enjoyment of the space.
To avoid these potential issues, it is generally recommended to remove the screen before painting a pool cage. This allows for better access and control during the painting process.
What Kind of Paint Do You Use on a Pool Cage?
Here are a few options for paints that are commonly used for pool cage painting.
1. Acrylic Paint: Acrylic paint is a popular choice for pool cage painting. It is durable, water-resistant, and provides good color retention. Look for acrylic paints labeled for exterior use or those designed for metal surfaces. They come in various finishes, such as gloss, semi-gloss, or satin.
2. Epoxy Paint: Epoxy paints offer excellent durability and resistance to moisture, making them suitable for pool cages. They create a tough, protective coating that can withstand harsh conditions. Epoxy paints often require a primer to ensure proper adhesion to the metal surface.
3. Powder Coating: Powder coating represents a specialized technique for painting, involving the electrostatic application of a dry powder onto metal surfaces. This process yields a robust and enduring coating that withstands chipping and fading. It is best for protection and enhancement of aluminum pool cages, ensuring their longevity and aesthetic appeal.
How Often Should a Pool Cage Be Repainted?
The frequency at which a pool cage needs to be repainted can be varied depending on some factors. These factors include the type of material used, the climate, and the overall condition of the cage. However, as a general guideline, it is recommended to repaint a pool cage every 5 to 7 years.
Repainting a pool cage serves both aesthetic and protective purposes. The paint on the cage may become discolored due to exposure to sunlight, rain, and other elements. Repainting not only enhances the appearance of the pool cage but also helps to protect the underlying structure from rust, corrosion, and other damage.
Regular maintenance is important to determine the condition of the paint on the pool cage. If you notice significant damage to the paint, it may be time to consider repainting. Additionally, if you live in an area with harsh weather conditions, you may need to repaint the pool cage more frequently.
Note that different types of paint may have different lifespans. Speak with a professional painter to determine the best paint type and maintenance schedule for your specific situation.
Final Words
Painting a pool cage is a viable option to enhance its appearance and longevity. Consider factors such as the cage’s condition, material, and proper preparation for successful results. Choose a high-quality exterior paint and ensure thorough cleaning and primer application for optimal adhesion and durability.
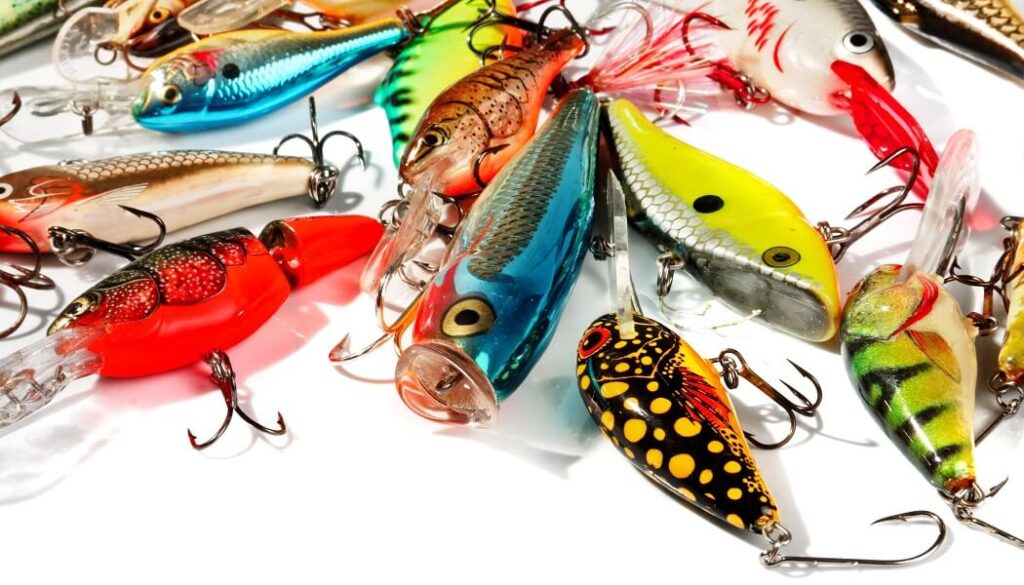
Choosing the right paint for your fishing lures is essential for both attracting fish and ensuring the longevity of your lures. A well-painted lure can mimic the appearance of real baitfish, enticing the fish to strike. With a wide range of paint options available on the market, it can be challenging to determine which one is the best paint for fishing lures.
To help you make an informed decision, we have researched and compiled a list of the top paint options specifically designed for lures. In this guide, we will provide you with comprehensive reviews of the perfect paints for fishing lures and some other relevant things that will help you to make your decision properly.
Let’s dive into the world of fishing lure paints and discover the top options available on the market.
1. Createx Colors Airbrush Paint
The ultimate reliable option for lure manufacturers and painters is the Createx colors airbrush paint. This paint brings the best version of fishing lures and that is exactly why we have put it on top of our list. Surprisingly, the paints are also quite affordable compared to what they offer.
Moreover, you can use the pigments for painting other many materials including leather, wood, fabric, ceramic, and others. Also, the paints are highly suitable for materials that are prone to fading. Thanks to its light-fast exterior-grade paint properties.
Thus, your fishing lures will not fade away even after being exposed to extensive sunlight. UV rays can do nothing to the paint. Additionally, the paint contains resins that make it last longer. After application, you can simply air dry the paint. However, professionals suggest going for heat curing.
To speak more about the formula, the Createx provides the water-based and non-toxic formula. The paints also ensure the ASTM D-4236 standards. You can give your fishing lures a beautiful satin finish by selecting any color from the wider range of collections. Again, the paints are easy to clean from the airbrush when you are done with the project.
Pros:
Offers excellent color selection with quality formula.
Provides a wonderful satin finish and doesn’t fade.
Easy to apply, dries faster, and multi-purpose paint.
Cons:
Not suitable for children and is a bit high-priced.
Our Verdict: Providing the best texture and result to your fishing lures, the Createx Colors paint is just the best airbrush paint for fishing lures you should pursue right away.
2. Wicked Colors W101-00 Wicked Primary Set Airbrush
What snatches the 2nd position in our list is the Wicked colors airbrush. After the first pick, it is also arguably excellent airbrush paint for fishing lures with lots of colors to offer. The colors are transparent yet contain highly pigmented properties.
Therefore, you will get outstanding coverage on your fishing lures after applying the paint. Also, you can over-reduce the formula for getting a thin and detailed paint on the materials. Moreover, the set comes with a 4012 High Performance Reducer to get you what you desire while painting.
Also, the colors are manufactured with lightfast pigments like our previous pick. Again, it also has exterior-grade resin for delivering the best result possible. The colors are compatible with any primer or paint.
However, to get the best outcome, producers suggest using the Wicked colors with Createx 4030 Intercoat. Together the compounds deliver an excellent matte finish on any plastic or hard-surfaces and automotive as well.
Moreover, like any other Createx production, the Wicked colors are also non-toxic and water-based. Each of the 6 bottles of the set contains a 2oz compound. Hence, the colors are durable as well.
Pros:
The set includes unique colors and a reducer.
Delivers a matte and long-lasting finish.
The non-toxic formula goes well with almost any material.
Cons:
The reducer may run out before the colors.
Our Verdict: Overall, with the best service, the Wicked Colors Set is a great airbrush color starter out there. Thus, if you are thinking of giving it a try, you will surely win.
3. Pro-Tec Jigs and Lures High Gloss Powder Paints
If you are more comfortable with powder paints, then you definitely should not skip this part. Let us introduce you to the next high-quality paint for fishing lures which is the Pro-Tec Jigs and Lures Powder Paints. The paint claims to be the most practical choice for painting purposes.
What has made the paint worldwide more acceptable is its durability and high-gloss finish. Such a finish will make the lures and jigs more effective in their performance. Moreover, the vibrant colors add more shininess to the materials.
Therefore, the glossy properties and vibrant colors together invite a large number of fish to catch. Surely, the paint is good at what it does. Your painting process will take nearly 20 minutes once you start with this paint.
Again, the paint is the ultimate time-saver. First, only a little amount goes a long way while painting. Second, applying only one coat is considered to be enough. In fact, you will not need any white primer while adopting the painting process.
Moreover, the powder formula is easy to work with. It also has fast-drying properties. You can certainly use a heat gun for curing like you can use with our previously mentioned paints as well.
Pros:
Comes with powdery and vibrant colors.
Takes less time to paint and provides a high-glossy finish.
The paints are highly durable and easy to apply.
Cons:
The color may seem slightly different after application.
Our Verdict: If you are actually thinking of making your fish baits highly attractive for the fish to be trapped, then the Pro-Tec jigs and lures powder paints are the ones you should go for.
4. SpaceBeams Glow in the Dark Paint
If you want to know what is the ideal glow paint for fishing lures then grab this SpaceBeams Glow in the Dark Paint for non-toxic formula. The glowing of this dark green fluorescence is extremely bright. It offers a strong, vivid, and ultra-glow in the dark that also long lasts for about 24 long hours.
With its brightness, you cannot as well doubt the safety it ensures. This SpaceBeams dark paint is toxic free and you can normally use this glowing formula safely. This non-toxicity of the paint offers non-flammable conditions as well.
And because it is water-based, the heavy chemicals are also less in quantity in the dark paint. Besides, the versatility of this paint will not only lure fishes but also can work on a wide range of spaces and surfaces. You can make them work on surfaces like wood, plastic, glass, and whatnot.
From luring fish to creating artwork on your wall, this multi-tasking paint can be your very favorite object. The pigment it uses is super durable and has an ultra-adhesive acrylic solution. It charges itself to glow better and longer. You can get both green and aqua colors and its different shades here too.
Pros:
Comes with a non-toxic and water-based formula.
Glows strongly, and brightly, and lasts for 24 hours.
Works on all types of surfaces like wood, plastic, glass, and so on.
Cons:
The container is very hard and makes squeezing hard.
Our Verdict: Overall this SpaceBeams dark paint is a wonder for it looks beautiful in the dark. As it offers two different colors, the brightness of these colors looks amazing.
5. Caliart Acrylic Paint Set for Beginners & Painters
For buying something in acrylic for your fishing lures, this Caliart acrylic paint set will literally serve its best with its complete package. It comes with 12 premium brushes that glide smoothly on the surface. Besides, this paint dries quickly. Most importantly this bombed package boosts your imagination faculty.
Not only on paper, but this paint also works even better on other hard materials including wood, concrete, metal, glass, and so on. You can even use it for painting a pumpkin and other Halloween decorations.
However, the quality of this acrylic paint set has not been downgraded at all. The pigmentation of the paints says it all. Also, the paint set is water-based and offers no toxicity at all.
Girls and boys of all ages can work with this set without getting any irritation or allergic reaction from it. The consistency of these paints come is very creamy and full of premium texture.
Thus, getting full coverage from this set is not an impossible thing to ask for. This creamy texture gets blended and dries easily in good ventilation areas.
Pros:
Offers a mind-blowing package with brushes and non-toxic paints.
The premium creamy texture of the paint dries fast.
Offers full coverage on different materials.
Cons:
Too many colors may make you confused.
Our Verdict: This acrylic paint set is so great that we were struggling to find a proper downside. From its packaging to its popped nature after application, all these made us startled. From beginners to professionals, all can have this amazing set in a legit affordable price range.
6. Golden High Flow Acrylic, Assorted 10 Color Set
Golden high flow acrylic color set is our major pick for the best paint for fishing lures. This color set offers ten different bottles and all of them are different in color. They are not some traditional color. So, you will definitely have a different vibe from them.
These amazing colors are arguably compatible, especially with golden acrylics and mediums. The ink-like consistency both has its advantages and disadvantages. You can use this consistency professionally in different sectors of art. You just need to have the controlling ability of the runny ink.
Also, this consistency ensures the flexibility of this Golden acrylic set. The colors come in considerable sized bottles. The acrylic base of the colors defines its “high flow” condition. That’s why you need to use an airbrush to paint them on the materials. An ordinary brush can give you trouble.
After the application of the paints, you will notice how the color has popped up. This is the most charming fact about this set. Besides, you will get a full coverage painting experience with this set.
Pros:
Loveable different unique colors with high flow nature.
Ink-like consistency helps to provide full coverage.
Amazing on all types of surfaces including metal, paper, wood, and so on.
Cons:
A little bit overpriced.
Our Verdict: Many professional fishing enthusiasts have liked this amazing set for its flexibility. The set offers a large variety of color choices.
What Paint to Use for Painting Fishing Lures?
When it comes to painting fishing lures, it’s important to choose paints that are durable, resistant to water and abrasion, and capable of adhering well to the lure’s surface. Here are a few types of paint that are commonly used and can be ideal for painting lures.
Acrylic Paint: Acrylic paints are popular for lure painting due to their versatility, wide color range, and ability to adhere well to the surfaces. They dry quickly, have good color opacity, and can be easily thinned with water or mediums for airbrushing.
Powder Paint: Powder paint is a unique type of paint that is applied by electrostatically charging the lure and then baking it to cure the paint. This results in a durable, chip-resistant finish. Powder paint is often used for jig heads and other metal lures. It offers a wide range of color options and is relatively easy to apply.
Vinyl Paint: Vinyl paints are flexible, water-resistant, and provide good adhesion to various lure materials, including plastic. They can withstand repeated exposure to water and are less likely to crack or peel. Vinyl paints are typically available in spray can form, making them convenient for application.
Painting fishing lures offers a choice between two primary contenders: airbrush paint and normal paint. Airbrush paint and normal paint possess unique qualities and advantages that make them well-suited for specific applications. Let’s explore their characteristics and compare their strengths to determine which option prevails.
1. Application Method
– Airbrush Paint: Airbrush paint is specifically designed for use with an airbrush tool. It provides a smooth and controlled application. It is sprayed onto the lure in a fine mist, allowing for precise detailing and shading.
– Normal Paint: Normal paint, such as acrylic or enamel, is typically applied with brushes, sponges, or other conventional painting tools. This method requires more manual dexterity and can result in uneven coverage if not applied carefully.
2. Versatility
– Airbrush Paint: Airbrush paint offers a wide range of colors, including metallic and transparent options. It can create intricate patterns, fades, and blends, making it ideal for creating realistic fish scales or lifelike designs.
– Normal Paint: Normal paint also comes in various colors, but it may not offer the same level of detail and control as airbrush paint. However, it can still be used effectively for basic color blocking and simpler designs.
3. Finish
– Airbrush Paint: Airbrush paint typically provides a smooth and even finish. It can result in a professional-looking, glossy or matte surface, depending on the type of paint used.
– Normal Paint: Normal paint can leave brush strokes or texture on the lure’s surface. It may not be as visually appealing or as smooth as airbrushed finishes.
4. Drying Time and Durability
– Airbrush Paint: Airbrush paint usually dries quickly, especially if specifically designed for fast-drying. It can adhere well to various lure materials and withstand exposure to water, making it more durable for fishing purposes.
– Normal Paint: The drying time for normal paint depends on the type and brand. It generally takes longer than airbrush paint to fully cure. Additionally, the durability may vary depending on the paint type and the surface of the lure.
5. Learning Curve and Skill Requirements
– Airbrush Paint: Airbrushing requires some learning and practice to master the technique. Achieving desired effects and maintaining consistency might take time and experience.
– Normal Paint: Using normal paint with brushes is more accessible for beginners. However, achieving intricate details and effects may be more challenging.
How to Paint Fishing Lures?
Painting fishing lures can be a fun activity that allows you to customize your lures to your preferences. Check this step-by-step guide on how to paint fishing lures. This guide is designed to paint lures with acrylic paint.
Materials you need:
Fishing lures
Sandpaper (200-400 grit)
Primer (optional)
Acrylic paints (water-based)
Fine paintbrushes (various sizes)
Paint mixing surface
Clear coat
A drop cloth
Masking tape (optional)
Gloves (optional)
Step 1: Preparation
– Start by selecting the fishing lures you want to paint. It’s best to choose lures that have a smooth surface and are clean of any dirt or debris.
– If you’re working with previously painted lures, use sandpaper to lightly roughen the surface. This helps the new paint adhere better.
– Clean the lures thoroughly to remove any oils, dirt, or residue. You can use a mild detergent and water, followed by rinsing and drying them completely.
Step 2: Priming (optional)
– If your lures have a dark or glossy surface, applying a primer can help create a better base for the paint.
– Choose a primer specifically designed for the material of your lures (plastic).
– Apply the primer and allow it to dry completely.
Step 3: Design Planning
– Before starting to paint, decide on the design and colors you want to use for lures. You can draw a rough sketch or use reference images to guide you.
Step 4: Painting
– Place a drop cloth on your work surface to protect it from paint spills.
– Squeeze out small amounts of your desired acrylic paint colors onto a paint mixing surface.
– Start painting the lure with a base color. Use a fine brush to apply thin, even coats of paint.
– Use different brush sizes to add finer details, such as patterns and stripes. Take your time and be patient during this process.
– If you want to create more intricate designs, you can use masking tape to create clean lines.
– Layer the paint gradually. Allow each layer to dry completely, until you achieve the desired opacity and vibrancy.
– Remember to clean your brushes in water between color changes.
Step 5: Drying and Finishing
– Once you have finished painting the lure, let it dry completely. This may take a few hours or overnight, depending on the paint and its thickness.
– If desired, you can apply a clear coat to protect the paint and provide a glossy finish. Choose a coat designed for the material of your lure.
With these steps, you should be able to paint your fishing lures and create unique designs that suit your fishing style. Remember to practice and experiment to improve your painting skills over time.
Final Thoughts
The choice of the best fishing lure paints depends on the angler’s personal preferences and fishing conditions. It is crucial to consider factors such as water clarity, target fish species, and desired visual effects when selecting a paint. Experimenting with different paints can also lead to the discovery of unique combinations that prove highly effective in specific fishing situations.
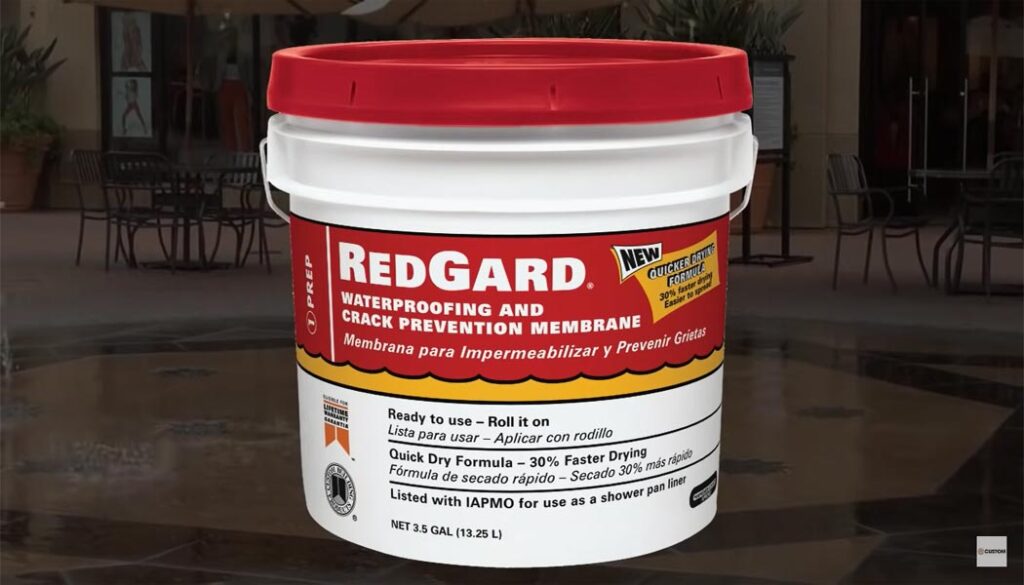
Yes, you can paint over Redgard!
If you’re wondering whether it’s possible to apply a fresh coat of paint on top of Redgard, the answer is a resounding yes. Note that Redgard is a popular waterproofing membrane used in construction and renovation projects.
Image Via Youtube
Are you curious to discover more? So, let’s delve into the world of Redgard and uncover whether painting over it is a viable option.
What Is RedGard?
RedGard is a liquid-applied membrane that is widely used in construction and home improvement projects. Manufactured by Custom Building Products, it is specifically designed to provide waterproofing and crack prevention in areas prone to moisture, such as bathrooms and showers.
RedGard serves as a durable and seamless barrier, protecting surfaces like cement boards, gypsum boards, and plywood from water damage. Its primary purpose is to prevent water from seeping through and causing issues like rotting and mold growth.
Additionally, it has excellent crack isolation properties, meaning it can bridge and reinforce small cracks in the substrate, maintaining the surface’s integrity. It also enhances tile adhesion, creating a stable surface for tile installation. Easy to apply with a roller, brush, or trowel, RedGard dries quickly. It can be used in various moisture-prone areas, including laundry rooms, kitchens, and balconies.
Its versatility, effectiveness, and ease of use make RedGard a preferred choice for both professionals and DIY enthusiasts seeking reliable waterproofing and crack prevention solutions.
Can You Paint over Redgard?
Yes, You Can Paint Over Redgard.
While painting over Redgard is possible, it’s important to note that the painted surface may require additional maintenance compared to traditional painted surfaces. The waterproofing properties of Redgard can affect the breathability of the paint, potentially leading to moisture issues if not properly maintained. Regular inspection and upkeep, such as addressing any cracks or gaps that may develop over time, can help preserve the integrity of the painted surface.
Redgard enhances the aesthetics of the treated area. It typically has a bright red or pink color, which may not be desired in all situations. By painting over it, you can customize the appearance and create a cohesive look of the surface to match your preferred color scheme or decor.
It provides excellent waterproofing and crack prevention properties, but the addition of paint can further enhance the durability of the surface. Paint acts as an additional protective layer, guarding against wear, abrasion, and potential damage. It also makes the surface easier to clean and maintain, as painted surfaces are generally more resistant to dirt, grime, and stains.
Painting over Redgard gives you the freedom to personalize your space according to your preferences. Whether you want a vibrant and colorful shower area or a muted and sophisticated bathroom, painting over Redgard allows you to achieve the desired aesthetic.
Remember, proper surface preparation is crucial before painting over Redgard. Ensure the Redgard surface is clean, dry, and free from any contaminants or loose particles. Additionally, consult the specific instructions provided by the paint manufacturer and follow their guidelines for application over Redgard.
How to Paint over Redgard Surface?
Painting over a Redgard surface requires careful preparation and the use of appropriate materials. Redgard is a waterproofing membrane typically used in areas such as showers, bathrooms, and other wet environments. To paint over a Redgard surface, follow these step-by-step instructions:
Gather the necessary materials:
High-quality paint suitable for the desired surface (latex or oil-based, depending on the project)
Paint roller and paint tray
Paintbrushes (various sizes)
Painter’s tape
Drop cloths or plastic sheets
Sandpaper (medium grit)
Tack cloth or a damp cloth
Primer (if necessary, based on the paint and surface condition)
Prepare the work area:
Clear the area of any furniture or objects that may obstruct your painting process.
Lay down drop cloths or plastic sheets to protect the surrounding surfaces from paint splatters or drips.
Use painter’s tape to cover any fixtures, edges, or areas you want to keep free of paint.
Clean the Redgard surface:
Remove any dust, dirt, or debris from the Redgard surface using a damp cloth or sponge.
Allow the surface to dry completely before proceeding.
Evaluate the Redgard surface:
Check the condition of the Redgard surface for any cracks, peeling, or damage.
If there are any issues, repair them before painting. Follow the manufacturer’s instructions for patching or repairing the Redgard surface.
Sand the Redgard surface:
Lightly sand the Redgard surface with medium-grit sandpaper. This step helps create a rough texture for better paint adhesion.
Be careful not to sand too aggressively, as it may damage the Redgard surface.
Clean the sanded surface:
Use a tack cloth or a damp cloth to remove any sanding dust or residue from the Redgard surface.
Ensure the surface is completely clean and dry before moving forward.
Apply a primer (if necessary):
Check the paint you’ve chosen and follow its recommendations regarding the need for a primer.
If a primer is required or recommended, apply it to the Redgard surface according to the manufacturer’s instructions.
Allow the primer to dry completely before proceeding.
Paint the Redgard surface:
Stir the paint thoroughly to ensure an even consistency.
Start by using a paintbrush to cut in around the edges and corners of the Redgard surface.
Then, use a paint roller to apply the paint to the larger areas of the Redgard surface.
Work in small sections, maintaining a wet edge to prevent visible brush or roller marks.
Apply multiple coats as needed, allowing each coat to dry completely before applying the next one.
Follow the paint manufacturer’s instructions regarding drying times and reapplication.
Remove painter’s tape:
Carefully remove the painter’s tape before the paint is fully dry to prevent it from peeling off with the tape.
Slowly peel the tape away at a 45-degree angle, pulling it back onto itself.
Clean up and allow the paint to cure:
Clean your brushes, roller, and paint tray according to the instructions provided by the paint manufacturer.
Allow the paint to cure fully based on the paint manufacturer’s recommendations before subjecting it to moisture or heavy use.
By following these steps, you should be able to successfully paint over a Redgard surface, providing a fresh and updated look while maintaining the waterproofing qualities of the Redgard membrane.
What Is Redgard Designed to Do?
Redgard is a specialized product designed for specific purposes in the construction and renovation industry. Here are the key points outlining what Redgard is designed to do:
Redgard is a waterproofing and crack prevention membrane.
It forms a barrier against water infiltration in tile and stone installations.
Redgard helps prevent cracks caused by substrate movement or temperature changes.
It offers moisture protection in areas prone to water exposure.
Redgard resists the growth of mold and mildew.
It can be easily applied by rolling, brushing, or troweling.
Redgard is versatile and compatible with various substrates, including concrete and plywood.
It promotes a healthier environment by preventing moisture-related damage.
Redgard meets industry standards and building codes for waterproofing.
It provides a durable and long-lasting solution for tile and stone installations.
What Type of Paint Can You Use over Redgard?
Redgard, a waterproofing membrane, can indeed be painted over with acrylic paint.
Acrylic paint is commonly recommended for this purpose due to its compatibility with Redgard and its ability to adhere well to the surface.
Acrylic paint is a water-based paint that dries quickly and forms a durable, flexible film. It offers good adhesion to various surfaces, including Redgard, and is suitable for both interior and exterior applications. When using acrylic paint over Redgard, it is recommended to choose a high-quality acrylic paint specifically designed for high-moisture areas or bathrooms.
Before applying acrylic paint, ensure that the Redgard surface is clean, dry, and free from any contaminants. It may be necessary to lightly sand the Redgard surface to promote adhesion. Applying a primer specifically formulated for acrylic paints can also enhance the paint’s adhesion and durability.
As always, it is advisable to follow the manufacturer’s instructions on the Redgard and acrylic paint products for the best results. If there are any specific recommendations provided by the manufacturer, they should be followed to ensure proper adhesion and longevity of the painted surface.
Does Paint Stick Well to Redgard?
Certainly! Paint generally adheres well to Redgard. Redgard is a waterproofing membrane that creates a smooth and stable surface.
It is important to ensure the Redgard surface is clean, dry, and free from any contaminants before applying paint. This will help promote good adhesion and ensure a durable and long-lasting paint finish.
Following the manufacturer’s guidelines and using compatible paint products will further enhance the adhesion.
Does Redgard Need Primer?
It is recommended to use a primer before applying Redgard.
Priming the substrate helps improve adhesion and promotes better performance of Redgard. A suitable primer for Redgard application is a high-quality latex-based primer such as KILZ Premium, Zinsser Bulls Eye 1-2-3, or Sherwin-Williams Multi-Purpose Latex Primer.
Always refer to the manufacturer’s instructions and consult with a professional for specific project requirements.
Can You Sand Redgard before Painting?
Yes, you can sand Redgard before painting.
Sanding Redgard helps create a smoother surface for better paint adhesion. It removes any imperfections, such as bumps or unevenness, and provides a more even and uniform substrate. Sanding also helps to roughen up the Redgard surface, allowing the paint to bond more effectively. It is important to follow proper safety precautions while sanding, such as wearing a mask and goggles to protect yourself from dust.
Final Thoughts
The question of whether you can paint over Redgard has been thoroughly examined, taking into account various factors and considerations. After careful analysis, the final verdict is that painting over Redgard is indeed possible, but it requires proper preparation and adherence to certain guidelines.
Choosing the right type of paint is crucial. Acrylic latex paints, specifically those formulated for high-adhesion or masonry surfaces, are often recommended for painting over Redgard. These paints have properties that enable them to adhere well to challenging surfaces like Redgard and provide a durable finish.
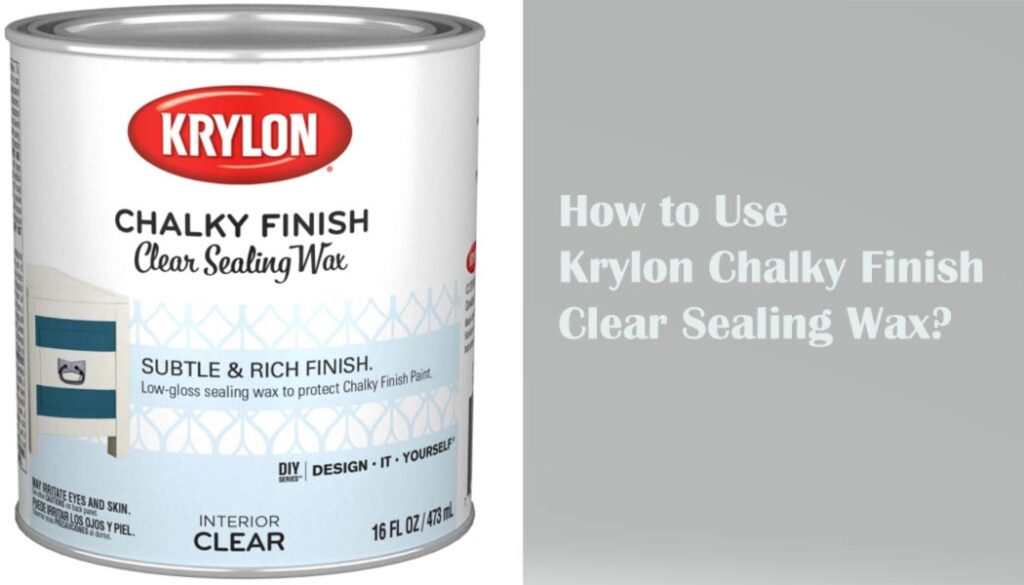
Unlock the full potential of your DIY projects with our comprehensive guide on “how to use Krylon Chalky Finish clear sealing wax“. Dive into the realm of artistic expression as we reveal the best using method of this remarkable product.
Image via krylon.com
Whether you’re an experienced craftsman or just embarking on your creative journey, join us as we provide you with step-by-step techniques for achieving professional-quality results. Prepare to ignite your imagination with the transformative power of Krylon Chalky Finish sealing wax.
How to Use Krylon Chalky Finish Clear Sealing Wax?
Krylon Chalky Finish Clear Sealing Wax is a versatile product designed to protect and enhance the finish of chalky painted surfaces. This wax provides a protective layer that helps seal and preserves the painted surface. Check the guide on how to use it.
Materials Needed:
Krylon Chalky Finish Clear Sealing Wax
Clean cloth or brush
Sandpaper (optional)
Soft cloth or sponge
Wax applicator (optional)
Step 1: Prepare the surface
Ensure that the chalky finish painted surface is clean, dry, and dust-free. If the surface is rough, you can lightly sand it with fine-grit sandpaper (such as 220 grit) to smooth it out. After sanding, wipe away any sanding residue with a soft cloth or sponge.
Step 2: Shake the can
Shake the Krylon sealing wax can vigorously for about a minute. This helps to ensure that the wax is well-mixed and ready for application.
Step 3: Apply the wax
There are several methods you can use to apply the wax.
Option 1: Cloth application
Take a clean, lint-free cloth and fold it into a pad or wrap it around your fingers for better control.
Dip the cloth into the can of wax and allow it to absorb a small amount of the product.
Apply a thin, even coat of wax onto the painted surface, working in small sections at first.
Rub the wax into the surface using circular or back-and-forth motions. Ensure that the wax is evenly distributed.
Option 2: Brush application
Choose a brush with soft bristles that are suitable for wax application.
Dip the brush into the can of wax so that it can absorb the wax properly.
To ensure an optimal result, carefully apply a thin and uniform layer of wax onto the surface.
Brush the wax onto the surface, following the direction of the grain or brush strokes for a smooth finish.
Option 3: Wax applicator
If you prefer, you can use a wax applicator specifically designed for this purpose.
Apply a small amount of wax onto the applicator.
Apply the wax gently. Make sure to use circular motions so that you achieve an even distribution.
Step 4: Remove excess wax
After applying the wax, allow it to set for a few minutes but not fully dry. Then, using a clean cloth, gently wipe away any excess wax from the surface. Take care not to remove too much wax, as it can affect the protective qualities of the finish. The wax should leave a thin layer on the surface.
Step 5: Let it dry
Allow the Krylon clear sealing wax to dry completely. The drying time can vary based on factors such as temperature and humidity. It’s recommended to wait at least 24 hours before subjecting the surface to heavy use or moisture.
Step 6: Buff the surface
If desired, you can achieve a smoother, more polished look by buffing the surface. Use a lint-free cloth or a wax buffing brush to gently buff the surface in circular motions. This can enhance the sheen and create a more polished appearance.
Note: Always refer to the instructions on the Krylon wax can for any specific guidance provided by the manufacturer.
Maintenance and Care of Chalky Finish Sealing Waxed Surfaces
Proper maintenance and care of chalky finish sealing waxed surfaces are crucial to ensure their longevity and aesthetic appeal. Whether you have recently applied wax to a surface or want to protect an existing waxed finish, following the right cleaning and maintenance tips is essential.
1. Allow the wax to cure: After applying the wax, it’s essential to let it cure properly. Follow the Krylon’s instructions for the recommended curing time. During this period, avoid touching or placing any objects on the surface.
2. Gentle cleaning: When cleaning a newly waxed surface, use a soft cloth or sponge to prevent scratching the wax. Avoid abrasive cleaners, harsh chemicals, or scrub brushes that can damage the wax.
3. Regular dusting: Dust the waxed surface regularly to prevent the buildup of dirt and debris. Use a soft cloth or a feather duster to gently remove dust particles.
4. Avoid excess moisture: While wax provides some protection against moisture, excessive exposure can still cause damage. Wipe up spills immediately to prevent stains from forming on the surface.
5. Avoid heat and direct sunlight: Prolonged exposure to heat and direct sunlight can cause the wax to deteriorate and fade. Keep waxed surfaces away from heat sources such as radiators or direct sunlight from windows.
6. Avoid dragging objects: When moving items across the waxed surface, lift them instead of dragging or sliding them. Dragging objects can cause scratches or remove the wax layer.
7. Use protective pads: Place felt or rubber pads under objects that are frequently moved, such as vases, lamps, or decorative items. These pads prevent direct contact with the waxed surface and reduce the risk of scratches.
8. Be cautious with sharp objects: Be mindful when using sharp objects on a waxed surface. Avoid directly cutting or chopping on the surface, as this can damage the wax and leave marks.
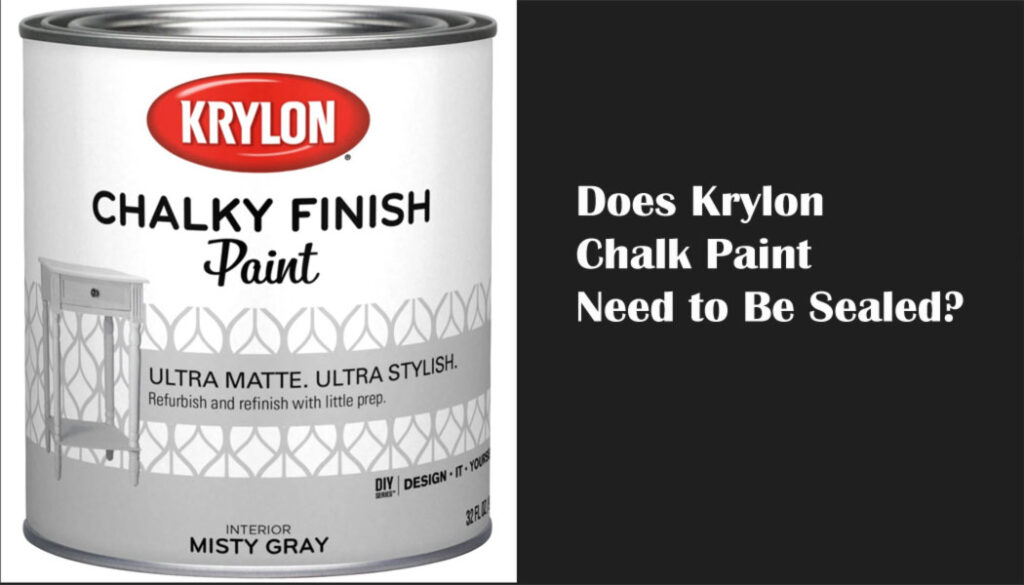
Does Krylon Chalky Finish Clear Sealing Wax Need Primer?
Krylon Chalky Finish clear wax is a protective topcoat used to seal and protect chalky finish paints. It is designed to enhance and protect the appearance of the chalky finish while providing a durable finish.
In general, primers are used as a preparatory layer before applying paint to ensure better adhesion. However, when it comes to using Krylon Chalky Finish wax, a primer is not typically required. Check why:
1. Chalky finish paints are known for their porous and matte appearance. These paints often have built-in adhesion properties that allow them to bond effectively without the use of a primer.
2. The primary purpose of sealing wax is to seal and protect the chalky finish paint. It forms a clear protective layer that helps guard against stains and wear and tear. Its role is to enhance the durability of the chalky finish, rather than providing adhesion like a primer.
Note: There may be specific circumstances or surfaces where using a primer with Krylon Chalky Finish clear wax could be beneficial. For example, if you’re working with a highly porous surface, such as bare wood or metal, a primer designed for that specific material might help improve adhesion. In such cases, it’s best to consult the product instructions or seek guidance from a professional to determine if a primer is necessary.
How Long Does Krylon Chalky Finish Sealing Wax Take to Dry?
The drying time of the Krylon sealing wax can vary depending on the environmental conditions and the thickness of the applied layer.
In general, Krylon recommends allowing the sealing wax to dry for at least 24 hours before handling the painted surface. However, it’s best to note that this is a minimum recommendation, and the drying time can be influenced by many different factors.
Higher temperatures and lower humidity levels generally promote faster drying times. Colder temperatures and higher humidity levels can prolong the drying process. It’s advisable to apply the wax in a well-ventilated area with moderate temperature and humidity for optimal drying.
If you apply the sealing wax in a thick layer, it will take longer to dry compared to a thin application.
The porosity of the painted surface can affect the drying time. If the underlying chalky finish paint has a high level of porosity, it may absorb the sealing wax more readily. On the other hand, if the surface is less porous, the drying time may be slightly longer.
Conclusion
Remember that Krylon Chalky Finish clear sealing wax is intended for interior use only. It is an ideal wax for furniture, decorative pieces, and other indoor projects. However, it is not suitable for outdoor use or areas exposed to excessive heat or moisture.
By following the above guidelines, you can effectively utilize Krylon clear sealing wax to enhance the beauty of your chalk-painted surfaces. With proper application and care, you can enjoy a long-lasting, professional-looking finish that will bring new life to your projects.
Looking to give your metal surfaces a fresh coat of paint? Wondering if latex paint is the right choice? We’ll address the common query:
“Can you use latex paint on metal?” Yes, latex paint can be used on metal surfaces by properly preparing the surface, using a metal primer, and ensuring good adhesion for long-lasting results.
Whether you’re planning to revamp your metal furniture, spruce up your outdoor décor, or restore the shine to metal fixtures, we’ve got you covered.
Say goodbye to dull metal surfaces and hello to a vibrant, durable finish with the power of latex paint.
Let’s get started!
What Kind of Paint Do You Use on Metal?
When painting metal surfaces, it’s important to choose a paint specifically formulated for that purpose. Different types of metals require different types of paint to ensure proper adhesion, durability, and protection against corrosion. Here are some specific paint options commonly used for metal:
Corotech® Waterborne Enamels for non-ferrous metals:
This type of paint is specifically formulated for non-ferrous metals like aluminum, brass, and copper. Waterborne enamels offer excellent adhesion, durability, and corrosion resistance. They also have low odor and are easy to clean up with water.
Corotech® Alkyd Enamels for ferrous metals:
Alkyd enamels are suitable for painting ferrous metals such as iron and steel. They provide excellent rust prevention and protection against corrosion. Alkyd paints have good adhesion and durability, and they dry to a hard, glossy finish.
In addition to the Corotech® brand, there are other reputable paint manufacturers that offer suitable options for painting metal surfaces. Some popular choices include:
Rust-Oleum Professional High-Performance Protective Enamel:
This paint is designed for metal surfaces and offers excellent rust prevention and corrosion resistance. It provides a durable finish and is available in various colors.
Benjamin Moore Metal & Wood Enamel:
Benjamin Moore offers a range of high-quality enamels suitable for metal surfaces. These paints provide good adhesion, durability, and weather resistance.
Sherwin-Williams Pro Industrial DTM Acrylic:
This direct-to-metal (DTM) acrylic paint is ideal for painting metal without the need for a separate primer. It offers excellent adhesion, corrosion resistance, and durability.
It’s worth noting that there are also other reputable brands available in the market offering similar types of paint specifically formulated for metal surfaces. When choosing a paint, consider factors such as the intended use, environmental conditions, and the specific metal you are painting.
Can You Use Latex Paint on Metal?
Latex paint can be used on some metal surfaces with proper preparation and priming, but it may not be suitable for all metals.
Latex paint is primarily designed for use on porous surfaces such as wood, drywall, and plaster but there are certain factors to consider before deciding to use it. First and foremost, it is important to ensure that the metal surface is properly prepared for painting. This typically involves cleaning the surface to remove any dirt, grease, or rust, and applying a suitable primer to promote adhesion.
One of the main benefits of using latex paint on metal is its ease of use. Latex paint is water-based, which means it can be easily applied and cleaned up with water. It also dries relatively quickly, allowing for faster project completion. Additionally, latex paint is available in a wide range of colors and finishes, providing flexibility in achieving the desired aesthetic.
However, there are also drawbacks to consider. On metal surfaces it may lack durability, protection, and resistance to corrosion compared to specialized paints like oil-based or epoxy coatings. It may prone to chipping and peeling, particularly in high-traffic or harsh environments, necessitating more frequent maintenance or repainting.
But evaluating the environment and intended use of the painted metal will help determine whether latex paint is the most suitable option.
How to Prepare the Metal Surface for Latex Paint?
Proper surface preparation is crucial for successful paint adhesion on metal surfaces. Neglecting this step can lead to paint failure, peeling, or flaking. Follow these steps to prepare a metal surface for latex paint:
Cleaning the surface:
Start by removing any dirt, grease, or oil from the metal surface. Take a mild detergent or degreaser and scrub the surface thoroughly. Ensure the use of fresh water for rinsing and allow adequate time for thorough drying.
Removing rust, corrosion, and old paint:
If there are any areas with rust or corrosion, employ a wire brush or sandpaper to remove them. For stubborn rust, you can use a rust remover or converter. If there is old paint that is flaking or peeling, scrape it off using a putty knife or paint scraper.
Sanding and smoothing the surface:
Use sandpaper or a sanding block to smooth out the metal surface. This step helps in removing any remaining loose paint, roughness, or imperfections. Start with a coarse-grit sandpaper and gradually move to finer grits for a smoother finish.
Remove old paint:
If there is any old paint that is flaking or peeling, it’s important to remove it. Use a scraper or putty knife to scrape off the loose paint. You can also use a paint stripper or remover to soften and remove stubborn paint layers. Follow the instructions provided by the manufacturer of the paint stripper.
Applying a primer for enhanced adhesion:
To ensure better adhesion of the latex paint, apply a primer specifically designed for metal surfaces. The primer creates a smooth, uniform surface for the paint to adhere to and helps prevent rust or corrosion. Follow the manufacturer’s instructions for proper application and drying time.
Fill in gaps and imperfections:
If there are any gaps, holes, or imperfections on the metal surface, use a suitable filler or putty to fill them in. Smooth out the filler with a putty knife and allow it to dry completely. Sand the filled areas lightly to create a smooth surface.
By following these steps and properly preparing the metal surface, you’ll create an ideal foundation for the latex paint. This will result in better adhesion, durability, and a professional-looking finish for your painted metal project.
How to Use Latex Paint on Metal?
After Preparing the Metal Surface for Latex Paint, now time to start painting by following the below steps-
Choose the Right Latex Paint
Select a latex paint that formulated for work on metal surfaces. Look for a paint that is labeled as “metal-friendly” or “suitable for metal.” Consider the finish you desire, whether it’s flat, satin, or glossy. Make sure the paint is compatible with the primer you’ve applied, if any.
Stir the Paint
Before applying the paint, thoroughly stir it using a paint stick or a stirring tool. This will ensure that the pigments and other ingredients are well-mixed and distributed evenly throughout the paint.
Apply the Latex Paint
Using a paintbrush, a roller, or a paint sprayer, applies the latex paint to the metal surface. Start with smooth and even strokes, working in one direction. If you’re using a brush or roller, apply the paint in thin coats. Permit each coat to dry thoroughly before jumping to the next. This will help prevent drips and ensure a smooth, even finish. If you’re using a paint sprayer, follow the manufacturer’s instructions for the appropriate technique and distance to maintain even coverage.
Allow the Paint to Dry
After applying the desired number of coats, allow the paint to dry thoroughly. Check the paint can for the recommended drying time. Keep in mind that the drying time may vary depending on factors such as humidity and temperature. Avoid touching or placing objects on the freshly painted surface until it’s fully dry.
Apply Additional Coats (if necessary)
Inspect the painted surface once it’s completely dry. If you notice any thin or uneven areas, you may need to apply an additional coat of latex paint. Repeat Step 7 by applying thin coats and allowing each coat to dry before adding another layer.
Clean Up
After you have finished painting, clean your rollers, brushes, or paint sprayer according to the manufacturer’s instructions. If you have used drop cloths or protective coverings, carefully remove them, ensuring that any paint drips or spills are contained and disposed of properly. Clean any tools or equipment used in the painting process with water or the appropriate cleaning solvent.
Maintain and Protect the Painted Surface
To ensure the longevity and appearance of the painted metal surface, it’s important to take proper care and maintenance. Avoid exposing the painted surface to extreme temperatures or harsh weather conditions. Regularly clean the surface with a mild detergent and water solution to remove any dirt or stains. Avoid using abrasive cleaners or rough scrub brushes that could damage the paint. If the painted surface gets chipped or scratched over time, touch up the area with the same latex paint to maintain a consistent appearance.
Remember to always refer to the specific instructions provided by the manufacturer of the latex paint you are using, as different products may have slightly different application techniques and drying times.
How Do You Get Latex Paint to Stick to Metal?
Take a look at some additional tips to help latex paint adhere to metal surfaces-
Consider using a metal etching primer specifically formulated to enhance paint adhesion on smooth or glossy metal surfaces.
If the metal surface has been previously painted with an oil-based paint, consider roughening it with sandpaper before applying latex paint to improve adhesion.
Ensure the metal surface is completely dry before painting to prevent moisture-related issues that can affect paint adhesion.
Apply the paint in thin, even coats, avoiding heavy applications that can lead to drips or sagging.
If the metal surface has intricate or hard-to-reach areas, consider using a spray paint application for more uniform coverage.
Some latex paints may benefit from an extended drying time to fully cure and achieve maximum adhesion. Consult the paint manufacturer’s recommendations for curing time.
In areas prone to high humidity or moisture, such as bathrooms or outdoor metal surfaces, consider using a latex paint formulated for increased moisture resistance.
If the metal surface is exposed to frequent handling or abrasion, consider applying a clear coat or sealer over the latex paint for added protection and durability.
Can You Use Flat Latex Paint on Metal?
Yes, you can use flat latex paint on metal surfaces.
But latex paint alone may not provide the same level of durability and adhesion as paints specifically formulated for metal. To ensure proper adhesion, it’s recommended to clean and prepare the metal surface by removing any rust, dirt, or grease.
Applying a primer designed for metal surfaces before applying the latex paint can also improve adhesion and durability. Additionally, using a topcoat or sealer specifically designed for metal can enhance durability and protect against rust and corrosion.
Can You Use Acrylic Latex Paint on Metal?
Yes, acrylic latex paint can be used on metal surfaces.
Acrylic latex paint is a water-based paint that contains acrylic resins, which provide good adhesion and durability. When applied correctly, it can adhere well to metal and provide a protective coating. Consider applying oil-based primer first to get the best outcome.
How Long Does Latex Paint Take to Dry on Metal?
Latex paint typically takes around 15 to 30 minutes, while oil-based latex paint can take anywhere from 6 to 8 hours to dry.
While the paint may feel dry to the touch within that timeframe, it may still take a few hours to fully cure and harden. Factors such as temperature, humidity, and the thickness of the paint layer can affect the overall drying and curing time.
The Bottom Line
While latex paint can adhere to metal surfaces, its durability and long-term performance may be compromised. Although it may work for certain indoor applications, such as decorative projects, it is not recommended for high-traffic or exterior use.
To ensure optimal results and protection against rust and corrosion, it is advisable to use specifically formulated metal paints or primers designed to bond effectively with metal surfaces. Choosing the right product will ensure a long-lasting and professional finish for your metal projects.
Carbon fiber hoods often come with a sleek, woven texture that showcases the material’s inherent beauty. However, some car owners may desire to personalize their vehicles further by adding a customized paint job. The idea of incorporating colors onto a carbon fiber hood may seem appealing, but it raises some concerns as well. And one common question that arises among car owners and modifiers is – ‘can you paint carbon fiber hoods’.
You can paint carbon fiber hood without damaging its overall quality. Certain techniques are required to get the best results. Right primer, base coat, and clear coat should be selected.
In this guide, we will explore some more things so that you can take a proper decision. Additionally, you will know how to paint carbon fiber hoods in the right way.
Can You Paint Carbon Fiber Hoods?
Yes, carbon fiber hoods can be painted. Carbon fiber hoods are often preferred by car enthusiasts due to their lightweight and strong nature. While carbon fiber has a distinct appearance on its own, it is possible to paint a carbon fiber hood to achieve a desired color or finish.
Proper surface preparation is crucial when painting carbon fiber hoods. The carbon fiber hood should be thoroughly cleaned and prepared before painting. Any dirt, dust, or contaminants should be removed to ensure proper adhesion of the paint.
Choosing the right type of paint is essential for painting carbon hood. It is best to use automotive-grade paints that are designed for use on composite materials. These paints are formulated to provide good adhesion and flexibility. And this is necessary to prevent cracking or peeling on the flexible carbon fiber surface.
When applying paint to a carbon fiber hood, it is important to follow the manufacturer’s instructions and use proper painting techniques. Applying multiple thin coats of paint rather than a single heavy coat is suggested. This allows each layer to dry properly and minimizes the risk of sagging.
Clear coat application is another important consideration after painting a fiber hood. Clear coat provides an additional layer of protection and enhances the final appearance of the paint job. It helps to protect the underlying paint from UV damage, fading, and scratches.
When it comes to customizing the appearance of a vehicle, painting a carbon fiber hood is a popular choice among car enthusiasts. But painting a hood comes with some pros and cons as well. Let’s check them.
A. Pros of Painting Carbon Fiber Hoods
Enhanced Aesthetics: One of the main benefits of painting a carbon fiber hood is the improved visual appeal it offers. Painting fiber hoods allows you to customize the color and finish to match the overall look of your vehicle. This can give your car a unique and personalized appearance.
Protection against UV Damage: Carbon fiber hoods, although durable, can be susceptible to UV damage over time. The clear coat on the carbon fiber can degrade when exposed to prolonged sunlight, leading to fading. Painting the hood with high-quality automotive paint provides an additional layer of protection against UV rays.
Increased Durability: Painting carbon fiber can offer an extra layer of protection against scratches, chips, and minor impacts. The paint acts as a barrier. It shields the carbon fiber from potential damage caused by debris or minor accidents. This can help prolong the lifespan of your carbon fiber hood.
Easier Maintenance: Carbon fiber hoods, when left unpainted, require regular cleaning and maintenance to preserve their shine. Painting the hood makes it easier to clean as you can use conventional automotive cleaning products without damaging the carbon fiber texture.
B. Cons of Painting Carbon Fiber Hoods
Added Weight: When you paint a carbon fiber hood, it adds a certain amount of weight (very slight) to the overall structure. However, for performance-oriented vehicles or enthusiasts who prioritize weight reduction, this additional weight may be a concern.
Potential Paint Damage: Painting hoods requires careful surface preparation and specialized techniques to ensure prevent paint damage. If the paint is not applied correctly, it may lead to paint chipping, cracking, or peeling. Proper maintenance and care are essential to prevent paint-related issues.
Higher Cost: When you choose to paint a carbon fiber hood, you will incur additional costs for high-quality paint and potential touch-ups or repairs in the future. The overall cost of painting a carbon fiber hood can be significantly higher compared to leaving it unpainted.
Color Match Challenges: Achieving a perfect color match between the painted carbon fiber hood and the rest of the vehicle can be challenging. The unique texture and pattern of carbon fiber may affect how the paint color appears, especially under different lighting conditions.
Painting carbon fiber hoods can be a rewarding project that adds a personalized touch to your vehicle’s appearance. Here, we will walk you through the step-by-step process of painting a carbon fiber hood, from the necessary materials to the meticulous techniques involved.
Materials You Need:
Carbon fiber hood
Sandpaper
Tack cloth
Primer
Automotive paint
Paint sprayer or spray gun
Respirator mask
Painter’s tape
Plastic sheeting
Gloves and safety goggles
Step 1: Preparation
Begin by thoroughly cleaning the carbon fiber hood to remove any dirt, dust, or grease. Use a mild detergent or automotive cleaner and a soft cloth. Rinse the hood with water and allow it to dry completely.
Use painter’s tape and plastic sheeting to mask off any areas that you don’t want to paint, such as the edges of the hood.
Step 2: Sanding
Start by using 320-grit sandpaper to scuff the entire surface of the carbon fiber hood. This will create a rough surface for the primer to adhere to.
Next, switch to 600-grit sandpaper and sand the entire hood again to smooth out any imperfections left by the previous sanding.
Finish with 1000-grit sandpaper to create a smooth and even surface.
Step 3: Cleaning
Use a tack cloth to remove any sanding dust from the hood. Make sure to wipe it thoroughly to eliminate any residue that could affect the paint job.
Step 4: Applying Primer
Apply a high-quality automotive primer to the fiber hood. Follow the proper mixing ratio and application technique.
Use a paint sprayer or spray gun to apply the primer in thin, even coats. Start with a light coat and allow it to dry according to the manufacturer’s instructions. Apply additional coats as necessary, allowing each coat to dry before applying the next.
Step 5: Sanding the Primer
After the primer has dried completely, use 1000-grit sandpaper to sand the surface lightly. This will ensure a smooth and even base for the paint. Clean the hood with a tack cloth to remove any sanding dust.
Step 6: Applying Base Coat
Mix the automotive paint properly. Ensure that you have the correct color and that it is compatible with the primer.
Use the paint sprayer to apply the base coat. Apply thin, even coats, moving the sprayer in a back-and-forth motion. Allow each coat to dry before applying the next.
Step 8: Applying Clear Coat
After the initial base coat has fully dried, it’s time to proceed with the application of the clear coat. To achieve a desirable glossy and protective finish for your project, it is recommended to apply multiple thin and even coats of the clear coat. Allow each coat to dry thoroughly before proceeding with the next one. By following these steps, you’ll achieve a beautiful and well-protected final result.
Important Tips:
Inspect the painted surface for any imperfections or areas that require touch-ups. Use fine-grit sandpaper to lightly sand these areas, and then apply touch-up paint as needed. Allow the hood to dry completely before using.
Note that painting a carbon fiber hood requires skill and experience with automotive painting techniques. If you’re not confident in your abilities, it’s better to seek professional assistance to achieve your desired results.
Check this video:
What Kind of Paint Do You Use on Carbon Fiber?
It’s important to choose the right type of paint to ensure proper adhesion and a durable finish. Here are two considerations for selecting the appropriate paint for carbon fiber.
1. Epoxy-based Paint: Carbon fiber has a smooth and non-porous surface, so it’s best to use an epoxy-based paint. Epoxy paints offer excellent adhesion and durability.
2. Automotive Paint: Automotive paints are often suitable for painting carbon fiber parts as they are designed to adhere well to plastics and composites. Look for automotive paints formulated for use on exterior body parts.
How Much Does It Cost to Paint a Carbon Fiber Hood?
The cost of painting carbon fiber hoods can vary depending on many different factors. The cost to paint a carbon fiber hood could range anywhere from $500 to $1200 or more. This cost typically includes the preparation work, priming, painting, and clear coating. However, it’s always best to contact local body shops in your area to get accurate and up-to-date estimates based on your specific requirements.
Keep in mind that prices can vary significantly depending on the location and the level of customization you desire. It’s also worth considering additional costs such as any repairs or modifications that may be needed prior to painting.
Please note that the prices mentioned here are indicative and may not reflect the current market rates.
Should You Paint Carbon Fiber Hoods at Home?
Painting carbon fiber hoods at home can be done, but it is not always a good idea. Let’s check why!
Why you should paint carbon fiber hoods at home:
1. Painting the hood yourself can save you money that you would otherwise spend on professional painting services.
2. Painting at home allows you to personalize it according to your desired color or design, giving your vehicle a unique look.
Why you should not paint carbon fiber hoods at home:
1. Professional painters possess the necessary skills and experience to handle the nuances of painting carbon fiber effectively.
2. Professional painters understand the specific requirements of carbon fiber. And thus, they can choose the appropriate products and techniques to ensure a high-quality paint job.
3. If your carbon fiber hood is under warranty, painting it at home may void the warranty.
Conclusion
It is essential to consider the potential impact of painting on the overall performance of the carbon fiber hood. Carbon fiber is valued for its high-strength characteristics.
Adding layers of paint can add weight to the hood, which may slightly affect the vehicle’s performance, albeit to a minimal extent. It is advisable to consult with manufacturers to understand any potential consequences and make an informed decision.
Have you ever found yourself mesmerized by the dazzling allure of glitter wall paint, only to later realize that its charm has worn off? Perhaps you’re now facing the daunting task of removing that shimmering layer from your walls, longing for a change or a more subdued aesthetic.
But how to remove glitter wall paint? Apply adhesive tape on the glitter paint, press firmly, and peel it off. Repeat until all glitter is removed.
Unlock more Secrets of Glitter Paint Removal. Transform your walls from sparkling to serene.
Glitter Wall Paint: Composition and Characteristics
Glitter wall paint is a unique type of paint that adds a sparkling and glamorous touch to interior walls. Its composition typically consists of a base paint combined with fine particles of glitter or metallic flakes. These glitter particles are evenly distributed throughout the paint, creating a shimmering effect when applied to the wall surface.
One of the key characteristics of glitter wall paint is its ability to reflect light, enhancing the overall visual appeal of a room. Depending on the type and size of the glitter particles used, the paint can create a subtle sparkle or a more dazzling and dramatic effect. Glitter wall paint comes in various colors, allowing homeowners and interior designers to choose from a wide range of options to suit different styles and preferences.
In the market, there are different types of glitter wall paint available to cater to various needs and design preferences. Some paints contain larger glitter particles, resulting in a more pronounced glitter effect, while others feature smaller particles for a more subtle shimmer. Additionally, there are paints with different base colors, allowing for customization and creative possibilities. Some glitter wall paints are also formulated with water-based or solvent-based compositions, offering different application methods and durability levels.
Despite the aesthetic benefits of glitter wall paint, there are potential challenges associated with its removal. Due to the nature of the glitter particles, which are mixed within the paint, removing glitter wall paint can be more labor-intensive compared to regular wall paint. The glitter particles tend to adhere to the wall surface, making it difficult to completely eliminate them without damaging the underlying wall or leaving residue.
Therefore, proper preparation and priming of the wall before applying glitter paint, as well as seeking professional assistance for removal, may be necessary to avoid these challenges.
Does Glitter Paint Ruin Walls?
Glitter paint can potentially cause some challenges for walls, but whether it actually ruins them depends on various factors.
Glitter paint typically contains small particles of glitter suspended in the paint, which can give a shimmering or sparkling effect when applied to surfaces.
One concern with glitter paint is its tendency to shed or flake over time. The glitter particles may become loose and detach from the painted surface, leading to a trail of glitter residue. This can create a messy appearance and require frequent cleaning or maintenance to keep the wall looking neat. Additionally, the loose glitter particles may spread to adjacent areas or objects, which could be undesirable depending on the specific environment.
Another issue is the removal of glitter paint. If you decide to repaint the wall or change the color, the glitter paint can pose a challenge. The glitter particles can make it difficult for new paint to adhere properly, resulting in an uneven finish. Removing glitter paint entirely may require extra effort, as the glitter particles tend to embed themselves into the surface, requiring sanding or scraping to achieve a smooth wall.
To minimize potential damage, proper preparation and application techniques are crucial. Thoroughly cleaning and priming the wall before applying glitter paint can help improve adhesion and reduce flaking. Additionally, sealing the glitter paint with a clear topcoat can provide an extra layer of protection, reducing the chances of glitter shedding and making it easier to clean the surface.
How to Remove Glitter Wall Paint?
Removing glitter wall paint can be a bit challenging, as the glitter particles tend to stick to the surface and can be stubborn to remove completely. However, with the right tools and techniques, you can effectively remove glitter wall paint. Here are some steps you can follow to remove glitter wall paint:
Method 1: Scraping
To remove glitter wall paint using the scraping method, follow these steps:
Prepare the area:
Clear the room of any furniture or objects that might obstruct your work. Lay down drop cloths or plastic sheets to protect the floor and surrounding surfaces.
Gather your tools:
Wear protective gloves and safety goggles. Get a scraper with a wide, flat edge, such as a putty knife or a paint scraper. You may also need a ladder if the paint is on higher sections of the wall.
Test a small area:
Select an inconspicuous spot on the wall and gently scrape the glitter paint to see how easily it comes off. This will help you determine the best approach and avoid damaging the wall surface.
Begin scraping:
Starting at the top corner of the wall, position the scraper at a shallow angle against the surface. Apply even pressure and push the scraper downwards, moving it horizontally across the painted area.
Work in sections:
Divide the wall into manageable sections and focus on one at a time. Scrape off as much glitter paint as possible from each section before moving on to the next.
Be patient and persistent:
Glitter paint can be stubborn to remove, so it may require several passes with the scraper. Take breaks if needed, but maintain a steady rhythm to avoid prolonged exposure to paint fumes.
Clean up debris:
As you scrape off the glitter paint, collect the residue in a dustpan or onto a disposable sheet. Dispose of it properly according to your local waste disposal guidelines.
Remove any remaining traces:
Once you have removed the majority of the glitter paint, examine the wall for any remaining specks. Use a fine-grit sandpaper or a sanding block to gently smooth out any rough spots or stubborn remnants.
Clean the wall:
After scraping off the paint, use a damp cloth or sponge to wipe the wall and eliminate any dust or residue. Ensure the wall is fully dry before continuing with additional treatments or painting.
Method 2: Chemical Stripping
To remove glitter wall paint using the chemical stripping method, follow these steps:
Gather materials:
First make sure to gather the following materials: a chemical paint stripper, plastic drop cloths, a scraper or putty knife, protective gloves, goggles, and a mask.
Prepare the area:
Lay down plastic drop cloths to protect the surrounding floor and furniture from the chemical stripper.
Wear protective gear:
Put on gloves, goggles, and a mask to protect your skin, eyes, and respiratory system from the chemicals.
Apply the chemical stripper:
Acquire a paint stripper containing methylene chloride or dichloromethane.
Ensure that you carefully read and adhere to the instructions provided on the paint stripper container. Proceed to apply the stripper uniformly onto the glitter wall paint, utilizing either a brush or roller.
Allow dwell time:
Let the chemical stripper sit on the wall paint for the recommended dwell time specified by the manufacturer. This time will vary depending on the brand of the paint stripper used.
Test a small area:
After the dwell time, test a small area by scraping it with a scraper or putty knife. If the glitter wall paint comes off easily, proceed to the next step. If not, you may need to let the chemical stripper sit for a bit longer.
Scrape off the paint:
Starting from the top of the wall, carefully scrape off the glitter wall paint using a scraper or putty knife. Work in small sections to avoid damaging the wall surface.
Dispose of the paint residue:
Collect the scraped-off paint residue and dispose of it properly according to local regulations. Seal it in a bag or container to prevent it from spreading.
Clean the wall:
Once all the glitter paint has been removed, clean the wall thoroughly using soap and water or a mild detergent to remove any residual chemicals.
Rinse and dry:
Rinse the wall with clean water to remove any remaining soap or detergent. Allow the wall to dry completely before applying new paint or wallpaper.
Method 3: Painting over the glitter wall paint
To remove glitter wall paint by painting over it, you’ll need to follow a few steps. Here’s a general method you can use:
Gather your materials:
You will need a primer, paint roller or brush, paint tray, painter’s tape, drop cloths or plastic sheets to protect your floor and furniture, and your chosen paint color.
Prepare the room:
Remove any furniture or objects from the area and cover the floor and remaining furniture with drop cloths or plastic sheets to protect them from paint splatters.
Clean the glitter wall paint:
Use a damp cloth or sponge to wipe down the glitter wall paint. This will remove any loose glitter or dirt from the surface and provide a clean base for the primer.
Apply painter’s tape:
Use painter’s tape to cover any edges, trim, or areas you don’t want to paint over, such as windows, door frames, or baseboards.
Apply the primer:
Using a paint roller or brush, apply a coat of primer to the entire glitter wall paint surface. The primer will help create a smooth, even base for the new paint and cover up the glitter particles. Follow the manufacturer’s instructions for the specific primer you’re using, including drying times.
Let the primer dry:
Allow the primer to dry completely according to the manufacturer’s instructions. This may take a few hours, but it’s essential to ensure a good base for the new paint.
Apply the new paint:
Once the primer is dry, use roller or brush to evenly apply new paint color over the primer. Apply multiple coats if necessary.
Remove painter’s tape:
Once the new paint is dry, carefully remove the painter’s tape from the edges and any other areas where you applied it.
Clean up:
Clean your brushes, rollers, and other painting tools according to the paint manufacturer’s instructions. Remove the drop cloths or plastic sheets from the floor and furniture, and return any moved objects to their original places.
Removing glitter wall paint by painting over it is a method to cover up the glitter, but some traces of glitter may still be visible depending on the intensity and type of glitter used in the initial application.
Can You Wallpaper Over Glitter Paint?
Yes, it is possible to wallpaper over glitter paint. However, there are a few important considerations to keep in mind.
The glitter particles in the paint may create a textured surface that can affect the appearance and adhesion of the wallpaper. It is recommended to sand the glitter paint lightly to create a smoother surface.
Additionally, using a primer before applying the wallpaper can help improve adhesion. Choose wallpaper that is thick enough to conceal the glitter. Follow the manufacturer’s instructions for proper application to ensure the best results.
Can You Paint over Glitter Paint on Walls?
Yes, you can paint over glitter paint on walls with proper preparation.
There are a few precautions to keep in mind. Consider the type of glitter paint you have used. Chunky or textured glitter may require additional sanding to create a smooth surface.
Choose a high-quality primer that is compatible with both the glitter paint and the new paint color. Ensure that the new paint you select is of good quality and has sufficient opacity to cover the glitter.
Remember to perform a small test patch before proceeding with the entire wall to ensure the desired results.
Does Glitter Paint Flake Off?
Glitter paint has a tendency to flake off over time.
The small glitter particles are typically suspended in the paint, but they can become dislodged with movement, friction, or exposure to the elements.
While some glitter paints may have better adhesion properties than others, flaking can still occur, especially in high-traffic areas or with age.
Proper surface preparation, application techniques, and the use of a protective topcoat can help minimize flaking and prolong the longevity of the glitter paint.
Removing glitter wall paint requires a combination of effective methods and patience. Throughout our discussion, we explored various techniques such as sanding, scraping, and using chemical strippers. It’s crucial to consider the condition of your wall and choose the most suitable approach.
Remember to follow safety precautions and consider seeking professional help if needed. With determination and careful execution, you can bid farewell to the glitter and enjoy a fresh canvas for your desired wall finish.
Looking for ways to stir paint without a stick? Paint stirring is a vital step in achieving a desired result for your projects. But what if you find yourself without a paint stir stick? How to stir paint without a stick?
Cut off the bottom of a water bottle straightly and smoothly. Put the cut end of the bottle into the paint can. Apply a back-and-forth flow to move the bottle inside the container.
Photo by Blue Bird (pexels.com/photo/man-mixing-paint-in-a-can-7217990/)
In this guide, we will explore some more things that can help you in stirring paints. So, let’s dive in and discover the ingenious way to stir paint without a stick!
Stirring paints thoroughly before use is an important step in ensuring their quality and achieving the desired results in any painting project. When paint sits unused for a while, its various components may begin to separate or settle. Pigments, binders, solvents, and other additives can separate into layers. Heavier components sink to the bottom and lighter ones rise to the top.
To address this, thorough stirring or mixing is necessary to recombine these components. Stirring will also help achieve a consistent composition throughout the paint.
By stirring, we are effectively redistributing the pigment particles, binders, and other additives. This ensures that they are evenly dispersed throughout the paint. This is vital because it ensures consistent color and texture when the paint is applied to a surface.
If the paint is not stirred properly, the pigments and other components may not be adequately mixed. This can lead to uneven coverage, streaks, or an overall inconsistent appearance on the painted surface. Stirring the paint ensures that these issues are minimized, providing a more uniform and pleasing end result.
Alternative Methods to Stir Paint without a Stick
When it comes to painting projects, achieving a well-mixed paint is essential for obtaining smooth, consistent color and texture. While the traditional method of stirring paint with a stick is commonly used, there are alternative methods that can be equally effective.
A. Using a whisk or mixer: A whisk or mixer can be used to stir paint by attaching it to a power drill or using a handheld mixer. The spinning action of the whisk or mixer helps mix the paint thoroughly and quickly.
B. Using a fork: A fork can be inserted into the paint can and manually moved back and forth to agitate and mix the paint. This method requires some effort but can effectively blend the paint.
C. Using a container: This method involves pouring the paint into a sturdy plastic bottle or container and tightly sealing it. The container is then shaken vigorously to mix the paint. The movement of the paint inside the closed container helps to combine the pigments and achieve a consistent color.
While a stick or paint stirrer is typically used for stirring paint, there may be times when you find yourself without one. Don’t worry, as there are some alternatives! In this step-by-step guide, we’ll show you how to stir paint using a plastic water bottle.
Materials You Need:
Clean plastic water bottle
Scissors or utility knife
Paint container with a tight-fitting lid
Step by Step Guide:
Gather all the materials needed for the process.
Ensure that the paint container is properly sealed with its lid.
Take a clean plastic water bottle and remove the cap.
Using a pair of scissors or a utility knife, carefully cut off the bottom of the water bottle. The cut should be straight and smooth.
Hold the paint container with one hand. With the other hand, insert the cut end of the water bottle into the container.
Push the water bottle down until it reaches the bottom of the container.
Hold the paint container firmly. Use a back-and-forth motion to move the bottle up and down inside the container.
Continue stirring the paint for a few minutes. Make sure that you reach all areas of the container to achieve a thorough mix.
Once the paint has reached a smooth consistency, carefully remove the water bottle from the container.
Close the paint container tightly with its lid to keep the paint fresh until further use.
Dispose of the water bottle appropriately.
By following these steps, you can easily stir paint without a stick. This method provides a simple and effective way to mix the paint thoroughly for your painting projects.
Tips for Stirring Paint without a Stick
The following tips will help you mix your paint thoroughly and achieve professional-looking results.
1. Use a slow and steady approach: When using alternative methods to stir paint, it’s important to take a slow and steady approach. Avoid quick, aggressive movements that could result in spills or splatters. Start with gentle mixing motions and gradually increase the intensity until the paint is well-blended.
2. Use caution when using alternative methods: While alternative methods can be effective, it’s crucial to exercise caution. Be careful of the tool or container you’re using, ensuring it’s sturdy and suitable for the task. Take care to avoid any sharp edges or potential hazards when using unconventional items to stir paint.
3. Clean up properly: After you’ve finished stirring the paint, make sure to clean up any tools or containers used. Rinse or wash them thoroughly to remove any paint residue. This will help prevent cross-contamination and ensure the longevity of your tools. Additionally, clean up any spills or drips promptly to prevent them from drying and becoming harder to remove later on.
Final Words
Knowing how to stir paint without a stirring stick can come in handy when you find yourself lacking the usual tools. Whether you’re in the middle of a home improvement project or engaged in a creative endeavor, improvisation can save the day. By using everyday item like plastic bottle, you can successfully mix your paint and achieve a smooth consistency.
Make sure the materials you choose are clean and free from contaminants. Also, be mindful of potential risks associated with improvised tools and take appropriate precautions.
Have you ever wondered if Krylon Chalk paint needs to be sealed to ensure a long-lasting and flawless finish? This paint has gained popularity among DIY enthusiasts for its ability to transform surfaces into a trendy, matte finish reminiscent of vintage chalkboards. However, the question often arises – does krylon chalk paint need to be sealed?
Generally, Krylon Chalk paint doesn’t require sealing. But adding a protective sealer can offer some advantages and extend the lifespan of your chalk painted surface.
Image via Krylon.com
In this article, we will delve into this topic, exploring the benefits and considerations of sealing chalk paint from Krylon.
Is Krylon Chalky Paint the Same as Chalk Paint?
Krylon Chalky paint and chalk paint are not the same. While they both have a chalky, matte finish, they are produced by different manufacturers. Krylon Chalky paint is a specific brand of paint produced by Krylon, known for its durability and suitability for various surfaces.
On the other hand, chalk paint is a generic term used to describe a type of paint that has a chalky appearance. It can be easily distressed for a vintage or shabby chic look. It is typically associated with brands like Annie Sloan and Rust-Oleum.
Yes, Krylon Chalk paint generally needs to be sealed to protect the painted surface and enhance its durability. While the chalk paint itself offers a matte, chalky finish, it is not inherently resistant to moisture, stains, or abrasion. Sealing the paint provides an additional protective layer that helps preserve the painted surface over time.
There are a few reasons why sealing Krylon Chalk paint is recommended. Take a look.
Protection: Sealing the paint creates a barrier that safeguards it against various elements including water, UV rays, dirt, and everyday wear and tear. This protection helps prevent the paint from chipping, peeling, or fading. Additionally, it makes the surface more durable and long-lasting.
Improved Cleanability: The sealer enhances the cleanability of the painted surface. It forms a smooth and easier-to-clean finish, allowing you to wipe away dirt, spills, or stains easily. This is particularly important for surfaces that are frequently touched or exposed to moisture, such as furniture, cabinets, or kitchen countertops.
Enhancing Color and Finish: Sealing the chalk paint can enrich its color and appearance. Some sealers have the ability to deepen the hue of the paint, intensifying its richness. Moreover, the sealer can provide a subtle sheen or satin finish if desired, altering the original matte look of the chalk paint.
Longevity: By sealing the paint, you extend its lifespan and ensure that the painted surface maintains its beauty for an extended period. Sealing helps prevent premature fading or deterioration. It keeps the surface fresh and vibrant over time.
What Are the Risks if Krylon Chalk Paint Not Sealed?
If chalk paint is not sealed, there are several potential risks.
Vulnerability to damage: Chalk paint without a sealant is more susceptible to scratches, and general wear and tear. It may not hold up well to regular use or cleaning.
Staining and discoloration: Unsealed chalk paint can absorb liquids and stains, leading to discoloration and a loss of the desired finish. Spills or exposure to moisture can result in permanent marks on the painted surface.
Limited durability: Without a sealant, the paint may not have sufficient protection against fading, peeling, or cracking. Sunlight, humidity, and other environmental factors can degrade the paint over time.
Difficulty with cleaning: Unsealed chalk paint tends to be more challenging to clean. Dust and dirt can become embedded in the porous surface.
Lack of longevity: The absence of a sealant can shorten the lifespan of the painted surface. The paint may deteriorate more quickly, requiring frequent touch-ups or complete repainting.
Sealing Options for Krylon Chalk Paint
To seal chalk paint, you have a few options: wax, polyurethane, or varnish. Each method provides protection and durability. Test it on a small area first for compatibility.
1. Wax: Applying a clear wax over the painted surface is a common method to seal and protect chalk paint. Use a clean brush to apply a thin, even layer of wax. Allow it to dry for the recommended time specified on the wax packaging. Finally, use a clean cloth to buff the wax, creating a smooth and protective finish.
2. Polyurethane: You can also use water-based polyurethane to seal chalk paint. Choose clear, water-based polyurethane specifically designed for use over painted surfaces. Apply the polyurethane using a clean brush or roller, following the manufacturer’s instructions for drying time.
3. Varnish: Another option is using a clear varnish to seal the chalk paint. Select a varnish suitable for protecting painted surfaces. Apply it evenly over the painted area using a brush. Multiple coats may be necessary for optimal protection.
How to Seal Krylon Chalk Paint Easily?
By properly sealing your chalk-painted surface, you can protect it from wear and tear while enhancing its longevity. Here’s how you can easily seal your Krylon Chalk paint for a beautiful finish.
Materials you need:
Krylon Chalk paint
Soft-bristle paintbrush
Clean, lint-free cloth
Sandpaper
Krylon Chalky Finish Clear Sealer
Step 1: Prepare the surface
Ensure that the surface you’re painting is clean and dry. If necessary, sand the surface lightly with sandpaper to create a smooth and even base.
Step 2: Apply Krylon Chalk paint
Ensure proper blending of the Krylon paint by stirring it thoroughly until a uniform texture is achieved. Submerge the brush into the paint, and then eliminate any surplus by lightly tapping it against the side of the paint container. Apply the paint in smooth, even strokes, following the grain of the surface. Allow ample time for the paint to dry thoroughly.
Step 3: Assess the finish
Once the paint is dry, evaluate the finish. If you’re satisfied with the appearance, you can proceed to the next step. However, if you prefer a more distressed or weathered look, you can lightly sand the painted surface with fine-grit sandpaper to achieve the desired effect.
Step 4: Apply the clear sealer
Shake the Krylon Chalky finish clear sealer well before using it. Using a clean brush, apply a thin and even layer of the sealer over the painted surface. Work in small sections and brush in long, smooth strokes. Avoid excessive brushing, as it may disturb the paint beneath.
Step 5: Let it dry
Allow the sealer to dry according to the manufacturer’s instructions. This typically takes a few hours. However, it’s advisable to wait for at least 24 hours to ensure proper curing.
Step 6: Assess the sealed finish
Once the sealer is completely dry, inspect the sealed surface for any missed spots or imperfections. If necessary, apply an additional coat of the clear sealer to ensure even coverage and protection. Allow the final coat to dry thoroughly.
Tips for Successful Sealing Krylon Chalk Paint
Here are some tips for successfully sealing chalk paint.
Clean and prepare the surface thoroughly before painting to ensure proper adhesion of the paint and sealer.
Use a soft-bristle paintbrush or foam brush for a smooth and even application of both the paint and sealer. Avoid using brushes with stiff bristles.
Apply thin coats of paint to prevent drips and buildup. Multiple thin coats are better than one thick coat, as it allows for better control and faster drying.
Allow sufficient drying time between each coat of paint and before applying the sealer. This ensures that each layer has a chance to dry and cure properly.
When applying the clear sealer, use long and even strokes to achieve a uniform coverage. Avoid over-brushing, as it can create streaks or marks.
If you prefer a distressed or aged look, consider lightly sanding the painted surface before applying the sealer.
By following these tips, you can achieve a successful seal on your Krylon Chalk paint, enhancing its durability for years to come.
Final Words
Ultimately, the decision to seal Krylon Chalk paint or any chalk paint is a personal preference based on the specific project. If the painted surface will be subjected to frequent use, sealing can help protect and preserve the paint. On the other hand, if the project is decorative and will not endure much wear, sealing may not be necessary.
Regardless of your choice, it is always recommended to follow the manufacturer’s guidelines when working with chalk paint. Experimenting with a small test area or consulting with experts in the field can also provide valuable insights. All these will ensure the best results for your specific project.
If you’re an avid boater or own an aluminum boat, you may find yourself faced with the task of removing old or peeling paint. Over time, paint on aluminum boats can become worn or discolored, diminishing the vessel’s appearance and potentially affecting its performance. Fortunately, removing paint from an aluminum boat is a manageable project. But how to remove paint from aluminum boat?
There are several methods you can use to remove paint from an aluminum boat including chemical stripper, mechanical scraper, sanding, heat gun, or pressure washing method.
In this guide, we will take you through some step-by-step processes to effectively remove paint from your boat. So, grab your safety gear and let’s dive into the world of paint removal from aluminum boats.
Why Do You Need to Remove Paint from Aluminum Boat?
There are various reasons why you might consider removing paint from an aluminum boat.
Repainting: If you want to apply a fresh coat of paint to your aluminum boat, it’s essential to remove the existing paint. This ensures proper adhesion of the new paint and allows for a smoother, more durable finish.
Maintenance: Removing the paint periodically allows you to inspect the condition of the aluminum surface. It helps identify any signs of corrosion, damage, or wear that may be hidden under the paint. This allows for timely repairs and maintenance to keep your boat in good condition.
Surface preparation: If you plan to apply a different type of coating, it’s necessary to remove the existing paint. Different coatings may have specific requirements for surface preparation. Removing the old paint ensures optimal adhesion and performance of the new coating.
Weight reduction: Multiple layers of paint can add significant weight to a boat. Removing the paint can help reduce the overall weight of the vessel. Moreover, this process improves its performance and fuel efficiency.
Restoring the appearance: Some boat owners prefer the natural look of bare aluminum. Removing the paint allows you to restore the original appearance of the boat, showcasing the metallic surface.
How to Remove Paint from Aluminum Boat?
When it comes to restoring or refinishing an aluminum boat, removing old paint is often a necessary step. Over time, paint can deteriorate, fade, or simply become outdated, prompting the need for a fresh coat or a change in aesthetics. Here are a few methods that can be employed to strip paint from an aluminum boat.
Method 1: Removing Paint Using a Chemical Stripper
Using a chemical stripper can make the paint removing process easier and more effective. However, it’s important to follow proper safety precautions and instructions when using a chemical stripper to avoid any potential hazards. Here’s a guide on the method.
Materials required for this method:
Chemical paint stripper
Protective gear
Drop cloths or plastic sheets
Scraper or putty knife
Wire brush or abrasive pad
Clean rags or towels
Water source (hose or buckets)
Step 1: Prepare the work area
Move your boat to a well-ventilated outdoor area or a space with good airflow. Lay down drop cloths or plastic sheets to protect the ground from paint chips or stripper residue.
Step 2: Wear protective gear
Put on gloves, safety glasses, and a respirator mask to protect your skin, eyes, and lungs from the chemical stripper.
Step 3: Test the stripper
Before applying the chemical stripper to the entire boat, test it on a small, inconspicuous area. Perform this step to ensure it doesn’t cause any damage or discoloration.
Step 4: Apply the chemical stripper
Follow the manufacturer’s instructions on how to use the specific chemical stripper you have. Generally, you’ll need to brush or spray the stripper onto the painted surface, ensuring an even and thorough application.
Pay attention to any areas with multiple layers of paint, as they may require additional stripper and more time to work.
Step 5: Allow the stripper to work
Give the chemical stripper enough time to penetrate and soften the paint. This typically takes around 15-30 minutes.
Step 6: Scrape off the paint
Once the paint has been sufficiently softened, use a scraper or putty knife to gently scrape off the paint from the aluminum surface. Work in small sections, applying light pressure to avoid damaging the underlying metal. Place the scraped paint chips into a trash bag or container for disposal.
Step 7: Remove residue
After scraping off the majority of the paint, use a wire brush or abrasive pad to remove any remaining paint residue or stubborn spots. Scrub the aluminum surface in circular motions to loosen the paint particles.
Step 8: Rinse the boat
Use a hose or buckets of water to thoroughly rinse the boat. It will make sure all chemical stripper and paint residue are removed. Rinse from top to bottom to prevent the stripper or residue from running down onto previously cleaned areas.
Step 9: Clean and dry the boat
Use clean rags or towels to wipe down the boat and remove any excess water. Allow the boat to dry completely before proceeding with any further steps.
Method 2: Removing Paint Using the Scraping Method
Removing paint from an aluminum boat using the scraping method requires a few tools and materials. Follow the step-by-step guide described below.
Materials required for this method:
Paint scraper or putty knife
Wire brush
Sandpaper (medium grit)
Safety goggles
Respirator mask
Drop cloth
Cleaning solvent
Rags or paper towels
Bucket of water
Step 1: Preparation
Cover the ground with a drop cloth to catch any paint chips or debris. This will make cleanup easier. Put on safety equipment to protect yourself from paint particles and fumes.
Step 2: Scraping
Start by using a paint scraper or putty knife to scrape off as much loose paint as possible. Hold the scraper at a slight angle and apply firm pressure, but be careful not to damage the aluminum surface. Continue scraping until you remove all loose or peeling paint from the boat.
Step 3: Wire brushing
Use a wire brush to scrub the surface of the aluminum boat. This will help remove any remaining paint flakes and provide a smooth base for the next steps. Scrub in a circular motion, applying moderate pressure, until the aluminum surface is clean and free of paint.
Step 4: Sanding
If there are any stubborn paint spots or rough areas on the aluminum, use sandpaper with a medium grit to sand them down. Sanding will help smoothen the surface further. Sand in the direction of the grain or in a circular motion, depending on the condition of the boat’s surface.
Step 6: Cleaning
After sanding, clean the aluminum boat using a cleaning solvent. It will work to remove any residue from the cleaning processes. Dip a rag or paper towel into the cleaning solvent and wipe the entire boat surface. You can also use a water hose or a bucket of water to rinse off the boat thoroughly.
Step 7: Final inspection
Inspect the boat surface for any remaining paint or rough areas. If necessary, repeat the scraping, wire brushing, and sanding steps until the surface is smooth and free of paint.
Method 3: Removing Paint with Sandblasting
One effective method for stripping paint from an aluminum boat is sandblasting. This method involves using compressed air to propel fine abrasive particles at high speed to remove the paint and other contaminants from the boat’s surface. Let’s check the steps.
Materials required for this method:
Sandblasting equipment
Fine-grit abrasive media
Safety gear
Plastic sheets
Paint scraper (optional)
Cleaning solvent or degreaser
Water source for rinsing
Rust inhibitor or primer (optional)
Step 1: Prepare the work area
Park the aluminum boat in a well-ventilated area away from other objects. Cover the surrounding area with plastic sheets to protect it from abrasive media and paint particles.
Step 2: Wear safety gear
Wear safety glasses, gloves, and appropriate protective clothing to shield yourself from dust, debris, and chemical exposure.
Step 3: Set up the sandblasting equipment
Connect the sandblasting equipment components, including the sandblaster, air compressor, hose, and nozzle. Fill the sandblaster with the fine-grit abrasive media (aluminum oxide or garnet) according to the equipment’s capacity and guidelines.
Step 4: Pre-clean the boat surface
Remove loose dirt, grease, and other contaminants from the boat’s surface using a cleaning solvent or degreaser. Rinse the boat thoroughly with water to remove any residue from the cleaning process and allow it to dry completely.
Step 5: Adjust the sandblaster settings
Adjust the air pressure and nozzle distance accordingly to achieve the desired results without damaging the aluminum surface.
Step 6: Sandblast the boat surface
Hold the sandblaster nozzle at the recommended distance from the boat’s surface (typically 8-12 inches). Direct the stream of abrasive media onto the painted areas. Move the nozzle back and forth evenly, covering the entire painted surface systematically.
Once all the paint has been removed, thoroughly rinse the boat with water to remove any remaining abrasive media and paint particles. Allow the boat to dry completely before using.
Can I Sand Paint Off Aluminum Boat?
You have the option to sand the paint off an aluminum boat. Sanding is a reliable method commonly used for paint removal from aluminum surfaces. However, it’s crucial to prioritize safety throughout the process. Ensure you wear appropriate protective gear to shield yourself from paint particles and aluminum dust.
Before proceeding with sanding, it’s important to thoroughly clean the boat’s surface. Start with a coarse-grit sandpaper (around 80 to 120 grit) to eliminate most of the paint. And then switch to a finer-grit sandpaper (around 180 to 220 grit) for a more refined finish.
While sanding, adopt a controlled back-and-forth or circular motion, ensuring even pressure. Be mindful not to exert excessive force, as it could inadvertently harm the aluminum. Consistently keep the sandpaper in motion to avoid creating grooves or uneven areas. Following these guidelines should assist you in effectively sanding the paint off your aluminum boat.
What Is the Best Method to Remove Paint from an Aluminum Boat?
When it comes to removing paint from an aluminum boat, there are a few methods you can consider. The best method for you will depend on various factors such as the type of paint, the condition of the boat, your available resources, and your personal preferences. Here are a few effective methods you can try.
Chemical Paint Strippers
Mechanical Scrapper
Sanding
Soda Blasting
Heat Gun
Does Removing Paint Damage Aluminum Surface?
Removing paint from an aluminum surface can potentially damage the surface if not done carefully. Aggressive paint removal techniques or abrasive materials may scratch or mar the aluminum. It is important to use gentle methods and appropriate paint removal products specifically designed for use on aluminum surfaces. Thus, you can minimize the risk of damage. Some more things you can consider:
Choose a method that is suitable for aluminum surfaces. Chemical strippers formulated for use on aluminum are generally a safe option.
Before starting the paint removal process, consider protecting delicate parts of the aluminum surface that you don’t want to be damaged.
Follow manufacturer instructions. They often provide guidance on application, safety precautions, and the recommended contact time for effective paint removal.
When applying the paint removal method, avoid using excessive force or aggressive scrubbing. Instead, work in gentle, even strokes or motions.
Cleaning Tips to Keep the Environment Safe
It’s important to follow proper paint removing techniques to keep the environment safe. Take a look on the following tips.
Look for paint strippers that are labeled as environmentally friendly, non-toxic, and biodegradable. Avoid using harsh chemicals that can harm aquatic life and the environment.
If possible, perform the paint removal process outdoors. Adequate ventilation helps prevent the buildup of fumes and ensures fresh air circulation.
Collect the debris and dispose of it properly, following local regulations for hazardous waste disposal.
To prevent contaminants from entering water sources, avoid working near bodies of water or storm drains.
Do not pour paint or paint-related chemicals down drains, toilets, or sewers.
Final Words
Chemical strippers offer an effective solution for removing multiple layers of paint, but they require proper application and caution due to their potentially harmful nature.
Abrasive methods like sanding involve mechanical removal of the paint. These techniques can be time-consuming but provide effective results.
Regardless of the chosen method, it is important to thoroughly clean and prepare the aluminum surface before applying any new coatings. Overall, removing paint from an aluminum boat requires careful planning, adherence to safety measures, and the use of appropriate techniques and tools.