
Acrylic Paint
Painting Miniatures with Acrylic Paint: A Beginner's Guide
Acrylic paint suits miniatures and models because it dries quickly, offers many colors, and supports thin layers, blending, and precise detail work.
Published · Updated
Acrylic paints are the top hobby paint among tabletop gamers(for example Warhammer), miniature collectors, and model builders because of their water-based formula and rapid drying. The paint has a lot of color options compared with other paint, so getting any color or effect, or design is quite easy for miniature artists. Some artists use the paint for getting a realistic effect that is pretty cool.
This article will be the ultimate guide to painting miniatures and models. So hang tight 🙂
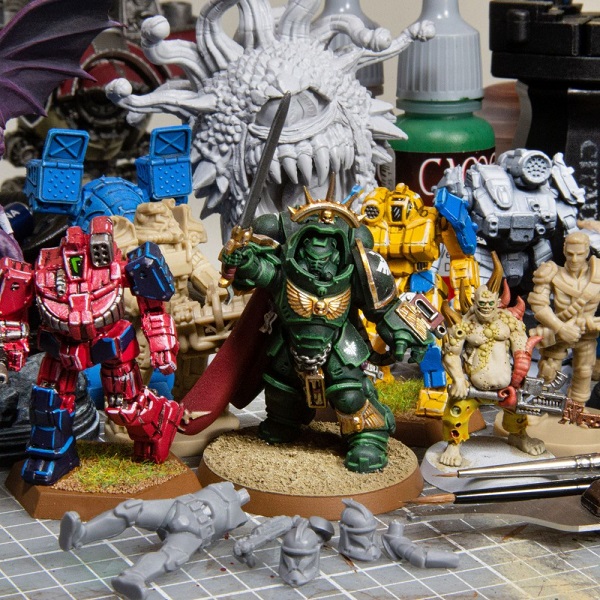
Step-By-Step Tutorial on Painting Miniatures and Models with Acrylic Paint
A good miniature-painting workflow moves from cleaning and priming through base coats, shading, highlights, details, and a protective finish.
Prepare Miniature for Painting
Step 1: Setup proper lighting
Good lighting is very important when painting miniatures/models. You should be able to see every detail properly when you paint. So setup your best lamp or any light source in your workspace.
Step 2: Choose right model
Select the perfect model. Match it with your skill level and interests. Beginners should go for a simpler model, while experts can take on more complex designs.
Step 3: Clean the model
Ensure a pristine model by removing all mold release agents, dust, and debris. Use a soft brush, soap, and warm water for cleaning. Rinse the model thoroughly and let it dry entirely.
Step 4: Remove flash and mold lines:
Inspect the model for any imperfections like excess plastic or metal, or noticeable mold lines. Take out these areas carefully with a hobby knife, file, or fine sandpaper. Exercise extra care during this phase if you're not an expert to prevent damaging the model or injuring yourself.
Step 5: Assemble the model (if necessary):
Glue multiple parts together with appropriate adhesives such as plastic cement for plastic models, or super glue for metal or resin models. Properly follow the model's instructions for the best assembly results.
Prime Miniature
Primer can help paint adhere and create an even base, but the right product depends on the miniature material and the paint system. Follow the primer maker’s directions.
Prime types
Common options include brush-on, aerosol, and airbrush primers. Choose based on the miniature material, product compatibility, workspace, and the level of control you need.
- Brush on (great control but time consuming) intermediate artist option
- Spray cans (control not good but fast) beginner option
- Airbrush (good control and fast) for expart artist
We will learn how to prime miniatures with brush-on and spray can techniques.
Keep in mind, color selection of primer is an important option also because it influences the final appearance of paint. There are 3 most common types of color.
- White (brighter base color, make color more vibrant)
- Black (dark and mix white with black give darker shade)
- Gray (balance between two)
Pro tip: If you paint multiple miniatures or models, it will be very helpful for work them as a batch instate one by one. If will save a lot of time and also will make it easier to work with.
Prime Miniature with Spray Primer
Step 1: Ventilation nassery
Use aerosol primer only with the ventilation, protective equipment, and fire precautions specified on its label. A cloth or dust mask may not protect against vapors; do not spray indoors unless the product label explicitly allows it.
Step 2: Choose right spray primer
Choose higher quality and cpitable primer for miniature or model. Here are some best spray miniature primers.
| Primer | Surface | Grade |
| The Army Painter Color Primer Spray Paint | Metal, Plastic | Artistic |
| Vallejo Fantasy Color | Metal, Plastic | Artistic |
Step 3: Small test
Test your primer on a small area to ensure compatibility and desired results because different miniatures and brands may react differently. This tactic also makes you aware for future big issues.
Step 4: Apply spary
Shake the cans properly the apply spray on the miniature. Hold the can from 6-10 inches distance and use control and short bursts. Apply another coat only after the product's stated recoat time. Check carefully any missed areas or uneven coverage and fix the area.
Step 5: Dry time
Wait the primer maker’s stated time before painting; temperature, humidity, and coat thickness can change drying and curing.
Prime Miniature by Brush-on
Step 1: Choose right primer and brush
Use high quality primer and small synthetic paint brush for primer. It will give you great control.
Here are some best brush on primer and brush for miniature painting
| Products | Category | Grade | Comment |
| The Army Painter Brush-On | Primer | Artistic | Populer product |
| Reaper Miniatures Brush-On Primer | Primer | Artistic | Good alternative |
| BOSOBO Paint Brushes Set | Brush | Student | Basic brush set but great for prime and cheap detail project |
Step 2: Apply
Shake the liquid primer battle and the put small amount primer in a paint palette. Apply the primer with small brush, make sure cover every spots.
Instead apply one thick layer apply multiple thin layers. It will save primer form peeling off.
Step 3: Dry
Drying is very important. Between layers wait for 10-30 minutes and final finish wait for 1 day for complete cure. And then the miniture is ready for painting.
Paint Miniature
Apply First Coat of Paint
Step 1: Reference style
Step up your reference painting style in front of your eyes. References can be photos, artwork, even real life objects. It will make your artwork more accurate and realistic.
Step 2: Choose your color scheme
This is a very helpful part. If you choose and create your own color scheme before, there will be no confusion and wrong decision into painting time. If you are a beginner, you need to do some practice, and create your own color scheme before painting.
Step 3: Choose acrylic paint
You need best quality acrylic paint thats are compatible for miniature painting. Here are some best acrylic paints for miniature painting.
| Paint | Grade |
| Games Workshop Warhammer | Artistic |
| The Army Painter Paint Set | Artistic |
| Vallejo Basic USA Acrylic Colors Paint Set | Artistic |
Step 4: Thinning paint
Acrylic paint comes with thicker consistency in the tube. You need to thin down before applying the paint. Water is a very common medium for thin paint. But you can use different mediums such as glazing medium, matte medium, and flow improver to thin the paint for getting your necessary needs.
Thin the paint a little at a time with water or a compatible medium, then test it on a spare surface. The useful consistency depends on the paint and the technique.
Step 5: Apply paint
Apply a thin and even stock in the first coat with a paint brush. Work from larger areas to small details.
First coat dry then apply another coat, always be patient to build up color. Applying multiple layer make more smooth and professional.
Pro tip: Find uneven and missed spots and then fix it with touch up.
Step 6: Dry
Give 10-30 minutes for between coats to dry, and then apply details.
Add Details and Finishing
Step 1: Brush selection
Right brush is a key, for different effect need different types and shapes of brush.
Already mentioned a brush set, it is cheap but good for priming, sealing, and first paint coat but for details, highlight, shade you need something more accurate and handy, these are the best details brushes for miniature acrylic painting.
| Brush | Grade | Comment |
| Winsor & Newton Series 7 Kolinsky Sable Brush | Artistic | This brush is one of the most popular and high quality brushes in the market. Many shapes and sizes are available. Choose your right size and shape |
| The Army Painter Wargamer Rotmarder Sable Brush | Artistic | Specialized brand for miniature painting |
Step 2: Shading
To create shadows and depth, apply washes or glazes to recessed areas. Mix darker shades of your base colors or use pre-mixed washes made for shading. Apply the washes with care, ensuring no pooling or staining on flat surfaces.
Pro tips: Little paint mistake is common. Take a clean, damp brush and blend the mistake with the surrounding areas. Also you can lift off the paint if the paint is wet. If the paint is dry, do not use a general-purpose thinner on the model. Check the paint maker’s removal advice and test any approved cleaner on an inconspicuous area first.
Step 3: Highlighting
To enhance miniature details, highlight raised areas with a lighter or complementary color. Use thin, controlled brush strokes and focus on natural light-catching areas.
Employ techniques like edge highlighting, dry brushing, or glazing. Give the illusion of light reflection with a lighter shade on raised areas and edges. For a more striking effect, try dry brushing or edge highlighting.
Pro tip: It is most important to avoid touching the painted surface with fingers because it is causing create bad spot marks.
Step 4: Fine details
Paint small details like eyes, buttons, and different patterns carefully. For applying details choose small details brush such as size 0.
Pro tips: For adding expart details required patience and practice. So keep in mind the trick.
Seal the Miniature Painting
Sealing your miniatures/models after acrylic painting is very impotent part. Protect your paint job from wear and tear, especially if it's for gaming or frequent handling. A reliable sealant preserves colors and details, prevents chipping, smudging, and fading. Don't let your hard work go to waste!
There are 2 popular techniques for sealing paint
- Brush on varnish
- Spary cans varnish
Below these 2 methods will be describe step by step.
Also, there have two popular types of varnish.
- Matte (non-reflective finish and look like more realistic appearance)
- Glossy (Shiny effect and eye catching)
Pro tip: May be it will be more creative, you can use this 2 type of varnish in your same project for get realistic effects. Apply matte varnish to all areas of miniature and use gloss varnish in certain area like eyes or gems.
Prepare the Miniature for Sealing
Step 1: Ensure paint completely dry
You can’t apply sealer until the paint completely dry, completely cure can take around 24 hours. To best way to check this touch lightly with finger. If it feel like tacky or stacky, paint not dry yet. Another method is gently pressing a piece of masking tape on the paint and then peeling off. If the tape come off clearly without any paint, the paint is dry properly for sealing.
Step 2: Cleaning
Clear all dust from miniature with a soft cloth. Remember, dust can weaken the sealing surface.
Apply Brush on Sealing Vernish
Step 1: Choose right varnish
You need to choose good and reputed varnish brand. If you need more protection there UV protection varnish available. Those varnish will give you great outdoor protection. Here are the best brush on varnish for miniature painting.
| Varnish | Grade | Comment |
| Vallejo Acrylic Paint Varnish | Artistic | All type of varnish (gloss, satin, or matte) available, spacialize for miniature painting |
| Liquitex Professional Gloss Varnish | Artistic | Any type of acrylic paint project |
Step 2: Prepare the varnish
Thin the varnish if necessary. Apply any thinning agent depending on the product. Make sure mix varnish well but always avoid creating air bubble.
Pro tip: Understanding the thickness you can apply a small amount on a small surface.
Step 3: Apply varnish
Choose mid length soft bristle synthetic brush for ensure even and smooth stoke. Apply thin even and long strokes and avoid overloading the brush.
Ensure complete coverage of the model by working systematically, while maintaining a consistently wet edge to avoid unsightly brush marks.
Pro tip: Apply the varnish full coverage with a steady hand. Avoid brushing over the same area multiple times to prevent streaks and uneven layers.
Step 4: Allow the varnish to dry
Follow the varnish maker’s drying and curing times between coats and before handling the miniature.
Step 5: Second coat
To achieve best protection and a flawless finish, apply multiple coats of varnish as needed. Wait until each coat is fully dry before adding the next one. Find missing and uneven areas and follow same apply method as the first coat.
Remember, thin coats are preferable for an even finish and good protection.
Apply Spray Sealing Varnish
Step 1: Proper ventilation
Use spray varnish only in the conditions and with the protective equipment specified on its label. A basic mask is not a substitute for the required respirator or ventilation; if you cannot meet the label directions, choose a brush-on finish instead.
Step 2: Choose right spray sealer
Here are some good spray sealer you can use.
| Spray varnish | Grade |
| The Army Painter Spary Varnish | Artistic |
| Liquitex Professional Spray Varnish | Artistic |
Step 3: Shake the varnish well and test
Shake the varnish properly. Then apply it on small areas like cardboard or paper. Check the layer and spray pattern. If you happy, go for main project.
Step 4: Spray on the painting
Spray varnish from 10-12 inches far distance. Smooth sweeping motion to apply thin. Avoid over spray and apply too much paint at once. Instead apply multiple coats. Give some time to dry before apply each coat.
Step 5: Dry
The varnish takes 15-20 minutes between layers in and for final finish 24 hours.
Bottom line, congratulations! Now you know a lot about miniature painting. Time to go for practical projects.
If you think this article helpful, share it with your artist friends and family. The information may help them.
Related articles
Explore more PaintZeal articles for practical guidance on related paint questions, materials, surfaces, techniques, and common project problems.

Professional Acrylic Brushes: Best Paint Brush Set 2023
Compare brush shapes, fibers, stiffness, and sizes for detailed acrylic painting.

Best Airbrush Cleaner for Acrylic Paint
Learn how to clean acrylic paint from an airbrush and keep fine-detail equipment working well.
Can I Put Acrylic Paint Over Enamel Paint?
See how surface preparation affects acrylic adhesion when painting over an enamel base.

Paint Plaster Paris with Acrylic
Explore another small-scale acrylic project involving priming, layering, and surface preparation.