Are you considering using BEHR enamel paint for your next painting project and willing to know – is BEHR enamel paint water based?
BEHR Enamel paints have different selections including water-based and oil-based enamel. But be sure that the brand doesn’t offer only water based enamel.
Knowing whether BEHR enamel is water-based or not can help you determine its properties, how to apply it, and how to clean up after use. In this response, we will discuss the composition of BEHR enamel paint and whether it is water-based or not.
What Kind of Paint Is BEHR Enamel?
BEHR is a brand that produces a variety of paints, including enamels. BEHR enamel paints are typically oil-based or water-based. They are suitable for use on a range of surfaces, including wood, metal, and concrete. The enamel is specifically formulated to provide a smooth, hard, and long-lasting finish that resists fading, cracking, peeling, and chalking.
BEHR enamel is available in different types, including:
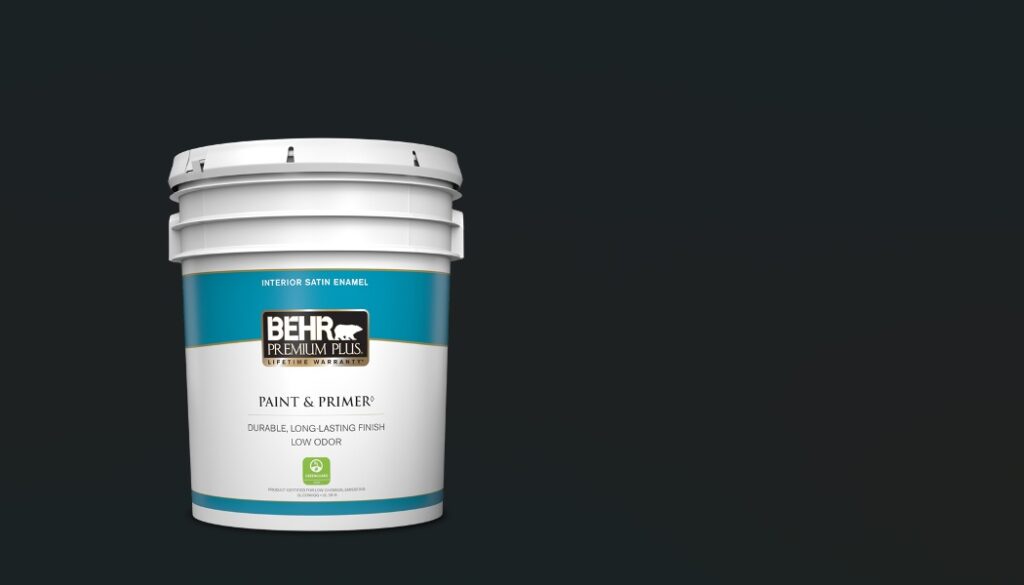
BEHR Premium Plus Enamel: This is a water-based paint that is ideal for use on walls, trim, and doors. It provides excellent coverage, durability, and adhesion, and dries quickly to a hard, smooth finish.
BEHR Alkyd Enamel: This oil-based paint is ideal for metal, wood, and masonry surfaces. It provides superior protection against rust and corrosion and is resistant to mildew, fading, and chalking.
BEHR Urethane Alkyd Enamel: To use on cabinets, furniture, and other high-traffic areas, this enamel is an ideal choice. It is designed to offer a durable, scratch-resistant finish that is easy to clean and maintain.
Is BEHR Enamel Paint Water Based?
BEHR Enamel Paint can come in both water-based and oil-based formulations, depending on the specific product line.
If you are looking for a water-based enamel paint, BEHR offers a variety of options such as their Premium Plus Ultra enamel, which is a 100% acrylic water-based paint that is designed for use on interior surfaces such as walls, trim, and doors.
Water-based enamel paints are known for their fast-drying time, easy clean up with soap and water, and low odor. They are also generally more environmentally friendly than oil-based paints, as they produce fewer harmful fumes and are easier to dispose of.
However, if you require an oil-based enamel paint for a specific project, BEHR also offers products like their Oil-base Semi-gloss enamel, which provides a hard, durable finish and is ideal for use on metal, wood, and other surfaces that require a tough, protective coating.
When choosing an enamel paint, be sure to read the label carefully to determine whether it is water-based or oil-based, and to ensure that it is suitable for your specific project needs.
Is BEHR Semi-gloss Enamel Water-based?
It depends on the specific product you are referring to, as Behr offers several different semi-gloss enamel paint products. However, in general, Behr’s semi-gloss enamel paints are water-based.
Water-based paints, also known as latex paints, are a popular choice because they are easy to clean up, have odor-free and quick-drying feature. They are also more environmentally friendly than oil-based paints, as they have fewer volatile organic compounds (VOCs) and release less harmful fumes into the air during application.
To be sure if a specific Behr semi-gloss enamel paint is water-based, you can contact Behr’s customer service for more information.
Is BEHR Urethane Alkyd Satin Enamel Water-Based?
No, BEHR Urethane Alkyd satin enamel is not a water-based paint. It is an oil-based paint that uses a combination of urethane and alkyd resins to provide a durable, satin finish.
This type of paint is typically used for interior and exterior surfaces that require excellent adhesion and resistance to wear and tear, such as trim, doors, and cabinets. When using this type of paint, it’s important to follow proper ventilation and safety precautions due to the use of solvents in the formula.
This paint is available in a wide range of colors and can be tinted to match almost any color. It is thinned and cleaned up with solvents such as mineral spirits or paint thinner. It dries more slowly than water-based paints, which can be an advantage in some situations as it allows for more time to work with the paint and achieve a smooth finish.
Also Read: Is primer needed for BEHR paint?
Should You Use BEHR Enamel Paint?
Enamel paint is a durable and high-gloss paint that can be used for various projects. It is popular for its ability to create a smooth and shiny finish that resists chipping and fading over time.
BEHR enamel paint is available in both oil-based and water-based formulations. Oil-based enamel paints offer superior durability and a more robust finish, while water-based enamel paints are more environmentally friendly and easier to clean up.
When deciding whether to use BEHR enamel paint, it is important to consider the project you are working on and the surface you will be painting. Enamel paint is ideal for high-traffic areas, where durability and longevity are essential. It can also be used for decorative purposes, such as painting furniture or accent walls.
Before using any paint item, it is essential to follow the manufacturer’s instructions carefully, including surface preparation, application, and drying times.
Ultimately, the decision to use BEHR enamel paint will depend on your specific needs and preferences. Consider the project you are working on, the surface you will be painting, and your desired finish before making a final decision.
BEHR Enamel Paint: Water-based or Oil-based?
Water-based BEHR enamel products are ideal for use on surfaces that require frequent cleaning. They have lower VOC (volatile organic compounds) emissions than oil-based paints, making them a better choice for indoor painting.
Oil-based BEHR enamel paints offer superior durability and adhesion to surfaces that are exposed to harsh weather. They are commonly used for painting metal, wood, and concrete surfaces, as they provide excellent rust and corrosion resistance. They also take longer to dry than water-based paints, and require mineral spirits or turpentine for cleanup.
The choice between BEHR water-based or oil-based enamel depends on your project needs. If you require a fast-drying, low odor paint, choose a water-based enamel. If you require a long-lasting finish that can withstand harsh weather conditions, choose an oil-based enamel.
Wrapping Up
BEHR enamel paint comes in both water-based and oil-based formulas. If you are looking for a water-based enamel, BEHR Premium Plus Interior/ Exterior enamel is a great option.
However, if you need a more durable finish and don’t mind using paint thinner or mineral spirits for cleanup, BEHR Oil-based enamel may be a better choice for your project. It’s important to read the label carefully and choose the appropriate type of enamel for your specific needs.
An airbrush makes painting pretty quick and easy and is loved by professionals and DIY enthusiasts. If you have already worked with airbrushes, you know how important it is to keep your airbrush clean. This is when you need an airbrush cleaner.
But with so many available options, finding the best airbrush cleaner can be tough. No worries, we got you covered.
In this buying guide, we’ll talk about good-quality airbrush cleaners for acrylic paint. We will also talk about what to look for when choosing the right airbrush cleaner. So, whether you are a beginner or a professional, this guide will help you choose the ideal airbrush cleaner for your next project.
Our Top Picks
- Best Overall: Angelus Airbrush Cleaner (See Price)
- Best Multipurpose: Iwata-Medea Brush Cleaner (See Price)
- Best User-friendly: Vallejo Aux: Airbrush Cleaner (See Price)
- Best for DIY: TAMIYA Air Brush Cleaner (See Price)
- Best Fast-acting: Evo Dyne Cleaning Kit (See Price)
- Best for Beginner: Createx Airbrush Cleaner (See Price)
- Best for Budget: Chefmaster Airbrush Cleaner (See Price)
- Best Professional: Master Cleaning Solution (See Price)
Best Airbrush Cleaner Reviews (For Various Paints)
Not all airbrush cleaners are the best. So, we have analyzed many of the airbrush cleaners and found out some great options for you. Check them below.
1. Angelus Brush Cleaner for Air Brush Sprayers & Paint Brushes
A good quality airbrush cleaner will help you clean the airbrush fast and allow you to switch between acrylic colors seamlessly. If you are looking for an airbrush cleaning product that allows for easy cleaning, this Angelus brush cleaner is the product for you.
It is easy to use, making it a suitable option for beginners. When it comes to choosing a cleaning product for your airbrush, you need to make sure the product is safe for both your health and the airbrush gun.
No worries about this cleaner because it is non-toxic and safe to use. You can even use this cleaner for paintbrushes. Lastly, this cleaner contains a conditioning agent to keep your brush bristles supple and soft.
Pros:
- This product is relatively easy to use.
- The cleaner is non-toxic.
- Works on both airbrushes and paintbrushes.
Cons:
- It can produce a smell that some users don’t like.
Our Verdict: Whether you are a beginner or a professional looking for an airbrush cleaner that is safe and easy to use, this Angelus brush cleaner can be your go-to option.
2. Iwata-Medea Airbrush Cleaner
If you are looking for a multipurpose cleaner for your airbrush, Iwata-Medea airbrush cleaner can be an ideal option for you. It is a general-purpose cleaner that cleans various types of paint like acrylics, gouache, watercolors, inks, or dyes.
So, with this amazing airbrush cleaner, you are not limited to cleaning acrylic paints only. And no worries about your specific airbrush model, it works great on all airbrush models. It also works on different types of natural-haired and synthetic paintbrushes.
You can even use it on technical pens for ultrasonic cleaning. This product is environmentally safe, so there are no worries about safety issues. Lastly, this multipurpose cleaner can be used to enhance the paint flow in your airbrush by simply applying it along the needle and the needle cap.
Pros:
- This cleaner works on various types of paint.
- It can help enhance the paint flow in your airbrush.
- Can be used on technical pens for ultrasonic cleaning.
Cons:
- Can cause moderate eye irritation.
Our Verdict: This cleaner can be used for multiple cases, from cleaning airbrushes to paintbrushes to technical pens. If you are looking for a multi-purpose cleaning product, we highly recommend it.
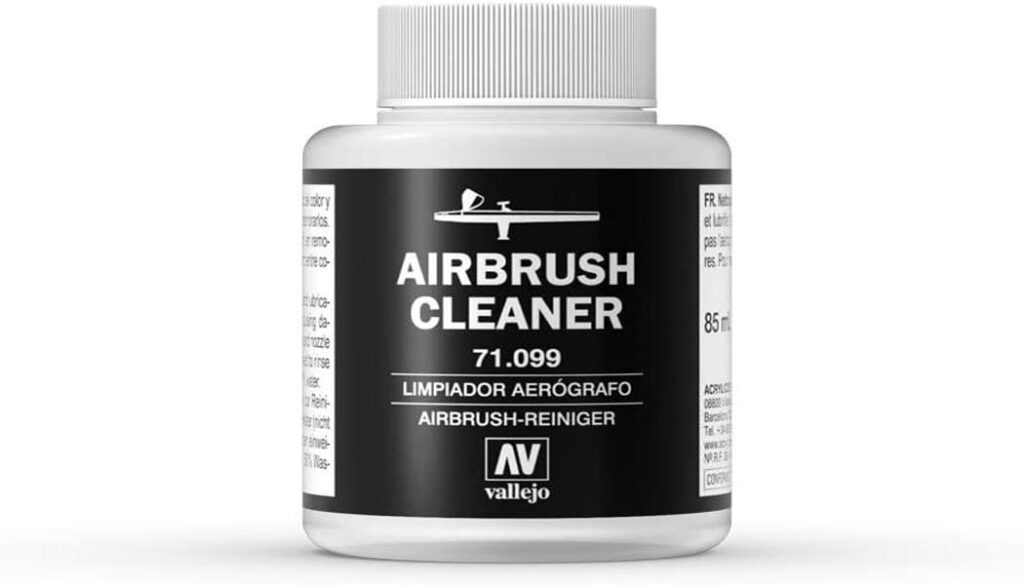
3. Vallejo Aux: Airbrush Cleaner
Are you looking for an airbrush cleaner for keeping your airbrush equipment in excellent condition? If so, this Vallejo airbrush cleaner can be the right thing for you. The cleaner helps remove stubborn paint residue from your airbrush to give you a better painting experience.
It comes in a plastic squeeze bottle, so using this cleaner is considerably easy. Which makes it a great choice for people who are just starting out with airbrush painting. Using this cleaner regularly and maintaining airbrush cleanliness will prevent paint buildup, so you will be able to paint more efficiently.
The product is non-flammable and non-toxic, making it a safer option to work with. Lastly, this cleaner comes in a 17 ml. bottle, which contains enough cleaning solution for multiple uses.
Pros:
- Comes in a squeeze bottle for easy application.
- It is non-flammable and non-toxic.
- Convenient size makes it easier to carry anywhere.
Cons:
- Packaging should be improved.
Our Verdict: Definitely, it’s a good option if you’re looking for an airbrush cleaner that you can easily use, carry, and store.
4. TAMIYA 250ml Airbrush Cleaner
Anyone would love an airbrush cleaner that can be used for multipurpose. We are talking about the TAMIYA airbrush cleaner. It’s more than just an airbrush cleaner. Art enthusiasts even use this as the extra thin cement for their projects!
So, purchasing a bottle of this not only works as a strong and effective airbrush cleaner but also serves the purpose of extra thin cement at a low price. That’s why it’s a win-win for art enthusiasts. In terms of cleaning, this TAMIYA cleaner works quite fast, allowing you to switch between colors easily.
As a result, you can focus more on your art without wasting time cleaning your airbrush. It not only cleans acrylic paints effectively but also other paint types, allowing you to work with different paint types on your project.
Pros:
- Can effectively clean different types of paint.
- Comes in 250ml for multiple uses.
- Can be used as extra thin cement.
Cons:
- Get hot easily and quickly.
Our Verdict: If you are a DIY enthusiast who uses airbrushes and makes models, this can serve both purposes. It not only works efficiently as a cleaner for airbrushes but also as the extra thin cement for projects.
5. Evo Dyne Multi-Purpose Airbrush Cleaning Kit
Removing acrylic paint from an airbrush requires care and a safe cleaning solution. An airbrush cleaner is an artist’s best friend, and every airbrush artist deserves a top-quality one. If you are looking for your perfect companion, this Evo Dyne airbrush cleaner awaits you!
This is a multi-purpose cleaner. Its strong formula is suitable for cleaning different types of paint, from acrylic paints to gouache to ink and dye. It can be used not only for airbrushes but also for natural and synthetic-haired paintbrushes and technical pens.
With this excellent cleaner, you can switch between colors easily. Plus, it is non-toxic and safe to use. Whether you are a seasoned pro airbrush artist or a beginner trying out the airbrush for the first time, it can be a great choice for your projects.
Pros:
- Works effectively on different types of paints.
- Can be used for multiple cleaning purposes.
- It has been certified as non-toxic.
Cons:
- The product seems a bit pricey.
Our Verdict: If you want to use a cleaning product not only for cleaning airbrushes but also for paintbrushes and technical pens, this product can be a go-to option for you.
6. Createx Airbrush Cleaner
If you want a product to keep your airbrush in good shape, this Createx airbrush cleaner can be a handy choice. Since this comes in a 4 Fl Oz pack, it is suitable for small-scale projects and can be carried and stored easily.
If you use multiple colors while working with an airbrush, there is always a hassle to clean the airbrush gun. But no more with this Createx airbrush cleaner because it allows you to clean between switching colors easily and effectively.
It is suitable with airbrush guns from different manufacturers. Also, with regular use, it can prevent paint buildup and extend the longevity of your airbrush tool. Lastly, this product is easy to use, so it is a suitable option for beginners.
Pros:
- Suitable for small-scale projects.
- Can be carried and stored with convenience.
- Works on a variety of surfaces.
Cons:
- This is not an ideal choice for professional cleaning.
Our Verdict: This one can be a suitable option, if you want a multipurpose product that you can use for cleaning your airbrush. Since it comes in a small bottle, it will not occupy a lot of space, so it will be easy to store.
7. Chefmaster Airbrush Cleaner
The Chefmaster airbrush cleaner is formulated to clean your airbrush guns with ease. It efficiently dissolves paint and protects the gun from getting clogged. Also, it’s useful for removing the previous color easily. So, switching between colors will be easier without affecting the quality of your work.
This cleaner is designed to be suitable for use with any brand of airbrush gun, making it a go-to option for hobbyists and professional airbrush artists. Plus, the product is easy to use, making it a suitable option for people who are just starting out with airbrush painting.
Using this cleaning solution regularly can help prevent the paint buildup inside the airbrush gun, ensuring optimal performance and extending the longevity of the gun.
Pros:
- Designed to work with any airbrush gun.
- Can efficiently clean the gun between switching colors.
- It is a suitable option for beginners.
Cons:
- Not a great option for larger project.
Our Verdict: This is a simple cleaning product that works great on your airbrush. For the price, it’s can be an ideal product if you don’t want anything fancy.
8. Master Airbrush Cleaner – Fast Acting Cleaning Solution
For a large-scale airbrush painting project, you need a large airbrush cleaner, which is when the Master airbrush cleaner comes in handy. It comes in a large 473ml volume and is suitable for larger projects. This is a great tool for professionals and art enthusiasts because it is suitable for all styles of airbrushes.
If your creative hands are not limited to working with airbrushes only, this product can still be the right choice for you because it can clean various artists’ tools such as paintbrush bristles and technical pens.
The solution is suitable for cleaning clogged airbrushes and quick cleaning for switching colors easily. Lastly, this product is able to clean acrylics, water-based paint, watercolors, gouache, tanning solution, inks, makeup, and more from your airbrush.
Pros:
- Can be used to clean various artist’s tools.
- Can clean paints of different types, including acrylic.
- The product is easy to use and clean.
Cons:
- To many users, it doesn’t smell good.
Our Verdict: It can effectively remove various types of paint including acrylic, watercolor, inks, and so on. So, it can be a great choice for professionals.
Things to Consider when Buying an Airbrush Cleaner for Paints
An airbrush cleaner is essential to any airbrush artist. Whether you need to switch between colors, or you are done painting for the day and want to start the next day, you will need to clean the brush properly to get your desired results.
When it comes to choosing an airbrush cleaner, there are plenty of options available, which may leave you thinking about which is the suitable airbrush cleaner for acrylic paint. Here, we will talk about the things you need to consider when choosing the right airbrush cleaner for your project.
Compatibility with acrylic paint:
The first thing you need to look for when purchasing an airbrush cleaner is whether the product is compatible with acrylic paint. Some airbrush cleaners may be more effective and compatible with a specific type of paint.
That’s why you need to choose a product that suits the acrylic paint the most. You can check this from the manufacturer’s information, and you are most likely to find it on the label of the product.
Cleaner materials:
The next thing you should remember is the cleaner’s chemical composition. Airbrush cleaners contain chemicals that help clean the paint from the airbrush. However, if the cleaner contains harsh chemicals, it may damage the airbrush or the paint.
Some low-quality cleaners may contain chemicals that can be harmful to health. So, make sure you choose a product that doesn’t contain any harmful chemicals that can be hazardous to your health or your airbrush.
Effectiveness of application:
When it comes to cleaning paint from airbrushes, you will find some cleaning products that can clean relatively faster. This can be due to the strength of the product. So, consider the cleaning strength of the product, and make sure you select a product that works more efficiently on acrylic paint.
Ease of use:
Always pick a cleaner that is easy to use. Try to go for ready-made cleaners instead of picking products that require you to mix the different solutions manually.
Size of the product:
If you are not a professional but a DIY enthusiast who frequently uses airbrushes for small-scale projects, you should consider the size of the cleaner according to your project size. You don’t need to go for larger cans of cleaners, you should pick smaller cleaning products to avoid wasting them.
Cost:
It’s surprisingly true that the price of the cleaner can be directly linked to the effectiveness of the product. You may need to pay more for a better-quality product. However, don’t compromise the quality for the cost. We always recommend going for high-quality products, even though you need to pay more.
Also Read: Should You Dampen the Brush before Applying Acrylic Paint?
How to Clean Acrylic Paint from an Airbrush?
Airbrush cleaning can be a bit tricky if you don’t know the right procedure. Today, we are breaking down the entire airbrush cleaning procedure into some simple and easy-to-understand steps. Follow the steps below to clean your airbrush.
Step 1: Dump out the remaining paint
The first step to cleaning your airbrush is to clean the paint remaining inside the airbrush gun. Turn the gun over and let the paint drip. Also, shake the gun to get rid of paint as much as you can. Use a medium-sized bowl or a waste bin to avoid messing up your workspace.
Step 2: Disassembling the airbrush gun
Now, it’s time to disassemble your gun. If you are a beginner, we certainly don’t recommend disassembling the airbrush gun, unless you have proper knowledge of its internal architecture.
If you don’t have proper knowledge about the parts and architecture, you can get help from an experienced person to disassemble and practice yourself a couple of times before deep cleaning.
Anyway, you can disassemble your airbrush gun in the following method:
- First, unscrew the cap that covers the needle, after that, take off the nozzle cap.
- Take off the nozzle from the airbrush gun.
- Hold the gun’s back part and take it off gently.
- Take off the chucking nut that holds the needle in place.
- Finally, pull out the needle from the body of the airbrush gun.
Step 3: Cleaning the parts
Take a small bowl that is large enough to hold the disassembled parts and fill it with an airbrush cleaning solution. Now, dip the parts in the solution and let them soak in it for roughly 10–15 minutes. Keep in mind, soaking the parts in the solution for a long time can damage the gun.
After soaking, you can use a wet cloth to wipe the small parts to remove the visible paint. Additionally, you can use cotton swabs and pipe cleaners to thoroughly clean the hard-to-reach areas.
Step 4: Rinsing the parts in water
Once you are done cleaning the parts with cloth and cotton swabs, you need to rinse them with distilled water to get rid of any traces of the cleaning solution. So, pour some warm distilled water into a small bowl and rinse the parts thoroughly.
Step 5: Let the parts dry
Now, take the parts out of the water and shake them to get rid of the remaining water inside. Place them in your workspace and let them dry.
Step 6: Reassembling and testing
Reassemble the airbrush gun in the following way:
- Begin by placing the needle inside.
- Place the nozzle gently and tighten it.
- Fasten the needle chucking nut by screwing it on.
- Gently place the needle cap and nozzle cap in their respective positions.
- Lastly, place the back cover of the gun.
Once you are done assembling, take some water in the paint cup of your airbrush gun and test it to see if it is working as it is supposed to.
Next Read: Is it possible to sand acrylic paint?
What Dissolves Acrylic Paint in Airbrush?
There are several options available to dissolve acrylic paint in an airbrush. Take a look at some easily accessible options.
Water: Water can help thin acrylic paint in an airbrush. It is the most accessible option available.
Isopropyl Alcohol: A high percentage of isopropyl alcohol can effectively dissolve acrylic paint in an airbrush. However, keep in mind that you need to use a high percentage of it to make it work effectively. You need to make sure that the cleaning solution contains at least 91% of isopropyl alcohol.
Acrylic Airbrush Cleaner: Lastly, you can purchase some airbrush cleaning products that are specifically designed to dissolve acrylic paint in the airbrush. This can be the most effective option compared to the two above.
Can You Thin Acrylic Paint with Airbrush Cleaner?
Though it is technically possible to use an airbrush cleaner to thin acrylic paint, we always recommend using a dedicated acrylic paint thinner to thin the paint. An airbrush cleaner that is specifically designed to dissolve acrylic paint from the airbrush. So, it can work as a thinner.
Nevertheless, you should keep in mind that the chemical properties and the chemical ratios in the cleaner can be different from thinners, which can ultimately impact the final result. So, if you are planning to use airbrush cleaner as a paint thinner, make sure you carefully check the manufacturer’s instructions and decide whether to use it or not.
Final Thoughts
An airbrush cleaner is an everyday tool for every airbrush artist. A good quality airbrush cleaner helps you clean the airbrush gun quickly so that you can switch to a new color as fast as possible. Also, it helps remove stubborn paint that sits inside the gun.
In this buying guide, we talked about some good quality airbrush cleaning products. So, instead of getting overwhelmed by all the products on the market, you can choose from our top picks that fit your project best.
When it comes to protecting painted surfaces from wear and tear, Rustoleum Crystal Clear Enamel is a popular choice. However, one question that often arises is – is Rustoleum Crystal Clear enamel UV resistant?
Rustoleum enamel is not 100% UV resistant. But some of their products including Crystal Clear Enamel can provide some level of UV resistance.
UV rays can cause paint to fade and discolor over time, which can be especially problematic for outdoor applications. In this article, we will explore whether Rustoleum Crystal Clear enamel is UV resistant and what that means for its performance in various settings.
What Is Rust-Oleum Crystal Clear Enamel Used For?
Rust-Oleum Crystal Clear enamel is a clear coating that is designed to provide a protective, non-yellowing finish to a variety of surfaces. It is commonly used to protect and enhance the appearance of surfaces such as metal, wood, ceramics, and plastics.
Some common applications of this enamel include:
- Protecting metal surfaces from corrosion and rust.
- Providing a protective coating to wooden furniture and other wooden surfaces.
- Sealing and protecting ceramic tiles and other ceramic surfaces.
- Enhancing the appearance of plastic surfaces by providing a glossy, clear finish.
- Protecting surfaces from UV rays, weather, and other environmental factors.
Is Rustoleum Enamel UV Resistant?
Rustoleum offers a range of enamel paints, and the UV resistance of each product may vary depending on its planned use and formulation. However, many Rustoleum enamel paints are designed to be UV-resistant and offer protection against fading and other forms of damage caused by prolonged exposure to sunlight.
For example, Rustoleum’s “Stops Rust” enamel spray paints are formulated with a unique blend of resins and pigments that provide excellent durability and resistance to fading and chalking. This product is also marketed as being “UV resistant” on their website.
Similarly, “Professional” enamel spray paints are also formulated to be UV resistant and are designed for use in outdoor applications where exposure to sunlight is likely.
That being said, keep in mind that no paint or coating can provide 100% protection against UV damage. Over time, even UV-resistant paints can begin to break down and degrade, particularly if exposed to extreme temperatures, moisture, or other environmental factors.
Is Rustoleum Crystal Clear Enamel UV Resistant?
UV resistance refers to a material’s ability to resist the damaging effects of ultraviolet (UV) radiation from the sun. UV radiation can cause fading, discoloration, and degradation of surfaces, particularly those exposed to direct sunlight over long periods of time.
Rust-Oleum Crystal Clear enamel is a polyurethane-based clear coat finish that is designed to provide a protective layer over surfaces. While the brand does not specifically claim that this product is UV resistant, it is formulated to be durable and long-lasting, which suggests that it can withstand some level of exposure to UV radiation.
Polyurethane coatings are known for their high durability, chemical resistance, and ability to resist weathering and abrasion. These properties make them a popular choice for protective coatings in a variety of applications, including automotive, marine, and industrial settings. However, polyurethane coatings can be prone to yellowing over time, especially when exposed to UV radiation.
To address this issue, some polyurethane coatings are formulated with UV stabilizers or absorbers that help to prevent yellowing and other damage caused by UV radiation. Rustoleum offers several products that are specifically formulated with UV protection.
Note that even with UV-resistant coatings, prolonged exposure to sunlight can cause fading or other damage to surfaces over time. It is always advised to protect surfaces from direct sunlight and to follow the manufacturer’s manual for proper maintenance.
Is Rust-Oleum Enamel Spray Paint UV Resistant?
Enamel spray paint can be UV-resistant or non-UV resistant depending on the specific product. UV resistance is an important consideration when using spray paint on exterior surfaces.
Fortunately, many enamel spray paint products are formulated with UV-resistant additives that help to protect against the harmful effects of sunlight. These additives typically absorb or reflect UV radiation, preventing it from penetrating the paint and causing damage.
Rust-Oleum Enamel Spray Paint is not specifically designed to be UV resistant. While the paint can withstand exposure to sunlight and outdoor weather conditions to some extent, over time, UV rays can cause the color to change.
Wrapping Up
Rustoleum Crystal Clear enamel is manufactured to offer a clear protective coating for many surfaces. While it does offer some level of protection against UV rays, it is not specifically marketed as a UV-resistant product. Some users have reported that the product may yellow over time when exposed to direct sunlight.
If UV protection is a critical requirement for your project, be sure to choose a product that is specifically made for this purpose.
Are you searching for a durable and waterproof enamel for your DIY project? Rustoleum Enamel is a popular choice for many DIYers, but the question remains: is Rustoleum enamel waterproof?
Rust-Oleum enamels provide water resistance, but they’re not fully waterproof. Some of the Rust-Oleum products can offer different level of waterproof, but they have some limitations as well.
In this article, we will explore the waterproofing properties of Rustoleum enamel and some other issues. So, if you are wondering whether this enamel is the right choice for your project, keep reading to find out!
Is Rustoleum Enamel Waterproof?
Rust-Oleum enamel is a versatile paint that can be used on a variety of surfaces, including metal, wood, concrete, and more. It is formulated with high solids content and a tough, durable finish that provides excellent adhesion, coverage, and corrosion resistance. While this enamel may provide some water resistance, it is not completely waterproof.
Enamel paints are typically not designed to be fully waterproof, as they are meant for indoor or outdoor use where exposure to water is minimal. However, Rust-Oleum enamel may offer some level of water resistance due to its oil-based composition, which can repel water to some extent.
Bear in mind that the level of water resistance will depend on various factors, including the surface being painted, the application process, and the conditions the painted surface will be exposed to. In general, Rustoleum enamel may be suitable for use in areas with occasional exposure to water, such as bathroom walls or outdoor furniture.
To ensure maximum water resistance, it is recommended to apply a clear topcoat over the enamel to provide an additional layer of protection. Additionally, proper surface preparation and application techniques can also help to enhance the durability and water resistance of the enamel.
Is Rustoleum Crystal Clear Enamel Waterproof?
Yes, Rust-Oleum Crystal Clear enamel is waterproof once it has fully cured. It forms a protective barrier that is resistant to water, moisture, and other environmental factors.
This Crystal Clear enamel is a high-quality, durable coating that provides a protective and glossy finish to various surfaces. It is solvent-based enamel that contains acrylic resin and other additives that provide excellent adhesion, hardness, and resistance to wear and tear.
This enamel is commonly used for protecting and enhancing the durability of surfaces such as metal, wood, ceramics, and plastics, among others. However, keep in mind that the effectiveness of the waterproofing may depend on factors such as the quality of application and the conditions in which the enamel is exposed to.
Is Rustoleum Protective Enamel Waterproof?
Rustoleum Protective enamel is a durable coating designed to provide long-lasting protection and resistance against rust, corrosion, chipping, and fading. While the enamel provides a certain level of water resistance, it is not completely waterproof.
If Rust-Oleum Protective enamel is exposed to water or moisture for extended periods, it can eventually lead to deterioration and corrosion of the underlying surface. Therefore, it’s best to avoid prolonged exposure to water and moisture to maintain the quality and longevity of the enamel coating.
If you need a completely waterproof coating, you may need to consider using a specialized waterproof sealant or coating designed explicitly for that purpose. You should follow the product’s instructions when applying any coating or sealant to ensure its performance and effectiveness.
Is Rustoleum Paint Water Resistant?
Rust-Oleum produces a wide range of paints, each with different properties, so the water resistance of Rust-Oleum paint can vary depending on the specific product you are using.
Some paints, such as Universal All Surface Spray Paint, are designed to be water-resistant and suitable for use in areas exposed to water or moisture. This type of paint is often used for outdoor applications such as painting metal furniture, garden tools, or fences.
Other Rust-Oleum paints, such as Painter’s Touch Ultra Cover 2X, are not specifically designed for water resistance but may still offer some degree of protection against water. However, prolonged exposure to water may cause the paint to degrade over time.
It’s good to read the label and product specifications of the specific paint you plan to use to determine its water resistance properties.
What Happens If Rustoleum Enamel Gets Wet?
If Rust-Oleum enamel is exposed to water for an extended period of time, the water can seep into the paint and cause it to soften, bubble or peel. This can result in a loss of adhesion, which can make the paint susceptible to further damage or wear.
In addition, water can cause the enamel to become discolored or stained, particularly if the water contains chemicals or other substances that react with the paint.
To prevent damage to Rust-Oleum enamel paint from moisture, it’s best to follow the recommended application process. Allow the paint to fully cure before exposing it to water or moisture. If the painted surface is repeatedly exposed to water or moisture, it may require more frequent touch-ups or repainting to maintain its appearance and protection.
Final Words
Rustoleum enamel has a range of different products, each with unique features and purposes. Some of these products may be more water-resistant than others. Make sure to read the label carefully to understand the specific properties of the enamel product you are using.
Rust-Oleum enamel can provide excellent protection to a variety of surfaces, but it should not be relied upon to provide complete waterproofing.
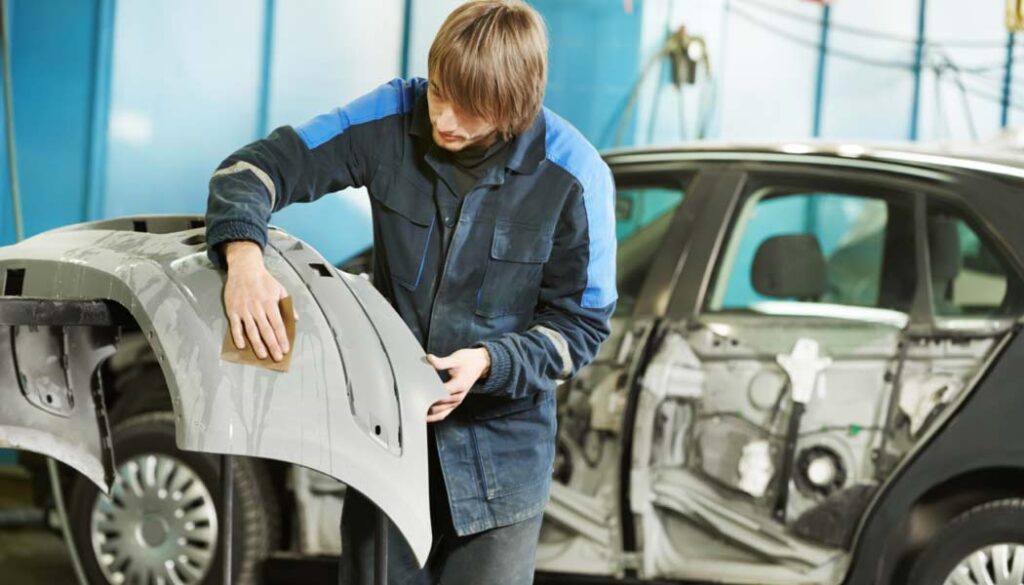
Are you tired of looking at a dull, faded plastic bumper on your car? Plastic bumpers are a popular choice in modern car designs, but they are notorious for losing their shine over time. To restore its appearance, you can paint the bumper. And before that, you may have this question in your mind – what primer to use on plastic bumper?
Adhesion promoting primer is the ideal primer to use on plastic bumpers. Plastic primer is also available as an affordable option. You can also choose high-build primer for car’s plastic bumper.
To make things easier for you, we have put together a comprehensive guide that will help you understand the different types of primers available and select the perfect one for your car’s bumper. So, sit back and relax as we take you through the ins and outs of primers for plastic bumpers.
Do You Need Primer for Plastic Bumper?
Primer is important for painting a plastic bumper for several reasons. First, plastic is a non-porous material that can be difficult for paint to adhere to. A primer is specially formulated to bond with the plastic surface and create a surface that is more receptive to paint. Without a primer, the paint may not adhere properly to the plastic surface, resulting in a rough, uneven, or flaking finish.
Second, a primer can help to smooth out any imperfections in the plastic surface, such as scratches, dents, or other damage. This creates a more even surface for the paint to adhere to, resulting in a smoother, more professional-looking finish.
Third, a primer can help to protect the plastic surface from the elements, such as sunlight, moisture, and temperature changes. This can help to prevent the plastic from becoming brittle, cracking, or fading over time.
So, using a primer is an essential step when painting a plastic bumper to ensure a high-quality, long-lasting finish that looks great and provides reliable protection for your vehicle.
What Primer to Use on Plastic Bumper?
When it comes to painting a plastic bumper, using the right primer is necessary to ensure the paint adheres properly and doesn’t peel or flake off over time. Plastic bumpers are made of materials such as polypropylene or ABS, which can be challenging to paint due to their low surface energy and flexibility.
To prepare the plastic bumper for painting, you’ll need to clean it thoroughly and sand it with fine-grit sandpaper to create a rough surface that the primer can adhere to. Once you’ve done that, you’ll need to choose the right primer for the job.
There are a few types of primer that can work well on plastic bumpers.
Adhesion Promoting Primer: This type of primer is specifically designed to bond to plastics and other low surface energy materials. It contains chemicals that create a stronger bond between the plastic surface and the paint.
Plastic Primer: This type of primer is also formulated to bond with plastic surfaces, but it’s not as effective as an adhesion-promoting primer. However, it may be a good option if you’re working with a tight budget.
High-build Primer: If the plastic bumper has significant damage, such as cracks or dents, a high-build primer can help smooth out the surface and create a more even finish. This type of primer is thicker than other types, so it can fill in small imperfections.
When selecting a primer for a plastic bumper, make sure to choose one that is compatible with the type of paint you plan to use. It is vital to use an adhesion-promoting primer or plastic primer when painting a plastic bumper. A high-build primer can also be used to fill in small imperfections.
Do You Need Special Primer for Plastic Bumper?
Yes, a special primer is required for plastic bumper repair. There are various types of plastic primer available in the market, and they are specially formulated to work with different types of plastic materials.
Some of the common types of plastic primer include adhesion promoter primers, plastic primers, and high-build primers. These primers are specifically designed to create a strong bond between the plastic surface and the paint, ensuring that the paint adheres properly and doesn’t peel or flake off.
It’s important to choose the right primer for the type of plastic used in the bumper. Using the wrong type of primer or applying it incorrectly can result in poor adhesion, uneven paint finish, and other problems that can compromise the appearance and durability of the repair.
What Is the Best Type Primer to Use for Plastic?
The best type of primer to use for plastic depends on the type of plastic being primed and the specific project requirements.
For example, if you are working with a non-porous plastic like PVC or ABS, a solvent-based primer such as a chlorinated solvent-based primer or a tetrahydrofuran-based primer may work best. These types of primers are designed to soften the surface of the plastic, allowing the paint to adhere better.
However, if you are working with a porous plastic like polyethylene or polypropylene, an adhesion-promoting primer may be more effective. These types of primers contain special additives that help the paint to bond with the plastic surface.
Can I Use 2K Primer on Plastic Bumper?
2K primer can be used on plastic bumpers. Before applying the 2K primer, it is important to thoroughly clean and prepare the surface of the bumper. This may involve sanding or using a plastic adhesion promoter to ensure good adhesion of the primer.
Follow the manufacturer’s instructions carefully, as 2K primers typically require mixing with a hardener and may require specific application techniques. Additionally, it is important to use proper safety equipment such as gloves and a respirator when working with 2K primers.
How to Select the Best Primer for Plastic Bumper?
Whether you’re repairing a scratch or giving your ride a whole new look, selecting the right primer is the key to a successful paint job. So, how do you choose the best primer for plastic bumpers?
First things first, choose a primer specifically designed for plastic. Plastic can be a bit tricky to paint, as it’s not as porous as other materials. That’s why using a specialized primer is important.
Next, consider the type of paint you’ll be using. Different paints require different types of primers. For example, if you’re using enamel paint, you’ll want to use an enamel primer. If you’re using lacquer paint, you’ll want to use a lacquer primer. Make sure to read the labels carefully and choose a primer that’s compatible with your chosen paint.
Another important factor to consider is the condition of your bumper. If it’s brand new, you’ll need a different primer than if it’s scratched or damaged. If your bumper has scratches or damage, you’ll want to use a primer that’s engineered to fill in those imperfections.
Finally, don’t forget to consider the color of your paint. If you’re painting your bumper a light color, you’ll want to use a light-colored primer. Similarly, if you’re painting your bumper a dark color, you’ll want to use a dark-colored primer. This will help the paint go on smoothly and evenly.
Final Verdict
Choosing the right primer for your plastic bumper is very important to achieving a durable and long-lasting finish. You will need to choose a primer that is best for plastic. Primers designed for other surfaces will not work on plastic bumpers.
Consider factors such as adhesion and flexibility when making your selection. Proper preparation and application techniques are also important for achieving the best results.
Are you looking to add a pop of color to your tile project? And asking yourself – can you paint Hardie Backer board?
Hardie Backer board is not designed to be painted. However, it is possible to paint this board if desired. The ability of this board to hold paint depends on some factors such as the paint, the preparation, and the application method.
In this guide, we will explore some more things that you need to know when you’re planning to paint your Hardie Backer boards. So, whether you’re a DIY enthusiast or a professional contractor, keep reading to learn more.
What Is Hardie Backer Board?
Hardie Backer board is a type of cement board used as an underlayment for tiles in areas such as bathrooms, kitchens, and floors. It is made of cement, sand, and cellulose fibers, which make it strong and durable.
It helps to prevent moisture damage and provides a stable surface for the tiles to adhere to. It is an excellent option for homeowners who want to ensure the longevity and stability of their tile installations.
It is often used as a substitute for traditional plywood or drywall underlayment in areas where moisture is present. This board is available in different thicknesses, ranging from 1/4 inch to 1/2 inch, depending on the application. The boards come in standard 3 foot by 5 foot sheets, making it easy to transport and install.
Can You Paint Hardie Backer Board?
Hardie Backer board is a cement-based product commonly used as a substrate for tile in wet areas. While it is okay to paint this board, it is not typically recommended as it is primarily designed to be covered with tile or another type of finish.
If you do decide to paint this board, it is essential to use the correct type of paint and preparation techniques to ensure a long-lasting and durable finish. You should use a high-quality, 100% acrylic paint that is suitable for use on masonry surfaces.
Before painting, the board should be cleaned thoroughly with soap and water, and any loose or flaking areas should be repaired. A primer designed for masonry surfaces should be applied to ensure proper adhesion of the paint.
Note that painting Hardie board will not make it completely waterproof, and it may not be as durable as other finish options such as tile or stone. Therefore, it may not be the best decision in areas that will be exposed to high moisture or wear and tear.
Also, take a look on the following section to understand why you think again before painting HardieBacker board.
First, this board is not designed to be a finished surface, and it does not have the same properties as other materials that are commonly painted, such as drywall or wood. This board is porous and has a rough texture, which makes it difficult to achieve a smooth, even finish when painting.
Second, the board is designed to be water-resistant, and painting it can compromise its ability to resist moisture. Painting this board can create a surface that is less resistant to water penetration and can lead to problems such as mold growth or tile failure.
Finally, most tile installations are done in areas where moisture is present, and using paint on HardieBacker board can create a surface that is less resistant to water, which can lead to damage over time.
Can You Paint Hardie Board a Different Color?
Hardie Board can be painted a different color. This board, also known as fiber cement siding, is a durable and popular building material. It is designed to last for many years with minimal maintenance, but it can be painted if you want to change its color.
To paint it, you need to follow a specific process to ensure that the paint adheres properly. The basic steps are –
- Clean the surface of the board thoroughly to remove any dirt, debris, or loose paint.
- Sand any rough areas and feather out any sharp edges with fine-grit sandpaper.
- Apply a high-quality exterior primer to the entire surface of the board. Be sure to choose a primer that is compatible with fiber cement siding.
- Allow the primer to dry completely before applying the paint. Apply one or two coats of high-quality exterior paint to the primed surface, using a paintbrush or a sprayer.
- Allow the paint to dry completely before applying a second coat, if necessary.
Should You Paint Hardie Backer Board before Install?
It is not necessary to paint Hardie Board before installation. This board is designed to be installed as an unfinished product and then painted after installation. In fact, painting the board before installation can actually lead to problems down the road, such as peeling or cracking of the paint due to the stress caused by the installation process.
Additionally, painting before installation can make it more difficult to install properly. The paint can create a slippery surface that can cause the boards to slide out of place during installation. It can also make it more difficult to achieve a tight fit between the boards, which can compromise the integrity of the siding.
If you really want to change color of your Hardie Backer board, it is advised to install board first and then paint it after installation. This will ensure that the siding is properly installed and that the paint adheres correctly to the surface.
Can You Spray Paint Hardie Board?
HardieBacker board is a popular brand of fiber cement siding that is known for its durability and resistance to weathering. Experts recommend using a 100% acrylic topcoat that is specifically designed for use with their products.
Before spray painting, make sure the surface is clean and free of dust and debris. It’s also important to apply the paint in the right weather conditions, typically between 40 and 90 degrees Fahrenheit with low humidity.
When spraying, use a high-quality paint sprayer and be sure to apply the paint evenly in thin layers. It’s also a good idea to test a small area first to ensure the paint adheres properly and looks the way you want it to.
What Kind of Paint Do You Use for Hardie Board?
When painting Hardie board, it’s wise to choose a high-quality exterior paint that can withstand the elements and adhere well to the surface. For this board, you can choose paint from the options below.
100% Acrylic Paint: Acrylic paint is the most popular choice for Hardie board due to its excellent adhesion, durability, and color retention. It’s also resistant to fading, cracking, and peeling, making it an ideal option for exterior applications.
Elastomeric Paint: This type of paint is highly flexible and can stretch up to 600%. It is an excellent choice for the board that expands and contracts with changing temperatures.
Urethane-Modified Acrylic Paint: This paint offers the benefits of both acrylic and urethane paints, providing top adhesion, durability, and weather resistance. It is also highly resistant to cracking, fading, and mildew growth.
How Well Does Hardie Backer Board Hold Paint?
If you plan to paint the board, clean the surface thoroughly to remove any dirt. You may also need to prime the surface with a bonding primer specifically designed for use on cement-based substrates before applying the paint.
This paint still may not hold paint as other surfaces such as drywall or wood. This is because Hardie board is a cement-based material that is porous and has a rough texture, which can make it difficult for paint to adhere evenly.
Before painting, it may be a good idea to consult with a professional painter or tile installer to determine the best approach for your specific project.
Final Verdict
Hardie Backer board is a popular choice for tiling and flooring applications. You can paint this board, but experts don’t recommend painting it and may not yield the best results. If you are considering painting the board, it is important to properly prepare the surface and use the appropriate materials for best results.
Imagine driving on a dark road, and suddenly, a sign illuminates in front of you, guiding your path. That’s the power of reflective paint! This incredible coating contains special additives that reflect light back to its source, making the surface of the painted object visible even in low light conditions.
Besides purchasing reflecting paint, you can make your own paint? Well, in this case, you want to know ‘how to make reflective paint’?
Adding glass beads to acrylic paint can provide you reflective paint. Mixing aluminum powder and the right amount of paint can also create reflective coating. The proper mixture of photoluminescent pigments and paint will give you powerful reflecting coating.
In this comprehensive guide, you’ll learn how to create reflective paint using different methods in detail.
What Is Reflective Paint?
Reflective paint is a type of coating that is designed to reflect light back towards its source, making it easier to see in low-light or dark conditions. It contains tiny glass beads or other reflective materials that bounce back light, creating a shimmering effect.
This type of paint is commonly used on road signs, safety equipment, bicycles, and other objects that need to be visible in low-light situations. So, imagine it like having a superpower to shine bright and catch people’s attention even when it’s dark outside!
Reflecting paint is usually made up of tiny reflective materials, such as glass beads or microspheres that are mixed with a paint base. The reflective particles are designed to reflect light back in the direction it came from, rather than scattering it in all directions like regular paint. This makes it particularly effective in situations where visibility is limited.
What Is the Composition of Reflective Paint?
This is a type of paint that contains reflective materials, such as glass beads or reflective pigments that reflect light back towards the source. The composition of reflective paint can vary depending on the manufacturer and intended use, but typically it consists of the following components.
Binder: The binder is the main component of the paint that holds the other ingredients together and adheres the paint to the surface. Common binders used in reflecting paint include acrylic, vinyl, and alkyd resins.
Pigments: Reflective pigments are the key ingredients that make the paint reflective. These pigments are made from tiny glass beads, aluminum flakes, or other reflective materials that reflect light. The amount and type of pigment used can affect the reflectivity and color of the paint.
Solvent: The solvent is the liquid component of the paint that helps it spread evenly and evaporates as the paint dries. Common solvents used in this type paint include water, mineral spirits, and other organic solvents.
Additives: Various additives may be included in paint to improve its performance or appearance. These may include thickeners, flow agents, UV stabilizers, and other ingredients.
Note: The exact composition of reflective paint can vary. For example, reflective paint used on road signs and pavement may have different properties and ingredients compared to paint used on buildings or other surfaces.
What Are the Uses of Reflecting Paint?
This type of paint is commonly used in a variety of applications to increase visibility and safety. We have described below some common uses of this paint.
Road Markings
One of the most common uses of reflecting paint is for road markings. These paints are applied to roads, highways, and other surfaces to improve visibility at night. The reflective properties of the paint allow drivers to see the road markings clearly, even in low light conditions. This helps to reduce the risk of accidents and improve overall road safety.
Safety Signage
Signs that need to be visible at night or in low light conditions, such as stop signs, pedestrian crossings, and speed limit signs, are often coated with reflective paint. This increases their visibility and helps to ensure that they are easily seen by drivers and pedestrians.
Sports Surfaces
Reflective paint can also be used on sports surfaces, such as tennis courts, basketball courts, and running tracks. The reflective properties of the paint help to improve visibility and make it easier for athletes to see the boundaries and lines on the court or track.
Industrial Equipment
These paints are also used on industrial equipment and machinery to improve safety in the workplace. The reflective properties of the paint make it easier for workers to see the equipment, even in low light conditions.
Clothing and Accessories
The reflecting paints have uses on clothing and accessories, such as jackets, backpacks, and bicycle helmets. These are also used on shoes and other accessories for runners and joggers, helping to improve their visibility when exercising in low light conditions.
What Are the Available Methods to Make Reflective Paint?
Reflecting paint can be made in different ways. If you want to try any method, you can check one from the following.
Glass Beads Method: This method involves adding glass beads to the paint mixture. The glass beads reflect light and create a reflective surface. This method is relatively simple and inexpensive, and it is widely used in the production of reflective paints.
Aluminum Powder Method: This method includes mixing aluminum powder and paint. The aluminum powder reflects light and creates a reflective surface. This method is more expensive than the glass beads method, but it produces a brighter and more reflective finish.
Retroreflective Paint Method: In this method, you will need to mix tiny glass beads and a retroreflective powder into a clear base paint. This type of paint is highly reflective and is commonly used on road markings and signs.
Photoluminescent Paint Method: Here, photoluminescent pigments and the paint create reflecting paint. These pigments absorb and store light energy during the day and emit it as a glow in the dark effect at night.
Note: Note that reflective paints are typically applied in thin layers and are often used in conjunction with other safety measures such as reflective tape, signage, and lighting.
How to Make Reflective Paint with Glass Beads step-by-step?
Making reflective paint with glass beads is a great way to make your objects or surfaces visible in low light conditions. To get the best result, make sure to follow the guide described below.
Materials you need:
- Acrylic paint
- Glass beads
- Stirring stick
- Mixing bowl
- Paintbrush
- Measuring cup
Step 1: Pour acrylic paint into a mixing bowl. The amount of paint you use depends on the size of the surface you want to paint. Use a measuring cup to make sure you have the right amount.
Step 2: Add glass beads to the acrylic paint. The amount of glass beads you use will determine the reflectivity of the paint. Use a stirring stick to mix the beads and paint thoroughly.
Step 3: Apply the reflective paint to the surface using a paintbrush. Make sure to apply it evenly and cover the entire surface.
Step 4: Allow the paint to dry completely. This may take a few hours based on the temperature and humidity of the environment.
Step 5: Once the paint is dry, it should be reflective in low light conditions. To test the reflectivity, shine a flashlight on the painted surface and see if the light reflects back.
Note: It’s important to use glass beads specifically made for reflective purposes. Regular glass beads used for crafts or jewelry may not have the same reflective properties.
Tips:
- You can purchase glass beads at most craft stores or online.
- If you want a more textured reflective surface, try using larger glass beads or mixing in some sand or other small particles.
- To increase the durability of the paint, consider applying a clear coat on top of it once it has dried.
- Reflecting paint works best on smooth surfaces, so make sure to prepare the surface by sanding and cleaning it before painting.
Making Reflecting Paint with Aluminum Powder
Reflective paint made with aluminum powder is a popular choice for adding shine and visibility to various surfaces. Check the method below.
Materials you need:
- Aluminum powder
- Acrylic paint (white or light-colored)
- Mixing container (glass or plastic)
- Stirring stick (wooden or plastic)
- Paintbrush
- Protective gloves and eyewear
- Start by measuring out the amount of acrylic paint you need for your project into a mixing container. Use a light-colored paint, such as white, to ensure maximum reflectivity.
- Slowly add aluminum powder to the paint, stirring continuously to ensure even distribution. The amount of aluminum powder you need will depend on the desired level of reflectivity. As a general rule, a 1:1 ratio of aluminum powder to paint will produce a highly reflective finish, while a 1:2 ratio will produce a less reflective finish.
- Continue stirring the paint and aluminum powder mixture until the powder is fully incorporated into the paint. You may need to add more paint or powder to achieve the desired consistency.
- Use a paintbrush to apply the newly made paint to the surface you want to make reflective. Apply the paint in thin, even coats, allowing each coat to dry before adding the next. After the final coat of reflective paint has dried, the surface should be highly reflective and visible in low-light conditions.
Tips:
- Always use caution when working with aluminum powder, as it can be flammable and may cause skin and eye irritation.
- To increase the durability of the reflective coat, consider adding a clear topcoat of sealant after the final coat of paint has dried.
Making Reflecting Paint with Photoluminescent Paint
Photoluminescent paint, also known as glow-in-the-dark paint, is a type of paint that glows in the dark after being exposed to light. Reflecting paint, on the other hand, is a type of paint that reflects light that is directed towards it. By combining the two, you can create a paint that not only glows in the dark but also reflects light.
Materials you need:
- Photoluminescent paint
- Reflective paint
- Paintbrush
- Stirring stick
1. Choose the right type of paint: Make sure you choose the right type of photoluminescent paint and reflective paint for your project. There are different types available, so be sure to choose the ones that best suit your needs.
2. Mix the photoluminescent paint: Stir the photoluminescent paint well with a stirring stick to make sure it is well mixed. You can also shake the bottle if that is easier.
3. Mix the reflective paint: Stir the paint well with a stirring stick to make sure it is well mixed. Again, you can shake the bottle if that is easier.
4. Mix the two paints together: Pour the reflective paint into the photoluminescent paint and stir well. Make sure you mix them thoroughly to ensure an even consistency.
5. Test the paint: Once you have mixed the two paints together, test the paint to make sure it is the desired consistency and color. If it’s too thick, add a small amount of water or thinning agent to thin it out. If it’s too thin, add more any of the paints to thicken it up.
How Long Does Reflective Paint Last?
The lifespan of this paint depends on various factors such as the quality of the paint, the application method, the surface on which it is applied, and the environmental conditions it is exposed to. Generally, high-quality reflective paints can last anywhere between 2 to 10 years or even longer.
Factors such as exposure to UV radiation, extreme temperatures, and harsh weather conditions can cause the reflective properties of the paint to degrade over time. Poor application and surface preparation can also lead to the premature failure of paint.
Is Reflective Paint Waterproof?
Most reflecting paints are designed to be water-resistant, but whether or not they are fully waterproof can depend on the specific product and the conditions in which it is applied.
Reflective paint can provide an added layer of protection against water damage, particularly when used on outdoor surfaces. However, keep in mind that no paint is completely waterproof, and the usefulness of the water-resistant properties can be changed. The quality of the paint, the surface, and the amount of exposure to water and moisture can impact the waterproof feature of paint.
Some types of paints may be more suitable for waterproofing than others. For example, some reflective paints are designed specifically for use on boats or other marine applications, where water resistance is particularly important.
Final Words
Making reflective paint can be a great way to add visibility and safety features to a variety of surfaces, from bicycles and helmets to signs and road markings. With the right materials and techniques, anyone can create their own custom reflecting paint and enjoy the benefits of increased visibility and safety in low-light or nighttime conditions.
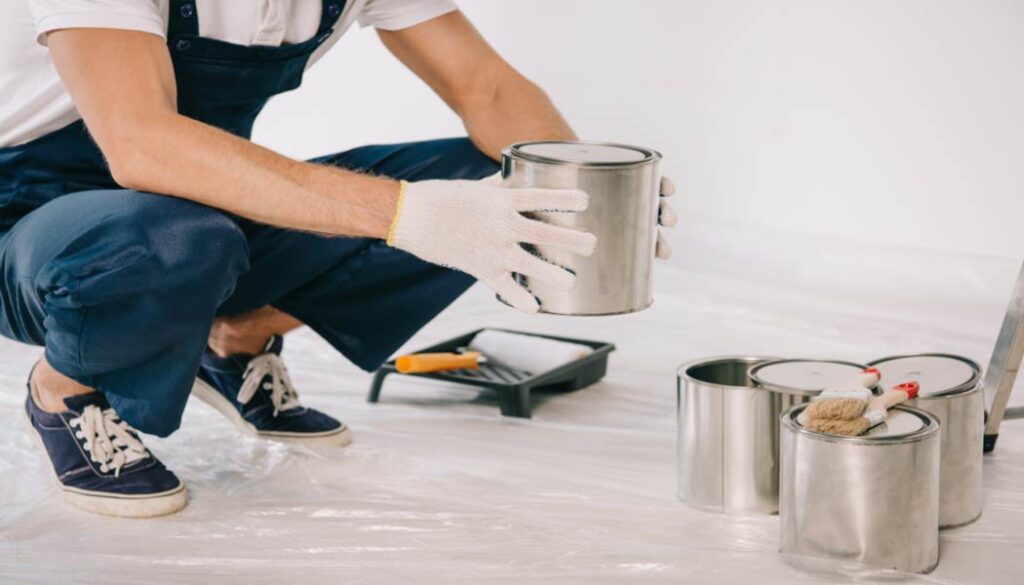
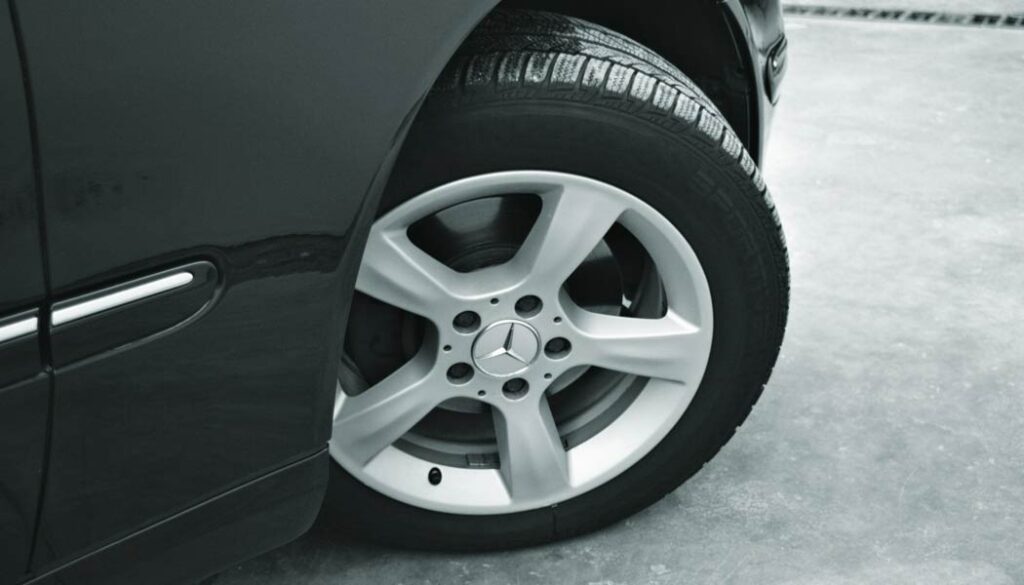
If you’re a car enthusiast or just looking to give your ride a fresh look, you may be considering painting your rims. After all, a sleek set of rims can make a huge difference in the overall appearance of your vehicle. However, before you head to the nearest auto body shop, you may be wondering about the cost of this upgrade. You may have this question in your mind – how much does it cost to paint rims?
To paint a rim, you need to spend any amount from $50 to $150. As a DIY project, this cost can be around $100. For professional service, the cost can be more than $150. Thus, you can calculate this cost for 2, 3, or 4 rims.
In this article, we’ll break down the different costs associated with painting your rims, so you can decide if it’s a worthwhile investment for you.
Can I Paint My Car Rims?
It is a common practice among car enthusiasts to paint their rims. It helps to achieve a custom look and enhance the overall appearance of their vehicle.
Painting rims can be a good decision if done correctly. The following factors should be considered before deciding to paint your car rims.
- Painting your rims can be more cost-effective than purchasing new rims. However, the cost of the paint, materials, and labor can add up, so it’s important to factor in the total cost before proceeding.
- The quality of the paint job can impact the overall appearance of your car. A poorly done paint job can look cheap and affect the resale value of your car.
- The durability of the paint depends on the quality of the paint and the preparation of the rim surface. If the paint is not applied correctly, it can easily chip, peel or scratch.
- Painted rims require regular maintenance to keep them looking their best. Proper cleaning, waxing, and touch-ups are necessary to maintain the appearance of the rims.
So, we can now say, painting your car rims can be a good decision if you consider the cost, quality, durability, and maintenance. Make sure to use high-quality materials and hire a professional to achieve the best results.
How Much Does It Cost to Paint Rims?
The cost of painting rims can vary depending on various factors such as the size of the rims, the condition of the rims, the type of paint used, and the location of the service provider.
On average, the cost to paint rims can range from $50 to $150 per rim.
However, it’s essential to note that some service providers may charge less or more than the average cost, depending on their level of expertise and the quality of their services. Additionally, some providers may offer discounts or package deals for painting multiple rims or other services.
It’s recommended to get quotes from multiple service providers to compare prices and ensure you’re getting a fair price for the service. Additionally, make sure to choose a reputable service provider with experience in rim painting to ensure quality results.
The following are some of the key factors that can impact the price of painting rims.
Rim size: The size of the rims is one of the most significant factors that determine the charge of painting. Larger rims require more paint, and as a result, they cost more to paint.
Rim condition: The condition of the rims can also impact the cost of painting. If the rims have significant damage or corrosion, they may require additional preparation work before painting, which can increase the cost.
Type of paint: The type of paint used can also affect the cost. High-quality paints, such as ceramic paint or powder coat, are more expensive than regular paint, but they offer superior durability and longevity.
Location: Some areas are expensive and you need to pay more for painting rims in those areas. On contrary, smaller and less expensive cities will charge less for rim painting services.
Service provider: A highly skilled and experienced service provider may charge more for their services than a less experienced one.
It’s also worth noting that the charge of painting rims may not include additional services such as removing and reinstalling the tires or repairing any damage to the rims. These services may incur additional costs.
In general, the cost of painting rims can range from $50 to $150 per rim. However, the actual cost will depend on the factors listed above. To get an accurate estimate, it’s best to contact a few service providers in your area and request quotes based on your specific requirements.
Cost for Painting Rims as a DIY Project
Painting your rims is a simple DIY project that can be done at home. It is an easy way to give your car a fresh new look without breaking the bank. The cost for painting rims as a DIY project will vary depending on the type of paint and equipment you use. Here’s a breakdown of the cost for painting your rims as a DIY project.
Cost of paint: The type of paint you choose will determine the cost. A basic can of spray paint will cost around $6 to $12, while a high-quality automotive paint can cost anywhere from $15 to $50 per can. The number of cans required for your rims will depend on their size and how many coats you want to apply.
Cost of primer: Primer is essential for ensuring that the paint adheres properly to the rim. A can of primer can cost anywhere from $6 to $15.
Cost of sandpaper: Sandpaper is used to remove any rust or chipped paint from the rim. You will need sandpaper with a grit of 320 or higher, which can cost around $3 to $6 per sheet.
Cost of masking tape: You will need masking tape to cover the tires and any other parts of the car you don’t want to paint. A roll of masking tape can cost around $3 to $6.
Cost of clear coat: Applying a clear coat will protect the paint and give your rims a shiny finish. A can of clear coat can cost around $10 to $20.
Cost of equipment: To complete the project, you will need some basic equipment such as a spray gun or a canister, a compressor, a paint tray, and a face mask. The equipment cost will vary depending on the type and quality of the products you choose. You can expect to pay anywhere from $50 to $300 for all the necessary equipment.
On average, the rim painting cost as a DIY project can be $100 or more, depending on the quality of the products you choose and the equipment you use. However, the cost is still significantly lower than what you would pay for a professional paint job.
Cost for Painting Rims at Professional Service Center
Painting rims at a professional service center can be a great option if you want a high-quality and long-lasting finish. However, it can also be more expensive than doing it yourself.
The cost of painting rims at a professional service center can vary depending on a number of factors, such as the size of the rims, the type of paint and finish you choose, and the location of the service center. On average, you can expect to pay anywhere from $150 to $300 per rim.
Some service centers may charge a flat rate for the job, while others may charge by the hour. It’s important to ask for a detailed estimate before you agree to have the work done, so you know exactly what you’re paying for.
In addition to the paint job costing, you may also need to pay for any additional services, such as rim repair or cleaning. These costs can add up quickly, so make sure you ask for a complete breakdown of all charges before you agree to the work.
While it may be more expensive to have your rims painted at a professional service center, there are some advantages to this approach. For one thing, you’ll get a high-quality finish that will last longer than a DIY job. You’ll also be able to choose from a wider range of colors and finishes, and you’ll have the peace of mind of knowing that the work is being done by trained professionals.
If you’re willing to pay more for a high-quality, long-lasting finish, then it may be worth it to have the work done by professionals. However, if you’re on a tight budget and don’t mind a more DIY approach, then painting your rims yourself may be a better option.
What Are the Factors that Affect the Cost of Painting Rims?
There are several factors that can affect the charge of painting rims, including:
Rim size: Larger rims will require more time and materials to paint, so they will generally cost more than smaller rims.
Rim material: Different rim materials may require different painting techniques or coatings, which can affect the rate of the painting process.
Rim condition: If the rims are damaged or have corrosion, extra preparation work may be needed to prepare the surface for painting.
Type of paint: High-quality paints can cost more but may provide better durability and a more professional finish. Low quality paint will not give that expected result.
Number of rims: If you are painting a set of rims, the cost per rim may be lower than if you are painting just one rim.
Labor costs: The labor cost can be changed depending on the location and experience of the painter.
Customization: If you want a custom design or color, this can increase the rate of the painting process.
It’s important to discuss these factors with the painter before getting your rims painted so that you have a clear idea of the total cost.
What to Choose between DIY or Professional Service when Painting Rims?
Choosing between DIY or professional service when painting rims ultimately depends on your skills, budget, and time. Here are some advantages and disadvantages of each method to help you make an informed decision.
DIY Painting Rims
When you’re planning to complete painting your rims as a DIY project, you will find the following advantages and disadvantages.
Advantages:
- You can save money by doing it yourself instead of hiring a professional.
- You can choose the color and finish you want, and work at your own pace.
- Painting rims can be a fun and educational DIY project that allows you to learn new skills.
Disadvantages:
- It can take a lot of time to properly prepare and paint the rims.
- If you lack experience or knowledge, the outcome may not be as good as you hope.
- There is a higher chance of making mistakes such as overspray, uneven coating, and bubbling.
Professional Painting Rims
Painting rims from professionals can offer you also some pros and cons. Let’s check them.
Advantages:
- Professionals have the necessary skills, knowledge, and equipment to deliver high-quality results.
- You can save time by having professionals paint your rims, allowing you to focus on other things.
- Professionals are less likely to make mistakes and ensure a flawless finish.
Disadvantages:
- Hiring professionals can be expensive, especially if you want a high-quality job.
- You have to choose from the colors and finishes that the professional offers.
- You won’t have as much control over the process as you would if you were doing it yourself.
The choice between DIY or professional service when painting rims depends on your priorities. If you value cost-effectiveness and flexibility and don’t mind investing your time and effort, then DIY may be a good option for you. If you want high-quality results without the risk of mistakes and have the budget to spend, then professional service is the way to go.
How Long Do Painted Rims Last?
The lifespan of painted rims depends on several factors, such as the quality of the paint used, the level of care and maintenance, and the driving conditions. Generally, a well-painted rim can last for several years with proper care.
Whether painting rims is worth it or not depends on personal preference and the condition of the rims. If the rims are in good condition but have minor scratches or blemishes, painting them can give them a fresh new look and extend their lifespan.
On the other hand, if the rims are severely damaged or corroded, it may not be worth the investment to paint them, as they may need to be replaced soon anyway.
If you are looking to enhance the look of your vehicle and don’t mind the additional maintenance that comes with painted rims, then it may be worth considering. However, if you prioritize practicality and don’t want to invest in additional maintenance, then leaving the rims as they are may be a better option.
How Much to Paint Rims Black?
The cost of painting four rims black can range from $200 to $600 or more, with the average cost falling around $350 to $500. However, the cost can be higher or lower depending on the factors mentioned above.
If you are looking for a high-quality, long-lasting paint job, it is recommended to choose a professional automotive paint shop that specializes in rim painting. This will ensure that the paint is applied evenly, and the rims are properly prepped and cleaned before painting.
It’s also worth noting that painting cost of rims black can be less expensive if you choose to do it yourself, but keep in mind that this can be a time-consuming and challenging task, especially if you do not have experience painting car rims.
How Can You Save Money while Painting Rims?
There are several ways you can save money while painting rims. Check the following tips.
Do it yourself: The most obvious way to save money is to paint your rims yourself. DIY painting can save you money on labor costs, and you can purchase the materials you need for a fraction of the cost of hiring a professional.
Use spray paint: Spray paint is an affordable way to paint the rims. You can purchase spray paint in a range of colors, and it is easy to apply.
Prep the rims properly: Proper preparation of the rims is essential to achieving a professional-looking finish. Clean the rims thoroughly, and remove any rust or debris before painting. Sand the rims to create a smooth surface, and use a primer to ensure the paint adheres properly.
Opt for a single color: Painting rims a single color can save you money on materials and labor. A single color is also easier to apply than multiple colors, reducing the likelihood of mistakes or issues.
Shop around: If you decide to hire a professional, shop around for the best price. Get quotes from several providers, and compare their prices and services to find the most affordable option.
Final Thoughts
The exact cost of painting rims will vary. It is clear that the benefits of a freshly painted set of rims are well worth the investment. Not only will it enhance the appearance of your vehicle, but it will also help protect your rims from damage.
So, whether you are looking to add a pop of color or simply restore your rims to their former glory, the cost of painting your rims is a small price to pay for the satisfaction and enjoyment of driving a beautiful, well-maintained vehicle.
Have you ever spent hours painting a room with washable paint, only to realize that the color just isn’t right? Or maybe you’ve accidentally smeared a spot with dirt or grime? The frustration of wanting to change something that you’ve already spent time and effort on can be overwhelming. But don’t worry, because there’s good news! You can paint over washable paint with ease and transform your space into something new and fresh.
But how to paint over washable paint? To paint over washable paint, clean the surface thoroughly and let it dry. Then, sand lightly and apply a coat of primer. Once the primer is dry, apply your desired paint color. Allow the paint to dry completely before applying a second coat, if necessary.
We will explore here every single detail about painting over washable paint. Let’s know more.
What is Washable Paint?
Washable paint is a type of paint that can be easily cleaned off surfaces with water and mild soap. It is designed to be used by children and is commonly used in classrooms, art projects, and at home. It is typically made with a water-based formula, making it easy to clean up after use.
Washable paint is made with non-toxic ingredients that are safe for children to use, and it typically comes in bright, bold colors that are easy to apply and mix. The paint can be used on a variety of surfaces, including paper, cardboard, and even fabric. Washable paint is a great way for children to express their creativity and develop their artistic skills, while also being easy to clean up and maintain.
Can You Paint over Washable Paint?
Yes, with proper preparation and the right type of paint, it is possible to successfully paint over washable paint to achieve a new look or protect the underlying surface.
Washable paint is designed to be durable and easy to clean, and it is commonly used in high-traffic areas or areas where there may be frequent exposure to moisture. However, if you want to change the color of a room or update the look of a surface, it may be necessary to paint over existing washable paint.
One important thing to keep in mind is that the new coat of paint may not adhere properly if the surface is not properly prepared. It is important to clean the surface thoroughly to remove any dirt, dust, or grease that may be present. If there are any holes or cracks in the surface, these should be filled and sanded smoothly before applying a new coat of paint.
Another consideration is the type of paint that should be used for the new coat. Different types of paint have different properties, such as sheen level, drying time, and durability. It is important to choose a paint that is compatible with the existing washable paint and that will provide the desired finish and level of durability.
How to Paint over Washable Paint?
Have a look to our steps that will result in a smooth and even finish when painting over washable paint.
Following materials:
- Paint of your choice
- Primer
- Sandpaper (medium grit)
- Painter’s tape
- Paint roller
- Paintbrush
- Paint tray
- Drop cloths or plastic sheeting
- Cleaning solution or soap and water
- Rag or sponge for cleaning
Clean the surface:
Before painting over the washable paint, clean the surface thoroughly. Use a cleaning solution or soap and water to remove any dirt, dust, or grease. Dry the surface with a clean rag or sponge.
Sand the surface:
Sand the surface lightly using medium grit sandpaper. This helps to create a rough surface that helps the new paint to adhere better.
Apply primer:
Apply a layer of primer to the surface. The primer helps to create a smooth surface and ensures better adhesion of the new paint. Allow the primer to dry completely before painting.
If the washable paint is still in good condition and adhering well to the surface, there may be no need to prime the surface before applying the new coat of paint. However, if the washable paint is flaking or peeling, it is recommended to apply a primer before painting to ensure good adhesion of the new coat of paint.
Use painter’s tape:
Use painter’s tape to cover any areas that you do not want to paint, such as trim or baseboards.
Paint the surface:
It is important to select the appropriate type of paint for the new coat. For instance, if the existing paint is an oil-based washable paint, it is recommended to use an oil-based paint for the new coat. Similarly, if the existing paint is a latex-based washable paint, it is recommended to use a latex-based paint for the new coat.
Use a paint roller or paintbrush to apply the paint to the surface. Start with a thin layer and wait for it to dry before applying additional layers. Be sure to follow the manufacturer’s instructions for drying times.
Apply a second coat:
Once the first coat is dry, apply a second coat of paint. This helps to ensure that the surface is fully covered and provides a more even finish.
Remove painter’s tape:
After the second coat is dry, remove the painter’s tape carefully.
Clean up:
Clean your paintbrush and roller thoroughly with soap and water. Dispose of the drop cloths or plastic sheeting appropriately.
What Can You Put over Washable Paint?
When using washable paint, there are several things you can put over it to help protect the paint and make it last longer.
Clear Acrylic Sealer:
A clear acrylic sealer can be applied over washable paint to protect it from moisture, dirt, and other environmental factors. It creates a protective barrier that will help keep the paint looking fresh and new for a longer period of time. It can be brushed or sprayed on and dries clear, leaving the original paint color unchanged.
Wax:
Applying a coat of wax over washable paint is another option for protecting the surface. Wax provides a protective layer that repels water and other liquids, making it ideal for use in areas that are prone to spills or splatters. It can also add a subtle sheen to the surface, giving the paint a polished look.
Varnish:
Varnish is a clear coating that can be applied over washable paint to protect it from damage. It provides a hard, durable finish that resists scratches, scuffs, and stains. Varnish can be applied with a brush or spray and dries to a glossy or matte finish.
Polyurethane:
Polyurethane is a clear, protective coating that can be applied over washable paint to protect it from wear and tear. It is extremely durable and resistant to scratches, scuffs, and stains. It can be applied with a brush or spray and dries to a clear, glossy finish.
The type of washable paint you’re using will determine whether or not it’s suitable for use with polyurethane. Some washable paints contain additives that can affect the adhesion and performance of the polyurethane, so it’s always a good idea to check the manufacturer’s instructions or consult with a professional before applying polyurethane over your washable paint.
Mod Podge:
Mod Podge is a popular sealer and adhesive that can be used to protect washable paint. It is a versatile product that can be applied in multiple coats to create a protective layer that is resistant to moisture, heat, and other environmental factors. It dries clear and can be applied with a brush or sponge.
Keep in mind that Mod Podge is not waterproof, so if the project will be exposed to water or moisture, additional waterproofing may be necessary.
Each of these products has its own unique benefits and drawbacks, so it is important to do some research and choose the best option for your specific needs.
What is the Difference between Washable and Normal Paint?
Washable paint and normal paint differ in the following ways:
Washability:
Washable paint, as the name suggests, is a type of paint that can be washed off easily with soap and water, while normal paint is not designed to be cleaned and may require special cleaning solutions.
Durability:
Washable paint is typically less durable than normal paint and may require more frequent touch-ups and repainting.
Stain Resistance:
Washable paint is generally more stain-resistant than normal paint and can withstand spills and stains better. Washable paint contains special additives that make it more resistant to stains and marks, allowing it to be cleaned without damaging the paint surface. Normal paint does not contain the same additives. It may require solvents or harsh chemicals to remove stains and marks.
Finish:
Washable paint usually has a flat or matte finish, while normal paint comes in a variety of finishes such as matte, satin, and glossy.
Application:
Washable paint is generally easier to apply and may require fewer coats than normal paint.
Application area:
Washable paint is a good option for high-traffic areas, households with kids and pets, and places prone to spills and stains, while normal paint may be a better choice for areas where durability and finish are a priority.
Price:
Washable paint is often more expensive than normal paint due to its additional features and benefits.
Is Washable Paint the Same as Acrylic?
Washable paint and acrylic paint are not exactly the same, but they do share some similarities. While both washable paint and acrylic paint are water-soluble and can be cleaned up easily with soap and water, they differ in their composition, texture, drying time, color range, and intended usage.
Acrylic paints are made with pigment suspended in an acrylic polymer emulsion, whereas washable paints are typically made with a water-soluble vinyl or acrylic polymer. This means that acrylics are more durable and resistant to fading, while washable paints are designed to be easily washed off with soap and water.
Acrylic paints have a thicker texture and can be used for impasto techniques or layered for a textured effect. Washable paints have a thinner consistency and are designed to be applied in one even coat.
Acrylic paints dry relatively quickly, usually within a few hours, whereas washable paints may take longer to dry, depending on the brand and formulation.
Acrylic paints come in a wider range of colors, including metallic and fluorescent hues. Washable paints, on the other hand, are typically available in basic primary and secondary colors.
Acrylic paints are generally used for fine art and crafts, while washable paints are designed for use by children and are commonly used for school projects and finger painting.
Can You Wash off Washable Paint?
Yes, washable paint can be washed off with water and soap. Washable paint is designed to be easily cleaned up with water and soap, making it a popular choice for children’s crafts and activities.
When washing off washable paint, it’s important to act quickly, as the longer the paint sits on the surface, the harder it will be to remove. Simply rinse the painted area with warm water and gently scrub it with a sponge or cloth. For tough stains, you can add a small amount of mild soap to the water to help break down the paint.
It’s worth noting that although washable paint can be easily removed from most surfaces, it may not come off completely from all surfaces. For example, washable paint may leave a slight stain or discoloration on certain fabrics or porous surfaces. It’s always a good idea to test a small, inconspicuous area before washing off washable paint to ensure that it won’t damage the surface or leave any unwanted stains.
Can You Use Washable Paint on a Wall?
Yes, you can use washable paint on a wall. Washable paint is specially formulated to resist stains and allow for easy cleaning without damaging the paint finish. It is an excellent option for high-traffic areas such as hallways, kitchens, and bathrooms, where walls are more likely to get dirty and require frequent cleaning.
Washable paint is available in both latex and oil-based formulas. Latex-based washable paint is more commonly used as it dries faster and emits fewer fumes. Before applying washable paint, it is important to clean the wall thoroughly and ensure it is free of any dirt, grease, or grime. Once the wall is clean and dry, apply the paint with a brush or roller as you would with regular paint.
How long does It Take for Washable Paint to Dry?
Washable paints, in general, may take longer to dry compared to non-washable paints. This is because washable paints often contain more water, which can affect the drying time.
The exact drying time for washable paint can still vary based on factors such as the type of paint, the thickness of the application, and the environmental conditions. Some washable paints may take as long as 24 hours to dry completely, while others may dry within a few hours.
To get a more accurate estimate of the drying time for a particular type of washable paint, it’s best to refer to the manufacturer’s instructions or to conduct a small test on a sample surface. Additionally, it’s important to note that even if the paint appears dry to the touch, it may not be fully cured, so it’s best to wait at least 24 hours before handling or applying another coat of paint to the surface.
Is washable Paint Permanent?
Washable paint is not considered permanent because it is designed to be easily removed from surfaces. It is formulated to be more water-soluble than other types of paint, which allows it to be easily washed out of clothing, skin, and surfaces.
However, some washable paints may leave a stain or residue if they are not washed out immediately or if they are applied to porous surfaces such as unfinished wood or concrete. So, while washable paint is not permanent, it may leave a mark if not washed off promptly or if used on certain surfaces.
Final Words
I’ve found that painting can be a therapeutic and rewarding experience. There’s nothing quite like the satisfaction of transforming a room with a fresh coat of paint. While it may seem daunting to some, with the right materials and techniques, it can be accomplished by anyone, regardless of skill level.
It’s important to remember that preparation is key when it comes to painting over washable paint. Taking the time to clean and prime the surface will ensure that the new paint adheres properly and lasts for years to come. Additionally, choosing the right type of paint and tools is essential for achieving the desired finish.
So, if you’re feeling hesitant about painting over washable paint, don’t be afraid to give it a try. With a little bit of practice and determination, you’ll be able to tackle any painting project that comes your way.
Have you ever looked at your hot tub cover and thought, “I wish this looked better?” Maybe it’s become weathered and faded over time, or perhaps you just want to switch up the color scheme in your backyard oasis.
Whatever the reason, the question on your mind is likely, “Can you paint a hot tub cover?” Yes, you can paint a hot tub cover with a specific type of paint that is designed for outdoor use and can withstand exposure to heat, water, and chemicals. It’s important to thoroughly clean and prepare the surface before painting to ensure proper adhesion.
As a seasoned DIY enthusiast and hot tub owner myself, I can assure you that not only is painting a hot tub cover possible, but it’s also a fun and rewarding project that can breathe new life into your backyard retreat. So, grab your paintbrush, and let’s dive in!
Can You Paint a Hot Tub Cover?
Yes, it is possible to paint a hot tub cover. Many types of paint are available that can adhere to plastic, vinyl, or wood, which are commonly used materials for hot tub covers. However, it is important to choose the right type of paint that is suitable for the material of the hot tub cover and can withstand exposure to moisture, heat, and UV radiation. Using the wrong type of paint may result in peeling, flaking, or fading of the paint, and may also damage the hot tub cover.
Before painting the hot tub cover, it is important to clean it thoroughly to remove any dirt, grime, or debris. Sanding the surface may also be necessary to create a smooth, even surface for the paint to adhere to. It is also recommended to use a primer before painting to enhance the adhesion and durability of the paint.
Painting a hot tub cover can be a cost-effective way to give it a new look or to match it with the surrounding decor. However, it is important to follow proper safety precautions and to use appropriate materials and techniques to ensure a long-lasting and high-quality finish.
What Kind of Paint Do You Use on a Hot Tub?
When it comes to painting a hot tub, it is essential to use a specific type of paint that can withstand exposure to high temperatures and water. One option is a two-part epoxy paint that is specifically designed for use on hot tub surfaces.
One example of this type of paint is the Rust-Oleum Specialty Tub and Tile Epoxy Paint. This paint is designed to provide a durable, long-lasting finish that can withstand temperatures of up to 200°F (93°C) and is resistant to water, chemicals, and UV rays. It is also formulated to resist peeling, chipping, and fading over time.
To use this paint, you will need to prepare the surface of the hot tub by cleaning it thoroughly with a non-abrasive cleaner and allowing it to dry completely. Then, you can apply the paint using a brush or roller, making sure to follow the manufacturer’s instructions for application and drying times.
It is important to note that not all hot tubs can be painted, and you should check with the manufacturer of your hot tub before attempting to paint it. Additionally, it is recommended to consult a professional if you are not familiar with painting and refinishing techniques.
Also Read: Chalk Paint over Oil Based Paint – Is It Okay?
How Do You Paint a Hot Tub Cover?
Painting a hot tub cover can give it a new look and prolong its lifespan. Just follow the steps to paint a hot tub cover:
Materials Needed:
- Sandpaper (220-grit)
- Cleaning solution (mild soap and water or a degreaser)
- Bucket
- Water hose
- Plastic sheet or tarp
- Painter’s tape
- Primer (outdoor use)
- Paint (outdoor use)
- Paintbrush or paint roller
Step-by-step process:
Clean the hot tub cover:
Remove any dirt, debris, or oil stains from the hot tub cover surface using a soap or detergent solution. Rinse it off with water and let it dry completely.
Sand the surface:
Use 220-grit sandpaper to lightly sand the entire surface of the hot tub cover. This will create a better surface for the primer to adhere to. Clean the dust off with a cloth.
Cover the areas you don’t want to paint:
Use painter’s tape and a plastic sheet or tarp to cover any areas you don’t want to paint, such as handles, locks, or hinges.
Apply the primer:
Apply an outdoor-use primer to the entire hot tub cover using a paintbrush or roller. If you are using acrylic paint, apply a coat of primer is compulsory. Wait for it to dry completely before moving on to the next step. Follow the instructions on the primer can for drying time.
Paint the hot tub cover:
Apply the first coat of paint using a paintbrush or roller. Use long, even strokes, and be sure to apply the paint evenly. If using spray paint, hold the can about 8-10 inches away from the surface and spray in a sweeping motion. Let the first coat dry completely.
Add another coat:
After the first layer of paint dries completely, apply another coat of paint to ensure complete coverage. Wait for it to dry completely. If necessary, apply a third coat of paint once the second coat has dried completely.
Remove the tape and plastic:
Once the paint is completely dry, remove the tape and plastic covering from the hot tub cover.
Let the hot tub cover cure:
Allow the hot tub cover to cure for the recommended time specified on the paint can before using it.
Why Do You Need to Paint a Hot Tub Cover?
Painting a hot tub cover may seem like a purely cosmetic decision, but there are actually several practical reasons why you might want to do so. Here are some of the main reasons why painting a hot tub cover can be beneficial:
Protection against the elements:
A hot tub cover is constantly exposed to the sun, wind, rain, and other elements, which can cause it to become faded, discolored, and damaged over time. Painting the cover can provide an additional layer of protection against these elements, helping to prolong its lifespan and maintain its appearance.
Heat retention:
Hot tub covers are designed to help retain heat, which is important for keeping your hot tub at a comfortable temperature and reducing energy costs. A painted cover can be more effective at retaining heat than an unpainted one, as the paint can act as an insulating layer.
Aesthetics:
Let’s not forget the most obvious reason for painting a hot tub cover: it can improve its appearance. If your cover is looking worn or outdated, a fresh coat of paint can give it a new lease on life and make your hot tub area look more attractive overall.
Customization:
Painting your hot tub cover can also give you the opportunity to customize it to your liking. You can choose a color that matches your outdoor decor or opt for a design that complements your personal style.
Waterproofing:
Depending on the type of paint you use, painting your hot tub cover can also help to make it more waterproof. This can be especially beneficial if your cover is prone to leaks or if you live in an area with heavy rainfall.
Improved durability:
A high-quality paint job can help improve the durability of your hot tub cover. This is especially true if you choose a paint that is specifically designed for outdoor use and is resistant to fading, chipping, and peeling.
Protection from chemicals:
If you use harsh chemicals in your hot tub, such as chlorine or bromine, painting the cover can help protect it from damage. These chemicals can cause the cover to deteriorate over time, but a good coat of paint can help prevent this.
Easy maintenance:
Finally, painting your hot tub cover can make it easier to clean and maintain. A smooth, painted surface is much easier to wipe down and keep clean than a rough, textured cover.
Next Read: Painting Laminate Wall – A Guide
Can You Change the Color of Your Hot Tub?
Yes, you can change the color of your hot tub, but the process will depend on the type of hot tub you have and the material it’s made of.
- If your hot tub is made of fiberglass or acrylic, you can change the color by refinishing or painting it. There are special paints and refinishing kits available that are specifically designed for hot tubs. However, before you start painting or refinishing your hot tub, it’s important to clean it thoroughly and follow the manufacturer’s instructions carefully.
- If your hot tub is made of a different material, such as wood or metal, you may be able to stain or paint it, but it’s important to use products that are specifically designed for those materials. Again, make sure to follow the manufacturer’s instructions carefully to ensure a good result.
- Another option to change the color of your hot tub is to use colored lighting. Many hot tubs come with built-in LED lighting that can be programmed to display different colors. Alternatively, you can purchase aftermarket LED lights that can be installed in your hot tub.
Keep in mind that changing the color of your hot tub may affect its resale value, so it’s important to consider this before making any changes.
What Color Should You Paint Your Hot Tub?
The color you choose to paint your hot tub depends on your personal preference and the overall aesthetic of your backyard or outdoor living area.
Some popular colors for hot tubs include shades of white, blue, green, and gray. These colors are often associated with relaxation and tranquility and can create a soothing atmosphere in your backyard. Ultimately, the color you choose is up to your personal taste and the overall style of your outdoor living area.
With these tips in mind, you can choose a color that will enhance the look and feel of your outdoor space and create a relaxing and enjoyable hot tub experience.
Consider the style of your outdoor space:
The color you choose should complement the style and decor of your outdoor space. For example, if you have a modern and minimalist backyard, you may want to choose a neutral color like white or gray. If you have a more rustic or natural outdoor space, earthy colors like green or brown may be a better choice.
Think about the mood you want to create:
The color you choose can have an impact on the mood and atmosphere of your hot tub experience. If you want a relaxing and calming environment, soft colors like blue or lavender can help create a peaceful atmosphere. If you want a more energizing and invigorating atmosphere, bright colors like red or orange can help create a lively and fun environment.
Contrast:
Consider the color of your hot tub’s surroundings. If the area is already very dark or neutral, you may want to choose a bright or contrasting color to make the hot tub stand out. On the other hand, if the area is already colorful or busy, a more muted or neutral color may be a better choice.
Durability:
It’s important to choose a paint that is durable and designed specifically for use on hot tubs. Some colors may fade or wear off more quickly than others, so consider the longevity of the paint as well.
Consider the maintenance:
Painting a hot tub requires maintenance and upkeep to ensure it looks great and lasts for years. Darker colors can show dirt and debris more easily than lighter colors, so keep this in mind when choosing a color. Lighter colors may require more frequent cleaning to keep them looking their best.
Check with your hot tub manufacturer:
Before painting your hot tub, check with the manufacturer to ensure that painting is allowed and what type of paint is recommended. Using the wrong type of paint can damage the hot tub and void any warranties.
Final Thoughts
Painting a hot tub cover is indeed possible. However, it’s important to keep in mind that not all paints are suitable for this task, and it’s essential to choose a paint that is designed for use on plastic surfaces.
While some materials like vinyl or plastic may require special paint or coatings, others like wood can be easily painted with regular outdoor paint. It’s important to consider the impact of the paint on the cover’s durability and lifespan, as well as the potential for the paint to chip or peel over time
In addition, it’s crucial to ensure that the hot tub cover is clean, dry, and free of any dust or debris before applying the paint. . Before attempting to paint your hot tub cover, it’s always best to do your research and consult with a professional to ensure the best possible outcome.
When it comes to removing paint or any other stubborn residue from a vehicle, using a paint remover can be an effective solution. However, one question often arises – will paint remover damage tires?
Paint remover contains some harsh chemicals that can damage tires. Even it can affect human health and the environment as well. However, you can find some specially-made paint removers for tires.
The tires are one of the most critical components of a vehicle, and any damage to them could compromise the safety of the driver and passengers. In this article, we will explore the potential risks and effects of using paint remover on tires and provide some helpful tips to keep your tires safe while using this product.
Does Paint Remover Work on Tires?
It is not recommended to use paint remover on tires, as it may cause damage to the rubber and the structural integrity of the tire. Generally, paint remover works on wood, metal, and plastic by dissolving and removing paint. But it can cause the rubber in the tire to break down and become brittle.
Additionally, paint remover may contain harsh chemicals that can be harmful to both the tire and the user. These chemicals can release harmful fumes and can be dangerous if they come into contact with the skin or eyes.
If you need to remove paint from your tires, try to use a specialized tire cleaner that is designed to be safe for rubber. These cleaners are typically water-based and do not contain harsh chemicals that can damage the tire.
Can You Use Paint Remover on Tires?
Using paint remover on your tires can be a tempting solution for those pesky spray paint or graffiti marks that refuse to come off with soap and water. It can also be used to remove old tire letters or logos that you want to replace with something new and shiny. The paint remover is designed to dissolve and strip away layers of paint, making it seem like the perfect solution to your tire woes.
However, before you go grabbing that can of paint remover and a brush, let’s consider the potential risks. Firstly, paint remover is a highly caustic and corrosive chemical that can cause severe skin irritation and damage your eyes if it comes into contact with them. So, if you don’t have proper safety equipment, it’s best to steer clear of the paint remover altogether.
Secondly, the chemical reaction that occurs when the paint remover comes into contact with the rubber on your tire can weaken the material, causing it to become brittle and more susceptible to cracking or puncturing.
While paint remover may seem like a quick and easy solution to tire-related problems, it’s essential to consider the potential risks before diving in headfirst. Otherwise, it may be best to leave the tires as they are or seek alternative solutions to the problem at hand.
Will Paint Remover Damage Tires?
Paint remover, also known as paint stripper, is a chemical solvent that is commonly used to remove paint and coatings from various surfaces. However, when it comes to tires, the use of paint remover can be a risky proposition. While paint remover can effectively strip off paint and coatings from tires, it can also cause damage and weaken the rubber compounds that make up the tire.
Rubber tires are made up of a variety of chemicals, including polymers, accelerators, and antioxidants, which all work together to create a strong and durable material.
When paint remover is applied to a tire, it can break down these chemicals and weaken its structure. This can lead to cracking, splitting, and other forms of damage that can compromise the safety and performance of the tire.
In addition to damaging the tire itself, paint remover can also have negative effects on the environment. Many paint removers contain harsh chemicals and solvents that can be harmful to the environment, including volatile organic compounds (VOCs) and hazardous air pollutants (HAPs). When these chemicals are released into the air, they can contribute to air pollution and have negative health effects on people and animals.
Therefore, if you need to remove paint or other substances from your tires, it is best to use a non-abrasive cleaner that is specifically designed for use on tires.
There are some paint removers that are safer to use on tires than others. Some products are specifically designed for use on rubber and other sensitive materials, and these may be a better choice if you absolutely need to remove paint from your tires.
Can You Use Paint Remover on Wheels?
Yes, you can use paint remover on wheels, but it depends on the type of paint remover and the type of wheels you have.
Here are some facts:
- Different types of wheels require different types of paint remover. For example, alloy wheels can be damaged by certain chemical paint removers, while steel wheels are more durable and can withstand a wider range of chemical paint removers.
- If you’re using a chemical paint remover, be sure to wear gloves, goggles, and a mask to protect your skin, eyes, and lungs from the fumes.
- Avoid using paint removers on wheels that have been powder-coated or anodized, as these finishes are designed to resist chemical treatments.
- In general, it is recommended to use a mechanical method, such as sanding or blasting, to remove paint from wheels. This is a safer and more effective way to strip the paint without damaging the wheels.
- After removing the paint, it is important to thoroughly clean the wheels to remove any residue and prepare them for a new finish.
- It is always a good idea to test a small area first before applying paint remover to the entire wheel to avoid any unwanted damage or adverse reactions.
Will Paint Thinner Hurt Tires?
Paint thinner can hurt tires if it comes into prolonged or repeated contact with them.
Paint thinner is a solvent that is used to thin and clean up the paint, varnish, and other similar products. It is usually made up of a combination of chemicals, including acetone, toluene, and xylene. These chemicals can cause damage to tires by breaking down the rubber compounds and causing them to dry out, crack, and eventually fail.
When paint thinner is spilled or dripped onto a tire, it can penetrate the surface and start to break down the rubber compounds. If it is not cleaned up immediately, the thinner can continue to soak into the tire, causing further damage. The longer the paint thinner is in contact with the tire, the greater the risk of damage.
Furthermore, paint thinner can also weaken the bond between the tire and the wheel, making it more susceptible to coming off the rim. This can be extremely dangerous while driving, as it can cause a sudden loss of control of the vehicle.
Final Thoughts
Paint remover can potentially damage tires, depending on the type of paint remover and the composition of the tires. Paint removers that contain harsh chemicals such as methylene chloride, acetone, or benzene can cause the rubber in tires to break down and become brittle, leading to cracking or even tire failure.
Therefore, it is important to avoid using paint removers that contain these harsh chemicals on or near tires. Instead, it is recommended to use milder paint removers that are specifically designed for use on automotive surfaces.
Looking to give your sneakers a unique and eye-catching makeover? Hydro dipping is a fun and creative way to customize your shoes and make them stand out from the crowd. As someone who has experimented with hydro-dipping shoes, I know firsthand the excitement and satisfaction of seeing a plain pair of shoes transform into a unique and eye-catching work of art.
But with so many different types of paints available, it can be hard to know what paint to use for hydro dipping shoes. Acrylic spray paints or specialized hydro-dipping paints work best for hydro-dipping shoes. They provide vibrant colors, good adhesion, and can withstand the wear and tear of daily use.
Here we’ll dive into the world of hydro dipping and explore the best paints to use for transforming your plain sneakers into one-of-a-kind works of art. So grab your paintbrush and let’s get started!
What is Hydro Dipping?
Hydro dipping, also known as water transfer printing or hydrographic printing, is a process used to apply a design or pattern to a three-dimensional object. The process involves placing a special film with the desired design on the surface of water and then dipping the object to be decorated into the water. The design is transferred onto the object as a thin film that adheres to its surface.
The process typically involves several steps, including preparing the object by cleaning and priming it, applying a base coat of paint, and then dipping it into the water with the film. After the film has been transferred, a clear coat is applied to protect the design.
Hydro dipping can be used to decorate a wide variety of objects, including car parts, helmets, sporting goods, and even fingernails. The process allows for a wide range of custom designs, and patterns and can create a unique, high-quality finish that is durable and long-lasting.
What kind of paint do you use to hydro dip shoes?
Choosing the right type of paint for hydro-dipping shoes is crucial to achieving the desired results. With so many options available, it’s important to select a paint that is specifically formulated for use in water and will adhere to the surface of the shoes. Some popular choices include acrylic paints, spray paints, and vinyl dye.
It is recommended to use water-based acrylic paint. This type of paint is easy to work with, dries quickly, and adheres well to the shoes. It also allows for good color saturation and creates a smooth, even finish.
Note: Not all acrylic paints are suitable for hydro dipping. Make sure to choose a paint that is specifically designed for use with water-based hydrographic films. Some popular brands of hydro-dipping paint include Angelus and Hydro-Vator.
Before painting, it is important to properly clean and prepare the shoes. Make sure they are free of any dirt, dust, or oils. Once the shoes are clean and dry, they are ready to be dipped in the paint and water mixture.
What materials do you need to hydro dip shoes?
To hydro-dip shoes, you will need the following materials:
Shoes:
The first thing you need is a pair of white shoes to customize ((canvas, leather, or vinyl works best).
Spray Paint:
This is the main material used for the dipping process. As mentioned earlier, it’s important to choose a paint that is specifically designed for use with water-based hydrographic films.
Hydrographic film:
This is the material that will transfer the pattern or design onto the shoes. There are many different designs and patterns available, so choose one that best suits your style and preference.
Hydrographic Activator:
Activator is used to dissolve the hydrographic film and allow it to adhere to the shoes. You will need a hydrographic activator for this process.
Container or Bucket:
You will need a container or bucket large enough to hold your shoes and deep enough to submerge them in water.
Water:
Clean tap water is needed to create the hydro dipping solution.
Protective Gear:
Protective gear like glove and face masks is important to protect you from the paint and chemicals.
Masking tape:
This is used to mask off areas of the shoes that you don’t want to get painted.
Stir stick:
A stir stick is needed to mix the paint and water together.
Prepping materials:
Sandpaper, primer, and degreaser are used to prepare the shoes for painting.
Clear coat:
A clear coat is optional but recommended to apply over the paint to protect the design and give the shoes a glossy finish.
Drying rack:
A drying rack is needed to allow the shoes to dry after the dipping process.
These are the basic materials required for hydro dipping shoes, but additional materials and tools may be needed depending on the specific design and process you choose.
How to Hydro Dip Shoes?
With a little patience and creativity, you can create a unique and personalized pair of hydro-dipped shoes. Just follow our tips and tricks on how to hydro-dip shoes:
Step 1: Prepare your shoes
Clean your shoes thoroughly with soap and water to remove any dirt, oils, or residue that may prevent the paint from adhering. Remove the laces also. Allow the shoes to dry completely before moving to the next step.
Step 2: Masking off
Cover any areas on your shoes that you don’t want to get painted on with painter’s tape. This includes areas like the sole, tongue, and shoelace holes. Be sure to press the tape down firmly to prevent any paint from seeping through.
Step 3: Fill the container with water
Fill the plastic container with water, leaving enough room at the top to allow for dipping the shoes. The water should be room temperature or slightly warmer.
Step 4: Spray the paint
Shake the spray paint can well and then spray your chosen colors of spray paint onto the surface of the water, creating a pattern of your choice. Use light and even strokes, spraying each color onto the water in a circular pattern. You can use multiple colors to create a marbled effect or just one color for a solid look. It is best to use spray paint that is specifically formulated for hydro dipping.
Step 5: Mix the colors
Use a toothpick or stick to gently mix the colors together in the water. Be careful not to over-mix, or the colors will become muddy.
Step 6: Dip the shoes
Put on your gloves to avoid staining your hands. Hold your shoes and dip them into the water at an angle, pushing them under the surface of the water. Make sure the entire shoe is submerged and then slowly lift it out of the water, allowing the excess paint to drip off. You can use the toothpick or stick to remove any excess paint on the surface of the water before dipping your shoes.
Step 7: Dry the shoes
Place the shoes on a paper towel or a drying rack to dry completely. Be sure to remove the painter’s tape once the shoes are dry.
Step 8: Seal the shoes
Apply a clear coat of sealant to protect the paint and make it more durable. This step is optional, but it will help your custom shoes last longer. Be sure to follow the manufacturer’s instructions for the sealant, including any recommended drying time.
That’s it!
What is the Best Spray Paint for Hydro Dipping Shoes?
The best spray paint for hydro-dipping shoes is one that is designed specifically for use on a variety of surfaces, including plastic, metal, and fabric. Rust-Oleum Specialty Camouflage spray paint is a great option as it has excellent adhesion and durability, dries quickly, and provides smooth and even coverage.
Additionally, it comes in a range of colors that work well for hydro-dipping projects. It’s important to choose a paint that is waterproof and won’t fade over time to ensure your hydro-dipped shoes last for as long as possible.
Can You Hydro Dip Shoes with Acrylic Paint?
Yes, acrylic paint can be used for hydro-dipping shoes. Acrylic paint is water-soluble and has good adhesion properties, making it a suitable choice for hydro dipping. However, the paint may need to be thinned down to the right consistency and proper surface preparation is important. This includes cleaning the shoes and applying a base coat of paint to help the design adhere better.
Hydro dipping with acrylic paint can be a fun and creative way to customize shoes, but proper safety precautions should be taken, such as working in a well-ventilated area and wearing protective gear.
Should I Use Primer Before Hydro Dipping?
Yes, it is highly recommended to use a primer before hydro-dipping shoes. Using a primer before hydro dipping can greatly improve the quality, durability, and longevity by providing a layer of protection against wear and tear of the final product.
The primer helps to create a clean, even surface for the hydrographic film to adhere to, which ensures a smooth and consistent finish. Without a primer, the hydro dip may not stick properly or may peel off easily, resulting in a poor-quality finish.
If You Miss a Spot on Shoes Can You Double Dip?
It’s generally safe to double-dip the shoes back into the water to try to apply the design to the missed area. But not recommended to double dip during the hydro dipping process, as this can result in uneven and clumpy patterns on the surface of the shoe.
If you miss a spot, it’s best to touch it up with a small brush or sponge to ensure that the pattern is consistent and even.
Make sure to follow the manufacturer’s instructions and use the recommended amount of dipping time and water temperature to achieve the best results.
Is Hydro Dipping Shoes Permanent?
The permanence of hydro dipping on shoes depends on several factors, such as the type of shoes, the quality of the hydro dipping process, and the care taken after the dipping. Generally, if the shoes are properly prepped and primed, and the hydro dipping is done professionally with high-quality materials, the result can be long-lasting and resistant to wear and tear.
However, if the shoes are not prepped correctly, the dipping is done poorly, or the shoes are not cared for properly after the dipping, the hydro dip may begin to peel or fade over time.
Final Words
Hydro dipping shoes is a popular DIY trend that involves using water and a special hydrographic film to transfer a pattern or design onto the shoes.
After researching and considering various factors, it’s clear that using acrylic paints with a hydrographic activator is the best choice for hydro-dipping shoes. This combination not only produces vibrant and long-lasting colors but also provides excellent adhesion and durability on shoe materials such as leather, rubber, and canvas.
It’s essential to properly prepare the shoes before painting, as well as follow the necessary safety precautions when working with chemicals.
What’s the delay? Let’s experience it!