Whether you’re an aspiring artist or someone who loves to dabble in crafts, adding a touch of shine to your creations can elevate them to a whole new level. One popular way to achieve this dazzling effect is by incorporating glitter into your artwork. But can you mix glitter with acrylic paint?
You can mix glitter particles with acrylic paint. The result will be something that will wholly change your decorative works.
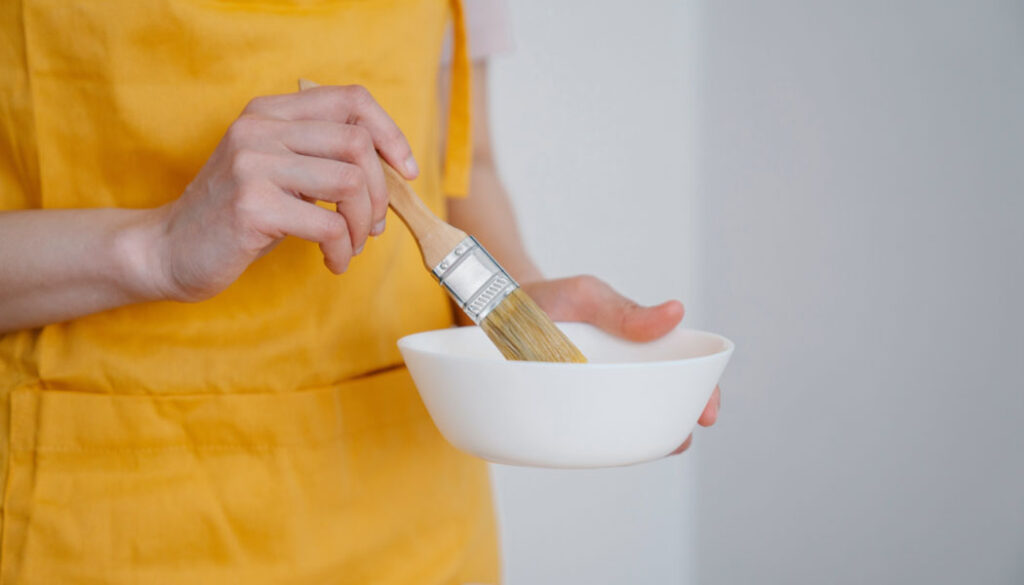
In this guide, we will explore the exciting possibilities of mixing glitter with acrylic paint. We will delve into the techniques, tips, and considerations that will help you navigate this glittery journey.
Glitter and Acrylic Paint: Characteristics and Uses
Glitter and acrylic paint are popular materials in the world of crafts and artistic expression. Glitter adds a touch of sheen, while acrylic paint offers versatility and vibrant colors. Let’s explore their characteristics and uses briefly.
Glitter
Glitter refers to tiny, reflective particles that come in various colors. They are typically made from materials such as plastic, glass, or metal. They are often used to add glaze to various objects or surfaces. Glitter can come in different forms, including loose particles, adhesive-backed sheets, or mixed with other substances like paint or glue.
Glitter particles have a reflective surface that catches and reflects light, creating a sparkling effect. They are typically very small, ranging from a fraction of a millimeter to a few millimeters in size. These are available in a wide range of colors, allowing for versatile decorative options.
Glitter can be applied to various surfaces such as paper, fabric, wood, or plastic. It is often used to enhance the appearance of decorations for events, parties, or festive occasions. It can be mixed with paint, glue, or other mediums to create unique textures and visual effects in paintings, sculptures, or mixed media artwork.
Acrylic Paint
Acrylic paint refers to a fast-drying, water-based paint that contains pigment suspended in an acrylic polymer emulsion. It is known for its versatility, durability, and ease of use. Acrylic paint can be used on various surfaces and provides a wide range of finishes, from matte to glossy.
Acrylic paint dries quickly compared to other paint types, allowing for rapid layering and overpainting. It is water-based, making it easy to clean up with water and soap. It can also be thinned or diluted with water for different effects.
This paint can be used on a wide range of surfaces, including canvas, wood, paper, fabric, ceramics, and more. It has good coverage and can often provide opaque or semi-opaque layers, depending on the pigment concentration.
Acrylic paints can be easily mixed together to create a vast array of colors and shades. They can also be mixed with various mediums to alter their properties.
Can You Mix Glitter with Acrylic Paint?
Yes, you can mix glitter with acrylic paint to add sparkle and texture to your decorative works. Mixing glitter with acrylic paint can create a dazzling effect, especially when the light catches the glitter particles. It can be used to enhance various art projects, such as paintings, crafts, and DIY decorations.
When mixing glitter with acrylic paint, ensure that the glitter particles are fine and compatible with the paint. Chunky glitters may not mix well and could affect the consistency of the paint. It is recommended to use fine glitter or glitter specifically made for mixing with paint.
One advantage of mixing glitter with acrylic paint is the ability to create unique and eye-catching textures. The glitter particles can give your artwork a three-dimensional aspect, adding depth and visual interest. This can be particularly appealing when creating abstract or decorative pieces.
However, there are a few things to keep in mind when mixing glitter with acrylic paint. The presence of glitter can affect the drying time of the paint, so it’s important to allow sufficient drying time. Moreover, if you plan to varnish or seal your artwork, be aware that some varnishes may dull the glitter effect.
How to Mix Glitter with Acrylic Paint: Step-by-Step
Mixing glitter with acrylic paint is a wise decision when you want to add a beautiful shimmer to your work. Check this guide on how to do it.
Materials You Need:
- Acrylic paint (any color of your choice)
- Fine glitter (choose a color that complements your paint)
- Mixing palette or disposable plate
- Mixing utensil (such as a palette knife or plastic spoon)
- Paintbrushes
- Canvas or painting surface
- Protective covering for your workspace (optional)
- Clear varnish or sealant (optional)
Step 1: Prepare your workspace
Cover your workspace with a protective covering like newspaper or plastic. This will help to avoid any accidental spills or stains.
Step 2: Squeeze out acrylic paint
Squeeze out the desired amount of acrylic paint onto your mixing palette or a disposable plate. You can choose any color you like, depending on your artistic vision.
Step 3: Add glitter to the paint
Sprinkle a small amount of fine glitter onto the paint. Start with a conservative amount and gradually add more if desired. You can always add more glitter later if needed.
Step 4: Mix the paint and glitter
Use a palette knife or plastic spoon to thoroughly mix the glitter into the acrylic paint. Make sure the glitter is evenly distributed throughout the paint. Continue mixing until you achieve the desired consistency.
Step 5: Test the mixture
Before applying the glitter paint to your artwork, it’s good to test the mixture on a small section or scrap paper. This will allow you to see how the glitter appears in the paint and adjust the amount of glitter if necessary.
Step 6: Apply the glitter paint
Once you are satisfied with the glitter paint mixture, use a paintbrush to apply it to your painting surface. You can use various techniques like brush strokes or stippling onto the surface for different effects.
Step 7: Let it dry and evaluate
Allow the paint to dry completely according to the instructions. Once dry, evaluate the glitter effect on your work. If you feel it needs more sparkle, you can repeat the process by applying additional layers of glitter paint.
Step 8: Seal the artwork
To protect the glitter and add a glossy finish, you can apply a sealant over the dried paint. Follow the instructions on the varnish or sealant product for the best results.
Additional Tips
- Use fine glitter for a more subtle shimmer. Go for chunkier glitters if you want a bolder effect.
- If you want a more intense glitter appearance, you can mix the glitter directly into the paint tube before squeezing it onto the palette.
- Keep in mind that excessive mixing can cause the glitter particles to break down or lose their sparkle. So, try to minimize excessive manipulation.
- Clean your brushes and utensils thoroughly with water immediately after use. This will prevent the glitter from clumping or hardening on them.
What Happens if You Mix Glitter with Acrylic Paint?
When you mix glitter with acrylic paint, the following effects typically occur.
Distribution: The glitter particles become evenly dispersed throughout the acrylic paint. Finally, it creates a glittery effect. The paint essentially acts as a medium to hold and distribute the glitter particles.
Aesthetic Enhancement: Glitter adds a sparkling and reflective quality to the paint, giving it a shimmering appearance. The type, size, and color of the glitter used will determine the specific glittering effect produced.
Texture: Glitter particles are often solid and can add texture to the paint. The surface of the dried paint may feel slightly rough or gritty due to the presence of the glitter particles. The texture can vary depending on the size and amount of glitter added.
Light Reflection: Glitter particles reflect light, enhancing the overall reflective properties of the acrylic paint.
Note: It’s significant to note that glitter does not chemically react with acrylic paint. Instead, it is simply suspended within the paint as an additive. The glitter particles will remain intact and separate from the paint binder, maintaining their original properties.
Is It Safe to Use Glitter with Acrylic?
Using glitter with acrylic can be safe as long as you take certain precautions and use appropriate products. Important considerations to keep in mind –
Use cosmetic-grade glitter: When working with glitter, make sure to use glitter that is specifically labeled as “cosmetic-grade” or “body-safe.” These glitters are less likely to cause irritation or allergic reactions.
Avoid non-cosmetic glitters: Non-cosmetic glitters, such as craft glitters might have sharp edges or contain chemicals that could cause irritation.
Mix glitter with acrylic gel: To incorporate glitter into acrylic, it’s recommended to mix it with an acrylic gel or medium. This helps to bind the glitter particles and prevent them from coming loose during application or over time.
Be cautious around the eyes: Glitter particles can be irritating if they get into your eyes. When using glitter near the eye area, exercise caution to prevent it from falling into your eyes. If you wear contact lenses, it’s best to remove them before applying glitter.
Always prioritize safety and choose high-quality, skin-safe products when working with glitter and acrylic. If you have any concerns or experience any adverse reactions, consult a medical professional.
Does Glitter Make Acrylic Paint Bad?
No, glitter does not make acrylic paint bad. It can be used to enhance the beauty to your work. However, there are some considerations to keep in mind. You should ensure thorough mixing, using dedicated brushes, using high-quality glitter, and sealing the finished painting.
If you follow these properly, glitter will make acrylic much better for your artwork.
Final Thoughts
You can mix glitter with acrylic paint to add luster to your artwork. Experiment with different types and sizes of glitter to achieve your desired effect. Add glitter gradually to avoid a lumpy texture.
Note that glitter can affect drying time and finish, and may settle at the bottom over time. Choose high-quality, lightfast glitters for long-lasting results. Overall, mixing glitter with acrylic paint can be a fun way to create eye-catching artwork.
Ever wondered what it takes to give your trusty bicycle a stunning makeover? Painting the frame is a fantastic way to breathe new life into your two-wheeled companion. But let’s consider – how much does it cost to paint a bicycle frame?
The price of painting a bicycle frame can fluctuate. Overall, you can make a plan to spend around $30 to $1000 for painting your bicycle frame. DIY project or professional service will significantly affect the cost.
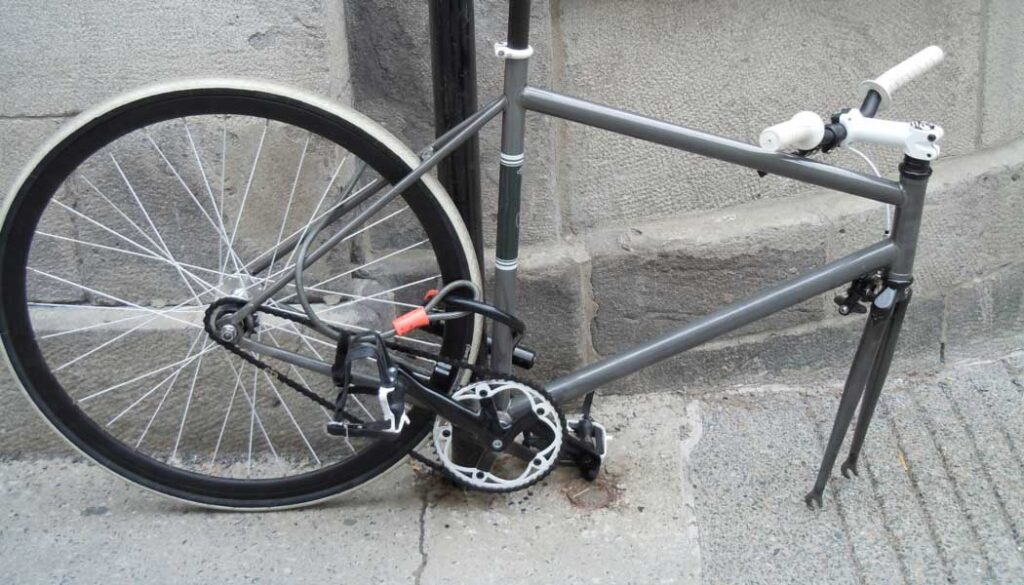
In this guide, we’ll delve into some influencing factors, offering insights into the expected expenses associated with painting a bicycle frame.
Why Should You Paint Your Bicycle Frame?
Painting your bicycle frame can offer several benefits. So, it can be sometimes a good decision to give your bicycle frame a new look by painting.
Protection: A coat of paint acts as a protective layer for a bicycle frame. New paints shieldthe frame from the elements such as moisture, sunlight, and corrosive substances. It helps prevent rust and corrosion, extending the lifespan of your bicycle.
Aesthetic Appeal: Painting your bicycle frame allows you to customize its appearance according to your personal taste. You can choose a color scheme that reflects your style, or even create unique designs.
Camouflage Scratches and Imperfections: Over time, bicycle frames can accumulate scratches, chips, or other imperfections. Painting the frame can help conceal these blemishes, making your bike look fresh and well-maintained.
Personalization: Painting your bicycle frame provides an opportunity for self-expression and creativity. It allows you to create a bike that feels uniquely yours.
Is It Better to Paint Or Powder Coat a Bicycle Frame?
The decision to paint or powder coat a bicycle frame depends on some factors. Both methods have their advantages and considerations, so let’s explore them.
1. Painting
Customization: Painting offers a wide range of color choices.It allows for greater creativity in design, including custom graphics, fades, and effects.
Repairability: If the frame gets scratched or damaged, it can be repainted easily.
Cost: Painting is generally more affordable than powder coating.
Weight: Paint is generally lighter than powder coat, but the weight difference is minimal.
2. Powder Coating
Durability: Powder coating provides a more durable finish compared to paint. It is resistant to chips, scratches, and fading from UV exposure.
Maintenance:It requires less maintenance.It is more resistant to corrosion and can withstand harsh weather conditions better.
Application: Powder coating is applied as a dry powder and then cured, resulting in a smooth and even finish without drips, runs, or brush marks.
Environmental impact: It is considered more environmentally friendly as it produces minimal waste and contains no solvents or VOCs.
Note: If you prioritize customization, color options, and affordability, painting may be the better option. On the other hand, if durability, low maintenance, and weather resistance are your main concerns, powder coating could be the more suitable choice.
How Much Does It Cost to Paint a Bicycle Frame?
The cost of painting a bicycle frame will be different. If you consider painting the frame as DIY, the cost will be significantly lower.If you choose to have a professional do the job, their level of expertise and reputation may also affect the cost.
On average, a basic single-color paint job for a bicycle frame can range anywhere from $30 to $300. This price generally includes sanding and preparation of the frame, primer and paint application, and a clear coat for protection and shine.
However, if you opt for a more complex design, multiple colors and graphics, the cost can increase significantly. Custom paint jobs with intricate designs or airbrushing techniques can range from $200 to $1,000 or more.
It’s significant to note that these are general estimates, and prices can vary widely depending on many relevant factors. Below, we will describe the bicycle frame painting cost in more details.
How Much Does It Cost to Paint a Bicycle Frame DIY?
If you decide to paint a bicycle frame yourself at home, the cost will be significantly lower compared to hiring a professional painter. We can provide you with a general estimate of the costs involved.
Paint: The cost of paint will depend on the brand and quality you choose. High-quality paints specifically designed for bicycles can range from $10 to $30 for a small can. If you want multiple colors or specialty paints, the cost may increase.
Primer and Clear Coat: You may need a primer to ensure better adhesion of the paint and a clear coat to protect the finish. These can cost around $10 to $20 each.
Sandpaper and Masking Materials: You’ll need sandpaper to prepare the surface for painting, as well as masking tape, plastic sheets, or newspaper to cover areas you don’t want to paint. The cost for these materials is relatively low, usually ranging from $5 to $20.
Tools: Depending on what tools you already have, you might need to purchase brushes, rollers, or spray equipment. The cost will depend on the type and quality of tools you choose, but a basic set of brushes or rollers can cost around $10 to $20.
So, a DIY bicycle painting project can cost anywhere from $30 to $100 or more. Bear in mind that the actual cost can vary based on updated product price, your location, and personal preferences.
Bicycle frame painting:
How Much Does a Professional Bicycle Frame Painting Cost?
The cost range for a professional bicycle frame painting typically starts at around $200 and can go up to several thousand dollars. It depends on the complexity of the design, the quality of materials, the reputation of the painter, and any artwork involved.
Remember that it’s always a good idea to reach out to professional painters for up-to-date pricing information. Some things that influence the cost are:
Design Complexity: The complexity of the design you choose will impact the cost. Simple designs or solid colors will generally be less expensive than intricate patterns, gradients, or detailed artwork.
Surface Preparation: If the bike frame requires extensive surface preparation, such as stripping off the old paint, sanding, or repairs, it can add to the overall cost. The condition of the bike and any necessary pre-painting work will be considered.
Artwork: If you want customized artwork, logos, or specific detailing, it will likely increase the cost. The painter’s skill level and time required for hand-painted artwork will contribute to the pricing.
Paint Quality: The quality of the paint used can affect the cost. High-quality automotive-grade paints or specialized bicycle paints tend to be more expensive. However, they will offer better durability and a professional finish.
Additional Finishes: Some painters may offer additional finishes. Additional coating, metallic finishes, or special effects like color-shifting can add to the overall cost.
How Much Does It Cost to Paint a Carbon Bike Frame?
Painting a carbon bike frame requires specialized knowledge and skills to ensure the integrity of the frame is not compromised.
Generally, a professional paint job for a carbon bike frame can cost anywhere from $300 to $800 or more. This estimate may include the cost of stripping the old paint, preparing the surface, applying primer and paint, and finishing with a clear coat. Keep in mind that these prices are approximate and can vary significantly based on the factors mentioned earlier.
It’s recommended to reach out to local bike shops that specialize in painting bike frames to get accurate quotes for your specific project. They will be able to provide you with a more precise estimate based on your requirements.
Final Thoughts
There is no fixed price for painting a bicycle frame. Considering factors such as paint, design, frame condition, and professional expertise, you can estimate the cost.
It’s advised to research local painting services, gather quotes, and discuss your specific requirements with professionals to get an accurate idea of the expenses. If you have time and you’re in a tight budget, paint the bicycle frame at home and you can save a lot.
Are you planning to paint a metal surface that has been previously coated with red oxide primer? If so, you may have this question in your mind – can you paint over red oxide primer?
Painting over red oxide primer is possible. But a good preparation is required. Additionally, another primer and a suitable paint are essential. And finally, you will have to follow some steps to complete the painting.
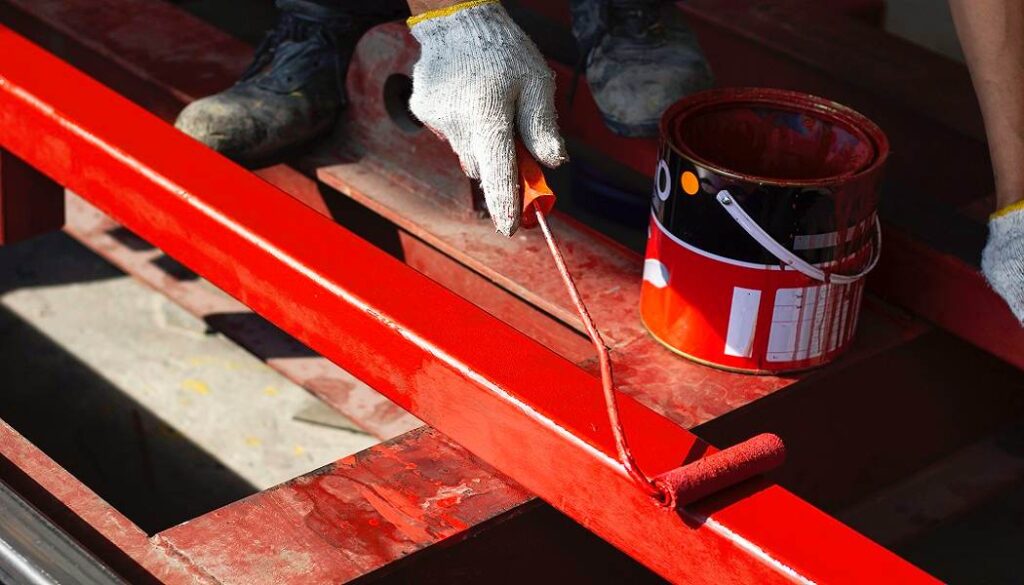
Red oxide primer is a popular choice for protecting and priming metal surfaces, but it can leave a red tint that may affect the final paint color. In this article, we will address the question of whether you can paint over red oxide primer and provide some helpful tips for achieving a flawless finish.
What Is Red Oxide Primer?
Red oxide primer is a type of coating that is used to prevent metal surfaces from rusting and corroding. It is made of an oil-based formula that contains a high concentration of iron oxide, giving it its signature red color. This primer is particularly useful in industrial and commercial applications where metal structures are subject to harsh environmental conditions.
The primary purpose of red oxide primer is to serve as a base coat for subsequent layers of paint. By creating a stable and corrosion-resistant surface, it allows paint to adhere better and last longer. This type primer can be applied using a brush, roller, or spray gun, and it dries to a hard and durable finish. The surface can be sanded or lightly scuffed to create a smooth surface for the final coat of paint.
This primer is highly versatile and can be used on any ferrous metal surface, including steel, iron, and cast iron. It can also be used as a standalone coating or as a base layer for various types of paint, such as oil-based, water-based, or epoxy coatings. In addition, it is highly resistant to heat and moisture. Therefore, it is an ideal choice for use in harsh environments.
Can You Paint over Red Oxide Primer?
Yes, you can paint over red oxide primer. However, several crucial factors come into play to determine whether or not you can achieve a successful outcome. These include the quality of the primer, the type of paint you’re using, and the surface you plan to paint.
Before you proceed to paint over the red oxide primer, it is essential to ensure that the primer is in good condition and hasn’t started peeling. In the event that it has, you’ll need to sand and re-prime the surface before applying any paint.
The type of paint you use is also a vital consideration. While oil-based paint can be applied directly onto the red oxide primer, water-based paint may not adhere as well and may require a bonding primer.
To prepare the surface, it is crucial to clean it thoroughly to eliminate any dirt or debris. Any rust or corrosion should be removed using sandpaper or a wire brush, and the surface should be wiped down using a damp cloth.
After cleaning, you’ll need to sand the surface lightly to provide a rough texture for the paint to stick. If necessary, apply a primer or bonding agent before applying the topcoat. Don’t avoid following the manufacturer’s instructions for each layer and allowing sufficient time for each layer to dry.
What Types of Paints Can Be Used over Red Oxide Primer?
Red oxide primer is a rust-inhibiting primer that provides corrosion resistance. Once the red oxide primer is applied and allowed to dry, it can be top-coated with various types of paints depending on the application and the environment.
Oil-based paints: Oil-based paints work for giving you a glossy finish. These paints are durable and resist moisture, making them ideal for use in areas that are exposed to high humidity or moisture.
Acrylic paints: Acrylic paints are easy to apply. They also provide a smooth, even finish. They dry quickly and are resistant to fading, cracking, and peeling.
Epoxy paints: Epoxy paints work great in high traffic areas or industrial environments. They provide a hard, glossy finish that resists scratches, stains, and chemicals.
Enamel paints: Enamel paints are an excellent option for top-coating red oxide primer. They provide a hard, durable finish that resists chipping, fading, and staining. Enamel paints come in a wide range of colors and are suitable for both indoor and outdoor use.
How to Paint over Red Oxide Primer?
Painting over red oxide primer can be a bit tricky, as it requires the use of specific techniques to achieve the desired results. In this guide, we’ll outline the steps involved in painting over red oxide primer.
Step 1: Prepare the surface
Make sure that there is no dirt, debris, or other contaminants on the surface. Clean the surface with a damp cloth or a pressure washer if it’s a large area. Allow the surface to dry completely before moving to the next step.
Step 2: Sand the surface
Lightly sand the chosen area with fine-grit sandpaper, approximately 220-grit. This will generate a coarse surface that can accommodate the new paint. Following the sanding process, wipe the surface using a dry cloth.
Step 3: Apply a primer
Use a high-quality primer that’s compatible with both the red oxide primer and the topcoat paint. Apply the primer according to the manufacturer’s instructions, and allow it to dry completely before moving on to the next step.
Step 4: Apply the topcoat paint
To achieve optimal results, select a topcoat paint that is well-suited with the primer and red oxide primer. Utilize a quality paintbrush to apply the paint in thin, uniform layers. It is preferable to apply two or three thin coats of paint instead of one intense coat, as this promotes even drying and excellent coverage.
Step 5: Allow the paint to dry
After applying the paint, allow it to dry properly according to the manufacturer’s instructions. Don’t rush the drying process, as this can lead to the paint cracking over time.
Step 6: Inspect the painted surface
After the paint has dried, inspect the surface for any imperfections or areas that may need touch-up. If necessary, sand the spot again and apply another coat of paint. Before using or exposing the surface to moisture or harsh weather conditions, make sure the surface is fully dried.
Can You Paint Directly over Red Oxide Primer?
There is no problem to paint directly. However, it is important to confirm that the primer is completely dry and cured before painting over it. Additionally, it is suggested to use a well-matched paint type, such as oil-based or epoxy paint. It’s also a good practice to follow the manual and recommendations. It will ensure the best adhesion and durability of the paint.
Can You Use Water Based Paint over Red Oxide Primer?
Yes, you can use water-based paint. Water-based paints, also known as latex paints, are easy to use and clean up with water. They are compatible with most types of primers, including red oxide primer. However, surface preparation is vital while using water based paints.
Do You Need to Sand Red Oxide Primer before Painting?
It is recommended to sand red oxide primer before painting. However, the amount of sanding required will depend on the specific type of primer and the condition of the surface.
In the event that the red oxide primer is in excellent condition, a gentle sanding using a fine-grit sandpaper like 220-grit might suffice. However, if the chosen area is uneven, a more forceful sanding with a coarser-grit sandpaper like 120-grit may be required.
How Long Before You Can Paint over Red Oxide?
The time it takes to paint over red oxide depends mostly on the environmental conditions and the thickness of the red oxide coating. Generally, it is recommended to wait at least 24 hours after applying red oxide primer before painting over it.
If the environment is humid or cool, it may take longer for the red oxide to dry completely. In that case, you may need to wait longer before painting over it.
Conclusion
In a nutshell, you can paint over red oxide primer with the precise type of paint. However, it is important to prepare the surface correctly before painting to ensure good adhesion. This includes cleaning the surface, sanding the surface, and applying a primer specifically designed for use over red oxide primer.
Once the primer has been applied, use a high-quality paint that is compatible with the primer and can withstand the intended use and environment. By following these steps, it is possible to attain a smooth, long-lasting finish when painting over red oxide primer.
Limewash is a centuries-old technique used for painting walls and surfaces with a coating produced from slaked lime, water, and natural pigments. It is a popular choice for adding a natural, textured look to interior and exterior walls.
However, as trends and preferences change, it is not uncommon for homeowners to want to update the look of their limewashed walls. This often raises the question: can you paint over limewash?
You can paint over limewash. Some specific steps should be taken as the preparation. Right primer and paint is important when you plan to paint over limewash.
In this article, we will explore whether it is feasible to paint over limewash and what steps to take to ensure proper adhesion. Additionally, we will discuss other factors to consider before making a decision regarding painting over limewash.
Can You Paint Over Limewash?
Yes, it is okay to paint over limewash. Limewash is a traditional paint that is made from lime, water, and pigment. It has a unique, matte, and textured appearance that can be attractive in certain situations.
However, over time, limewash can become discolored or worn. Also, note that it is not as durable or washable as modern paints. This is why some people choose to paint over limewash to refresh the look of their walls. Also, it helps to improve their durability and washability.
Painting over limewash can be a good option if you want to update the look of your walls without completely removing the existing paint. It allows you to change the color and finish of the walls, and it can provide better protection against wear and tear. Additionally, modern paints can be more resistant to mold, mildew, and water damage, which can be important if you live in a humid environment.
However, there are also some potential downsides to painting over limewash. For one, limewash is a breathable paint that allows the walls to “breathe” and release moisture. By painting over it with a modern paint, you may be sealing the walls and preventing them from breathing. This can finally lead to problems with mold or mildew. Additionally, limewash can have a unique character that some people may want to preserve, and painting over it could diminish this character.
In a nutshell, while it is possible to paint over limewash, it is important to consider the pros and cons before making the decision. If you do choose to paint over limewash, proper preparation is key to ensure a smooth and durable finish.
How Does Limewash Affect Normal Paint?
Limewash and normal paint are two different types of coatings that have different properties and characteristics. As such, they can affect each other in several ways depending on the specific conditions and circumstances.
In general, applying limewash over normal paint is not recommended. It can cause adhesion problems and result in a patchy, uneven finish. This is because limewash is a breathable coating that penetrates the surface of the substrate and bonds with the underlying material.
On the other hand, paint creates a film on top of the surface and seals it off from moisture and air. If limewash is applied over paint, it may not be able to penetrate and bond properly, leading to adhesion issues and poor performance.
Applying normal paint over limewash may also cause problems, as the porous nature of the limewash can affect the adhesion, and durability. Additionally, the high alkalinity of the lime can react with certain types of paints and cause discoloration or other issues.
Therefore, if you are considering using limewash and normal paint together, it is important to consult with a professional. Follow the manufacturer’s instructions carefully to ensure that the coatings are compatible and applied correctly.
Also Read: How to paint laminate walls?
What Primer to Use over Limewash?
When using limewash on a surface, select a primer that is compatible with lime-based coatings. A primer that is designed for use with acidic materials may not adhere well to a limewashed surface. Here are a few options for primers to use over limewash.
Lime-compatible primer: Look for a primer that is designed for lime-based coatings. These primers are formulated to work with the alkaline properties of limewash and will provide a good base for additional coats of paint or sealer.
Acrylic primer: An acrylic primer can also be used over limewash, as long as it is labeled as being suitable for use on alkaline surfaces. Acrylic primers are widely available and can be applied with a brush, roller, or sprayer.
Oil-based primer: You can use oil-based primer over limewash. Oil-based primers tend to be more durable than water-based alternatives, so they are a good choice for high-traffic areas.
How to Paint over Limewash?
Painting over limewash requires proper preparation of the surface to ensure that the new paint adheres well. Here is a detailed step-by-step guide on how to paint over limewash surface.
Materials You Need:
- Painter’s tape
- Plastic sheeting
- Drop cloth
- Sandpaper (medium-grit)
- Tack cloth
- Primer
- Paint
- Paintbrush or roller
Step 1: Clean the Surface
Use a soft-bristled brush to remove any loose or flaking limewash. Next, clean the surface with a mixture of warm water and mild detergent, using a scrub brush. Rinse with water and let it dry completely.
Step 2: Protect Surrounding Areas
Cover any areas you do not want to paint, like trims, windows, and door frames, with painter’s tape and plastic sheeting. Place a drop cloth on the floor.
Step 3: Sand the Surface
Use medium-grit sandpaper to sand the limewash surface lightly. This will help remove any residue and smooth out any rough areas. Be sure to remove any sanding dust with a tack cloth.
Step 4: Apply Primer
After the surface has been cleaned and sanded, use primer, one coat first. Choose a primer specifically designed for porous surfaces like limewash. Using a brush or roller, apply the primer evenly across the surface. Allow it to dry according to the manufacturer’s instructions.
Step 5: Paint the Surface
Wait until the primer is dried entirely. And then, you will need to apply a paint that you have chosen already for the selected surface. Use a brush or a suitable roller for the surface. Paint the surface in a way so that every part of the surface gets painted completely. You may need to apply more coats to get the best results.
Following these steps will ensure that the new paint adheres properly to the limewash surface. Moreover, you will achieve a smooth and long-lasting finish.
Can You Paint over Limewash with Emulsion?
It is not recommended to paint over limewash with emulsion paint. It is because the limewash will not provide a good base for the emulsion to adhere to.
Limewash is a traditional coating made from natural materials, such as limestone, and it is highly porous and breathable. Emulsion paint, on the other hand, is a water-based paint. It contains synthetic materials, such as acrylic or vinyl, and it creates a non-porous surface.
If you try to paint over limewash with emulsion, the emulsion may not stick properly. It may peel or flake off over time. Additionally, emulsion paint will seal the limewash, which will prevent it from breathing and may cause the limewash to crack or peel.
Can You Paint over Limewash Brick?
Painting over limewash brick is a feasible option if you want to change the appearance of your brickwork. However, there are certain considerations to keep in mind before embarking on this endeavor.
Firstly, it’s essential to ensure that the limewash has cured entirely. This may take several weeks. If the limewash hasn’t cured completely, the paint may not adhere to the surface correctly.
Secondly, the brick should be cleaned thoroughly before painting. Any dust or dirt on the surface can interfere with the adhesion of the paint. Using a primer before painting can help to improve adhesion and ensure a smoother finish.
Thirdly, it’s essential to choose the right type of paint for painting brick that is compatible with both the limewash and the brick. This will ensure that the paint adheres correctly and provides a long-lasting finish.
Note: Painting over limewash will change the natural appearance of the brick. If you prefer the original look of the brick, it may be better to avoid painting over the limewash.
Limewash painting video:
Can You Paint over Limewash Render?
Limewash render can be painted over, but it is important to take some key factors into consideration. Limewash render allows for breathability, which means that it permits moisture to escape from the underlying material.
When painted with a non-breathable type of paint, the trapped moisture may result in dampness and mold. Therefore, it is necessary to select a breathable paint that is specifically designed for use on lime-based surfaces.
Another vital aspect to keep in mind is the preparation of the surface. This involves a thorough cleaning to remove all dirt and debris. Additionally, the surface should be completely dry before painting and any loose or flaking limewash must be removed.
A small and inconspicuous area must be tested with the paint. It will make ensure that it adheres properly to the limewash render without causing any moisture or other issues.
Final Thoughts
The decision to paint over limewash should not be taken lightly. It is a process that requires attention to detail and proper preparation in order to achieve the desired results. By carefully considering the pros and cons and taking the necessary steps, you can successfully paint over limewash. And finally, you can give your space a fresh, new look.
Have you ever found yourself in a situation where you need to change the paint of a room? And with that, this question comes in your mind frequently – can you paint eggshell over semi gloss?
Note that you can apply eggshell paint over semi-gloss surfaces, but the paint will not be as smooth as semi-gloss. Moreover, eggshell will provide a little bit textured appearance.
In this topic, we will explore the compatibility of eggshell and semi-gloss paints. Additionally, we will provide you with some handy tips to achieve a successful paint job.
Is Semi Gloss the Same as an Eggshell?
Semi-gloss is a high-sheen finish that reflects a lot of light, making it very shiny. It is often used for high-traffic areas such as bathrooms and kitchens because it is durable and easy to clean. It is also commonly used for trim and doors because it provides a glossy contrast to the flatter finish of the walls.
Eggshell, on the other hand, is a low-sheen finish that has a soft, velvety appearance. It has a slight sheen, but much less than semi-gloss. It is often used for interior walls because it provides a subtle shine and is easy to clean. It is a popular choice for bedrooms, living rooms, and dining rooms as it creates a warm and inviting atmosphere.
In a nutshell, semi-gloss is a high-shine finish, while eggshell is a low-shine finish. They are both popular choices for interior paint, but they have different aesthetic and practical characteristics.
Why to Paint Eggshell over Semi-gloss?
When it comes to painting your home, there are two popular options: eggshell and semi-gloss. While both have their benefits, there are several reasons why people may choose to paint eggshell over semi-gloss.
Hides Imperfections Better: Eggshell finishes have a slight sheen that can help to hide imperfections on walls, such as dents and uneven textures. In contrast, semi-gloss finishes tend to highlight imperfections, making them more noticeable.
More Subtle Shine: Eggshell paints have a subtle shine that gives walls a bit of a glow without being too shiny. This can be especially beneficial in rooms where you want a more muted look, such as bedrooms or living rooms.
Easier to Touch Up: Eggshell finishes are easier to touch up than semi-gloss finishes because they don’t have as much of a sheen. This means that if you need to touch up a small area of your wall, it will be less noticeable than if you were trying to touch up a semi-gloss finish.
Less Reflective: Eggshell paints are less reflective than semi-gloss paints, which can be helpful in rooms with a lot of natural light or where you want to avoid glare, such as in a home office or media room.
More Forgiving: Eggshell finishes are more forgiving when it comes to brush or roller marks. Because the finish is more matte, any marks or imperfections left behind during application are less noticeable.
Can You Paint Eggshell over Semi Gloss?
Yes, you can paint eggshell over semi gloss.
Eggshell paint is a versatile option that can be used for both interior and exterior applications. It is possible to apply eggshell paint over semi-gloss surfaces, but there are some important considerations to keep in mind for a successful outcome.
One of the primary benefits of eggshell paint is its ability to adhere well to a variety of surfaces. Its broad surface coverage allows it to stick to almost any surface, including those previously painted with semi-gloss.
However, the finish of eggshell paint will not be equally smooth like semi-gloss. This is because eggshell paint has a slightly textured appearance that can help to hide imperfections and provide a more durable finish.
How to Paint Eggshell over Semi Gloss?
Painting eggshell over semi-gloss can be challenging as the two finishes have different levels of sheen. However, it can be done successfully by following these steps.
Materials You Need:
- Warm water
- Mild detergent
- Sandpaper (220-grit)
- Painter’s tape
- Drop cloth
- Primer
- Eggshell paint
- Paintbrush or roller
- Clean, dry cloth
Step 1: Prepare the surface
Start by preparing the surface to be painted. This includes cleaning the surface thoroughly and sanding it lightly. Here’s how to do it.
Clean the surface: Use warm water and mild detergent to clean the surface, and then rinse it with clean water. Use a clean, dry cloth to wipe away any excess moisture.
Sand the surface: Use sandpaper with a fine grit (220-grit) to lightly sand the entire surface. This will help the eggshell paint adhere better. Make sure to remove any dust and debris from the sanding process with a clean, dry cloth.
Protect areas you don’t want to paint: Use painter’s tape to protect areas you don’t want to paint, such as trim or windowsills. Also, lay a drop cloth on the floor to catch any drips or spills.
Step 2: Apply a primer
Before applying the eggshell paint, you need to apply a primer to the surface.
Stir the primer: Open the primer can and stir the paint thoroughly. Use a paint stirrer or a clean stick.
Apply the primer: Use a paintbrush or roller to apply the primer evenly, working in small sections at a time. Don’t forget to apply smooth and even strokes, avoiding overlapping the paint.
Step 3: Apply the eggshell paint
Once the primer is completely dry, it’s time to apply the eggshell paint. Follow the steps below.
Stir the paint: To prepare the paint, open the paint can and thoroughly stir the contents using either a paint stirrer.
Apply the paint: Use a paintbrush or roller to apply the paint evenly. To avoid overworking the paint, make sure smooth strokes. Allow the first coat to dry completely before applying a second coat if necessary.
Let the paint cure: After applying the eggshell paint, it’s essential to wait for it to dry thoroughly and cure as per the guidelines of the manufacturer. The duration for curing may vary from a few minutes to a few hours, relying on the surrounding humidity and temperature. Thus, it’s crucial to ensure that the environment is conducive to the paint’s curing process.
Additional Tips to Follow
- Make sure the surface is completely dry and free of dust before applying the primer and paint.
- Use a high-quality paintbrush or roller to achieve an even finish.
- Apply the primer and paint in a well-ventilated area to avoid inhaling fumes.
- Follow the brand’s instructions for the primer and paint regarding the number of coats and drying time.
Can You Paint Eggshell over Semi-gloss without Sanding?
In most cases, it is not ideal to paint eggshell over semi-gloss without sanding. Sanding the surface beforehand helps to create a smooth and even surface for the new coat of paint to bond better with the underlying surface.
If you apply eggshell paint directly without sanding, the eggshell paint may not adhere properly. As a result, you will achieve an uneven and unattractive finish. Additionally, the paint may flake off over time because of poor adhesion.
Do You Need an Undercoat with Eggshell Paint?
Low sheen finish and durability make eggshell paint a unique choice. However, whether or not you need an undercoat with eggshell depends on the condition and color of the surface you are painting on.
If the surface is new, unpainted, or has been previously painted with a similar or lighter color, an undercoat is not necessary. The eggshell paint can be applied directly to the surface after it has been cleaned, sanded, and primed. The primer serves as a base coat and helps the eggshell paint adhere well to the surface.
On the other hand, if the surface has been previously painted with a darker color, is stained, or has an uneven texture, it is recommended to apply an undercoat. The undercoat will help to block out the previous color or stains and create a uniform surface for the new paint. The undercoat should be allowed to dry completely before applying the eggshell paint.
Keep in mind that using an undercoat will provide a better finish and increase the durability of the paint. It also helps to prevent the color of the previous paint from showing through the new paint, which can affect the overall appearance of the finished product.
Does Primer Stick to Semi-gloss Paint?
Primer typically sticks well to semi-gloss paint, as long as the paint has been properly prepared. Also, make sure the surface is clean, dry, and dirt-free before applying primer.
If the semi-gloss paint is in good condition, a light sanding with fine-grit sandpaper can help improve the adhesion of the primer. Additionally, choosing a high-quality primer that is specifically designed for use on glossy or semi-gloss surfaces can also help ensure good adhesion.
What Does Eggshell Finish Look Like?
Eggshell finish is a type of paint finish that is characterized by its low sheen or luster. It is named after the surface texture and appearance of an eggshell, which has a slight sheen but is not reflective like a high-gloss surface.
Eggshell finish has a soft, velvety texture that is often described as having a subtle glow or radiance. It is a popular choice for interior walls and trim because it offers a little more shine than a flat or matte finish, while still maintaining a low profile.
Eggshell finish is less shiny than a satin finish, but more lustrous than a matte finish. It provides a smooth and even coverage, and can help to hide minor imperfections or flaws on the surface of the painted area.
Final Thoughts
Painting eggshell over semi-gloss is definitely possible, but it requires proper preparation and technique to achieve a smooth and durable finish.
While the eggshell finish can tone down the shine of semi-gloss, it won’t completely hide imperfections on the surface. It’s significant to remember that the success of this project largely depends on the condition of the semi-gloss surface and the quality of the paint used.
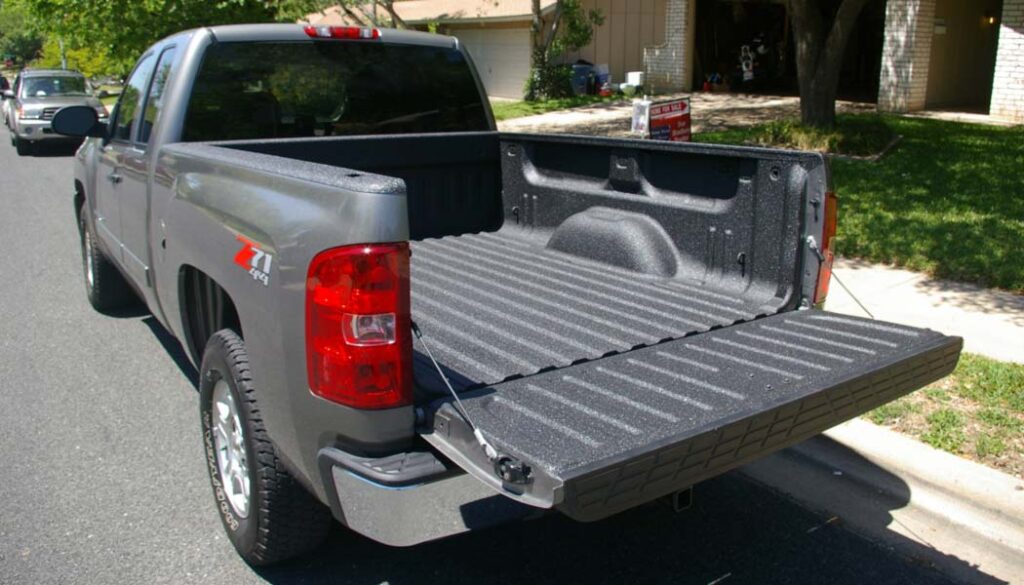
Are you planning to customize your truck bed with a new paint job, but it’s already coated with Raptor liner? If so, you may have this question in mind: can you paint over Raptor liner?
Yes, you can paint over Raptor liner. But you will need to follow some steps with care that include proper preparation, using the right paint and adhesion promoter, and applying paint carefully.
In this guide, we will explore whether it’s possible to paint over Raptor liner and the steps you need to take to do it successfully.
Why to Paint over Raptor Liner?
While Raptor liner is a durable coating, there are several reasons why people may choose to paint over it.
1. Aesthetics: Raptor liner comes with a textured coating that can have a rough or matte finish. While this texture can be desirable in some cases, it might not be the look that some people want for their vehicle. By painting over it, you can achieve a smoother and more polished finish that may be more aesthetically pleasing.
2. Color: This is obtainable in a limited number of colors, typically black or gray. If you want to change the color of your vehicle, painting over it is an easy way to achieve this.
3. Customization: By painting over it, you can create custom designs and graphics on your vehicle. This can be especially desirable for businesses that want to add logos or branding to their vehicles.
4. UV protection: While Raptor liners are resistant to UV rays, painting it with a clear coat can provide an extra layer of protection. It works against fading and damage caused by the sun.
5. Repair: If the liner on your vehicle becomes damaged, painting over it can repair the damage and restore the appearance of your vehicle.
Can You Paint over Raptor Liner?
If you are looking to paint Raptor liner, it is possible, but there are some important considerations to keep in mind.
- Prepare the Raptor liner surface before painting, including cleaning and lightly sanding the surface. Any dirt, grease, or other contaminants on the surface should be removed before painting.
- The curing time of the liner should be considered before painting over it. It is recommended to wait at least 24 hours after applying the liner before painting.
- If the liner is damaged or peeling, it should be repaired or removed before painting over it. This step will ensure a smooth surface for the paint.
- When choosing paint, select one that is well-suited with the liner coating. For example, some paints may not adhere well to polyurethane coatings. So, make sure to choose a paint specifically formulated for use on polyurethane surfaces.
- An adhesion promoter can be used to help the new paint adhere to the facet. This is especially important if the surface has been exposed to UV rays, which can cause the surface to become slick and reduce the adhesion of the paint.
How to Paint over Raptor Liner?
To paint over a Raptor liner, you will need to follow some specific steps for satisfying result. Here’s a step-by-step guide on painting over liner surface.
Materials You Need:
- Sandpaper (80 grit and 220 grit)
- Tack cloth or microfiber cloth
- Adhesion promoter
- Paint (with a compatible primer)
- Spray gun or paint roller
Step 1: Clean the surface
Before you start sanding, you need to clean the surface thoroughly. Use a mild soap and water to remove any dirt, grease, or oil. Rinse well and dry with a clean cloth.
Step 2: Sand the surface
Using 80-grit sandpaper, roughen up the area to assist the adhesion promoter stick to the area. Sand the surface until it feels rough to the touch. Then, use a 220-grit sandpaper to smooth out any rough patches or bumps. Be sure to eliminate any dust or debris with a tack cloth or microfiber cloth.
Step 3: Apply adhesion promoter
Apply a coat of adhesion promoter to the liner surface. It will aid the paint adhere better to the textured surface. Follow the instructions on the adhesion promoter and allow it to dry completely before moving on to the next step.
Step 4: Apply primer
Applying a coat of primer will create a smooth base for the paint to adhere to and will also help the paint color to appear more vibrant. Allow the primer to dry completely before applying paint.
Step 5: Apply paint
Using a spray gun or paint roller, apply your paint to the surface. Make sure to apply the paint evenly and in thin coats. Allow the first coat to dry completely before applying a second coat. You may need to apply multiple coats to achieve the desired finish.
Step 6: Allow the paint to dry
Once you have applied the final coat of paint, allow it to dry completely before using or touching the surface. Check the paint’s instructions for the recommended drying time.
Tips to Ensure Successful Painting over Raptor Liner
In a nutshell, you will need to complete the following steps to achieve best painting over Raptor liner.
- Clean the surface thoroughly to make sure the surface is free of any dirt, debris, or grease.
- Sand the surface until it’s smooth and even, and then wipe it clean with a tack cloth.
- Prime the surface; it will help the paint adhere better and prevent peeling.
- Choose the right paint that is compatible with the primer you’ve used.
- Apply the paint in thin coats to achieve a smooth finish.
- Allow each coat of paint to dry completely before applying the next one.
- Protect the surface with a clear coat or other protective coating to prevent damage and ensure a long-lasting finish.
Advantages and Disadvantages of Painting over Raptor Liner
While it is designed to be used as a standalone coating, some people opt to paint Raptor liner for aesthetic or protective reasons. Here are some advantages and disadvantages of painting over Raptor liner.
Advantages:
- Painting over protective liner is particularly useful if it has started to fade or look worn.
- Painting it can provide extra protection against scratches, UV rays, and other environmental factors.
- To customize the color and finish of the surface, people paint it.
Disadvantages:
- Paint may not adhere well to the Raptor liner. This can lead to bubbling, cracking, and peeling of the paint over time.
- The process requires careful preparation to ensure a smooth finish. It’s time-consuming as well.
- Painting over the surface adds an extra layer of material and labor, which can increase the cost of the project.
What Types of Paints Go with Raptor Liner?
Raptor liner is a type of polyurethane coating that’s famous for its durability, abrasion resistance, and chemical resistance.
When it comes to painting over it, it’s vital to choose the suitable paint. The following are some paints that are compatible with it.
Acrylic enamel paint: This type of paint is often used for automotive applications and provides a hard, durable finish that resists chipping and fading.
Epoxy paint: Epoxy is a two-part system that forms a hard, chemical-resistant coating. It’s often used in industrial settings and is an excellent choice for surfaces that will be exposed to harsh chemicals.
Urethane paint: Urethane paint is high-quality automotive paint that provides excellent gloss and durability. It’s resistant to chipping and fading and is an excellent choice for surfaces that will be exposed to sunlight.
Can Painting Raptor Liner Affect Its Strength?
The good news is that properly applied paint should not significantly impact the strength of Raptor liner. However, it is crucial to make sure that the paint is allowed to dry thoroughly before any heavy use. Note that any modifications made to the original liner, such as sanding or cutting, may compromise its strength and durability.
Therefore, if you plan to paint your Raptor liner, use compatible paint and apply it correctly. It is because any mistakes may result in a compromised finish that may not provide the expected protection.
If you’re interested to check Raptor liner paint job:
Final Thoughts
Ultimately, the decision to paint over Raptor liner should be based on the specific needs and preferences of the user. If a different color or finish is desired, or if the liner has become damaged, painting over it may be a good option. However, it is important to approach the process with care. Careful planning and execution are the key to achieving a smooth and flawless paint job over Raptor liner.
Are you looking for a way to spruce up your old felt hat and give it a fresh, new look? One of the easiest and most effective ways to do this is by painting it. However, not all paints are suitable for use on felt hats.
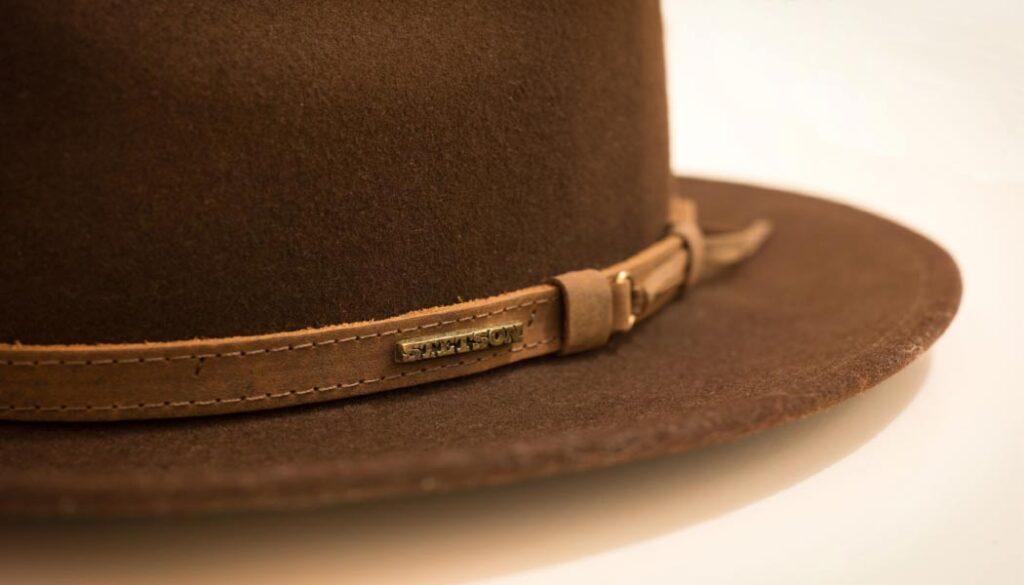
Choosing the wrong one could lead to disappointing results or even damage to your hat. That’s why we’ve put together a comprehensive guide to help you find the best paint for felt hat. In this article, we’ll review some of the top-rated paints particularly designed for use on felt. So, keep reading to make an informed decision and achieve a beautiful, long-lasting finish on your felt hat.
Our Top Picks
- Best Overall: Tulip Dimensional Fabric Paint (See Price)
- Best for DIY: ARTEZA Permanent Fabric Paint (See Price)
- Best Professional: Jacquard Paint Colorfast (See Price)
- Best for 3D Paint: Crafts 4 All Paint Set (See Price)
- Best Puffy Paint: Mr. Pen 3D Paint Set (See Price)
- Best Metallic: Shuttle Art Metallic Colors Paint (See Price)
Reviews of 6 Best Paints for Felt Hats
Felt hats can become worn out and faded over time. To maintain the appearance of your felt hat, you can use a high-quality paint manufactured specifically for this purpose. In this section, we will review some of the best paints for felt hats currently available on the market.
1. Tulip Dimensional Fabric Paint
Our topmost pick for the best paint for felt hat belongs to the brand Tulip which let you shine with all your creativity. The Tulip Fabric Paint is definitely the best one among other fabric paint products.

You can not only use the paint on your felt hat but also almost anything for the purpose of décor. The paint brings a beautiful creation while boosting the creator’s confidence. However, the paint comes in a solid form in a bottle.
Its slick black color provides the felt hat with a beautiful glossy finish. Moreover, after applying, the paint dries fast. It takes almost 4 hours to cure. However, the most magnificent feature of the paint is it does not crack after drying.
Additionally, the paint is fade-resistant as well. Thus, once you paint your precious felt hat with the Tulip paint, it will likely serve you for years. Again, the felt hat colored with this paint is absolutely washable. Washing won’t fade its color at all.
Pros:
- Comes in a great texture and formula.
- Resistant to crack and fade.
- Offers excellent coverage.
Cons:
- Its tip clogs easily.
Our Verdict: Needless to say, the Tulip Dimensional Fabric paint is easy to apply as it transfers easily while offering great coverage. You surely do not want to miss out on such a quality product that ensures value for money as well.
2. ARTEZA Permanent Fabric Paint
Our very second pick is the best spray paint from the popular brand ARTEZA. It is a permanent fabric paint that comes in 24 different shades which is crazy. So, you can paint your favorite felt hat with any color you want.

You can even give your hat a semi-transparent color to keep its fabric soft. However, the paint set includes some other unique colors as well including 4 neon and 2 metallic shades along with 18 classic colors.
Moreover, it is a permanent clothing paint. That means you can spray the paint over almost any fabric type including cotton, leather, linen, or even denim for lifetime. Since it comes with a fast-drying formula, you can be very creative with just one pack of ARTEZA fabric paint.
Additionally, this selection is also crack and peel-resistant. The company claims the paint will not fade away even after abusive use of the hat or after numerous washes. Moreover, with a metallic finish, the paint offers partial coverage.
Nonetheless, being created or designed by some real artists, using this fabric paint can never go wrong.
Pros:
- The paint transfers and sets excellently.
- The application is smooth and resistant to peel or crack.
- Best deal for the money.
Cons:
- Ironing is required for a permanent finish.
Our Verdict: The most convincing facts about the ARTEZA permanent paint are its versatility and a wider range of shades to choose from. It is a must-add tool for any of your DIY projects as well.
3. Jacquard Paint – Permanent and Colorfast
The third selection for the best felt hat paint talks about professionalism and it belongs to the brand Jacquard. The textile color comes in a bottle with a volume of 70 milliliters. It is a professional quality paint that you can apply not only on fabric surfaces but also on paper and wood surfaces as well.

However, people choose the paint for its amazing finish. After applying, the paint makes the fabric way softer. Even after several washes, its softness and color brightness still remain the same. The color also does not chip, peel, fade, or crack even if you wear the hat repeatedly.
Moreover, unlike other paints for felt hats, you can use this paint for outdoor purposes as well like painting upholstery. You can also apply the paint over a wider range of fabric types including extruded or stretchy fabrics.
Nonetheless, speaking of its coverage, the paint can offer semi-transparent to intense coverage. The application is also simple. For increasing transparency, you can simply add water up to 25% to the medium.
However, to not affect the consistency, you can also use a Colorless extender to get your desired transparency.
Pros:
- Comes in a professional quality formula.
- Can be applied on several surfaces.
- Can form any other color by intermixing some colors.
Cons:
- Cannot cover a large surface area.
Our Verdict: Overall, the Jacquard Textile Color is the best for professional use. The multiple techniques and unique properties surely make the paint stand out.
4. Crafts 4 All Paint Set – Assorted 3D Paints
Next on the list comes the best paint for felt fabric from the famous brand Crafts 4 All. This set of paint is amazing the moment you discover them. Its one-pack has a total of 24 different shades to offer. Each painting has an attractive hue and surely, has a brilliant spectrum.

Moreover, the set also includes 3 brushes for easy application on almost anything. You can apply the paint on clothes, canvas, bags, decors, and even on sneakers. Also, you can paint upholstery and other surfaces with different textures like wood, glass, ceramics, paper, and so on.
However, each bottle contains non-toxic paint. After applying it to your felt hat, the paint delivers an awesome matte finish. As the paint composition is not toxic at all, anyone from kids to adults can use it.
Nonetheless, till now the most amazing feature of this fabric paint set is its ability for painting both 2D and 3D. You can also doodle or write anything with these paints. You can paint your felt fabric with it like traditional acrylics. Again, the squeeze bottles are easy to use for painting and art purposes.
Pros:
- Offers 24 unique and permanent shades.
- Non-toxic and has a nice matte finish.
- Safe for kids and the bottles are easy-squeeze.
Cons:
- You may find variations in the consistency of the component.
Our Verdict: Overall, coming in a perfect-sized bottle, each color is vibrant and offers great value for the price as well.
5. Mr. Pen 3D Paint Set – Puffy Paint for Fabric
With 3D paint ability, the Mr. Pen – 3D Fabric paint pack is also surely the one you do not want to miss out on. Moreover, it includes a number of 12 must-have shades to reflect your creativity to the fullest on your felt fabric.

Moreover, you can use this puffy paint for doodling, drawing, or for any smaller DIY projects. Again, the 3D fabric paint has premium quality materials to provide you with long-lasting results. The paint is absolutely washable when dries.
Also, when dries the vinyl paint reflects a shiny 3D effect. The glossy finish makes the felt hat look incredible. However, the packaging of the paint is done in a bottle. Hence, squeezing the bottle is easy for easier application.
Additionally, the bottles have a precise tip that does not allow any waste of paint. Again, the bottles are transparent or clear so that you can detect the shade with only a glance of your eyes. When dries, you can wear the fabric as many times as you want. And you can wash it as well since the paint will not peel off.
Pros:
- Puffy and vinyl paint for multiple uses.
- The containers come with precise tips.
- Washable and does not peel or crack.
Cons:
- The components may create air bubbles.
Our Verdict: With a 30-day return guarantee, you can never go wrong with Mr. Pen 3D paint. It also ensures the usability of all age ranges.
6. Shuttle Art Metallic Colors Permanent Soft Fabric Paint
Coming to the last pick, the metallic fabric paint from Shuttle Art manages to hold the position for its great performance. Metallic paint on felt fabric, surely, looks extraordinarily good. Shuttle Art provides 18 unique and permanent shades for use on soft fabric.

Like our other suggested textile paint, this one is also non-toxic and acid-free. Hence, kids are welcome to use the paint to explore their creativity. Giving a metallic finish, the paint is absolutely a multi-purpose one. Use it on whatever fabric you like including jeans, bags, shoes, and T-shirts.
Convincingly, the paint comes with 3 brushes and stencils with 18 patterns stickers. So, you can start painting your felt hat with metallic paint right away after buying it. Moreover, the tools ensure easy transfer of the paint. Additionally, the package also includes a palette.
Also, the flip caps of the paint bottles make sure it is easy to open and close. Hence, using the paint is also highly convenient.
Pros:
- Premium paint remains vivid for a longer period.
- Comes in bright metallic colors for a great finish.
- Washer safe and permanent paint and also, multi-purpose.
Cons:
- Some may find it more glittery than metallic.
Our Verdict: Guaranteeing satisfactory use, the Shuttle Art metallic paint is a certified product. So, buying its great color section will not be a loss.
How to Choose the Best Paint for Felt Hat?
When it comes to painting a felt hat, it’s important to choose the right paint that will look good and last for a long time. Here are some factors to consider when choosing paint for a felt hat.
Type of Paint: The type of paint you choose will depend on the type of felt hat you have. If your felt hat is made of wool, acrylic paint will be the best choice as it will adhere well to the fabric and will not crack or peel. On the other hand, if your felt hat is made of synthetic material, it is better to use fabric paint as it is designed to bond with synthetic fibers.
Color: When choosing a color, consider the style and occasion the hat will be used for. Neutral colors like black, brown, and gray are versatile and can be used for a wide range of occasions. Bright and bold colors like red and pink are great for making a statement.
Texture: If you want a smooth and even finish, choose paint with a creamy texture. If you prefer a more textured look, consider using paint with a more granular texture.
Durability: A high-quality paint that is designed for use on fabric will last longer and will not crack or peel over time. Look for paints that are labeled as “fade-resistant” and “water-resistant” for added durability.
Ease of Application: Choose a paint that is easy to apply. Some paints require multiple coats, while others can be applied in a single coat. Consider the drying time of the paint as well, as some paints may take longer to dry than others.
Health and Safety: Consider the health and safety implications of the paint you choose. Look for paints that are non-toxic and safe to use around children and pets. Also, make sure to use the paint in a well-ventilated area to avoid inhaling fumes.
Choosing the right paint for a felt hat requires careful consideration of factors. By taking the time to choose the right paint, you can ensure that your felt hat looks great.
Care and Maintenance Tips to Follow while Painting Felt Hats
Painting felt hats is one way to add a unique touch to your headwear. However, it’s essential to follow the proper care and maintenance tips to ensure the paint adheres to the felt and doesn’t damage it. Here are some tips to consider.
1. Prepare your felt hat: Before painting, clean your hat with a soft-bristled brush or lint roller to remove any dust or debris. If your hat is stained, use a mild detergent and water solution to spot clean the affected area.
2. Choose the right type of paint: Felt is a porous material, which means it can absorb paint differently than other fabrics. It’s essential to choose a paint specifically designed for felt or one that is fabric-friendly. Fabric paints or acrylic paints are recommended, as they provide better adhesion and flexibility on felt.
3. Test your paint: Before painting the entire hat, test the paint on a small, inconspicuous area of the hat. This will help to ensure it doesn’t cause any discoloration or damage to the felt. Let the paint dry completely before assessing the results.
4. Apply the paint in thin layers: Apply the paint in thin layers, allowing each layer to dry completely before applying the next. This technique helps prevent the paint from soaking into the felt too deeply, which could cause the hat to lose its texture.
5. Use a soft brush to paint: Using a soft brush or sponge, apply the paint gently to the felt hat. Do not press too hard or rub the paint onto the felt. Doing so could cause the felt to pill.
6. Allow the paint to dry: Allow the paint to dry completely before wearing or storing the hat. This helps ensure the paint stick to the felt and doesn’t transfer onto clothing or other items.
7. Store your hat correctly: Store your felt hat in a dry, cool place away from direct sunlight to prevent fading or discoloration. Avoid stacking other items on top of the hat, which could cause it to lose its shape.
How Long Does the Paint Last on Felt Hat?
In general, properly applied paint can last for several months or even up to a year. But make sure the hat is not exposed to harsh conditions such as extreme heat or moisture. However, if the hat is exposed to frequent wear and tear, the paint may start to fade or crack sooner.
To extend the life of the paint on a felt hat, it’s important to store the hat in a cool and dry place when not in use. Avoid exposing your hat to direct sunlight for long periods of time, and avoid getting it wet or exposing it to high humidity. Additionally, gently cleaning the hat with soft cloth can help remove any dirt or dust that may cause the paint to wear off faster.
Note that some types of paint may be more durable than others. So, it’s important to choose a high-quality paint specifically designed for use on felt fabric.
Can I Paint a Felt Hat that Has Already Been Painted?
Yes, you can paint a felt hat that has already been painted. But the final outcome will depend on the type of paint used on the hat originally and how well it has adhered to the felt material.
If the original paint is water-based, it may be easier to paint over, while oil-based paint may require a primer. Use acrylic paint suitable for felt material. Apply it in thin, even coats, and allow each coat to dry completely before applying the next one.
Painted hat that you may like:
Can I Paint a Felt Hat with Regular Paint?
While it may be tempting to paint a felt hat with regular paint, it’s not a good idea. Felt is a delicate material made from compressed fibers that can easily be damaged by water or wet materials. Regular paint contains solvents that can cause the felt to shrink, become hard, or lose its shape.
If you’re looking to add some color or designs to your felt hat, consider using fabric or acrylic paints mixed with a fabric medium. Fabric markers are designed specifically for use on fabrics and are less likely to damage the material. Acrylic paints mixed with a fabric medium help to bind the paint to the fabric and prevent cracking or peeling.
Final Verdict
Choosing the best paint for felt hats depends on the type of hat you have, the type of paint you prefer, and the purpose of your painting. When it comes to felt hats, it’s important to choose a paint that won’t damage the fibers or cause discoloration.
Acrylic paints, fabric paints, and spray paints are popular choices, but it’s always recommended to test a small, inconspicuous area first before applying it to the entire hat.
Additionally, it’s important to follow the manufacturer’s instructions and use proper ventilation when working with paint. With the right paint and techniques, you can give your felt hat a unique and personalized touch while preserving its quality and durability.
Have you ever struggled with color contamination while airbrushing, leading to inaccurate and frustrating results? If so, you’re not alone. One of the most common challenges in airbrushing is properly cleaning the airbrush between colors.
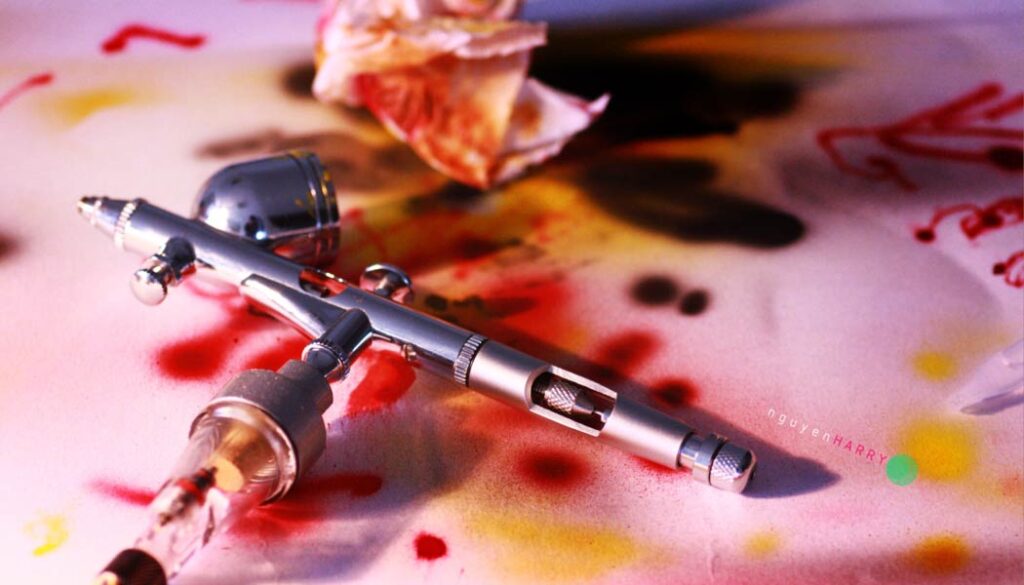
In this article, we’ll explore the step-by-step process of ‘how to clean an airbrush between colors’. This will help you to avoid color contamination and achieve accurate color application. So, if you’re ready to take your airbrushing to the next level, let’s dive in.
Why Do You Need to Clean an Airbrush between Colors?
Airbrushing is a popular painting technique used in various fields such as art, automotive, and so on. It involves using compressed air to spray a fine mist of paint onto a surface. When switching between different colors, it is essential to clean the airbrush thoroughly to avoid mixing colors. It is vital also to avoid compromising the quality of the artwork or the surface being painted.
Here are some reasons why cleaning an airbrush between colors is necessary.
Color Accuracy: Airbrushing requires precise color accuracy, especially when working with subtle shades or intricate designs. If the airbrush is not cleaned between colors, the leftover paint in the nozzle and tip can mix with the new color. It can create unwanted color variations and affecting the quality of the work.
Prevent Clogs: Paint residue left in the airbrush can dry and clog the nozzle and tip. It leads to uneven spray patterns and ultimately damaging the airbrush. Cleaning the airbrush thoroughly after use prevents paint buildup and extends the life of the airbrush.
Avoid Contamination: Using an airbrush to apply multiple colors without cleaning it in between can lead to cross-contamination of the paint. This can cause unwanted mixing of colors and may affect the overall appearance of the final result.
Consistency: Consistency is crucial when working with an airbrush. Proper cleaning of the airbrush between colors ensures consistent paint flow and spray patterns. It ultimately helps to achieve the desired result.
How to Clean an Airbrush between Colors?
Cleaning an airbrush between colors is essential to ensure the purity and consistency of the colors being sprayed. Take a look on the step-by-step instructions for cleaning an airbrush between colors.
Essential Materials:
- Airbrush cleaning solution
- Paper towels
- Small cleaning brush
- A container for cleaning solution
- An airbrush cleaning station
Step 1: Empty the color cup
Firstly, empty the remaining paint or color from the airbrush cup into a container. To do this, hold the airbrush over the container, turn it upside down and press the trigger to spray out any remaining paint.
Step 2: Clean the cup and needle
After emptying the cup, remove it from the airbrush and clean it with a paper towel. Wipe it until it is completely dry. Then, carefully clean the needle with a soft cleaning brush, making sure that no paint or residue remains.
Step 3: Fill the color cup with cleaning solution
Fill the airbrush color cup with a top-quality cleaning solution. The cleaning solution can be purchased from any art store, or you can make your own by mixing equal parts of water and rubbing alcohol.
Step 4: Spray the cleaning solution
Hold the airbrush over the cleaning station and spray the cleaning solution through the airbrush, using the trigger. Keep spraying until the cleaning solution runs clear and there is no more paint or color residue coming out.
Step 5: Wipe the airbrush
When spraying the cleaning solution through the airbrush is completed, wipe it down with a paper towel. Check the nozzle, as this is where paint tends to accumulate. Use a small brush or toothbrush to remove any stubborn paint.
Step 6: Repeat the process
If you need to switch to a different color, repeat the process from Step 1 to 5. If you are finished using the airbrush, make sure to rinse it with water to remove any remaining cleaning solution.
Using the right cleaning solution and following the above steps will help you to keep your airbrush functioning at its best.
A video guide:
Tips for Maintaining an Airbrush while Cleaning between Colors
To ensure your airbrush remains in good working condition and delivers consistent results, it’s important to take proper care of it while cleaning it between color changes. Here are some tips that can help you maintain your airbrush and achieve the best possible outcomes with each use.
- Use a cleaning solution or appropriate cleaner recommended by the manufacturer to clean the airbrush thoroughly. Make sure to disassemble and clean all the parts of the airbrush, including the needle, nozzle, and air cap.
- Using a separate brush for each color will help prevent cross-contamination of colors. This will also help to keep your airbrush dirt free and maintain its longevity.
- After flushing the airbrush, test spray it onto a paper towel to ensure that the airbrush is completely clean and free from any residual color.
- When cleaning and drying is done, store it in a safe and dry place to prevent damage or contamination. Always cover the needle with a protective cap to prevent it from being damaged or bent.
Can You Run Water through an Airbrush to Clean It?
Yes, you can run water through an airbrush to keep it clean. In fact, it is recommended to do so after every use to prevent paint buildup and clogging in the airbrush.
To clean the airbrush using water, first disassemble the parts carefully, including the nozzle, needle, and other components. You can then use a small brush or toothbrush to gently scrub away any residual paint or debris.
Once you’ve removed the visible residue, it’s time to run water through the airbrush. Attaching the airbrush to a jar or bowl of warm water and running it through will help ensure that any remaining particles or debris are washed away.
Can You Use Thinner to Clean Airbrush?
It is generally not suggested to use thinner to clean an airbrush. While thinner can effectively clean some materials, it can also be too harsh for the delicate parts of an airbrush.
Instead, it is recommended to utilize a specialized airbrush cleaning solution. These solutions are typically gentle enough to clean without damaging the parts of the airbrush.
Final Thoughts
Failure to clean an airbrush properly can lead to clogs, inconsistent spray patterns, and other issues. By following the steps outlined in this guide, you can effectively clean your airbrush between colors. Proper cleaning ensures that it continues to perform at its best.
With regular try, mastering the art of cleaning the airbrush between colors becomes effortless.
Have you ever walked into your apartment and immediately noticed a pungent smell that reminds you of freshly painted walls? It can be quite jarring, especially if you weren’t expecting it. The odor of paint can permeate through every nook and cranny of your home, leaving you feeling uneasy and even a bit queasy. I understand how frustrating it can be to deal with the strong smell of paint in your home. It can make you feel nauseous, give you headaches, and even impact your ability to sleep and relax.
Perhaps you just had some home renovations done, or maybe a neighbor in the building is painting their own apartment. Regardless of the cause, it’s important to understand the exact reason.
One common question can arise in your mind – “why does my apartment smell like paint?”
Your apartment may smell like paint because of recent painting, staining, or varnishing. Paint and other coatings can emit strong fumes that can linger for days or even weeks after application. Proper ventilation and air circulation can help dissipate the smell.
Let’s discuss the common reasons for this occurrence and provide some tips on how to rid your home of the unpleasant scent. So, grab a cup of coffee, and let’s start!
Why Does My Apartment Smell Like Paint?
There are several possible causes of paint smells in apartments. Some of the most common reasons include:
Fresh paint:
If your apartment has been recently painted, the paint smell you’re experiencing is likely due to the fresh coat of paint. This odor can linger for several days or even weeks, depending on the type of paint used and how well-ventilated the area is.
Poor ventilation:
If your apartment doesn’t have proper ventilation, the paint fumes may accumulate and cause a stronger odor than usual. This can be a particular problem in older buildings that may not have been designed with ventilation in mind.
Low-quality paint:
Cheap or low-quality paint may have a stronger odor compared to higher quality brands. This can be due to the use of lower-grade materials or a lack of proper ventilation during the manufacturing process.
Painting technique:
If the painter didn’t use proper ventilation or application techniques during the painting process, the smell may linger longer than it should. Additionally, if the painter didn’t let the paint dry properly before closing windows or doors, the fumes may be trapped inside.
Mold:
In some cases, a musty or moldy smell in an apartment can be mistaken for a paint smell. If you suspect that mold may be the cause of the odor, you should have the area inspected by a professional.
Chemical reactions:
In rare cases, paint fumes can react with other chemicals in the apartment, such as cleaning products or insecticides. This can result in a stronger odor or even toxic fumes, so it’s essential to take this seriously and seek professional help.
If you’re experiencing a strong odor that persists even after a few days, it’s best to contact a professional to investigate the problem and ensure that it’s safe to stay in the apartment.
Why Does My Apartment Smell Like Spray Paint?
If you’ve noticed a strong smell of spray paint in your apartment, it can be concerning and potentially harmful. The odor could be coming from various sources, and identifying the cause is crucial to ensuring your safety and well-being. Have a look at some of considering reasons.
Freshly painted walls or furniture:
If you or your landlord recently painted any part of the apartment, the smell of spray paint could linger for a few days. This is because paint contains solvents that evaporate and release fumes that can be toxic and irritating to the respiratory system.
Neighbors painting:
If one of your neighbors is painting their apartment or nearby walls or furniture, the smell of spray paint could seep into your apartment. It can come through the ventilation system or cracks in the walls.
Inadequate ventilation:
If there isn’t enough air circulation in your apartment, the fumes from cleaning products, cooking, or any other source can build up and create an unpleasant odor.
Spraying insecticide:
If you or someone else in the building sprayed insecticide to get rid of pests, the smell of spray paint could linger for a while. Insecticides contain chemicals that can cause respiratory problems, and the smell can be particularly strong and irritating.
Construction or renovation work:
If there is ongoing construction or renovation work in the building, the smell of spray paint could be coming from the workers’ equipment or materials used in the process.
Vandalism or graffiti:
If someone sprayed graffiti or vandalized the building, the smell of spray paint could be a result of their activity.
Methamphetamine production:
Although rare, it is possible that someone in the building is illegally producing methamphetamine, which requires the use of spray paint or other chemicals. The smell of spray paint could be a sign of such activity, and if you suspect this is the case, you should contact the authorities immediately.
How to Get Rid of the Paint Odor from Your Apartment?
Painting is a great way to refresh and update the look of your apartment. However, the strong odor of paint can be quite unpleasant and linger for days or even weeks after the paint job is complete. Here’s a step-by-step process to help you get rid of the paint odor from your apartment:
Getting rid of paint odor from your apartment can be a bit challenging, but there are a few effective ways to do it. Here are the steps you can follow to get rid of paint odor:
Materials needed:
- An air purifier or ventilation system
- Baking soda
- White vinegar
- Activated Charcoal
- Essential oils (optional)
Increase ventilation
The first step is to increase ventilation in your apartment. Open all the windows and doors to allow fresh air to circulate. You can also turn on ceiling fans or place portable fans around the room to help with air circulation. If your apartment has a ventilation system, turn it on to help remove the paint odor.
Use an air purifier
An air purifier can help filter out the paint odor from the air. Look for an air purifier with a HEPA filter that can remove fine particles from the air, including paint fumes. Place the air purifier in the painted room and let it run for a few hours each day until the paint odor dissipates. Make sure to clean or replace the filters regularly for maximum effectiveness.
Use baking soda
To get rid of paint odor using baking soda is considered one of the best effective ways. You can sprinkle a generous amount of baking soda onto a plate or shallow dish and place it in the painted room. Leave it for a few hours or overnight. Then dispose of the used baking soda and replace it with fresh baking soda if necessary. Baking soda helps to absorb the odors and freshen the air.
Use white vinegar
White vinegar is another natural odor absorber. Mix equal parts of white vinegar and water in a spray bottle and spray the solution around the room. Let it sit for a few hours before wiping it away with a clean cloth.
Use Activated Charcoal
Using activated charcoal is another effective way. You can place a few chunks of activated charcoal in a bowl or on a plate and place it in the painted room. Leave it for a few hours or overnight, then discard the used charcoal and replace it with fresh chunks if necessary. Activated charcoal helps to absorb odors and chemicals from the air. It’s important to note that activated charcoal can leave stains on surfaces, so be careful when handling it.
Use essential oils (optional)
If you prefer a more pleasant scent, you can use essential oils to mask the paint odor. Add a few drops of your favorite essential oil to a diffuser and let it run for several hours a day. You can also add a few drops of essential oil to the baking soda or white vinegar solutions.
Wait it out
Finally, if none of the above methods work, the only thing left to do is wait it out. Paint odor typically dissipates on its own over time, usually within a week or two. In the meantime, continue to ventilate the room, use natural odor absorbers, and avoid spending too much time in the painted room until the odor is gone.
How Long Will My Apartment Smell Like Paint?
The duration for which your apartment will smell like paint will depend on various factors, such as the type of paint used, the ventilation in your apartment, and the size of the space being painted.
In general, the smell of paint can last for anywhere from a few hours to several days, and even up to a week or more. This is because the paint contains volatile organic compounds (VOCs) that evaporate into the air as the paint dries, causing a distinctive paint smell.
To help reduce the duration of the paint smell, you can open windows and use fans to increase ventilation in the room. You can also consider using low-VOC or no-VOC paints, which emit fewer harmful chemicals and tend to have a milder odor.
If you are concerned about the paint smell lasting too long or causing health issues, you may want to consider temporarily staying elsewhere until the smell dissipates.
If You Want to Know the Trick to Smell Your House Like Full of Fragrance Check This:
Final Words
Unpleasant odors in your apartment can be a frustrating issue to deal with, especially when they smell like paint. This issue can arise due to a variety of reasons, such as recent painting, improper ventilation, or hidden mold growth. Although pinpointing the cause of the smell is essential, also essential to address it accordingly to prevent any potential health hazards or further damage to your living space.
Some effective solutions to get rid of the paint smell include airing out the apartment, using air purifiers or dehumidifiers, and applying odor-absorbing materials. A little bit of patience, persistence, and attention to detail can go a long way toward resolving this issue and ensuring a more comfortable living environment.
Is glow in the dark paint radioactive?
Modern glow in the dark paints contain phosphorescent materials that are not radioactive. Some older glow in the dark paints may contain radioactive materials.

While glow in the dark paint is popular for its ability to illuminate dark areas, concerns have arisen about the safety of using this type of paint. In this article, we’ll explore whether glow in the dark paint is radioactive and what this means for your health and safety.
Is Glow in the Dark Paint Radioactive?
Glow in the dark paint is not necessarily radioactive. The glowing effect in the paint is achieved through the use of phosphorescent materials. These materials absorb light and then slowly release it over time. This is called luminescence.
There are two types of luminescence: fluorescence and phosphorescence. Fluorescent materials absorb light and then immediately release it, while phosphorescent materials continue to emit light for a period of time after the light source has been removed.
Most glow in the dark paints use non-radioactive phosphorescent materials, such as strontium aluminate, zinc sulfide, or calcium sulfide. These materials are not radioactive and are considered safe for general use.
However, it is vital to note that some older glow in the dark paints may contain radioactive materials, such as radium or tritium. These materials are highly toxic and pose a significant health risk if ingested or inhaled. Therefore, don’t forget to check the label of any glow in the dark paint. And finally, ensure that it does not contain radioactive materials.
Is Fluorescent Glow-in-the-Dark Paint Radioactive?
Fluorescent glow-in-the-dark paint is a type of paint that contains phosphors that emit light when exposed to UV light. This paint does not contain radioactive material by default.
However, some older types of glow-in-the-dark paints, such as radium-based paints, did contain radioactive materials, specifically radium-226. These paints were used in the early 1900s for watches and instrument dials. They were able to emit a bright glow without the need for an external power source.
Radium-based paints are highly toxic and can cause some serious health problems. Therefore, they were banned in the 1960s. Modern glow-in-the-dark paints no longer contain radioactive materials.
Note: Follow proper safety precautions when using any type of paint, including wearing gloves and a mask. It is better to work in a well-ventilated area.
How Do You Know if Glow in the Dark Is Radioactive?
Not all glow-in-the-dark materials are radioactive, so it’s advised to know how to differentiate between them. Here are some ways to determine if a glow-in-the-dark item is radioactive.
Check the label or packaging: Most glow-in-the-dark products are made with non-radioactive phosphorescent materials. The label or packaging should indicate whether the product is radioactive or not. If there is no label or packaging, then it’s best to assume that the product is radioactive and not use it.
Check for a radiation symbol: Radioactive paints are generally labeled with a radiation symbol. This symbol looks like a trefoil with the letters “R” and “A” in the corners. If you see this symbol on the product or its packaging, then it’s likely radioactive.
Use a Geiger counter: A Geiger counter is a device that detects radiation. If you have access to one, you can use it to determine if a glow-in-the-dark item is radioactive. Place the Geiger counter near the item and see if it detects any radiation. If it does, then the item is radioactive.
Consult an expert: If you are unsure if a glow-in-the-dark paint is radioactive, it’s best to consult with an expert. You can contact a local radiation safety expert for assistance.
Comparison of Phosphorescence and Radioactivity
Phosphorescence and radioactivity are two different phenomena that involve the emission of light, but they differ in their underlying mechanisms, properties, and applications. Some key differences between phosphorescence and radioactivity are described below.
Mechanism: Phosphorescence involves the absorption and re-emission of light by molecular or electronic states. Radioactivity involves the spontaneous decay of atomic nuclei.
Energy scale: Phosphorescence typically involves electronic transitions within molecules or solids, which are on the order of a few electron volts (eV). Radioactivity involves nuclear transitions, which are on the order of millions of electron volts (MeV).
Duration: Phosphorescence has a relatively long duration, on the order of milliseconds to minutes. Radioactivity has a finite half-life, which can range from microseconds to billions of years, depending on the isotope.
Hazards: Phosphorescent materials are generally safe and non-toxic, although some may be sensitive to air, moisture, or heat. Radioactive materials can be hazardous to human health and the environment. The level depends on the type, quantity, and exposure pathway.
Comparison of Radioactive and Non-Radioactive Glow in the Dark Paint
There are two types of glow in the dark paints: radioactive and non-radioactive.
Radioactive glow-in-the-dark paints contain a small amount of radioactive material, typically radium or tritium. When the radioactive material decays, it emits particles that excite the phosphorescent material, causing it to glow.
While radioactive glow-in-the-dark paints are highly effective, they pose a health risk to those who come in contact with them. Inhaling or ingesting radioactive materials can cause radiation sickness, cancer, and other health problems.
Non-radioactive glow-in-the-dark paints use alternative materials to achieve the same effect without the use of radioactive materials. These materials are generally safer than radioactive materials. Some non-radioactive materials that can be used to create glow-in-the-dark paints include strontium aluminate, zinc sulfide, and europium-doped aluminate.
In terms of performance, both radioactive and non-radioactive paints can be very effective. However, non-radioactive paints tend to be more reliable and longer-lasting than their radioactive counterparts.
In a nutshell, non-radioactive glow-in-the-dark paints are a safer and more reliable choice than radioactive paints. They offer the same glowing effect without the health risks associated with radioactive materials.
Pros and Cons of Using Radioactive Glow in the Dark Paint
Radioactive glow-in-the-dark paint is a unique and intriguing way to add some glow to your life. However, it’s important to consider the pros and cons before using it. Let’s take a closer look.
Pros:
Long-lasting glow: Radioactive glow-in-the-dark paint provides a long-lasting glow that doesn’t require external light or batteries.
Brightness: This type of paint can produce a brighter glow than other glow-in-the-dark paints, making it useful for safety purposes.
Durability: Radioactive glow-in-the-dark paint can withstand exposure to various elements and is less likely to fade over time.
Cons:
Health risks: Radioactive materials present in this paint pose potential health risks. Exposure to high levels of radiation can lead to cancer, genetic mutations, and radiation sickness.
Environmental risks: Improper disposal of radioactive glow-in-the-dark paint can cause harm to the environment. It contaminates soil, water, and air, and harms wildlife and ecosystems.
Regulations: The use of radioactive materials in paint is regulated by governmental agencies. The purchase, possession, and use of this type of paint may be restricted.
Final Words
In conclusion, not all glow in the dark paint is radioactive. However, some types do contain radioactive materials and should be used with caution. It is essential to check the ingredients of the paint and handle it safely to avoid any potential health risks.
Have you ever wondered what would happen if you painted your car without applying primer? As any car enthusiast would know, the process of painting a car involves several steps, and one important step is applying a coat of primer.
But in some certain conditions, a few questions come in mind; can you paint a car without primer? What happens if you paint a car without primer?
While it is possible to paint a car without primer, it’s not advised. Without primer, the paint may not stick properly to the surface, leading to uneven finishes and potentially damaging the car’s beauty.
In this article, we’ll delve into the consequences of skipping the primer step and whether or not it’s possible to paint a car without it. So, let’s dive in!
The Role of Primer in Car Painting
Primer is the first coating that we need to apply on the surface before starting our main painting task. Its primary function is to provide a smooth and even base for the paint. A primer plays a great role in car painting project. Check the points below.
1. A primer enhances the adhesion of the paint to the car’s surface. This means that the paint will stick better to the car. As a result, we will achieve much better and satisfactory result.
2. The primer can also help to smooth out any imperfections on the car’s surface, such as scratches or dents. This ensures that the final paint job is smooth and even.
3. A primer can also protect the car’s surface from corrosion. This is particularly important in areas where the car is exposed to moisture, such as the undercarriage.
4. By providing a consistent base, a primer can improve the coverage of the paint. This means that fewer coats of paint are required, resulting in a faster and more efficient painting.
Can You Paint a Car without Primer?
While it is generally possible to paint a car without primer, it’s not wise due to the risks of poor adhesion, rust and corrosion, and an unsatisfactory finish. To make a paint job successful, we should definitely apply primer.
The primer acts as a barrier between the metal and the paint, preventing moisture and air from reaching the metal and causing it to rust. If anyone skips this process, he will actually damage the car’s structural integrity.
Furthermore, some types of paints may require a specific type of primer to achieve the desired finish. Therefore, it’s crucial to choose the appropriate primer for the paint you intend to use.
Can You Paint over Existing Car Paint without Primer?
Painting over existing car paint without a primer is not a good idea. Primer works as a bridge between the old and new layers of paint. Without it, the new paint may not adhere properly to the auto surface, resulting in flaking and peeling.
Primer creates a uniform surface that allows for a smooth application of the new paint. It helps to prevent rust and corrosion from forming on the metal surface of the car. Rust is a common issue that can cause extensive damage to the car’s bodywork, leading to costly repairs.
To achieve a long-lasting finish, using a primer before painting over existing auto paint is necessary. By doing so, you can ensure that the new paint adheres properly, providing a nice finish.
Can You Spray Base Coat on Car without Primer?
Spraying base coat on a car without applying primer beforehand is not a wise practice. The primer prepares the surface in a way that the base coat sets properly.
By avoiding the primer, the base coat may not bond correctly, leading to uneven coverage. This could result in a paint job that looks unpleasant and is prone to damage. Furthermore, the lack of a primer can also negatively impact the durability of the paint job.
What Happens if You Paint a Car without Primer?
Painting a car without primer can cause numerous issues. Primer provides a protective layer for the car’s body against rust, corrosion, and other environmental factors. Let’s explore the problems that can arise when painting a car without primer.
Poor Adhesion: Without primer, the paint will not stick properly to the car’s surface. This could lead to the paint peeling, cracking, or chipping, creating a rough and uneven appearance.
Corrosion: Primers contain chemicals that protect the car’s body from rust and corrosion. Without a primer, the metal can be exposed to moisture, which can lead to rust and corrosion. This will weaken the car’s structure and decrease its lifespan.
Uneven Surface: Painting a car without primer can result in an uneven surface. Different areas may absorb the paint differently, causing an unprofessional finish.
Time-consuming: Painting a car without primer requires more time and effort. You may need to apply multiple coats of paint to achieve a smooth finish, which can be time-consuming and costly.
Decreased Resale Value: A car painted without primer can show signs of wear and tear, decreasing its resale value. This can make it less attractive to potential buyers.
How Primer Affects the Final Result in Car Painting?
The application of primer in car painting is a key step that can significantly influence the final outcome. Primer is a specialized type of paint that is applied before the topcoat to prepare the surface for painting.
An excellent quality primer provides a smooth surface for the topcoat, leading to a seamless finish. Moreover, it aids in hiding any imperfections on the car’s surface such as dents and ensures that they do not appear in the final outcome.
On the other hand, using low-quality primer can cause numerous issues with the final result. It may not adhere correctly to the surface, causing the topcoat to peel or flake off.
In essence, using a high-quality primer and following the proper application procedure is essential to achieving optimal results when painting a car.
Primer need to be sprayed before painting your car? Watch it:
Why Some Users May Want to Skip Primer?
There are a few reasons why some users may want to skip using a primer before painting.
Time constraints: Using a primer adds an extra step to the painting process, which can be time-consuming. Some users may want to avoid using a primer to save time.
Cost: Depending on the type of primer used, it can add an additional cost to the painting project. Some users may want to skip using a primer to save money.
Surface type: In some cases, a primer may not be necessary if the surface being painted is already in good condition and has a clean, dry surface. For example, if painting a previously painted surface that is still in good condition, a primer may not be necessary.
Note: Keep in mind that using a primer before painting can have several benefits. A primer can help improve adhesion, prevent stains, and provide a consistent base color, among other things. Without using primer, the final painting will be less durable and less professional-looking.
Is There Any Benefits of Not Using Primer on Car?
No, there are no benefits to painting a car without primer. In fact, primer is an essential step in the painting process. Without primer, the paint may peel or chip off easily. Additionally, primer can help to prevent different types of damage to the underlying metal surface of the car. Avoiding the primer can lead to unsightly paint job that will not last as long as it should.
Final Words
It is clear that using primer before painting a car is an essential step in ensuring a successful and long-lasting paint job. It may add an extra step to the process, but the benefits of using primer far outweigh any potential drawbacks. Taking the time to properly prep the car’s surface with primer will result in a smoother, more durable, and more attractive finish that will stand the test of time.
Do you remember being fascinated by the glow in the dark stars on your bedroom ceiling as a child? Maybe you even had some glow in the dark paint on your walls or on your favorite toy. It’s easy to see why this type of paint is still popular today, especially for creating a unique and eye-catching look on walls, furniture, or art.
But if you’re considering using glow-in-the-dark for your project, you may be wondering: how long does glow in the dark paint last?
Glow in the dark paint can last up to 5 years if unopened and stored properly. Some paints also can last up to 10 years depending on the paint quality and preservation procedure. After recharge, glow-in-the-dark can glow up to 10 hours. However, you can enjoy the paint glowing from 2 to 10 hours on average.

In this article, we’ll explore the factors that affect the longevity of glow in the dark paint and what you can do to make it last as long as possible.
What Is Phosphorescence?
Phosphorescence is a type of luminescence in which a material emits light after being excited by a source of energy, such as light or heat. The emitted light persists for a longer period of time than that observed in fluorescence, which is another type of luminescence.
In phosphorescence, the material absorbs energy and stores it in excited electronic states that persist for a longer period of time. The electrons then gradually release the stored energy in the form of light, resulting in a glowing or luminescent effect that can last for seconds or even hours after the excitation source is removed.
One common example of phosphorescence is the glow-in-the-dark paint found on toys, stickers, décor, and other items. This material contains a phosphorescent substance that absorbs light and then slowly releases it, creating a visible glow in low-light conditions.
What Is Glow in the Dark Paint?
Imagine if you could paint your bedroom walls with a special paint that could make the room light up at night like a magical wonderland. This is where glow in the dark paint comes in!
So, how does it work? This paint contains a special type of pigment called a phosphor. This pigment absorbs energy from light sources, such as natural sunlight or artificial light bulbs, and stores it. When the light source is removed, the stored energy is slowly released in the form of light, creating the glow effect.
Glow-in-the-dark paint can be used different ways, from adding an eerie touch to Halloween decorations to creating a unique accent on a bedroom wall. It’s also used for safety purposes, such as marking exits and emergency equipment in low light conditions.
This paint is a fun and versatile way to add a unique touch to any project or design. Whether you’re looking to create a spooky atmosphere or simply want to add a cool glow to your artwork, this magical paint will definitely work.
If you want to learn more about how glow-in-the-dark paint works, check the video.
How Long Does Glow in the Dark Paint Last?
Glow in the Dark paint is a type of photoluminescent paint that contains phosphors that can absorb and store light energy, and later release it slowly over time. The duration of its glow depends on various factors, such as the quality of the paint, the amount of light it absorbs, and the conditions of the environment it is used in.
Here are some points to consider when discussing the longevity of Glow-in-the-Dark Paint.
Quality of the paint: The quality of the paint determines its durability and how long it can glow. High-quality paint usually contains more phosphors, which means it can glow for a longer period of time. Cheaper or low-quality paints may not last as long or may not glow as brightly.
Amount of light absorbed: The amount of exposure to light also plays a crucial role in the paint’s glow duration. The more light the paint receives, the longer it will glow. If the paint is exposed to strong light sources, it can recharge more quickly and glow brighter and longer.
Color and brightness of the paint: The color and brightness of the paint can also affect the lifespan of the glow-in-the-dark paint. Brighter colors usually glow for a longer time than darker colors. For example, yellow and green glow brighter and longer than red and blue.
Environmental conditions: The environmental conditions where the paint is applied can also affect the paint’s lifespan. If the paint is applied outdoors, it may not last as long as if it were applied indoors. Humidity, temperature, and air flow can all affect how long the paint will glow.
Maintenance: Proper maintenance can also extend the lifespan of the paint. Keeping the painted surface clean and free of dirt and debris can help the paint to absorb light and glow brighter for longer.
In general, glow in the dark paint can last for several hours to several days, depending on the factors mentioned above. Some high-quality paints can glow for up to 10 hours or more after being exposed to light for several minutes. However, low-quality paints may only glow for a few minutes before losing their brightness.
What Determines the Lifespan of Glow in the Dark?
Glow-in-the-dark paint, also known as phosphorescent paint, is a type of paint that emits light after being charged by exposure to a light source. The duration and intensity of the glow depends on a variety of factors.
Quality of the paint: Higher quality paint tends to have more phosphorescent pigments, which means it will glow brighter and for a longer period of time.
Type of pigment: Some pigments, such as strontium aluminate, are more effective at absorbing and storing light energy than others. These pigments can glow for several hours or even up to 12 hours.
Charge time: The amount of time the paint is exposed to a light source directly affects how long it will glow. It’s important to note that not all light sources are equal. UV light, for example, is more effective at charging the paint than regular incandescent or LED light.
Temperature: Cold temperatures can slow down the chemical reactions that create the glow effect, resulting in a weaker and shorter glow.
Exposure to light: Exposure to light over time can also degrade the phosphorescent pigments in the paint, which can reduce its ability to glow. To prevent this, it’s recommended to store the paint in a cool, dark place when not in use.
Application method: Thicker coats of paint tend to absorb and store more light energy, resulting in a longer and brighter glow. So, thinner coats of paint will not glow longer than thicker coats.
Tips to Make Glow in the Dark Paint Last Longer
Glow in the dark paint can be a fun and unique addition to any project, but how can you make sure it lasts as long as possible? If you’re using this stunning paint for a special project, you’ll want to ensure that it glows brightly and lasts a long time. Here are some tips to help.
Charge it well: The more you charge the paint, the longer it will glow. Make sure to expose it to strong light sources for several hours before turning off the lights.
Protect it from sunlight: The glowing paint can fade when exposed to direct sunlight for prolonged periods. Keep the painted objects away from windows or any other sources of sunlight.
Use high-quality paint: Using high-quality glow-in-the-dark paint will ensure that it lasts longer. Cheaper paints tend to lose their glow faster.
Apply multiple layers: Applying multiple layers of paint will make it thicker and more durable. This will also increase the amount of glow it emits.
Seal it: Sealing the paint with a clear topcoat will protect it from wear and tear, and also keep it from fading.
Clean it gently: Clean the painted surface gently using a soft cloth or sponge. Harsh cleaning agents or abrasive materials can damage the paint.
Store it properly: Store any unused glow in the dark paint in a cool, dry place away from direct sunlight. This will help preserve its quality and prevent it from drying out.
How Long Does Glow-in-the-Dark Paint Last on Clothes?
The longevity of glow-in-the-dark paint on clothes can vary depending mostly on the fabric of the clothes, the frequency of washing, and the exposure to light.
Generally, paint glow can last for several washes and still retain its luminous effect. However, over time, the paint may start to fade or lose its glow intensity.
To increase the longevity of glow in the dark on clothes, it is best to wash the clothes in cold water and avoid using harsh detergents or bleach. Also, avoid exposing the painted clothes to sunlight or high heat, as this can degrade the paint.
Bear in mind that some glow-in-the-dark paints are designed to be more durable and long-lasting than others. Therefore, choose high-quality glowing paint specifically designed for fabrics if you want the best longevity.
How Long Fully Intact Glow in the Dark Paint Lasts?
The high-quality intact glow-in-the-dark paint can last for several years, with some lasting up to 10 years or more. However, lower quality paints may lose their glow after only a few months. When exposed to a strong light source for a sufficient period of time, the paint can glow brightly for several hours like 5 to 10 hours. The intensity of the glow will gradually diminish over time as the stored energy is released.
To prolong the life of intact glow-in-the-dark, make sure to store the paint in a cool, dry place away from direct sunlight. Excessive exposure to sunlight can provoke the paint to damage more quickly.
What Are the Longest Lasting Glow in the Dark Paints?
When it comes to glow in the dark paints, the longevity of the glow is an important factor to consider. Some of the longest lasting dazzling paints on the market are those made with phosphorescent pigments. Some great options are mentioned below.
1. SpaceBeams Glow in the Dark Paint
This is a high-quality, water-based paint that contains photoluminescent pigments, which are charged by natural or artificial light sources and emit a bright green glow in the dark.
This paint is ideal for a variety of applications, such as highlighting safety exits, creating a unique and striking visual effect in art projects, or decorating surfaces for parties and events.
After being exposed to light for just a few minutes, the paint can emit a bright green glow for up to 12 hours. Overall, this is an ideal choice for applications where a reliable, long-lasting glow is essential.
2. Acmelight Glow in the Dark Acrylic Paint
This paint is specially formulated to provide a bright and long-lasting glow in the dark effect that can add a mesmerizing touch to any project.
On average, this acrylic paint can glow for up to 12 hours after exposure to light for 10-15 minutes. Its long-lasting glow effect, ease of use, and compatibility with different surfaces make it an ideal choice for artists, crafters, and DIY enthusiasts alike.
3. ARTME Glow in the Dark Paint
ARTME Glow in the Dark Paint is a fantastic product that allows you to create incredible glowing art that can add a touch of magic to your projects. This paint set includes 12 bright colors that can be used on a variety of surfaces.
The paint is easy to apply and dries quickly, making it perfect for both professional artists and beginners. The colors are vibrant and eye-catching in normal light, but they truly come to life in the dark. Once charged, the paint glows brightly for up to 10 hours, creating a stunning and mesmerizing effect.
4. JTEEY Glow in the Dark Pigment Powder
JTEEY Glow-in-the-Dark pigment powder is a type of luminescent powder. It is made from high-quality materials that are safe, non-toxic, and environmentally friendly, making it a popular choice for a wide range of applications.
One of the most notable features of JTEEY pigment powder is its long-lasting glow. The powder can glow for up to 8 hours after being exposed to a light source, which makes it perfect for use in various settings, such as in arts and crafts, home decor, and even in emergency situations.
Does Glow-in-the-Dark Fade over Time?
Yes, glow in the dark paint can fade over time, especially if it is exposed to sunlight or other sources of ultraviolet (UV) light. This is because the phosphorescent material that gives the paint its glow is sensitive to UV radiation, which can cause it to break down and lose its luminosity.
Higher-quality paints tend to be more resistant to fading. Paints that are stored in a dry place and are not exposed to direct light or other sources of UV light may last longer.
To extend the lifespan of the paint, you can also apply a clear protective topcoat to shield it from UV light and other environmental factors. Additionally, follow the manufacturer’s instructions for application and maintenance, as improper application or care can also contribute to fading.
Final Thoughts
Glow in the dark paint is an excellent way to add a unique and creative touch to any project or space. With proper application and care, it can provide a long-lasting and captivating glow that will impress and delight for years to come.
So, whether you’re looking to add some extra excitement to a child’s bedroom or create a stunning work of art, glow-in-the-dark paint is a fantastic option that’s sure to impress.