If you’re looking to give your aluminium window frames a fresh coat of paint or simply want to remove an old, chipping layer, you may be wondering how to remove paint from aluminium window frames without damaging the surface. Well, apply a paint stripper designed for use on aluminium to the window frames, following the manufacturer’s instructions. Use a scraper to remove the paint, and clean the frames with a solvent like acetone or denatured alcohol. So, whether you’re a DIY enthusiast or a homeowner looking to spruce up your property, keep reading to learn more about how to get rid of paint from your aluminium window frames.
What Is the Best Way to Remove Paint from Aluminium Window Frames?
When it comes to removing paint from aluminium window frames, there are a few methods you can try. However, using a chemical paint stripper is the most effective and efficient way to remove paint from aluminium window frames. It’s important to take the necessary safety precautions and follow the manufacturer’s instructions carefully to ensure a successful outcome. Here’s how to do it:
Materials needed:
- Paint stripper
- Protective gear (gloves, goggles, respirator mask)
- Brush or roller
- Putty knife or scraper
- Clean cloth
- Water
- Paint thinner or mineral spirits (optional)
Choose the right paint stripper:
Look for a paint stripper that is safe for use on aluminium surfaces. You can find a suitable paint stripper at your local hardware or DIY store.
Prep the area:
Before you start, protect the surrounding area from paint drips and splatters. Cover the floor with drop cloths and use masking tape to protect any adjacent surfaces you don’t want to strip.
Apply the paint stripper:
Wear gloves and protective eyewear, then apply a thick layer of paint stripper to the aluminium window frame using a brush or roller. Make sure the stripper covers the entire painted surface and penetrates any crevices or corners. Most paint strippers require a few minutes to start working, but be sure to monitor the progress closely so that the paint doesn’t dry back onto the window frame.
Let the stripper work:
Allow the paint stripper to work according to the manufacturer’s instructions. Typically, this will take anywhere from 30 minutes to several hours, depending on the type and thickness of the paint.
Scrape off the paint:
Once the paint has softened, use a scraper or putty knife to gently remove the paint from the aluminium surface. Work carefully to avoid scratching the metal. You may need to repeat this process several times until all of the paint has been removed.
Clean the surface:
Once all of the paint has been removed, use a clean cloth and a suitable cleaner to remove any remaining residue or paint stripper from the surface. Rinse the surface with clean water and allow it to dry completely before applying a new coat of paint.
Finish the Surface
Now that the aluminium window frame is free of paint, you can choose to finish the surface with a coat of paint or primer. This will help protect the metal from future wear and tear, as well as improve its appearance. Be sure to follow the manufacturer’s instructions for any paint or primer you use.
Is There Any Chemical-free Method to Remove Paint from Aluminium?
Yes, there are a few natural methods you can try to remove paint from aluminum window frames without using chemicals. Here are a few options to consider:
Hot water and soap:
Fill a bucket with hot water and add a few drops of dish soap. Dip a cloth in the solution and scrub the painted areas of the window frame. You may need to repeat this process a few times to remove all the paint.
Vinegar:
Soak a cloth in vinegar and apply it to the painted areas of the window frame. Let the cloth sit on the surface for about 30 minutes before scrubbing the paint off with a brush or cloth.
Baking soda and water:
Mix equal parts baking soda and water to create a paste. Apply the paste to the painted areas of the window frame and let it sit for 30 minutes before scrubbing with a brush or cloth.
Steam:
Use a handheld steam cleaner to loosen the paint from the window frame. Hold the steamer over the painted areas for a few minutes before using a cloth or brush to wipe away the paint. Remember to always test any method on a small, inconspicuous area of the window frame first to make sure it won’t damage the aluminum.
How to Remove Paint from Aluminium Window Frames?
Apart from the chemical paint stripper method that we explained earlier, there are some other methods you can use to remove paint from aluminium window frames, including:
- Sanding
- Heat gun
- Abrasive blasting
Here’s a closer look at each method and how to apply them:
Sanding Method:
Materials needed:
- Sandpaper or sanding block
- Gloves
- Protective eyewear
- Mask
Steps:
- Start by preparing the area around the window frame. Lay down a drop cloth or newspaper to catch any paint chips or dust that may fall during the sanding process.
- Use a scraper or putty knife to remove any loose or flaking paint from the window frame. This will make it easier to sand the remaining paint.
- Sand the window frame using a coarse sandpaper (60-80 grit) to remove the remaining paint. Start with the rough grit sandpaper and work your way up to a finer grit (120-150 grit). Use a sanding block or power sander to make the job easier.
- Pay attention to any corners or tight spaces on the window frame where paint may be difficult to remove. Use a small piece of sandpaper or a sanding sponge to reach these areas.
- Once all of the paint has been removed, wipe down the window frame with a clean, damp cloth to remove any dust or debris.
- You may also want to use a metal cleaner or polish to restore the shine to the aluminum window frame.
- Dispose of any paint chips or debris according to your local regulations.
It’s important to note that sanding can remove a thin layer of the aluminum window frame, so use this method sparingly and only when necessary.
Cautions:
Sanding can create dust and debris that can be harmful to breathe in. Use appropriate safety equipment and work in a well-ventilated area. Be careful not to sand away too much of the aluminum surface, as this can cause damage.
Heat Gun Method:
Materials needed:
- Heat gun
- Putty knife or scrapers (plastic and metal)
- Sandpaper (coarse and fine grit)
- Protective gear (gloves, goggles, respirator)
- Paint stripper (optional)
Step 1: Preparation
Start by preparing the area where you’ll be working. Cover the floor with a drop cloth or plastic sheet to catch any paint chips or dust that may fall. Put on protective gear like gloves, goggles, and a respirator to prevent inhalation of fumes and particles.
Step 2: Heat the Paint
Using a heat gun, heat the paint on the aluminum window frame until it starts to bubble and loosen. Keep the heat gun moving constantly to prevent overheating and damage to the metal. Start at a low heat setting and gradually increase as needed.
Step 3: Scrape the Paint
Once the paint has bubbled, use a plastic scraper to remove as much of it as possible. Be careful not to scratch the aluminum surface. If there are any stubborn areas, use a metal scraper to gently remove the paint.
Step 4: Repeat the Process
Continue heating and scraping until you’ve removed all the paint. If there are any traces of paint left, use sandpaper to sand the surface until it’s smooth.
Step 5: Clean Up
After removing the paint, clean the window frame thoroughly with soap and water to remove any remaining debris. Dry it completely with a towel or air-dry it.
Optional Step: Paint Stripper
If there are multiple layers of paint or the paint is particularly stubborn, you may want to consider using a paint stripper in addition to the heat gun. Follow the instructions on the paint stripper carefully, and use protective gear. After applying the stripper, use a scraper to remove the softened paint.
Cautions:
Be careful not to overheat the aluminium or hold the heat gun too close to the surface, as this can cause damage. Heat guns can produce fumes and may pose a fire hazard, so use them with caution.
Abrasive Blasting Method:
Materials needed:
- Abrasive blasting equipment
- Protective gear
- Abrasive media
- Mask
Steps:
This method requires specialized equipment and should only be done by a professional.
Cautions:
Abrasive blasting can be dangerous if not done properly. It should only be done by a professional who is trained and experienced in this method.
Can I Clean Aluminum Window Frames with Vinegar?
Yes, you can clean aluminum window frames with vinegar. Vinegar is an effective and natural cleaning solution that can remove dirt, grime, and oxidation from aluminum surfaces. To clean your aluminum window frames with vinegar, mix equal parts of water and white vinegar in a spray bottle. Spray the solution onto the window frames and let it sit for a few minutes. Then, scrub the frames with a soft-bristled brush or a sponge, and rinse thoroughly with clean water. Avoid using abrasive cleaners or tools that can scratch or damage the aluminum surface.
Note that while vinegar is generally safe for aluminum, it is acidic and can cause damage if used in excessive amounts or left on the surface for too long. Be sure to rinse the frames thoroughly after cleaning and avoid using vinegar on any areas that are coated or painted.
Can you Polish Aluminium Window Frames?
Yes, it is possible to polish aluminum window frames to restore their shine and remove any oxidation or stains. Start by cleaning the frames with a mild detergent and warm water, then use a non-abrasive metal polish or a mixture of vinegar and baking soda to remove any remaining stains. Apply the polish using a soft cloth and work in circular motions, focusing on one small area at a time. Once you’ve polished the entire surface, use a clean, dry cloth to remove any excess polish and buff the frames to a high shine.
Final Thoughts
Removing paint from aluminium window frames may seem like a daunting task, but it can be accomplished without the use of harsh chemicals. By utilizing techniques such as heat guns, sandblasting, pressure washing, or abrasive pads and sandpaper, you can achieve a smooth and polished surface on your window frames. However, it is important to approach this task with caution and take necessary safety precautions to avoid any damage to the surrounding area or injury to yourself. Ultimately, with a bit of effort and patience, you can successfully remove paint from your aluminium window frames and give them a renewed and refreshed appearance. So go ahead and give it a try using the method that suits you best.
Air-dry clay is a popular crafting material among DIY enthusiasts and kids due to its ease of use, versatility, and affordability. Once dry, you can paint the air-dry crafts with vibrant colors and transform them into masterpieces.
If you are a DIY enthusiast, every craft is precious. We understand. That’s why, to add a new dimension to your crafts, we are here with the best paint for air dry clay that we consider ideal choices for your artsy taste.
Stay with us as we explore those paint sets to give you a clear idea about them so that you can easily pick any product that will be the right fit for your next air dry clay project.
7 Best Paint for Air Dry Clay Reviews
Painting air dry clay is a tricky task. You should have ideal paints for this project. We have picked some of the suitable paints for air-dry clays.
1. Benicci Complete Acrylic Paint Set for Kids & Adults
Whether you are a seasoned air-dry clay craft expert, or you are just starting out, this Benicci Complete Acrylic Paint Set is the ideal choice for you. This set is packed with almost everything you need to DIYer.
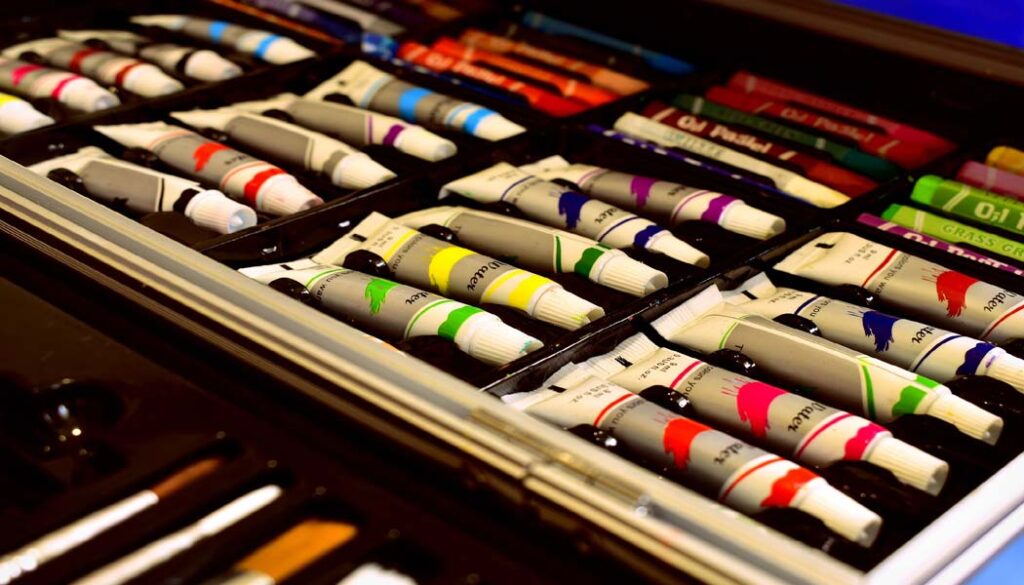
It comes with 12 brushes, a set of 24 12ml paint tubes, a mixing art knife, and a sponge, just the things you need to get your hands dirty on your next air-dry clay painting project!
Since this set features 12x non-shed nylon art brushes, it can be an ideal choice for projects that require complex and detailed brush strokes. This set is an amazing choice for any artist, DIYer, craft enthusiast kid, or adult.
Pros:
- Comes with almost all the necessary paints and tools for air-dry clay crafting.
- Features non-shed nylon art brushes that are compatible with oil and watercolor.
- The paint is easy to use and clean, making it a beginner-friendly option.
Cons:
- Use the paint quickly for a better result.
Our Verdict: This set can be an ideal choice for seasoned pros and beginners. For beginners who are just starting out air-dry clay painting, we highly recommend this product for them due to its easy-to-use and wide variety of paint and tool options.
2. MyArtscape Acrylic Paint Set – Artist Quality Painting Supplies
Quality paint has always been the “best friend” of any DIY painter. If you have tons of air-dry clay crafts waiting to get an artsy touch from you, this MyArtscape acrylic paint set is waiting to be your best friend for the rest of your life!
The colors are vivid and vibrant and are ideal for any craft painting project, especially air-dry clay painting. This professional quality paint set features 12 high-quality paint that is an ideal choice for any small-scale craft painting project.
And not only on clays, but this acrylic paint can also be used on wood, ceramic, fabric, canvas, metal, paper, nails, and so on, opening a window for endless creativity!
Pros:
- The paints can be used on a wide variety of surfaces.
- The paint contains non-toxic materials, making it safe to use.
- The compact size of the tubes makes them ideal for carrying anywhere.
Cons:
- This is not a good choice as heavy body paint.
Our Verdict: The paints blend easily and provide a rich finish. So, this acrylic paint set can be ideal for you if you want professional-quality paints for your air-dry clay painting project.
3. Aen Art Acrylic Paint Set, Rich Pigments for Beginners
Air dry clay crafts look more beautiful when you shower them with a myriad of colors. This Aen acrylic painting kit has 16 colors to leave your imagination reeling.
Each paint tubes contain acrylic paints that are smooth and produce a beautiful finish. The high viscosity of the paint allows you to create stunning air-dry clay crafts. The paint is easy to use, which makes it a great choice for kids and adults who are just starting out painting and DIY crafting.
Since the product is non-toxic, the paints can be used without health concerns. The paint is suitable for various surfaces including masonry, wood, paper, glass, clay, fabric, porcelain, and so on.
Pros:
- Compact paint tubes are easy to carry and store.
- The paint works on a wide variety of surfaces including fabric and leather.
- The painting set is easy to use, so it is a suitable option for beginner DIYers.
Cons:
- Smaller tubes, not suitable for larger projects.
Our Verdict: If you want to purchase a paint set that includes a lot of colors and suffices for multiple air-dry clay painting projects, this paint set can be a go-to option for you.
4. Tavolozza Acrylic Paint Set for Artists Beginners and Kids
Air-dry clay crafts are like small pieces from the craftsman’s own life. And to add colors to those pieces, you need a paint set packed with vibrant colors.
Perhaps you should take a look at the Tavolozza acrylic paint set that comes with 20 acrylic paints of vivid colors. The set also comes with a palette and 3 brushes sealed in a plastic box, making it an ideal choice for carrying around easily.
In terms of color and coverage, the rich, thick pigments provide amazing coverage and an excellent finish. The paints can be blended in easily, making them easier to work with and complete projects smoothly. Lastly, you can use this paint on a wide variety of surfaces, from canvas to glass to plastic.
Pros:
- The painting set comes in a plastic box, so it is suitable for carrying.
- Can be used on a wide range of surfaces including glass and ceramic.
- The set is easy to use, so it is a suitable option for beginners.
Cons:
- Use it quickly after purchase, it can dry faster.
Our Verdict: Since it is easy to use, makes an amazing finish, and can be applied to a wide range of surfaces, we highly recommend this to beginners who are starting out with air-dry clay painting.
5. Chalkola Acrylic Painting Supplies Kit
If you are looking for a professional painting set for your next DIY painting project, this Chalkola acrylic paint set is the thing you need.
This set is packed with 24 professional paint tubes, 1 palette, 10 brushes, and 5 canvases; almost everything you need as an artist. This paint set is an ideal choice for not only adults but for kids because it is ASTM D 4236 & EN71 certified, making it a safer option to work with.
Another great thing about the paint tubes is that they are individually marked with useful information like color name, light fastness, pigment code, opacity, and so on, helping you to add brushstrokes that produce accurate and expected colors.
Pros:
- The set offers 10 different style brushes.
- Paint tubes are labeled with useful information.
- Works on plastic, clay, glass, wood, and so on.
Cons:
- The product seems a bit expensive.
Our Verdict: If you want a professional finish on your craft, or you want to gift someone a complete acrylic painting set, we highly recommend this product.
6. Delta Creative Ceramcoat Acrylic Paint in Assorted Colors
If you are looking for rich paint that will dry to a matte finish, take a look at the Delta Creative ceramcoat acrylic paint. This amazing paint comes in a rich, creamy formula that provides beautiful coverage and dries to a nice matte finish.
Since the color dries to a matte finish, it can be a great choice for applying as a base coat. You can even do stamping, stenciling, and more with this paint. The paints come in over 200 different colors, allowing you to paint air-dry clay projects with vivid, stunning colors and finishes.
Plus, the paint can be applied to a wide variety of surfaces including terra-cotta, wood, traditional canvas, and more.
Pros:
- The colors dry to a nice matte finish, making them ideal for base coating.
- Can be applied easily and cleaned up easily with soap and water.
- The paint products are certified as non-toxic.
Cons:
- Some bottles may not provide actual shade.
Our Verdict: If your painting project requires a wide range of colors, this Delta Creative acrylic paint can be a great choice for you.
7. ARTISTRO Acrylic Paint for Wood, Fabric, Clay, Ceramic & Crafts
Are you looking for an art kit that contains everything you need to get started with air-dry clay painting? If yes, then take a look at the ARTISTRO 24 colors acrylic paint set. It’s got almost everything you need for an air-dry clay painting project.
It comes with 22 22ml paint tubes, 3 brushes, and a palette. One thing you will love about this set is its 2 larger paint tubes. Since you need to use black and white frequently, this kit features 50ml black and white color tubes, just perfect for using frequently.
Another great thing about the tubes is that they come with color names, color fastness ratings, transparency levels, and pigment codes on individual tubes, making them a convenient choice for beginners and seasoned artists.
Pros:
- Features 2 large volume 50ml black and white color tubes for frequent uses.
- Each tube contains colorfastness ratings, transparency levels, and pigment codes.
- Features mood-enlightening stickers for customization.
Cons:
- The lids can break with a little bit extra pressure.
Our Verdict: This set offers some added benefits that made us fall in love with it. Its extra volume of black and white paint tubes will surely benefit the artist for a longer time. And the color information on the tubes will give you a sense of the color you are using on your project.
How to Choose the Right Paint for Air Dry Clay?
When it comes to choosing paint for air dry clay, you have plenty of options on your hand, from pastel chalk to oil paint. However, this may lead you to confusion. No worries, the tips below can help you choose the best paint for air-dry clay painting.
- First, you should consider the clay you are using. It can be made of different types of material, and their color absorption rate will be different. So, before you jump into picking a color, take a look at the material first.
- Secondly, if you want the paint to dry on a specific finish like glossy or matte, etc., you should use paints that will dry to your desired finish. For instance, acrylic paint can dry to a matte finish.
- Now, coming to colors. If you want a solid, beautiful, single color on your craft, you can dye the clay with pigment before the shape dries. Alternatively, there are pre-colored air-dry clays available, you can pick them for your project.
- If you desire a solid bright look on your project, go for acrylic, poster, or tempera paints. Alternatively, you can use food coloring, they are most likely to produce the same results.
- If you want to clean the craft easily, using oil paints will not be a good idea. However, this type of paint can be good for a deep color. High-quality acrylic can also be a good option for vivid, deep coloring.
- You can give it a try with pastel chalk for lighter results.
- If you want to paint your craft and don’t want to spend a lot of money, watercolor can be the ideal option for you. However, you will get a subtle finish.
What Paint Is Best for Air Dry Clay?
Different types of paint are suitable for air-dry clay. However, some are more effective and easier to work with compared to others. Let’s take a look at some of the most effective options to paint air-dry clay.
Acrylic Paint: When it comes to painting air-dry clay crafts, we say, nothing’s more suitable than acrylic paint. This type of paint comes in a wide range of colors. They are easy to use and clean, making them an ideal choice for both professionals and beginners. These paints are even suitable for kids.
Acrylic paint dries relatively quickly and provides a beautiful finish. If you are a beginner who is just starting out painting, we highly suggest you give it a try with acrylic paint first, before getting your hands dirty with other types of paint.
Tempera Paint: Tempera paint is another great option for air-dry clay projects. Tempera paint is very easy to work with, making it a suitable option for kids, beginners, and seasoned pros. This type of paint mixes well and dries relatively quickly.
And not only on air-dry clay, but this paint also works on a wide range of surfaces. So, you can even try other projects with this paint.
Watercolor: Watercolor provides a subtle and beautiful finish. If you want to decorate your crafts with budget-friendly paint, watercolor can be the ideal option for you. Watercolor comes in a myriad of colors, so there is no limit to your imagination. However, this paint may not be an optimal choice for air-dry craft if we compare it with the previous two.
Oil Paint: Using oil paint for clay painting is okay, but you will need to be prepared for “not so easy” cleaning. Plus, after applying the paint, you will need to wait for a longer time compared to others. Nevertheless, good quality oil paint can provide a beautiful finish.
Spray Paint: Spray paint can leave a beautiful finish on your craft. We recommend this only if you are familiar with this painting method. If you are a beginner, or you are gifting paint to a kid, this paint is not recommended.
Can You Paint Straight onto Air Dry Clay?
Yes, you can paint straight onto air dry clay. However, for optimal results, you should do something more. Painting straight onto clay is possible, but the result may not last as long if you take some preparations and then paint the craft. For long-lasting results, you can do the following:
- First, you should sand the surface very gently.
- Clean the dust and debris using a paintbrush or tack cloth.
- Apply primer for better paint adhesion.
- Apply the desired paint after the primer is properly dry.
How Do You Paint Air Dry Clay?
Here is a step-by-step method for painting air-dry clay crafts. But first, gather these supplies:
- Acrylic paint
- A palette
- Paintbrushes (different sizes)
- Sandpaper
- Tack cloth
Step 1: Prepare the surface
Though you can paint directly on the clay, it’s best to prepare the surface for optimal results. Before you get started, make sure your craft is completely dry. You need to sand the surface of the craft very gently. Be careful not to damage the minute details.
If you fear you’ll damage the details, you can skip this step. Once you are done sanding, clean the dust and debris with a tack cloth or a dry paintbrush.
Step 2: Apply primer (optional)
For better paint adhesion and optimal results, you can apply a good-quality primer that is suitable to apply on the clay project. Apply the primer according to the manufacturer’s instructions. This is completely optional, so you may skip it if you want.
Step 3: Apply the paint
If you chose to apply the primer, proceed to this step only after you make sure the primer is completely dry. First, pour the paint onto the palette and use it from there instead of taking it directly from the tube or paint bottle. This will make your work easier.
Keep different types of brushes around since you will need to cover different areas of the craft. For example, for a narrow area, a small brush will be an optimal choice. If you are applying multiple colors, try applying the lighter color first. If you need multiple coats, make sure each coat is properly dry before applying the next.
Step 4: Apply a sealant
Lastly, to preserve your precious work, apply a good-quality sealant once the paint dries properly. Before applying a sealant, make sure it is suitable to be used on air-dry clay crafts.
What Gloss Should You Use for Air Dry Clay?
To add shine to your freshly painted craft, you can apply a good quality varnish or paint sealer. Make sure to pick a gloss that is compatible with the paint. And don’t compromise the quality for the price, because low-quality varnish or paint sealer can cause the paint to bleed or smear.
Additionally, make sure the sealer is non-toxic and safe for children if the craft is intended to be used around kids.
Final Thoughts
Air dry clay is a versatile medium to express your creativity. It’s a beginner-friendly medium that is loved by professionals, DIY enthusiast adults, and kids. Painting adds color and vibrancy to the crafts. With the right paint and techniques, you can preserve your work for years.
Paint plays one of the most important roles to transform an ordinary craft into a masterpiece. In this blog, we talked about some amazing painting sets for coloring air-dry clay crafts that are ideal for professional use and sending as a gift to a DIYer. Be sure to check them out and pick the one that suits your next masterpiece.
Has your DIY painting project left your rubber door seal with unsightly paint marks? Perhaps you accidentally got some paint on the seal while painting the door frame, or the previous owner’s paint job was not as precise as you would have liked. Whatever the reason, I understand the emotional frustration that can come with having unsightly paint marks.
In this situation, the first thing that comes to your mind is how to remove paint from rubber door seal, right? Okay, wipe excess paint, apply rubbing alcohol/nail polish remover, and scrape off stubborn paint with a plastic scraper. Use commercial paint remover if needed. Rinse and dry thoroughly.
So, with the right tools and methods, you can restore your rubber door seal to its original clean and polished condition. Let’s know more details.
Can You Remove Paint from Rubber Door Seal?
Yes, it is possible to remove paint from a rubber door seal yourself, but it depends on the type and thickness of the paint and the condition of the rubber seal.
There are several effective methods you can use, such as using rubbing alcohol, acetone, dish soap and water, a commercial paint remover, or a heat gun.
It’s important to choose the right techniques and follow safety guidelines when attempting to remove paint, especially if using chemicals or heat sources. Wear protective gear such as gloves and safety glasses, and work in a well-ventilated area.
Always test the method on a small, inconspicuous area of the rubber seal before proceeding with the entire seal. If you’re unsure about how to safely remove paint from a rubber door seal, it’s best to seek professional assistance.
How to Remove Paint from Rubber Door Seal Using Rubbing Alcohol?
Using rubbing alcohol is considered one of the most effective ways to remove paint from a rubber door seal. Just follow a few steps.
Materials needed:
- Rubbing alcohol
- Cotton swabs or soft cloth
- Gloves (optional)
- Protective eyewear (optional)
- Ventilation (if working indoors)
Step 1:
Put on gloves and protective eyewear if desired. Make sure you are working in a well-ventilated area.
Step 2:
Dip a cotton swab or soft cloth into the rubbing alcohol.
Step 3:
Gently rub the paint on the rubber seal with the cotton swab or cloth. Be careful not to apply too much pressure, as this can damage the rubber.
Step 4:
Continue rubbing the paint until it begins to loosen and come off. You may need to use multiple cotton swabs or cloths to cover the entire affected area.
Step 5:
If the paint is not coming off easily, let the rubbing alcohol sit on the affected area for a few minutes to loosen the paint.
Step 6:
Once the paint has been removed, rinse the rubber seal with warm water to remove any remaining rubbing alcohol.
Step 7:
Dry the rubber seal with a clean cloth.
Note: Rubbing alcohol can be effective in removing small amounts of paint from rubber, but it may not work for larger areas or thicker layers of paint. If the rubbing alcohol does not work, you may need to try a different method such as using a commercial paint remover or acetone.
How to Remove Paint from Rubber Door Seal Using Acetone?
To remove paint from a rubber door seal using acetone, follow these steps:
Materials needed:
- Acetone
- Cotton swabs or soft cloth
- plastic scraper or credit card
- Gloves
- Protective eyewear (optional)
- Ventilation (if working indoors)
Steps to follow:
- Put on gloves and eye protection.
- Apply a small amount of acetone to a clean cloth or cotton ball.
- Gently rub the paint on the rubber seal with the cotton swab or cloth. Be careful not to apply too much pressure, as this can damage the rubber.
- Continue rubbing until the paint starts to loosen and come off. You may need to use multiple cotton swabs or cloths to cover the entire affected area.
- Use a plastic scraper or credit card to gently scrape away the paint.
- If necessary, repeat steps 2-5 until all of the paint is removed.
- Once the paint has been removed, rinse the rubber seal with clean warm water to remove any remaining acetone.
Note: Acetone is a strong solvent and can dissolve rubber, so it’s important to use it sparingly and be careful not to apply too much pressure.
Acetone should only be used as a last resort, and only for small areas or thin layers of paint. Also, be careful not to spill acetone on any painted surfaces as it can damage the paint.
How to Remove Paint From Rubber Door Seal Using a Commercial Paint Remover?
Follow our step-by-step guide on how to remove paint from a rubber door seal using a commercial paint remover:
Materials needed:
- Commercial paint remover
- Gloves
- Protective eyewear
- Ventilation (if working indoors)
- Soft-bristled brush or cloth
- Clean water
- Clean cloth
Steps to follow:
- Put on gloves and protective eyewear. Make sure you are working in a well-ventilated area.
- Apply a small amount of the commercial paint remover to a soft-bristled brush or cloth.
- Gently apply the paint remover to the affected area of the rubber seal. Be careful not to apply too much pressure, as this can damage the rubber.
- Allow the paint remover to sit on the affected area for the amount of time specified on the label of the product. This time can vary depending on the brand and type of paint remover.
- After the recommended time has passed, use the soft-bristled brush or cloth to gently scrub the paint off the rubber seal. If the paint is not coming off easily, let the paint remover sit on the affected area for a few more minutes.
- Once the paint has been removed, rinse the rubber seal thoroughly with clean water to remove any remaining paint remover.
- Dry the rubber seal with a clean cloth.
Note: Follow the instructions on the label of the commercial paint remover carefully to avoid any potential hazards. It’s important to wear gloves and protective eyewear while working with the product.
Additionally, make sure to work in a well-ventilated area to avoid inhaling any fumes. Be careful not to spill the paint remover on any painted surfaces as it can damage the paint.
How to Remove Paint from Rubber Door Seal Using Dish Soap and Water?
This method may not be as effective as using stronger chemicals, but it is safer and less likely to damage the rubber seal. It is also a more environmentally-friendly option.
Materials needed:
• Dish soap
• Warm water
• Soft-bristled brush or cloth
• Gloves (optional)
• Protective eyewear (optional)
• Ventilation (if working indoors)
Continue following the steps:
- Fill a bucket or container with warm water.
- Add a few drops of dish soap to the water and mix well.
- Soak a clean cloth or sponge in the soapy water and wring out the excess water.
- Gently rub the affected area with the soapy cloth or sponge.
- Continue rubbing until the paint starts to loosen and come off.
- Use a plastic scraper or credit card to gently scrape away the paint.
- If necessary, repeat steps 3-6 until all of the paint is removed.
- Be sure to rinse the rubber seal thoroughly with warm water to remove all the soap and avoid leaving any residue behind and dry thoroughly.
Note: Be careful not to use a harsh brush or scrub too vigorously as this can damage the rubber. It may require some elbow grease and patience.
How to Remove Paint from Rubber Roor Seal Using Heat Gun?
Here’s a step-by-step guide on how to remove paint from a rubber door seal using a heat gun:
Materials needed:
- Heat gun
- Gloves
- Protective eyewear
- Ventilation (if working indoors)
- Soft-bristled brush or cloth
- Clean water
- Clean cloth
Put on gloves and protective eyewear. Make sure you are working in a well-ventilated area.
Set the heat gun to a low heat setting and hold it a few inches away from the affected area of the rubber seal. Move the heat gun back and forth over the area to soften the paint.
Use a soft-bristled brush or cloth to gently scrape the softened paint off the rubber seal. Be careful not to apply too much pressure, as this can damage the rubber.
Continue to heat and scrape the paint until it is completely removed. If necessary, increase the heat setting on the heat gun, but be careful not to overheat the rubber.
Once the paint has been removed, use a clean cloth and warm soapy water to wash the rubber seal. Make sure to remove any residue from the heat gun or paint.
Rinse the rubber seal thoroughly with clean water to remove any remaining soap.
Wipe the rubber door seal with a clean, damp cloth to remove any remaining paint residue.
Note: Be very careful while using a heat gun as it can become very hot and can cause burns or fire hazards. Keep the heat gun moving and do not hold it in one spot for too long. Also, make sure to wear protective gloves and eyewear to protect yourself from the heat and any debris that may come off while scraping.
Things to Consider While Removing Paint from Rubber Door Seal
By considering a few factors, you can determine the best approach for removing paint from a rubber door seal that is both effective and safe.
Type of paint:
Consider the type of paint you are trying to remove, as different types of paint may require different methods of removal.
Age of the paint:
The age of the paint can also affect the method of removal. Fresh paint may be easier to remove than older, dried-on paint.
Type of rubber:
Consider the type of rubber used in the door seal. Some rubber materials may be more sensitive to chemicals or scraping.
Surface area:
Consider the size of the surface area you need to clean, as this will affect the amount of time and effort required to remove the paint.
Work in a well-ventilated area:
Open windows or use a fan to ensure adequate ventilation when using chemicals. Avoid working in a confined space where fumes can accumulate.
Test chemicals:
Test any chemicals you plan to use on a small, inconspicuous area of the rubber seal first to make sure they don’t damage the material. Follow the manufacturer’s instructions carefully.
Avoid using sharp tools:
Avoid using sharp tools like razor blades or metal scrapers that may damage the rubber seal. Instead, use a plastic scraper or credit card to gently remove the paint.
Time and effort:
Removing paint from a rubber door seal can be a time-consuming and challenging process. Consider whether it is worth the time and effort required or if it would be more practical to replace the door seal.
Can Paint Remover be Used on Rubber?
It depends on the type of paint remover and the type of rubber. Some paint removers contain harsh chemicals that can damage certain types of rubber, while others are formulated to be safe for use on rubber surfaces. It’s important to read the label carefully and follow the manufacturer’s instructions when using a paint remover on a rubber surface.
Before applying the paint remover to the entire rubber surface, it’s recommended to test it on a small, inconspicuous area first to make sure that it doesn’t cause any damage or discoloration.
Final Words
Removing paint from a rubber door seal can be challenging, but by following the right steps that we explained earlier and taking proper precautions, it can be done safely and effectively. It’s important to consider the type of paint, age of the paint, type of rubber, surface area, and time and effort required before starting the process.
Remember to wear protective gear, work in a well-ventilated area, test any chemicals on a small area first, and dispose of chemicals properly. By doing so, you can remove the paint without damaging the rubber seal and restore it to its original condition. If in doubt, it’s always best to seek the assistance of a professional.
If you’ve ever found yourself in the frustrating situation of accidentally getting paint on your rubber tires, you know how difficult it can be to remove it. Not only is it unsightly, but it can also cause damage to the rubber if left untreated. Fortunately, there are effective methods for removing paint from rubber tires without causing further harm.
But what are those methods and how to remove paint from rubber tires effectively?
Take rubbing alcohol and rub it onto the paint on the rubber tire. Let it soak into the paint. Then scrub with a soft-bristled brush. This will remove paint from rubber tires.

To help you get the job done quickly and efficiently, we will provide some additional tips and tricks in this article. Keep reading.
How to Remove Paint from Rubber Tires?
One of the most effective methods for removing paint from rubber tires is by using a solvent such as rubbing alcohol. In this method, you have to follow some easy steps.
Materials Required:
- Rubbing alcohol
- Clean cloth
- Bucket of water
- Soft-bristled brush
Step 1: Prep the Tire
Before you start, make sure your tire is clean and dry. Use soap and water to remove any dirt or debris on the surface.
Step 2: Apply Rubbing Alcohol
Pour rubbing alcohol onto a clean cloth and gently rub it onto the painted area. Make sure to cover the entire painted surface with the rubbing alcohol.
Step 3: Soak
Leave the rubbing alcohol on the painted surface for a few minutes to allow it to soak into the paint. Make sure not to hurry.
Step 4: Scrub
Using a soft-bristled brush, gently scrub the painted area in circular motions. This will help loosen the paint from the rubber.
Step 5: Rinse
Dip the brush in a bucket of water and use it to rinse off the rubbing alcohol and paint from the tire.
Step 6: Repeat
If there is still paint remaining on the tire, repeat the process until it is completely removed. Use a clean cloth to dry the tire and make sure there is no moisture left on the surface.
How to Remove Paint from Rubber Tires Using a Heat Gun?
Removing paint from rubber tires using a heat gun can be a bit tricky, but with the right tools and technique, it can be done effectively.
Materials Required:
- Heat gun
- Paint scraper
- Protective gear (gloves and goggles)
- Rubbing alcohol
- Clean cloth
Step 1: Prepare the area
Make sure you are working in a well-ventilated area and that there are no flammable materials nearby. Protect any surrounding surfaces from heat or debris. Put on your protective gear.
Step 2: Heat up the paint
Using a heat gun, set the temperature to medium and aim it at the paint you want to remove. Move the heat gun back and forth over the painted area until the paint begins to soften and bubble.
Step 3: Scrape off the paint
While the paint is still hot and soft, use a paint scraper to gently scrape it off the rubber surface. Be careful not to scratch or damage the rubber.
Step 4: Clean the area
Once you have removed as much paint as possible, use rubbing alcohol and a clean cloth to remove any remaining paint residue. If there is still paint remaining, repeat the process until all the paint is removed.
Note:
Be careful when using a heat gun, as it can cause burns or start fires if used improperly. Always follow the manufacturer’s safety guidelines.
How to Remove Paint from Rubber Tires with Sandblasting?
Removing paint from rubber tires using sandblasting involves preparing the area, wearing protective gear, using a sandblasting machine with appropriate settings, keeping the nozzle moving continuously, cleaning the tires thoroughly, and inspecting them for any damage caused by the process. Continue following the steps.
1. Start by preparing the area around the tires. Cover any nearby surfaces with plastic sheets or newspaper to protect them from sandblasting debris.
2. Wear protective gear such as gloves, goggles, and a dust mask to keep you safe from the sandblasting process.
3. Use a sandblasting machine with the appropriate nozzle size and pressure settings. The size and pressure will depend on the type of paint and the condition of the rubber.
4. Position the sandblasting nozzle at a distance of 6 to 8 inches from the tire and start the sandblasting process. Keep the nozzle moving continuously to avoid damaging the rubber.
5. Continue sandblasting until all the paint has been removed from the tire. Check the tire regularly to make sure you’re not removing any of the rubber surfaces.
6. Once you’ve finished sandblasting, clean the tires thoroughly with water to remove any remaining sand or debris. Finally, inspect the tires for any signs of damage or wear and tear caused by the sandblasting process. If necessary, repair or replace the tires before using them.
Safely Precautions while Removing Paint from Rubber Tires
Removing paint from rubber tires can be a messy and potentially dangerous task, so it’s important to take proper safety precautions to avoid any mishaps.
- Always wear gloves, goggles, and a dust mask to protect yourself from paint dust and any debris that may fly off while removing paint.
- Choose a well-ventilated area to work in. This will prevent paint fumes from building up and causing health problems.
- Make sure you have the proper tools for the job. This may include a heat gun, sandblasting equipment, or chemical strippers. Always use the tools according to the manufacturer’s instructions.
- Before applying any method to the entire painted surface, test it on a small, inconspicuous area of the tire to ensure it does not cause damage or discoloration.
- Removing paint from rubber tires can be a time-consuming process. Avoid rushing the job, as this can lead to accidents and damage to the tire.
- Dispose of any chemical strippers, sand, or other materials used in the process properly. Follow local regulations for hazardous waste disposal.
How to Maintain Rubber Tires after Paint Removal?
After removing paint from tires, you should be careful to keep them suitable to run on the road. Keep an eye on the following tips.
Clean the tires regularly: To prevent any buildup of dirt, grime or debris on your tires, it is important to clean them regularly. Use a gentle cleaner specifically formulated for rubber tires and a soft-bristled brush to avoid any damage to the rubber.
Apply a tire protectant: After cleaning the tires, apply a high-quality tire protectant to keep the rubber moisturized and protected against harmful UV rays that can cause cracking and fading. Make sure to choose a protectant that is compatible with your tires.
Avoid harsh chemicals: Avoid using harsh chemicals such as bleach or ammonia on your tires, as they can cause the rubber to deteriorate over time.
Store your vehicle in a covered area: If possible, store your vehicle in a covered area to protect the tires from prolonged exposure to sunlight, rain, and other environmental elements.
Inspect your tires regularly: Check your tires regularly for signs of wear, such as cracks or bulges, and replace them if necessary. Properly inflated tires also help to maintain the integrity of the rubber, so make sure to check your tire pressure regularly as well.
Can WD 40 Remove Paint from Rubber Tires?
WD-40 is a popular multi-purpose lubricant and cleaner that can be used for various tasks. While it may be effective in removing some types of paint from certain surfaces, it is not recommended to use WD-40 to remove paint from rubber tires.
WD-40 is a petroleum-based product that can cause rubber to deteriorate and become damaged over time. Additionally, it is not specifically designed or formulated for paint removal, and therefore may not be effective in removing paint from rubber tires.
If you need to remove paint from rubber tires, it is recommended to use a specialized paint remover that is specifically designed for use on rubber surfaces.
Final Words
Removing paint from rubber tires can be a challenging task, but it is possible with the right tools, techniques, and safety precautions. Whether you choose to use a chemical paint remover or a mechanical method such as heat gun or sandblasting, it is important to take proper safety precautions to protect yourself and your tires from harm.
Additionally, proper maintenance and care of your rubber tires after paint removal can help ensure that they remain in good condition and continue to perform well.
If you’re a DIY enthusiast, you may have encountered a situation where you want to update the look of an oil-based painted piece of furniture or decor.
Maybe you’re unsure whether can you put chalk paint over oil based paint. Okay, you can apply chalk paint over oil-based paint as long as the surface is properly cleaned, sanded, and primed. However, it is recommended to test the compatibility of the paints on a small inconspicuous area before proceeding with the entire project.
But is chalk paint compatible with oil-based paint, will it adhere to the surface properly, or whether it peel off after some time? These questions can be more daunting, but fear not! We’ll explore the compatibility of chalk paint and oil-based paint and guide you through the process of using them together. So, let’s dive in!
What is Chalk Paint?
Chalk paint is a popular type of paint that was first developed by Annie Sloan in the 1990s. It is a decorative paint that can be used on furniture, walls, and other surfaces. The name “chalk paint” comes from the matte, velvety finish that it produces, which resembles the look and feel of chalk.
Chalk paint is known for its unique properties that make it different from traditional paint. It adheres well to most surfaces without the need for extensive preparation, such as sanding or priming. It also dries quickly and has a low odor. Chalk paint can be used to achieve a variety of decorative finishes, from smooth and sleek to distressed and shabby chic. Additionally, it can be easily customized by mixing different colors and finishes together to create a unique look.
Can You Put Chalk Paint Over Oil Based Paint?
Yes, you can apply chalk paint over oil-based paint with proper preparation. This is because chalk paint has unique properties that allow it to adhere well to most surfaces, including oil-based paint.
Chalk paint is typically made with a water-based formula that contains minerals and pigments. It is designed to adhere to a variety of surfaces without the need for extensive preparation, such as sanding or priming. Additionally, it dries quickly and has a low odor.
When applied over oil-based paint, the key to ensuring good adhesion is proper surface preparation. The surface should be thoroughly cleaned and lightly sanded to create a surface that the chalk paint can grip onto. Priming the surface with a high-quality primer that is designed to work with both oil-based and water-based paints is also important, as it will help to ensure that the chalk paint adheres properly and does not peel or flake over time.
Just make sure to take the necessary steps to properly prepare the surface and ensure that the paints are compatible.
How to Apply Chalk Paint Over Oil Based Paint?
With proper surface preparation and application, you can achieve a beautiful and durable finish that will last for years to come. Just follow our guide on how to apply chalk paint over oil-based paint:
Materials:
- Chalk paint
- High-quality primer
- Fine-grit sandpaper
- Tack cloth
- Paintbrush
- Roller
- Paint tray
- Drop cloths or newspaper
Steps to Follow:
Step 1:
Prepare the work area by covering the floor with drop cloths or newspaper to protect it from paint spills and drips.
Step 2:
Thoroughly clean the surface of the oil-based paint using a mild soap and water solution or a degreaser to remove any dirt, grime, or oils. Rinse the surface with clean water and allow it to dry completely.
Step 3:
Lightly sand the surface of the oil-based paint with a fine-grit sandpaper to create a surface that the chalk paint can adhere to more easily. Be sure to remove any loose paint or debris with a tack cloth.
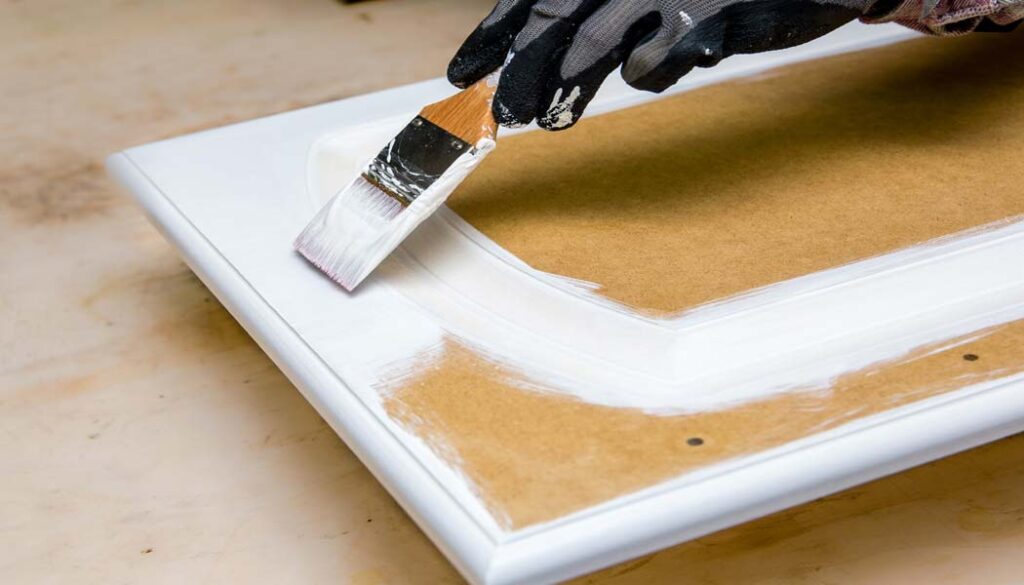
Step 4:
Apply a high-quality primer that is designed to work with both oil-based and water-based paints. This will help to ensure that the chalk paint adheres properly and does not peel or flake over time. Follow the manufacturer’s instructions for application and drying time.
Step 5:
Once the primer has dried, you can apply the chalk paint using a paintbrush, roller, or sprayer. Be sure to follow the manufacturer’s instructions for application and drying time.
Step 6:
Apply the first coat of chalk paint in a thin, even layer. Allow it to dry completely before applying additional coats, if necessary.
Step 7:
Once the final coat has dried, you can lightly sand the surface with a fine-grit sandpaper to create a smooth finish, especially if there are any imperfections or brush strokes. Be sure to remove any loose paint or debris with a tack cloth.
Step 8:
Apply a clear wax or a sealant to protect the chalk paint finish. Follow the manufacturer’s instructions for application and drying time.
Step 9:
Clean up any tools or equipment using soap and water or according to the manufacturer’s instructions.
Things to Consider When Applying Chalk Paint over Oil Based Paint
Whenever you are starting your painting project, there are key things to consider. Have a look-
Surface preparation:
Proper surface preparation is crucial to ensure that the chalk paint adheres well to the oil-based paint. Make sure to clean the surface thoroughly and remove any dirt, dust, or debris before painting. Sand the surface lightly with a fine-grit sandpaper to create a surface that the chalk paint can adhere to more easily.
Compatibility:
Chalk paint and oil-based paint have different properties, so it’s important to make sure that they are compatible before applying. Some chalk paint brands may not adhere well to oil-based paint without a suitable primer. Therefore, it is recommended to use a high-quality primer that works with both types of paint to ensure proper adhesion.
Paint quality:
Choosing the right paint quality is important for achieving a durable and long-lasting finish. Use a high-quality chalk paint that is specifically designed for the surface you want to paint. High-quality chalk paint has better coverage, adheres better, and is more durable than lower-quality paint.
Drying time:
Allow each coat of paint to dry completely before applying the next coat. Follow the manufacturer’s instructions for drying time, which typically ranges from 1-4 hours depending on the brand and type of paint.
Sanding:
Sanding is an important step in the painting process. Sand the surface of the oil-based paint lightly before painting to create a surface that the chalk paint can adhere to more easily. Sand the surface of the chalk paint between coats to achieve a smooth and even finish. Use a fine-grit sandpaper and sand in the direction of the grain.
Finishing:
Once the final coat of paint is dry, apply a clear wax or a sealant to protect the chalk paint finish and improve its durability. Follow the manufacturer’s instructions for application and drying time. Wax can be buffed with a clean cloth to achieve a soft sheen, while a sealant provides a more durable finish.
What are the Advantages of Chalk Paint?
There are lots of mentionable advantages to applying chalk paint over oil-based paint. Let’s find out.
Cost-effective:
Applying chalk paint over oil-based paint can be a cost-effective way to update or refresh furniture or home decor items without having to completely strip and repaint the surface.
Time-saving:
Chalk paint is a quick-drying paint that requires minimal prep work, allowing for a faster painting process compared to traditional painting methods.
Unique finish:
Chalk paint creates a unique, matte finish that is not achievable with traditional paint. It can give a shabby chic, vintage or rustic look to your furniture or home decor.
Versatility:
Chalk paint can be used on a variety of surfaces, including wood, metal, ceramic, and even fabric. This makes it a versatile option for DIY projects.
Durability:
When applied correctly over a properly prepared oil-based paint surface and sealed with wax or a sealant, chalk paint can be very durable and long-lasting.
Easy to distress:
Chalk paint is easy to distress using sandpaper or a damp cloth, which can add to the vintage or shabby chic look that is popular in many DIY projects.
Easy to clean up:
Chalk paint is water-based, so it’s easy to clean up with soap and water, which makes it less messy than oil-based paints.
No need for priming:
Chalk paint often does not require a separate primer, which can save time and money on a project.
Low VOC:
Chalk paint is often low in volatile organic compounds (VOCs), making it a more environmentally friendly option compared to traditional paints.
Creative possibilities:
Chalk paint can be used in a variety of creative ways, such as stenciling, layering, and color blocking, which can result in unique and personalized projects.
What are the Disadvantages of Chalk Paint?
While there are several advantages to applying chalk paint over oil-based paint, there are also a few disadvantages to consider:
Adhesion issues:
Chalk paint may not adhere well to oil-based paint without proper surface preparation and a suitable primer. This can result in peeling or chipping of the paint over time.
Color bleed-through:
In some cases, the color of the oil-based paint may bleed through the chalk paint, particularly if the oil-based paint is a darker color. This can affect the appearance of the finished project.
Drying time:
Chalk paint requires adequate drying time between coats and before sealing with wax or a sealant. If this process is rushed, it can result in a less durable finish.
Limited color options:
Chalk paint is available in a range of colors, but the options may be more limited than with traditional paint.
No worries. Proper preparation, application, and finishing can help to minimize these issues.
Is Primer Required for Chalk Paint?
Chalk paint does not require a separate primer when applied to a clean, properly prepared surface. But it can be beneficial in some situations.
Chalk paint is formulated to adhere well to a variety of surfaces, including wood, metal, and even plastic, without the need for a primer.
However, if you’re painting over a surface that has been stained or has a high-gloss finish, it’s a good idea to prime the surface first to help the paint adhere better.
Additionally, if you’re looking to achieve a specific color or a brighter finish, using a tinted primer can help to enhance the vibrancy of the chalk paint. Some manufacturers also offer specific primers that are designed to work with their chalk paint, which can help to ensure the best possible adhesion and finish.
Is Chalk Paint Water Based or Oil Based?
Chalk paint is typically water-based, although some brands may contain small amounts of oil. Water-based chalk paint is made with a mixture of water, minerals, and pigments, and it dries quickly and has a low odor. This type of paint is easy to work with, as it is easy to clean up with soap and water, and it can be applied to most surfaces without the need for extensive preparation.
Additionally, water-based chalk paint is generally considered more environmentally friendly than oil-based paints, as it does not contain harmful solvents or chemicals. However, it is important to check the label of the specific brand of chalk paint you are using to determine whether it is water-based or contains oil.
Does Chalk Paint Peel Off?
Chalk paint is known for its excellent adhesion properties, which means it typically does not peel off. But it should be fully cured. However, if the surface was not properly cleaned and prepared before painting, or if the paint was applied too thickly, it may be more prone to peeling or flaking.
Apart from this, exposure to moisture or excessive wear and tear can also cause the paint to peel over time. To avoid issues with peeling, it’s important to follow proper surface preparation techniques and apply the paint in thin, even coats.
Is Chalk Paint Permanent?
Once chalk paint has fully cured, it can be considered permanent. The unique properties of chalk paint, such as its ability to adhere well to a variety of surfaces and its durability, help to ensure that it provides a long-lasting finish. However, like any paint, chalk paint can be subject to wear and tear over time, especially in high-traffic areas. Regular maintenance, such as dusting or gently wiping with a damp cloth, can help to prolong the life of the finish.
Final Words
There is no doubt it is possible to put chalk paint over oil-based paint. Just you have to consider some important factors before doing so. Proper surface preparation, including cleaning and sanding, is essential to ensure proper adhesion of the chalk paint. It’s also important to be aware of potential issues such as bleed-through and cracking, and to take steps to address these issues before painting.
Despite these challenges, many DIY enthusiasts choose to use chalk paint over oil-based paint due to its unique properties, including its versatility, durability, and ease of use. By following best practices and taking the necessary precautions, you can achieve a beautiful and long-lasting finish with chalk paint over oil-based paint.
If you’ve ever had the displeasure of dealing with rubberized paint, you know how stubborn and difficult it can be to remove. As a DIY enthusiast myself, I understand the frustration that comes with trying to strip away this coating from your surface. You may have tried scraping, sanding, or using harsh chemicals, but to no avail.
Don’t worry. Through my own experience and research, I’ve compiled some effective methods and tips to help you succeed on how to remove rubberized paint from your surfaces. To remove rubberized paint, you can use a combination of heat and scraping tools to soften and peel away the coating. Alternatively, you can use solvents such as acetone or paint stripper to dissolve the paint. Always wear protective gear and work in a well-ventilated area.
So, let’s dive in and learn how to tackle this challenging task together!
Is Rubberized Paint Removable?
Yes, rubberized paint is removable. However, it can be a challenging task due to its durability and resistance to solvents. The process of removing rubberized paint depends on various factors such as the surface it’s applied on, the age of the paint, and the type of rubberized paint.
One effective method to remove rubberized paint is by using heat and scraping tools. Heat softens the paint, making it easier to scrape away. You can use a heat gun or a hair dryer to heat the paint, but be careful not to overheat the surface or cause any damage. Once the paint is soft, use a scraper or putty knife to peel it away.
Another method is to use solvents such as acetone or paint stripper. Apply the solvent to the painted surface and allow it to penetrate for the recommended time. Then, use a scraper or wire brush to remove the softened paint.
It’s essential to wear protective gear, including gloves, eye protection, and a respirator, when working with rubberized paint and solvents. Work in a well-ventilated area and dispose of any waste properly. If you’re unsure about removing rubberized paint, it’s best to seek the help of a professional.
How to Remove Rubberized Paint?
With a little bit of elbow grease and patience, you can get rid of that unwanted paint and achieve the desired results. Here’s a detailed guide for removing rubberized paint:
Method 1: Using chemicals solvent
Materials:
- Protective gloves
- Goggles
- Mask
- Chemical solvent (such as acetone, mineral spirits, denatured alcohol, or paint thinner)
- Clean cloth
- Stiff-bristled brush or scraper
Step 1: Wearing Protective Gear
Put on protective gloves, goggles, and a mask to avoid skin and eye irritation and inhalation of fumes.
Step 2: Choosing Chemical
Choose a chemical solvent suitable for the type of rubberized paint and the surface it is applied to. Check the manufacturer’s instructions for the recommended solvent.
Step 3: Applying Solvent
Apply the solvent to a small inconspicuous area to test for any adverse reactions or discoloration. Apply the solvent to the rubberized paint with a clean cloth or brush.
Step 4: Loosing the Paint
Let it sit for a few minutes to loosen the paint.
Step 5: Scrubbing
Scrub the paint with a stiff-bristled brush or scraper, working from the edges towards the center of the affected area.
Step 6: Wiping
Wipe the area with a clean cloth and inspect for any remaining paint. Repeat the process as needed until the paint is completely removed.
Step 7: Rinsing
Rinse the area thoroughly with water to remove any residue from the solvent.
Step 8: Drying
Allow the surface to dry completely before applying any new paint or coating.
Method 2: Mechanical Abrasion
Materials:
- Protective gloves
- Goggles
- Mask
- Rotary tool with wire brush attachment or sandpaper
- Scraper
- Clean cloth
Step 1: Wearing Protective Gear
Put on protective gloves, goggles, and a mask to avoid skin and eye irritation and inhalation of dust.
Step 2: Abrasion
Use a rotary tool with a wire brush attachment, sandpaper, or a scraper to remove the rubberized paint.
Step 3: Removing Paint
Apply moderate pressure and work in a circular motion to remove the paint without damaging the underlying surface. Continue working until the paint is completely removed.
Step 4: Wiping
Wipe the area with a clean cloth and inspect for any remaining paint. Repeat the process as needed until the paint is completely removed.
Step 5: Rinsing
Rinse the area thoroughly with water to remove any debris or dust.
Step 6: Drying
Allow the surface to dry completely before applying any new paint or coating.
Method 3: Heat and Scraper
Materials:
- Protective gloves
- Goggles
- Mask
- Heat gun or hairdryer
- Scraper or putty knife
- Clean cloth
Step 1: Wearing Protective Gear
Put on protective gloves, goggles, and a mask to avoid skin and eye irritation and inhalation of fumes.
Step 2: Heating
Use a heat gun or a hairdryer to heat the rubberized paint until it softens and begins to bubble.
Step 3: Scraping
Use a scraper or putty knife to remove the softened paint, working from the edges towards the center of the affected area. Continue working until the paint is completely removed.
Step 4: Wiping
Wipe the area with a clean cloth and inspect for any remaining paint. Repeat the process as needed until the paint is completely removed.
Step 5: Cooling
Allow the surface to cool completely before applying any new paint or coating.
Step 6: Rinsing
Rinse the area thoroughly with water to remove any debris or dust.
Step 7: Drying
Allow the surface to dry completely before applying any new paint or coating.
Note: Always work in a well-ventilated area and follow the manufacturer’s instructions for the chemicals and tools used for removing rubberized paint. If the paint is on a surface that is sensitive.
Check This Video:
How to Remove Rubberized Paint from Clothes?
Removing rubberized paint from clothes can be a tricky task, but with the right materials and steps, it can be done. Hove a look at our effective process for removing rubberized paint from clothes:
Materials:
- Dull knife or spoon
- Clean cloth
- Rubbing alcohol or acetone
- Mild detergent
- Soft-bristled brush (optional)
Step 1:
Scrape off excess rubberized paint using a dull knife or spoon.
Step 2:
Lay the stained area of the garment flat on a clean cloth, with the stain facing down.
Step 3:
Pour some rubbing alcohol or acetone on the stained area, and gently dab the spot with a clean cloth.
Step 4:
If the stain is stubborn, use a soft-bristled brush to scrub the affected area gently.
Step 5:
Once the stain is gone, rinse the garment thoroughly in cold water to remove any remaining paint and cleaning solution.
Step 6:
Wash the garment in the washing machine using a mild detergent in cold water.
Step 7:
Check the garment before drying to ensure that the stain is completely gone. If the stain remains, repeat the process or try using a stain remover.
Step 8:
If the garment is delicate or made of a sensitive fabric, consider taking it to a professional cleaner for removal.
Remember to always test any cleaning solution on an inconspicuous area of the clothing before applying it to the stain to avoid causing further damage.
You Can Also Apply This Trick:
How Do You Remove Old Rubberized Paint?
Here is an easy method to remove old rubberized paint.
Materials:
- Putty knife or scraper
- Paint stripper
- Wire brush or scrub pad
- Protective gloves, goggles, and mask
- Detergent or degreaser
- Water
- Sandpaper (if needed)
- Primer (if needed)
Steps to Follow:
- Use a putty knife or scraper to remove as much of the paint as possible.
- Apply a paint stripper that is appropriate for the surface and type of paint. Be sure to follow the manufacturer’s instructions.
- Allow the paint stripper to sit on the surface for the recommended time.
- Use a wire brush or scrub pad to remove any remaining paint.
- Rinse the surface with water and allow it to dry completely.
- If necessary, sand the surface lightly to smooth out any remaining imperfections.
- Clean the surface with a degreaser or detergent and water to remove any leftover residue.
- Rinse the surface with water and allow it to dry completely.
- If necessary, apply a primer to the surface before repainting or refinishing.
What Chemical Removes Rubberized Paint?
Acetone or rubbing alcohol can be effective in removing rubberized paint from surfaces. These solvents work by breaking down the bond between the paint and the surface, making it easier to remove the paint.
However, it is important to use these chemicals with caution and follow all safety instructions and precautions, including wearing protective gloves, goggles, and a mask. It is also recommended to test the chemical on a small, inconspicuous area of the surface before applying it to the entire area.
Does Paint Thinner Remove Rubberized Paint?
Paint thinner can potentially remove rubberized paint, but it depends on the type of paint thinner and the specific formulation of the rubberized paint.
In general, rubberized paint is designed to be more resistant to solvents, so it may require a stronger solvent or paint remover to effectively remove it. It’s important to test a small inconspicuous area first and follow all safety precautions when using paint thinner or any type of solvent. It may be more effective to use mechanical methods such as sanding or scraping to remove rubberized paint.
Final Thoughts
Removing rubberized paint can be a frustrating and time-consuming task, but with patience and the right tools, it is possible to achieve a successful result. When dealing with stubborn rubberized paint, it’s important to try a few different methods and see what works best for your particular situation.
Personally, I have found that using a combination of a chemical paint stripper and a scraper can be effective, but it requires a lot of elbow grease and can be messy. Alternatively, sanding can be a good option for smaller areas, but it can be difficult to remove all the paint without damaging the underlying surface. The key is to take your time and be careful not to damage the surface you’re working on.
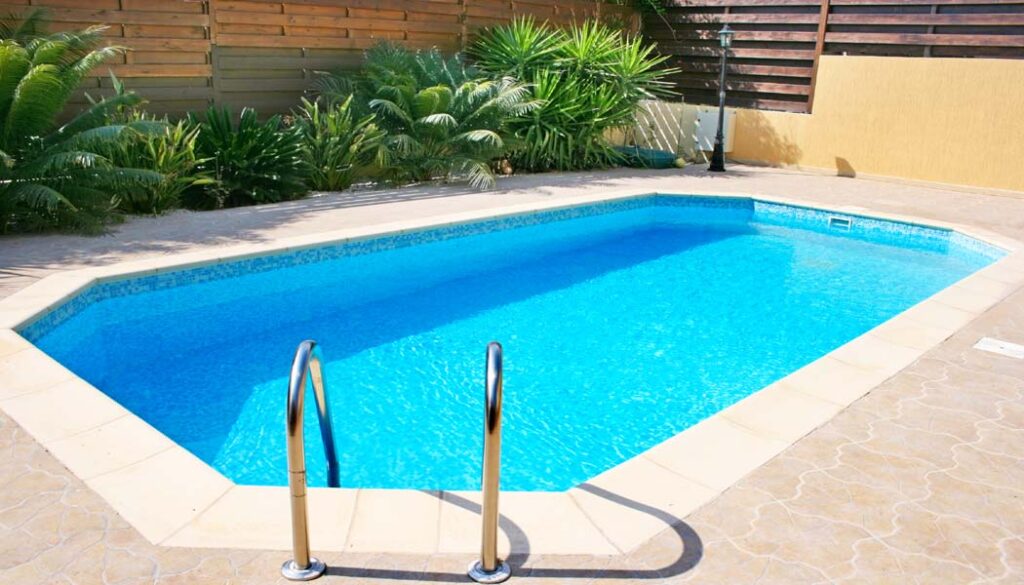
Are you a pool owner thinking of painting your pool and giving it a new look for summer? Sounds great! But how much does it cost to paint a pool?
The cost of painting a pool depends on various factors like the size of your pool, the type of paint you use, and whether you hire a professional or do it yourself. However, you can expect to pay anywhere from $250 to $1000 or more if you do it yourself and $1,000 to $5,000 or more if you decide to paint your pool with a skilled professional.
We have structured this blog to provide you with valuable cost analysis information that you need to know before painting your pool. Whether you’re looking to refresh the look of your pool, repair any damage, or simply extend its life, we’ve got you covered. So, let’s dive in!
Swimming Pool Paint Products: What to Choose
When it comes to pool painting, there are a variety of paint products available to suit different pool types and budgets. Here are some of the most common types of paint products and what they are best suited for:
- Epoxy pool paint: This is a durable and long-lasting paint that is perfect for concrete and gunite pools. It’s resistant to chemicals and UV rays, and it can last up to 8 years with proper maintenance.
- Acrylic pool paint: This paint is best suited for plaster, fiberglass, and previously painted pools. It’s affordable, easy to apply, and dries quickly. However, it’s not as durable as epoxy paint and may need to be reapplied every 2–3 years.
- Chlorinated rubber pool paint: This is a budget-friendly option that is easy to apply and perfect for concrete and plaster pools. It’s resistant to chemicals and UV rays, but it may need to be reapplied also every 2–3 years.
- Water-based pool paint: This paint is environmentally friendly, dries quickly, and can be used on various pool surfaces. However, it’s not as durable as other types of pool paint and may need to be reapplied more frequently.
When choosing a paint product for your pool, consider factors such as the type of surface you’re painting, your budget, and the durability you’re looking for.
What Can Increase the Cost of Painting Your Pool?
Before you dive into your pool painting project, it’s important to be aware of the factors that can increase the cost. Here are some common mistakes that can add to your pool painting expenses:
- Skipping the prep work: Proper surface preparation helps the paint adhere properly and last longer. Skipping this step can lead to paint failure, requiring costly touch-ups or even a complete redo.
- Neglecting repairs: Painting over cracks, leaks, or other damage without fixing them first can lead to further damage down the line. It’s best to address any issues before painting to avoid costly repairs later on.
- Using low-quality paint: While it may be tempting to choose a cheaper paint option to save money, it’s important to remember that cheaper paint may not last as long. Ultimately, this can require more frequent touch-ups or complete repaints.
- DIY mistakes: Though DIY pool painting can save you money, mistakes can be costly. Applying paint incorrectly or using the wrong paint type can result in damage to your pool and costly repairs.
- Hiring an inexperienced painter: Choosing a painter solely based on cost can lead to poor quality work and costly mistakes. Always research and choose a reputable, experienced pool painter to ensure the job is done right.
By avoiding these mistakes and taking the necessary steps, you can help keep the cost of your pool painting project under control.
What Is the Preparation Cost for Painting a Pool?
Proper preparation is essential to ensure a successful pool painting project that lasts for years. Here are some common preparation steps and the costs associated with them.
- Draining the pool: Before any surface preparation can take place, the pool must be drained. Draining the pool can typically cost around $100 to $300 depending on the size of the pool and the method used for draining.
- Surface preparation: This involves cleaning and prepping the pool surface by removing any debris, repairing any cracks or damage, and sanding the surface. The cost of surface preparation varies depending on the extent of the work required, but it can range from $500 to $1,500.
- Paint and materials: The cost of paint and materials varies depending on the type of paint chosen and the size of the pool. A typical 5-gallon bucket of pool paint can cost between $150 and $300, and additional materials such as brushes, rollers, and tape can add up to $100 to $200.
- Labor: If you decide to hire a professional painter, labor costs can add up quickly. The cost of labor varies depending on the painter’s experience, location, and the size of the pool, but you can expect to pay anywhere from $1,500 to $5,000 for professional pool painting services.
So, the preparation cost for painting a pool can range from a few hundred to several thousand dollars. However, the preparation cost for painting a pool can vary depending on where you live. Labor and material costs can vary widely based on the location and availability of supplies, as well as local regulations and requirements.
How Much Does It Cost to Paint a Pool?
Pool painting costs vary depending on several factors, like the size, the surface, the type of paint, and whether you do it yourself or hire someone. In general, the cost to paint a pool can range from a few hundred to several thousand dollars.
We are breaking down the factors separately so that you can easily get an overview of the cost of painting a pool.
The size of the pool
The size of the pool is one of the main factors that determine the cost of painting. A larger pool will require more paint and materials, as well as more labor to complete the job. Considering the size of your pool, you can take a look at this cost analysis information to get an idea of how much it’ll cost to paint it.
- Small pools (less than 20,000 gallons):
DIY cost range – $250-$500; Professional cost range – $1,500-$2,500
- Medium pools (20,000-40,000 gallons):
DIY cost range – $500-$750; Professional cost range – $2,500-$3,500
- Large pools (over 40,000 gallons):
DIY cost range – $750-$1,000; Professional cost range – $3,500-$5,000
To sum it up, for a DIY project, the cost of paint and materials can range from around $250 to $1,000 for an average-sized pool. This includes the cost of the paint, primer, brushes, rollers, and other necessary materials.
On the other hand, if you choose to hire a professional painter, the cost can be significantly higher. On average, you can expect to pay anywhere from $1,500 to $5,000 for professional pool painting services. This cost includes labor, materials, and any necessary preparation work.
Condition of the surface
The condition of the surface is another factor that can affect the cost. If the surface is in good condition and only needs a touch-up, the cost will be lower than if the surface requires significant repairs or extensive preparation work. Take a look at this cost range so that you can get an idea about your pool’s preparation cost.
- Good condition (minor touch-ups):
DIY cost range – $250-$750; Professional cost range – $1,500-$3,000
- Moderate condition (some repairs and preparation work needed):
DIY cost range – $750-$1,000; Professional cost range – $3,000-$4,000
- Poor condition (significant repairs and extensive preparation work needed):
DIY cost range – $1,000-$1,500; Professional cost range – $4,000-$5,000
Type of paint used
The type of paint used can also impact the cost. There are different types of pool paint available, such as epoxy, acrylic, and rubber-based paints. Epoxy paint is generally the most expensive, but it’s also the most durable and long-lasting.
Acrylic paint is less expensive, but it may not last as long as epoxy paint. Rubber-based paint is the least expensive, but also the least durable. You can get an idea of how much paint will cost from the below cost range:
- Epoxy paint:
DIY cost range – $500-$1,000; Professional cost range – $2,500-$5,000
- Acrylic paint:
DIY cost range – $250-$500; Professional cost range – $1,500-$3,000
- Rubber-based paint:
DIY cost range – $250-$500; Professional cost range – $1,500-$2,500
The cost of painting your pool may not be exactly the same as what we’ve discussed here, but it sure can give you an idea of what to expect. Just remember that the final cost will depend on your specific situation, but this guide can help you plan and budget accordingly.
Should I Hire a Professional Painter?
It can be tough to decide whether to hire a professional painter to paint your pool or do it yourself. Though hiring a professional can ensure high-quality work and save you time and effort, it can also be more expensive than doing it yourself.
Ultimately, the decision depends on your budget, the size and condition of your pool, and your own experience and comfort level with DIY projects. If you’re not confident in your ability to paint your pool, or you’re short on time, hiring a professional is likely the better option.
Can I Paint a Pool Myself?
Yes, you can paint your pool yourself, but it’s important to note that it’s not an easy task. Painting a pool requires careful preparation, specialized tools and materials, and knowledge of the proper techniques to ensure a high-quality and long-lasting result.
While painting your pool yourself can save you money on labor costs, it can be a time-consuming and challenging task that may not result in the professional finish you desire. So, before deciding to paint your pool yourself, consider your level of experience with DIY projects, the time you have on hand, and the necessary tools and materials to finish the project.
How Much Does It Cost to Paint a Pool by Professional?
The cost of hiring a professional to paint your pool can vary depending on several factors, including the size and condition of your pool, the type of paint used, and the location and experience level of the painter. Some painters may charge by the hour, while others may charge a flat rate based on the size of your pool.
Additional costs may include preparation, repairs, and any necessary cleaning or maintenance.On average, the cost to paint a pool with a professional can range from $1,000 to $5,000 or more.
DIY Pool Painting: Pros and Cons
Here are the pros and cons of DIY pool painting.
Pros:
- Potential cost savings by avoiding labor costs.
- More control over the timeline and process.
- Personal satisfaction and sense of accomplishment.
- Ability to customize the color and finish of the pool.
Cons:
- Requires significant time and effort, including preparation and application.
- Lack of experience and knowledge may result in mistakes and lower-quality finish.
- Limited access to specialized tools and materials used by professionals.
- Potential safety risks from handling chemicals and working in wet environments.
Professional Pool Paint: Pros and Cons
Here are the pros and cons of getting your pool painted by a professional.
Pros:
- Professional expertise and experience can result in a higher-quality finish.
- Access to specialized tools and materials for the job.
- Reduced risk of mistakes or errors during the process.
- Potentially faster completion time.
Cons:
- Higher costs due to labor and materials.
- Less control over the timeline and process.
- May require scheduling around the availability of the painter.
Is Painting Your Pool a Good Idea?
Painting your pool can be a good idea for several reasons.
- Aesthetics: Over time, the original finish of a pool can become faded, chipped, or discolored. Painting your pool can help to restore its appearance and make it look new again.
- Protection: Pool paint can protect the surface of your pool from damage caused by exposure to the sun, harsh chemicals, and normal wear and tear.
- Cost-effective: In some cases, painting your pool can be a cost-effective alternative to resurfacing or replacing it entirely.
- Customization: Painting your pool allows you to choose the color and finish that best fits your style and preferences.
How Long Does It Take to Paint a Pool?
The time it takes to paint a pool varies depending on factors like size, condition of the surface, and type of paint used. Generally, it can take a few days to a week or more, including preparation and painting. Some types of paint may require longer drying times.
Other factors, such as weather and the availability of professional painters, can also impact the timeline. Keep in mind that professional painters with experience in pool painting can typically complete the job more quickly and efficiently than a DIY project.
How Long Will Pool Paint Last?
The lifespan of pool paint varies depending on several factors, including the type and quality of paint used, the condition of the pool surface, and the amount of wear and tear the pool experiences. Typically, good quality pool paint can last anywhere from 3 to 7 years before it needs to be recoated.
Epoxy and rubber-based pool paints tend to last longer than other types of paint, while acrylic-based paints may require more frequent re-coating. Proper pool maintenance, including regular cleaning and chemical balancing, can also help extend the lifespan of pool paint.
How Often Should a Swimming Pool Be Painted?
The frequency with which a swimming pool needs to be painted depends a lot on the type and quality of the paint used. Generally, pool paint needs to be recoated every 3–7 years.
However, if the pool experiences heavy use or chemical imbalances, it may need to be recoated more frequently. Regular pool maintenance, such as cleaning and chemical balancing, can help extend the lifespan of pool paint and reduce the frequency of recoating.
Final Thoughts
Painting your pool can be a cost-effective way to improve its appearance and extend its lifespan. The cost can vary depending on different factors. While DIY painting can save money, it may also require more time, effort, and skill than hiring a professional.
Ultimately, the decision to paint your pool should be based on your circumstances and preferences. With proper maintenance and care, a painted pool can provide years of enjoyment for you and your family.
Repainting your old or worn-out bike is a great way to give it a fresh, new look. If you’re thinking about repainting your bike, you might be wondering, how much does it cost to paint a bike.
The answer depends on several factors, including whether you choose to do it yourself or hire a professional, the quality of the materials you use, and the complexity of the job. In general, however, you can expect to spend anywhere from $50 to $1,000 to paint your bike.
But as we’ll discuss in-depth in this article, there are many factors that can impact the cost of painting a bike. Whether you’re a seasoned biker or a casual rider, this information will help you decide whether to tackle the project yourself or seek the services of a professional bike painter.
Why to Repaint a Bike?
Repainting your bike is an excellent way to amp up an old, worn-out frame and give it a beautiful look. Here are some reasons why you might consider repainting your bike:
- Restore the appearance of an old or worn-out bike: Over time, the paint on a bike can become faded, chipped, or scratched, giving the bike a tired and unappealing appearance. Repainting the bike can restore its original luster and make it look new again.
- Protect the frame from rust and corrosion: The paint on a bike not only adds to its appearance but also serves as a protective layer that shields the frame from rust and corrosion. If the paint becomes damaged or worn, the frame is more vulnerable to damage from moisture and other elements.
- Customize your bike to your liking: Repainting your bike is an opportunity to express your individual style and preferences. You can choose from a wide range of colors and finishes to create a bike that’s uniquely your own.
- Increase the resale value of your bike: If you plan to sell your bike in the future, a fresh paint job can significantly increase its resale value. A well-maintained bike with an attractive paint job is much more appealing to potential buyers.
- Repair damage to the frame: In some cases, repainting a bike may be necessary to repair damage to the frame, such as rust or scratches. By sanding and repainting the affected area, you can restore the integrity and appearance of the frame.
How Much Does It Cost to Paint a Bike?
The cost of painting a bike can vary depending on several factors. Here are some of the main factors that impact the cost:
- Size of the Bike: The larger the bike, the more paint and preparation work will be required, which can increase the cost.
- Paint Used: The type and quality of paint used will impact the cost. High-quality paint will be more expensive, but will also provide a better finish and be more durable.
- Preparation Cost: Proper preparation is essential for a high-quality paint job. The cost of preparation can include sanding, filling in scratches or dents, and masking off areas that shouldn’t be painted.
- DIY vs. Professional Labor Cost: Painting a bike yourself can save money on labor costs, but it requires more time and effort. Professional bike painters have the experience and equipment necessary to provide a high-quality finish, but their services come at a higher cost.
Based on these factors, the cost of painting a bike can range from around $50 to $1,000 or more. Here is a breakdown of the estimated cost range for each factor:
- Size of the Bike: Small bikes (such as children’s bikes) can cost around $50-$100, while larger bikes (such as road bikes or mountain bikes) can cost $100-$300 or more.
- Paint Used: Low-quality spray paint can be as cheap as $5 per can, while high-quality, custom-mixed paint can cost $100 or more per quart.
- Preparation Cost: Depending on the condition of the bike, preparation work can add an additional $50-$200 or more to the cost.
- DIY vs. Professional Labor Cost: If you choose to paint the bike yourself, you’ll save money on labor costs, but will need to invest time and effort. If you opt for professional painting, the cost can range from $200-$1,000 or more, depending on the complexity of the job and the experience of the painter.
To sum it up, the cost of painting a bike can vary widely depending on the size of the frame and the type of paint used. Other factors like the preparation work required, and whether you decide to do it yourself or hire a professional, can also impact the cost.
Based on these factors, you can expect to pay anywhere from $50 to $1,000 or more for a high-quality paint job on your bike.
Can I Paint a Bike Myself?
Yes, you can definitely paint a bike yourself. Here are some of the pros and cons to consider before taking on this DIY project:
Pros:
- Cost Savings: One of the biggest advantages of painting a bike yourself is that it can save you money on labor costs. You only need to purchase the paint and any necessary supplies, which can be significantly cheaper than hiring a professional painter.
- Creative Control: Painting your own bike gives you the opportunity to be creative and customize your bike’s appearance. You can choose your own colors and designs and have the satisfaction of seeing your own work on display.
- Learning Experience: Painting a bike can be a fun and rewarding learning experience. You’ll learn new skills and gain a sense of accomplishment by completing the project on your own.
Cons:
- Time-Consuming: Painting a bike requires a significant amount of time and effort, particularly if you’re new to the process. You’ll need to set aside several hours (if not days) to complete the project properly.
- Skill Level: Painting a bike can be challenging and it requires a certain level of skill to achieve a high-quality finish. If you’re not confident in your abilities, you may end up with an uneven or unprofessional-looking paint job.
- Equipment: Painting a bike requires many pieces of equipment, including sandpaper, primer, paint, and a spray gun or brush. If you don’t have access to these tools, you’ll need to purchase or rent them, which can add to the overall cost of the project.
Painting a bike yourself can be a cost-effective and rewarding DIY project, but it requires a significant amount of time and effort. Before taking on this project, it’s important to consider your skill level, available equipment, and the potential for mistakes or uneven finishes. If you’re not confident in your abilities, it may be best to leave the job to a professional.
How Much Does DIY Bike Painting Cost?
The cost of DIY bike painting can vary widely depending on the size of the bike, the quality of the paint, and the equipment and supplies needed to complete the job. Here are some cost factors to consider when painting your bike yourself:
- Paint: The price of the paint can vary depending on the quality and brand you choose, with a can of high-quality paint ranging from $20 to $50 or more.
- Equipment and Supplies: In addition to paint, you’ll need various equipment such as primer, sandpaper, and a spray gun or paintbrushes. These items can be purchased individually or in a kit, which can cost around $50 to $100.
- Preparation: Preparation can involve sanding, priming, repairing minor imperfections, etc. The cost of these supplies can range from $10 to $50 or more.
So, the cost of DIY bike painting can range from $50 to $200 or more, depending on the factors discussed above.
Cost of Professional Painting of Your Bike
The cost of professional bike painting can vary based on the size of the frame, the type of paint and finish you want to use, the location of the painter, preparation, and labor. Larger bikes or custom paint jobs with multiple colors and high-gloss finishes tend to cost more.
Skilled painters can typically charge between $50 to $100 per hour, and the overall cost can range from $200 to $2,000 or more. It’s best to get a detailed quote from a professional painter to understand the total cost and scope of work involved.
Why Is Professional Painting So Expensive?
Professional bike painting can be expensive due to the skill and expertise required to achieve a high-quality finish. This involves using specialized equipment and materials, as well as a time-consuming preparation process for more complex paint jobs. Additionally, a skilled painter will often charge a higher hourly rate, and there may be a waiting list or high demand for their services.
However, many bike owners consider the cost worth it to achieve a custom, durable, and long-lasting paint job. Professional painters take extra steps to ensure the paint adheres properly and doesn’t peel or chip over time, resulting in an enhanced appearance and increased value of the bike.
How Much Does It Cost to Powder Coat a Bike?
Powder coating a bike involves applying a dry powder that is baked to create a durable finish. The cost can vary based on factors such as the size of the frame, number of parts, color, and finish.
Typically, coating a bike frame can cost between $80 to $250, while coating individual parts can cost between $15 to $75 per part. Powder coating is more environmentally friendly and durable than traditional wet painting, but can be more expensive.
Final Thoughts
The cost of painting a bike can vary depending on several factors. While DIY painting can be a cost-effective option, it requires a significant investment of time and effort, and the results may not be as good as those achieved by a professional painter.
Professional bike painting, on the other hand, can be expensive due to the skill, expertise, equipment, materials, and labor required achieving a high-quality finish. However, many bike owners consider the cost worth it to achieve a custom, durable, and long-lasting paint job that can enhance the appearance and value of their bike.
So, considering all of that, we say the price of painting your bike can typically fall between $50 and $1,000.
Are you tired of the color of your car or just want to freshen it up? Perhaps you’ve been thinking about whether can you paint over existing auto paint. Well, the good news is that it is possible to paint over existing auto paint. Just prepare the surface properly and choose the right type of paint. Sanding, cleaning, and using a primer can help ensure a successful outcome.
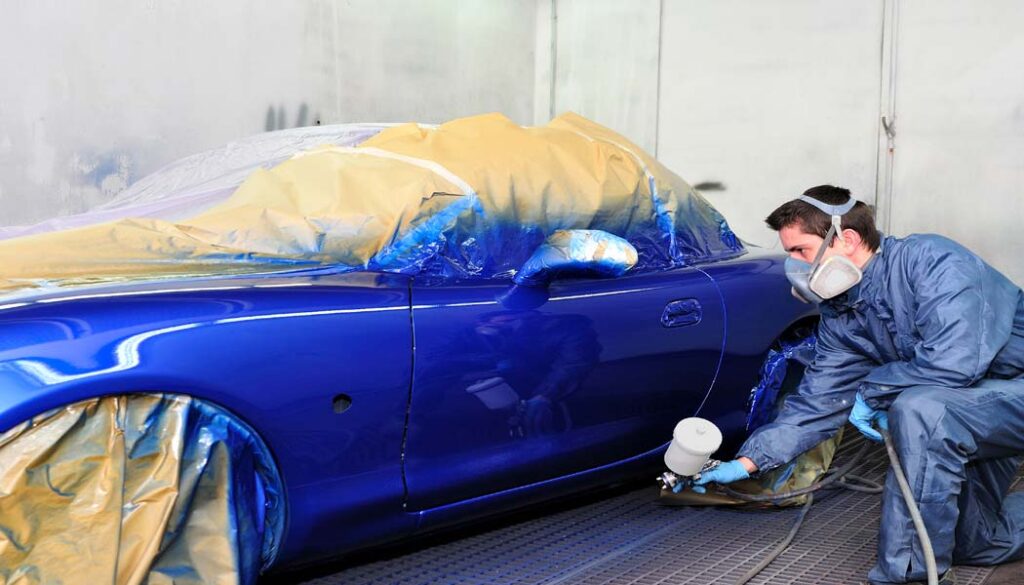
Whether you’re looking to add a new color, fix a few scratches, or simply give your car a facelift, read on to learn more about this process and how to do it right.
Can You Paint Over Existing Auto Paint?
Yes, it’s possible to paint over existing auto paint. Just make sure to properly prepare the surface and choose a paint that is specially formulated for auto paint, and primer to ensure a smooth, even finish that will last. In some cases, it may be necessary to remove the existing paint before applying new paint to ensure the best results.
You may wonder why I should paint over existing auto paint. Okay, there are numerous motives why you might want to do this. One of the most common reasons is to update the look of your car. Painting over the existing paint can give it a fresh, new look.
The new paint covers up scratches and other imperfections. If your car has scratches or other imperfections in the existing paint, painting over it can help to conceal these flaws.
Moreover, adding a layer of new can help to protect it from further damage, such as rust or fading due to exposure to the elements.
How to Paint a Car over Existing Auto Paint?
Painting a car over existing auto paint can be a cost-effective way to give your vehicle a new look without the expense of a full repaint. Here is a step-by-step process for painting a car over existing auto paint:
Materials needed:
- Automotive primer
- Automotive paint
- Clear coat
- Sandpaper (1500 grit, 2000 grit)
- Masking tape
- Drop cloth or plastic sheeting
- Paint sprayer or spray can
- buffing pad and compound
Step 1: Prep the Area to be painted
Prepping the area to be painted is essential for a successful paint job. This involves covering any parts of the car that will not be painted with masking tape and drop cloth or plastic sheeting. This includes areas such as windows, trim, and wheels.
Step 2: Clean the car thoroughly
Before painting over the existing auto paint, it’s important to clean the car thoroughly to remove any dirt, grime, or grease. Wash the car with soap and water, and then use a wax and grease remover to get rid of any remaining residue.
Step 3: Sand the existing paint
Using 1500 grit sandpaper, sand the entire surface of the car that will be painted. This will help the primer adhere better to the surface. After sanding, rinse the car with water and dry it completely.
Step 4: Apply the primer
Apply a coat of automotive primer to the sanded surface of the car. The primer will help the paint adhere better to the surface and will also help to fill in any imperfections in the existing paint. Let the primer dry completely before moving on to the next step.
Step 5: Sand the primer
Using 2000 grit sandpaper, sand the surface of the primer until it is smooth and even. Rinse the car with water and dry it completely before moving on to the next step.
Step 6: Apply the paint
Using a paint sprayer or spray can, apply the automotive paint to the surface of the car. Apply the paint in thin, even coats, and allow each coat to dry completely before applying the next. Depending on the color and finish of the existing paint, you may need to apply multiple coats of paint to achieve the desired finish.
Step 7: Apply the clear coat
Once the final coat of paint is dry, apply a clear coat over the entire surface of the car. This will protect the paint and give it a glossy finish. Apply the clear coat in thin, even coats, and allow each coat to dry completely before applying the next.
Step 8: Let the paint cure
After applying the clear coat, let the paint cure for at least 24 hours before driving the car. This will give the paint time to fully harden and set.
Step 9: Buff the area
Once the clear coat is dry, use a buffing pad and compound to buff the area in a circular pattern. This will help remove any imperfections and create a glossy finish. Be careful not to buff too aggressively, as this can damage the paint.
Step 10: Remove the masking tape and drop cloth
Once the paint has cured, remove the masking tape and drop cloth from the car. Your newly painted car is now ready to hit the road!
Remember, auto painting can be a complex process that requires attention to detail and patience. If you’re not comfortable doing it yourself, it’s best to seek the help of a professional.
Things to Consider When Painting Over an Existing Auto Paint
Before beginning a new paint job over existing auto paint, there are a few considerable things to keep in mind. Have a look.
The condition of the existing paint:
It’s important to assess the condition of the existing paint before starting the new paint job. If the existing paint is in good condition, you may only need to sand it lightly and clean it thoroughly before painting. However, if the existing paint is damaged, chipped, or peeling, it will need to be removed completely before painting.
The type of paint currently on the car:
The type of paint currently on the car will determine the type of primer and paint that should be used. Enamel, lacquer, and urethane are the three most common types of automotive paint. If you’re not sure what type of paint is on your car, consult with an auto paint specialist or use a paint test kit.
Color matching:
If you’re painting over an existing paint job, it’s important to ensure that the new paint matches the existing color of the car. To do this, you can take a small sample of the existing paint to a paint supplier or use a color matching tool. This step is critical to ensure that the new paint blends seamlessly with the old paint.
Surface preparation:
Proper surface preparation is key to a successful paint job. The surface must be cleaned thoroughly and sanded lightly to create a smooth, even surface. Any rust, dents, or scratches must be repaired before painting.
Type of paint application:
There are two main ways to apply automotive paint: with a paint sprayer or spray cans. A paint sprayer is the best option for large areas or for those who are experienced with painting. Spray cans are better for smaller areas or for those who are not as experienced with painting. Both methods have their pros and cons, so choose the method that suits your needs best.
Quality of paint:
High-quality automotive paint is essential for a long-lasting, durable paint job. Low-quality paint may not adhere properly to the surface or may fade quickly over time. Be sure to use a reputable brand of paint that is designed specifically for automotive use.
Clear coat application:
Applying a clear coat over the paint will protect the paint and give it a glossy finish. Make sure to apply the clear coat evenly and allow each coat to dry completely before applying the next. Clear coat is typically applied in two to three coats.
Curing time:
After painting, it’s important to let the paint cure for the recommended amount of time before driving the car. This will give the paint time to fully harden and set. The curing time may vary depending on the type of paint used, the temperature, and humidity.
Professional help:
If you’re not experienced with auto painting or if the paint job is complicated, it may be best to seek professional help. A professional auto painter will have the tools, equipment, and experience needed to ensure a quality paint job. This can save you time, money, and frustration in the long run.
Do You Need to Remove Old Car Paint before Repainting?
It depends on the condition of the existing paint and the type of new paint being applied.
In some cases, it may be possible to paint over the existing paint as long as it’s in good condition and properly prepped.
Nevertheless, if the old paint is chipping, cracking, or peeling, it’s generally recommended to remove it before applying a new coat of paint.
Removing the old paint will provide a clean, smooth surface for the new paint to adhere to, improving the overall finish and durability of the new paint job.
Do You Need to Primer Over Old Automotive Paint?
It’s generally suggested to use a primer when painting over old automotive paint, especially if the existing paint is in poor condition or has been sanded down to bare metal.
The primer provides a smooth, even surface for the new paint to adhere to, helps to prevent rust and corrosion, and can improve the overall durability of the paint job.
Using a high-quality automotive primer also ensures that the paint will have a consistent finish and color.
Apart from this, using a primer can help to cover up any imperfections or blemishes in the old paint, giving the new paint job a professional look. In short, while it’s possible to paint over old automotive paint without a primer, using one will generally lead to better results.
Can You Just Primer Over Old Paint?
Though you can apply primer over old paint, it’s not always the best as a long-term solution. The primer is designed to create a smooth, even surface for the new paint to adhere to, but it won’t be able to fill in any cracks, chips, or other imperfections in the old paint
If the old paint is in good condition, with no chipping, flaking or other damage, and the new paint is similar in color and type to the old paint, it may be possible to apply primer directly over the old paint.
But if you found the old paint is in poor condition, continue to degrade, which can cause the new paint to crack, peel, or flake off, it’s recommended to remove it before applying new primer and paint. This can involve sanding or stripping the old paint to create a clean surface for the new primer and paint to adhere to.
So, it’s best to assess the condition of the old paint and the surface being painted, and follow the manufacturer’s instructions for the specific primer and paint being used.
Can You Paint Over Paint Without Sanding?
It’s technically possible to paint over existing paint without sanding. But we highly recommend sanding the surface if you want to achieve a high-quality, long-lasting finish.
Sanding helps to create a smooth surface to adhere to the new paint. It can improve the overall durability and appearance of the new paint job.
Without sanding, the new paint may not adhere properly, which can cause it to peel or chip off over time.
While it may seem like a shortcut to skip the sanding step, taking the time to properly prep the surface will lead to a better end result.
How Many Coats of Primer Over Old Paint?
In most cases, two coats of primer should be sufficient to create a smooth, even surface for the new paint to adhere to.
Even though the number of coats of primer needed over old paint will depend on the condition of the old paint and the type of primer being used.
If the old paint is in poor condition or has been sanded down to bare metal, additional coats of primer may be needed to ensure a consistent finish.
It’s important to follow the manufacturer’s instructions for the specific primer being used, as some primers may require more or fewer coats depending on the surface being painted.
Final Words
To sum it up, painting over existing auto paint can be a practical solution to enhance the appearance of your car, cover up imperfections, and protect the existing paint.
It is important to approach the task with caution and care, as the quality of the finished product will depend largely on how well the surface is prepared and the appropriate materials are used.
Speaking from personal experience, taking the time to properly assess the condition of the existing paint, choose the right type of primer and paint, and prepare the surface thoroughly can make a huge difference in the final outcome.
With a bit of patience and effort, painting over existing auto paint can be a fun and rewarding way to breathe new life into your vehicle.
Spray paint is a popular choice for bike painting due to its efficiency and ability to cover large areas quickly. However, you might not have access to spray paint at the moment, or simply you prefer a different approach. Either way, it’s fine.
So, you want to know how to paint a bike without spray paint?
First, prepare the bike surface, then apply a primer. Once the primer is dry, apply suitable paint on the bike frame using a paintbrush. And lastly, to preserve your work, apply a clear coat.

It was a summary of just one method. In this article, we’ll explore more methods that are suitable for bike painting, as well as the best alternatives to spray paint. So grab your paintbrushes and let’s get started!
What Kind of Paint Do You Use to Paint a Bike?
When it comes to painting a bike, choosing the right kind of paint is important to ensure the best results. Here are some of the most common types of paint that are used for bike painting:
- Acrylic Paint
Acrylic paint is a popular choice for bike painting as it is water-based and dries quickly. It is also flexible and durable, making it suitable for bikes that are exposed to daily wear and tear. Acrylic paint is easy to apply and can be used on a variety of surfaces, including metal.
- Enamel Paint
Enamel paint is an oil-based paint that dries to a hard and glossy finish. It is durable and scratch-resistant, making it ideal for bikes that are frequently used. Enamel paint is also resistant to fading and weathering, making it suitable for outdoor use. However, enamel paint takes longer to dry and requires solvents for cleaning.
- Powder Coat Paint
Powder coat paint is a type of paint that is applied electrostatically and then cured with heat. It forms a hard and durable surface that is resistant to chipping, fading, and scratching. Powder coat paint is popular for bike frames, as it is long-lasting and can be customized with a range of colors.
When choosing a paint for bike painting, it’s important to consider the durability and flexibility of the paint. Plus, you need to make sure the paint can withstand weathering and daily wear and tear.
What Are the Best Alternatives to Spray Paint for Bike Painting?
Though spray paint is a popular choice for bike painting, several alternatives can also yield great results. Here are some of the best alternatives to spray paint for bike painting:
Brush-on Paint
Brush-on paint is a good alternative to spray paint, especially if you want to have more control over the application process. Plus, these paints come in a wide range of colors and finishes. There are various affordable brush-on paint options available such as acrylic paint, enamel paint, oil paint, etc.
Some notable benefits of using brush-on paint:
- Allows for greater control over the application process
- Can be used to achieve a traditional paint finish and precise details
- This method is more beginner-friendly
Powder Coat Paint
Powder coat paint is a durable alternative to spray paint that is applied electrostatically and heat-cured. Powder coat paint is a suitable option for bike painting due to its durability and versatility in terms of color customization.
Some notable benefits of using powder coat paint:
- Provides a durable and long-lasting finish
- Resistant to chipping, fading, and scratching
- Can be customized with a variety of colors and textures
Epoxy Paint
Epoxy paint is a two-part paint that forms a hard and durable surface when cured. It is resistant to chemicals, abrasion, and water, making it a good choice for bikes that are exposed to harsh conditions. Epoxy paint is available in a range of colors and finishes, and can be applied using a brush or roller.
Some notable benefits of using epoxy paint:
- Forms a hard and durable surface that resists daily wear and tear
- Can be applied to a variety of surfaces, including metal
Vinyl Wrap
A vinyl wrap can be a good alternative to paint for those who want a quick and easy way to change the color of their bike. Vinyl wrap is a thin, adhesive-backed material that can be applied to the bike using heat.
Some notable benefits of using vinyl wrap:
- Provides a quick and easy way to change the color or design
- Can be easily removed without damaging the bike’s original paint
- Offers a variety of colors and finishes to choose from
Each of these alternatives has its unique qualities and benefits that make them a good choice for bike painting.
How to Paint a Bike without Spray Paint?
If you want to paint your bike, and you don’t have access to spray paint, no worries! You still have plenty of options available to go with. Here are some easy methods that you can follow to paint your bike without spray paint.
Using Brush-on Paint:
This is probably the easiest and most familiar method for painting stuff. You can use your traditional brush and roller painting skills to paint your bike.
Here are the supplies you will need for this method:
- Primer paint
- Paint brushes (different sizes)
- Paint thinner or mineral spirits (for cleanup)
- Sandpaper (various grits)
- Masking tape
- Paint (acrylic, enamel, or oil-based)
- A tack cloth
Step 1: Prepare the bike surface
Use medium-grit sandpaper to remove any rust, dirt, or previous paint from the bike frame. Use fine-grit sandpaper to smooth out the surface. Wipe down the frame with a tack cloth or a clean cloth. Cover the areas with masking tape where you don’t want to apply the paint.
Step 2: Apply primer
Start by evenly applying a primer to the bike frame. For application and drying time, follow the manufacturer’s instructions. Once you are done, allow it to dry completely.
Step 3: Apply paint
Apply the brush-on paint to the bike frame using a paintbrush or roller. You may need multiple coats, so always allow the previous coat to dry properly before proceeding to the next one. For best results, follow the manufacturer’s instructions for application and drying times. Acrylic, enamel, and oil-based paints are suitable options for brush-on-bike painting.
Step 4: Apply a clear coat (optional)
If you want to protect the paint and add shine to the surface, apply a clear coat. Lastly, allow it to dry completely. For drying time, follow the manufacturer’s instructions.
Using Epoxy Paint:
For this method, you will need:
- Epoxy paint kit (includes resin and hardener)
- Paint brushes or rollers
- Sandpaper (various grits)
- Tack cloth
- Masking tape
- Drop cloths or plastic sheeting
Step 1: Prepare the bike surface
First, lay a drop cloth so that you can easily clean the space after painting. To prepare the bike frame for painting, start by using medium-grit sandpaper to remove any rust, dirt, or previous paint. Next, use fine-grit sandpaper to smooth out the surface.
Use a tack cloth or a clean cloth to wipe down the frame and remove any remaining dust or debris. Finally, cover the areas with masking tape where you don’t want to apply the paint.
Step 2: Apply primer
Primer helps the paint adhere better to the surface, prevents corrosion, and provides a smooth and even base for the topcoat. To begin the painting process, apply a coat of primer to the bike frame. Once you are done, allow the primer to dry completely before proceeding to the next step.
Step 3: Apply epoxy paint
Apply the epoxy paint to the bike frame using a paintbrush or roller. If you need multiple coats, make sure the previous coat is properly dry before applying a new coat of paint. For best results, follow the manufacturer’s instructions for application and drying times.
Step 4: Apply a clear coat (optional)
It’s important to apply a clear coat to protect the paint and add shine to the surface. A clear coat creates a protective barrier that shields the paint from UV rays, dirt, and scratches. Finally, allow the clear coat to dry completely before using the bike.
Using Vinyl Wrap:
This is another effective alternative to spray paint. And you can get amazing results without getting your hands dirty with paint.
Here are the supplies you will need for this method:
- Vinyl wrap
- Heat gun or hair dryer
- Squeegee
- Utility knife
- Rubbing alcohol
- Clean cloth or towel
Step 1: Prepare the bike surface
Clean the bike frame thoroughly to remove any dirt or debris.
Step 2: Cut the vinyl wrap
Cut the vinyl wrap to the appropriate size and shape for the bike frame.
Step 3: Apply the vinyl wrap
Apply the vinyl wrap to the bike frame, smoothing out any bubbles or wrinkles as you go. Use a heat gun or hair dryer to help stretch the vinyl and conform it to the bike frame.
Step 4: Trim the edges
Use a sharp knife to trim the excess vinyl from the edges of the bike frame.
Keep in mind that each method has its advantages and disadvantages, so it’s important to choose the one that suits your needs and experience level the best.
Can You Paint a Bike Without Sanding?
Technically, you can paint a bike without sanding. However, sanding plays a crucial role in the painting process, as it helps remove any imperfections on the surface and creates a smooth base for the paint to adhere to. Skipping the sanding step can lead to unsatisfactory results, including peeling, chipping, and uneven coverage.
However, if you’re short on time and unable to sand the entire bike frame, you can still achieve satisfactory results by following these tips:
- Clean the surface of the bike frame thoroughly with soap and water to remove any dirt, grease, or debris.
- Use a degreaser to remove any stubborn stains or contaminants.
- Apply a self-etching primer to the bike frame, which is designed to bond with bare metal and other surfaces without sanding.
- Once the primer has dried, apply the paint in thin and even coats, allowing each coat to dry completely before applying the next.
Though you may get somewhat satisfactory results, keep in mind that sanding will always provide the best results and ensure the paint adheres to the surface properly.
Can You Paint a Bike by Hand?
Yes, you can paint a bike by hand. However, it may take longer and require more effort compared to using spray paint or a paint gun. This method can also require more effort and attention to detail to achieve a smooth and even finish.
Nevertheless, painting a bike by hand does offer the advantage of greater control and precision, which can be particularly helpful when painting smaller or intricate areas of the bike frame.
Can I Paint a Bike with a Brush?
Yes, you can paint a bike with a brush. Using a brush to paint a bike is a common method, and it has both advantages and disadvantages. One of the main advantages is that it allows for greater control over the application of paint, especially when working on smaller or more detailed areas of the bike frame.
However, it can be time-consuming and labor-intensive, as it requires careful attention to detail and multiple coats to achieve a good result. Brush-on paint may also be more prone to drips, brush marks, and other imperfections if not applied properly.
Can You Paint a Bike with Oil Paint?
While it is technically possible to paint a bike with oil paint, it is not typically recommended due to some of its drawbacks. It is not commonly used for painting bikes due to its long drying time and the need for solvents to clean up.
Oil paint can take days or even weeks to dry, depending on the thickness of the application, which can be inconvenient for painting a bike.
Final Thoughts
Painting a bike without spray paint is possible and can be accomplished using various methods. And it can be a fun DIY project indeed. By using alternative paint options such as brush-on paint, powder coat paint, epoxy paint, or vinyl wrap, you can achieve impressive results with some patience and attention to detail.
Though each method has its advantages and disadvantages, it’s important to choose the one that best fits your needs and experience level. With proper preparation and application, you can enjoy a newly painted bike that not only looks great but also withstands daily wear and tear.
If you’re looking to give your bathroom a fresh new look, painting your laminate walls can be a cost-effective and fun way to do it. Laminate walls are a popular choice in bathrooms because of their durability and water resistance, but they can sometimes feel a bit dated.
Need to paint your laminate walls? But thinking about how to paint laminate walls in bathroom? Just clean the surface, sand the laminate to create texture, and use a primer specifically designed for laminate surfaces. Then apply two coats of paint.
As someone who has tackled this project before, let me share some details tips, and insights to help you get the job done right and create the bathroom of your dreams.
Can You Paint Over Laminate Bathroom Walls?
Yes, it is possible to paint over laminate bathroom walls. Laminate walls can be difficult to paint due to their smooth, non-porous surface. However, with proper preparation and high-quality paint and primer, you can achieve a durable and long-lasting finish.
It’s important to clean the walls thoroughly to remove any dirt, grime, or soap residue, and lightly sand the surface to create texture for better paint adhesion. Using a primer specifically designed for laminate surfaces will help the paint adhere and prevent peeling or chipping over time.
Why You Would Paint Laminate Walls?
There are several reasons why you might choose to paint laminate walls. Here are some of the main reasons:
To update the look of the room:
Laminate walls can look outdated or tired over time. Painting them is a cost-effective way to give the room a fresh, new look.
To personalize the space:
If you’ve recently moved into a new home or apartment and the laminate walls don’t fit your personal style, painting them is an easy way to make the space feel more like your own.
To protect the walls:
If the laminate walls are in an area of the home that is prone to moisture, such as a bathroom or laundry room, painting them can help protect them from water damage.
To cover up imperfections:
Laminate walls can be difficult to repair if they become scratched or chipped. Painting over them can help hide any imperfections and give them a smooth, even finish.
By painting your laminate walls, you can transform the look and feel of your space while also protecting them from potential damage.
How to Paint Laminate Walls in Bathroom?
Fortunately, with a little bit of preparation and the right tools, painting your laminate walls can be a straightforward process that transforms your bathroom into a stylish and modern space.
List of materials you’ll need to paint:
- Degreaser or cleaning solution
- Sandpaper (fine-grit)
- Damp cloth
- Drop cloths or plastic sheeting to protect floors and fixtures
- Painter’s tape (if needed)
- Primer specifically designed for laminate surfaces
- Paint (specifically formulated for use in a bathroom)
- Paint roller or brush
- Paint tray (if needed)
- Stir sticks (to stir the paint and primer)
- Paint can opener (if needed)
- Gloves (to protect your hands)
- Respirator or face mask (if desired for added protection)
Having all of these materials on hand before beginning the project will ensure that you have everything you need to complete the job efficiently and effectively.
Clear the room:
Remove any fixtures, accessories, or decorations from the walls and cover the floors and any remaining fixtures with drop cloths to protect them from paint splatters.
Clean the walls:
Use a degreaser or cleaning solution to thoroughly clean the walls and remove any dirt, grime, or soap residue. Rinse the walls with water and allow them to dry completely.
Sand the walls:
Using a fine-grit sandpaper, lightly sand the walls to create a slightly rough texture that will help the primer and paint adhere better. Wipe down the walls with a damp cloth to remove any dust.
Apply a primer:
Apply a primer specifically designed for laminate surfaces. Use a brush or roller to apply the primer in a thin, even layer. Allow the primer to dry completely before proceeding to the next step.
Paint the walls:
Apply two coats of paint to get an excellent finish. Use a roller or brush to do this task. After applying the first coat, take time to dry thoroughly. Once you notice the first coat is dried, then apply the next. It’s important to use paint that is specifically formulated for use in a bathroom to ensure it can withstand moisture and frequent cleaning.
Reinstall fixtures and accessories:
Once the paint has dried completely, reinstall any fixtures or accessories that were removed from the walls.
What Kind of Paint Should You Use on Bathroom Laminate Walls?
When painting bathroom laminate walls, it’s important to use a paint that is specifically formulated for use in a high-moisture environment. Here are the key points to consider when choosing paint for bathroom laminate walls:
Choose bathroom or kitchen and bath paint:
Use a paint specifically labeled for “bathroom paint” or “kitchen and bath paint”. These paints are designed to withstand moisture and frequent cleaning, which is important in a bathroom where the walls are exposed to water and humidity.
Use non-porous paint:
It’s also important to choose a paint that is appropriate for use on laminate surfaces. Laminate walls have a smooth, non-porous surface that requires a paint formulated for this type of surface.
Look for mildew-resistant or mold-resistant paint:
Use a paint that is mildew-resistant or mold-resistant to prevent the growth of mold and mildew in your bathroom.
Select a satin or semi-gloss finish:
A satin or semi-gloss finish is easier to clean and is more resistant to water and humidity than flat or matte finishes.
Consider the color of the paint:
Lighter colors can make the bathroom feel brighter and more spacious, while darker colors can add drama and sophistication to your bathroom.
By following these key points, you can choose a paint that will provide a durable, long-lasting finish on your bathroom laminate walls.
If you’re unsure about which paint to choose, speak to a professional at a paint or home improvement store. They can recommend a paint that is appropriate for your specific bathroom and laminate walls.
Can You Paint Directly onto Laminate?
While it is technically possible to paint directly onto the laminate without using a primer, it is not recommended.
Therefore, it is suggested to use a primer specifically formulated for use on non-porous surfaces like laminate before painting.
Skipping the primer can lead to a subpar paint job that may be prone to chipping, peeling, or cracking over time.
Do You Need Primer To Paint Laminate?
Yes, it is highly recommended to use a primer when painting laminate surfaces, including laminate walls. Laminate is a smooth, non-porous material that can be difficult for paint to adhere to without proper preparation.
A primer will help the paint adhere more effectively to the surface, creating a more durable and long-lasting finish.
Additionally, a primer can help to block any stains or discolorations that may be present on the surface of the laminate, which can affect the appearance of the final paint job. Using a high-quality primer specifically formulated for use on non-porous surfaces like laminate will help ensure the success of your painting project.
Final Words
Painting laminate walls in a bathroom can be a great way to update the look of your space without a major renovation. However, it is important to use the right materials and follow the proper steps to ensure a long-lasting and professional-looking finish.
Selecting the right type of paint, primer, and tools, as well as properly preparing the surface, are key to achieving a successful paint job on laminate walls.
By following the steps outlined in this guide, you can transform your bathroom laminate walls and enjoy a beautiful, updated space.
Remember, taking the time to properly prepare and prime the surface before painting will help ensure a smooth and durable finish that will hold up to the demands of a bathroom environment.
If you have a garage, probably it’s one of the most heavily used spaces in your home. From storing cars to tools to doing mad experiments, a garage floor goes through a lot of wear and tear. But have you ever got the idea of brightening it up with a fresh coat of paint?
Garage floor paint can give your space a polished look, protect your floor from stains, and cover cracks, and other damage. But with so many options out there, you might be wondering “what is the best garage floor paint”.

Luckily, in this guide, we are here with some paint products that we consider the best options for your garage floor. Additionally, we’ll talk about the key factors to consider when selecting garage floor paint, so you can make an informed purchase. So, let’s dive in!
How to Choose the Garage Floor Paint?
When it comes to choosing the best floor paint for your garage, you need to consider a few factors. These factors determine whether you are going to see a shiny garage for years or you are going to notice paint chipping after a few days!
So, here are some factors that you need to consider carefully before you make a purchase.
- Durability: As I said earlier, a garage has to withstand a lot of wear and tear. That’s why, ordinary paint will not be a suitable option for your garage. So, you need to select a paint that is durable enough to withstand a lot of traffic.
You also need to make sure that the paint is long-lasting because you don’t want to see the paint coming off after a few days of application.
- Coverage: Whether you are painting the garage floor or any other surface, it’s important to pick a product that can provide better coverage. So, look for products that can cover larger areas with comparatively less amount of paint.
- Drying time: Since the garage is a place that you need to visit frequently, it’s important to consider the drying time of the paint. This is because it will be problematic if you have to park your car outside for days just to ensure that the floor paint is properly dry. Therefore, pick a paint product that dries relatively quickly.
- Color and finish: Garage floor paints are available in a variety of colors and finishes. Though the style and design of your garage are totally up to you, it will be a smart decision if you pick a color that complements your home’s exterior.
- Budget: Garage floor paint can be available at a range of prices, that’s why you need to select the paint wisely. When it comes to painting the garage floor, your goal should be to cover as much area as possible, spending as little as you can.
However, we are not discouraging you to spend money on buying good quality paint. Don’t compromise on quality for cost. Good paint can save you a lot of money in the long run. We are simply recommending you select a paint that will get the job done without emptying your wallet.
While it may be difficult to find a single product that possesses all the mentioned qualities, aim to select a product that satisfies most of these criteria.
Also Read: Is It Safe to Store Paint in the Garage?
7 Best Garage Floor Paint Reviews 2023
Here are 7 paint products that we think are the best for your garage floors. Since there are different options to paint your garage floor, we are selecting a product from different categories to help you choose more easily.
1. Overall Best Paint for Garage Floor: KILZ 1-part Epoxy Acrylic Paint
If you are looking to give your rusty old garage a new look, the first product you should look for is this epoxy acrylic paint. This one-part epoxy acrylic paint is formulated to provide a durable finish on hard-to-clean areas of your house, for instance, your garage or basement.
You can use this paint on a variety of surfaces, from masonry to brick to uncoated concrete. This KILZ garage floor paint dries to touch relatively quickly; in just two hours. And you can even re-coat in four hours only.
This concrete paint offers good coverage. On a smooth surface, one gallon of this paint is enough to cover 400-500 sq. ft. areas, and on rough surfaces, one gallon of paint can cover 300-400 sq. ft. area.
Pros:
- The paint can be applied on new and uncoated concrete surfaces.
- It dries quickly, allowing you to complete the project faster.
- It is capable of covering a significant area with just one gallon of paint.
Cons:
- This product is not suitable for vertical surfaces, so you are limited to using it on horizontal surfaces only.
Our Verdict:
If you want to give your garage a vibrant look and make it last for years, this paint can be a good fit for your job. It’s easy to use and provides a durable finish in high-traffic areas.
2. Best Epoxy Paint for Garage Floor: Coloredepoxies 10002 Clear Epoxy Resin Coating
Are you thinking of giving your garage floor a unique metallic look? Then this Coloredepoxies clear resin is the thing you need! This amazing epoxy coating is suitable for a variety of surfaces like concrete, steel, iron, and resinous flooring. Also, it is suitable for industrial, commercial, and residential uses.
It is a great choice for professionals and DIYers because it gives them the freedom to work with their creative style. You can use it with mica flakes, quartz, metallic pigments, and various color flakes.
This two-component epoxy coating system acts as a waterproof barrier against moisture, making it an ideal choice for your garage floor. Lastly, this industrial-strength epoxy coating is VOHAP-free and contains low VOC.
Pros:
- The product is easy to use and provides a durable finish.
- This clear epoxy coating can be used on various surfaces.
- It contains low VOC, so no worries about health hazards.
Cons:
- You may need to wait for seven hours in between each coat.
Our Verdict:
If you want to give your garage floor a durable epoxy coating, and you have plenty of time in your hand, you can opt for this product and show your creativity.
3. Best Garage Floor Paint Coating Kit: Rust-Oleum Epoxy Shield Esh-06
If you are a person who loves to do some “mad scientific experiments” in his garage, then epoxy shield floor coating can be a great choice for you! As the name suggests, it works as a shield for your garage floor and provides resistance to chemicals, daily wear and tear, and even standing water.
It’s suitable for places that go through a lot of wear and tear like basements, garage floors, workshops, and so on. One gallon of this floor coating can cover up to 200 square feet of area.
Lastly, as Rust-Oleum claims, your garage will be ready for foot traffic in just one day and for vehicle traffic, it will take 4 days.
Pros:
- It protects your floor from daily traffic, chemicals, and water.
- Allows you to use decorative chips for personalization.
- This epoxy floor coating is relatively easy to use.
Cons:
- You may need to wait for a relatively long time to use the floor after applying it.
Our Verdict:
If you want to protect your workshop or garage floor where you need to work with chemicals regularly, this product can be an ideal choice for you. If your garage floor comes into contact with water occasionally, or if there is standing water on the floor at times, you might want to consider giving this kit a try.
4. Best Non Slip Garage Floor Paint: KILZ Decorative Concrete Coating
If you fear your garage floor, walkways, or pool decks are slippery and can cause accidents, especially on rainy days, this KILZ slip-resistant concrete coating can be an ideal choice for these areas.
This decorative concrete coating is ideal for both interior and exterior surfaces. Not only it provides a durable, protective finish, but also gives your lifeless masonry and concrete floors a stunning look.
This floor paint can withstand high traffic and hot tires. Plus, it fills up cracks, hiding imperfections on the floor. You may need to use multiple coats to achieve this, though.
Pros:
- Provides a slip-resistant surface for walkways and pool decks.
- Can withstand heavy traffic and hot tires.
- This product can fill up cracks and other minor imperfections.
Cons:
- This concrete coating is not suitable for vertical surfaces.
- It is not recommended to be used in areas where forklifts are used.
Our Verdict:
This product can be an ideal choice if you want a non-slippery surface to prevent accidents. That’s why it can be an ideal option for pool decks or other areas where it becomes slippery in contact with water, for instance, walkways or garage floors.
5. Best Concrete Garage Floor Paint: RUST-OLEUM 225359 Epoxy Shield
When it comes to painting a concrete garage floor, you need to ensure the paint remains durable for years and can withstand a lot of foot and tire traffic.
If you want a paint product that will not only provide a smooth and durable finish but also be easy to clean, this concrete floor paint can be the ideal choice for you. Since this paint features advanced acrylic technology, it can be easily applied and can be cleaned with soap and water only.
If you occasionally use your garage as your workshop, this paint can still be a great choice for you since it can withstand chemicals and hot tires. Plus, you can use this paint both indoors and outdoors.
Pros:
- Provides a long-lasting smooth finish on concrete floors.
- Easy to clean; only soap and water does the job.
- Can withstand chemicals and is suitable for both interior and exterior.
Cons:
- An improper application can result in a less durable finish.
Our Verdict:
This product can be a great choice for concrete floors. If you want less hassle while applying floor paint and you want it to clean easily, this can be the ideal option for you. However, you need to focus on surface preparation and application carefully because these can impact the durability of the resultant finish.
6. Best 1-Part Epoxy Garage Floor Paint: UNITED GILSONITE LAB 23813 Drylok E-1 Semi-Gloss Floor Paint
A good one-part epoxy garage floor paint can provide a durable finish that can last for years. Drylok E-1’s one-part epoxy floor paint could be the answer you need to transform your garage floor.
This floor paint is formulated to provide chemical resistance, excellent durability, and a beautiful finish. This amazing product can be used on a variety of surfaces including concrete floors, basement floors, patios, walkways, garage floors, etc.
With that said, no one would like a product that is hard to clean and maintain. But no worries with this 1-part epoxy garage floor paint because it can be maintained and cleaned easily. You can clean up this paint with water. It comes with low VOC, so no worries about health issues while working with this product.
Pros:
- This product is tested for color retention, durability, and water resistance.
- Since it requires water for cleaning, it can be cleaned and maintained easily.
- Comes in a low VOC formula, an environmentally friendly option.
Cons:
- Improper preparation and application may lead to peeling or unsatisfactory finish.
Our Verdict:
If you prefer to use a 1-part epoxy garage floor paint for floor painting, it can be an ideal solution for you. It provides a durable finish and is tested for various factors like color retention, water resistance, chemical resistance, etc.
7. Best Affordable Garage Floor Paint: Rust Bullet – Duragrade Easy to Apply Concrete Coating
Acid etching can be time-consuming. Wouldn’t it be great if you could directly apply the paint on your concrete garage floor without acid etching? Well, it’s possible with this DuraGrade concrete paint, as Rust Bullet claims. According to the company’s information, you can directly apply this product to a concrete surface.
When it comes to covering the garage floor with paint, we all love an affordable option that does the job well yet doesn’t cost a pretty penny. We picked this concrete coating as the best affordable garage floor paint since it provides a durable finish at an affordable cost.
It is easy to apply, and you can work with rollers, brushes, and spray equipment. It can withstand hot tire pickup and provides slip resistance. In addition, its ability to provide good coverage makes it a suitable option for projects of various sizes.
Pros:
- The floor coating provides UV, chip, scratch, and chemical resistance.
- It provides good coverage, which makes this product suitable for projects of various sizes.
- It is an environmentally friendly option to work with.
Cons:
- You may need surface preparation for optimal results, despite the company’s assertion that it can be applied directly.
Our Verdict:
If you are looking for a product that will give optimal results at an affordable price, this Rust Bullet concrete coating can be the best choice for your project.
Is Painting a Garage Floor a Good Idea?
Yes, painting your garage floor can be a great idea. There are several benefits of painting garage floors that you might want to coat your garage floor with good quality paint. Take a look.
- Aesthetics: A garage floor with bare concrete may look dull and lifeless, so painting it with a good quality paint product can amp up the floor and bring an aesthetic look to your house.
- Personalization: Instead of using plain paint, you can use some decorative chips to the paint that not only will create a unique look, but help make the floor less slippery.
- Protection: Floor paint can cover stains, splits, cracks, and other types of damage, working as a protective layer between high traffic and the concrete floor.
- Easier to clean: Coatings of paint on the garage floor can make it comparatively easier to clean than bare concrete.
- Increases property value: A well-painted garage floor can add a beautiful look to your house, attracting potential buyers or renters.
Is It Better to Paint Or Epoxy Garage Floor?
This depends on your personal preferences. Both are great options for painting a garage floor. However, they have some differences in terms of performance. Let’s take a deeper look.
Epoxy:
Firstly, you should not confuse this product with a paint type called epoxy paint; this is a different product. Epoxy coatings are generally hardened through a chemical reaction between a hardener and a resin. Epoxy coatings create a durable and long-lasting finish. It is a great option for your garage floor, but for some epoxy products, you may need to spend a pretty penny.
Floor Paint:
Garage floor paint can be an easy and cost-effective option to renovate your garage floor. Garage floor paints can come in a wide variety of colors and types, for instance, oil-based, latex-based, etc. However, in terms of durability, they may not be a good competitor to epoxy coatings.
To sum it up, I will say, the choice is really up to you. If you want a durable finish you can go with epoxy coatings, but if you want a more vibrant and budget-friendly option, you can opt for garage floor paints.
Do I Need to Prime Garage Floor before Painting?
Yes, I recommend using a good-quality primer before applying the garage paint. Priming the floor can help better paint adhesion and ultimately provide a long-lasting, beautiful-looking garage floor. To choose a primer for your garage floor, make sure you select a primer that is compatible with concrete garage floors.
For primer application,
- First, tape the areas of your wall where they meet the floor. You can use painter’s tape for this.
- Then start priming the edges of the garage floor with a brush.
- Once the edges are done, switch to a roller and quickly prime the rest of the areas of the floor.
Next Read: Is Primer Suitable for Use as Ceiling Paint?
What Kind of Paint Should I Use on My Garage Floor?
There can be several options in hand for painting your garage. Since each type of paint has its specific benefits, you can select one that suits your job the most. Here are some commonly used paint types that you can use on your garage floor:
- Acrylic Garage Floor Paints
These paints come in a wide variety of colors and are easy to use. Though this type of paint may cost you a bit more money than other paint types, it will provide a durable finish.
- Latex Garage Floor Paints
These paints are easy to apply and can be cleaned easily. They also dry quickly and are safe to use. It’s a great and cost-effective option for your garage floor.
- Epoxy Garage Floor Paints
It is a durable option for your garage floors. It may come in variants like true epoxy (2-part formula) and 1-part epoxy.
What Type of Paint Is Best for Concrete Floors?
The term “best” may differ from person to person. In terms of floor paint, some may consider a budget-friendly product to be the “best” option for them, while others may consider a durable one to be the “best”.
Anyway, to select floor paint for dressing up your concrete floor, you have two good options in hand; Epoxy Paint and Acrylic Latex Paint. Since acrylic latex paint is water-based, it can work with the floor surface quite easily. It will also cost less compared to epoxy.
Epoxy paint is known for its durability. It can provide a longer-lasting finish and withstand high traffic. However, it may cost more than acrylic latex paint. So, we say, the best product for your concrete floors will ultimately depend on your preferences and budget.
Final Verdict
After discussing the important factors to keep in mind when selecting paint for your garage floor, I went ahead and reviewed some products for you. We looked at different types of floors, paint options, and budgets to help you find the right fit.
I organized the products into different categories, so you can easily see which product is best for which task. You can compare the key factors of each product I reviewed and choose the one that best fits your project. So, go ahead and select the perfect paint for your garage floor.