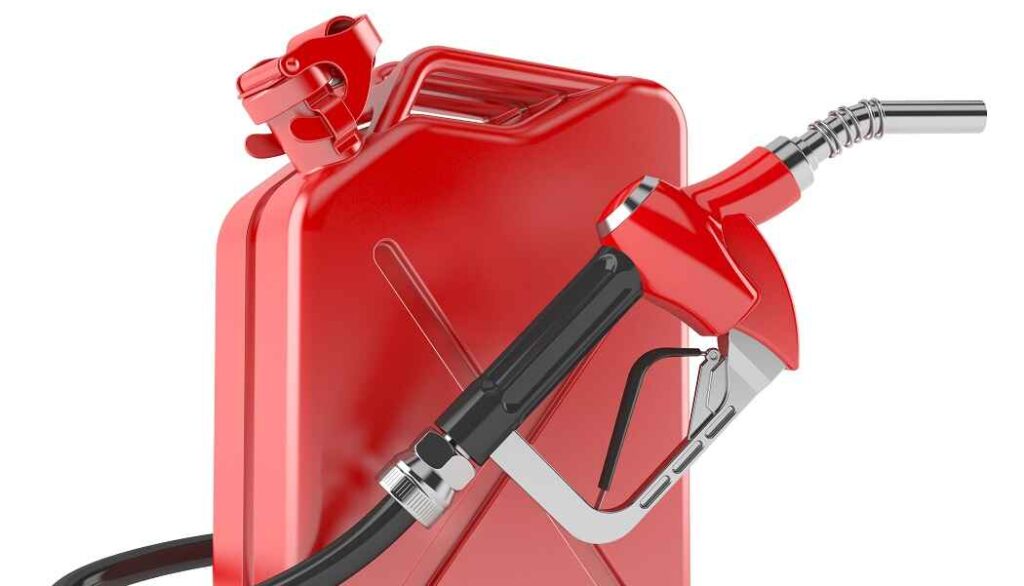
In the realm of DIY projects, home improvement, and automotive maintenance, questions often arise about the effectiveness of unconventional solutions. One such question that frequently pops up in various forums and discussions is-“Does gasoline remove paint?”
With so many conflicting opinions and anecdotes circulating, it’s time to put this debate to rest. Let’s find out the chemistry behind gasoline and paint, assess the risks and safety considerations, and finally, provide expert advice on the best practices for paint removal.
Does Gasoline Remove Paint?
Gasoline is a flammable liquid commonly used as fuel for internal combustion engines. It acts as a solvent and can dissolve certain materials, including paint, to some extent. The impact of gasoline on paint depends on factors like the type of paint, duration of contact, and environmental conditions.
Latex or oil-based paints are particularly vulnerable to gasoline exposure because gasoline can break down the organic compounds present in these paints. When gasoline comes into contact with paint, it can dissolve the paint’s chemical bonds, leading to softening, blistering, or bubbling of the paint. Extended contact with gasoline can cause more extensive damage, especially on older or damaged paint surfaces.
High temperatures and humidity levels can accelerate the chemical reactions, making gasoline’s impact on paint more noticeable. If gasoline spills on a painted surface, it is essential to remove it promptly using a clean cloth or paper towel. Washing the area thoroughly with soap and water can help minimize potential long-term damage.
Keep in mind that gasoline is highly flammable and must be handled with care. Always use it in a well-ventilated area, away from open flames or sparks, and consider wearing protective gear. Additionally, before using any cleaning agent or solvent on painted surfaces, perform a test on a small inconspicuous area to ensure it does not cause adverse effects.
Remember to exercise proper safety precautions when dealing with gasoline to avoid fires or other hazardous situations.
Does Gasoline Dissolve Spray Paint?
Yes, gasoline can dissolve spray paint to some extent. Gasoline is a solvent, meaning it has the ability to dissolve certain substances, including paint. Spray paint typically consists of pigments and binders suspended in a solvent carrier, which allows the paint to be easily sprayed onto surfaces.
When gasoline comes into contact with spray paint, it can start to dissolve the paint’s solvent carrier, causing the paint to soften and possibly spread or run. This process can lead to the paint losing its adherence to the surface it was applied to, potentially creating streaks or removing the paint altogether.
Advantages and Disadvantages of Using Gasoline as a Paint Remover
Gasoline, being a solvent, can dissolve paint quickly and appears to be an efficient solution. It comes with a range of advantages that outweigh its drawbacks. Here we will explore the advantages and disadvantages of using gasoline as a paint remover, shedding light on the safety risks and environmental concerns associated with this approach.
Advantages of Using Gasoline as a Paint Remover:
Effective Solvent: Gasoline is a powerful solvent that can effectively dissolve and remove various types of paints, including oil-based paints, enamels, and some acrylics.
Fast Action: Gasoline acts quickly. It will reduce the time and effort required to remove paint from surfaces, especially when compared to traditional scraping methods.
Easily Accessible: Gasoline is widely available at gas stations and automotive stores, making it convenient for users to purchase and use as a paint remover.
Cost-Effective: Compared to commercial paint removers, gasoline is relatively inexpensive, offering a cost-effective solution for paint removal tasks.
Versatility: Gasoline can be used on a variety of surfaces, such as metal, wood, and concrete, making it a versatile option for paint removal projects.
No Harsh Chemicals: Gasoline doesn’t contain harsh chemicals typically found in commercial paint removers, making it a more environmentally friendly choice.
Non-Corrosive: Gasoline is generally non-corrosive to many surfaces, reducing the risk of damage to the substrate being cleaned.
DIY Solution: Using gasoline as a paint remover allows for a do-it-yourself approach, eliminating the need for specialized equipment or professional assistance.
Disadvantages of Using Gasoline as a Paint Remover:
Highly Flammable: Gasoline is highly flammable and poses a significant fire hazard, especially when used indoors or near open flames, sparks, or heat sources.
Toxic Fumes: Gasoline emits harmful vapors that can cause respiratory issues, dizziness, and nausea when inhaled, making it potentially dangerous for health if proper ventilation is not ensured.
Environmental Concerns: Gasoline is a petroleum-based product, and its use as a paint remover can lead to soil and water pollution if not handled and disposed of properly.
Health Risks: Direct contact with gasoline can irritate the skin and eyes, leading to potential health risks for users, especially if they are not wearing appropriate protective gear.
Evaporation: Gasoline evaporates quickly, which can lead to excessive use and the need for additional applications during the paint removal process.
Regulatory Restrictions: The use of gasoline as a paint remover might be restricted or regulated in some areas due to safety and environmental concerns, limiting its availability and usage.
Things to Consider When Using Gasoline as a Paint Remover
Using gasoline as a paint remover can be effective, but it also presents serious safety and health risks due to its flammable nature and harmful fumes. It is essential to consider various factors to ensure you handle gasoline safely and efficiently when using it as a paint remover. Here are the things you need to carefully consider:
Safety Precautions:
- Always work in a well-ventilated area. Use the gasoline outdoors if possible to avoid the buildup of vapors.
- Wear appropriate personal protective equipment (PPE), including safety goggles, gloves, long-sleeved clothing, and a respirator mask designed for organic vapors.
- Keep the gasoline away from sources of ignition, such as open flames, sparks, and electrical equipment.
- Do not smoke while using gasoline or near gasoline fumes.
- Have a fire extinguisher nearby in case of emergencies.
Surface Compatibility:
- Make sure gasoline won’t damage the material you’re trying to remove paint from. Gasoline can dissolve some plastics and rubber, so it may not be suitable for certain surfaces.
- Test a small, inconspicuous area before applying gasoline to the entire painted surface to ensure it won’t cause damage or discoloration.
Proper Application:
- Use a non-metallic container to hold the gasoline. Metal containers can cause a reaction with gasoline and potentially lead to leakage or a fire hazard.
- Apply the gasoline using a brush, cloth, or sponge rather than spraying it to reduce the risk of accidental spills or splashes.
- Allow the gasoline to sit on the painted surface for a few minutes, but avoid letting it evaporate completely to maintain its effectiveness.
Disposal:
- Gasoline used as a paint remover becomes contaminated with paint particles, making it hazardous waste. Properly dispose of the used gasoline according to local regulations and guidelines.
- Do not pour the used gasoline down the drain or throw it in the regular trash.
Storage:
- Store gasoline in a well-ventilated and cool area, away from direct sunlight and potential ignition sources.
- Keep gasoline out of reach of children and pets.
Emergency Response:
- Have a clear plan in case of accidental spills, fires, or exposure to gasoline fumes. Know how to handle such situations and have access to emergency services if needed.
How to Use Gasoline as a Paint Remover?
If you choose to proceed with using gasoline as a paint remover, extreme caution should always be exercised when handling gasoline. Here is a details guide on how to apply gasoline with utmost care-
Step 1: Safety Precautions
Before you begin, ensure you have the necessary safety equipment: chemical-resistant gloves, safety goggles, a face mask, and suitable ventilation in the workspace. It is crucial to work in a well-ventilated area, preferably outdoors, to reduce exposure to fumes.
Step 2: Prepare the Area
Move the painted object to a well-ventilated and open space, away from any ignition sources, and place it on a protective surface like a drop cloth or cardboard.
Step 3: Test on a Small Area
Before applying gasoline to the entire painted surface, conduct a small test on an inconspicuous area to ensure it does not damage the underlying material. This step will help you determine the appropriate dwell time without causing harm.
Step 4: Apply Gasoline
Using a clean cloth or sponge, apply a small amount of gasoline to the painted surface. Avoid splashing or creating excessive fumes.
Step 5: Allow Dwell Time
Let the gasoline sit on the painted surface for a few minutes. The dwell time will depend on the thickness and type of paint.
Step 6: Scrape Off Paint
After the dwell time, gently scrape off the softened paint using a plastic or metal scraper. Be careful not to damage the underlying surface. If the paint doesn’t come off easily, reapply gasoline and wait a bit longer.
Step 7: Clean the Surface
Once the paint is removed, wipe the surface with a clean cloth dampened with water to remove any residue and gasoline.
Step 8: Dispose of Gasoline Properly
Gasoline-soaked rags or materials can be a fire hazard. Dispose of them properly by placing them in a tightly sealed metal container and store it in a safe location away from any heat source until you can properly dispose of them according to local regulations.
Step 9: Wash Up
After completing the paint removal process, wash your hands thoroughly with soap and water. Also, clean any tools or materials used in the process.
Step 10: Final Disposal
Dispose of the gasoline responsibly, following local guidelines for hazardous waste disposal.
Final Words
Gasoline indeed has the capability to remove paint. It contains potent solvents that can effectively dissolve and break down paint molecules, leading to paint removal from surfaces. But, it is vital to take necessary safety precautions and avoid its use near open flames or in confined spaces.
Absolutely! You can paint fiberglass windows following suitable methods. Painting fiberglass windows is a common practice to enhance their appearance and protect them from external elements.
Generally, fiberglass window has its own paint and it offers several advantages, such as durability, weather resistance, and low maintenance.
However, the original paint may fade over time. For this reason, homeowners consider repainting their windows. From surface preparation to selecting the right type of paint, understanding the process is vital. So, let’s see the essential guidelines for painting fiberglass windows for a fresh and vibrant look.
Can You Paint Fiberglass Windows?
You can paint fiberglass windows to refresh their appearance and provide protection against the outer elements. The durable and weather-resistant nature of fiberglass makes it suitable for repainting. You can achieve a long-lasting and aesthetically pleasing finish on your fiberglass windows. But you have to use the right materials and follow the proper steps for this.
To achieve a successful outcome, ensure the windows are clean and dry. Moreover, application of a primer will make the paint adherent to the surface. You also should choose an exterior-grade paint that is compatible with fiberglass.
Application of the paint evenly will allow each coat to dry thoroughly between applications. With the right preparation and appropriate paint, you can transform the appearance of your fiberglass windows and extend their longevity.
How to Paint Fiberglass Windows?
Painting fiberglass windows is not that difficult. Even you can perform it as a DIY project. But you need to follow a proper process to get the satisfactory result. Check this step-by-step guide on how to paint fiberglass windows.
1. Gather supplies
First, you need to gather all the necessary items for painting the fiberglass windows. You will need exterior-grade primer, exterior-grade paint for fiberglass, painter’s tape, paintbrushes or rollers, sandpaper (fine grit), mild detergent and water, clean cloth, and plastic sheets. Moreover, you have to clean the work area before painting.
2. Clean the windows
Clear the area around the windows. Cover nearby surfaces with drop cloths or plastic sheets to protect them from paint splatter. Use a mild detergent and water solution to clean the windows thoroughly. Remove dirt, dust, and any debris that may affect paint adhesion.
3. Sand the window surface
Lightly sand the fiberglass surface to create a rough texture. A rough texture will help the primer and paint adhere better. Use fine-grit sandpaper and be careful so that the fiberglass is not damaged.
4. Remove hardware and tape off areas
Remove any hardware or fixtures attached to the windows, such as handles or locks. If removal is not feasible, cover them with painter’s tape to protect them from paint.
5. Use Primer
Choose an exterior-grade primer specifically formulated for use on fiberglass. Apply a thin, even coat of primer to the windows using a paintbrush or roller. Allow it to dry completely as per the manufacturer’s instructions.
6. Inspect and prepare for painting
Check the primed surface for any imperfections. If necessary, sand down any rough spots or drips. Wipe off any dust or debris before proceeding.
7. Choose and apply paint
Choose exterior-grade paint suitable for fiberglass surfaces. Stir the paint thoroughly before use. Apply the paint evenly using a paintbrush or roller, following the manufacturer’s recommended drying times between coats.
8. Apply multiple coats
Depending on the paint and desired finish, you might apply multiple coats for a smooth and even appearance. Allow each coat to dry completely before applying the next.
9. Allow for curing
After completing the painting process, give the windows ample time to cure and harden fully. Avoid touching or putting pressure on the painted surface until it has completely dried. Finally, you will get a smooth and amazing window surface.
What Kind of Paint Will Stick to Fiberglass?
When painting fiberglass, it’s crucial to choose the right type of paint. Otherwise, the paint will not adhere well to the surface and provide lasting results. So, here are some paint options that stick effectively to fiberglass.
- Acrylic Latex Paint
Acrylic latex paint is a popular choice for painting fiberglass. This paint has excellent adhesion and durability. It forms a flexible and weather-resistant coating and makes it ideal for exterior applications like windows and doors.
- Epoxy Paint
Epoxy paint adheres exceptionally well to fiberglass surfaces. It offers superior durability and resistance to moisture, chemicals, and abrasions. Moreover, this paint is suitable for demanding environments.
- Polyurethane Paint
Polyurethane paint is known for its strong adhesion and long-lasting performance on fiberglass. It creates a hard and glossy finish. It also provides protection against UV rays and weathering.
- Marine-Grade Paint
Marine-grade paints are designed to withstand harsh marine environments. So, it will be an excellent choice for fiberglass boats and marine applications. These paints adhere well to fiberglass surfaces and offer exceptional water resistance.
- Alkyd Enamel Paint
Alkyd enamel paint is a durable option that adheres well to fiberglass. It dries to a hard and glossy finish. Moreover, it has good resistance to moisture.
- Polyester Paint
Polyester paint is another suitable option for fiberglass surfaces. It offers good adhesion and durability. Moreover, it is commonly used where the weather is harsh.
However, when choosing the paint, consider the specific needs of your project. For example, you can consider the location of the fiberglass surface (indoors or outdoors), the level of exposure to sunlight and weather, and the desired finish.
Can You Paint Directly on Fiberglass?
While you can paint directly on fiberglass, it is essential to follow the proper preparation steps. Otherwise, the adhesion will not be better and the finish will not be long-lasting. You must not apply the paint only on the fiberglass without any preparation.
You should sand the surface lightly to create a rough texture. If not, the paint will not adhere to the surface effectively. After preparing the surface, select the primer and paint wisely. Acrylic latex paint, epoxy paint, and polyurethane paint are some options suitable for painting fiberglass.
If you apply a high-quality primer designed for fiberglass surfaces, it will improve the durability. Following these steps will help you achieve a successful paint job on fiberglass and enhance the appearance of your project.
Can You Paint White Fiberglass Windows?
You can paint white fiberglass windows. Painting white fiberglass windows allows you to update their appearance and match them with your desired color scheme. Before painting, ensure the windows are clean and dry.
Moreover, sanding the surface lightly is also necessary. Then you can follow a step-by-step process. For example, applying the primer, applying the suitable paint and multiple coating of the paint, curing the paint, etc. are the essential steps.
You can apply the paint on white fiberglass windows evenly with a brush or roller. Moreover, the drying time must be sufficient. Or else, the paint will chip off over time. Finally, you can paint the white fiberglass windows according to your color choice. It will create a fresh and vibrant outlook of your home exterior.
Final Thoughts
Painting fiberglass windows can be an easy way to revitalize their appearance and complement your home’s aesthetic. By following the proper preparation steps, such as cleaning, sanding, and applying a suitable primer, you can ensure the paint adheres better and provides a long-lasting finish.
Choosing the right type of paint designed for fiberglass surfaces is a must for achieving optimal results. With a fresh coat of paint, your white fiberglass windows can contribute to an enhanced and visually appealing exterior for your home.
No, you cannot mix water with oil-based stain because simply oil and water do not mix well.
We understand as a regular user of stain you may have to experience with them. Hence, you must wonder asking if you can mix water with an oil-based stain.
Though no one suggests mixing water with oil-based stain yet you can combine them. But for that, you have to make sure the previous coat is dry completely. However, there can be other ways to make it work if not mix the two ingredients directly.
Let’s make things clear regarding the topic in this article. Bear with us till the end.
Can Oil Based Stains Be Mixed?
Here, we need to understand that oil and stains are two different things. However, you can mix them together. Their properties will allow you to mix them. In other words, oil-based stain components include a binder property. The property is manufactured in a way that dries slowly. Therefore, you can mix different oil-based stains together and they will mix evenly.
However, as long as you want your signature mix of stains, you can follow a proper intermixing process. In the process, you can mix up to three oil-based stain colors together. The result will be a custom blend. However, the mixing process is somewhat easy. But you have to be a bit extra careful while adopting the mixing step.
Moreover, you also have to ensure that the colors you have chosen for mixing have an almost similar undertone. Therefore, for the experience, you can choose colors like cherry, oak, and maple together. These oil-based stain colors have similar types of undertones. That is why their intermixing will result in the desired shade.
Nonetheless, to mix up the stains, layering can be an option. Overlapping different coats of oil-based stains will add dimension and depth to your precious woos piece of furniture. Moreover, to make the mixture proper, take several cups for respective stains and then pour them into the cups. Take another cup and pour a small amount of stains from each cup. Start by taking a small portion and then gradually increase the amount.
Can You Mix Water with Oil Based Stain?
We have mentioned earlier that you cannot mix oil and water since they actually do not mix. In fact, your childhood experience says so. When you try to mix water with oil-based stain, the mixture will look milky and it will feel globby.
And if you keep the mixture for some time then they will separate from each other. Again, when you are up to applying the mixture after stirring them, the coat will take forever to dry. Moreover, the result will be globby and spotty which you certainly will not like.
Furthermore, if you want to mix them anyway, you have to blend them well enough until the mixture becomes homogenized. However, such a mixture can also create bubbles after application.
Nonetheless, you can always use water and oil-based stains over each other. But for that, you have to maintain some rules like –
- If you already have applied an oil-based gel stain over a raw wood piece, make sure you leave the piece for about one entire day to dry properly. After that, you can apply the water-based product.
- But in case of a piece that already has an existing finish, leave the oil-based stain to dry for around 72 hours. Then you can apply a water-based stain.
- However, in the case of applying an oil-based stain over a water-based stain, waiting for 24 hours will be enough.
However, for your further information, if it is a normal or traditional oil paint that you are using then you can mix water-soluble oils. These water-soluble oils are also known as water-miscible or water-mixable oil paints.
Can You Mix Oil Stain and Water Poly?
You certainly can mix oil stain and oil poly or polyurethane. Many experimenters mix them to achieve their desired finish. To speak the fact, in woodworking places, mixing poly and stain is a very common practice. But unfortunately, you cannot mix oil stain and water poly together.
Also, the mixture has several benefits. It increases the protection of the product against wood with stains. Additionally, it reduces application time. However, you need to take care of the amount while mixing them. Also, make sure that both elements reflect the same base.
This means if the stain is oil-based then the poly also has to be oil-based. And if the stain is water-based then you must use water-based poly. The science behind this is simply the previous fact we mentioned, oil and water do not mix.
However, to mix them together, the most popular ratio is considered 1:1. Again, if you take a wood stain, the stain and polyurethane ratio should be 25:75. It is because wood stain works as a thinner in polyurethane. Therefore, the more you add stain to the mixture, the more it will be thinner. Nonetheless, while mixing, make sure you stir it until its color is even.
Will Oil-based Stain Dry Over Water-based Stain?
Yes, oil-based stain dries over water-based stain. Though oil-based ones need more time to dry compared to water-based ones, gradually it dries completely. However, for that, you have to follow the instructions properly.
To adopt the process properly, make sure the underlying surface is completely dry. Again, after applying the water-based stain let the piece dry for 24 hours. Do not apply oil-based stain before that. However, many do the mistake of applying too many stain coats.
It is a crucial reason why overlapping of stains of different bases terribly fails. Hence, try not to apply too many coats of water-based stain. Otherwise, it will take too much time to dry and the overlapping of oil-based stain will not set properly. As a result, you will not get your desired result.
Final Thoughts
To summarize, you cannot mix water with oil-based stain. It is not a wise decision. But there are surely other many ways of intermixing stains of different bases. You can adopt them to create your own signature stain or customized shade.
However, you need to acknowledge the ratio, and undertone of the stains while mixing. To make your stains thin, add water to water-based stains and oil to oil-based stains. Thus, we hope you have gotten a better idea regarding this face before staining your wood.
If you’ve ever wondered about sprucing up your home’s entrance, you may have come across composite doors as a durable and stylish option. But the burning question remains, “Can you paint composite doors?”
Here we’ll discuss the ins and outs of painting composite doors, exploring the dos and don’ts, best practices, and the potential benefits of giving your entrance a fresh and vibrant makeover.
Discover how a simple coat of paint can breathe new life into your composite door and elevate the curb appeal of your home.
Can You Paint Composite Doors?
Yes, composite doors can be painted, and doing so can give them a fresh and updated look.
Composite doors are typically made from a combination of materials, including wood, PVC, and glass reinforced plastic (GRP). They have demonstrated their material adaptability, proving to be well-suited for painting when approached with the appropriate techniques and materials. Their robust construction allows them to withstand the paint application process without compromising their structural integrity.
Moreover, painting composite doors opens up a realm of possibilities for aesthetics and customization. Homeowners can take advantage of an extensive range of paint colors and finishes, effortlessly tailoring their doors to complement their preferred style and architectural design, thus adding a personalized touch to their home’s exterior.
Proper preparation stands as a key determinant of the final result. The surface should be thoroughly cleaned, any damages addressed, and suitable primers applied to ensure the paint adheres well and provides a long-lasting finish.
It is crucial to use high-quality exterior-grade paint specifically formulated for composite materials to achieve both durability and a visually appealing result. Investing in top-tier paint products will reduce maintenance needs and ensure the painted doors require fewer touch-ups over time.
While painting composite doors can be a rewarding DIY project for those with experience in home improvement, seeking professional assistance is a prudent choice for individuals less familiar with the process. Expert painters possess the necessary expertise, tools, and precision to deliver impeccable results, minimizing the risk of errors and ensuring a flawless finish that enhances the overall appearance of the home.
Can You Paint Composite Windows?
Yes, composite windows can be painted, but it is essential to follow the manufacturer’s guidelines and use the appropriate paint to ensure a successful and long-lasting finish.
Composite windows are made from a combination of materials, typically including wood, PVC, and other elements. These materials are chosen for their durability, low maintenance, and resistance to weathering.
Before painting composite windows, thorough preparation is crucial. Begin by cleaning the surface to eliminate any dirt or debris. Subsequently, gently sand the window frames to establish a smooth surface, facilitating better paint adhesion. After sanding, apply a primer that is specifically designed for use on composite materials, as this will help the paint bond properly.
When choosing paint, opt for high-quality exterior paint that is suitable for the composite material and is recommended by the window manufacturer. Consider the color carefully, as darker colors may absorb more heat and could potentially impact the performance of the windows. It’s best to avoid painting in direct sunlight, as this can cause the paint to dry too quickly, leading to uneven coverage or adhesion issues.
Allow each coat of paint to dry thoroughly before applying the next one, following the manufacturer’s recommended drying times. Be cautious of any hardware on the windows, such as handles or hinges, and either remove them before painting or take steps to protect them from paint splatter.
It’s important to consider the climate and environmental factors of your location when choosing paint and painting composite windows. Properly painted and maintained composite windows can enhance the aesthetic appeal of your home and help protect the windows from wear and tear. However, always adhere to the manufacturer’s guidelines and use the appropriate paint to ensure the best results and maintain any warranties provided by the window manufacturer.
How to Paint a Composite Door?
Painting a composite door requires careful preparation and the right materials. Follow this step-by-step guide to achieve a smooth and long-lasting finish:
Materials you’ll need:
- Sandpaper (medium grit)
- Cleaning solution or mild detergent
- Clean cloth or sponge
- Painter’s tape
- Drop cloths or old newspapers
- Exterior-grade primer
- Exterior-grade paint (acrylic or latex-based)
- Paintbrushes or foam rollers
- Paint tray
Step-by-Step Guide:
1. Remove the Door (optional):
If possible, it’s easier to paint the door if you remove it from its hinges. However, if you cannot remove the door or if it’s too heavy, you can paint it in place. Just make sure to protect the surrounding areas from paint drips and splatters.
2. Clean the Door:
Wipe down the entire surface of the door with a clean cloth or sponge and a cleaning solution or mild detergent. This will remove any dirt, dust, or grime that could interfere with the paint adhesion.
3. Sand the Door:
Use medium-grit sandpaper to lightly sand the entire surface of the door. This will create a rough texture, which helps the primer and paint adhere better to the door’s surface. After sanding, wipe away any dust with a clean cloth.
4. Apply Painter’s Tape:
Use painter’s tape to mask off any areas you don’t want to paint, such as hinges, handles, and windows. Take your time to ensure the tape is applied evenly and securely.
5. Protect Surrounding Areas:
Lay down drop cloths or old newspapers around the door to protect the floor and surrounding areas from paint spills or drips.
6. Apply Primer:
Apply a thin, even coat of exterior-grade primer to the entire door. The primer will help the paint adhere properly and improve the overall durability of the finish. Allow the primer to dry according to the manufacturer’s instructions.
7. Apply the Paint:
Once the primer is dry, stir your exterior-grade paint thoroughly to ensure an even color. Use a paintbrush or foam roller to apply the paint to the door. Work in long, even strokes, following the grain of the composite material. Start from the top and work your way down.
8. Allow to Dry:
Let the first coat of paint dry completely before applying a second coat. Depending on the paint type and weather conditions, this might take several hours.
9. Apply Additional Coats (if necessary):
If you notice any uneven areas or thin spots after the first coat is dry, add extra layers of paint as necessary. Make sure to let each coat dry completely before adding another.
10. Remove Painter’s Tape:
After allowing the last coat of paint to dry, carefully remove the painter’s tape to reveal clean edges.
11. Reattach the Door (if applicable):
If you removed the door from its hinges, reattach it carefully once the paint is completely dry.
12. Clean Up:
Clean your paintbrushes and rollers with soap and water, and dispose of any used materials and drop cloths responsibly.
With proper preparation and execution, your composite door should now have a fresh, attractive, and long-lasting paint finish!
What Type of Paint Is Best for Composite Doors?
Composite doors consist of a combination of materials such as wood, uPVC, and metal. As a result, the conventional paint used for wooden doors may not be suitable. It is crucial to select an appropriate type of paint specifically designed for composite doors to achieve a long-lasting and visually appealing finish.
The recommended paint types for composite doors are:
Exterior-Grade Acrylic Paint:
- Water-based paint formulated for outdoor use on composite doors.
- Offers excellent weather resistance and UV protection.
- Flexible, preventing cracking or peeling with door movement.
- Quick drying and easy cleanup with low VOC content.
- Available in various sheen levels for different finishes.
Oil-Based Enamels:
- Provides better coverage than latex paints.
- Suitable for exterior use and offers good durability.
- Requires longer drying times compared to water-based paints.
- Generally has a stronger odor and requires proper ventilation during application.
Both exterior-grade acrylic paint and oil-based enamels are suitable for painting composite doors. The choice between the two options depends on your preference, local climate conditions, and the specific properties you desire in the paint. Regardless of the type of paint you choose, proper surface preparation and application techniques are essential for achieving a long-lasting and professional-looking finish.
Can You Change the Color of a Composite Door?
Yes, you can change the color of a composite door. Composite doors are designed to be painted, so you have the option to update their appearance by choosing a different color.
When choosing a paint color, opt for lighter shades or colors that are not too dark, as darker colors can absorb more heat and might cause the composite door to expand and contract more than it should. Overall, using an exterior-grade acrylic or latex-based paint will help ensure that your composite door maintains its appearance and protection for years to come.
Can You Polish a Composite Door?
No, you cannot polish a composite door in the same way you would polish a wooden surface. Unlike wood, composite doors are typically made from a combination of materials such as glass-reinforced plastic (GRP), uPVC, foam core, and other composite materials. These materials do not have a natural grain or texture that can be enhanced through polishing.
To keep your composite door looking its best, a simple cleaning routine using mild soap and water is usually enough. Steer clear of abrasive cleaners or harsh chemicals, as they can potentially harm the door’s surface. Stick to gentle cleaning methods to maintain its appearance over time. If there are any stains or marks that cannot be removed with regular cleaning, it’s best to consult the manufacturer’s guidelines or contact a professional for advice on how to address the specific issue.
Final Words
Painting composite doors is a practical and creative means of rejuvenating your entryway. By considering the material’s adaptability, embracing the potential for customization, executing thorough preparatory steps, selecting high-quality paint, and being open to professional assistance, homeowners can transform their composite doors into eye-catching features that reflect their unique style and elevate the curb appeal of their property.
To remove spray paint, use a mixture of mild soap and water to scrub the spray-painted areas. For metal rims, use paint thinner; for painted rims, use isopropyl alcohol.
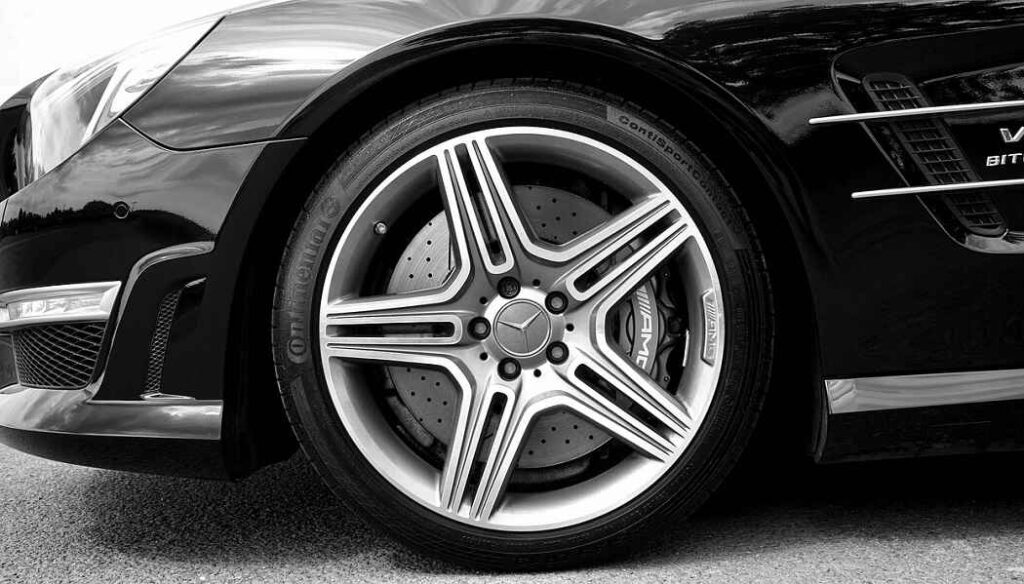
Are you frustrated with unwanted spray paint on your cherished rims and wheels? Fear not! Discover simple yet effective techniques to remove spray paint, leaving your rims spotless and gleaming once more. Keep your rims shining like new!
What Are Different Methods of Removing Spray Paint from Rims?
Removing spray paint from rims can be a challenging task, but there are several methods you can try. The effectiveness of each method may vary depending on the type of paint, the condition of the rims, and the materials you have available. Here are some different methods you can consider:
Rubbing Alcohol or Acetone: Dampen a cloth or cotton ball with rubbing alcohol or acetone (nail polish remover) and gently rub the spray paint. Be cautious with acetone on certain types of rims, as it may damage the finish or paint of some materials.
WD-40 or Goo Gone: Apply WD-40 or Goo Gone to the painted area and let it sit for a few minutes. Then, use a soft cloth or sponge to wipe away the paint.
Automotive Paint Remover: Purchase a paint remover designed specifically for automotive use. Follow the instructions on the product carefully and wear protective gloves when using strong chemicals.
Baking Soda and Water Paste: Create a paste using baking soda and water. Spread it over the painted surfaces. Allow it to sit for a while, and then gently scrub the paint off with a soft brush or cloth.
Pressure Washer: A pressure washer can be a handy tool for tackling spray paint. If you have one available, why not give it a shot? Be cautious not to use too high a pressure as it may damage the rims.
Steel Wool or Sandpaper: Use fine-grade steel wool or sandpaper to carefully scrub off the paint. Be cautious to avoid scratching the rims, especially if they have a delicate finish.
Heat Gun: For stubborn spray paint, you can try using a heat gun to soften the paint, making it easier to scrape off. Be careful not to overheat the rims or use this method on plastic or sensitive surfaces.
Vinegar: Soak a cloth in vinegar and apply it to the paint. Let it sit for a while to help loosen the paint, then wipe it away with a soft cloth.
Clay Bar: An automotive clay bar can be used to remove surface contaminants, including spray paint. It may not work for heavy or thick layers of paint, but it can be helpful for lighter splatters.
Before attempting any of these methods, it’s essential to test them on a small inconspicuous area of the rim to make sure they won’t damage the finish or material.
What Is the Fastest Way to Remove Paint from Rims?
The fastest way to remove paint from rims is by using an automotive paint stripper. Paint strippers are powerful chemical solutions designed to dissolve paint quickly and effectively. However, please be aware that this method is also one of the riskiest, as it involves handling strong chemicals that can be hazardous if not used correctly. Always follow safety guidelines and wear protective gear, such as gloves, eye protection, and a respirator, when working with paint strippers.
Here’s a step-by-step guide on how to use an automotive paint stripper to remove paint from rims:
Materials Needed:
- Automotive paint stripper (make sure it is suitable for rims and follow the manufacturer’s recommendations)
- Gloves
- Eye protection
- Respirator or mask
- Old newspapers or drop cloth
- Plastic scraper or putty knife
- Wire brush or steel wool (fine-grade)
- Clean water
- Clean rags or paper towels
Step 1: Prepare the Work Area
Choose a well-ventilated area to work in, preferably outdoors. Lay down old newspapers or a drop cloth to catch any drips or spills.
Step 2: Wear Protective Gear
Put on gloves, eye protection, and a respirator or mask to protect yourself from the fumes and potential splashes.
Step 3: Apply the Automotive Paint Stripper
Read the manufacturer’s instructions on the paint stripper carefully. Apply the paint stripper to the painted areas of the rim using a paintbrush or an old rag. Ensure that the paint stripper covers the entire surface you want to remove the paint from. Let it sit for the recommended amount of time specified in the instructions (usually a few minutes).
Step 4: Test a Small Area
Before proceeding with the whole rim, it’s a good idea to test the effectiveness of the paint stripper on a small inconspicuous area. This will give you an idea of how long it takes to remove the paint and if any adjustments are needed.
Step 5: Scrape off the Paint
Using a plastic scraper or putty knife, gently scrape away the softened paint from the rim. Be careful not to scratch the surface, especially if the rims have a delicate finish. The paint should come off relatively easily due to the action of the paint stripper.
Step 6: Use a Wire Brush or Steel Wool
After most of the paint has been removed, use a wire brush or fine-grade steel wool to scrub off any remaining traces of paint. This will help clean and smoothen the surface.
Step 7: Rinse and Clean
Thoroughly rinse the rims with clean water to remove any leftover paint stripper and residue. Wipe the rims dry with clean rags or paper towels.
Step 8: Inspect and Repeat (if necessary)
Inspect the rims to ensure all paint has been removed. If there are any stubborn spots, you may need to repeat the process or use a more targeted approach for those areas.
Step 9: Polish and Protect
Once the paint is completely removed and the rims are clean and dry, you can apply a suitable rim polish or wax to restore their shine and protect them.
Step 10: Dispose of Paint Stripper and Clean Up
Follow local regulations for the safe disposal of paint stripper and clean up the work area properly.
How to Remove Spray Paint from Rims and Wheels?
Removing spray paint from rims and wheels requires a careful approach to avoid damaging the surface. Here’s a generalized step-by-step method to help you remove spray paint effectively:
Materials you’ll need:
- Rubber gloves
- Safety goggles
- Face mask
- Water
- Mild dish soap or car wash soap
- Soft bristle brush or microfiber cloth
- Plastic scraper or plastic putty knife
- Paint thinner or acetone (for metal rims)
- Isopropyl alcohol (for painted or coated rims)
- Automotive wax or polish (for protecting the rims after cleaning)
Step-by-step process:
Safety first: Wear protective gear and work in a well-ventilated area.
Preparation: Rinse the rims with water to remove loose dirt and debris.
Soap and water: Create a mixture of mild dish soap or car wash soap with water. Use a soft bristle brush or microfiber cloth to gently scrub the spray-painted areas.
Test spot: Before using any chemical solvent, test a small inconspicuous area on the rims to ensure it doesn’t cause damage or discoloration.
Choose the appropriate solvent:
- For metal rims: Use paint thinner or acetone. Moisten a clean cloth with the chosen solvent and gently rub the spray-painted areas. Wipe off the paint residue with a separate clean cloth.
- For painted or coated rims: Use isopropyl alcohol. Dampen a cloth with isopropyl alcohol and gently rub the spray-painted areas. Wipe off the paint residue with a separate clean cloth.
Plastic scraper or putty knife: For stubborn paint spots, you can use a plastic scraper or putty knife to carefully remove the paint.
Repeat if necessary: Depending on the thickness and type of spray paint used, you may need to repeat the cleaning process to completely remove the paint.
Clean and dry: After removing the paint, thoroughly clean the rims with water and a clean cloth to remove any residue from the solvents used. Allow the rims to dry completely before proceeding.
Protect the rims: Once the rims are clean and dry, apply automotive wax or polish to protect the surface and give it a shiny finish. Follow the manufacturer’s instructions on the wax or polish product.
How Do You Get Spray Paint Off Alloy Wheels?
To remove spray paint from alloy wheels, you’ll need safety gear like rubber gloves, safety goggles, and a face mask.
- Start by rinsing the wheels to remove loose dirt and debris.
- Create a mixture of mild dish soap or car wash soap with water. Then gently scrub the spray-painted areas using a soft bristle brush or microfiber cloth.
- Next, dampen a cloth with denatured alcohol and gently rub the spray-painted areas. The alcohol will effectively dissolve and remove the spray paint without damaging the alloy wheel coating.
- Depending on the paint’s thickness, you may need to repeat the process to completely remove the paint.
- After the paint is gone, thoroughly rinse the wheels to remove any alcohol residue and then dry them with a clean cloth.
How Do You Get Spray Paint Off of Chrome Rims?
To remove spray paint from chrome rims, you can follow these steps:
Materials you’ll need:
- Rubber gloves
- Safety goggles
- Face mask
- Water
- Mild dish soap or car wash soap
- Soft bristle brush or microfiber cloth
- Chrome cleaner (non-abrasive)
Step-by-step process:
- Begin by rinsing the chrome rims with water to remove loose dirt and debris.
- Create a mixture of mild dish soap or car wash soap with water. Use a soft bristle brush or microfiber cloth to gently scrub the spray-painted areas.
- Apply a non-abrasive chrome cleaner following the product’s instructions. These cleaners are designed to be gentle on chrome while effectively removing contaminants like spray paint.
- For stubborn paint spots, you may need to repeat the process or use a plastic scraper (non-abrasive) to carefully remove the paint.
- Thoroughly rinse the rims to remove any cleaner residue and then dry them with a soft towel.
- To restore shine and protect the surface, apply a chrome polish or wax following the product’s instructions.
Final Words
Removing spray paint from both rims and wheels can be a manageable task with the right approach and tools. Throughout our discussion, we have explored various effective methods that can help restore the pristine appearance of your vehicle’s rims and wheels. From household items to specialized ones, there are plenty of options to choose from based on the severity of the paint job and the type of surface.
By following the right techniques and being mindful of safety, you can successfully remove spray paint from your rims and wheels.
Looking to maintain the perfect appearance of your Hardie board siding? Wondering about the ideal painting schedule to keep it looking its best? But the burning question on every homeowner’s mind:
“How often does Hardie board need to be painted?” Hardie board typically needs to be painted every 10-15 years, depending on some factors like climate, sun exposure, and maintenance.
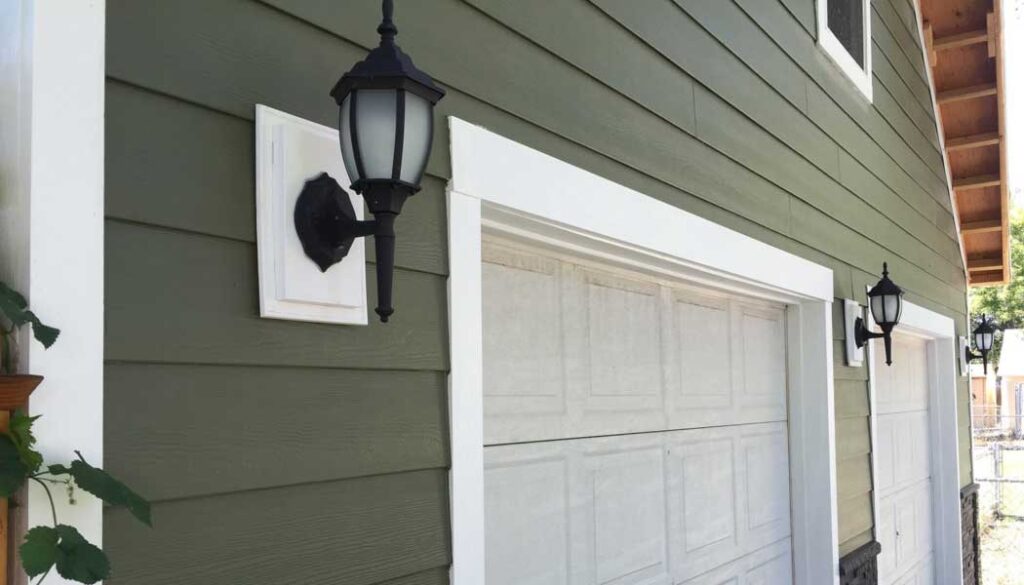
Let’s explore together the world of Hardie siding and maximize its aesthetic appeal effortlessly!
How Often Does Hardie Board Need to Be Painted?
Hardie board is also known as fiber cement siding. It is a popular choice for exterior cladding due to its durability and low maintenance requirements. When it comes to painting this board, the frequency depends on several factors. You should consider the quality of the paint, exposure to environmental elements, and the overall condition of the siding.
It typically comes pre-painted from the factory, and the paint applied during the manufacturing process is designed to last for many years. But keep monitor the board’s condition regularly, as external factors can affect this timeline.
Harsh climates, excessive sunlight, heavy rainfall, and high humidity can all accelerate the deterioration of the paint finish. Over time, the paint may fade or show signs of wear and require repainting. For example, areas with high levels of sun exposure, harsh winters, or saltwater environments may require more frequent repainting.
The frequency of repainting Hardie board can vary, but it is generally recommended to repaint it every 10-15 years.
Regular maintenance and inspection of the board are crucial for determining when it needs to be repainted. Look for signs of peeling, cracking, or chipping paint, as well as any areas where the substrate is exposed. If these issues are present, it is advisable to repaint the affected areas promptly. It’ll prevent further damage and ensure the board’s longevity.
When repainting Hardie board, follow the manufacturer’s guidelines. Make sure to use high-quality exterior paint that is suitable for fiber cement siding. Proper surface preparation is also crucial for achieving a long-lasting and aesthetically pleasing paint finish.
How Long Can Hardie Go Unpainted?
It is recommended to paint Hardie siding within 180 days (approximately 6 months) of installation to ensure optimal protection of the product.
But the exact time period that Hardie siding can go without painting can vary due to many factors.
Painting fiber cement siding provides an additional layer of protection against environmental factors. Unpainted fiber cement siding may be more prone to fading, discoloration, and potential damage over time.
Remember, James Hardie Industries strongly advises painting their fiber cement siding products as part of their recommended guidelines. Painting helps maintain the warranty and extends the lifespan of the siding. Therefore, it is generally recommended to paint the siding within a reasonable timeframe after installation.
If you have specific concerns or requirements regarding Hardie siding, it’s best to consult the official documentation.
What Are the Signs of Paint Failure on Hardie Board?
While Hardie board is known for its durability, even the highest-quality paint systems can experience failure over time. The signs of paint failure on Hardie board can include:
Peeling or Flaking: Paint that is coming off in small or large chips indicates a failure of the paint adhesion to the Hardie surface.
Blistering or Bubbling: The appearance of bubbles or blisters under the paint film is a sign of moisture or heat trapped beneath the surface. It causes the paint to lose adhesion and eventually peel.
Fading or Chalking: When the paint color starts to fade or become chalky, it indicates degradation of the paint film.
Cracking: The development of fine or large cracks resembling the scales of an alligator suggests the paint film is aging and losing its elasticity. It can happen due to repeated expansion and contraction of the Hardie Board.
Staining or Discoloration: The presence of stains or discoloration on the painted surface can be a sign of water intrusion, moisture buildup, or underlying issues that are affecting the paint’s integrity.
If you notice signs of paint failure on your Hardie board, it may be necessary to address the issue on time to maintain the aesthetic appeal of the surface.
Factors Affecting Paint Durability on Hardie Board
Several key factors can influence the longevity and overall performance of the paint coating.
Moisture Management: Hardie board is resistant to moisture, but excessive moisture can still affect paint durability. It is important to ensure that the board is adequately protected from water intrusion. Proper flashing, caulking, and maintaining a suitable gap between the board and adjacent materials can help prevent moisture-related issues.
Quality of Paint: The quality of the paint itself plays a significant role in determining its durability. Choosing a high-quality, exterior-grade paint designed for use on cementitious surfaces can provide better adhesion.
Paint Application: Applying the paint at the recommended thickness and using the appropriate tools can help achieve a uniform and durable finish. Multiple coats may be necessary for optimal coverage and durability.
Environmental Factors: Exposure to extreme temperatures, UV radiation, moisture, and other environmental factors can cause paint to degrade. It is great to choose paints that are specifically formulated to withstand the local climate conditions.
Maintenance Tips to Extend Paint Longevity on Hardie Board
Proper maintenance can further extend the paint longevity. Here are some tips to help you maintain the paint on your Hardie Board siding.
Regular Cleaning: Perform regular cleaning of your Hardie siding to remove dirt, dust, and other contaminants that can degrade the paint. Use a soft-bristle brush or a low-pressure power washer to clean the surface. Avoid using abrasive materials or high-pressure washers, as they can damage the paint.
Inspect for Damage: Conduct periodic inspections to identify any signs of damage to the paint. Look for cracks, peeling, or areas where the paint has worn away. Promptly repair any damaged areas to prevent water infiltration and further deterioration of the paint.
Touch-up Paint: If you notice any small areas where the paint has chipped or worn off, touch them up quickly. Use an exterior paint that matches the color of your Hardie board siding.
Avoid Harsh Chemicals: When cleaning the siding, avoid using harsh chemicals, such as bleach or ammonia-based cleaners. These chemicals can fade or discolor the paint. Use mild soapy water recommended by the manufacturer.
Trim Landscaping: Trim back any bushes, trees, or vines that are in close proximity to the Hardie board. Overhanging branches or plants can cause moisture buildup, which can accelerate paint deterioration. And potentially they lead to mold or mildew growth.
Maintain Proper Drainage: Ensure that your gutter system is functioning correctly and directing water away from the siding. Proper drainage is essential to prevent water from seeping into the substrate and causing paint damage. Keep the gutters clean and free from debris that can clog them.
Can You Paint Hardie Board a Different Color?
Certainly! Hardie board siding can indeed be painted in a different color to suit your preferences.
Consider your home’s architectural style, the surrounding environment, and personal preferences when choosing a color for the siding. Obtain paint samples and test them on a small section of the siding to ensure you are happy with the color before proceeding with the full application.
You can consider colors like classic white for a timeless look, neutral gray for a contemporary feel, and coastal blue for a refreshing vibe. Also, warm taupe for a cozy atmosphere, olive green for a natural blend, deep charcoal for a bold statement, or soft beige for an elegant touch can give you joy.
Conclusion
Periodic repainting every 10 to 15 years, are recommended for Hardie board to preserve its aesthetic appeal. By investing in proper care, you can ensure that your Hardie board retains its beauty and contributes to the long-lasting durability of your home or building.
Ever found yourself longing for a picture-perfect finish on your painted projects? Wondering if there’s a way to enhance their beauty and protect them from the elements at the same time? Look no further! We’ve got a surprising technique that just might be the missing piece to achieving that professional-grade result you’ve been dreaming of.
Curious? Today, we’re here to explore the intriguing question: Can you use spar urethane over paint? Prepare to be amazed as we uncover the possibilities and reveal how this combination could be the game-changer for all your painting endeavors!
What is Spar Urethane?
Spar urethane is a high-performance protective coating widely used in woodworking and outdoor applications. It is a type of polyurethane finish specially formulated to withstand harsh environmental conditions, making it ideal for protecting wood surfaces exposed to moisture, sunlight, and temperature fluctuations.
Unlike regular interior polyurethane, spar urethane possesses superior flexibility, UV resistance, and water repellency. It forms a robust, clear, and glossy film when applied. It enhances the wood’s natural beauty while providing long-lasting protection against weathering, rot, and mildew.
It’s commonly employed on exterior wooden structures such as doors, windows, decks, and boats. It acts as a reliable barrier, preserving the integrity and aesthetics of wood in challenging outdoor environments.
Can You Use Spar Urethane Over Paint?
Yes, you can use spar urethane over paint. Spar urethane is a versatile and durable clear protective finish that can also be applied over painted surfaces to provide additional protection and enhance the longevity of the paint job.
For successful application, it’s crucial to ensure the painted surface is clean, dry, and free from any contaminants or loose particles. Proper surface preparation will promote strong adhesion between the paint and the urethane, resulting in a seamless and long-lasting finish.
Selecting the appropriate type of spar urethane is essential. Choose a product specifically designed for exterior applications, as it will offer better resistance against UV rays, moisture, and temperature fluctuations. Opt for a water-resistant and flexible urethane to accommodate natural expansion and contraction of the painted surface.
By using spar urethane over paint, you not only add an extra layer of protection but also impart a beautiful and glossy sheen to the painted surface. It’s a reliable choice for enhancing the appearance and durability of outdoor furniture, trim, doors, or any other painted exterior surface. Always follow the manufacturer’s instructions for the best results and enjoy a long-lasting, protected finish that withstands the test of time.
Can You Use Spar Urethane Over Acrylic Paint?
Yes, you can absolutely use Spar Urethane over Acrylic Paint.
Spar Urethane is known for its versatility and ability to adhere well to various surfaces, including acrylic paint. When applying it over acrylic paint, it forms a protective and durable coating that enhances the longevity of the painted surface. The urethane’s clear finish preserves the vibrant colors and textures of the underlying acrylic paint. It provides a glossy and professional look to your artwork or project.
It’s essential to ensure that the acrylic paint has thoroughly dried before applying Spar Urethane. Typically, acrylic paint dries relatively quickly, but it’s recommended to wait for at least 24 hours before proceeding with the urethane application. This waiting period allows the acrylic paint to cure properly, preventing any potential issues with adhesion or bubbling.
Before applying Spar Urethane, make sure the acrylic paint surface is clean, free from dust, and smooth. If there are any imperfections or rough areas, sanding the surface lightly can help achieve a more even and flawless finish.
When applying Spar Urethane over acrylic paint, use a high-quality brush, foam brush, or a spray gun for even and smooth application. Follow the manufacturer’s instructions for the specific product you are using, regarding the number of coats and drying times between applications. Applying thin coats of Spar Urethane is usually recommended to avoid drips or uneven coverage.
Can You Use Spar Urethane Over Enamel Paint?
Yes, you can use spar urethane over enamel paint whether it’s outdoor furniture or decorative items, spar urethane can provide an additional layer of protection and enhance the overall finish.
Protective Coating for Outdoor Furniture:
You’ve just finished painting your outdoor wooden furniture with enamel paint to give it a beautiful glossy finish and protection against the elements. However, since outdoor furniture is exposed to harsh weather conditions, you want to provide an extra layer of protection to ensure the paint lasts longer. In this case, you can apply spar urethane over the enamel paint.
Before applying the spar urethane, make sure the enamel paint has dried and cured completely. Then, lightly sand the surface, and apply spar urethane following the manufacturer’s instructions. This will create a durable, weather-resistant finish that prolongs the life of your painted furniture.
Enhancing the Shine and Protection on Decorative Items:
Imagine you’ve crafted a beautiful wooden sign or a decorative item for your home and painted it with enamel paint to achieve a vibrant color and glossy finish. Now, you want to add an extra layer of protection to safeguard the paint and give it an even more lustrous shine. In this scenario, you can use spar urethane as a topcoat over the enamel paint.
For painting, once the enamel paint has fully dried and cured, lightly sand the surface and clean it to prepare for the spar urethane. Apply the spar urethane carefully to achieve a clear, high-gloss finish that enhances the colors of the enamel paint and adds extra protection against wear and scratches.
Can You Put Spar UIrethane Over Latex Paint?
Absolutely! Applying spar urethane over latex paint is indeed a viable option, provided that you follow the right surface preparation and application techniques. By doing so, you can create a remarkable protective layer that not only enhances the appearance of your painted surface but also fortifies it against the elements.
Choose an exterior-grade spar urethane or a water-based polyurethane, as they are more suitable for outdoor applications. They will added flexibility and reduced yellowing.
Always adhere to the manufacturer’s instructions for drying and curing times, and avoid heavy use of the painted surface during the curing period. For any uncertainties, seek professional advice for your specific project.
Can You Put Spar Urethane Over Chalk Paint?
Yes, you can absolutely apply spar urethane over chalk paint. Combining spar urethane as a topcoat over chalk paint is a popular method to achieve both an attractive appearance and a durable, protective finish.
Chalk paint is known for its matte and rustic charm and doesn’t always provide the level of protection some projects require, particularly for high-traffic areas or outdoor use. Spar urethane, on the other hand, is a robust, water-resistant coating typically used for outdoor wood surfaces like decks and boats.
To apply spar urethane over chalk paint, make sure the chalk paint has fully dried and cured. Lightly sand the surface to create a smooth base for the urethane. Use a high-quality brush or foam applicator for even coverage.
You can choose the level of sheen you prefer by selecting glossy, semi-gloss, or satin spar urethane. Keep in mind that the glossier the urethane, the more it will alter the original matte appearance of the chalk paint.
Can You Use Spar Urethane on Painted Wood?
Yes, you can use spar urethane on painted wood to provide an added layer of protection and enhance the appearance of your painted surfaces. Whether you have painted a wooden tabletop, a decorative piece, or any other painted wood item, spar urethane can be a great choice to seal and safeguard the paint.
Especially if your wood item is exposed to moisture, sunlight, or other harsh environmental conditions, Spar urethane provides a protective barrier that helps to prevent the paint from chipping, fading, or deteriorating over time, thus extending the life of your painted woodwork.
However, when applying spar urethane over painted wood, it is crucial to ensure that the paint is fully dried and cured before proceeding. If the paint hasn’t dried completely, the urethane can trap moisture beneath the surface, leading to bubbling, peeling, or other adhesion issues. Therefore, it’s best to wait for at least two to four weeks after painting before applying spar urethane.
Keep in mind that spar urethane can add a slight amber tint to the wood, so test the product on a small, inconspicuous area first to ensure you are satisfied with the result. Additionally, avoid applying spar urethane in direct sunlight or extremely hot and humid conditions, as it can lead to uneven drying and potential issues with the finish.
Final Words
To sum up, using spar urethane over paint is a feasible and effective solution for protecting and preserving your painted projects, both indoors and outdoors. Embrace this winning combination, and enjoy the benefits of a durable and attractive finish for years to come.
Yes, Sherwin Williams offers both water-based and solvent-based paints, but they primarily produce water-based paints due to their environmental and safety advantages.
Let’s know details about Sherwin Williams and their exceptional paint products!
What Type of Paint Does Sherwin Williams Have?
Sherwin-Williams, one of the largest paint manufacturers in the world, offers an extensive range of paint types to cater to various surfaces and project needs. Here are some of the common types of paint they typically offer:
Interior Paints:
Latex Paint (Acrylic): This is the most commonly used paint for interior walls. It is water-based, dries quickly, and emits minimal odor. Latex paint is easy to clean up with water and offers good durability and color retention.
Oil-based Paint (Alkyd): While less common than latex, oil-based paints offer a smooth, durable finish for interior trim, doors, and cabinets. They take longer to dry and require mineral spirits for cleanup.
Exterior Paints:
Exterior Latex Paint: Designed to withstand outdoor elements, this water-based paint offers excellent durability, flexibility, and color retention. It resists peeling, cracking, and fading.
Exterior Oil-based Paint: Though less common due to environmental concerns, oil-based paints can still be found for specific applications that require added durability and adhesion.
Wood Stains:
Interior Wood Stains: Sherwin-Williams provides various wood stain products to enhance the natural beauty of interior wood surfaces, such as furniture, cabinets, and floors.
Exterior Wood Stains: Formulated to protect wood from UV rays, moisture, and mildew, exterior wood stains are suitable for decks, fences, and other exterior wood surfaces.
Specialty Paints:
Ceiling Paint: Designed to minimize spatter and offer better coverage on ceilings, this paint typically has a flat finish.
Bathroom Paint: Featuring enhanced moisture resistance, bathroom paint helps prevent mold and mildew growth.
Kitchen Paint: These paints are formulated to withstand frequent cleaning and resist stains and moisture in kitchen environments.
Primers:
Multi-purpose Primers: These primers work on various surfaces and help improve paint adhesion, coverage, and durability.
Specialty Primers: Sherwin-Williams offers primers formulated specifically for problematic surfaces like stains, rust, and tannin bleed.
Metal and Masonry Paints:
Metal Paint: Specially designed for metal surfaces, these paints provide rust protection and adhesion on ferrous and non-ferrous metals.
Masonry Paint: Ideal for concrete, brick, and stucco surfaces, masonry paints offer good adhesion, breathability, and weather resistance.
Floor Coatings:
Epoxy Floor Coatings: These coatings provide durable, chemical-resistant finishes for garage floors, basements, and other high-traffic areas.
Note: Sherwin-Williams might have expanded its product line or made changes after my last update. Therefore, for the most up-to-date information on their product offerings, I recommend visiting their official website or contacting a local Sherwin-Williams store.
Is Sherwin Williams Paint Water Based?
Sherwin-Williams offers a wide range of water-based paints known for their exceptional quality and numerous benefits. One of their most renowned water-based paint lines is the Sherwin-Williams Duration Home® line, which features advanced stain-blocking technology and a washable finish for excellent adhesion and durability on various surfaces.
In addition to Duration Home®, Sherwin-Williams has several other popular water-based paint lines:
SuperPaint: This premium exterior paint is known for its durability and weather resistance, providing long-lasting protection for your home’s exterior surfaces.
Emerald: Sherwin-Williams Emerald Paint is a water-based acrylic latex paint that offers superior coverage and durability for both interior and exterior surfaces. It emits fewer harmful VOCs, making it environmentally friendly and safer for indoor use.
Harmony: For those seeking an eco-friendly option, Sherwin-Williams Harmony is a zero-VOC paint that promotes better indoor air quality and reduces potential health risks associated with traditional solvent-based paints.
The primary advantage of Sherwin-Williams water-based paints lies in their low VOC content, which makes them environmentally friendly and safer for both users and the surrounding environment. These paints emit fewer harmful fumes compared to traditional oil-based paints, ensuring better indoor air quality and reducing potential health risks.
Additionally, Sherwin-Williams water-based paints have quick drying times, allowing for faster project completion. They are easy to apply and clean up, making them convenient for DIY enthusiasts and professional painters alike. The reduced odor is particularly advantageous for interior applications, as it minimizes disruptions during painting projects and ensures a more pleasant painting experience overall.
Furthermore, these water-based paints are known for their outstanding color retention and resistance to fading, ensuring that your paint job stays vibrant and fresh-looking for an extended period. Whether you are painting walls, trim, or other surfaces, Sherwin-Williams water-based paints offer excellent coverage and a smooth finish, enhancing the overall aesthetics of your space.
Is Sherwin-Williams Emerald Paint Water-Based?
Yes, Sherwin-Williams Emerald Paint is a water-based product. It is specifically formulated as an acrylic latex paint, which means it uses water as its primary solvent. This type of paint is commonly known as water-based or waterborne paint.
One of the significant advantages of Emerald Paint being water-based is its low VOC (Volatile Organic Compounds) content. VOCs are potentially harmful chemicals that can be released into the air as paint dries, contributing to air pollution and indoor air quality issues. By using water as the solvent, Emerald Paint emits fewer VOCs, making it a safer and more environmentally friendly option for both the surroundings and those applying the paint.
Emerald Paint is known for its exceptional durability and coverage. It adheres well to various surfaces, including wood, metal, and previously painted walls. The paint’s low-odor formula enhances the painting experience, making it more pleasant to work with, particularly for indoor applications.
In addition to its durability and low VOC content, Sherwin-Williams Emerald Paint is designed to resist stains and mildew growth, making it particularly suitable for high-humidity areas like bathrooms and kitchens. Its fast drying time allows for quicker recoating, reducing downtime during painting projects.
Sherwin-Williams offers Emerald Paint in a wide range of colors and finishes, providing consumers with ample choices to suit their preferences and project requirements.
Is Sherwin Williams Super Paint Water Based?
Certainly! Sherwin-Williams Super Paint is another popular product in their paint lineup, and like Emerald Paint, it is also water-based. Sherwin-Williams formulates Super Paint as an acrylic latex paint, which means it utilizes water as the primary solvent in its composition.
The decision to create a water-based product aligns with Sherwin-Williams’ commitment to providing environmentally friendly options and reducing the impact of Volatile Organic Compounds (VOCs) on air quality. By using water as the solvent, Super Paint emits fewer harmful VOCs during the drying process compared to traditional solvent-based paints.
It is renowned for its versatility and ease of application. It is suitable for a wide range of surfaces, including wood, metal, and previously painted walls. This water-based formula promotes strong adhesion, ensuring a long-lasting and durable finish for various interior and exterior projects.
One of the significant advantages of Super Paint is its ability to resist mildew growth and staining, making it a reliable choice for areas with high humidity and moisture. Its low-odor feature enhances the painting experience, making it more pleasant to work with, especially in interior spaces.
With an extensive color palette and various finishes to choose from, Sherwin-Williams Super Paint offers homeowners and professionals alike plenty of creative options to achieve their desired look.
Final Words
Sherwin Williams offers a wide range of paint products, some of which are indeed water-based. Throughout our discussion, we explored the various types of paints offered by Sherwin Williams, including water-based latex paints and solvent-based oil paints.
As responsible consumers, you just consider the specific requirements of our projects and choose the appropriate paint type accordingly.
Are you on the quest for the ideal color palette to complement Sherwin Williams Peppercorn, a stunning shade that exudes sophistication and elegance?
Okay, Sherwin Williams Peppercorn pairs beautifully with soft neutrals like cream, beige, or gray for an elegant and sophisticated look.
Let the transformative journey begin!
What Color Goes with Sherwin Williams Peppercorn?
Sherwin Williams Peppercorn is a beautiful deep gray color with subtle brown undertones. It’s a versatile color that can be paired with various other shades to create different atmospheres and design aesthetics. Here are some excellent color suggestions that complement Sherwin Williams Peppercorn:
Creamy White (e.g., Sherwin Williams Creamy): A soft, creamy white will create a classic and timeless look when paired with Peppercorn. It will provide a beautiful contrast and add a sense of warmth to the space.
Nebulous White (e.g., Sherwin Williams Nebulous White): Nebulous White, a soft gray-white shade, this combination offers an elegant and calming contrast, ideal for a serene atmosphere. This well-balanced palette with dark Peppercorn and lighter Nebulous White creates depth and visual interest, suiting various settings, from traditional to contemporary living spaces and bedrooms.
Light Gray (e.g., Sherwin Williams Repose Gray): For a more monochromatic and contemporary feel, a soft, light gray shade complements Peppercorn nicely. This combination offers a modern, sophisticated look.
Beige or Greige: Neutral beige or greige (a combination of gray and beige) can work well with Peppercorn, creating a warm and inviting ambiance.
Navy Blue (e.g., Sherwin Williams Naval): If you want to create a dramatic and moody atmosphere, pairing Peppercorn with a deep navy blue can achieve just that. The combination will exude elegance and richness.
Soft Blue (e.g., Sherwin Williams Sea Salt): For a calming and coastal vibe, a soft blue tone complements Peppercorn beautifully. This combination creates a tranquil and relaxing environment.
Blush Pink (e.g., Sherwin Williams Charming Pink): To add a touch of softness and femininity, a blush pink hue can work wonders with Peppercorn. This combination creates a balanced and visually appealing contrast.
Coral or Coral Pink: To add a vibrant and energetic touch, consider using coral or coral pink accents with Peppercorn. This combination brings a lively and cheerful atmosphere to the space.
Mustard Yellow: Adding a pop of mustard yellow can bring warmth and energy to a room with Peppercorn walls. This combination is perfect for creating a cozy and inviting space with a touch of boldness.
Deep Purple (e.g., Sherwin Williams Grape Harvest): If you want a luxurious and regal feel, pairing Peppercorn with a deep purple shade can achieve that. This combination creates an elegant and sophisticated atmosphere.
Teal (e.g., Sherwin Williams Oceanside): For a bold and vibrant look, consider pairing Peppercorn with a teal color. This combination brings a sense of energy and depth to the space.
Muted Green (e.g., Sherwin Williams Sage Green): If you prefer a more nature-inspired and calming ambiance, a muted green tone complements Peppercorn beautifully. It will create a soothing and harmonious space.
Remember, when choosing colors to complement Sherwin Williams Peppercorn, it’s essential to consider the lighting in the room and the overall mood you want to achieve. You can also use accents like metallics (e.g., gold, silver) or natural wood tones to enhance the color palette further. As with any design decision, it’s a good idea to get color samples and test them in the room to see how they interact before making a final decision.
Where Sherwin Williams Peppercorn Works Best?
Sherwin Williams Peppercorn works best in various rooms, adding depth and sophistication to the space. Here are some specific areas within a room where Peppercorn can be applied for a stylish look:
Living Room: Consider using Sherwin Williams Peppercorn on one accent wall in the living room to create a cozy and inviting atmosphere. Pair it with neutral furniture and pops of complementary colors in the decor for a stylish look.
Bedroom: Peppercorn can be applied to all bedroom walls or used as an accent wall behind the bed to create a calming and elegant environment. It works particularly well in master bedrooms, providing a luxurious feel.
Dining Room: Painting the dining room with Peppercorn can set a sophisticated tone for dinner parties and gatherings. It pairs well with a range of dining room furniture styles and can enhance the ambiance of the space.
Home Office: Apply Peppercorn in a home office to create a stylish and productive workspace. It can add a touch of professionalism and focus to the room, making it suitable for remote work or study.
Kitchen: While it’s less common to use dark colors on kitchen walls, consider using Peppercorn as an accent color for kitchen cabinets, particularly when combined with lighter countertops and backsplash. It can also work well on a feature wall in the kitchen.
Bathroom: For a chic and luxurious bathroom, use Peppercorn on the walls or as an accent color for cabinets and vanity. Paired with white fixtures, it creates a striking contrast.
Entryway/Hallway: Make a bold statement by using Peppercorn in the entryway or hallway. It can be especially effective in wide hallways with ample natural light.
Furniture and Decor: Incorporate Peppercorn into the room through furniture pieces or smaller decor elements like picture frames, vases, or accent chairs, if you prefer not to paint the walls.
What to Consider when Selecting Sherwin Williams Peppercorn for an Area?
When selecting Sherwin Williams Peppercorn for an area, consider the following factors:
Lighting conditions: Peppercorn is a deep, rich color with subtle undertones. Take into account the amount of natural and artificial light in the area, as it can significantly influence how the color appears.
Size of the area: Dark colors like Peppercorn can make a space feel smaller and cozier. If the area is already small or lacks natural light, using this color may intensify that effect.
Surrounding decor: Consider the existing furnishings and decor in the area. Peppercorn can complement a variety of styles, but it’s essential to ensure it harmonizes with your overall design scheme.
Mood and ambiance: Peppercorn exudes sophistication and elegance. Think about the desired mood and ambiance you want to create in the space, as this color can add depth and drama.
Samples and swatches: Always test the color on the actual surface before committing. Obtain paint samples or swatches and apply them to the walls to see how Peppercorn interacts with the room’s elements.
Contrast and coordination: Think about the adjacent spaces and how Peppercorn will relate to them. Consider if you want to create a seamless flow or define the area distinctly through color contrast.
Maintenance and upkeep: Dark colors can sometimes show wear and tear more visibly than lighter shades. Consider the practicality of maintaining Peppercorn, especially in high-traffic areas.
By considering these factors, you can make an informed decision about whether Sherwin Williams Peppercorn is the right choice for your area and how to incorporate it effectively into your design.
What Is the Undertone of Sherwin Williams Peppercorn?
Sherwin Williams Peppercorn is a dark gray color with a warm undertone that leans slightly towards brown rather than a cool undertone like blue or green. This warm undertone gives the color a deep and rich appearance.
However, it’s essential to keep in mind that the way a paint color appears can be influenced by lighting and the surrounding environment.
To get the most accurate impression of the color, it’s recommended to obtain a physical swatch or paint sample and test it in your specific space.
For the latest and most precise information about this color, it’s best to visit the Sherwin Williams website or reach out to their customer support directly.
What Is One Shade Darker than Sherwin Williams Peppercorn?
If you’re looking for a color that is one shade darker than Peppercorn within the Sherwin Williams collection, you might consider “Sherwin Williams Urbane Bronze” (SW 7048).
Urbane Bronze is a rich, deep brown-gray color with a warm undertone. It is a versatile and sophisticated shade that can add depth and elegance to any space.
Note: Paint colors and collections may be updated or changed over time, so it’s recommended to visit a Sherwin Williams store or their website for the latest color options and swatches.
Final Words
Throughout our discussion, we explored several color combinations that complement Peppercorn beautifully. Whether you opt for a classic, contemporary, or eclectic approach to design, Sherwin Williams Peppercorn will undoubtedly add a depth, character, and timeless elegance to your spaces.
So, go ahead and experiment with the suggested color palettes, let your creativity flow, and watch your living spaces transform into captivating havens of style and sophistication.
In the realm of car care advice, you may have come across a curious debate: do dryer sheets damage car paint? With conflicting opinions floating around, it’s essential to get to the bottom of this matter.
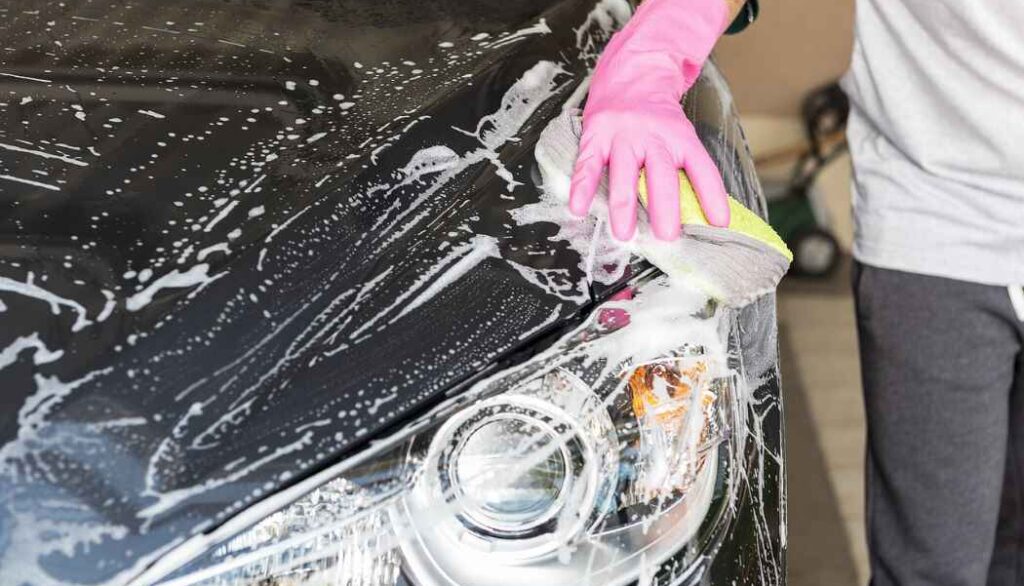
Let’s understand the science behind it and sort out what’s true and what’s not. By the end, you’ll have the knowledge to keep your beloved car looking stunning for a long time.
Will Dryer Sheets Damage Car Paint?
Dryer sheets, commonly used in laundry to reduce static and add fragrance to clothes, are not designed for use on car paint.
While they might seem convenient for removing dirt or grime from a vehicle’s exterior, using them can potentially cause damage over time. The chemicals in the dryer sheets will dissolve the finish.
Dryer sheets typically contain various chemicals and additives, such as fabric softeners, fragrances, and surfactants. While these ingredients are safe for use on fabrics, they are not formulated or tested for compatibility with automotive paint finishes. Some of these chemicals may have adverse effects on the paint, especially if used repeatedly or in concentrated amounts.
One primary concern is that the abrasive nature of the dryer sheet’s fibers may cause micro-scratches or swirl marks on the paint surface. Over time, this can lead to a dulled appearance and reduced shine. Additionally, certain chemicals in the dryer sheets might react with the paint’s protective clear coat or underlying layers, potentially causing fading, discoloration, or even degradation of the finish.
It is crucial to use products specifically designed for automotive paint care to maintain the appearance and longevity of your car’s paint job. To clean your car safely, opt for a dedicated car-wash product that is pH-balanced and does not contain harsh chemicals. Car wash products are formulated to lift and remove dirt and grime without damaging the paint.
After giving your vehicle a thorough wash, it becomes crucial to apply either wax or a paint sealant to safeguard its paint from harmful environmental elements and relentless UV rays. This protective layer formed through waxing not only accentuates the car’s luster but also simplifies future cleaning endeavors. It ensures a sparkling appearance for your beloved ride.
Will Dryer Sheets Scratch Car Paint?
Dryer sheets may not be the best option for cleaning or polishing your car’s paint surface. While they generally contain fabric softeners and conditioning agents suitable for laundry, their composition can pose a risk to the paintwork. The texture of the dryer sheets may contain small abrasive particles or chemicals that can scratch the paint’s clear coat, leading to unsightly swirl marks or fine scratches.
To preserve your car’s paint and finish, it’s essential to use products specifically designed for automotive care. Opt for microfiber cloths, soft mitts, or high-quality detailing towels. Specialized car detailing products, like automotive waxes and polishes, are formulated to clean and protect the paint without causing damage.
So, while using dryer sheets on your car may seem convenient, they are not the best choice for preserving the paint’s pristine appearance. Stick to tried-and-tested automotive cleaning products to ensure a scratch-free shine.
Can I Leave Dryer Sheets in My Car?
Yes, you can leave dryer sheets in your car to freshen up the interior and achieve a pleasant smell. For a similar effect, you can place an open box of dryer sheets under one of your car’s seats, allowing the fragrance to disperse gradually. It’s a convenient and cost-effective way to maintain a pleasant driving experience.
However, before using dryer sheets, be mindful of passengers who may have allergies or sensitivities to strong scents. Informing them about the presence of the dryer sheets can help avoid any discomfort during the ride.
Keep in mind that in hot weather, the temperature inside a car can rise significantly, which may cause the chemicals in the dryer sheets to break down or release a stronger fragrance. While this is unlikely to be dangerous, it’s essential to use the dryer sheets in moderation and replace them regularly, especially if they become soiled or damaged.
Where Do You Put Dryer Sheets in a Car?
Dryer sheets can be used in a car to help keep it smelling fresh and to reduce unwanted odors. There are a few places where you can put dryer sheets in a car:
Under the Seats: One common place to put dryer sheets is under the seats of the car. Simply slide the dryer sheets under the front seats and, if you have rear seats, under them as well. The sheets will be somewhat concealed, and the air conditioning or heating system in the car will help distribute the fresh scent throughout the cabin. Just make sure the dryer sheets are secure and won’t interfere with the seats’ movement or any safety mechanisms.
In the Door Pockets: Another option is to place a dryer sheet in the door pockets on the driver’s and passenger’s sides. This can be especially useful if the door pockets have enough space to hold the dryer sheets without obstructing anything.
In the Trunk: If you notice odors coming from the trunk of your car, you can place a dryer sheet in there as well. This is especially helpful if you frequently transport items that might leave a lingering smell.
Where Not to Use Dryer Sheets in Car?
Using dryer sheets in a car should be done with caution, and they should only be placed in appropriate areas that do not pose any safety risks or cause damage to the vehicle. Here is a concise and accurate list of places where you should avoid using dryer sheets in a car:
Air Vents: Do not insert dryer sheets into the air conditioning or heating vents as it can release chemicals and fibers into the cabin, which may be harmful if inhaled.
Dashboard and Control Surfaces: Avoid placing dryer sheets on the dashboard, steering wheel, or any control surfaces inside the car to prevent potential damage to these surfaces.
Visibility Areas: Never place dryer sheets near the windshield, rearview mirror, or side windows, as the residue may obstruct your view and compromise road safety.
Engine Compartment: Avoid placing dryer sheets in the engine compartment or near mechanical components to prevent a fire hazard due to exposure to high temperatures.
Exhaust Pipes: Do not place dryer sheets near the exhaust pipes, as they can ignite or melt when exposed to the high temperatures of the exhaust system.
Safety Concerns: Be cautious about placing dryer sheets anywhere that could interfere with the proper functioning of airbags, seatbelts, or other safety features in your car.
Gas Tank: Avoid placing dryer sheets in or around the gas tank opening to prevent any potential fire hazard or complications with refueling.
Can You Use Dryer Sheets to Remove Bugs from Car Paint?
Dealing with bugs in your car can be incredibly irritating. As they accumulate on the windshield and grille, they create a mess that not only obstructs your view but also becomes challenging to remove.
Fortunately, dryer sheets can come to the rescue! Yes, you can use dryer sheets to remove bugs from your car. To use dryer sheets for this purpose, first, gather a few unused dryer sheets. Dampen one of the sheets slightly with water to avoid scratching the paint. Then, gently rub the dampened dryer sheet over the areas where you see dead bugs or bug splatters on your car’s paint. The soft and non-abrasive nature of the dryer sheet will help lift the bug residues without causing damage to the paint.
If the bug residues are particularly stubborn or have been sitting on the paint for a while, you may need to apply a bit more pressure while rubbing with the dryer sheet. However, always be cautious not to press too hard to avoid any potential scratching.
You can also create a bug-busting spray by filling an empty spray bottle with water and placing a rolled-up dryer sheet inside it. After shaking the bottle and letting it sit for a few minutes, spray the bug-spattered areas. Then, use a dry dryer sheet to clean the surface. Repeat the process as necessary until your car is clean and bug-free.
This simple and cost-effective solution can make bug removal a breeze, leaving your car looking clean and ensuring a more enjoyable driving experience.
Can You Clean Car Windows With Dryer Sheets?
Yes, you can use dryer sheets to clean car windows. Dryer sheets are effective at removing light dirt, dust, and water spots from glass surfaces. Their slightly abrasive texture helps to break down grime without scratching the glass.
To use them, dampen the dryer sheet slightly with water and then gently wipe the car windows in a circular motion. For tougher stains or heavily soiled windows, it’s better to use a dedicated glass cleaner or a vinegar-water solution for more effective results. But, make sure to avoid using dryer sheets on tinted windows, as the abrasiveness might damage the tint film.
Final Words
Dryer sheets might offer a quick fix for removing stubborn debris from your car, but it is not worth the potential risks of causing damage to car’s paint. Invest in proper car care products and follow the recommended cleaning methods to ensure your vehicle maintains its pristine appearance and value in the long run. Remember, prevention is always better than dealing with expensive repairs and repainting due to improper care.
yes, you can use oil-based paint in an airless sprayer, but you must ensure that the sprayer is compatible with oil-based materials, use the correct pressure and nozzle size, strain the paint before loading it, and thoroughly clean the sprayer after use.
Let’s explore the new painting techniques.
Can You Use Oil Based Paint in Airless Sprayer?
Using oil-based paint in an airless sprayer is indeed possible, but it requires certain considerations to ensure a successful and efficient application.
Airless sprayers are designed to handle a wide range of paint types, including both oil-based and water-based paints. When using oil-based paint in an airless sprayer, it’s crucial to check the sprayer’s specifications and ensure that it is compatible with oil-based materials.
Since oil-based paints tend to be thicker and more viscous compared to water-based paints, it’s essential to use an airless sprayer with the appropriate pressure rating and nozzle size. A sprayer with higher pressure and a larger nozzle can handle the higher viscosity of oil-based paint, allowing for a smoother spray pattern and reducing the risk of clogs.
Before loading the oil-based paint into the airless sprayer, it’s essential to strain the paint to remove any impurities or lumps that could potentially clog the sprayer’s nozzle or pump. This step helps maintain consistent paint flow and prevents interruptions during the painting process.
Additionally, proper cleaning and maintenance of the airless sprayer after using oil-based paint are crucial. Oil-based paints can leave behind residue that may cause issues in future paint jobs if not thoroughly cleaned. Follow the manufacturer’s instructions for cleaning the sprayer, using appropriate solvents or cleaning agents designed for oil-based paints.
What Kind of Oil-based Paint Do You Use in an Airless Sprayer?
When using an airless sprayer for painting, it is essential to choose the right type of oil-based paint to ensure optimal performance and a smooth finish. Airless sprayers are powerful tools that atomize paint without the need for compressed air, making them suitable for a wide range of painting projects, including large surfaces, exteriors, and high-viscosity coatings.
When selecting oil-based paint for an airless sprayer, consider the following factors:
Viscosity: Oil-based paints tend to be thicker and more viscous than water-based paints. To use them in an airless sprayer, it’s crucial to check the paint’s viscosity and ensure that it is compatible with your sprayer’s specifications. Some airless sprayers can handle higher-viscosity paints, while others may require thinning.
Thinning: If your oil-based paint is too thick for your airless sprayer, you may need to thin it. However, it’s essential to follow the manufacturer’s recommendations regarding the appropriate thinning ratio. Avoid over-thinning, as it can negatively impact the paint’s coverage and finish.
Paint Compatibility: Not all oil-based paints are suitable for airless sprayers. Some paints contain additives or pigments that can clog or damage the sprayer’s components. Always check the paint can label for guidance on whether it can be used with airless sprayers.
Priming: Some oil-based paints may require priming before being used in an airless sprayer. Check this before purchasing. Priming can help prevent potential clogs and ensure the paint adheres properly to the surface.
Can You Use Oil-Based Paint in Wagner Sprayer?
Yes, you can use oil-based paint in certain Wagner sprayer models, such as the Wagner FLEXiO HVLP Paint Sprayers.
These sprayers are designed to handle both water-based and oil-based paints without the need for thinning. The ability to spray unthinned latex or oil-based paint makes FLEXiO HVLP Paint Sprayers a popular choice for both home and professional use, as it offers more convenience and efficiency in painting projects.
But, Wagner produces a range of paint sprayers that are designed to handle both water-based and oil-based paints. So, it’s crucial to verify the compatibility of your specific Wagner sprayer model with oil-based paint by checking the user manual or contacting Wagner’s customer support. Different Wagner sprayer models may have varying capabilities, and some might not be optimized for oil-based paints.
To ensure safe and efficient use of your Wagner sprayer with oil-based paint, always follow the manufacturer’s recommendations and guidelines provided in the user manual. Using the correct type of paint for your sprayer will help avoid clogs, uneven spraying, or damage to the equipment, leading to better results and longer-lasting performance.
Can You Use Oil Based Paint in Graco Sprayer?
Yes, you can use oil-based paint in a Graco sprayer, specifically in the Graco Magnum Project Painter Plus. The owner’s manual specifically indicates that Graco sprayers are suitable for both water-based and oil-based materials. This means you can confidently use oil-based paints with the sprayer without any issues.
However, it is essential to follow the manufacturer’s guidelines and recommendations for proper usage and maintenance. Ensure you clean the sprayer thoroughly after each use, especially when switching between different types of paints, to avoid any potential clogs or performance problems. By adhering to the instructions provided in the manual, you can achieve excellent results with oil-based paints using your Graco sprayer.
How Do You Thin Oil-Based Paint for an Airless Sprayer?
To thin oil-based paint for an airless sprayer-
- Start by checking the manufacturer’s recommendations for both the paint and the sprayer, as some products may not require thinning.
- Next, choose the appropriate solvent, typically mineral spirits or paint thinner, as directed on the paint can.
- Gradually add small amounts of the chosen solvent to the paint while stirring continuously to ensure even distribution.
- Mix thoroughly until you achieve the desired consistency for spraying, aiming for a smooth and even flow without drips or splatters.
- Once the paint is properly thinned, perform a test spray on a scrap surface to ensure the sprayer is working correctly and the paint is delivering the desired results.
- Always remember to wear proper safety gear, work in a well-ventilated area, and dispose of any waste materials responsibly.
Final Words
Ultimately, the decision to use oil-based paint in an airless sprayer should be based on a careful evaluation of the specific project requirements, the sprayer’s capabilities, and the user’s expertise.
When used correctly, an airless sprayer can provide efficient and impressive results with oil-based paint. However, it is vital to stay informed and take the necessary precautions to ensure a successful and hassle-free painting experience.
If you’ve ever wondered whether aluminum foil tape can become your artistic canvas, the answer is an exciting ‘yes.’
Let’s discover invaluable tips and techniques on how to paint, design, and transform ordinary foil tape into captivating masterpieces.
Can You Paint Aluminum Foil Tape?
Yes, you can paint aluminum foil tape.
Aluminum foil tape is a versatile adhesive tape commonly used for sealing, patching, and repairing HVAC ducts, insulation, and other metal surfaces. If you want to change the tape’s appearance or match it with a specific color scheme, painting can be a suitable option.
Painting can also provide an extra layer of protection against environmental factors like oxidation and UV radiation, enhancing its longevity in certain situations. Additionally, painting can allow for customization, such as adding labels or markings on the tape.
However, there are situations where painting aluminum foil tape might not be advisable. If the tape is used for heat reflection or insulation purposes, painting it could reduce its effectiveness.
The adhesive properties of the tape are not affected by painting, but if the adhesive side needs to adhere to surfaces, it’s better to leave it unpainted to ensure proper adhesion. Moreover, if the tape serves its purpose effectively in its original state and there is no specific need for painting, it might not be necessary, saving time and resources.
What Kind of Paint Will Stick to Aluminum Foil Tape?
If you want to paint over aluminum foil tape for a specific reason, such as camouflaging it or integrating it into a project, you’ll need to select the appropriate type of paint to ensure good adhesion and durability.
Here are some paint options that can work well with aluminum foil tape:
Acrylic Paint: Acrylic paint is a versatile water-based paint that adheres reasonably well to many surfaces, including aluminum foil tape. It dries quickly and creates a durable, flexible finish. Make sure to clean the tape surface before applying the paint to remove any dirt, oil, or residue that might interfere with adhesion.
Tempera Paint: Tempera paint is another type of paint that can be used on aluminum foil tape. Tempera paint is water-based and known for its opaque and vibrant colors. It is often used in art and craft projects and can adhere reasonably well to various surfaces, including aluminum foil tape.
Latex Paint: Like acrylic paint, latex paint is also water-based and can adhere to aluminum foil tape effectively. It is commonly used for interior and exterior applications and offers good durability and flexibility.
Spray Paint: Spray paint, specifically designed for metal surfaces, can be a suitable option for painting aluminum foil tape. It provides an even and smooth finish when applied correctly, and many spray paints are compatible with metal surfaces.
Epoxy Paint: If you require a more robust and long-lasting paint finish, epoxy paint can be a good choice. Epoxy paint forms a strong bond with metal surfaces and provides excellent protection against moisture and chemicals.
Factors to Consider Before Painting Aluminum Foil Tape
Before painting aluminum foil tape, there are several factors to consider to ensure a successful and long-lasting paint job:
Surface Preparation: Properly prepare the surface by cleaning it thoroughly to remove any dirt, dust, grease, or other contaminants. This helps the paint adhere better to the tape’s surface.
Compatibility of Paint: Ensure that the paint you choose is compatible with both aluminum and adhesive materials. Some paints may not adhere well to certain types of adhesives or may react adversely with the aluminum surface.
Paint Type: Select the appropriate type of paint for the intended use. For example, if the tape will be exposed to outdoor conditions, consider using weather-resistant or outdoor-specific paint to protect against the elements.
Look for paints labeled as “metal paint” or “aluminum paint” to achieve the best results.
Adhesion Promoter: Depending on the paint and tape types, using an adhesion promoter or primer may be necessary to improve the bond between the paint and the tape’s surface.
Drying Time: Consider the drying time of the paint. If the tape is needed for immediate use after painting, choose a fast-drying paint to avoid smudging or sticking issues.
Temperature and Humidity: Check the recommended temperature and humidity range for the paint application. Extreme conditions may affect the paint’s drying and curing process.
Surface Texture: Take into account the texture of the tape’s surface. Some aluminum foil tapes may have a smooth or slightly rough surface, which can impact how the paint adheres and looks.
Paint Application Method: Choose an appropriate paint application method such as brush, roller, or spray. The method may affect the paint’s coverage and finish.
Number of Coats: Determine the number of paint coats needed to achieve the desired opacity and color intensity. Multiple thin coats are often better than a single thick coat.
Paint Curing Time: Allow sufficient time for the paint to fully cure before subjecting the tape to any stress or use.
Durability: Consider the tape’s intended use and environment. If the tape will be subject to frequent handling or exposure to harsh conditions, select a paint that offers good durability and resistance to wear and tear.
How to Paint Aluminum Foil Tape Successfully?
Painting aluminum foil tape can be a useful way to customize its appearance, provide additional protection, or make it blend in with other surfaces. To successfully paint aluminum foil tape, follow these steps:
Materials you’ll need:
- Aluminum foil tape
- Clean cloth or rag
- Mild detergent or rubbing alcohol
- Fine-grit sandpaper (optional)
- Primer (suitable for metal surfaces)
- Acrylic or enamel paint
- Paintbrushes (foam or bristle brushes work well)
- Painter’s tape (optional)
Step-by-step process:
1. Surface preparation:
- Before painting, ensure the aluminum foil tape is clean and free from any dirt, dust, or grease. Use a clean cloth or rag to wipe the surface gently.
- If the tape has adhesive residue or stubborn stains, you can clean it with mild detergent or rubbing alcohol. Allow it to dry completely before proceeding.
2. Optional: Sanding the surface (if needed):
If the tape has a glossy or smooth surface, you may want to lightly sand it with a fine-grit sandpaper. This step helps improve paint adhesion by creating a slightly roughened surface. After sanding, wipe away any dust with a clean cloth.
3. Applying primer (recommended):
- Applying a primer designed for metal surfaces is highly recommended, as it helps the paint adhere better and ensures a more even and durable finish.
- Stir the primer thoroughly before application, and then use a brush to apply a thin, even coat over the entire surface of the aluminum foil tape. Allow the primer to dry according to the manufacturer’s instructions.
4. Painting the tape:
- Once the primer is dry, you can start painting the aluminum foil tape.
- Choose a high-quality acrylic or enamel paint in your desired color. These types of paint adhere well to metal surfaces and provide good coverage.
- Stir the paint thoroughly before using, and then apply it to the tape with a brush. Use smooth, even strokes to avoid visible brush marks.
- Depending on the color and coverage, you may need to apply multiple coats of paint. Allow each coat to dry completely before applying the next one. Follow the paint manufacturer’s recommendations for drying times.
5. Optional: Adding designs or patterns (using painter’s tape):
- If you want to add designs or patterns to the painted aluminum foil tape, you can use painter’s tape to create clean lines and shapes.
- Apply the painter’s tape over the painted surface, following the desired pattern. Make sure the edges of the painter’s tape are firmly pressed down to prevent paint from seeping underneath.
- Paint over the exposed areas, and once the paint is dry, carefully remove the painter’s tape to reveal the design.
6. Final touches:
- After the paint has dried completely, inspect the painted aluminum foil tape for any imperfections or areas that may need touch-ups.
- If necessary, use a fine paintbrush to touch up any spots or add finer details.
7. Allow proper drying time:
Give the paint ample time to dry and cure fully before subjecting the tape to any stress or use. This duration may vary depending on the type of paint used, but it’s generally a few days.
Conclusion
In the end, painting on aluminum foil tape is not just an artistic experiment; it’s an invitation to think outside the box and challenge traditional notions of what can be used as a canvas. Embrace the unique characteristics of this medium and watch as your creativity flourishes. Happy painting!