Yes, it is possible to ceramic coat single stage paint without any ill effects. But for that, you need to be very careful as ceramic coating can occur blotchiness on single stage paint sometimes.
To solve this problem, the application of quick nice polish of Essence can make your ceramic coat look fabulous without any negative impact. Many people with single stage paint on their cars look for a ceramic coating-like effect on them. It’s because ceramic coating enhances the beauty of single stage paint and provides a very sleek yet glazy feature on the car.
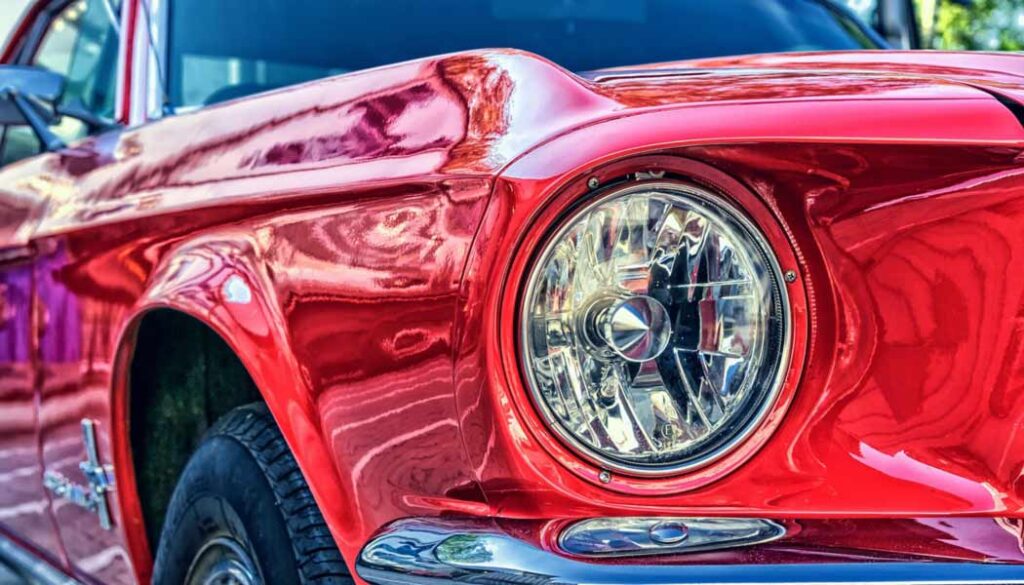
However, following a proper method for applying a ceramic coating is another important factor to adopt. Otherwise, blotchiness might ruin the wholesome look of your car after a wrong application of ceramic coat. Applying a proper polish with the right procedure can only save your single stage painted car from having blotches through ceramic coat application.
Also Read: Painting Carbon Fiber Hoods: What to Know
Can You Ceramic Coat Single Stage Paint?
Ceramic coating on single stage paint is possible but the fact is if the coat will last longer or tend to make any blotchiness or not. Single stage paint is easier to apply as it only requires only two steps – one is cleaning the surface properly and the other step is applying the paint with a careful mind. A single coat is enough in this case. It even does not require any finish with a clear coat in the end as well.
Still, single stage paint is immensely reliable for promising chemicals that it carries. These chemicals offer actual adhesion and absolute durability of the paint. Besides an easier application method, this single stage paint brings glossiness and color in just one coat without any bumps and blotches. But when you think of applying a ceramic coat to it, you need to consider a lot of facts.
Also, as single stage paint as automotive paint does not require any clear coat afterward, some people become suspicious about applying another coat of ceramic over it. But applying a ceramic coat needs only some preparations like you do when applying a clear coat to paint.
Applying proper polish on the paint can make your application of ceramic coat a lot better. Therefore, we can agree to the fact that it is 100% possible to ceramic coat single stage paint following the right procedure.
Next Read: How Much to Paint a Tahoe?
Potential Challenges of Ceramic Coating Single-stage Paint
Ceramic coating single stage paint can bring both advantages and challenging disadvantages. You can get an extra protective layer on your car after applying a ceramic coat and save the paint from getting exposed to UV rays, acid rains, and other natural chemical disturbances.
Besides the hydrophobic nature of ceramic coats won’t let raindrops, or liquids to be penetrated deep into the surface and ruin the paint. Rather liquids would turn into beads and roll down leaving the surface unaffected.
All these advantages together help the paint to preserve its actual color and bring back the real vibrant color of it. But when facing its downsides, you might find the job of applying ceramic coating challenging too.
For example, if you don’t prepare the surface, the ceramic coat will not adhere to the surface properly. As a result, you will face blotchiness on the paint. This can ruin the look of your car. Ceramics, as a glazy component, requires a surface that will help it penetrate deep into it. But single stage paint might not always offer that kind of surface.
It happens when you don’t follow the type of single stage paint that you are using on your car. There are several kinds of automotive paints available in the market in the name of single stage paint. Among them, not all are fit for the adoption of ceramic coating.
In this circumstance, if you still want to apply a ceramic coat, then things might get tougher to deal with. That’s why choose your product and step carefully to avoid potential challenges. Also, ceramic coating cannot always defend against scratches and marks.
You will witness water stains too to some extent if you leave the car unwiped. Proper maintenance for a long-lasting service is what seems more challenging to some users. Besides, the high cost of this coating should also be in your consideration as not all people can afford ceramic coating on their car.
How to Apply Ceramic Coating to Single Stage Paint?
Ceramic coating has become globally very renowned for its shiny and rich attempt to make a car look enchanting. But if you are a DIYer and want to ceramic coat single stage paint on your car, then following the next steps will lead you to the right path.
Step 1: Clean Your Car
You need to start off by giving vigorous yet proper cleaning to your car. Apply soapy water and cleanse your car appropriately. You can also use commercial cleaning products for deep cleaning. Also, a clay bar can help you to rinse your car greatly after a hand wash of the car.
This will bring back the fresh color of your paint to a great extent. For grime on the metal parts, you can use a degreaser. This will pull out the grease and layers of irons on metal parts like rims, wheels, and handles of your car. After using any degreaser, give another clean with soapy water to remove the residue as well.
Step 2: Dry Your Car
You cannot move on to the next step until you let your car dry completely. To let out the excessive water, you can let your car rest for some minutes. But it won’t be wise to let water sit on the car for so long and leave water stains as a consequence.
That’s why you need to wipe out the extra water using a microfiber towel or drying cloth. Make sure the towel is clean and also it has to be paint-friendly, otherwise, it can leave light scratches on your car. Apart from that, you can also use a blow-dryer for a quick drying method.
Step 3: Apply Polish
The next step is to get ready with a polisher. It is an important step as your ceramic coating needs some to adhere to the surface properly and this polisher will do this job. Before polishing your car, make sure you have let it dry completely out and out. Otherwise, the reaction of the polisher with water only will ruin the adhesion capacity of the surface.
Also, you need to keep in mind in this crucial stage that single stage paint is prone to get damaged. That’s why polishing it won’t be easy unless you are giving your best attention. The polisher will do the job of paint correction. You can use Carpro Essence as it is now leading the market big time. Or, you can use a polishing pad with a light texture. Don’t overdo the polishing as it can ruin single stage paint.
Step 4: Apply Ceramic Coating
Once you are done with the polishing step, you can now turn to the most expected step and that is to apply ceramic coating. Make sure the car is dry fully again. Then using an applicator pad made of microfiber, you can thoroughly apply a ceramic coating on the surface of single stage paint.
Don’t run your applicator pad with ceramic on the same spot more than twice. Carefully run the pad either in a circular motion or in a pattern more like a cross hatch. You can do the application by sectioning your car for the right pattern.
Step 5: Let It Cure
After applying a ceramic coat on single stage paint of your car, your manual job is done. But you need to let the car dry properly. The coating will take almost 48 hours to dry properly. You cannot take it outdoors and make it exposed to rain or water. Also, make sure you don’t wash the car until it’s 2 full weeks after the application of the ceramic coat, and your job of waiting is done there.
Maintenance Tips for Ceramic Coated Single-stage Paint
As ceramic-coated single stage paint looks highly rich and shiny, its maintenance is also necessary. Nothing is resistant to decay and your ceramic coated single stage paint will not last longer on your car if you don’t take care of it properly.
Make sure you remove the dust and debris from your car regularly. Also, clean the damp dirt instantly before they leave any permanent scar on your car. Anytime your car gets exposed to raindrops, wipe out the moisture with a microfiber dry clean cloth.
Also, while washing your car, you can adopt shampoo specially formulated for ceramic coated cars. A regular wash after 1 or 2 weeks will preserve the shiny look and vibrant color of your car for a long time. Also, wrap your car properly when you are not using it for a long time to save it from scratches and marks.
Final Thoughts
To conclude, applying a ceramic coat on single stage paint is a very cool idea as it offers a fine look to your car. The right way can give you an immensely good result with a ceramic coating. Therefore, follow our rules and methods of applying ceramic coat on single stage paint and let your car shine thoroughly.
To get a Pale Oak-like color, Sherwin Williams’ Simple White color provides the best alternative option. Even though it is not 100 percent of the color Pale Oak, this Simple White color offers almost the same ambiance as the Pale Oak.
The color of it is whiter than Pale Oak to a little extent but the performance and overall view of the color on the surface will leave you confused while recognizing. For exterior paint colors, a tasteful modern person always looks for a shade in neutral colors. Because neutral colors look classy from the outside and give a defined look to the house. Among many neutral shades, what most people ask for the color is Pale Oak.
This Pale Oak color has a taupe shade and a very mild yellow tint. To have a close color to this Pale Oak, the Sherwin Williams brand for paints is the only way that you can adopt. This renowned brand’s Simple White color is remarkably similar to Pale Oak color and no other alternatives can beat it.
Does Sherwin Williams Have a Pale Oak Color?
As a very trustworthy and remarkable brand, Sherwin Williams has already recognizable globally for its enormous color collections for painting. This brand has qualitative colors, especially, in neutral shades. And that’s why many people want to learn if Sherwin Williams has a Pale Oak color in any of its colors.
Well, as an individual brand of paints, Sherwin Williams has its own discrete colors and you will very much like them. It does not copy any shade of other brands and sprinkles its own unique creativity in each color, be it neutral or be it bright.
However, you can have a Pale Oak-like color in one of Sherwin Williams’ colors. Its Simple White color almost hit the same texture as Pale Oak. Even though you cannot get hundred percent similarities as no two things are entirely similar to each other in this world, you can at least get some similar essence from both of these colors.
What Color Is Pale Oak in Sherwin Williams?
We have already sorted out the fact that the Sherwin Williams carries a color almost like Pale Oak in our early segments. Its Simple White color fascinates most people because it has the craziest similarity with the authentic Pale Oak color. It is almost unrecognizable when you see painting two surfaces with these two different colors.
But there is this positive distinctness present in the color of Sherwin Williams’ Simple White. You will not get this distinctive feature in Pale Oak. However, we are not trying to demean any of these colors, but rather trying to uphold their own discrete features.
Pale Oak color has a whitish color but has several subdued colors as well. These colors sometimes look yellowish, sometimes gray, or taupe, and sometimes off-white. These colors will vary from the contrastive colors you will put with this Pale Oak color.
On the other hand, we see the Simple White color of Sherwin Williams has the most unique white shade. This white shade does not entirely blend with bland whiteness. But has an off-white and violet tone underneath. For a backdrop of your both interior living room and exterior look, this neutral color has a great demand.
You will feel the same warmth and crispy nature of whiteness coming from your Simple White paint from Sherwin Williams that you used to get from Pale Oak paint. Only the subdued colors underneath these paints will show their differences. But both paints have convincing shades as subdued colors and go easily with the warmth of whiteness.
While the LRV of Pale Oak is 69.89, Simple White has 70 LRV. That means the latter from Sherwin Williams is a little bit whiter than the color of Pale Oak. But these colors are pretty much close as you can see the difference between LRV is not so huge and considerable enough.
Is Pale Oak GREY or Beige?
Pale Oak is not definitely gray or entirely beige. It carries a color that stays between beige and gray. That’s why we see most people call the color Greige. This color has an ambiance that can partly provide both gray and beige dominantly depending on the color scheme of weather or other contrast colors.
Gray color can seem very boring and dull after some days, and that’s why many people avoid using solid gray color for their walls. On the other hand, beige has different shades from light to dark. These shades are pretty much pale and yellowish gray or grayish yellow. But when you combine them with a more neutral color, they look more beautiful.
Pale Oak is that shade that provides peacefulness to the eyes. Also, their neutral shade which is not so gray and not so beige brings out the most acceptable shade within white. The color is not bland or featureless rather it has its own specs. And when you combine it with darker shades like black, it defines the exterior decoration of your home more subtly.
The Impact of Pale Oak in Interior Design
If you want a subtly gorgeous look with the most calming color scheme, then there is no better use than the color Pale Oak. Neutral colors are getting so famous that people are using them simultaneously for both exterior and interior decoration.
In the case of Pale Oak, its refreshing and soothing color scheme performs hugely in making the interior design up to the mark. You can use this greige color for the backdrop of your master room and living room as well. To make it more impactful, use a dark-shaded color as the contrast of it.
This color contrast game totally changes the whole look of your boring interior design to an extraordinarily modern look. For the ceiling also, Pale Oak can contribute to enhancing the beauty totally selflessly.
We have also seen people painting ceramic or metal-based furniture with Pale Oak color to give a proper color scheme in the term of interior room decoration. Overall, the experience with Pale Oak color in interior decoration is definitely royal and classy.
Conclusion
To conclude, there are some neutral colors that don’t play a neutral performance at all. Pale Oak and Simple White from Sherwin Williams are two different branded colors that offer neutral colors with the huge capability of versatility. The color of Pale Oak is so famous that Sherwin Williams’ attempt to uphold the Simple White color almost resembles the former one. As a result, people choose it as the best alternative to Pale Oak.
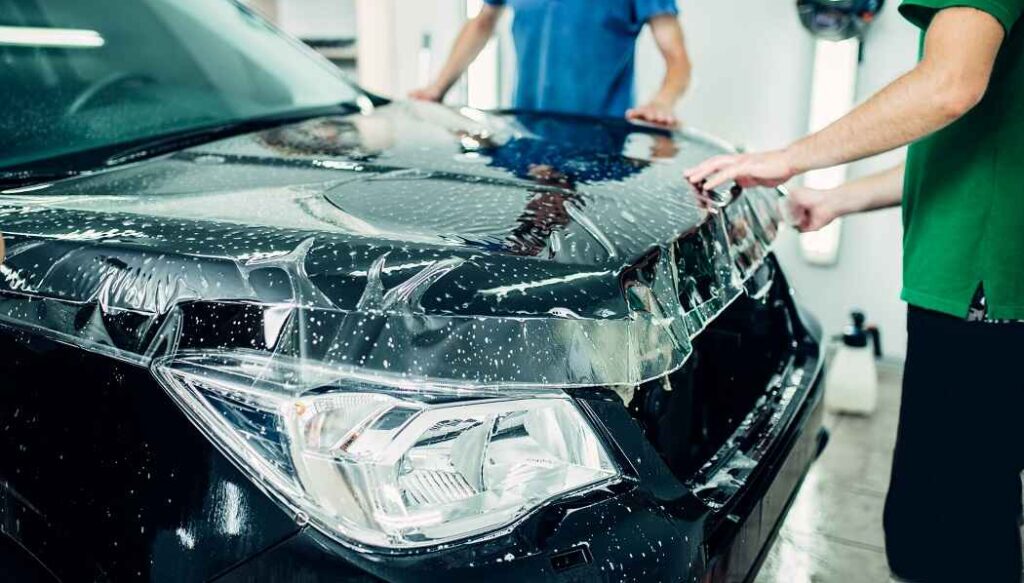
Paint protection film (PPF) doesn’t damage paint. This transparent, thermoplastic urethane film helps to shield a vehicle’s paintwork from many other potential damages.
Automotive enthusiasts often invest significant time and effort in maintaining the pristine appearance of their vehicles. To safeguard the exterior surfaces, they turn to various protective solutions, one of which is paint protection film (PPF).
In this article, we’ll explore the truth behind the potential impact of PPF on automotive paint. We’ll discuss in detail – does paint protection film damage paint, or does it serve as a reliable shield against the hazards of everyday driving?
What Is Paint Protection Film (PPF)?
Paint Protection Film (PPF) is also known as clear film. It is a transparent, thermoplastic urethane film. It is used to the outside surfaces of vehicles to guard them from harm caused by debris, rocks, and scratches. It is a durable and self-healing film that can provide protection to the vehicle’s paintwork.
PPF is typically applied to high-impact areas such as the hood, fenders, bumper, mirrors, and door edges, but it can also be applied to the entire vehicle for comprehensive protection. The film is designed to be nearly invisible. It allows the original paint color and finish to shine through.
The primary purpose of PPF is to prevent damage to the vehicle’s paintwork. It acts as a barrier against chips, scratches, and stains. Moreover, it offers some level of resistance against UV rays, oxidation, and fading.
PPF is commonly installed by professionals who have the necessary expertise to ensure a precise application. It is a popular choice among car enthusiasts and those seeking long-term protection for their vehicles.
Does Paint Protection Film Damage Paint?
Paint protection film is specifically designed to protect the paint on vehicles and does not damage it. Some people believe that applying a film to the surface of the paint may cause harm. However, PPF is formulated with advanced technologies that allow it to adhere to the paint without causing any adverse effects.
One common misconception regarding PPF and paint damage is that the adhesive used to attach the film can harm the paint when removed. But in real, modern PPF products are designed with advanced adhesive systems that are gentle on paint. When applied and removed correctly by a professional, PPF does not cause any damage or leave residue on the paint.
Expert opinions and studies also support the notion that PPF does not damage paint. Many automotive professionals recommend the use of PPF as a means of protecting a vehicle’s paint from various external elements. These experts have extensively tested PPF and have found it to be an effective barrier against different minor damages.
Keep in mind, improper installation or removal techniques by untrained individuals can result in unexpected issues. The problems can be like adhesive residue, bubbling, or uneven finish.
Role of PPF in Shielding Car Paint from External Elements
PPF plays a crucial role in shielding a car’s paint from external elements. Below, we’ve described some key roles of PPF in shielding car paint.
Protection against rock chips and scratches: One of the primary functions of PPF is to guard the vehicle’s surface against rock chips and scratches. The film absorbs the impact of small debris and prevents it from reaching the paint surface. It acts as a sacrificial layer, taking the damage instead of the underlying paint.
Shielding from road debris: Various environmental elements like road debris can cause etching or chemical reactions with the paint surface over time. The film prevents direct contact and makes it easier to clean the car.
UV radiation protection: Continuous exposure to the sun’s ultraviolet (UV) rays can fade and deteriorate car paint. PPF contains UV stabilizers that help block harmful UV radiation. This UV protection prevents color fading, discoloration, and oxidation.
Resistance to discoloration and staining: PPF has the ability to recover from light scratches and swirl marks through heat and time. This property helps maintain the film’s clarity and prevents it from becoming an eyesore on the car’s surface.
Longevity and removable nature: High-quality PPF is durable and designed to withstand harsh weather conditions. It can last for several years without losing its protective properties. Additionally, when it’s time to remove the film, it can be peeled off without damaging the paint surface.
Factors Influencing Paint Damage with PPF
Though PPF provides excellent protection against many types of paint damage, certain factors can still influence its effectiveness. Let’s find out the factors that can impact paint damage with PPF.
Quality of PPF: The quality of the PPF itself plays a significant role in determining its effectiveness. Higher quality films tend to have better clarity, durability, and resistance to damage. Choose a reputable brand and ensure that the PPF meets industry standards for thickness and performance.
Installation: Proper installation requires skill and experience to ensure that the film adheres smoothly and seamlessly. A poorly installed PPF may have visible edges, bubbles, or debris trapped underneath.
Surface Preparation: The car surface should be thoroughly cleaned, free of contaminants such as wax or oils. Any existing paint defects such as swirl marks should be addressed before installation. Proper surface preparation reduces the risk of paint damage.
Environmental Factors: Factors such as temperature, humidity, and exposure to UV radiation can affect the film’s durability. Prolonged exposure to extreme weather conditions may degrade the film and compromise its protective properties.
Maintenance and Care: Proper cleaning techniques using mild soaps and microfiber towels should be followed to avoid scratching the film. Harsh chemicals and automatic car washes with brushes should be avoided.
Driving Habits: Aggressive driving, off-road excursions, or exposure to road debris can increase the risk of paint damage. While PPF provides a layer of protection, it is not completely impervious to all forms of damage.
Time and Usage: Depending on the quality of the film and its exposure to various factors, it may require periodic replacement. The duration of protection can vary. Check for specific recommendations of your PPF product.
Does Removing PPF Damage Car Paint?
When PPF is properly removed using the correct techniques and tools, it should not cause damage to the car’s paint.
But if the PPF has been improperly removed, there is a possibility to happen something bad. In rare cases, if the PPF is forcefully peeled off, it can potentially pull off paint along with it.
To minimize the risk of paint damage, it is strongly recommended to have PPF removal performed by experienced persons. They are equipped with the appropriate methods and they can safely remove the film without harming the underlying paint.
Final Verdict
When professionally installed, high-quality PPF can effectively shield the car’s paint. It helps preserving the original paint. It can significantly extend the lifespan and overall appearance of a vehicle’s paint job.
However, improper installation and low-quality film can lead to negative effects on the paint. Poor installation techniques may result in adhesive residues or even peeling.
To enjoy the best results from PPF, choose a reputable installer with experience in PPF application. Thus, you can keep your vehicle’s paint safe.
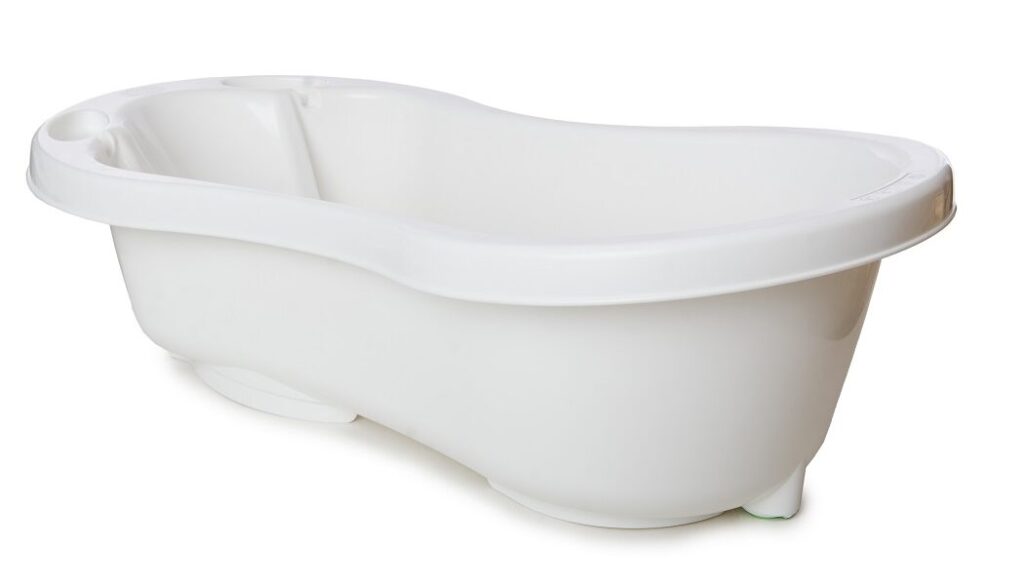
You can certainly paint a plastic bathtub even with different types of paints. Some people think plastic has adherence problems, and as a result, painting might create bumps or terrible bubbles. But in reality, there are paints that give a totally new look to your overly used, filthy, and yellowish bathtub.
For this rejuvenation of your bathtub, you need to prepare it properly before painting.
For a new bathtub, you might not have to put much effort into preparing the surface of it before the application of paint. However, plastic is totally a different material than concrete or metal. The latter materials have their own adherence texture.
But plastic is comparatively stubborn and won’t let paint penetrate deep into it. That’s why durability and proper adhesion have become a matter of great question. Today we will find out all the clear solutions to every question regarding painting on plastic bathtubs.
Can You Paint a Plastic Bathtub?
Painting a bathtub is not something that you cannot do. You are free to give it a colorful look or modernize your plastic bathtub with the help of paints. But there are some restrictions that you need to follow. We have already said that plastic has less adhesion capacity. It will not let paint penetrate deep into the surface.
As a result, painting might not last for a longer period of time. But you should not back out only for this reason. You can come up with ideas just by preparing the surface with a proper primer. This will definitely lead you to successfully paint the bathtub and it will also last for many years.
However, you also need to be careful about choosing paint. Less qualitative and old paint is not going to help you. Therefore, it’s always better to do some research before buying paints for your bathtub.
For a wise decision, choose a water-resistant paint, so, continuous exposure to water in the bathtub does not encourage the paint to peel off the surface. Epoxy or acrylic polymer paints work legit fine for this job.
Besides that, a good finish will also ensure that the painting of your bathtub will remain intact for many years. For finishing, there are refinishing kits that offer compatibility with your plastic bathtub. You will just now have to choose the right kit for it.
How to Paint a Plastic Bathtub?
Many people adopt plastic bathtubs because they are not only affordable but also extremely durable. But what is thinkable is the cheap look of your plastic bathtub. To cover this cheapness, many people paint the plastic bathtub. If you are DIYer and want to paint your bathtub too, you can do it by following these few steps.
Step 1: Materials You Need
First thing first, you need to collect all the materials for this job beforehand so that later on, you don’t get bewildered. Besides, this makes the job easier.
- Epoxy or acrylic enamel paint
- Primer
- Safety wear
- An open space
- Tape
- Paintbrush or roller
- Scrubber, soap, deep cleaner, and washcloths
Step 2: Prep Your Bathtub
The second step tells you to give an intense cleaning to your bathtub. With time, plastic material gets worn out with dingy, yellowish layers of grease, sticky molds, body oils, residues of toiletries, and so on. Therefore, it is important to prepare your bathtub by cleaning out all the dirt from it.
First, remove all the extra elements from the bathtub. Then spread soapy water in the bathtub and let it soak it for 2 or 3 hours. During this time the layers and bonds of dust and dingy will get loosed. You can also use mild warm water or degreasing formula for extremely bad situations.
Give a vigorous cleaning by using a scrubber and abrasive material till the tub gets back to its previous clean look. You can also use fine sandpaper and sand your bathtub. This can add some adherence power to your bathtub too.
Step 3: Tape Important Areas and Put Primer
After providing a vigorous cleaning, you need to wipe out the extra water. Make sure there are enough ventilation areas for the passing of air. Before painting, you need to tape the important areas like the shower stall and edges where your painting will not look good. You can just tape any metal parts of your tub.
When you are done taping important metal parts of your tub, it’s time to put quality primer for plastic on the surface. We all know how effectively a primer helps to increase the adhesion power of both surface and paint. Spread out the primer on the surface evenly and give it enough time to be absorbed by the plastic and dry properly.
Step 4: Paint Your Bathtub
Your next job is to apply paint on the dried surface with the help of a paintbrush or roller. For an even layer of paint, the roller is more effective. However, epoxy or acrylic enamel paint is your best option. With the help of the roller, apply a thin coat on the surface of your bathtub evenly and seamlessly.
When the first coat dries fully, you can apply a second coat following the same manner. This will help to pop out the real color of the paint. Remember to wear a safety suit during the whole process. Because paints for plastics can emit serious chemical gas and fumes, they might attack your lungs and cause irritation.
Step 5: Finish It with a Topcoat
The next step is to check out if the second coat has dried or not. If it has dried, then apply an acrylic topcoat to seal the paint properly. Give it time to dry and then remove all the tape from the bathtub and Voila! Your new modernized bathtub is welcoming you to use it.
Factors to Consider before Painting Plastic Bathtubs
There are many controversies regarding painting a bathtub. Among those the controversy that plastic does not take paint properly on it is the major one. But if you follow some factors before you paint your plastic bathtubs, you can avoid such controversies.
1. Assess the condition of the plastic bathtub
If you are using your plastic bathtub for years, then there is a chance that it has many greasy layers on it. These layers can also be of dirt. Besides, continuous extraction of body oil contributes to making greasy layers on your bathtub.
Also, if your water has iron in it, over time, you will see the yellowish iron stick to the plastic like leeches stick to the body. So, you need to assess the condition of the plastic bathtub before painting it. Sometimes, the layers get so stubborn that even sanding won’t be of any help.
In circumstances like that, you might have to give up on the idea of painting it. Then again, there are many plastic bathtubs that have old paint which are already peeling. For this context, assess carefully if the tub is re-paintable or not.
2. Research the appropriate paint and primer for plastic surfaces
It always results in good when you do your homework properly and then sit for the examination. Likewise, before jumping into the step of painting your bathtub, you should do some research.
There are some specific paints available for plastic materials. These paints are so great that you don’t have to prime the surface beforehand. They adhere evenly on the plastic-based surface.
But if you want to adopt some regular paint, then research properly. Our recommendation is you can go with epoxy and some quality acrylic paints. For using these paints, adopting primer for plastic material is a must.
3. Consider the impact on the bathtub’s functionality and longevity
Plastic is already very durable and has great endurance. But it has a lifespan too. Some bathtubs can be made of very cheap plastic and they will wear out pretty soon. So, you need to check the plastic quality of the bathtub first. See if it has bearable endurance and durability or not.
If it is cheap and weak, a vigorous cleaning before painting might snatch its last breath. So, you have to be careful about it.
What Kind of Paint Do You Use on a Plastic Bathtub?
You can check several types of paints in the market for your plastic bathtub. For the materials, not all kinds of paints are going to work fine on it. Paints that have much adhesion power suit the best on plastic surfaces.
There are many paints that are resistant to water. As a bathtub has to expose to moisture on a continuous basis, paints with water-resistant agents work the best without any doubt. You will find this kind of feature in epoxy paint. Epoxy paint is not only resistant to water but it also has immense adhesion quality and impressive durability too.
Also, there are some acrylic paints that go with plastic materials pretty well. Using a primer for these paints is advisable by experts. Also, you can use spray paints as well. Spray paints are very comfortable to work with. For plastics, there are also recommendable spray paints in the market.
Can You Spray Paint a Plastic Bathtub?
Yes, you can spray paint a plastic bathtub and it’s one of the easiest ways of painting as well. Many experts have recommended using spray paint for an even spreading of the paint. The evenness that you will hardly get from using a paintbrush or roller, you will get easily with a sprayer.
But the only concerning thing about using spray paint is it costs a lot. Besides, how many spray cans of paint you need is also a matter of concern. Apart from this, spray paint offers great advantages. Because it spreads evenly without any trouble, it also gets dry easily.
However, you need to be patient while using spray paint. Overdoing it might cause a dripping condition of the paint and as a result, your bathtub will have a bump-looking condition. So, it requires a little bit of professionalism and a lot of ventilation for air to dry the paint correctly.
Can You Change the Color of a Plastic Bathtub?
You are free to change the color of your plastic bathtub by painting it nicely. If the plastic material of your bathtub looks cheap, then you can paint it and change its color or overall look. But for this, you cannot just go straight to any hardware store and buy any of the colors.
You should learn the condition of your bathtub first. If it is paintable, only then you can paint it. Also, don’t just pick any of the colors. If you pick light colors and your plastic bathtub has already a dark bright color then the former would not be able to hide the latter color.
Also, not all paints are suitable for the plastic materials of your bathtub. Therefore, you have objections there too. Buy the paints specially made for plastic for having less trouble in making the base on the surface of your plastic bathtub.
Can I Use Enamel Paint on a Plastic Bathtub?
There are controversies regarding the usage of enamel paint on plastic bathtubs. Some people think that enamel paint makes bubbles or bumps on the surface making the paint look uneven and ugly. But this only happens when someone does not prepare the surface well.
For this kind of problem, one has to prepare the surface with sandpaper and primer. Only then enamel paint can work nicer on the surface of plastic materials. Besides this, enamel paint is durable enough once you apply it properly to your bathtub.
Because it has waterproofing agents, its durability speaks for itself. As moisture cannot penetrate through enamel paint, you can use this paint with certainty.
How Long It Takes to Paint a Plastic Bathtub?
Painting a bathtub can be a long process. Still, it depends on the mood, professionalism, and seriousness of the DIYer. Then again, it depends on the condition of the surface of the plastic bathtub. It takes approximately 3 or 2 days to paint a plastic bathtub in general.
But if the surface of the plastic bathtub is full of dingy, greases, layers of irons, and molds, then cleaning it will take almost a full day. Then applying primer and letting it soak for a whole day covers almost 2 full days.
After that, you can paint slowly on the surface taking up more time so it dries properly and gets ready for the second coating. This whole process might require 1-2 days. So, it should not take more than 3 or 4 days.
Professional Service vs. DIY for Painting a Plastic Bathtub
Professional service ensures guaranteed performance and will make your plastic bathtub look new and beautiful. It will bring successful results quickly and properly. But for this, you have to spend a hefty sum of money. Besides, professional service is professional and if it serves wrongly by tricking you, your money will go in vain.
But DIY for painting a plastic bathtub offers many things to learn to the DIYer. With numerous ideas, she or he can do the painting. It might get a little messier but the satisfaction level is unbeatable. A DIYer will certainly not perform like professionals but his work is 100 percent honest and self-satisfying.
Final Words
To conclude, a plastic bathtub can never be a barrier to making your bathroom look beautiful. No matter how cheap the plastic looks of your bathtub, you can give it a new look by painting it following our instructions and information. So, now you know with the proper knowledge to answer the question “Can you paint a plastic bathtub”.
The cost to paint a Tahoe can range from $500 to $5000 or more. The cost can reach up to $10000 depending on all relevant factors.
Here we will explore the factors that influence the cost of painting a Tahoe. We’ll additionally provide you with valuable insights and estimations. We hope these will help you navigate the price palette for this captivating makeover.
Let’s unveil the cost spectrum and guide you towards a beautiful transformation for your cherished Tahoe.
How Much Does It Cost to Paint a Tahoe?
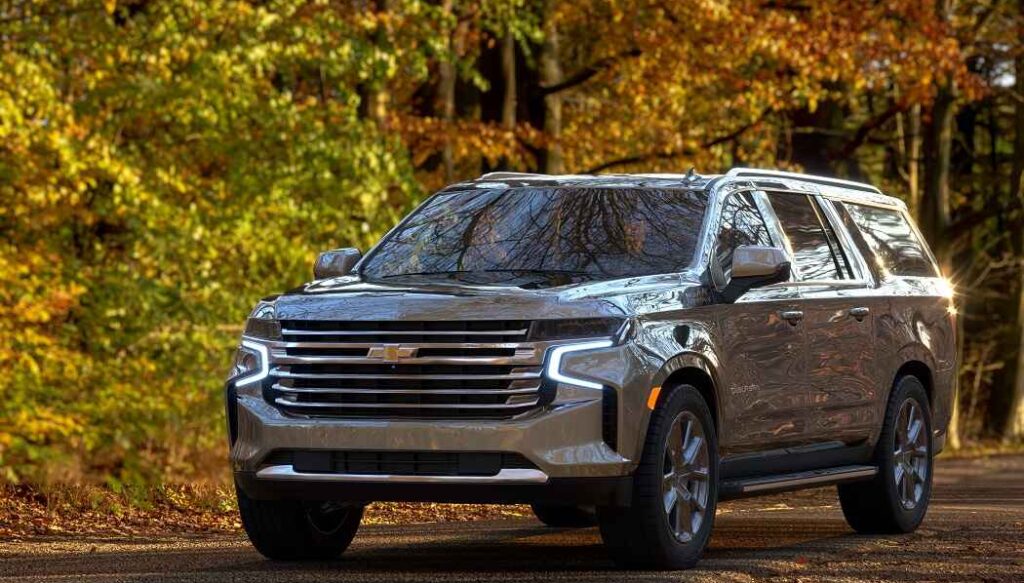
The Tahoe, also known as the Chevy Tahoe, is a popular SUV known for its rugged capabilities and spacious interior. It offers a blend of comfort, versatility, and power. All these make it a reliable choice for those seeking adventure and family-friendly transportation.
Painting a Tahoe is a popular choice for vehicle owners looking to refresh its appearance or give it a personalized touch. Take a look at the average price ranges associated with painting a Chevy Tahoe.
Spot or Panel Paint: If you have a few specific panels that require repainting, the cost can range from $200 to $600 per panel. Price can be varied depending on the size and extent of the damage. Keep in mind that this is an approximate range, and prices may change.
Basic Paint Job: A basic paint job for a Tahoe can cost anywhere from $1,000 to $3,000. This typically includes a single-stage paint application in a standard color without any extensive bodywork or repairs. This estimate includes surface preparation, masking, paint application, and minor touch-ups.
Mid-Range Paint Job: A mid-range paint job that includes better-quality paint and some minor bodywork can range from $3,000 to $6,000. This may involve fixing minor dents, scratches, and imperfections before applying the new paint.
High-end Paint Job: A high-end paint job that uses premium paint brands, custom colors, and additional detailing can cost $5,000 to $10,000 or even more. This type of paint job may also involve advanced techniques like airbrushing or custom designs.
Tips: We suggest you to obtain quotes from multiple reputed auto body shops to get a more accurate idea of the cost.
Important Factors Affecting the Cost of Painting a Tahoe
Several important factors can affect the cost of painting a vehicle. Consider the below points before deciding painting you Tahoe.
Vehicle size: The size of the Tahoe will play a significant role in determining the cost of painting. Larger vehicles generally require more paint and labor, resulting in higher cost.
Type of paint: There are various options available, such as solid colors, metallic finishes, and custom paint jobs. Specialized paints or custom finishes may be more expensive than standard options.
Surface preparation: Proper surface preparation is significant for a high-quality paint job. This includes cleaning, sanding, and potentially fixing any dents or scratches. If there is significant damage to the body that requires repair work, it will add to the overall cost.
Paint quality: Higher-quality paints are typically more expensive but offer better durability and overall finish. Choosing a premium paint brand may increase the cost of the painting project.
Labor costs: Labor costs can vary based on the location and expertise of the auto body shop. Experienced painters or specialized shops may charge higher rates than less experienced or general repair shops.
Warranty and guarantees: Some auto body shops offer warranties or guarantees on their paintwork. This can provide peace of mind but may come with an additional cost.
Insurance coverage: If you are painting your Tahoe due to damage from an accident or other covered event, your insurance coverage may affect the cost. Check with your insurance provider to understand what is covered and any associated costs.
What Is the Average Cost to Paint a Chevy Tahoe?
A complete paint job for a Chevy Tahoe can range anywhere from $1,000 to $5,000 or more. This cost includes the preparation work, such as sanding and priming, as well as the actual painting process.
The average cost is not fixed. It can be changed time to time and for many factors. The quality of paint, the vehicle size, the extent of the paint job (partial or full), and other factors influence the average cost for painting your Tahoe. Additionally, labor costs can vary depending on the shop or professional hired to perform the work.
How Much Does It Cost to Wrap a Tahoe?
Wrapping a Tahoe offers a cost-effective alternative to painting. It allows you to change the appearance of your vehicle without the permanence and expense of a traditional paint job.
The cost of wrapping a Chevrolet Tahoe can be mostly influenced by the quality of the vinyl used and the size of the vehicle. Generally, a full vehicle wrap for a Tahoe can range from $1,500 to $5,000 or more.
Is Painting Your Chevy Worth the Investment?
Of course, painting your Chevy can be a worthwhile investment. It is best if you want to restore Chevy’s original beauty, protect it from rust and damage, or customize it with a new color.
A high-quality paint job can significantly enhance the car’s appearance and make it stand out. Weigh the costs against the potential benefits when deciding if painting your Chevy is worth it for you.
How Long Does It Take to Paint a Chevy Tahoe?
Generally, a professional auto body shop can complete a full paint job on a Tahoe within a timeframe of 3 to 5 days. Less-experienced painters can take more time. This timeframe is an approximation. It can change due to the complexity of the paint job, and the skill level and efficiency of the painter.
Can Insurance Cover the Cost of Painting a Tahoe?
Insurance coverage for painting a Tahoe would depend on the specific terms and conditions of your insurance policy. Generally, auto insurance policies do not cover the cost of painting a vehicle for cosmetic purposes. The insurance policy can cover painting if it is necessary due to a covered incident, such as an accident or vandalism.
If the paint damage is a result of a covered incident, comprehensive insurance coverage may apply. This coverage typically reimburses you for the cost of repairing or replacing your vehicle, including painting, up to the policy limits and after accounting for deductibles.
However, if you are simply looking to change the color of your Tahoe for aesthetic reasons, it is unlikely that your insurance policy would cover the cost of painting.
Final Thoughts
The cost of painting a Tahoe can range considerably. It is important to obtain multiple quotes from reputable painters to ensure a fair price. By doing so, you can make the right decision that aligns with your budget and achieve a high-quality paint job for your Tahoe.
Definitely, you can mix glitter with emulsion paint to add a sparkling effect. Simply stir the glitter into the paint thoroughly before applying it to achieve a decorative finish with a touch of shimmer.
Shimmering and radiant, glitter has long captivated our imagination, transforming ordinary objects into extraordinary works of art. Its enchanting allure can be found in crafts, cosmetics, and even fashion, but have you ever wondered if it could find its way onto your walls?
Can you mix glitter with emulsion paint to bring a touch of magic to your living space? As the brush meets the palette, let’s delve into the realm of creativity and explore the possibilities of blending glitter and emulsion paint.
Can You Mix Glitter with Emulsion Paint?
Yes, it’s okay to mix glitter with emulsion paint. Glitter is often added to emulsion paint to create a sparkling or shimmering effect on painted surfaces. When mixed together, the glitter particles become suspended in the paint. And then, this mixture allows them to be evenly distributed on the surface during application.
Emulsion paint is water-based and consists of a binder, pigments, and additives. Glitter typically consists of small reflective particles made from materials like plastic, metal, or mica. When added to emulsion paint, the glitter particles become incorporated into the paint’s liquid medium without affecting its overall consistency.
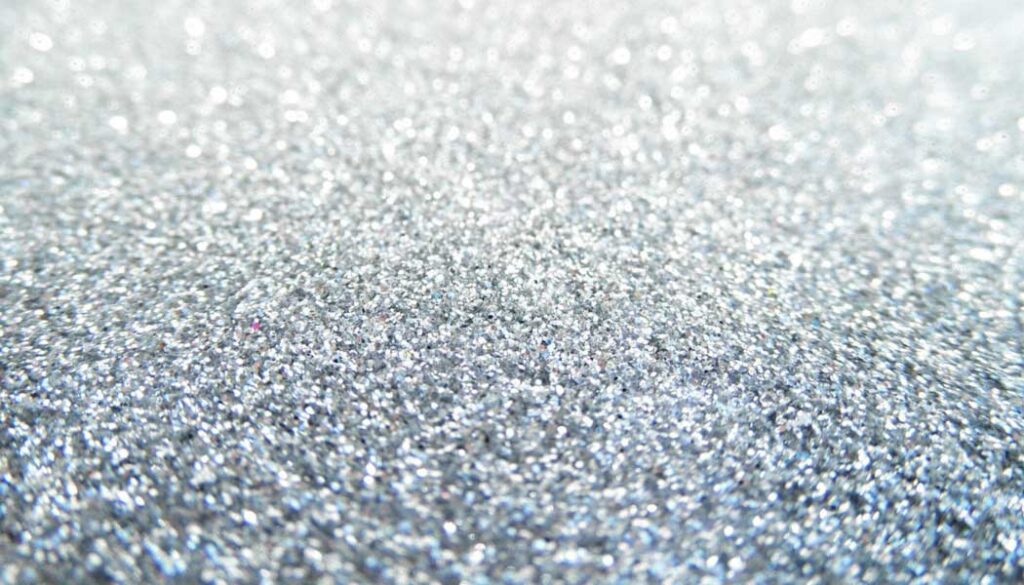
Yet, the type and amount of glitter added to emulsion paint can affect the final result. Fine glitter particles tend to create a more subtle shimmer. On the other hand, larger particles can produce a more pronounced sparkle. Additionally, adding excessive amounts of glitter can make the paint thicker and more difficult to work with. So, start with small amounts and gradually increase if desired.
What Kind of Glitter Can You Add to Emulsion Paint?
When it comes to adding glitter to emulsion paint, choose a glitter that is specifically designed for mixing with paint.
Not all glitters are suitable for this purpose, as some may not adhere well to the paint or may affect its consistency. Here are a few considerations for selecting the best-suited glitter for adding to emulsion paint.
Fine or ultra-fine glitter:
Opt for glitter that has a fine or ultra-fine texture. These types of glitter particles are smaller and tend to mix more evenly with the emulsion paint. Fine glitters also have a better chance of adhering to the paint and not sinking over time.
Polyester or craft glitter:
Look for glitters made from polyester or specifically labeled as craft glitter. These types of glitter are often more durable and resistant to fading or bleeding. They are designed to withstand various conditions and are less likely to lose their shine over time.
Non-toxic and colorfast:
Ensure that the glitter you choose is labeled as non-toxic and colorfast. This is particularly important if you plan to use the glitter-infused paint in areas where it may come into contact with people, such as walls in living spaces or children’s rooms. Non-toxic glitters are safer and do not emit harmful fumes when mixed with paint. Colorfast glitters will retain their color and vibrancy without bleeding or staining the paint over time.
Solvent-resistant:
If you are using solvent-based emulsion paint, make sure the glitter is solvent-resistant. Some glitters may dissolve or lose their sparkle when mixed with solvent-based paints. Checking the glitter’s compatibility with solvent-based paints will ensure a successful result.
Lightfast properties:
If the glitter-infused paint will be exposed to direct sunlight or other light sources, consider choosing glitters with lightfast properties. Lightfast glitters are more resistant to fading caused by UV exposure.
Pros and Cons of Mixing Glitter with Emulsion Paint
Mixing glitter with emulsion paint can add a touch of sparkle to your walls. But it also has both advantages and a few drawbacks. Let’s explore the advantages and disadvantages in detail.
Advantages of Adding Glitter to Emulsion Paint
Enhanced aesthetic appeal: Mixing glitter with emulsion paint can instantly transform a plain wall into a visually captivating and sparkling feature.
Customization and personalization: By incorporating glitter into emulsion paint, individuals can personalize their living spaces. It allows for creative expression and the ability to create a truly one-of-a-kind look.
Versatility and flexibility: Glitter-infused emulsion paint offers versatility in design options. It allows individuals to experiment with different colors and glitter particle sizes to achieve desired effects.
Fun and whimsical atmosphere:
Mixing glitter with emulsion paint can bring a sense of joy, playfulness, and whimsy to a space. It is an excellent choice for children’s bedrooms, playrooms, or creative spaces where a touch of sparkle can inspire imagination and creativity.
Disadvantages of Adding Glitter with Emulsion Paint
Cleanup and maintenance: Glitter particles can be challenging to clean up once they have been applied. They tend to scatter and can be difficult to remove from surfaces.
Texture and uneven finish: The addition of glitter can alter the texture of emulsion paint, resulting in a slightly rough finish.
Limited color options: While glitter itself comes in various colors, mixing it with emulsion paint can limit the color choices available. Some glitter particles may be transparent or have limited color variations.
Difficulty in matching repairs or touch-ups: If a surface painted with glitter-infused emulsion paint requires touch-ups in the future, it can be challenging to achieve an exact match. The glitter particles may settle differently or become less prominent over time.
How Do You Use Glitter in Emulsion Paint?
Glitter can be mixed with emulsion paint in different ways. Here, we’ll describe a step-by-step method that is easy to do.
Step 1 – Preparation
- Choose a high-quality emulsion paint in the desired color.
- Select a fine glitter in the color of your choice. Make sure it is suitable for mixing with paint.
- Get a clean, wide-mouthed container or bucket for mixing the paint and glitter. Also, have a stirring stick or a paint mixer attachment for a drill.
Step 2 – Measure the Paint
- Determine the amount of emulsion paint you’ll need to cover the desired area. This will help you determine the appropriate amount of glitter to use.
- Pour the required amount of emulsion paint into the mixing container. Leave some room for adding glitter and stirring.
Step 3 – Add the Glitter
- Begin by adding a small amount of glitter to the paint. You can always add more if you want a stronger glitter effect.
- Start with a ratio of roughly 1 to 4, meaning for every cup of paint, add about a quarter cup of glitter. Adjust this ratio to achieve your desired level of glitteriness.
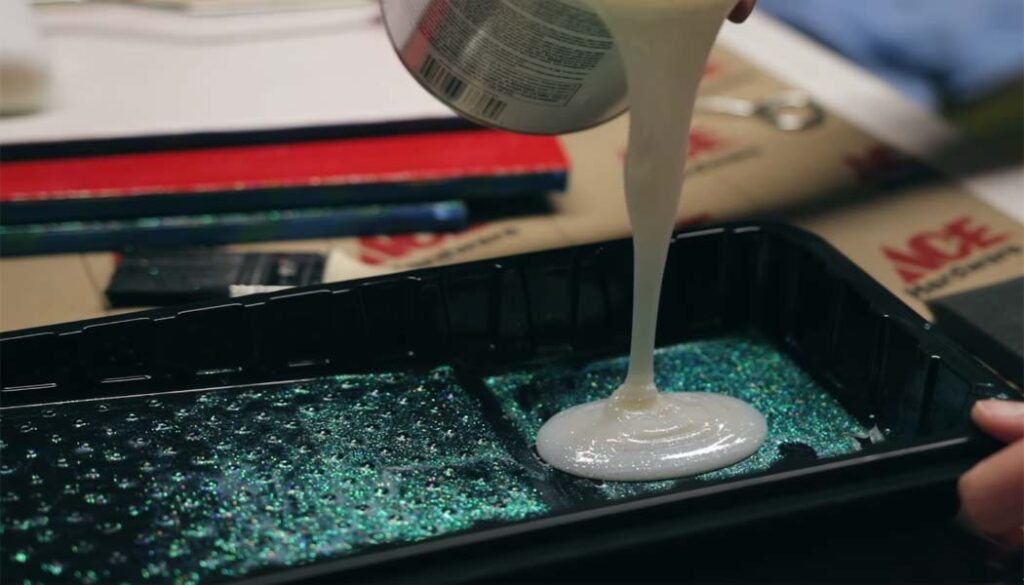
Step 4 – Mix Thoroughly
- Thoroughly mix the glitter into the emulsion paint. Use a stirring stick or paint mixer attachment to ensure the glitter is evenly distributed throughout the paint.
- Continue stirring until there are no clumps of glitter.
- Stir in a gentle, circular motion to avoid creating air bubbles.
Step 5 – Test the Mixture:
- Before applying the glitter paint to your surface, it’s a good idea to test a small area to make sure you’re satisfied with the glitter concentration and the overall look.
Step 6 – Apply the Glitter Emulsion Paint
- You can now proceed to apply the glitter-infused emulsion paint to the desired surface.
- Use a roller or brush to apply the paint in a right way, just as you would with regular emulsion paint.
- Apply it just like you would with regular paint, making sure to spread it evenly.
- Apply a few thin coats if needed. This will ensure a consistent sparkle and coverage.
Note: Remember to follow the instructions on the emulsion paint and glitter containers for any specific guidelines or safety precautions.
Final Words
So, the answer is a resounding ‘yes’! Mixing glitter with emulsion paint opens up a world of creative possibilities for adding glamour to your walls.
Whether you want to create a bold statement, this combination allows you to unleash your artistic vision. It transforms your living spaces into sparkling showcases. So go ahead, grab your emulsion paint and glitter, and let your imagination run wild!
To remove varnish from wood, create a solution by mixing equal parts of vinegar and water. Apply the solution to the varnished wood with a cloth and let it sit for a few minutes. Scrub off the varnish using a brush or sponge.
In this guide, we’ll walk you through the step-by-step process of using vinegar to remove varnish. This will be actually an affordable and eco-friendly alternative to harsh chemical strippers.
Get ready to discover a tried-and-true method that will rejuvenate your wood and bring out its natural beauty once again.
Understanding Varnish and Its Effects on Wood
Varnish is a transparent or semi-transparent coating. It is commonly used to protect and enhance the appearance of wood surfaces. It is a popular choice for finishing furniture, cabinetry, floors, and other wooden objects. Varnish provides several benefits to wood.
It creates a protective barrier on the surface. Varnish shields the wood surface from moisture, UV rays, and other environmental elements. This protective layer helps prevent the wood from warping, cracking, or rotting.
Varnish improves the look of its natural grain and color. It adds depth and richness to the wood surface. It can also be tinted or stained to alter the color of the wood or achieve a specific aesthetic.
Moreover, this coating improves the resistance of wood to scratches, stains, and abrasions. It provides a hard and smooth surface that is easier to clean and maintain. Regular maintenance (such as cleaning) can help preserve the appearance and integrity of the wood over time.
Remember, varnish can alter the texture and feel of the wood. Some people prefer the natural, untreated feel of wood. So, they may opt for other finishes like oil or wax. Besides, improper application of varnish can lead to issues such as uneven coverage, bubbling, or yellowing over time.
What Are the Natural Ways to Remove Varnish from Wood?
Removing varnish from wood can be done using natural methods that are effective and safe. Here are some natural ways to remove varnish from wood.
Heat and scraping: One method is to use heat to soften the varnish and then scrape it off. Start by using a heat gun or a hairdryer to warm up the varnish. Be cautious not to overheat or scorch the wood. Once the varnish becomes soft, gently scrape it off using a putty knife or a scraper. This method requires patience and care to avoid damaging the wood.
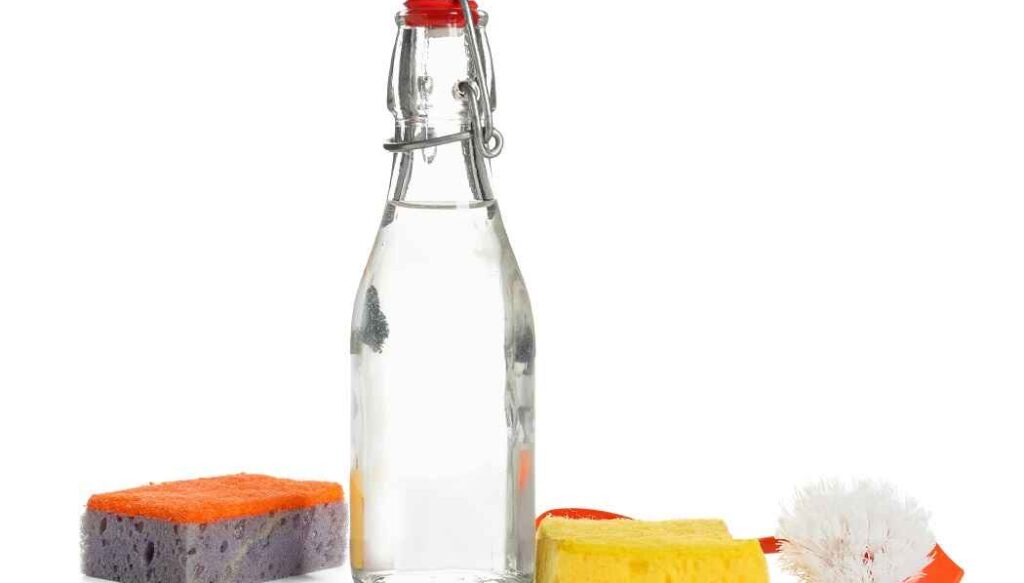
Vinegar: Soak a cloth or a sponge in white vinegar and apply it directly to the varnished surface. Let it sit for a few minutes, then scrub the area with a soft brush or cloth. The acetic acid in vinegar helps to break down the varnish, making it easier to remove. Rinse the wood with clean water afterward.
Citrus-based solvents: Citrus-based solvents, such as citrus peel extracts or orange oil, are effective natural alternatives for varnish removal. These solvents contain d-limonene, a powerful compound that can dissolve varnish. Apply the solvent to the varnished surface using a cloth or sponge. Wait for a few minutes. Then, use a scraper or a brush to remove the softened varnish.
Baking soda and water paste: Mix baking soda with water to form a thick consistency. Apply the paste onto the surface, ensuring an even layer. Leave it on for several hours to allow the mixture to penetrate the varnish. Once the paste has dried, scrape it off with a scraper. This method may require multiple applications for complete varnish removal.
How Vinegar Works for Removing Paint from Wood?
When it comes to removing paint, vinegar works by breaking down the chemical bonds that hold the paint together. It helps to loosen paint’s adhesion to the wood. This is a detailed explanation of how it works for removing paint from wood.
Acetic Acid Content: Vinegar contains acetic acid, which is a mild acid.The acid is typically around 5%, making it safe to handle but still potent enough to dissolve paint. It acts as a solvent, breaking down the chemical bonds in the paint and weakening its adherence to the wood.
Softening the Paint: When vinegar comes into contact with the paint, the acetic acid starts to soften the paint layers. It penetrates the paint and reacts with the chemicals in the paint, weakening the bonds between the paint molecules.
PH Balance: Vinegar has a low pH, typically around 2. This acidic nature helps to neutralize the alkaline properties of some types of paint, such as latex-based paints. By lowering the pH, it helps to break down the paint and make it easier to remove.
How to Remove Varnish from Wood with Vinegar?
If you’re looking to remove varnish from wood, using vinegar can be an effective and natural solution. Vinegar’s acidic properties help break down the varnish, making it easier to strip away. To remove varnish from wood using vinegar, you can follow these steps.
Necessary supplies:
- White vinegar
- Rubber gloves
- Safety goggles
- Soft cloth or sponge
- Plastic wrap
- Paintbrush
- Paint scraper
- Fine-grit sandpaper
- Clean water
Prepare the work area:
Choose a well-ventilated area to work in, as vinegar can produce strong odors. Lay down a protective drop cloth to prevent any damage to the surrounding surfaces.
Put on your safety gear:
- Wear rubber gloves to protect your hands from the vinegar.
- Put on safety goggles to shield your eyes from potential splashes.
Apply vinegar:
- Dip a soft cloth or sponge into white vinegar and gently rub it onto the varnished surface.
- Allow the vinegar sit on the wood for about 10-15 minutes. Thus, vinegar will penetrate and loosen the varnish.
Cover with plastic wrap:
- Once the vinegar has had time to work, cover the treated area with plastic wrap to prevent it from drying out.
- The plastic wrap will also help to enhance the effectiveness of the vinegar by keeping it in contact with the varnish.
Remove plastic wrap and varnish:
- After about 1-2 hours, remove the plastic wrap and inspect the wood.
- The varnish should have softened and lifted from the surface.
- Use a paint scraper to gently scrape away the loosened varnish.
- Be careful not to apply excessive pressure or damage the wood underneath.
Sand the wood:
- Once you have removed the majority of the varnish, use fine-grit sandpaper to sand the surface.
- Sanding will help to remove any residual varnish and smooth the wood.
- Sand in the direction of the wood grain for the best results.
Clean the surface:
- Wipe down the wood with a clean, damp cloth to remove any dust from sanding.
Repeat if necessary:
- If there are still traces of varnish remaining, you can repeat the process with vinegar.
Final steps:
- Once you have removed all the varnish, allow the wood to be dried completely.
- If desired, you can apply a new finish to the wood to protect and enhance its appearance.
Why Choose Vinegar Over Commercial Paint Strippers?
Removing paint from any surfaces, many people turn to commercial paint strippers due to their widespread availability and perceived effectiveness. But vinegar offers several advantages over commercial paint strippers. Take a look why vinegar can be a compelling choice for paint removal.
Safety: One of the significant advantages of using vinegar as a paint stripper is its safety. Commercial paint strippers often contain harsh chemicals such as methylene chloride. This chemical can be toxic and pose health risks if not handled properly. Vinegar, on the other hand, is a natural and non-toxic substance. It is a safer option for both the user and the environment.
Accessibility and affordability: Vinegar is readily available in most households. It can be purchased at a low cost from grocery stores. In contrast, commercial paint strippers may require a trip to a specialized store. And their prices can vary significantly depending on the brand and type of product. Using vinegar as a paint stripper can save both time and money.
Versatility: Vinegar is not only effective at removing paint from various surfaces, but it can also tackle other stubborn stains. It can be used on materials such as wood, metal, glass, and plastic. This versatility makes vinegar a multipurpose solution, providing additional value beyond just paint removal.
Ease of use: Vinegar is a user-friendly option for paint removal. Simply applying it to the painted surface and allowing it to sit for a period of time can help loosen the paint. This straightforward application process eliminates the need for complex instructions or specialized tools.
Environmentally friendly: Vinegar is biodegradable and does not release harmful fumes into the air during use. Its eco-friendly nature makes it a preferred option for those seeking to minimize their ecological footprint.
Safer for delicate surfaces: Some commercial paint strippers may be too harsh for delicate surfaces, causing damage or discoloration. Vinegar, being a milder solution, poses less risk to delicate materials and finishes.
What Kind of Vinegar Removes Paint from Wood?
White distilled vinegar is the recommended option to remove paint from wood. It is clear vinegar made from the fermentation of distilled alcohol, typically derived from grains such as corn.
This vinegar is widely available and known for its mild acidity. It is commonly used for various cleaning purposes due to its versatile nature.
When using vinegar for paint removal, it is important to dilute it with water to minimize the risk of damaging the wood. A mixture of equal parts white distilled vinegar and warm water is often used for this purpose.
Keep in mind that different types of vinegar, such as apple cider vinegar or wine vinegar may have varying levels of acidity. They may not be as effective as white distilled vinegar for paint removal from wood. Therefore, it is best to use white distilled vinegar when attempting to remove paint from wood surfaces.
Does Vinegar Damage Wood?
Vinegar can potentially damage wood if used improperly. Its acidic nature can cause the wood to lose its natural oils, leading to dryness. Prolonged or excessive exposure to vinegar can also strip the finish or varnish off the wood.
It is advisable to use mild, pH-neutral cleaners specifically formulated for wood surfaces to avoid any potential damage.
Conclusion
Vinegar to remove varnish from wood offers a practical and eco-friendly approach. But it can be a labor-intensive process, so it’s essential to be patient and take your time to achieve the desired results.
Throughout our discussion, we explored the steps involved in this process. You can just follow our instructions to effectively revive the natural allure of your wood furnishings.
Glitter paint and their tendency to flake off are not uncommon at all. Especially, over time, due to its extremely dried-out formula, glitter paint falls off your wall reluctantly. Besides, glitter paint requires walls or any material-based surfaces very well prepared with primer. If you fail to do the preparation properly, glitter paint will flake off within a few months.
Many people have an extreme obsession with glitter. Therefore, glitter paint is their easiest adoption for painting every surface where they feel it is appropriate. But the question ‘does glitter paint flake off’ prevents them to apply it to surfaces at their sweet will.
Glitter paint has its own downsides and flaking off unexpectedly is one of the major and disturbing cons. But that should not stop you from following your heart to apply glitter paint to your wall or other materials.
Does Glitter Paint Flake Off?
Glitter paint obviously carries glittery agents in it. That’s why the amalgamation of paint and glitter should come with proper ratio and adhesion. Without the right proportion of ingredients in it, glitter will tend to flake off easily.
Also, because glitter paint carries some loose elements, together they tend to make your paint flake off. These loose elements, including glitter itself, won’t just adhere to the surface easily and evenly. Without implying much effort while applying this paint, you cannot go on properly.
The result will be blotchy and as a result, you will see it flaking off of your wall if you take your glitter paint lightly. A very well preparation can only save your glitter paint from flaking off superfast.
Factors Affecting Flaking of Glitter Paint
There are some significant factors that work behind the cause of the flaking of your glitter paint. Avoiding these factors can increase the lifespan of your glitter paint on the wall.
Well, complete exposure to outside weather can make your glitter flake. The continuous action of UV rays and other calamity disasters can terribly affect your glitter paint. Heavy rainfall will loosen up the agent glitter from the paint and it will eventually compel the paint to flake off.
Then again, glitter paint will come off in small pieces if it does not get enough air circulation and room temperature. If you put a piece of furniture pressing it to the wall stained with glitter paint, it may cause blockage in the passage of air. This will encourage a damp condition on the wall and flakes will appear soon.
Another factor that influences greatly in flaking of glitter paint is conducting any rough cleaning on it. Glitter paint is already more sensitive than other regular paint for its glittery effect. That’s why vigorous cleaning will put an insensitive effect on the wall. Even oftentimes, cleaning the glitter-painted surface on a regular basis can be the fuel behind the gradual growing flakes on your wall.
The thin pieces of glitter paint can also come off the wall due to using detergent and harsh chemicals like it. They can seriously affect glittery agents and loosen up the bond. As a result, flaking off glitter paint will be of no surprise. Besides, scrubbing with an abrasive tool brings about the same result.
Common Issues Due to Flaking of Glitter Paint
People apply paint to the surface of walls to increase beauty. But this very paint can be the reason for your wall to look clumsy or disgusting. Flaking of glitter paint is also one of the reasons for which your favorite wall or piece of work can lose its natural beauty.
If glitter paint from a small part starts to come off once, there is no ending to it. That small part has the potential to encourage other areas to flake off. Besides, if an area flakes off, then there has an immense tendency for other parts to flake off glitter paint easily. This is how it utterly ruins the whole beauty of your wall.
Not only this but also the flaking of glitter paint makes the whole space look and feel dirty. The dust of glitter paint falls right on the carpet. As a result, your carpet, no matter how cheap it is, gets dirty as well. This is how this bad part of your room can affect other superior parts to look bad as well.
Also, due to the flaking of glitter paint, many people are afraid of applying it on their favorite spots. The condition of flaking off demotivates some people to adopt glitter paint. Even some people form negative impressions about glitter paints when they can get rid of these problems as well.
How to Stop Glitter Paint Flake-off?
Seeing the reasons and consequences of glitter paints flaking off, you must now be craving for the solution to these problems. There are some solid ways following which you can prevent your glitter paint from flaking off.
First of all, as a precaution, you should apply a quality primer on the surface before the application of glitter paint. Because glitter is a loose component, it requires a lot of adhesion. Only this can help your glitter paint to stick to the surface.
Also, application with the right tool to make the paint spread evenly is another important step that you should follow. It’s actually tough to apply glitter paint on the surface as it gives a hard time by not spreading evenly all over the surface. That’s why proper attention and effort are two important facts to follow.
Besides those, to stop glitter paint flake off, you need to avoid conducting vigorous cleaning with harsh chemicals. Try not to use liquid for cleaning every day. Also, let the painted area breathe properly in a room temperature and offer it a fairly air-circulated area.
Don’t apply glitter paint where there is continuous exposure to scorching heat and heavy rainfall. Otherwise, the paint will not survive many days in this circumstance. Apart from all, try to adopt a quality positive-reviewed branded glitter paint by doing some research and save your glitter paint from flaking off.
Final Words
In conclusion, the answer to ‘if glitter paint flake off or not’ is positive. But the good news is you can prevent your glitter paint from flaking off by taking measures that we have already mentioned above. Now it’s your turn to make an effective outcome with the help of our information regarding this topic.
Yes, it is possible to spray paint over clear coat. Clear coat serves as a protective layer on surfaces, providing a glossy and durable finish.
However, if you wish to change the color or add a design, spray painting over clear coat is a viable option. By following the proper preparation and application techniques, you can achieve excellent results.
In this comprehensive guide, we will delve into the steps involved, potential challenges, and expert tips to help you achieve a flawless finish when spray painting over clear coat. Revamp your vehicle, furniture, or other surfaces with stunning outcomes. Discover the secrets of this painting technique!
Can You Spray Paint over Clear Coat?
Spray painting over clear coat can be a great option for altering the appearance of a surface. However, you will need to consider several factors before proceeding. It’s important to understand the importance of conducting a test area and the potential risks involved.
1. Factors to Consider
Surface condition: Before spray painting over clear coat, assess the condition of the existing clear coat. If the clear coat is damaged, peeling, or showing signs of wear, it may not provide a suitable base for the new paint. In such cases, remove the coat completely before proceeding with spray painting.
Compatibility: Compatibility between the spray paint and the clear coat is essential to ensure proper adhesion and durability. Different types of clear coats, such as acrylic, urethane, or enamel, may react differently to various types of spray paints. It is advisable to seek professional advice to ensure compatibility between the products.
Preparation: Begin by thoroughly cleaning the surface to remove any dirt, debris, or contaminants. Sanding the clear coat lightly with fine-grit sandpaper can create a textured surface that promotes paint adhesion. Additionally, applying a primer specifically designed for adhesion can improve the bond between the clear coat and the spray paint.
Test Area: Conducting a small test area before proceeding with full-scale spray painting is highly recommended. This test area allows you to evaluate the compatibility of the spray paint with the clear coat. Apply the spray paint to a tiny portion of the surface by following proper techniques.
Observe the results over time. This test area helps mitigate potential risks.
2. Results and Risks
One common issue is poor adhesion, which can lead to paint peeling and cracking. This can occur if the clear coat is incompatible with the spray paint. It can also happen if the surface preparation is inadequate.
Another risk is paint failure, where the new paint may not adhere uniformly or may have an uneven finish. In some cases, the clear coat may react with the solvents in the spray paint, causing bubbling or other effects.
How to Spray Paint over Clear Coat?
Spray painting over a clear coat can be a bit tricky, but it is possible with the right preparation and technique. It’s important to approach the process carefully to ensure a smooth and professional-looking finish. Check this simple but effective step-by-step method for spray painting over clear coat.
Step 1: Prepare the surface
Make sure the surface is clean and free from dust. If necessary, wash the surface with soap and water and allow it to fully dry. If there are any rough spots, sand them lightly using fine-grit sandpaper to create a smooth surface.
Step 2: Mask off surrounding areas
If there are any areas nearby that you don’t want to be painted, use masking tape to cover them. This will help prevent overspray and ensure that the paint is applied only to the intended surface.
Step 3: Choose the right paint
Select a spray paint that is compatible with the clear coat you’re working with. Choose a high-quality paint that adheres well and provides good coverage. Consider the type of surface you’re painting and the desired finish (matte, glossy, etc.) when selecting the paint.
Step 4: Test spray
Before applying the paint directly onto the surface, it’s a good idea to do a test spray on a scrap piece of material. This will help you gauge the spray pattern, adjust the nozzle, and ensure that the color matches your expectations.
Step 5: Apply the paint
Hold the spray can about 8 to 12 inches away from the surface. Begin spraying with even strokes. Start from one side and work your way across. Avoid spraying too close or staying in one spot for too long, as this can cause the paint to create uneven patches.
Step 6: Allow for drying time
After you’ve applied the first coat of paint, ensure it dries. This typically takes 10 to 30 minutes. Make sure to follow the recommended drying time to achieve the desired result. If necessary, apply additional coats, allowing each coat to dry between applications.
Step 7: Final curing time
After you’ve completed the painting process, allow the surface to cure fully before handling or exposing it to any elements. This can take a few hours to a few days, depending on the specific paint and clear coat you used.
Can You Spray Paint over Clear Coat on Plastic?
Clear coats are typically used to protect the underlying surface, so painting directly over it may not yield the expected adhesion. To promote adhesion, applying a primer specifically designed for plastic surfaces is a good idea. The primer provides a suitable surface for the paint.
So, you can use spray paint over clear coat on plastic with some specific steps. You can follow this “How to Spray Paint over Clear Coat” written above.
However, spray painting on plastic’s clear coat provides some benefits and drawbacks as well.
Spray painting makes the plastic surface more resistant to scratches, fading, and environmental damage. It offers a convenient way to customize and personalize plastic objects according to your preferences. Spray painting is a relatively easy and accessible method for coating plastic surfaces.
Note: Clear coats are designed to provide a smooth surface, which may not always provide optimal adhesion for spray paint. If the clear coat is too smooth or has certain additives that prevent paint adhesion, the spray paint may not adhere properly.
Can You Spray Paint over a Clear Coat on Wood?
Yes, you can spray paint over a clear coat on wood. However, note that the durability of the spray paint may be affected by the condition of the clear coat. Proper surface preparation and selecting the appropriate spray paint can help ensure a successful outcome.
With attention to detail and care, you can achieve a satisfactory result.
Can You Spray Paint over Clear Coat Cabinets?
You can spray paint over clear coat cabinets. Clear coat cabinets are typically finished with a protective layer. Before proceeding with spray painting, ensure that the cabinet is in good condition, free from peeling or cracking. Otherwise, you may need to sand them to create a smooth surface.
When choosing a spray paint, opt for one that is fit for use on cabinets and provides good coverage. Apply multiple thin and even coats of spray paint, ensuring adequate drying time between each layer.
By following proper steps, you can successfully spray paint over clear coat cabinets. And finally you can achieve a refreshed and transformed look for your kitchen or living space.
Can You Spray Paint over Lacquer Car?
Spray painting over a lacquer car finish is possible. Lacquer is a type of automotive paint that provides a glossy finish. However, it can be prone to fading and cracking over time, which may necessitate repainting.
Before spraying paint over a lacquer car, confirm the lacquer is in good condition with no signs of damage. Additionally, using an automotive primer can improve the adhesion of the new paint.
Choosing the right paint for your car is important. Automotive spray paints come in various formulations, including acrylic, enamel, and urethane. Select a paint that is compatible with lacquer.
Can You Spray Paint over Clear Coat without Sanding?
Spray painting over clear coat without sanding is generally not recommended. Clear coat is a transparent layer. Over time, it can be damaged, requiring a fresh coat of paint.
Skipping the sanding step and apply new paint directly over the clear coat can lead to several issues. Sanding serves multiple purposes, such as creating a rough surface for the new paint, removing imperfections, and promoting better adhesion.
Without sanding, the new paint may struggle to bond properly to the smooth clear coat surface. The paint may peel, crack, or bubble over time.
To ensure a successful paint job, it is generally recommended to properly prepare the surface by sanding the clear coat. This creates microscopic grooves that allow the new paint to adhere securely, promoting a more professional-looking finish.
Important Video with Some Tips:
Final Thoughts
So, the verdict is clear. You can spray paint over a clear coat. While it may seem tempting to take shortcuts and spray paint directly over clear coat, it is best to follow the proper procedures for optimal results.
Remember, if you are unsure about the best approach or lack the necessary experience, you can take help from professional service.
Apply a suitable paint stripper onto the painted stone using a brush. Let the paint stripper sit on the stone surface for about 15 minutes. Next, use a nylon bristle brush to scrub the paint. Lastly, scrape off the softened paint using a plastic scraper.
Perhaps you accidentally spilled paint on your stone patio, or maybe you’ve acquired an old building with layers of paint obscuring its original splendor. Whatever the case, the prospect of removing paint from stone may initially seem daunting. But fear not!
In this guide, we will explore effective methods and considerations for safely removing paint from stone. So, if you’re ready to unveil the timeless allure of your stone surfaces, let’s discover how to transform them into pristine works of art once again.
Removing Paint from Stone: Basics of the Paint and Stone Types
Removing paint from stone surfaces requires careful consideration of both the type of paint and the type of stone. The methods for removing paint from stone can vary depending on these factors. Here are some basics to keep in mind.
1. Identify the type of stone: Different types of stone have varying levels of hardness and porosity, which can affect the removal process. Common types of stone include granite, marble, limestone, sandstone, and slate.
2. Identify the type of paint: Paints can be oil-based, latex-based, or acrylic-based. Oil-based paints are generally more difficult to remove than latex or acrylic paints.
3. Conduct a spot test: Before applying any paint removal method to the entire surface, conduct a spot test on a small area of the stone. It will ensure that it won’t cause damage or discoloration.
4. Dry removal methods: If the paint is relatively new, you can try using a scraper to gently remove the paint from the stone. Be careful not to scratch or damage the stone surface while doing so.
5. Poultice method: Poultices are a paste-like mixture applied to the painted surface to loosen and lift the paint. You can make a poultice using a suitable absorbent material like kaolin clay or diatomaceous earth, mixed with a solvent recommended for your stone type.
6. Pressure washing: If the stone surface is durable enough, pressure washing can help remove paint.
7. Seek professional help: Stone restoration specialists can evaluate the situation and apply the most appropriate techniques to remove the paint.
How to Remove Paint from Stone?
When it comes to removing paint from stone surfaces, the task can prove quite challenging. Stone’s porous and textured nature makes it particularly susceptible to damage during the paint removal process. Here, we will explore various methods and step-by-step instructions to effectively eliminate paint from stone.
Scraping Technique to Remove Paint from Stone
Removing paint from stone using scraping technique can be done with the right tools and methods. Check this step-by-step guide on this technique.
1. Gather the necessary tools:
– Plastic or metal scraper: Choose a scraper with a flat edge that won’t scratch or damage the stone surface.
– Safety goggles and gloves: Protect your eyes and hands from any paint chips or debris.
– Drop cloths: Cover the surrounding areas to catch any paint chips and prevent them from spreading.
2. Prepare the work area:
– Open windows or provide proper ventilation.
– Lay down drop cloths to protect the surrounding area.
– Use masking tape to cover any adjacent surfaces you want to avoid scraping.
3. Test a small area:
– Before proceeding, test the scraping method on an inconspicuous area to ensure it doesn’t damage the stone.
4. Scrape off the paint:
– Hold the scraper at a low angle (around 15-30 degrees) to the stone surface.
– Apply moderate pressure and scrape the paint gently in one direction.
– Be cautious not to dig the scraper into the stone, as it can cause damage the surface.
– Remove the loosened paint chips with a cloth to prevent them from spreading.
5. Repeat the process:
– Continue scraping the paint in sections, working your way across the entire painted area.
6. Clean the stone surface:
– Once you’ve removed the majority of the paint, clean the stone surface with a mild detergent or stone cleaner.
– Use a soft brush or sponge to scrub the surface gently, removing any remaining paint residue.
– Rinse the area with clean water and wipe it dry.
Remember, different types of stone may have varying levels of durability and sensitivity to scraping. Always test any method in an inconspicuous area first and proceed with caution to avoid damaging the stone surface.
Paint Stripper to Remove Paint from Stone
Painted stone surfaces may lose their natural beauty and character. However, thanks to the advancements in chemical solutions. A specialized product known as paint stripper has become an effective solution for removing paint from stone.
Materials You Need:
- Paint stripper
- Safety goggles
- Gloves (chemical-resistant)
- Mask or respirator
- Protective clothing
- Nylon bristle brush
- Plastic scraper
- Clean rags
- Water
1. Prepare the area
– Consider working outdoors to minimize exposure to fumes.
– Lay down plastic sheeting to protect the surrounding surfaces.
2. Wear protective gear
– Put on safety goggles, gloves, a mask or respirator, and suitable clothing to protect your skin.
3. Apply the paint stripper
– Follow the instructions provided with the paint stripper product.
– Apply a generous coat of the paint stripper to the painted area using a brush. Make sure to cover the entire painted surface.
4. Let the paint stripper work
– Allow the paint stripper to sit on the stone surface for the recommended amount of time. This typically ranges from 15 minutes to several hours, depending on the thickness of the paint.
5. Scrub and scrape the paint
– Use a nylon bristle brush to agitate the paint and help remove it from the stone.
– Use a plastic scraper to gently scrape off the loosened paint. Make sure not to scratch or damage the stone surface.
6. Repeat if necessary
– If some areas still have paint residue, you may need to repeat the paint stripper application and removal process.
Note: Remember to dispose of the used paint stripper and any contaminated materials according to local regulations.
Using Rubbing Alcohol to Remove Paint from Stone
Rubbing alcohol can be effective for removing certain types of paint from stone. Here’s a guide to removing paint from stone using rubbing alcohol.
Necessary Materials:
- Rubbing Alcohol
- A clean cloth
- A plastic scraper
- Mild soap
- Water
- Protective gloves
1. Moisten a cloth or sponge with rubbing alcohol. Make sure it is not dripping wet but adequately damp.
2. Mildly rub the wet sponge on the painted spot. Start with light pressure to avoid scratching or damaging the stone surface. If the paint is stubborn, you can increase the pressure slightly.
3. After applying rubbing alcohol, allow it to sit on the painted surface for a few minutes. This will give it time to soften and dissolve the paint.
4. Once the paint has softened, use a plastic scraper to gently scrape or scrub away the loosened paint. Work in small, controlled motions.
5. After removing the paint, clean the stone surface with a mixture of mild soap and water. Use a sponge to wash away any remainder from the rubbing alcohol and paint.
6. Rinse the area thoroughly with clean water to remove any soap residue. Use a dry cloth or towel to pat the stone surface dry.
Additional Tips and Considerations when Removing Paint from Stone
To ensure a successful paint removal process, there are several important additional tips and considerations to bear in mind. Here’s a closer look at each of these points.
1. Delicate stones like limestone or sandstone require more gentle paint removal methods to avoid causing damage. Avoid abrasive tools that could scratch or etch the surface.
2. For intricate or valuable stone objects, it’s best to seek the guidance of a professional conservator or restoration expert. They specialize in working with stone. They have the necessary skills, experience, and tools to safely remove paint while preserving the value of the object.
3. If you’re painting near stone surfaces, use masking tape to create a barrier between the painted area and the stone. This will help prevent accidental splatters from reaching the stone.
What Dissolves Dried Paint?
Dried paint can be difficult to remove, but there are several substances that can help dissolve it. The specific method you use depends on the type of paint and the surface it has adhered to.
A. Solvents: Paint thinner or mineral spirits are effective for dissolving many types of oil-based paints. Apply a small amount to a cloth and gently rub the dried paint until it starts to soften.
B. Isopropyl alcohol: This can be used to dissolve some types of latex or water-based paints. Moisten a cloth or sponge with isopropyl alcohol and rub it over the dried paint until it loosens. Rinse the surface with water afterward to remove any residue.
C. Vinegar: White vinegar is often effective at softening dried latex paint. Soak a cloth or sponge in vinegar and apply it to the paint, letting it sit for a few hours. Once the paint has softened, gently scrape it off with a putty knife.
D. Hot water and soap: For water-based paints, you can try soaking the affected area in hot water with a mild soap. Let the water soften the paint, and then scrub it off with a cloth or sponge.
E. Commercial paint removers: There are various paint removers available in the market designed to dissolve dried paint. These products typically contain stronger chemicals. So, be sure to follow the manufacturer’s instructions carefully and take proper safety precautions.
Does Vinegar Remove Paint from Stone?
Yes, vinegar can help remove paint from stone surfaces to some extent. Vinegar is an acidic solution that can break down certain types of paint. However, its effectiveness may vary depending on the type and age of the paint, as well as the type of stone.
Vinegar may not completely remove all types of paint from stone. If the paint has penetrated deeply or if it is an oil-based paint, Vinegar may not work.
How to Remove Oil-Based Paint from Stone?
The sooner you can address the paint spill, the easier it will be to remove. If the oil-based paint is still wet, use a soft cloth to blot and absorb as much of the paint as possible. Avoid wiping or spreading the paint around.
Different types of stone may react differently to various cleaning methods and chemicals. It’s important to know what type of stone you’re dealing with before proceeding.
If the paint has dried and adhered to the stone, you may need to use a paint stripper designed for oil-based paint. Typically, you’ll need to apply the stripper, let it sit for a specified amount of time. Finally, scrape away the softened paint with a plastic scraper or putty knife.
After using the paint stripper, you may still have some paint residue left. Use a stiff-bristle brush to scrub the affected area gently. Be cautious not to scrub too hard, as this could scratch the stone.
How to Remove Latex Paint from Stone?
Use a plastic scraper or putty knife to gently scrape off any excess latex paint from the stone surface. Remove as much paint as possible using this method.
You can now make a cleaning solution. Fill a bucket with warm water. Add some mild detergent or dish soap to the water. Mix the solution until it forms suds.
Immerse a sponge into the solution of soapy water. Now, softly scrub the painted surface. Exert a moderate amount of pressure to dislodge the paint while ensuring the stone remains unharmed. Continue scrubbing until the paint begins to lift.
Once the paint has started to come off, rinse the area with fresh water to remove the soapy residue. You can use a sponge or cloth dampened with water for this step.
How to Remove Acrylic Paint from Stone?
If there are stubborn acrylic paint stains, you can try using paint thinner or mineral spirits. However, test them on a spot of the stone first to ensure they won’t cause discoloration. Apply a small amount to a cloth and gently dab the paint.
Once the paint is removed, clean the stone surface again with mild soap and water to remove any residue. Rinse thoroughly and dry the area with a cloth.
Conclusion
Several methods can be employed to remove paint from stone surfaces. Chemical paint strippers can be effective in softening the paint, making it easier to scrape or wash off. However, it is essential to choose a product that is safe for use on stone.
Mechanical methods such as scraping can also be employed, depending on the stone’s resilience. These methods require caution to avoid scratching or damaging the stone. Using the right tools such as plastic scrapers or soft brushes can minimize the risk of causing harm.
Acetone can damage your car paint if applied improperly. Even, it can hurt clear coat and affect underlying paints as well. So, use it carefully.
Protecting the glossy sheen of your car’s paint job is crucial for maintaining its value and aesthetic appeal. But have you ever wondered if using acetone could potentially harm your car’s precious exterior?
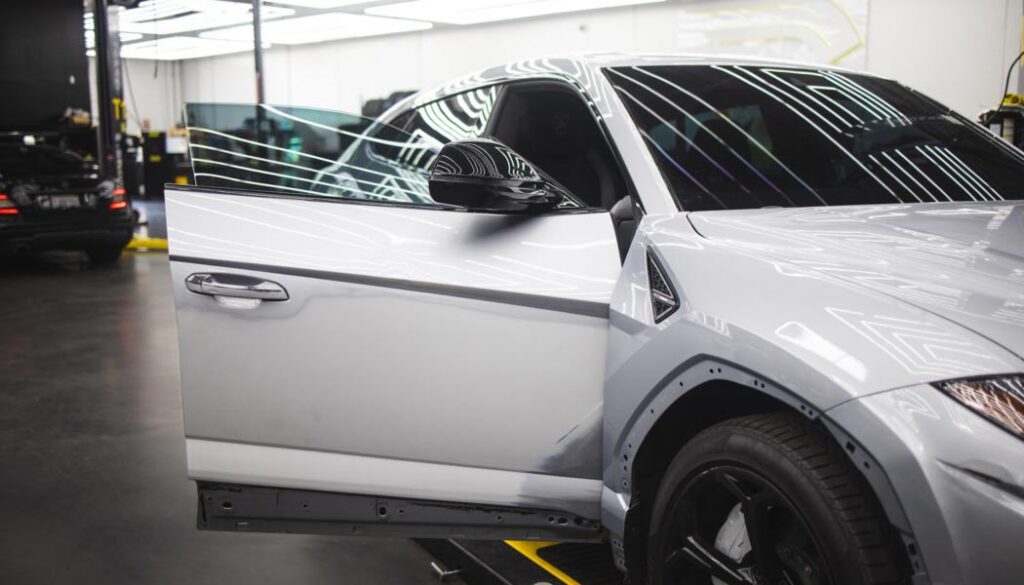
In this article, we’ll explore the question: ‘will acetone damage car paint’.
Why Use Acetone on a Car?
Acetone is a commonly used chemical solvent that can have a few applications when it comes to cars. While acetone can be used for certain purposes, it should be handled with care. You should use it cautiously due to its flammability and potential to damage certain surfaces. Here are some potential benefits of using acetone on a car.
1. Paint and adhesive removal: Acetone can effectively dissolve and remove paint overspray, adhesive residue, or decals from the car surface. It can be particularly useful for removing stubborn or old paint layers or adhesive marks.
2. Surface preparation: Acetone can be used as a pre-painting surface preparation solvent. It can help remove oils, waxes, and other contaminants from the car’s surface. It provides a clean base for better paint adhesion.
3. Cleaning greasy residues: Acetone helps to clean greasy or sticky substances, such as tar or tree sap. Its strong solvent properties can help break down and remove these substances effectively.
Will Acetone Damage Car Paint?
Yes, acetone can damage car paint if used improperly or in excessive amounts. Acetone is a powerful solvent that is commonly used in various industrial and household applications. While it has some benefits for cleaning and removing certain substances, it can also cause significant harm to car paint.
When acetone comes into contact with car paint, it can dissolve the paint’s protective layer, leading to a loss of gloss and color. This is especially true for older or lower-quality paint finishes that may be more susceptible to damage. Acetone can strip away the clear coat. It can expose the underlying layers of paint and making them vulnerable to further damage.
One of the primary reasons acetone can be harmful to car paint is its ability to dissolve. It does not dissolve just dirt and grime, but also the protective waxes and sealants. These elements are commonly applied to maintain the paint’s appearance and protect it from environmental elements.
By removing these protective layers, acetone leaves the paint more vulnerable to fading. Plus, paint can face oxidation, and damage from UV rays, water, and other contaminants.
Additionally, acetone is a highly volatile and fast-evaporating solvent. If used in excessive amounts or left on surface for too long, it can cause the paint to dry out and become brittle. This can lead the paint to cracking and peeling.
Acetone can also affect the plastic and rubber components of a car, causing them to become discolored, deformed, or weakened.
Keep in mind that while acetone can cause damage, it can also be useful in certain situations. For instance, it can effectively remove adhesive residue left behind by stickers or decals on car surfaces.
Acetone can also be used to clean metal surfaces. It helps to prepare the surfaces for painting by removing oils and contaminants. However, when using acetone on a car’s paint, caution should be exercised to minimize the risks.
Potential Risks of Using Acetone on Car Paint
Using acetone on car paint can indeed pose several risks. Check the following risks associated with using acetone on car paint.
A. Paint Discoloration: Acetone can strip away the protective clear coat and remove the paint layers. It can cause the color to fade or become discolored, resulting in a patchy appearance on the car’s surface.
B. Damage to Clear Coat: The clear coat is a protective layer that provides shine and safeguards the underlying paint. Acetone can dissolve the clear coat and lead to its deterioration or complete removal. This can expose the paint to environmental factors, such as UV rays.
C. Impact on Other Materials: Acetone can harm other materials commonly found on cars, such as plastics, rubber, or vinyl trims. It can cause these materials to become brittle, crack, or discolor. Using acetone near these components can result in permanent damage to the car’s aesthetic.
D. Accidental Consequences: Incorrect application or misuse of acetone can lead to unintended consequences. For example, if acetone is left on the paint for too long, it can penetrate deep into the layers. As a result, it causes significant damage that may require professional intervention to fix. Additionally, acetone is highly flammable, so improper use or storage can pose fire hazards.
Factors That Determine Acetone’s Impact on Car Paint
When it comes to the impact of acetone on car paint, several factors come into play. Understanding these factors is crucial for maintaining the integrity and appearance of a vehicle’s paintwork. The factors that determine acetone’s impact on car paint include:
1. Composition of Car Paint
Car paint typically consists of multiple layers, including a primer, base coat, and clear coat. The vulnerability of each layer can vary based on the quality and composition of the paint.
Some car paints are more resistant to chemical exposure, while others may be more susceptible to damage. High-quality paints with a durable clear coat are generally more resistant to acetone compared to lower-quality paints.
2. Quality of the Paint Job
Original factory paint jobs are usually done using high-quality paints. It makes them more durable and resistant to various factors, including acetone.
On the other hand, aftermarket paint jobs may vary in quality, and the type of paint used can influence its resistance to acetone. Generally, original factory paint is more likely to withstand acetone exposure better than aftermarket paint.
3. Exposure Time
The duration of acetone exposure to car paint can affect the level of damage. Short-term contact with acetone may not cause significant harm to the paint if promptly and properly addressed.
However, prolonged exposure to acetone can increase the chances of damage, especially if the paint is of lower quality.
4. Concentration of Acetone
The concentration of acetone used can also impact its effect on car paint. Undiluted acetone solvents have a higher potential to cause damage compared to diluted solutions. It’s generally recommended to use mild and diluted acetone solutions for cleaning purposes.
However, even with diluted solutions, it’s essential to test a small, inconspicuous area before applying it to the entire paint surface to ensure compatibility.
How to Use Acetone on Car Paint Safely?
Using acetone on car paint can be risky if not done properly. However, if you follow these guidelines, you can use acetone safely.
A. Test on a Small Hidden Area: Before using acetone on the entire car surface, perform a patch test on a small, hidden area. This helps you determine if the acetone will damage or discolor the paint.
Choose an inconspicuous spot; apply a small amount of acetone. Observe the reaction after a few minutes. If there are no adverse effects, it should be safe to proceed.
B. Proper Dilution and Application: Acetone is a potent solvent, so it’s important to dilute it before use. Mix equal parts of acetone and water to create a diluted solution.
Avoid using undiluted acetone directly on the car paint, as it can cause serious damage. Apply the diluted acetone using a soft, clean cloth or sponge, and gently rub the stained area. Be cautious not to scrub too hard, as it may remove the paint.
C. Protective Measures: When working with acetone, take proper protective measures. Wear chemical-resistant gloves to protect your hands from direct contact with the solvent.
Additionally, use microfiber cloths for application, as they are gentle on the paint surface. Ensure that you perform your task in a well-ventilated area to avoid inhaling the fumes. The vapors of acetone can be harmful, so proper ventilation is surely essential.
D. Alternative Methods: If the stain on your car paint is stubborn and acetone doesn’t work, it’s advisable to explore safer alternatives. There are various commercial products available specifically designed to remove stains from car paint.
Look for products that are labeled as safe for automotive use and follow the instructions provided. You can also try using mild soapy water, automotive detailing clay, or specialized paint cleaners as alternative options.
Remember, even when using acetone correctly, there is still a risk of damaging the car paint. If you’re unsure or uncomfortable with using acetone, it’s best to consult a professional auto detailer for assistance.
How to Repair Acetone Damage on Car?
Accidents can happen, and if acetone comes into contact with your car’s paintwork, it can cause damage. If your car has suffered such acetone damage, here are some steps you can take to repair it.
1. Assessing the Damage
- Examine the surface where the acetone damage has occurred. Look for any discoloration, dullness, or roughness.
- Acetone can penetrate the clear coat and even the paint layer. Check if the damage is superficial or if it has reached the underlying layers.
2. Seek Professional Help
- If the acetone damage is severe, covers a large area, seek professional help from a car detailing expert.
- If you are unsure about your ability to fix the damage, consulting an expert can ensure a proper repair.
3. DIY Solutions for Minor Repairs
- Wash the damaged area with a mild car wash soap and water to remove any dirt, debris, or residual acetone.
- For minor damage, you can try using a light abrasive polish to buff out the affected area. Use a microfiber cloth or a polishing pad.
- If the damage has gone through the paint layer, you may need to perform spot touch-ups. Find a touch-up paint that matches your car’s color. Carefully apply it to the damaged area.
- After the repair, use a polishing compound and a soft cloth to restore the shine of the repaired area. Finish by applying a coat of wax to protect the paint.
4. Preventive Measures
- Keep your car away from substances that contain acetone, such as paint thinners and some cleaning agents.
- If you accidentally spill acetone on your car, clean it immediately to minimize the potential damage.
- Apply a good quality car wax periodically to provide a protective layer on the paint.
Does Acetone Remove Car Paint?
Yes, acetone can remove car paint. Acetone can dissolve many types of paints and coatings, including automotive paint. It is commonly used in paint thinners and removers due to its ability to break down paint molecules.
If you plan using acetone to remove car paint, apply it to a clean cloth and gently rub the affected area in a circular motion. Test a small area first to ensure that the acetone does not cause any adverse effects on the car’s paint. After using acetone, wash and wax the car’s surface.
Will Acetone Remove Clear Coat?
Acetone can also remove clear coat. Clear coat is a transparent layer applied to the top of automotive paint to protect it and give it a glossy appearance.
Highly-concentrated acetone can remove clear coat. Note that this type can be very strong solvent and can also damage the underlying paint. So, use it with caution and only in small amounts.
Final Thoughts
It is important to recognize that acetone can damage car paint. While modern automotive paints have become more resistant to solvents, acetone’s powerful properties can still pose a risk if used improperly. To maintain the integrity of your car’s paint job, it is advisable to exercise caution.
Use appropriate cleaning agents, and consult professionals when in doubt to preserve the appearance of your car’s paint.
To achieve different glitter effects, add 150 to 400 grams of glitter to 1 gallon of paint. The amount of glitter will be varied depending on the type of glittery effect you want (light or heavy).
Sparkling and shimmering, glitter has the extraordinary power to transform the ordinary into something magical. If you’re planning to give a fresh coat of glitter effect to your living space, the question inevitably arises: how much glitter should you add to a gallon of paint?

In this writing, we will uncover the secrets to achieving the perfect balance of sparkle and sophistication. So, keep reading.
How Much Glitter to Add to Paint?
The amount of glitter to add to paint can differ depending on personal preference and the desired effect. However, as a general guideline, you can start by adding approximately 5% to 10% glitter by volume to the paint. This means that for every 100 grams (g) of paint, you would add 5 g to 10 g of glitter.
It’s important to note that glitter can be quite dense. So, add smaller amounts first and gradually increase if you want a more pronounced sparkle. Work on test based first to assess the desired glitter concentration and adjust accordingly based on your preference.
Understanding Glitter-to-Paint Ratio
The glitter-to-paint ratio refers to the proportion of glitter to be added to a specific quantity of paint. It determines the overall sparkle and glitter effect in the final paint mixture. The ratio is typically expressed as a percentage or a specific measurement, such as grams or ounces.
Factors to Consider when Determining Glitter Quantity
1. Desired level of sparkle: Consider how much sparkle you want in the final paint. Some people prefer a subtle shimmer, while others may desire a more intense glitter effect. Determining the desired level of sparkle will help you gauge the amount of glitter needed.
2. Paint color and opacity: The color and opacity of the paint will influence how the glitter appears. Lighter colors may require less glitter to achieve the desired effect. Darker colors might need a bit more glitter to make it noticeable. Additionally, opaque paints tend to showcase glitter better than transparent or translucent paints.
3. Glitter size and type: The size and type of glitter particles also affect the overall look. Fine glitter will create a more subtle effect. Larger glitter particles will provide a bolder and more pronounced sparkle. Some glitter types, such as holographic or iridescent, may require different quantities to achieve the desired effect.
General Guidelines for Glitter-to-Paint Ratio
1. Light glitter effect: For a light glitter effect, a ratio of approximately 1% glitter to paint is a good starting point. This means that for every 100 grams of paint, you would add 1 gram of glitter.
2. Medium glitter effect: If you want a moderate amount of sparkle, a ratio of around 2-5% glitter to paint can be used. This means adding 2-5 grams of glitter for every 100 grams of paint. Adjust the ratio within this range based on your desired effect.
3. Heavy glitter effect: For a heavy glitter effect with a lot of sparkle, a ratio of 5-10% or more glitter to paint can be employed. This would involve adding 5-10 grams of glitter to every 100 grams of paint. Experiment and adjust the ratio based on the intensity of glitter you want.
Remember, these guidelines are general recommendations. You can always adjust the glitter-to-paint ratio based on the specific effect you want to achieve.
How Much Glitter to Add to a Gallon of Paint?
The amount of glitter to add to a gallon of paint depends on many things. There is no specific measurement that works universally for all situations. It largely depends on the type and size of the glitter particles, the desired effect, and the manufacturer’s recommendations.
However, as a general guideline, it is common to add around 150-400 grams of glitter per gallon of paint for different glittery effects. In this range, you can achieve light, medium, and heavy glitter effect.
Determining Glitter Weight per Unit Area
To determine the glitter weight per unit area, you will need to refer to the manufacturer’s specifications. Glitter weight is typically measured in grams per square meter (g/m²) or ounces per square foot (oz/ft²). The manufacturer should provide this information on the glitter packaging.
Estimating Surface Area Coverage for a Gallon of Paint
Here, you need to know the spreading rate of the specific paint you are using. The spreading rate is typically provided by the paint manufacturer. It is usually given in square feet per gallon (ft²/gal). This information tells you how many square feet of surface area can be covered by one gallon of paint.
Calculation Formula for Glitter Quantity
Now you have the glitter weight per unit area (g/m² or oz/ft²) and the spreading rate of the paint (ft²/gal). It’s time to calculate the amount of glitter to add to a gallon of paint. The formula is:
1. Convert the spreading rate from ft²/gal to m²/gal if necessary:
– If the spreading rate is given in ft²/gal, multiply it by 0.0929 to convert it to m²/gal.
2. Calculate the surface area covered by a gallon of paint in square meters (m²):
– Divide 1 gallon (3.785 liters) by the spreading rate in m²/gal to get the surface area coverage in m².
3. Multiply the surface area coverage by the glitter weight per unit area to get the glitter quantity:
– Multiply the surface area coverage in m² by the glitter weight per unit area in g/m² (or oz/ft²) to obtain the glitter quantity in grams (or ounces).
Tips to Follow when Adding Glitter to Paint
Adding glitter to paint can add a touch of sparkle and glamour to any surface you wish to transform. However, achieving a beautiful and consistent glitter effect requires careful preparation and application techniques. Check the following tips when adding glitter to paint for a better result.
- Use a stirring stick to thoroughly mix the paint before adding the glitter. This helps ensure that the glitter is evenly distributed throughout the mixture.
- Stir the paint in a circular motion. Make sure to scrape the sides and bottom of the container to incorporate any settled pigment.
- Before applying the glitter-infused paint to a larger surface, test the effect on a small piece of scrap material.
- Evaluate the glitter distribution, density, and overall appearance to ensure it meets your desired effect. Adjust the amount of glitter added if necessary.
- For smaller surfaces or detailed areas, a brush may be more suitable. A roller is ideal for larger areas, as it allows for faster coverage.
- Consider using a sprayer for achieving an even and smooth application on large surfaces. Ensure that the glitter particles are small enough to pass through the nozzle without clogging.
- Start with a base coat of the glitter-infused paint. Apply it smoothly across the surface using the chosen application method.
- To achieve a consistent glitter distribution, maintain a consistent pressure and speed while applying the paint.
- For a denser glitter effect, apply multiple coats. Give each coat enough time to dry before adding the next layer.
Note: Follow tips from manufacturers for the glitter and paint products you are using. Additionally, take appropriate safety precautions, such as wearing protective gear and working in a well-ventilated area.
Final Words
Determining the appropriate amount of glitter to add to a gallon of paint requires careful consideration. It is vital to strike a balance between adding enough glitter to create a dazzling effect and avoiding a clumpy appearance.
The key is to start with a small amount, gradually adding more glitter until the desired level of shimmer is achieved. Ultimately, the right amount of glitter will depend on individual taste and the intended purpose of the painted surface. So, have fun experimenting and unleash your creativity to create a truly mesmerizing paint with just the right touch of glitter!