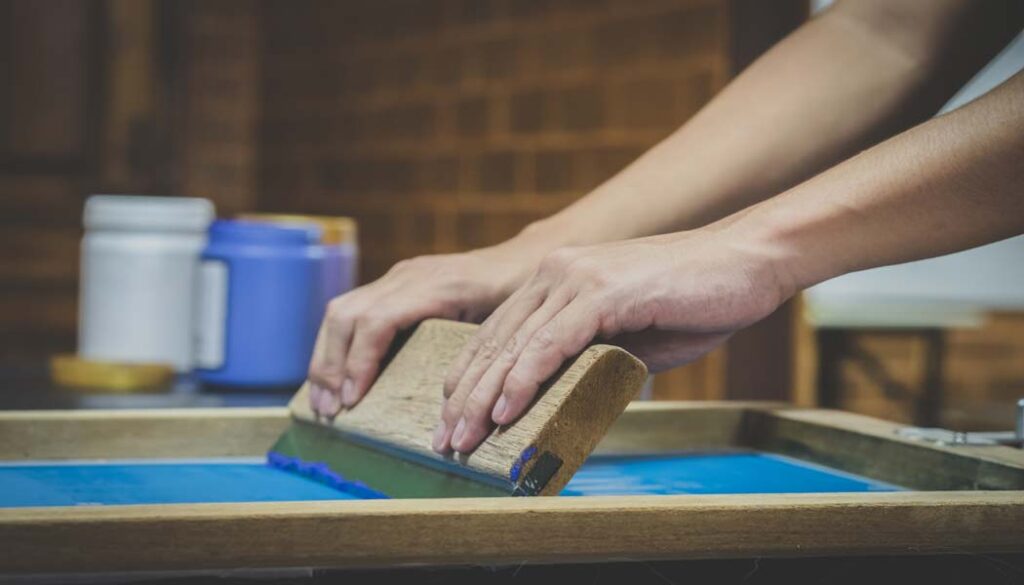
Are you a DIY enthusiast looking to add some personal flair to your fabric crafts? You are left with some screen printing ink, but not sure if you can use it on the fabric instead of fabric paint. And this question comes in your mind – can you use screen printing ink as fabric paint?
Screen printing ink can be used as fabric paint, but the result will not be that satisfactory. Screen printing ink is thicker and not flexible as fabric paint. And this ink is specially designed for utilization in screen printing methods. So, it will not be wise to use it on fabric.
In this blog, we’ll explore some vital points so that you achieve optimal results from screen printing ink if you don’t have fabric paint at hand at the moment. So, let’s dive in and uncover the world of screen printing ink and fabric paint!
Can You Use Screen Printing Ink as Fabric Paint?
Before we delve into whether you can use screen printing ink as fabric paint, let’s take a moment to explore what these two products are.
Screen Printing Ink:
Screen printing ink is a type of ink that is specifically designed for use with screen printing techniques. It is a thick, opaque ink that is applied to fabrics using a mesh screen and a squeegee. Screen printing ink is available in a range of colors, and can be used to create detailed designs on fabrics.
Fabric Paint:
Fabric paint, on the other hand, is a type of paint that is specifically designed for use on fabrics. It is available in a range of colors and can be applied directly to fabrics using a brush or applicator. Fabric paint is designed to be flexible and durable and can be used to create detailed designs or patterns on fabrics.
Now let’s come to the topic of our discussion: “can you use screen printing ink as fabric paint”. While it is technically possible to use screen printing ink as fabric paint, it may not produce the desired results.
Screen printing ink is often thicker and less flexible than fabric paint, which can result in cracking and fading over time. Additionally, the screen printing ink is designed to be used with screen printing techniques, so it might be hard to apply directly to fabric.
But what happens if someone insists on using screen printing ink as fabric paint? Well, if someone insists on using screen printing ink as fabric paint, they may find that the results are less than optimal.
Screen printing ink’ thick consistency makes it hard to apply evenly to fabrics and may fade or crack over time. Additionally, using screen printing ink in this way may damage the fabric or affect its texture.
What if you used different types of fabric? Will the results be the same? Yes, the type of fabric used can affect the results of using screen printing ink as fabric paint. Some fabrics may not absorb the ink evenly, resulting in a patchy or uneven appearance. Additionally, different fabrics may require different application techniques or types of ink, depending on their texture, weave, and other properties. So, trying different fabrics may not improve the results!
Is there a technique to help achieve satisfactory results with screen printing ink? There are a few techniques that can help you achieve satisfactory results when using screen printing ink as fabric paint. One is to dilute the ink with water or fabric medium to make it thinner and more flexible.
Another is to use a heat press to set the ink into the fabric, which can help to reduce cracking or fading over time. Additionally, practicing on scrap fabric before applying the ink to your final project can help you fine-tune your application technique and achieve better results.
To sum it up, we say, though it is possible to use screen printing ink as fabric paint, it may not produce the best results. Fabric paint is specifically designed to be flexible, durable, and easy to apply directly to fabrics.
However, with the right techniques and practice, it is possible to achieve close to satisfactory results with screen printing ink on certain types of fabric. It’s always best to choose the right product for the job and use it as directed for the best possible results.
Is There Any Similarity between Printing Ink and Fabric Paint?
While there are notable differences in the composition and intended use of screen printing ink and fabric paint, they also share some similarities.
Both screen printing ink and fabric paint are used for decorating fabric surfaces. They can be used to create a range of designs and patterns and can be applied to various types of fabrics, such as cotton, silk, and polyester. Additionally, both ink and paint can be used to create custom designs and logos for clothing, bags, and other fabric-based products.
However, it’s important to note that though there may be some similarities in their application, the composition and properties of the two are quite different.
What Are the Differences between Printing Ink and Fabric Paint?
Though screen printing ink and fabric paint may seem similar at first glance, there are notable distinctions between the two that can impact their use and effectiveness. Understanding these differences can help you choose the right type of ink or paint for your specific project and achieve optimal results.
In this section, we’ll explore some key differences between them, from their composition and application methods to their texture and durability.
- Composition: Screen printing ink typically has a higher pigment concentration, which makes it more opaque and suitable for printing on a range of materials. Fabric paint, on the other hand, has a lower pigment concentration and is designed to be applied by hand to fabric surfaces.
- Method of application: Screen printing ink is usually applied using a screen printing process, which involves transferring the ink onto the fabric through a stencil. Fabric paint is often applied by hand using a brush, fabric pen, or other tools.
- Texture and finish: Screen printing ink can produce a smoother, more uniform texture on fabric surfaces due to its high pigment concentration and application method. Fabric paint, on the other hand, can create a range of textures and finishes depending on the application method and type of paint used.
- Colorfastness and durability: Fabric paint is typically more colorfast and durable than screen printing ink, making it a better option for fabrics that will be washed frequently or exposed to the elements.
Can You Use a Brush with Screen Printing Ink?
You can use a brush with screen printing ink, but the results may not be optimal. Screen printing ink is designed for getting transferred onto fabric through stencils. Using a brush to apply this ink can result in a less precise application and may cause the ink to bleed or smudge.
Additionally, as we said earlier, the screen printing ink is typically thicker than fabric paint, so it may not flow as well through a brush. If you need to apply ink by hand, it’s generally better to use fabric paint, which is designed for this purpose and can produce better results.
Final Words
While screen printing ink can be used as fabric paint in a pinch, it’s generally not recommended as it may not produce optimal results. For best results, it’s recommended to use fabric paint for hand applications or screen printing ink for screen printing processes.
In the blog, we talked about the differences between the two. And by understanding these differences, you can choose the right type of ink or paint for your specific needs and achieve the best possible results.
Are your bathroom cabinets looking worn out and outdated? While wooden cabinets can be easily painted, what about cabinets made of other materials?
When it comes to repainting your non-wooden bathroom cabinets, the first thing that can come into your head is how to paint bathroom cabinets that are not wood.
To paint bathroom cabinets that are not wood, start by cleaning and sanding the surface. Apply a coat of primer, and then follow up with two coats of paint. Allow each coat to dry completely before applying the next one. Use a high-quality brush or roller for best results.
In this article, we’ll explore some tips and tricks for painting bathroom cabinets that are not made of wood. So, let’s get started!
Can You Paint Cabinets That Are Not Wood?
Yes, you can paint cabinets that are not made of wood, such as those made of laminate, metal, or MDF (medium-density fiberboard). The process of painting these types of cabinets is similar to painting wooden cabinets, but there are a few differences to keep in mind.
First, it’s important to clean the surface thoroughly and sand it lightly before applying any paint or primer. This will help the paint adhere better to the surface. Additionally, it’s important to choose a primer and paint that are appropriate for the cabinet material. For example, if you’re painting metal cabinets, you’ll need a primer and paint that are formulated for use on metal surfaces.
Just be sure to follow the manufacturer’s instructions for any products you use and allow each coat of paint or primer to dry completely before applying the next one.
How to Paint Bathroom Cabinets That Are Not Wood?
With the right preparation and tools, you can transform your bathroom cabinets and give them a fresh new look. Take a look at our step-by-step instructions for painting bathroom cabinets that are not wood:
Materials you’ll need:
- Cleaning solution (e.g. TSP, vinegar)
- Sandpaper (120-220 grit)
- Primer (appropriate for the cabinet material)
- Paint (appropriate for the cabinet material)
- Paintbrush or roller
- Painter’s tape
- Drop cloths
Step 1: Clean the cabinets thoroughly
Remove all items from the cabinets and clean them using a cleaning solution such as TSP or vinegar. Use a sponge or cloth to wipe the cabinets, then rinse with water and allow to dry completely.
Step 2: Sand the cabinets
Lightly sand the cabinets with sandpaper (120-220 grit). This will help the primer adhere better to the surface. Wipe off any sanding dust with a damp cloth and allow to dry.
Step 3: Apply painter’s tape
Use painter’s tape to protect any areas you don’t want to be painted, such as the walls or countertop.
Step 4: Apply the primer
Apply a coat of primer that is appropriate for the cabinet material. Allow the primer to dry completely, following the manufacturer’s instructions.
Step 5: Paint the cabinets
Apply two coats of paint that are appropriate for the cabinet material, allowing each coat to dry completely before applying the next one. Use a high-quality brush or roller for the best results.
Step 6: Remove painter’s tape and clean up
Once the final coat is dry, remove the painter’s tape and clean up any drips or mistakes. Allow the cabinets to dry completely before replacing any items.
What Paint is Best for Non Wood Cabinets?
The best paint for non-wood cabinets will depend on the material of the cabinets. Here are some recommendations:
Laminate Cabinets:
High-quality acrylic latex paint or a paint that’s specifically designed for use on laminate surfaces will work well. Look for a paint that has good adhesion properties and is durable enough to withstand regular cleaning.
Metal Cabinets:
Choose a paint that’s specifically designed for use on metal surfaces, such as an oil-based enamel or a high-quality acrylic paint. These paints are formulated to adhere well to metal and will provide a durable finish.
MDF Cabinets:
A high-quality water-based paint or a paint that’s specifically designed for use on MDF surfaces will work well. Look for a paint that’s formulated to resist chipping, cracking, and peeling.
In general, it’s important to choose a paint that’s appropriate for the cabinet material and provides good adhesion and durability. Be sure to follow the manufacturer’s instructions for any paint or primer you use, and allow each coat to dry completely before applying the next one.
What Kind of Paint do You Use on Bathroom Cabinets?
When painting bathroom cabinets, it’s important to choose a paint that is durable, moisture-resistant, and can withstand regular cleaning. Here are some paint options to consider:
Acrylic Latex Paint:
This type of paint is a good choice for bathroom cabinets because it’s durable, easy to clean, and resists mildew and moisture.
Enamel Paint:
Oil-based enamel paint is another option for bathroom cabinets, as it provides a durable and moisture-resistant finish.
Cabinet-specific Paint:
Many paint manufacturers offer paints that are specifically designed for use on cabinets. These paints often contain additives that make them more durable and moisture-resistant than regular paint.
When selecting paint, be sure to choose one that is appropriate for the cabinet material and finish, and follow the manufacturer’s instructions for application and drying times.
Do You Need Primer to Paint Bathroom Cabinets?
Yes, it’s highly recommended to use a primer when painting bathroom cabinets. A primer will help the paint adhere better to the surface, provide a uniform base coat, and can also help cover any stains or imperfections.
Additionally, a primer can help prevent the paint from chipping or peeling over time. It’s important to choose a primer that is appropriate for the cabinet material, such as a primer that’s specifically designed for use on non-wood surfaces. Be sure to follow the manufacturer’s instructions for application and drying times.
Is It Better to Spray or Paint Cabinets?
Both spraying and painting cabinets can result in a beautiful and long-lasting finish, but there are some differences to consider.
Spraying cabinets typically produces a smoother finish with no brush marks or roller stipple. It can also be faster and more efficient than painting with a brush or roller. However, it can be more difficult to control overspray and achieve an even coat.
Painting cabinets with a brush or roller can be more time-consuming, but it allows for more control over the application process and can be easier to touch up or fix mistakes.
Ultimately, the best method for painting or spraying cabinets will depend on personal preference, the size of the project, and the materials being used.
Can You Reface Non Wood Cabinets?
Yes, you can reface non-wood cabinets, such as those made of laminate, MDF, or metal. Refacing involves applying a new layer of material over the existing cabinets, such as a wood veneer or laminate sheets, and replacing the doors and hardware.
This can be a cost-effective way to update the look of your cabinets without the expense and hassle of a full replacement. It’s important to work with a professional refacing company or contractor who has experience with the specific materials you have, to ensure a quality result.
Final Words
Painting bathroom cabinets that are not made of wood, such as those made of laminate, MDF, or metal, can be a simple and cost-effective way to update the look of your bathroom. It’s important to choose a paint that is appropriate for the cabinet material, such as a high-quality acrylic latex paint for laminate or paint designed for metal surfaces.
It’s also recommended to use a primer to help the paint adhere better and provide a uniform base coat. Whether you choose to spray or paint with a brush or roller, taking the time to properly prepare the surface and follow the manufacturer’s instructions will ensure a beautiful and long-lasting finish.
Are you a DIY enthusiast with tons of fabric paint waiting to be brushed on? Perhaps you are thinking of trying screen printing and wondering if your beloved fabric paint can do the trick! ‘Can you use fabric paint for screen printing’ – is that what you are thinking?
The answer is, yes, with some effort, it may be possible to use fabric paint for screen printing. But is it recommended, or can it make satisfactory results?
That’s what we are going to discuss in this blog. So, stay with us to find out whether using fabric paint for screen printing is a cost-effective option, or whether you should stick to traditional screen printing inks for optimal results.
What Kind of Paint Do You Use for Screen Printing?
When it comes to screen printing, there are a few different types of paint that you can use, but the most common and widely recommended is screen printing ink. Unlike regular paint or fabric paint, the screen printing ink is specifically formulated for this printing method and has several properties that make it suitable for the job.
One of the most important characteristics of screen printing ink is its viscosity or thickness. Screen printing ink is thick enough to be pushed through a fine mesh screen, but not so thick that it clogs the screen or produces uneven prints. This viscosity also allows the ink to sit on top of the fabric rather than sinking in, which is crucial for creating crisp, vibrant prints.
Another key feature of screen printing ink is its opacity. In order to produce bright, bold prints, the ink needs to be opaque enough to cover the fabric and any underlying colors or patterns. Screen printing ink is typically more opaque than other types of paint or ink, making it ideal for this purpose.
Finally, the screen printing ink is designed to be cured, or dried, at high temperatures. This helps to set the ink into the fabric, making it more durable and resistant to fading or cracking over time. Some types of screen printing ink require a heat press or oven for curing, while others can be air-dried or cured with a heat gun.
Here are some other types of paint that can be used for screen printing:
Acrylic ink:
This type of ink is similar to screen printing ink, but is water-based rather than solvent-based. It can be used on a variety of fabrics and dries quickly, but may not be as durable as other types of ink.
Plastisol ink:
This is a type of screen printing ink that contains PVC particles that are suspended in a liquid plasticizer. When heated, the ink cures and forms a durable, flexible layer on top of the fabric. Plastisol ink is commonly used for printing on t-shirts and other garments.
Watercolor or dye-based ink:
While not typically used for traditional screen printing, watercolor or dye-based inks can be used for a variation called “screen painting” or “screen dyeing”. This technique involves painting or brushing the ink directly onto the screen, and then transferring the design onto the fabric using a squeegee.
It’s worth noting that though these alternative options can be used for screen printing, they may not produce the same high-quality results as screen printing ink, and may not be as durable over time. So, screen printing ink is the preferred choice for screen printing due to its viscosity, opacity, and curing properties.
Can You Use Fabric Paint for Screen Printing?
Before we jump into the discussion, first let’s learn a bit about fabric paints.
Fabric paint is a type of paint that’s specifically formulated for use on fabric. It’s typically made with a combination of pigments, binders, and solvents that allow it to adhere to fabric fibers and resist fading or washing out over time. Fabric paint comes in a wide range of colors and finishes, including metallic, glitter, and glow-in-the-dark.
Though fabric paint can be used for a variety of DIY projects, including painting on t-shirts, bags, and other fabric items, it may not be the best choice for screen printing. This is because fabric paint typically has a thinner consistency than screen printing ink, which can result in bleeding, smudging, or uneven prints.
Additionally, fabric paint may not be as opaque as screen printing ink, which can result in muted or washed-out prints. If you insist on using fabric paint for screen printing, it’s possible to get satisfactory results with some extra effort and experimentation.
One option is to thicken the fabric paint by adding a fabric printing medium or a thickener like cornstarch or flour. This can help to create a thicker consistency that’s better suited for screen printing. Another option is to use a lower mesh count screen, which can help to reduce bleeding and smudging.
However, even with these techniques, it’s unlikely that fabric paint will produce the same high-quality, durable results as screen printing ink. If you’re looking for professional-grade screen prints that will hold up over time, it’s generally recommended to use screen printing ink that’s specifically formulated for the job.
When it comes to screen printing, choosing the right type of ink can make all the difference in the quality and longevity of your prints. Though it may be tempting to experiment with alternative types of paint or ink, such as fabric paint or acrylic ink, using a specialized screen printing ink is typically the best choice for achieving professional-grade results.
Is Fabric Paint the Same As Screen Printing Ink?
Though you might find some similarities between fabric paint and screen printing ink, they are not the same. Here are some key differences that set them apart.
- Consistency: Fabric paint is typically thinner in consistency compared to screen printing ink, which is designed to be thick and viscous. This difference in consistency can affect how the ink or paint behaves on the fabric surface during the printing process.
- Opaqueness: Screen printing ink is typically more opaque than fabric paint, meaning that it can produce more vibrant and saturated colors. This is especially important when printing on darker fabrics, as the ink needs to be able to fully cover the fabric fibers.
- Durability: Screen printing ink is designed to be durable and long-lasting, even after multiple washes. Fabric paint, on the other hand, may fade or crack over time with repeated washing and use.
- Specialty inks: Screen printing ink can come in a variety of specialty formulations, including metallic, fluorescent, and glow-in-the-dark ink. These specialty inks are often not available in fabric paint formulations.
- Application: Both fabric paint and screen printing ink can be applied to fabric surfaces, but the application process is different. Screen printing ink is typically applied using a squeegee and a mesh screen, while fabric paint can be applied with a brush or other tool.
Final Words
It may be tempting to use fabric paint for screen printing projects, but it’s important to keep in mind that screen printing ink is the best choice for achieving professional-grade results. Screen printing ink is thicker and more durable than fabric paint, making it better suited for the demands of screen printing.
While fabric paint can be a useful tool for DIY fabric projects, it may not produce the same level of quality and longevity as screen printing ink. If you’re interested in trying screen printing for yourself, be sure to invest in quality screen printing ink and follow proper screen printing techniques to achieve the best possible results.
If you’re looking for a quick and cost-effective way to give your ceilings a fresh coat of paint, you might be wondering – can primer be used as ceiling paint?
While primer can be used as a substitute for ceiling paint in certain situations, it’s not recommended for most cases. Primer isn’t formulated to withstand the wear and tear that comes with the normal use of a ceiling.
However, before you break out the primer, there are a few things you need to consider. In this article, we’ll explore whether primer can be used as ceiling paint, and what factors you should keep in mind when deciding whether or not to use it. So, let’s dive in and find out if the primer is a suitable alternative to ceiling paint!
Primer vs. Ceiling Paint
There are a few key differences between primer and ceiling paint. Take a look.
Purpose:
Primer is used to prepare a surface for painting, while ceiling paint is formulated specifically for use on ceilings.
Finish:
Primer is typically available in a variety of finishes, while ceiling paint is formulated with a flat finish that helps to hide imperfections and doesn’t reflect light.
Coverage:
Primers are typically thinner and more porous than paint, allowing them to penetrate the surface and create a strong bond with the paint. Ceiling paints are formulated to provide good coverage and protection to the surface.
Durability:
While primers can provide some protection to the surface, they’re not designed to withstand wear and tear on their own. Ceiling paints, on the other hand, are formulated to be durable and long-lasting, even when exposed to moisture, heat, and other environmental factors.
Application:
Primers are typically used as a first coat before applying paint, while ceiling paints can be used as a single coat to achieve a smooth and even finish.
Now choose the right product for your specific painting project and achieve the best possible result by understanding the differences between primer and ceiling paint.
Can Primer be used as Ceiling Paint?
Primer is designed to create a smooth surface and help paint adhere better, so it seems like a logical solution to use primer as ceiling paint. But if you want to achieve a smooth, even finish and protect your ceiling from wear and tear, it’s best to use a paint specifically designed for ceilings.
If you’re painting a ceiling that has never been painted before, using a primer first can help create a consistent surface that the paint can adhere to. However, if you’re painting over an existing ceiling, using primer instead of ceiling paint can be a mistake. Primers are typically thinner and more porous than paint, so they won’t provide the same level of coverage and protection as a paint specifically designed for ceilings.
Additionally, primers are typically available in a variety of finishes, while ceiling paint is formulated with a flat finish that helps to hide imperfections and doesn’t reflect light. If you use a primer with a glossy or semi-glossy finish, you may end up with a shiny, reflective surface that draws attention to any imperfections in the ceiling.
Why Use Primer on Ceiling?
Know a few reasons why you might want to use primer on a ceiling:
Stain Blocking:
If your ceiling has water stains or other discolorations, using a primer can help to block them from bleeding through the new paint. Many primers are formulated specifically for stain blocking, so they can be especially useful in these situations.
Surface Preparation:
If your ceiling has never been painted before, or if it has an uneven texture or other imperfections, using a primer can help create a smooth and consistent surface that the paint can adhere to. Primers are designed to penetrate the surface and create a strong bond with the paint, ensuring a long-lasting finish.
Adhesion:
Even if your ceiling has been painted before, using a primer can help improve the adhesion of the new paint. This is especially important if you’re using a different type of paint than what was previously used, as different paints can have different adhesion properties.
Time Savings:
Using a primer can help to reduce the number of coats of paint you need to apply to achieve good coverage. Because primers are designed to penetrate the surface and create a strong bond with the paint, they can help the paint adhere better and provide better coverage with fewer coats.
How to Priming Your Ceiling
here are the step-by-step instructions on how to prime your ceiling:
Materials you’ll need:
- Primer
- Paint roller
- Paint tray
- Paintbrush
- Painters tape
- Drop cloth
Step 1: Prepare the room
Remove any furniture, decorations, or fixtures from the room. Cover the floor and any remaining items with a drop cloth to protect them from paint splatters.
Step 2: Clean the ceiling
Use a broom or vacuum with a brush attachment to remove any dust or cobwebs from the ceiling. Clean any stains or marks with a damp cloth or sponge, and allow the ceiling to dry completely before continuing.
Step 3: Apply painter’s tape
Use painter’s tape to mask off the edges of the ceiling and any areas you want to protect from the primer.
Step 4: Mix the primer
Stir the primer thoroughly with a paint stirrer to ensure that the pigment is evenly distributed.
Step 5: Pour the primer
Pour the primer into a paint tray and load the roller evenly.
Step 6: Apply the primer
Starting at one corner of the ceiling, use the roller to apply the primer in long, even strokes. Work in small sections, rolling the primer onto the ceiling in a “W” pattern. Use a paintbrush to get into any hard-to-reach areas or corners.
Step 7: Allow the primer to dry
Follow the manufacturer’s instructions to determine how long to allow the primer to dry before applying paint. Typically, it will take a few hours.
Step 8: Inspect and touch up
Once the primer has dried, inspect the ceiling for any missed areas or imperfections. Use a paintbrush to touch up any areas as needed.
Step 9: Clean up
Clean your tools with soap and water, and remove the painter’s tape from the ceiling.
That’s it! Following these steps should ensure a smooth and even primer coat on your ceiling, ready for paint.
Is Primer Better than Paint?
No, primer is not better than paint, but they serve different purposes. Primers are designed to prepare surfaces for paint by providing a smooth, even base and promoting adhesion.Paint, on the other hand, is formulated to provide color, durability, and protection to a surface.
While both are essential in the painting process, they have different properties and are not interchangeable. Using a quality primer before painting can help ensure a professional-looking finish, but it should not be used in place of paint.
Is Primer Cheaper than Paint?
In general, primer is cheaper than paint. Primers are usually priced lower than paints because they contain fewer pigments, which are the expensive ingredients that give the paint its color.
Additionally, primers often come in larger quantities than paint, so you get more products for the same price. However, the cost difference between primer and paint can vary depending on the brand, type, and quality of the product.
Is Primer Thicker than Paint?
Generally speaking, primer is not necessarily thicker than paint. The thickness of a primer or paint is typically determined by the type of paint, the manufacturer’s formulation, and the intended application method.
However, some types of primers, such as oil-based primers, may have a thicker consistency than some types of paints. This thicker consistency can help the primer adhere to the surface and provide a smooth, even base for the topcoat of paint. However, there is no inherent difference in thickness between primer and paint.
Final Words
Primer can be used as a base coat on a ceiling, it is not so good as a substitute for ceiling paint. Primers are designed to prepare surfaces for painting, whereas ceiling paints are specifically formulated to provide the right level of adhesion, coverage, and durability for a ceiling.
Attempting to use primer as ceiling paint may result in a suboptimal finish that is prone to peeling, cracking, or discoloration over time. It is best to invest in quality ceiling paint that is specifically designed to meet the demands of a ceiling surface.
If you have a cinder block wall that looks bland or unattractive, you can give it a new look by painting it to resemble a stone wall. But when trying it by yourself, you have this in mind – how to paint cinder block wall to look like stone?
Using faux stone paint can be a great option. Clean the cinder block surface first and use a primer on it. Then, apply faux paint to get a stone look on the cinder wall.
In this step-by-step guide, we will show you more on this topic, from preparing the surface to adding the finishing touches. Follow these steps and transform your wall into a stunning stone feature that will touch everyone’s heart.
How to Paint Cinder Block Wall to Look Like Stone
If you’re looking to spruce up your cinder wall and give it a more natural look, painting it to look like stone is a great option. If you have a proper guide, you can create a stunning, realistic stone finish that will give your wall a new lease on life. We’ll learn the step by step process below.
Detailed Preparation
To achieve a convincing stone look on a cinder block, proper preparation is crucial. Here are the steps you can take to prepare the wall for painting.
1. Clean the cinder wall thoroughly with a pressure washer or a scrub brush and a solution of trisodium phosphate (TSP) and water. Allow the wall to dry completely before proceeding.
2. Inspect the wall for any cracks or chips, and repair them with a concrete patching compound. Smooth out any rough spots with a sanding block.
3. Apply a coat of concrete primer to the wall using a paint roller. The primer helps the paint adhere to the surface and provides a more even finish.
Different Painting Techniques
Painting a cinder block wall to look like stone can give it an appealing and natural look. This can be done using a few different techniques, depending on the level of detail desired.
Method 1: Faux Stone Finish
For this method, you have to follow below processes.
Materials needed:
- Primer
- Paint (base coat in a light color)
- Faux paint (a darker color for the stone)
- Paint brushes and rollers
- Sponge
- Brush
- Paint tray
Step 1: Clean the wall
Start by cleaning the wall surface by removing any dirt or debris. Use a power washer or scrub brush and soap to clean the surface. Let it dry completely before proceeding.
Step 2: Prime the wall
Apply a coat of primer to the wall to help the paint adhere better. Use a roller or brush to apply an even coat of primer to the entire wall surface. Let it dry according to the manufacturer’s instructions.
Step 3: Apply the base coat
Using a paint roller, apply a base coat of paint in a light color to the wall. This will be the color of the ‘grout’ between the stones. Let it dry completely before proceeding.
Step 4: Apply the darker color paint
Use a brush or roller and apply the darker color paint to the wall in small sections. Don’t worry about making it look perfect at this point. Once the section is painted, use a sea sponge to blot and mingle the paint, creating a textured stone effect. Work in small sections and repeat this process until the entire wall is covered. Let it dry.
Step 5: Feather the edges
Using a feather duster or brush, gently feather the edges of each stone to create a more realistic look. This will soften the edges and give the stones a more natural appearance.
Method 2: Dry Brush Method
This method involves using dry brush to apply a light coat of paint over a darker base coat to create the appearance of surface and depth.
1. Clean the wall
Before you start painting, clean the cinder wall with soap and water to eliminate any dirt, dust, or debris. Allow the wall to dry completely before moving on to the next step.
2. Apply the base coat
Use a paint roller to apply base coat to the wall. Choose a color that is darker than the color you want the stone to be. Let the paint dry completely.
3. Choose the colors for the stone
You will need two or three colors of paint to create the look of stone. Choose colors that are similar to the natural colors of stone, such as gray, brown, and beige.
4. Prepare the dry brush
Dip the tip of the dry brush into one of the colors of paint. Use something like paper towel to remove excess paint from the brush. Make sure the brush is dry to the touch.
5. Apply the paint
Use the dry brush to lightly drag the paint over the surface of the cinder block. Work in small sections and use a random, circular motion to create the appearance of stone. Make sure to leave some of the base coat showing through.
6. Repeat with other colors
Once you have applied one color of paint, repeat the process with the other colors. Use a clean, dry brush for each color.
7. Blend the colors
Use a clean brush to evenly mix the colors with each other. This will finally create a more natural look.
8. Add details
Use a small, fine brush to add details, such as cracks or lines, to the painted stones. This will add to the realism of the finished wall.
9. Seal the wall
Once the paint has dried completely, apply a coat of clear sealer to shield the wall and give it a finished look.
Tips for Success while Painting Cinder Wall to Look Like Stone
Painting a cinder wall to look like stone can be a challenging but rewarding task. To help you achieve success, here are some tips.
1. Ensure that the surface of the cinder block is clean, dry, and free of any loose debris. Use a wire brush to take away any loose particles and then clean the surface with soap and water.
2. Use a high-quality primer specifically designed for masonry surfaces. So, the paint adheres better to the surface and prevents it from peeling or flaking.
3. Select a high-quality masonry paint that is specifically designed for use on cinder block. These paints are formulated to resist fading, chipping, and peeling, and might be tinted to mimic the colors and textures of natural stone.
4. Use a base coating of paint that matches the color of the stone you want to replicate. This will assist create depth and dimension to the final result.
5. Use a textured roller or sponge to create a textured effect on the surface of the wall. It will aid mimic the look of natural stone.
6. Use a small brush to add details, such as veins or spots, to produce a more realistic effect.
7. Allow the new paint to dry completely between each coat, following the manufacturer’s instructions.
8. After the final coat of paint has dried, apply a sealer to protect the surface from fading.
Common Mistakes to Avoid while Painting Cinder Block
Painting a cinder surface to look like stone can be a fun project, but it’s important to avoid some common mistakes to ensure the best possible outcome.
Skipping the Prep Work: Skipping the prep work can lead to a lackluster finish and peeling paint.
Using the Wrong Type of Paint: Not all paint types are suitable for painting cinder blocks. Using the wrong type of paint can cause paint to peel or fade quickly.
Not Using a Primer: Applying a primer before painting can help the paint adhere to the surface better, leading to a more durable finish.
Painting Too Quickly: Rushing the painting process can lead to uneven coverage and streaks. Take your time and apply the paint in thin, even coats.
Not Adding Texture: One of the key elements of creating a stone-like appearance on a cinder wall is to add texture to the surface. Not adding texture can result in a flat, unconvincing finish.
How Do You Make a Cinder Block Wall Look Nice?
There are several ways to make a cinder built wall look excellent, here are some options.
Paint the wall: Painting your cinder block wall can give it a fresh and modern look. Choose a color that complements the surrounding environment and adds interest to the space.
Install veneer: A veneer is a thin layer of decorative material that is applied to the surface of the cinder wall. This can include stone, brick, or even wood veneer. Veneer can add a rustic and charming look to the wall.
Install wall art: Hang art or decorative items on your cinder wall to add some visual interest. This could include paintings, photographs, or sculptures.
Add lighting: You can use lighting to highlight the textures and patterns of your cinder block. This could include up-lighting or accent lighting to create a dramatic effect.
What Paint to Use on Cinder Block Wall to Make It Look like Stone?
To make a cinder block look like stone, you can use a variety of paints and techniques.
Faux Finish Paint: Faux finish paints are a popular choice for painting cinder block walls to look like stone. These paints typically have a base coat and a topcoat that is applied using a sponge or a textured roller. You can find these types of paints at most home improvement stores.
Concrete Stain: Concrete stain is another option that can give your cinder block the look of stone. This type of stain comes in a variety of colors to be applied using a sprayer or a brush. It works by penetrating the surface of the concrete to create a natural-looking stone finish.
Mineral Paint: Mineral paint is a type of paint that contains natural minerals, such as limestone or marble, to create a textured and realistic finish. It can be applied to cinder walls using a brush or roller.
Final Thoughts
In conclusion, painting a cinder block wall to look like stone can be a cost-effective and creative way to enhance the aesthetics of your space. With the right tools, techniques, and materials, you can achieve a realistic stone effect that adds character and texture to your walls.
Remember to properly clean and prepare the surface, use a high-quality primer and paint, and apply paint layers correctly to achieve the best result. It may take some time and effort, but the end result will be a beautiful and unique wall that will impress anyone who sees it.
Are you looking to add a warm and earthy tone to your next art project? Tan paint can be the perfect color to achieve this. Making your own paint at home is not only cost-effective, but it also allows you to have complete control over the quality and consistency of the paint.
Wondering how to make tan paint quickly? Well, to make tan paint quickly at home, you simply need to mix brown and white paint. If you don’t have pre-made brown paint, you can mix red, yellow, and blue paint together to make brown. Then, add white paint to the brown to make a tan color.
In this blog, we will walk you through the step-by-step process of creating your own tan paint using simple materials that you may already have at home. Whether you’re a seasoned artist or just starting out, making your own paint can be a fun experience. So let’s get started!
What Color Is Tan?
Tan is a warm and earthy color that can range from light to dark shades, depending on the amount of white or brown added to the mixture. Tan is a versatile color that can complement a wide range of other colors, making it a popular choice for both interior design and art projects.
In nature, we can see different shades of tan in various objects such as sand, rocks, and animal hides. Tan can also be found in everyday objects such as furniture, clothing, and accessories. When it comes to mixing paints, achieving the perfect shade of tan can be challenging.
This is because there are many factors to consider such as the base color, the amount of pigment used, and the overall consistency of the paint. However, with the right technique and a bit of experimentation, you can create a beautiful tan color that is perfect for your artistic vision.
What Colors Make Tan Paint?
Tan paint is a mixture of different colors, usually brown and white. The exact shade of tan you want to achieve will depend on the ratio of brown and white used in the mixture. Some artists also add a touch of yellow or red to the mixture to create a warmer tone.
If you don’t have brown paint on hand, you can create it by mixing equal parts of red, yellow, and blue paint together. Once you have brown paint, mix it with white to create different shades of tan.
Keep in mind that the amount of white and brown used will affect the final outcome. Adding more white will create a lighter tan, while adding more brown color will create a darker tan. To achieve the perfect shade of tan, it may take a bit of experimentation and adjusting the ratio of white and brown until you get the desired color.
What Two Colors Make a Tan Color?
If you’re wondering what two colors make a tan color, the answer is brown and white. Brown is a mixture of red, yellow, and blue, and when combined with white, it creates a beautiful tan color. The amount of brown and white used will determine the shade of tan you end up with.
Keep in mind that the exact ratio of brown and white will affect the final color, so you may not get the perfect shade of tan on the first go.
How to Make Tan Paint: Step-by-Step Guide
Tan is a versatile and popular color that can be used in a wide variety of art projects, from painting to crafting to interior design. While it’s easy to buy pre-made tan paint from the store, making your own allows you to customize the shade and texture of the paint to suit your specific needs.
In this section, we’ll show you how to make tan paint quickly and easily using a variety of methods. Whether you’re a beginner or an experienced artist, these step-by-step guides will help you create beautiful and unique shades of tan. So, let’s get started!
Method 1: Mixing Brown and White Paint
Step 1: Gather the Supplies
To make tan paint with brown and white paint, you will need brown paint, white paint, a palette, and a paintbrush.
Step 2: Mix Brown and White Paint
Squeeze a small amount of brown paint onto the palette, and add a small amount of white paint to it. Mix well with the paintbrush.
Step 3: Adjust the Shade
Continue to add small amounts of white paint until you achieve the desired shade of tan. Mix well after each addition of paint.
Step 4: Use Your Tan Paint
Once you have achieved the perfect shade of tan, your paint is ready to use!
Method 2: Mixing Complementary Colors to Make Brown
Step 1: Gather the Supplies
To make tan paint with complementary colors, you will need red and green paint, a palette, and a paintbrush.
Step 2: Mix Complementary Colors to Make a Brown
Squeeze equal parts of red and green paint onto the palette, and mix them together with the paintbrush to create brown paint.
Step 3: Add White Paint
Add white paint to the brown paint to create different shades of tan. Mix well after each addition of paint.
Step 4: Adjust the Shade
Keep adding a little bit of white paint at a time until you get the tan color you want.
Method 3: Making Tan with Red, Yellow, and Blue Colors
Step 1: Gather the Supplies
To make tan paint with primary colors, you will need red, yellow, blue, and white paint, a palette, and a paintbrush.
Step 2: Mix Primary Colors to Make Brown
Squeeze equal parts of red, yellow, and blue paint onto the palette, and mix them together with the paintbrush to create brown paint.
Step 3: Add White Paint
Add white paint to the brown paint to create different shades of tan. Mix well after each addition of paint.
Step 4: Adjust the Shade
Keep adding small amounts of white paint until you achieve the desired shade of tan. Mix well after each addition of paint.
By following any of these methods, you can create a beautiful and unique shade of tan paint that is suitable for your next art project.
How to Make Tan with Acrylic Paint?
Acrylic paint is a popular medium for artists of all skill levels, thanks to its versatility and vibrant colors. If you’re working with acrylics and want to make your own tan paint, it’s easy to do with just a few simple steps.
In this section, we’ll show you how to make tan paint with acrylics, so you can create beautiful and unique shades for your next painting or art project. Let’s see the steps.
Step 1: Gather Your Supplies
You will need red, yellow, and green acrylic paint, white paint, a palette, and a paintbrush.
Step 2: Mix the Base Color
Squeeze a small amount of red, yellow, and green paint onto your palette. Using your paintbrush, mix the three colors together until you have a dark brown color.
Step 3: Add White Paint
Add a small amount of white paint to the dark brown mixture, stirring it in well with your brush. Keep adding white until you achieve your desired shade of tan.
Step 4: Test Your Tan Paint
Test your tan paint on a scrap piece of paper or canvas to make sure it’s the shade you want. If it’s too light, add a little more brown paint. If it’s too dark, add a little more white paint.
Check This Video:
How to Make Tan Paint with Primary Colors?
Before we get into the steps for making tan paint with primary colors, let’s take a quick look at what primary colors are. Primary colors are the three colors from which all other colors can be made.
These colors are red, yellow, and blue. When mixed together, they create the secondary colors of orange, green, and purple. In this section, we’ll show you how to make tan paint using just the primary colors of red, yellow, and blue. Let’s get started!
Step 1: Gather Your Supplies
For this method, you will need:
- Red paint
- Yellow paint
- Blue paint
- White paint
- A palette
- A paintbrush
Step 2: Mix the Base Color
Squeeze a small amount of red, yellow, and blue paint onto your palette. Using your paintbrush, mix the three colors together until you have a dark brown color.
Step 3: Add White Paint
Add a little bit of white paint into the dark brown mix and blend it thoroughly with your brush. Keep adding white until you achieve your desired shade of tan.
Step 4: Test Your Tan Paint
Check whether your tan paint is the right shade by testing it on a scrap canvas or paper. If it’s too light, add more brown paint, and if it’s too dark, add more white paint.
What Colors Make Tan without Brown?
Brown is an important color when it comes to making tan because it is a neutral color that can be lightened or darkened with the addition of other colors. Without brown, making a tan can be a little tricky, but it is still possible to achieve the desired result with a combination of other colors.
Here are the steps for making tan without brown:
Step 1: Gather Your Supplies
- You will need yellow, white, and a small amount of red and green paint, a palette, and a paintbrush.
Step 2: Mix the Yellow and Red Paint
- Squeeze a small amount of yellow and red paint onto your palette and mix them together with your brush until you have a bright orange color.
- Add a small amount of green paint to the orange mixture, stirring it in well with your brush. The green will help to neutralize the brightness of the orange and give it a more muted tone.
Step 4: Add White Paint
- Add a small amount of white paint to the mixture and stir well with your brush.
- Keep adding white until you achieve your desired shade of tan.
Step 5: Test Your Tan Paint
- Test your tan paint on a scrap piece of paper or canvas to make sure it’s the shade you want.
- If it’s too light, add a little more yellow and red paint. If it’s too dark, add a little more white paint.
How to Make Darker Tan Paint?
Darker tan paint is often used in art to create shadows, depth, and contrast. It can be used to add a warm and natural feel to paintings of landscapes, portraits, and still-life subjects.
Here are the steps for making darker tan paint:
Step 1: Gather Your Supplies
You will need brown paint, yellow paint, red paint, and a palette.
Step 2: Mix the Brown and Yellow Paint
Squeeze a small amount of brown and yellow paint onto your palette and mix them together with your brush until you have a warm, medium-toned tan color.
Step 3: Add Red Paint
Add a small amount of red paint to the mixture, stirring it in well with your brush. The red will help to deepen the color and make it darker.
Step 4: Adjust the Color
Test your paint on a scrap piece of paper or canvas to make sure it’s the shade you want. If it’s too light, add more brown or red paint. If it’s too dark, add more yellow or white paint.
Note: The amount of each color you use will depend on the specific shade of darker tan you want to achieve. Don’t be afraid to experiment with different ratios to find the perfect color for your artwork.
How to Make Tan Color Paint Lighter?
Lighter tan paint is often used in interior design to create a soft, warm, and inviting atmosphere. It can be used on walls, furniture, and other decorative accents.
Here’s a step-by-step guide on how to make tan paint lighter:
- Step 1: Identify the shade of tan paint that you want to lighten.
- Step 2: Squeeze a small amount of white paint onto your palette.
- Step 3: Using a clean paintbrush, mix a small amount of white paint into your tan paint.
- Step 4: Stir the mixture thoroughly until the white paint is fully blended in.
- Step 5: Test the color by painting a small swatch onto a piece of paper or cardboard.
- Step 6: If the color is still too dark, repeat steps 3-5 until you achieve the desired shade of lighter tan paint.
Remember to use small amounts of white paint at a time to avoid over-lightening the tan color. You can always add more white paint as needed, but it can be more difficult to darken the color once it’s too light.
What Colors Make Tan Skin Tone?
To create a skin-tone tan color, you will need a mixture of warm colors, such as reds, yellows, and oranges, along with some cool colors, such as blues and greens.
Here are some steps to create a tan skin tone color:
- Start by mixing equal parts of red and yellow paint on your palette.
- Add a small amount of orange paint to the mixture and stir it thoroughly.
- Next, add a tiny amount of blue or green paint to the mixture to create a more muted, natural skin tone color.
- Mix the paint well, and test the color on a separate piece of paper to make sure it matches the desired skin tone.
- Adjust the color as needed by adding more red or yellow for a warmer tone or more blue or green for a cooler tone.
Once you have achieved the desired color, apply it to your painting or artwork. If you don’t find your desired color, don’t hesitate to experiment by changing the amount of paint.
How Do You Make Beige Paint Tan?
To make beige paint more tan, you can add some warm colors, such as red, orange, or yellow, to the beige paint. Here are some steps to create a tan color from beige paint:
- Start by mixing some red, orange, or yellow paint onto your palette.
- Add a small amount of the warm color to the beige paint and stir it thoroughly.
- Mix the paint well, and test the color on a separate piece of paper to make sure it matches the desired tan shade.
- If the color is not quite tan enough, add more of the warm color until you achieve the desired shade.
Once you have achieved the desired color, apply it to your painting or artwork. Keep in mind that the amount of warm color you add to the beige paint will determine how tan the final color will be. Add small amounts at a time and test the color as you go to avoid over-saturating the beige paint.
Final Thoughts
Making tan paint at home is a fun and easy process that allows you to create your own custom shades. Whether you choose to mix brown and white or use primary colors, there are various ways to achieve the perfect tan hue.
Additionally, by understanding how to lighten or darken tan paint, you can adjust the shade to fit your specific needs. So, don’t be afraid to experiment and have fun with the process of creating your own tan paint!
Are you looking to add a touch of elegance to your next painting project? Why not try painting a champagne bottle? Painting a champagne bottle is a creative activity. It may seem daunting at first, but with the right tools and techniques, anyone can do it. That’s why you might want to know how to paint a champagne bottle.
To paint a champagne bottle, you’ll need a few basic supplies, including acrylic paints, paintbrushes, and a champagne bottle to paint. First, prepare the surface of the bottle, then apply a base coat of paint, and finally add the details and finishing touches.

In this complete guide, we will walk you through step-by-step how to paint a champagne bottle. So, grab a glass of bubbly, and let’s get started!
What Paint Do You Use to Paint Champagne Bottles?
When it comes to painting champagne bottles, there are a few options for the type of paint you can use. The most popular type of paint is acrylic paint, which is versatile and easy to work with.
Acrylic paint is water-based and dries quickly, making it a great option for painting on glass surfaces like champagne bottles. Acrylic paint comes in a wide range of colors and finishes, from matte to glossy, allowing you to customize your design.
Another option is enamel paint, which is oil-based and dries to a hard, glossy finish. Enamel paint is known for its durability and can withstand wear and tear. It is a good option if you plan to display your painted champagne bottle frequently. However, enamel paint requires special preparation and should only be used in a well-ventilated area due to its strong fumes.
If you are looking for a more temporary option, you can also use spray paint specifically designed for glass surfaces. This type of paint dries quickly and provides a smooth finish. But it may require multiple coats to achieve the desired opacity.
However, acrylic paint is the most common and easy-to-use option for painting champagne bottles. It is readily available at most art and craft stores and can be mixed to create custom colors.
How to Paint a Champagne Bottle?
Painting a champagne bottle is a fun and creative way to add a touch of elegance to your decor. Here’s a step-by-step guide on how to paint a champagne bottle.
Step 1: Gather Your Supplies
To paint a champagne bottle, you’ll need the following supplies:
- Champagne bottle
- Acrylic paint in your desired colors
- Paintbrushes (small and medium sizes)
- Painter’s tape
- Paper towel or cloth
- Palette or mixing tray
- Optional: spray varnish or clear coat
Step 2: Prepare the Surface
Clean the champagne bottle thoroughly to remove any dirt, dust, or residue. If necessary, you can use rubbing alcohol to clean the surface. Once the bottle is clean and dry, use painter’s tape to cover any areas you do not want to paint, such as the label or the bottom of the bottle.
Step 3: Apply a Base Coat
Choose a color for your base coat and apply it to the bottle with a paintbrush. Acrylic paint dries quickly, so work in small sections to avoid the paint drying before you can blend it.
Use a small paintbrush to paint any hard-to-reach areas, such as the neck of the bottle. Once you have applied the base coat, let it dry completely before moving on to the next step.
Step 4: Add Details
Using a smaller brush, add details to the bottle such as the champagne label, bubbles, or any design that you desire. Take your time and work in small sections, layering colors as necessary. If you make a mistake, don’t worry – you can always paint over it once the paint has dried.
Step 5: Add Finishing Touches
Once the paint is dry, remove the painter’s tape. If desired, you can add a layer of spray varnish or clear coat to protect the paint and give the bottle a shiny finish. Allow the varnish to dry completely before handling the bottle.
Step 6: Display Your Work of Art
Your painted champagne bottle is now ready to display! You can use it as a vase, or centerpiece, or simply display it on a shelf. You can also experiment with different colors and designs to create unique and personalized pieces.
Tips and Tricks:
- Use a variety of brush sizes to create different textures and details.
- Experiment with blending colors to create a unique design.
- If you are painting the bottle with multiple colors, allow each color to dry completely before painting over it with a different color.
- If you make a mistake, don’t worry – acrylic paint is forgiving and can be painted over once it has dried.
- Be patient and take your time – painting a champagne bottle can be time-consuming, but the result is worth it!
See How to Paint a champagne bottle With Acrylic:
How to Decorate a Champagne Bottle?
When you have an empty champagne bottle, you might think of decorating it. Here are some ideas on how to decorate a champagne bottle:
- Add a Ribbon or Bow
Tie a ribbon or bow around the neck of the bottle to give it a festive touch. You can choose a color that matches your decor or the occasion.
- Paint the Bottle
As we discussed earlier, painting a champagne bottle is an excellent way to create a unique and personalized decoration. You can use acrylic paint to create a design, add patterns, or customize the bottle with a message.
- Add Glitter
Coat the bottle with glue, then sprinkle glitter over it to add a shimmering effect. You can also use glitter glue or glitter spray to add a touch of sparkle.
- Apply Vinyl Decals
You can use vinyl decals or stickers to create a custom design on the bottle. Choose a design that matches the occasion or your decor.
- Wrap the Bottle
You can use wrapping paper, tissue paper, or fabric to wrap the bottle. Add a ribbon or bow to complete the look.
- Add Flowers
Use fresh or silk flowers to create a beautiful floral arrangement around the neck of the bottle.
Check This Video:
How Do You Glitter a Champagne Bottle?
Glittering a champagne bottle is an easy and fun way to add a touch of glam to your celebration or decor.
Step 1: Clean the Bottle
Make sure the champagne bottle is clean and dry before starting. Use rubbing alcohol to remove any residue or dirt.
Step 2: Apply Glue
Use a brush to apply a layer of glue to the bottle. You can use any clear glue such as Mod Podge or Elmer’s glue.
Step 3: Sprinkle Glitter
Sprinkle glitter over the glue. Use a paper plate or tray to catch the excess glitter.
Step 4: Shake Off Excess Glitter
Once the bottle is completely covered in glitter, shake off any excess glitter onto the plate.
Step 5: Let it Dry
Let the bottle dry for a few hours. If you want a more intense glitter effect, repeat steps 2-4 after the first layer has dried.
Step 6: Seal the Glitter
Once the glitter is dry, use a clear coat or varnish to seal the glitter in place. This will prevent the glitter from shedding or rubbing off.
Your glittered champagne bottle is now ready to use as a centerpiece or decoration. Enjoy your sparkling creation!
How to Spray Paint Champagne Bottles?
Spray painting a champagne bottle can be a quick and easy way to give it a new look. Here are the steps to spray paint a champagne bottle:
Step 1: Clean the Bottle
Make sure the champagne bottle is clean and dry before starting. Use rubbing alcohol to remove any residue or dirt.
Step 2: Prepare the Area
Choose a well-ventilated area to spray paint the bottle. Cover the surrounding area with a drop cloth or newspaper to protect from overspray.
Step 3: Prime the Bottle
Apply a coat of primer to the bottle. This will help the paint adhere to the surface and prevent chipping or peeling. Let the primer dry completely.
Step 4: Spray Paint the Bottle
Hold the spray paint can about 6-8 inches away from the bottle and spray in a sweeping motion. Apply multiple thin coats, allowing each coat to dry before applying the next.
Step 5: Let it Dry
Once you have achieved the desired coverage, let the bottle dry completely. Avoid touching the painted surface until it has fully dried.
Step 6: Seal the Paint
To protect the paint and prevent chipping, apply a clear coat or varnish over the painted surface. This will give the bottle a glossy finish and help the paint last longer.
You Can Check This Video:
How to Paint Champagne Bottle for Wedding?
Painting a champagne bottle for a wedding can be a beautiful and personalized way to add a special touch to the occasion. Here are some steps to paint a champagne bottle for a wedding:
Step 1: Choose a Color Scheme
Decide on a color scheme that matches the wedding theme or the couple’s preferences.
Step 2: Clean the Bottle
Make sure the champagne bottle is clean and dry before starting. Use rubbing alcohol to remove any residue or dirt.
Step 3: Apply a Base Coat
Use a brush to apply a base coat of paint to the bottle. Choose a color that matches your color scheme.
Step 4: Add Details
Once the base coat is dry, add details such as flowers, hearts, or the couple’s initials using a smaller brush.
Step 5: Customize the Bottle
You can customize the bottle by adding a message or quote with a stencil or by freehand painting.
Step 6: Let it Dry
Once you have finished painting, let the bottle dry completely before handling or adding any embellishments.
Step 7: Embellish the Bottle
Add embellishments such as ribbons, lace, or rhinestones to complete the look.
Final Thoughts
Painting or decorating a champagne bottle can be a creative way to add a personal touch to any occasion, whether it’s a wedding, anniversary, or just a special gathering.
From glittering to spray paint to hand painting, there are a variety of ways to transform a plain champagne bottle into a beautiful and unique centerpiece. By following some simple steps and using your creativity, you can create a stunning and memorable piece that will add to the ambiance of your celebration.
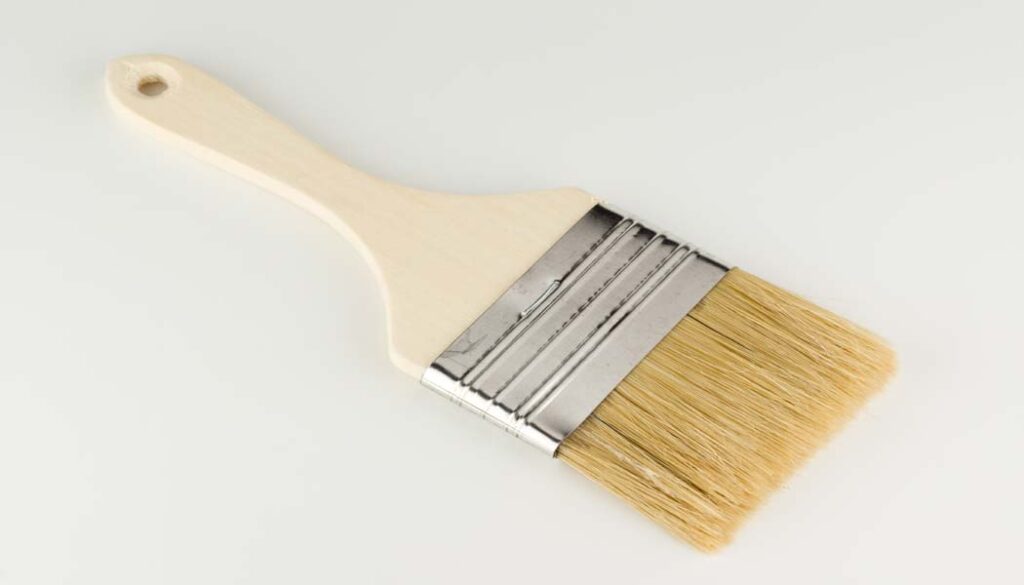
Are you planning to paint a masonry surface, such as a concrete wall or brick fireplace? If so, choosing the right type of brush is crucial for achieving a smooth finish. That’s why you might be curious about what type of brush for masonry paint?
For masonry paint, it’s recommended to use a brush with synthetic bristles, such as nylon or polyester, and a thickness of at least 2 inches. A brush with a tapered or angled edge can help to reach tight spaces and corners, while a roller can be used for larger areas.
With so many types of brushes available, it can be overwhelming to choose the best one for your project. In this article, we’ll guide you through the process of selecting the perfect brush for masonry paint.
What Type of Brush for Masonry Paint?
When it comes to painting masonry surfaces such as concrete, brick, or stone, it is important to use the right type of brush for achieving a professional-looking finish. The surface of masonry can be rough and porous, so using the wrong type of brush can result in an uneven application.
Moreover, it can cause brush marks, and premature wear and tear of the bristles. Therefore, it’s important to choose a brush that is specifically designed for masonry paint. Now you can take a closer look at the different types of brushes available for masonry paint and choose the best one for your project.
- Bristle Material
You can use a brush with synthetic bristles, such as nylon or polyester. These types of bristles are more durable than natural bristles, which can break down more quickly on rough surfaces. They are also better able to hold their shape and maintain their stiffness over time, which is important for achieving an even application of paint.
- Brush Thickness
When choosing a brush for masonry paint, it is important to select one with a thickness of at least 2 inches. This will help to ensure that you are able to apply a generous amount of paint to the surface. It is necessary for achieving a smooth and even finish.
Brushes that are too thin may result in a streaky or uneven application. On the other hand, brushes that are too thick can be difficult to maneuver in tight spaces.
- Brush Shape:
A brush with a tapered or angled edge can help to reach tight spaces and corners. This is particularly important for masonry surfaces that may have irregular shapes or contours. An angled brush can also help to reduce the amount of paint that is wasted on areas that do not require coverage.
- Roller:
While brushes are the most common tool used for painting masonry surfaces, a roller can also be used for larger areas. A roller can help to cover a larger surface area more quickly and efficiently than a brush. But it will still provide a smooth and even application.
However, it is important to choose a roller with a nap (the length of the fibers on the roller) that is appropriate for the texture of the masonry surface. A shorter nap is better for smoother surfaces. On the other hand, a longer nap is better for rougher surfaces.
- Quality:
Finally, it is important to choose a high-quality brush that will provide long-lasting and durable performance. Cheaper brushes may seem like a more cost-effective option. But they may not hold up as well over time and may need to be replaced more frequently.
Look for brushes with well-constructed handles and firmly attached bristles. Moreover, consider investing in a brush with a warranty or guarantee.
In summary, choosing the right type of brush for masonry paint is essential for achieving a smooth finish. From the above-mentioned factors and types of brushes, you can decide the suitable one.
What Type of Brush Works Perfectly for Masonry Paint?
Choosing the right brush for masonry paint is essential to achieve an even finish on rough and porous surfaces. The wrong type of brush can result in different problems on the surface. For this, it is important to consider certain factors while choosing the perfect brush for masonry paint.
Nylon or polyester will be a good choice from synthetic bristles brush types. , is recommended for masonry paint. Synthetic bristles are more durable than natural bristles and can withstand the roughness of the masonry surface. They also maintain their stiffness and shape for a more even application of paint.
You can also consider the thickness of the brush. For example, a thickness of at least 2 inches is recommended. It will ensure a generous amount of paint is applied to the surface, resulting in a smooth finish. A thin brush can leave marks or unevenness on the surface. Contrarily a thick brush will be difficult to maneuver in tight spaces.
If you consider reaching tight spaces or corners, an angled or tapered edge on the brush can help. This is especially necessary for masonry surfaces that have irregular shapes or contours. If you use this type of brush, it will reduce the quantity of paint wasted on surfaces that don’t need to be painted.
A roller can also be utilized for bigger areas. So it’s important to choose a roller whose nap matches the roughness of the masonry surface. On smoother surfaces, a shorter nap is preferable, meanwhile, a longer nap is preferable for rougher surfaces.
A high-quality brush must be purchased if you want it to operate over time with regularity. Cheaper brushes could appear to be a good deal, but they might not last very long and might require replacement rather frequently. Hence, search for brushes with sturdy handles and tightly fastened bristles.
However, selecting the right brush for masonry paint involves considering these factors. You can go through the above-mentioned factors to find out a suitable brush.
What Is the Best Way to Apply Masonry Paint?
Masonry paint is a great way to protect and enhance the appearance of your home’s exterior. However, applying it can be a bit tricky, so it’s important to follow these steps for the best results.
Step-1: Clean the surface
Before applying masonry paint, you need to make sure the surface is clean and free of any loose or flaking paint, dirt, or debris. You can do this by pressure washing or scrubbing with a stiff-bristled brush and a mixture of water and mild detergent.
Step-2: Repair any damage
If there are any cracks or holes in the masonry, it’s important to repair them before applying the paint. You can use a filler or patching compound to fill in any gaps. Then smooth it out with a putty knife.
Step-3: Prime the surface
Once the surface is clean and dry, apply a masonry primer to help the paint adhere better and ensure a more even finish. Be sure to follow the manufacturer’s instructions for mixing and applying the primer.
Step-4: Apply the paint
When the primer is dry, it’s time to apply the masonry paint. You can use a brush, roller, or sprayer, depending on the size of the surface and your personal preference.
Make sure to apply the paint in thin and even coats. Work in small sections to avoid drips or runs. If you’re using a roller or sprayer, backroll or back brush the surface to ensure an even finish.
Step-5: Second coat
Once the first coat of paint has dried, a second coat should be applied. This will ensure the surface is completely covered. Moreover, it will provide better protection against the elements.
Step-6: Drying time
Masonry paint can take several hours to dry, depending on the weather conditions. It’s important to allow the paint to dry completely before applying a second coat or exposing the surface to any moisture.
Step-7: Clean up
After painting, it’s important to clean up any spills or splatters immediately. Masonry paint can be difficult to remove once it has dried. So it’s best to clean up while it’s still wet.
Can You Use Roller for Masonry Paint?
Yes, a roller can be used for applying masonry paint. In fact, using a roller can make the job easier and quicker, especially when covering large areas.
When using a roller for masonry paint, it’s important to choose the right roller sleeve. A roller sleeve with a medium or long pile is recommended. It will be able to hold more paint and provide better coverage. Here are some tips on how to use a roller for masonry paint.
- Preparation
As with any painting project, it’s important to prepare the surface properly before painting. The surface should be clean, dry, and free of any loose or flaking paint.
- Priming
If the surface has not been previously painted, it’s recommended to apply a suitable primer before painting. This will help the paint adhere better and provide better coverage.
- Pouring the paint
The masonry paint should be poured into a paint tray or bucket, depending on the size of the project.
- Dipping the roller
Dip the roller into the paint and roll it back and forth in the paint tray or bucket. It will distribute the paint on the roller sleeve evenly.
- Applying the paint
Start at the top of the surface and work downwards, using long, even strokes. Be sure to apply the paint evenly, without leaving any thick or thin spots.
- Second coat
Once the first coat of paint has dried, a second coat should be applied using the same technique.
- Drying time and cleaning
Depending on the weather, it may take several hours for masonry paint to dry. Dry the surface very well. After finishing the painting, clean the roller and tray properly. Otherwise, dried paint on the roller will not remove easily.
Final Thoughts
Whether you choose to use a roller or brush for masonry paint, the most important factors are proper preparation and technique. It’s essential to select the right brush to ensure an even finish.
A brush with stiff bristles is the best choice as it can handle the rough surface of masonry. Synthetic bristles are ideal as they hold up better than natural bristles against the harsh chemicals in masonry paint. However, choosing the right brush is important for achieving optimal results, making the process easier and more efficient.
Metallic paint adds a touch of glamour and sophistication to any surface, making it a popular choice for home decor, furniture, and craft projects. However, purchasing metallic paint can be expensive and limiting in terms of color choices. The good news is that making your own metallic paint is easy and cost-effective. With just a few simple ingredients and a little bit of creativity, you can create a variety of stunning metallic shades that are customized to your liking.

But how to make metallic paint?
Using metallic powder like mica powder is an easy way to start. Add the metallic powder to clear medium. Then adjust them one by one and check when the mixture achieve the exact metallic shade.
In this article, we will explore some easy DIY methods for making metallic paint. Whether you want to add some sparkle to your walls, revamp an old piece of furniture, or create unique art pieces, these methods will help you achieve the perfect metallic finish.
What Color Shade Is Metallic?
Metallic colors are shades that have the appearance of polished metal, typically with a reflective or glossy finish. These colors are often used in automotive paints, fashion, and design to add a sleek and modern feel to the product.
The most common metallic colors include silver, gold, bronze, copper, and steel, but there are also many variations of these colors. For instance, metallic blue or green may have a bluish or greenish tint to them, while metallic red or orange may have a reddish or orangey undertone.
Metallic colors are achieved by adding metallic particles to the paint or ink, which reflect light and create a shimmering effect. The size and shape of these particles can influence the final color and finish, with smaller particles typically producing a more subtle shimmer and larger particles creating a more dramatic effect.
How Is Metallic Paint Made?
Metallic paint is made by adding small metallic particles to the paint or ink base. These particles can be made of a variety of materials, including aluminum, copper, bronze, or zinc. The size and shape of the particles can affect the final appearance of the paint, with larger particles typically creating a more pronounced metallic effect.
The metallic particles are suspended in a solvent or resin base, along with binders and other additives to help the paint adhere to surfaces and provide the desired texture and finish. The paint is mixed thoroughly to ensure that the particles are evenly distributed throughout the base.
Once the paint is applied to a surface, the metallic particles reflect light, creating a shiny and reflective finish. The angle of the light source and the surface texture can also affect the appearance of the metallic paint, with different angles creating different shades of color and levels of reflectivity.
Metallic paint provides a unique and eye-catching look to a variety of surfaces and is often used in automotive finishes, industrial coatings, and interior and exterior design applications.
How Do Manufacturers Make Metallic Paint in Factories?
Metallic paint is a popular choice for automotive and industrial applications due to its shiny appearance and durability. Manufacturers make metallic paint in factories through a process called “flaking”.
The first step in making metallic paint is to create a base coat using pigments and binders. The base coat is usually a solid color that provides the background for the metallic flakes. Once the base coat is applied, metallic flakes are added to the paint.
The flakes are typically made of aluminum or copper and come in various sizes and shapes. The manufacturer mixes the flakes into the paint using a mixer or shaker to ensure even distribution. The size and shape of the flakes determine the appearance of the finished product. Larger flakes produce a more prominent metallic effect, while smaller flakes create a subtler shine.
Once the flakes are mixed in, the metallic paint is ready to be applied to the desired surface. The manufacturer can adjust the concentration of the flakes to create different effects, such as a pearlescent finish or a sparkling appearance. The paint is then sprayed onto the surface using specialized equipment.
So, manufacturers make metallic paint in factories by adding metallic flakes to a base coat and mixing them thoroughly. The result is a durable and visually appealing finish that is ideal for automotive and industrial applications.
How to Make Metallic Paint Step by Step
There are several ways to make metallic paint, depending on the type of metallic finish you want to achieve. Here are four different methods you can use to make metallic paint at home:
Method 1: Using Metallic Powder
This method involves mixing the metallic powder with a clear medium to create a metallic paint. Here’s how to do it.
Materials:
- Metallic powder (copper, bronze, aluminum, etc.)
- Clear resin or epoxy
- Mixing cups
- Stirring sticks
- Paintbrush or foam brush
- Sandpaper or polishing cloth
- Protective gloves and goggles
- Respirator mask (optional)
Step 1: Choose your metallic powder
Select the metallic powder that you want to use for your project. There are several options available, such as copper, bronze, aluminum, and more. Consider the finish and color you want to achieve before selecting your powder.
Step 2: Prepare your workspace
Before you begin mixing your metallic powder, ensure that your workspace is clean and clear of any debris. Place a protective covering over your workspace to avoid any spills or messes. Wear gloves, goggles, and a respirator mask if necessary.
Step 3: Mix the metallic powder with the clear medium
In a mixing cup, combine the metallic powder and clear resin or epoxy in the desired ratio. Stir the mixture until it is thoroughly combined. The ratio of metallic powder to resin/epoxy will vary depending on the manufacturer’s instructions, but it is generally around 10-20% powder to 80-90% resin/epoxy.
Step 4: Apply the mixture to your surface
Using a paintbrush or foam brush, apply the metallic powder and resin/epoxy mixture to your object or surface. Be sure to apply the mixture evenly to avoid any clumps or uneven spots. Depending on the size and shape of your object or surface, you may need to apply multiple coats.
Step 5: Let it dry
Allow your metallic mixture to dry completely before handling or sanding. The drying time will vary depending on the type of resin or epoxy used, but it is generally between 12 and 24 hours.
Step 6: Sand and polish
If desired, sand the surface of your metallic object or surface to smooth out any rough spots or edges. You can use sandpaper or a polishing cloth to achieve a smooth finish. Be careful not to sand too hard, as this can remove the metallic powder mixture.
Method 2: Using Metallic Paint Pigment
Metallic paint is a popular choice for interior and exterior decoration, as it adds a vibrant shine to any surface it’s applied to. Here, we’ll go through the steps of making metallic paint using metallic paint pigment.
Step 1: Gather your materials
To make metallic paint, you will need the following materials.
- Metallic paint pigment
- Acrylic or latex paint in a base color of your choice
- Mixing cups or containers
- Stirring sticks or mixing utensils
- Measuring spoons or a scale
Step 2: Choose your metallic paint pigment
Metallic paint pigment is the key ingredient in making metallic paint. You can find it in most craft stores or online. There are various types of metallic paint pigment available, each with a different level of shine and intensity. Choose the pigment that suits your project and the desired level of shimmer.
Step 3: Mix the pigment with the base paint
Once you have your metallic paint pigment and base paint, it’s time to mix them. Start by pouring a small amount of base paint into a mixing cup. Then, add the metallic pigment to the base paint, using a measuring spoon or a scale to measure the amount. The ratio of pigment to paint will depend on the level of shimmer you want to achieve. As a general rule, use 1 part metallic pigment to 10 parts paint.
Step 4: Stir thoroughly
After adding the pigment to the base paint, it’s important to stir the mixture thoroughly. Use a stirring stick or a mixing utensil to combine the two components. Make sure to stir until the metallic pigment is evenly distributed throughout the paint.
Step 5: Test the paint
Before applying the metallic paint to your project, it’s a good idea to test it on a small area first. This will help you ensure that the paint has the desired level of shine and that the color is accurate.
Step 6: Apply the paint
Use a brush, roller, or spray gun to apply the metallic paint to the surface you want to decorate. Allow it to dry completely before adding any additional coats or finishing touches.
Method 3: Using Aluminum Foil
Creating metallic paint using aluminum foil is an affordable way to achieve a unique, shiny look. Here’s how you can make metallic paint using aluminum foil.
Materials you will need:
- Acrylic paint in your desired color
- Aluminum foil
- A blender or food processor
- A mixing bowl
- A paintbrush
- Water
Step 1: Prepare the aluminum foil
Tear off a piece of aluminum foil and crumple it up into a ball. Flatten the ball out and tear it into small pieces. The pieces should be about the size of a quarter or smaller.
Step 2: Blend the aluminum foil
Put the aluminum foil pieces into a blender or food processor and blend until the foil is shredded into very small pieces. The smaller the pieces, the finer the metallic effect will be in your paint.
Step 3: Mix the aluminum foil into the paint
In a mixing bowl, add your desired amount of acrylic paint in the color you want. Add the shredded aluminum foil to the bowl and mix thoroughly. You may need to add water to achieve the desired consistency.
Step 4: Apply the paint
Using a paintbrush, apply the metallic paint to your project. Apply it in thin, even coats, allowing each coat to dry before applying the next. You can add more aluminum foil to the mixture if you want a more metallic effect.
How to Increase the Shine of Metallic Paint?
To increase the shine of metallic paint, you can follow these steps:
- Prepare the surface: Ensure that the surface to be painted is clean, dry and smooth. Any debris or unevenness will affect the final result.
- Apply a base coat: Apply a base coat of high-quality primer that is formulated for use with metallic paint. This will help to ensure that the metallic paint adheres evenly and provides a smooth, uniform finish.
- Apply metallic paint: Apply the metallic paint in thin, even coats, using a high-quality paintbrush or spray gun. Allow each coat to dry completely before applying the next.
- Apply a clear coat: Once the metallic paint is dry, apply a clear coat of high-quality varnish or lacquer to protect the finish and increase its shine. The clear coat should be applied in thin, even coats, using a clean brush or spray gun.
- Buff the surface: After the clear coat has dried, use a soft, clean cloth to buff the surface to a high shine. This will help to remove any imperfections and bring out the metallic shine of the paint.
How Do You Make Silver Metallic Paint?
To make silver metallic paint, you will need:
- Silver metallic powder
- Clear acrylic medium or varnish
- Stirring utensil
- Mixing container
Here are the steps to make silver metallic paint:
- Begin by pouring the clear acrylic medium or varnish into the mixing container. The amount you use will depend on how much paint you want to make, but a good starting point is equal parts medium and metallic powder.
- Slowly add the silver metallic powder to the medium while stirring continuously. It’s essential to add the powder gradually to prevent clumping and ensure the color is consistent.
- Keep stirring the mixture until the metallic powder is fully incorporated into the medium. You should have a smooth, even consistency.
- Once you’ve achieved the desired consistency, your silver metallic paint is ready to use. You can apply it to your desired surface using a brush, roller, or spray gun.
Note that the ratio of medium to metallic powder can be adjusted depending on the intensity of the silver color you want. You can also experiment with different clear mediums or varnishes to achieve different finishes and effects.
How to Make Metallic Red Paint?
To make metallic red paint, you will need a few basic materials, including a red base paint, metallic pigment powder, and a mixing tool.
Here are the steps to make metallic red paint:
- Choose a red base paint: Select a high-quality red paint that is suitable for your project. Acrylic or oil-based paint is a good option.
- Add metallic pigment powder: Purchase metallic pigment powder in a red shade to match your base paint. The amount of pigment powder you add will depend on the intensity of the metallic effect you want to achieve. A good starting point is 1-2 tablespoons of pigment powder per cup of paint.
- Mix well: Use a mixing tool to blend the pigment powder into the red base paint. Mix thoroughly until the pigment powder is evenly distributed throughout the paint. Be sure to scrape the sides and bottom of the container to ensure the paint is well-mixed.
- Test the color: Apply a small amount of paint to a test surface to check the color and metallic effect. If the color is not intense enough, add more pigment powder and mix again.
- Apply the paint: Once you are satisfied with the color, apply the metallic red paint to your project. Use a paintbrush, roller, or spray gun depending on the surface and desired finish.
Remember to follow the manufacturer’s instructions when working with paint and wear proper protective gear.
Tips for Making the Metallic Paint
Making metallic paint is a great way to add a touch of glamour to your art and craft projects. Here are a few tips to help you achieve the perfect metallic paint:
- There are different types of metallic pigments available in the market such as aluminum, bronze, copper, gold, and silver. Choose the pigment that suits your project and the look you want to achieve.
- Metallic pigments tend to settle down quickly. So, make sure you mix the pigment well before adding it to the paint. Use a palette knife or stirrer to mix the pigment thoroughly.
- The binder is an important component of metallic paint. It helps to hold the pigment together and ensures that it sticks to the surface. Choose a good quality binder that is compatible with the pigment you are using.
- Add the metallic pigment slowly to the paint, mixing well after each addition. This will help you to control the intensity of the metallic effect and achieve the desired look.
- Always test the metallic paint on a small area before using it on your project. This will help you to determine if the paint is the right shade and consistency.
By following these tips, you can make beautiful metallic paint that will add a touch of elegance to your art and craft projects.
Final Words
Making metallic paint can be a fun and rewarding DIY project. Whether you use metallic powder, metallic paint pigment, aluminum foil, or metallic spray paint, you can create a variety of metallic finishes to suit your needs.
Experiment with different ratios of materials to achieve the desired effect, and be sure to test your metallic paint on a small surface before applying it to your final project.
Want to bring a little sparkle and glamour into your home? Look no further than glitter paint for walls! A room painted with glitter paint is like a canvas that has been transformed into a magical wonderland.
With so many glitter paint products available on the market, it’s not easy to know where to start. That’s why we’ve put together a list of the best glitter paint for walls, complete with detailed reviews and a buying guide to help you choose the perfect product for your needs.
So, whether you’re looking to create a bold accent wall or add a touch of whimsy to your home decor, read on to discover the top picks that we consider the best glitter paint products for your walls.
Our Top Picks
- Best Overall: Rust-Oleum 323860 Glitter Wall Paint (see price)
- Best for Smooth Finish: Rust-Oleum 345699 Glitter (see price)
- Best for Fast-drying: Rust-Oleum 349201-4PK Paint (see price)
- Best Premium Glitter: Hemway Glitter Paint Crystal (see price)
- Best Multi-purpose: Hemway Premium Sparkle (see price)
- Best for Exterior: V1RTUS Holographic Additives (see price)
- Best for Interior: CrystalsRus Glitter for Emulsion (see price)
- Best Silver Crystals: Valspar signature colors Crystals (see price)
What Is Glitter Paint and Glitter Painting?
First, let’s talk about glitter paint. Glitter paint is a type of decorative paint that contains small particles of glitter or shimmer that create a sparkling effect on the painted surface. It’s a great way to add an artsy touch to your living room, bedroom, accent wall, etc.
You can also use glitter paint on furniture and DIY projects. The glitter particles in the paint catch the light and create a dazzling effect, adding depth and texture to the surface. Glitter paint comes in a wide range of textures and colors, so you can easily pick the right product that will fit your needs.
Now, let’s talk about what we mean by glitter painting. Glitter painting is the technique of applying glitter paints to add a unique look to a surface. You may choose a wide range of surfaces to practice glitter painting, including decorative accessories, furniture, walls, and so on. It’s a great way to express your creativity, style, and personality.
Coming up in this article, we will be exploring the process of applying glitter paint very soon. So, please hold on to your excitement for just a little while longer.
8 Best Glitter Paint for Walls (Also Additives) Reviews
We’ve picked only 8 glitter paints and additives for walls from hundreds of options. So, you can now make your decision faster and start increasing the beauty of your home.
1. Rust-Oleum 323860 Glitter Interior Wall Paint
The Rust-Oleum Glitter wall paint is an amazing choice if you are looking to add a touch of sparkle to your room. This high-quality acrylic paint is suitable for use on various interior surfaces such as metal, wood, and plastic.

The special feature of this glitter paint is that it is washable, making it ideal for use in high-traffic areas such as dining rooms, living rooms, and bedrooms. It also provides a long-lasting finish.
The glitter paint is easy to apply, dries quickly, and delivers stunning results, making it an excellent choice for DIY enthusiasts and professional painters alike. Give your walls a touch of sparkle with this awesome glitter paint!
Pros:
- The paint is easy to apply and dries quickly.
- Suitable for use on various interior surfaces.
- It provides a nice and long-lasting finish.
Cons:
- Due to the glitter particles in the paint, cleanup can be a bit more challenging than with traditional paints.
2. Rust-oleum 345699 Intense Glitter Paint
Looking to add some sparkle to your home decor or DIY projects? Rust-Oleum 345699 paint in silver is the ideal product for you! This brush-on paint offers a sparkly finish that is smooth to the touch and does not require a sealer as the brand claims.

The glitter is encapsulated in the paint, ensuring that it won’t flake off when touched like other glitter paints. This acrylic paint can be used on a variety of surfaces such as wood, plastic, glass, metal, and more, making it a versatile choice for any project.
Its matte finish provides a subtle shimmer, giving your project an understated elegance. This glitter paint also offers easy cleanup and is washable, making it an excellent option for both indoor and outdoor use.
Pros:
- Suitable for both interior and exterior use.
- Offers a smooth and sparkly finish for home decor projects.
- Covers up to 35 square feet, providing great value for the price.
Cons:
- It may require multiple coats to achieve the desired level of glitter and shimmer.
3. Rust-Oleum 349201-4PK Imagine Craft & Hobby Intense Glitter Paint
Are you up for making a sparkling DIY project? Take a look at the Rust-Oleum 349201-4PK paint. This pack of four 8 Fl Oz cans is an ideal choice for adding a touch of glamour to metal, plastic, wood, and glass surfaces.

Plus, the paint dries to the touch in just one hour, making it a quick and easy way to add some glitz to your next DIY project. With a coverage area of 12 sq. ft. per can, this pack of four provides plenty of glitter paint to tackle multiple projects.
Whether you’re updating old furniture, creating handmade decorations, or adding some sparkle to a special occasion, this amazing paint is an excellent choice.
Pros:
- Works on a variety of surfaces including glass, plastic, metal, etc.
- The paint dries to the touch quickly.
- It is easy to apply, and suitable for both beginners and professionals.
Cons:
- You may need multiple coats to increase the overall shimmer.
4. Hemway Glitter Paint Additive Glitter Crystals for Acrylic Paint
Hemway Glitter Paint Additive in Rose Gold is a great choice for furniture, DIY, and other home decor projects. This paint additive is perfect for enhancing the glittery effect of your water-based paint or varnish. With premium-quality light-reflecting crystals, this additive creates an eye-catching finish.

This glitter paint additive is easy to use, making it a suitable option for beginners. Simply mix in your desired amount of additive with your paint or varnish, apply, and watch as the glittery magic unfolds.
This additive is vegan and cruelty-free, so you can feel good about your purchase. And the 3.5-ounce container contains plenty of sparkles to go around. This is a great product for expressing your sense of art.
Pros:
- The paint additive is fairly quick and easy to use.
- Compatible with a variety of surfaces.
- The product is non-toxic, so you can use it with confidence.
Cons:
- It may not be suitable for some surfaces.
5. Hemway Premium Ultra Sparkle Glitter Multi-Purpose
Add some extra sparkle to your DIY crafts with this Hemway multipurpose glitter. This cosmetic-graded glitter is safe to use in makeup, body art, nails, lip gloss, and hair. You can also use it to create a variety of sparkly crafts such as card decorations, epoxy resin tumblers, and so on.

With premium raw materials, it’s heat and fade-resistant, so you can enjoy the shine for longer. Hemway glitter is cruelty-free, vegan, and comes in resealable and recyclable packaging.
The product is very easy to use. Simply mix the glitter into your desired medium, whether it’s an acrylic top coat, clear gel coat, makeup adhesive, or clear varnish, and then apply. Get ready to take your cosmetics, arts, and crafts to the next level with this multipurpose glitter!
Pros:
- The product is non-toxic; can also be used in body parts.
- Comes in resealable and recyclable packaging.
- Suitable for various projects from greeting cards to epoxy resin jewelry.
Cons:
- If the glitter accidentally gets spilled, it may be difficult to remove from some surfaces, such as carpets or upholstery.
6. V1RTUS Silver Holographic Glitter Paint Crystal Additive
V1RTUS Silver Holographic Glitter Additive is a great product to add a touch of magic to your interior or exterior ceilings and walls. With this glitter paint additive, you can create your own glitter paint in just a few easy steps by adding it to any emulsion or acrylic paint.

You can simply sprinkle this glitter into any paint to get a sparkling finish on your walls and ceilings. This glitter paint additive is non-toxic and easy to use, so it’s safe for use around children.
You can surprise your kids with amazing sparkly walls without worrying about safety concerns. The product is temperature-resistant and can withstand high temperatures. You can use this glitter paint additive on a variety of surfaces to achieve brilliant glitter-sparkling results.
Pros:
- The glitter paint additive is non-toxic and child-safe.
- It can withstand high temperatures up to 230°C.
- Works with a variety of finishes, including dead flat, silk, soft sheen, etc.
Cons:
- You need to follow specific instructions and buff the paint to unleash the full sparkle potential.
7. CrystalsRus Silver My Glitter Wall Glitter for Emulsion Paint
My Glitter Wall Silver Glitter Flakes pouch is an ideal product to decorate any room. These amazing glitter flakes can be mixed with emulsion paint, making it easy to add sparkle to your walls.

Simply mix the 150-gram bag of glitter flakes with your desired emulsion paint thoroughly for 5 to 7 minutes and start painting. It’s that easy! The glitter flakes work with water-based emulsion and, after the paint has dried completely, the wall can be buffed with a cloth for a beautiful look.
The silver glitter flakes can be used indoors or outdoors, adding a touch of sparkle to any room. With its ease of use and beautiful results, this pouch of glitter is a must-have for anyone looking to add a little extra sparkle to their walls.
Pros:
- Can be used for indoor and outdoor decorations.
- This fantastic product can be used with different emulsions.
- The glitters work with water-based emulsions.
Cons:
- They may not work well with gloss paint, bathroom or kitchen paint, etc.
8. Valspar signature colors Interior Paint Crystals
Valspar Signature Colors Interior Paint Crystals are a fantastic way to add a touch of elegance and sophistication to any room. These silver paint crystals are designed to create stunning results and shine and come in a 1-ounce pack.

The crystals create a beautiful, glittery finish that adds a unique touch to your walls. The paint crystals are easy to use and suitable for a variety of interior surfaces.
You can try it anywhere whether it’s a bedroom, living room, or dining room. So, if you want to create a beautiful, shimmering space in your home, give this bag of interior paint crystals a try!
Pros:
- The product creates a stunning look on various surfaces.
- The compact pack is enough for a small project or accent wall.
- Easy to use, making it a suitable option for beginners.
Cons:
- You may need to spend more to get the desired results.
Things to Consider when Buying Glitter Paint and Additives for Walls
Selecting the ideal paint for wall decoration requires careful consideration. There are so many options available on the market, but not all of them are suitable for your specific requirements. However, by adhering to some basic guidelines, you can easily identify a paint that will be suitable for your task. Here are the things you need to consider before buying glitter paint and additives.
Type of glitter: You may find different types of glitter paint and additives in the market such as iridescent or holographic glitter, chunky, fine, extra chunky, etc., and glossy or matte finish. You will need to pick the type of glitter depending on your decorative ideas.
Color: Glitter paint and additives are available in a wide range of colors, that’s why you can choose a color that will suit your decorative style.
Quantity of glitter: The quantity of glitter in glitter paint and additives differs. If you want to give the desired surface a simple and tidy look, go for products that have less glitter but if you want a more gorgeous and vibrant look, you can select products containing more glitter.
Safety: Some paint products can contain harmful chemicals, toxic fumes, etc., so you should check the label of the product to get a clear idea about the safety of the product. Since kids and pets will be around the painted surface, make sure to choose glitter paint products that contain low VOCs.
Coverage area: The coverage area of glitter paint products may also differ. Some products may require multiple coats for full coverage, so it’s important to take them into consideration.
Durability: You need to consider the durability of the additive or paint. Since some walls or furniture are exposed to high traffic, extreme conditions (especially outdoor furniture), and moisture, they will be more prone to damage, so you need to pick a durable product in this case. Make sure to select a product that can resist chipping, fading, peeling, etc.
Application: Glitter paint can differ in various application methods. Some products need to be mixed with the base paint, while some are ready to use. The application method for glitter additives also varies. Some additives are mixed into the paint, while some can be simply sprinkled onto a wet paint surface.
How to Use Glitter Wall Paint?
Since there are different types of glitter paint available, such as ready-to-use glitter paint, glitter additives, and so on, the techniques for using glitter paint on walls can vary. In this section, we will guide you through different techniques for applying glitter wall paint.
Method 1: Ready-to-use Glitter Paint
Ready-to-use glitter paint is pre-mixed, and you can apply it directly to the wall; no need for measuring and mixing. Here are the steps for this method:
Step 1: Prepare the surface
First, clean the surface well so that there is no dust, dirt, or grease. Make sure to fill up the holes, cracks, and other imperfections to achieve a better result. After the repairs are dry, you need to sand the surface so that it helps better paint adhesion.
Step 2: Priming
A paint job is incomplete without priming. If your wall is not primed, you can apply a suitable primer for a better result. A good primer will help better paint adhesion and ultimately help achieve a smooth and even finish. To apply the primer perfectly, follow the manufacturer’s instructions. Don’t proceed to the next steps until the primer is properly dry.
Step 3: Applying the paint
Begin by using a paintbrush to stir the glitter paint inside its container. You can use a paint roller to evenly apply the paint on the surface. A single coat might not be enough for eye-catching results, so if you need multiple coats, make sure each coat is dry before applying the next coat.
Method 2: Glitter additive
If you don’t want to proceed with the step above, you can mix a fine glitter powder known as glitter additive with a clear base paint. Here are the steps to work with glitter additive:
Step 1: Prepare the surface
Similar to the previous method that we discussed above, begin by cleaning the surface well so that there is no dust, dirt, or grime on the wall.
Step 2: Apply the primer
If the wall is not primed already, select a high-quality primer and apply it according to the manufacturer’s instructions. A good primer will drive better results.
Step 3: Mix the additive
In ready-to-use glitter paint, the glitter comes pre-mixed, so you can’t change the amount of glitter according to your preferences. This glitter additive method, however, allows you to define exactly how much glitter you want for your project. And you can even mix this powder with a wide variety of paint types; just make sure you check if the paint is compatible with glitter paint before purchasing.
Anyway, take some paint and glitter additive in a container. Now, stir the mixture well using a stirring stick or paintbrush to make sure the glitter is evenly distributed.
Step 4: Apply the paint
Once you are done preparing the paint, it is time to create a sparkling accent wall! You may use paint brush or roller; the choice is yours. However, we would recommend using a roller since it will make your work faster and easier.
Plus, you will be able to evenly apply the paint with ease. You may need to use multiple coats for a rich-looking result. If you want to apply multiple coats, make sure each coat is dry before applying the next coat.
Method 3: Sprinkling glitter
This method is a little different from the previous two methods. It requires you to sprinkle glitter onto the wet paint. Here are the steps to apply glitter using this method:
Step 1: Surface preparation and priming
The steps for surface preparation and priming are exactly the same as we discussed above. Simply clean the surface and fix the imperfections. Lastly, apply a primer following the manufacturer’s instructions.
Step 2: Apply the base coat
Use high-quality paint to coat the wall and let it dry until it reaches a state where it is wet but not dripping.
Step 3: Sprinkle glitter
Now it’s time to sprinkle the glitter onto the painted surface. You can sprinkle using your hand or a shaker, so you can choose the amount of glitter you want for your walls.
Step 4: Ensuring better adhesion
Use a clean, dry paintbrush to gently press the glitter particles into the wet base paint to prevent them from coming off once they are dry.
Is Glitter Paint Good for Walls?
If you are aiming to achieve a unique and creative look in your home décor, glitter paint can be a great choice. The paint can give you a unique, sparkling look that is not possible to achieve with regular paint.
However, the durability and final result will depend on how well the paint was applied. And keep in mind that sometimes it can be difficult to remove the paint from walls.
What Kind of Glitter Do You Put in Wall Paint?
There are a wide variety of glitter products available in the market; some are suitable for DIY, some are used in cosmetics and beauty products, while others are used for other decorative purposes. You will find some glitter products that are specially designed to be applied on walls. You can purchase them from any online retailer or your local paint shop.
Is There a Paint that Has Glitter in It?
Yes, there are paints that come with glitter particles already mixed in. They are commonly known as glitter paint or sparkle paint and are available in different colors and levels of shimmer. These paints are specifically designed to add a glittery effect to walls, furniture, or other surfaces with ease.
Learn How to Make Your Own DIY Glitter paint:
Final Thoughts
Glitter paint is a fun and creative way to add a touch of glamour and personality to any space. By following the tips and guidelines that we’ve discussed in this article, you can easily choose the best glitter paint for your needs, and apply it to create stunning and eye-catching design features in your home.
Whether you’re looking to create a dazzling accent wall, add a bit of shimmer to your furniture or accessories, or just inject a bit of fun into your home decor, glitter paint is an ideal option to consider.
Consider using the products discussed in the review section. This way, you won’t have to spend a lot of time finding the ideal product for your project. Instead, you can concentrate on creating a stunning and unique wall that reflects your personal style and vision.
You might be confused about whether can you store paint in the garage, right? Okay, the paint can be stored in the garage. But it depends on your ability to control its environment as paint requires specific weather to be stored.
A garage can be an option to store paint because it generally has enough unused space for such things. But paint can get damaged under bad weather as well. So, some special measures are to be taken in order to store paint in a garage safely.
Can You Store Paint in the Garage?
You can store paint in the garage only if the room is dark, cold, and dry. If it is not, your paint will get spoiled due to lack of proper environment.
Your garage might seem to be the best place for storing the remaining paint. But be aware! It can be a wrong choice. Your paint needs a dry and dark environment to stay well for a long time.
Sometimes some paints react in the presence of light and their color gets changed. A damp environment may damage the paint as well. However, the risk of damage to the paint is the highest when it is exposed to hot temperatures.
The paint stays well in not-so-low temperatures. But in hot places, paint easily gets spoiled. So, keeping in a cold, dry, and dark garage is safe although garages generally do not have such an environment.
Maybe you do not have any place left for storing it either. In such a situation, you will have to manually prepare the room for storing paint. Special maintenance is required in this matter.
Try to close all the windows and doors and keep them shut all the time. It is because you have to resist sunlight from entering the garage. This will prevent the room from getting heated also.
Take steps to keep the room temperature at a moderate state. It should not be any more than 25° Celsius.
How Long Can You Store Paint in a Garage?
You can store paint in a garage for 4-5 years or much more than that only if you can make sure that the room has an appropriate environment.
It is hard to find a suitable place for storing paint. Generally, garages do not have the features needed to keep paints good. But by dint of proper maintenance and hard work, it is possible to store paint in a garage.
In a garage, paint can remain good for up to 4 years at least. Although the durability of a thing mostly depends on the quality of the product and how one takes care of it. If all the conditions are met, store your paint and preserve it there as long as you need.
Firstly, paint which is mostly made of pigment stays good if it does not get in touch with air. So, you have to keep it in a pot or bucket that protects it from the air. It is better to use a glass pot because then the user will be able to monitor the exact color of the paint. Many also suggest that one should label it as well.
Secondly, keep the garage dry and cool. Do not let the room be extremely heated. You can keep the paint on shelves to save it from having an impact on the humidity of the ground. If not, the metal might get rusted and it might spoil the paint.
Temperature control is very important in this regard because if the paint gets too hot, its ingredients start to deteriorate. On the contrary, freezed paint’s liquid and solid materials get separated. When you use this freezed paint in the future, it will no longer stick to the surface. So, climate control is very crucial for storing paint.
Keeping all these in mind, you can store paint in a garage for really a long time!
Is It Safe to Store Paint in the Garage?
Storing paint in the garage in a suitable climate is safe.
When we finish painting our houses or various things, it is a common scenario that some excessive paint remains. A frugal user should look for storing it safely in some place to use it later. But when it comes to choosing where to keep, many run into difficulty. If someone thinks about storing it in a garage, then the question arises whether it will be safe or not!
Actually, common garages hardly have the perfect environment for storing paint. If it seems to be possible to keep a suitable climate in a garage, only then one should think of the garage as an option!
What Temperature Can Paint Be Stored?
Temperature around 15° C to 25° C is worthy for storing paint. Paint should not be stored in cooler or hotter places than this range.
While storing paint in any place, the first and foremost thing to be considered is its temperature. You already know why it is so important. Paint can totally get spoiled if it is kept under an ill-suited temperature.
It is proven that paint stays well in the above-mentioned range of temperature. Thus you can store paint for years safely. Storing the remainder paint for future use is a praiseworthy decision. It will save your money and reduce misuse of it.
Learn How to Store Paint Properly:
Where Is the Best Place to Store Paint?
Where to store paint depends on the weather of the place. The place should be dry, cold, far from sunlight, rain, and children’s touch.
Storing paint becomes successful only under some strict conditions. In an adverse situation, the paint might not stay good or usable. That is why a perfect place is to be chosen for keeping it good.
A storehouse or a leftover room can be a good place to store paint. In fact, you have to make sure the room has the exact temperature and humidity to store paint. The room temperature should be neither at freezing point nor more than 25° C.
You can use a container of lined metal, plastic, or glass. But if it is a metal container, you should not keep it on the ground because it might cause rust to the container, and eventually, the paint might be affected as it will get exposed to the air.
Another thing you must make sure that the container is strictly sealed. As you know that paint gets damaged when it gets in touch with air. You can use equipment like a hammer to close the lid over the can. While doing so, stay alert that the paint does not get distorted anyways.
To firmly seal it, use a block of wood of the same size and shape of the lid. It will prevent from distortion by distributing the pressure of the hammer all over the surface.
Remember to put a level on the container writing the color of the paint. If you have decided where to paint with this in the future, write that too in it. It will be beneficial when you reopen it for use.
If you have opened it after properly sealing it once and want to store the paint again, you can write down the date on the label as well.
You Can Also check This Video:
Final Thoughts
Throwing away things that could be used is a waste of money and it is obviously a bad habit. Meanwhile, if you are looking for saving excessive things for the future are highly appreciative.
You might want to store paint for a long or short period of time but you have to have good maintenance of it to keep it good. But in an adverse place like a garage, it requires much effort to store paint safely.
Are you confused about bringing paint on a plane? Confusion can be very common when you travel with paints in your carry-on bags or checked baggage. Sometimes, artists carry different types of paints with them and get in trouble. That’s why this question might arise; can you bring paint on a plane?

You can bring non-flammable paints on a plane only. Many paints are prohibited from carrying on a plane because of their flammability. Some paints, like water-based paints, water-based acrylic paints, etc., can be carried in your checked baggage.
Keep in mind, oil-based and other flammable paints cannot be brought on a plane in your checked baggage. You must label the paint-carrying bags for bringing them on a plane.
However, if you still need clarification about bringing paints on a plane, you need to know in detail. Different paints have different chemicals and solvents. So, understanding them in detail will help you a lot. Let’s see the details about it.
Can You Take Paint in Carry-On?
You can take some specific paints in a carry-on that are non-flammable. Many paints are not allowed in carry-on bags on a plane because they are flammable. Flammable materials are not allowed in carry-ons. So, knowing about flammability is a must.
Whether the bag is a carry-on or checked, flammable paints are not allowed. You must check the labels of the paints before packing. Otherwise, this simple mistake can cause a big problem.
If the solvents and chemicals of the paint are non-flammable, you can take it in your carry-on. For example, most water-based paints are safe in your carry-on bag. But you must check the label for extra safety.
Is Paint Allowed in Checked Baggage?
Yes, non-flammable paint is allowed in checked baggage. But all paints are not made of the same materials. Some paints contain flammable and hazardous chemicals. That’s why authorities often don’t allow paints in checked baggage. For this reason, keeping the labels of non-flammable properties should be carried.
Another thing you must be careful about is keeping the paints in different plastic packaging or bag. Sometimes, safe paints also leak and make the baggage challenging to carry. So, you should take the paints in a separate plastic bag if you want to bring them in checked baggage.
If you can ensure the non-flammable property and proper packaging, you can carry the paints in checked baggage. Otherwise, paints are not allowed in checked baggage.
Can You Bring Paint on a Plane?
You know there are different categories of paints. You can’t bring all types of paints on a plane. First, you have to know about the kind of paint and ingredients of it. Most paints have flammable chemicals. These paints are not allowed to bring on the plane.
Then you might be confused about the type of paint that you can carry on a plane. Generally, most water-based paints are non-flammable. These paints are made of water and don’t have any hazardous material. As a result, water-based paints are allowed to bring on the plane.
Moreover, acrylic paint is also safe to bring while flying because this paint is also water-based. But you have to ensure that the paints are not dried in the tubes or containers. Some paints are flammable when they are dried.
Besides, there are rules and regulations about the weight of paint when you carry them. You can’t take a too large amount of paint in your baggage. Also, while carrying liquid paints, you must pack them with plastic wrap or in a plastic bag. Otherwise, paint can leak from the tube or container.
However, if you can follow the rules mentioned above and regulations, you can carry non-flammable paints on a plane. Otherwise, carrying any paint is prohibited on the plane.
How Many Gallons of Paint Are Allowed on a Plane?
Paint is not allowed too large amount on a plane. Generally, paints are often not allowed on a plane due to their flammability. But some paints are non-flammable. Still, according to TSA regulations, you can’t take a too large amount of paint on a plane.
You can take non-flammable liquid and gel paints less than 3.4 oz or 100 ml. According to TSA regulations for liquid, you can’t take more than 3.4 oz liquid or gel paints on a plane. This amount is not much because of safety. However, this limit is for each traveler, and you can take a quart-size packet or bag for carrying the paints.
Can I Bring Acrylic Paint on a Plane?
Yes, you can bring acrylic paint on a plane. Generally, acrylic paint is a water-based paint. It doesn’t contain oil. So, acrylic paint is considered non-flammable. You can carry acrylic paint tubes on a plane.
While traveling with paints on a plane, flammable and hazardous materials are entirely prohibited. Acrylic paints are safe because of their non-flammable property. However, don’t carry an excessive amount of paint, whether they are acrylic or not.
Moreover, while packing the acrylic paint, you must be very careful. Sometimes, leakage from acrylic paint tubes can make it messy. Besides, check the label on the paint before packing.
How to Travel with Acrylic Paints?
You might know that you can carry acrylic paints on a plane. So, whether traveling on a plane or in other vehicles, you can take acrylics. However, you must pack the paints carefully. Here are some tips about how to travel with acrylic paints.
- Don’t carry an excessive amount of paint with you in your baggage.
- Put a label or note on the bag or plastic packaging that will carry the acrylic paints.
- Tighten the caps of the paint tubes or containers before packaging.
- Try to bring the acrylic tubes in a plastic bag.
Learn How to Packing your Paints when Flying:
Can You Take Oil Paint on a Plane?
No, you are not allowed to take oil paint on a plane. Oil paints are strictly prohibited from carrying on a plane. These paints are highly flammable. So, they are not allowed to carry on a plane like other flammable materials.
Oil paints are also considered hazardous. Moreover, TSA regulations don’t allow oil paint on a plane. Whether the authority checks it or not, you must not carry oil paint in carry-on or checked baggage on a plane. This can lead to a severe hazard.
Are Watercolor Paints Allowed on Planes?
Watercolor paints are safe and they are allowed on planes. You might know that planes don’t allow flammable materials to carry. For this reason, many paints are not allowed on planes.
But watercolor paints are made of water-based materials and don’t contain flammable chemicals. These paints are allowed in both carry-on and checked baggage. But don’t carry too large amount of paint. Besides, try to pack the watercolor paints well to prevent leakage. You can pack the watercolor paints in a plastic bag for safety.
Can You Bring Paint Markers on a Plane?
Yes, you can bring paint markers on a plane. But all markers are not safe. You must read the label and instructions on the markers to know about the ingredients of the paint.
Most paints in markers are made of a water-based liquid. But sometimes, flammable liquid can also be present on the markers, that’s why knowing about the ingredients is essential.
However, the paint markers contain little amount of paint inside. TSA regulations allow you to carry markers on a plane. Bringing paint markers in your carry-on bag is preferable. But you can take them in checked baggage also.
Can You Take Tubes of Paint on a Plane?
It depends on the type of paint. Paint tubes are allowed on a plane if the paint is water-based or acrylic. These paints are non-hazardous and safe to carry on a plane. But when it comes to tubes of paint, you must be extra careful.
For example, tubes can be leaked inside the baggage. So, you need to wrap the tubes in plastic and carry them in a plastic bag. But if the tubes contain flammable paints, they are not allowed to take on a plane.
Can You Take Tins of Paint on a Plane?
Whether you can take tins of paint on a plane depends on the paint type. For example, some paints are flammable, and the paint is pressurized in the tin. Then this tin of paint can be hazardous. In this case, you should not take the paint tin on a plane.
But sometimes, paints in the tins are non-flammable and water-based paints. These paints are safe to carry on a plane. But there are regulations about carrying liquids in the plane, and TSA regulations allow a limited amount of paint. That’s why knowing about the rules and reading the label on the tin is a must.
Can I Bring Citadel Paint on a Plane?
Yes, you can. You might not hear the name of this paint, but Citadel is a water-based acrylic paint. Water-based paints are non-toxic and non-flammable. So, there is no problem with carrying the paint on a plane.
However, you must think carefully about the packaging of this paint. Since the paint is water-based and liquid, it can leak from the tube or container. That’s why bringing the Citadel paint in a plastic bag will be convenient. Moreover, please read the instructions for this paint on the label before getting it on a plane.
Can I Bring Gouache Paint on a Plane?
Gouache paint is another liquid paint that you can bring on a plane. But since this paint is liquid, you should bring it in your carry-on bag. Generally, gouache paint doesn’t contain any flammable chemicals. That’s why this paint can be carried.
However, if the gouache paint label shows that it contains flammable ingredients, you must not carry it on a plane. So, checking the label on the paint tube is essential.
See What Items You Shouldn’t Take on a Plane:
Final Thoughts
Paints can be of a wide variety. Different paints are made of different elements. You can’t say all paints have safe chemicals. That’s why knowing about paint ingredients is a must. Non-flammable paints are allowed to carry on a plane.
On the other hand, oil-based and flammable paints are not allowed on a plane. Moreover, there are many rules and regulations about carrying paints in your carry-on or checked baggage. So, you should know about paints before bringing them on a plane.