Brick pavers are an excellent choice for constructing walkways, driveways, or patios. They are long-lasting and with adequate preparation and proper installation techniques, you can install brick pavers on various surfaces. However, compared to all the colors in your interiors and exteriors, your brick pavers may look quite lifeless.
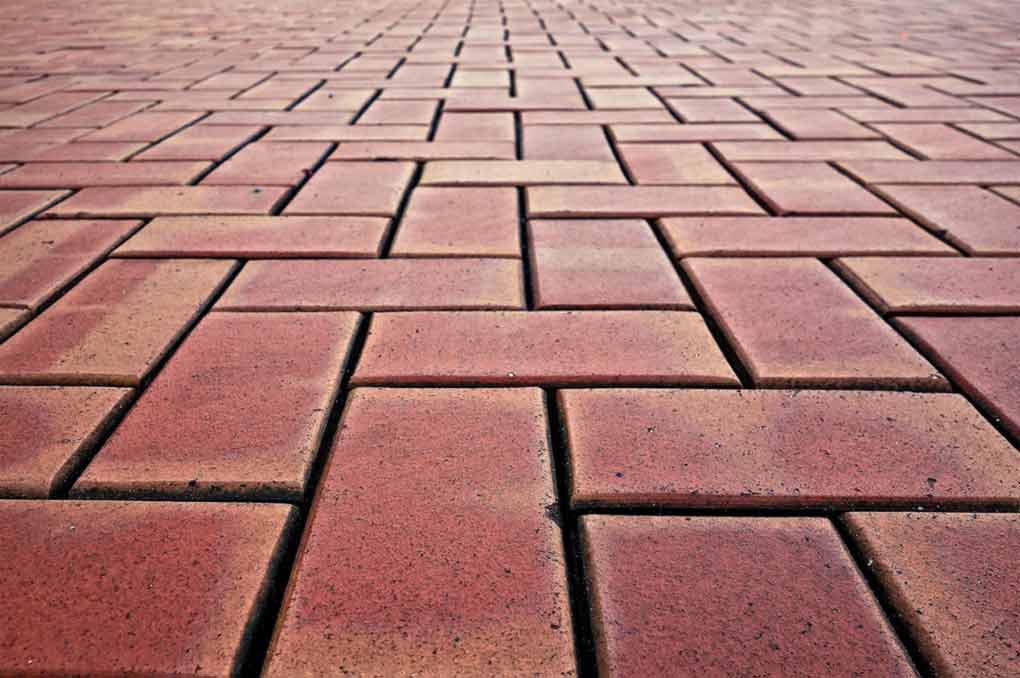
Have you ever got the idea of painting your brick pavers or at least a question came to your mind like can you paint brick pavers? Our straightforward answer is, yes, with proper preparation, you can paint brick pavers.
In this guide, we are going to discuss how you can turn your lifeless brick pavers into a part of your colorful backyard or garden decorations.
Can You Paint Brick Pavers?
Yes, as we have said earlier, you can paint. If you make the right preparation and follow proper guidelines during the application, you can paint your brick pavers. However, keep in mind that your pavers will have to withstand extreme weather conditions, from freezing cold to heavy rainfall.
Besides that, your pavers will be exposed to heavy traffic, sun, and harmful UV every day. So, before you start painting your brick pavers with any regular paints, you need to make sure the paint can withstand harsh weather conditions as well as high traffic.
And like most other things in the world, painting brick pavers has pros and cons. If the paint is not suitable for the bricks, it will not last long and the brick pavers will look even worse than before.
That’s why we say it’s okay to paint your brick pavers, but make sure the paint is suitable for the surface and you take proper preparation before applying the paint. If you can ensure these and some additional conditions, you are ready to paint your brick pavers.
Also Read: Hydro Dipping Methods with Acrylic Paint
Can You Spray Paint Brick Pavers?
If the pavers are looking old and faded, it’s normal to think about spray painting in the first place. That’s because spray painting is probably the easiest way to paint something. However, painting brick pavers with spray paints might not be an as good idea as it sounds!
You see, when your brick pavers are exposed to sunlight and other harsh weather conditions, the colors fade away unequally. Some pavers may look darker while others are comparatively lighter. And this can be a reason that the homeowner would want to repaint the pavers. If your case is similar and that’s why you are thinking of repainting, we got something to tell you.
Not all pavers can absorb the paint equally. So, even if you spray paint the whole area maintaining a uniform coat of paint, you may end up with the same problem that you started with; uneven darker, and lighter tones in the pavers.
If you insist on going with spray paint, you can try painting on a smaller area first. Make a good preparation before using spray paints and make sure you choose a spot where people won’t notice the painted area easily. We recommend avoiding spray painting while the outdoor temperature is too high or there is too much humidity in the air.
When choosing the paint, make sure to check if it is suitable for brick pavers or not. Plus, you need to think about the durability of the paint as well.
Your brick pavers will remain outdoors for years and will be exposed to sunlight, UV, humidity, and so on. That’s why make sure you choose paint that is suitable for the outdoors and can withstand extreme weather conditions.
The application process would be the same as spraying on furniture or other stuff. Apply thin and even coat all over the area. After applying the paint, if you notice the brick has absorbed the color and the tone looks lighter, no worries, just add another coat. After that, let it dry properly.
After you are satisfied with your final coat and the brick pavers are completely dry, you can give it a try with a sealer because you don’t want all your hard work to disappear after a few days. After applying the sealer, wait for a few days and see how they look. If you are satisfied with the color, you can move on to paint larger areas.
Next Read: Can You Wash Acrylic Paint?
What Kind of Paint Do You Use on Brick Pavers?
Since your pavers will have to withstand a lot of heat, moisture, traffic, and so on, regular paints will not be quite effective here. That’s why you need a paint that will strongly adhere to the brick surface in all weather.
To be more specific, look for acrylic concrete paint or good-quality paving paint.
And due to high traffic and exposure to extreme weather conditions, paving paint might not be enough. You need to use a primer and a sealer for better paint adhesion.
How Do You Prepare Brick Pavers for Painting?
Before start painting, you need to prepare the surface first. Preparing includes a few things.
Step 1: Removing the Weeds
It’s normal to have weeds growing around the pavers. The first thing you need to do is to remove those weeds.
Step 2: Removing Dust and Dirt
Use a push broom to clean all the dust and dirt.
Step 3: Cleaning with Water
After all the dry dirt and dust are gone, you need to use water to clean away the remaining grime and stain. Fill a bucket with water. Take liquid dish soap and pour 4-5 drops of it into the bucket. Now take some water from the bucket and pour it over the areas you want to clean and start scrubbing afterward. You can use a floor cleaner brush for this task.
Finally, thoroughly rinse the area with water after cleaning. To get better results from painting, you can start the preparation stage one to two days earlier before you will apply the paint. This will give the pavers enough time to dry.
Continue Reading: Sealing Acrylic Paint on Glass
How to Paint Brick Pavers?
After the preparation step is over, it’s time to start painting the brick pavers. Here are the things you need to get started:
- Paint tray
- Concrete primer (Acrylic)
- Acrylic concrete or paving paint
- Paint roller
- Concrete sealer
Now, let’s start the process.
Step 1: Applying Primer
First, take the can of acrylic concrete primer and stir it well. You can pour it into the paint tray for convenience.
Submerge the roller into the primer. Start rolling roller brush back and forth onto your brick pavers using fine strokes. Try to spread the paint everywhere as evenly as possible.
After you are done, wash the paint tray and the roller and let them dry. To make sure the primer is properly dry, let the pavers rest for one to four hours.
After the waiting period is over, you can touch the pavers to check if the pavers are completely dry or not. If the pavers still feel damp, wait for one or two more hours before applying the paint.
Step 2: Applying the Paint
Take the can of acrylic paint and stir it well. Pour it into the tray; it will make your work easier. Now dip the roller in the paint and start applying the paint on the surface the same way you applied the primer.
After the first coat is applied, you need to wait for about two hours to ensure that the first coat is dry. But that’s a lot of time. If you leave your paint tray and roller in the sun, they can dry out easily. That’s why you can use plastic wrap to cover the tray and roller.
After the waiting period is over, remove the plastic wrap from the tray and roller and apply a second coat. After the second coat is applied, let the pavers rest for two days.
Step 3: Applying Sealer
Open the can of sealer, and pour it into the tray. Dip the roller into the sealer. Now evenly apply the sealer all over the painted areas. Don’t forget to cover the joints. After you are done, wash the roller and allow the brick pavers to rest for two hours or more.
To complete your project successfully, keep these things in mind:
- Never apply paint, primer, or sealer if the temperature is too high because you don’t want bubbles to appear on the paint.
- Avoid painting, priming, or sealing when there is too much humidity in the air.
Can You Change the Color of Brick Pavers?
If your brick pavers look strained or faded, yes, you can change the color by painting with the right type of paint.
If you want to paint the pavers for craft only, you can do that as well. You need to make a good preparation first, and then the rest of the process will remain quite the same. Since brick has an uneven surface, you can use a penetration sealer to fill out the pores. This will save your paint as well.
After the sealer is cured, you can apply your desired paint according to the manufacturer’s instructions to change the color of your brick pavers.
This video can be supportive:
What Is the Best Paver Paint?
This may depend on various things. First, the paint should adhere to the brick surface well.
The best paver paint should be able to withstand heavy traffic, UV rays, scorching sun, humidity, snow, and salty coastal weather if you live in coastal areas.
If the paint fulfills most of these conditions, you can consider that a good paint for your pavers.
Final Thoughts
Driveways, pavers, and walkways go through a lot of traffic every day. That’s why over time they become faded.
But no more dealing with dull-looking pavers, in this guide, we discussed how you can paint your brick pavers and bring a shiny new look. So, follow our guide and turn your faded pavers into a part of your colorful outdoor decorations.
GameCube Controller; the thing that takes us back to our joyful childhood. If you own a GameCube Controller from your school days and you don’t get enough time to play with it nowadays, I believe it has already made its place in the basement.

Wait, you can bring the GameCube Controller back to its shiny new look or even better! In this article, I’m going to tell you how to paint a GameCube Controller and bring the look that will take you to your sweet old gaming days. So, what are we waiting for? Just push the button on your GameCube Controller and let’s get started.
Also Read: Tips to Remove Paint from Rubber
What Kind of Paint Do I Use on a Controller?
When we are talking about painting a GameCube Controller, it means we are about to restore one’s childhood, and it is a serious task for sure! So, I would recommend you to stick to trusted spray paints. It will be a lot easier than traditional brush-on paints.
If you are not quite good at traditional brush-on painting, I wouldn’t recommend you try it out. So, if you want to work fast and hassle-free way, pick some spray paint cans.
How to Paint a Gamecube Controller?
There can be different ways of painting a GameCube controller. The steps may vary a little bit. But I will tell you an easy way of transforming your old masterpiece into a new one. Let’s begin.
Step 1: Take Apart the Controller
Before you make your hands messy with paints, you need to disassemble your controller. To take apart the controller, the first thing you need to do is to remove the screws. However, if you have a Nintendo product, you may find some difficulties removing the screws.
You will notice the screws are the tri-wing type, so regular Phillips screwdrivers are quite useless in this case. That’s why you need to purchase a tri-wing screwdriver. Then the rest of the process is normal as always. After removing the screws, gently pull out the rear shell.
Now you can easily remove the internal parts. You can keep them in a sealed bag or a container so that you don’t lose them. You can leave the buttons if you want to paint them. Okay, now you only have the shell which we are going to prepare for painting.
Step 2: Cleaning the Shell
The first step to painting your GameCube Controller is making good preparation. And a good prep phase starts with cleaning. You can use some dish soap and warm water. Make sure the water is mild; not too hot.
Now you need to thoroughly clean the shell with a sponge. After removing dirt and grime, rinse the shell. Repeat this process until the shell is properly cleaned.
Step 3: Buffing
After the GameCube Controller shell is cleaned, you need to buff it a little bit. You can easily do this with a regular Scotch Brite pad. This will remove the remaining grime or grease and the protective coating as well. Buffing will help better paint adhesion.
Remember I said there can be different ways of painting a GameCube Controller and the steps may vary a little bit. If you want, you can do sanding first using 600 grit sandpaper. Then you can wash the shell thoroughly and let it dry. You can use a damp paper towel to remove the excess water and accelerate the drying process.
Step 4: Adding Primer
For the base coat, a white primer would be a great choice. Shake the paint can well for about a minute. Now you need to gently apply a few very light paint coats. Once you get the speed, you need to evenly apply the paint so that the paint looks the same in all areas.
To evenly apply the paint, you should focus on overlapping your previous coat about 50% with the new coat. The height and speed you need to maintain while applying are important as well. If you are applying the paint from about 8 to 10 inches distance, you need to move slowly.
But when you are applying from a closer distance, you need to move fast otherwise you will end up with paint buildup.
Step 5: Allowing the Paint to Dry
After applying the primer, you need to allow it to dry for about 10 to 20 minutes.
Step 6: Applying the Main Paint
After the primer is dry, you need to start applying the main color. Apply the paint the same way you applied the primer. Maintain proper distance and speed to get better results. While applying the paint, following the manufacturer’s instructions would be a smart thing to do.
A single coat of paint may not be sufficient, so you will need to apply multiple coats. Make sure you allow each coat to sit properly before applying a new coat. Plus, when it comes to drying time, it may vary from brand to brand. So, make sure to check the drying time of the paint you chose and let it dry accordingly.
Step 7: Sealing the Paint
After the last coat of paint is properly dry, it’s time to protect the paint of the masterpiece. You can pick a good quality automotive clear coat spray paint. Using a good quality sealer will protect the paint underneath and make the GameCube Controller look glossy and professionally finished.
You may need to apply more than one coat. If you apply two coats, make sure each coat gets enough time to sit before you touch it. Plus, make sure the paint and sealer reach the hard-to-reach areas otherwise the finish will look unprofessional. So, don’t rush, take your time here.
Some paint fumes can be toxic, so take protective measures while applying the paint. You can wear a respirator. After you are done, you need to allow the shell to dry properly. However, don’t leave the shell outside to dry because dust, pollen, dirt, etc may damage the paint.
So, you can let the item dry in a place inside the house where it will be safe from dirt and dust particles. If you still notice some dust particles have clung to it, don’t worry, it’s not the end of the world! But it’s a tiresome job for sure. You need to allow the shell to dry first, then use sandpaper, and finally re-spray.
See How To Paint a Gamecube Controller:
How Do I Put a Logo on My GameCube Controller?
If you want a custom logo or a picture on the controller, you can choose waterslide decals or vinyl decals. Vinyl decals are very thin and you won’t be able to differentiate them from the actual paint designs until you look very closely. It’s a cheap option as well.
But if you want to add a complex design and want it to look more realistic, go for waterslide decals. After the two coats of the clear coat are properly dry, place the waterslide decals or vinyl decals on the shell and add a layer of clear coat again to make everything look perfect.
Note that if you are using a waterslide decal, you need to allow it to dry properly before applying the last coat of the clear coat.
Final Thoughts
GameCube Controllers are a true nostalgia. Painting a GameCube Controller is like turning an old masterpiece into a shiny new masterpiece that reminds our good old days when there were no worries about expenses, debt, or paying the bills. Some people get emotional when they get to meet these childhood buddies after a long time.
In this guide, I have talked about how you can paint your GameCube Controller. So, follow this guide and customize your GameCube Controller to bring your sweet memories back to their shiny look.
A painting project is always an interesting work that can entirely change the look of any space. You can create a place that is filled with style and expresses your personality or taste.
Whenever you are painting indoors or outdoors or creating a DIY project, a little amount of paint can splatter somewhere in your working area. Don’t be tensed, it’s normal. You can remove the paint easily.
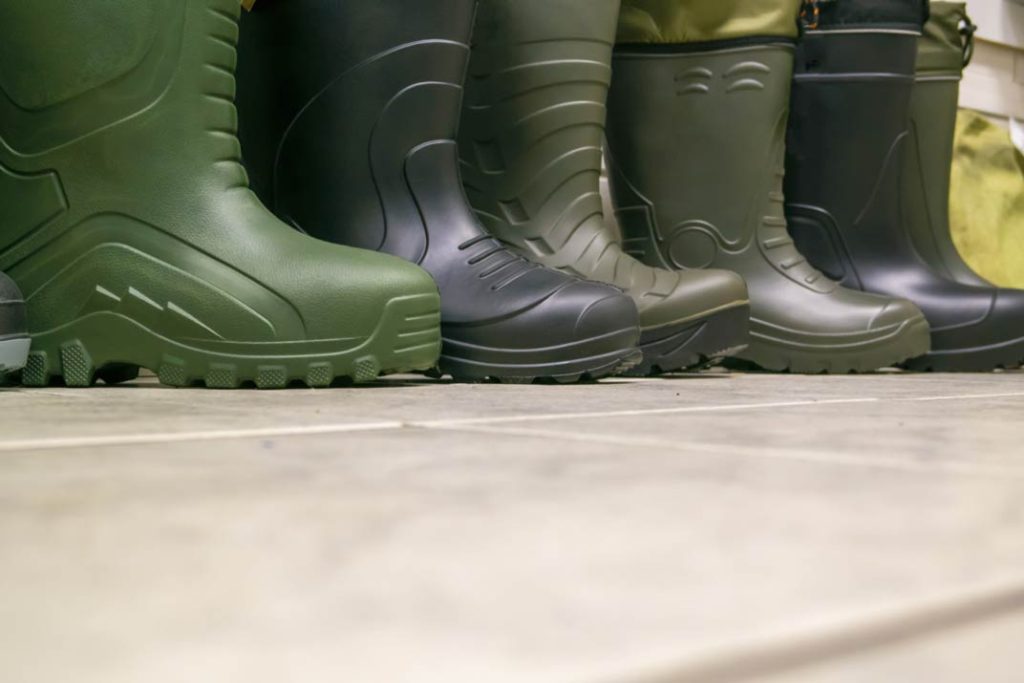
Accidentally, paint can get onto a rubber surface as well. It is still possible to remove it with the proper method. We are here to offer you a complete guide on ‘how to remove paint from rubber’.
Can You Use Paint Remover on Rubber?
Yes, you can. Just check that the paint remover you are going to use is guaranteed to be safe on rubber. Try to select a remover that is certified as harmless among all latex paint removal products. If you pick a paint remover randomly which is not good for rubber surface can damage the rubber materials.
Also Read: Is Acrylic Paint Washable
Will Acetone Remove Rubber Paint?
Definitely, yes. It is one of the most powerful solvent to remove rubber paint. It’s known mostly as a special-purpose cleaner and remover. Another plus point is that it can evaporate quickly. It’s suitable for removing oil-based, latex-based, and uncured paints.
How to Remove Paint from Rubber?
By any chance, you can spray paint on a rubber surface. You can also apply paint intentionally. Now you want to remove it. There are different methods to remove paint from rubber. If the paint gets dry, still, you can get rid of it. You should choose a process accordingly to the type of paint you used.
We decided to discuss a general method to remove paint from rubber. Let’s take a look at the procedures.
Use a sponge to wet the paint
The paint that is splattered on the rubber surface can be dry or hard. You need to soften it. Take warm water in a bowl or something else that can carry water. Then soak a sponge into the water, and apply it to the area from where you want to remove the paint.
Apply a little pressure so that the water soaks properly into the paint. It will help you to soften the paint. Otherwise, when you try to remove hard paint, the rubber surface can be damaged.
Try to scrape the paint gently
Check whether the paint gets enough softer or not. When the paint is enough softer, it’s time to apply the next step. Try to scrape the paint gently. You can use a toothbrush or scraper to scrape it. In this case, your fingernail also works pretty well.
You should choose the tool depending on how difficult to remove the stubborn paint. If removing the paint is too hard; of course, you will need a more abrasive tool. Work carefully to avoid unnecessary scratches.
Clean the area and dry it
Once you notice that the paint is scraped off properly, clean the area. Use a rag and soapy water to clean it. Then dry the rubber surface thoroughly.
Use rubbing alcohol
Check, still any spot of paint remains there or not. If you notice something like that, consider using rubbing alcohol. Take a clean cloth. Soak a corner of the cloth in the alcohol, and then wipe away the paint spot. Remember to wash again and dry it properly.
How to Remove Paint from Rubber Shoes?
If your rubber shoes have got any paint marks, you can easily remove it by using acetone. This can be found in any hardware store. Let’s take a look.
- First thing you have to do is using a metal file to scrape off the noticeable thicker paint from the project area. Hold it like a pencil and use the corner of it. Start scraping the paint from border first. Then go on the middle part of the midsole. It will make everything a lot easier. You should not press the metal file too hard; otherwise, you are going to ruin it.
- Use a toothbrush to get rid of the dust or any excess paint. Make sure the bristles of the brush are soft and clean.
- Mask the additional part where no paint spot remains. Use a blue painter tape for taping the area. Otherwise, acetone can affect the clean area.
- Remember to cover the air units of your shoes with cotton balls to avoid entering acetone into the leaks.
- Now time to apply the acetone with cotton balls. Soaking the cotton balls with acetone and then rub the area lightly. Don’t rub really hard. It may harm the midsole. Wear hand gloves to get protection.
- After removing paint properly, clean the shoe and dry it. You can use warm water and a soft clean cloth to clean the remaining.
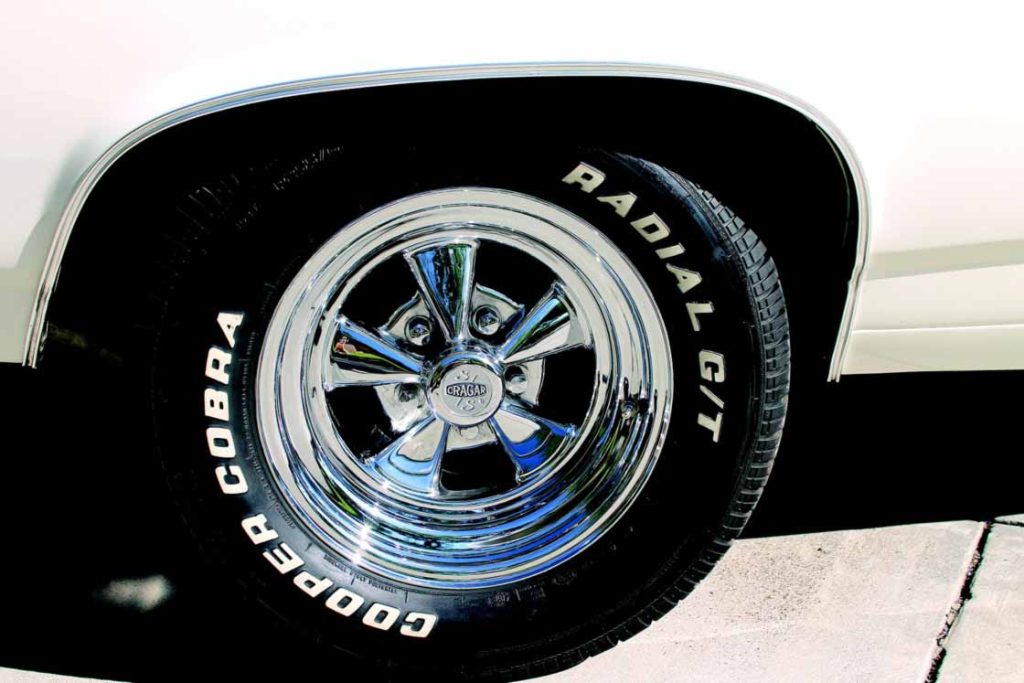
How to Remove Paint from Rubber Tires?
Suppose you attempt to paint on your car tires. Unfortunately, paint spreads everywhere on the tires. Maybe you forgot to mask off the wheels properly, or it can happen for any other reasons.
Now, you want to remove the splattered paints from rubber tires. Well, there are several methods to remove the paint. We provide you with a pretty easy way to remove paint from rubber tires. Using rubbing alcohol is one of the best techniques. Let’s take a look.
- Take a cleaner pad. Pour a small amount of rubbing alcohol on it.
- Wipe away the splattered paint on your rubber tire. Remember to wear hand gloves for safety.
- While wiping, don’t put more pressure. It can damage the tire surface.
- Observe whether the paint comes off or not. When you notice that it comes off properly, clean it with a soft cloth.
Here is a detailed guide on removing paint from rubber tires.
Does Vinegar Remove Paint from Rubber?
Yes, it can. Vinegar is an easy and more effective green substance that can easily remove paint from rubber and other surfaces. It’s just like a cleaning powerhouse. The most important point is that it is environmentally-friendly. It has no harmful chemicals; not so expensive or out of your budget.
Does Paint Thinner Remove Paint from Rubber?
Applying paint thinner is a short and pretty quick procedure to remove paint from rubber. To get rid of stubborn paint, soak the rubber in paint thinner, and then remove the paint with a steel scraper. If the product manufacturer permits to apply it on rubber, only then consider applying it.
Does Paint Thinner Damage Rubber?
Paint thinner dissolves the paint. Many users use it to clean up the splattered paints.
Paint thinners can basically damage rubber tires. That is because the rubber tires are more prone to cracking or brittleness. Be careful, whenever you consider using it. If the manufacturer permits you to use it on rubber, you can apply it. Check product labels for safety and proper use.
Does Acrylic Paint Come Off of Rubber?
Yes. Acrylic paint can come off of rubber. Soak a sponge in the solution of warm water and a cleansing agent to remove acrylic paint from rubber surface. If you don’t get the expected result by applying warm water, use rubbing alcohol to the painted area.
Final Thoughts
Removing rubber paint is not so tough task. The process can be easier if all necessary tools are available near your hand. We have tried to discuss the different methods above.
Just find the tips accordingly to your needs. When you are struggling to remove paint from rubber, check out this complete guide. But always try to maintain the actual quality of your rubber products. Handle them carefully.
Sometimes chrome on a surface like bicycles, motorcycles, or car bumpers gets painted. Everything feels okay until the paint starts to flake off; it reveals the chrome underneath. If your case is similar, you can easily remove the paint and enjoy the chrome again. All you need to know is how to remove paint from chrome.
The good thing is that in this article, we are exactly going to discuss the ways to remove paint from chrome, step by step. So, let’s begin.
What Is the Easiest Way to Remove Paint from Chrome Plating?
We are going to discuss three ways to remove paint from chrome without damaging it. All of the methods are very easy and straightforward. Plus, you don’t need to spend a pretty penny as well. So, here are the three easy methods of removing paint from chrome:
- Using Paint Stripper
- Using Oven Cleaner
- Using Lacquer Thinner
You can try any of these methods to deal with paint on a chrome surface.
How to Remove Paint from Chrome without Damaging the Chrome?
We’ve said earlier, there are three ways to remove paint from chrome without damaging it. Now, let’s discuss them in brief.
Method 1: Using Paint Stripper
To start removing the paint from chrome, you need to collect some supplies first. Here are the things you need for this method:
- Chemical paint stripper
- Soft cloth
- Plastic wrap
- Plastic scraper
Step 1: Applying the Paint Stripper
The first thing you need to do to safely remove the paint from chrome is apply the chemical paint stripper. The best advice would be to follow the instructions provided by the product manufacturer.
Okay, cover the area or the surface with the paint stripper. Make sure you apply it well and don’t let any spots uncovered. After you are done, put the object in a plastic bag and seal it properly. Now, let the item rest for about 12 to 14 hours. It’s best to let it rest for a night. What to do if the object is too large for a plastic bag?
Don’t worry; you don’t need to put the whole object in a plastic bag. You can simply wrap the area you applied the paint stripper with plastic wrap and seal it using tape. You need to let it rest for a night as well.
Step 2: Removing the Paint
The next day, after the job of the paint stripper is done, you need to scrape off the paint from the surface. It will not be troublesome work because the paint stripper has already done the toughest part of the job for you.
Now, gently scrape the paint off using a plastic scraper, soft cloth, and scrubber. Using a nylon scrubber is recommended. Don’t go too rough on the paint; you don’t want to damage the chrome underneath.
Method 2: Using Oven Cleaner
For this method, you will need:
- Oven cleaner
- Soft cloth
- Plastic wrap
- Plastic scraper
- Nylon scrubber
Step 1: Applying the Oven Cleaner
Start spraying the oven cleaner on the object. Evenly cover the object or the surface. Make sure you don’t miss any spots. When applying the oven cleaner, the best advice would be to follow the instructions provided by the product manufacturer.
Now, the process is quite the same as method 1. So, put the object in a plastic bag and seal it properly. If the surface is large, wrap the area you applied the oven cleaner with plastic wrap and seal it using tape.
After you are done, let the item rest for about 12 to 14 hours. Again, the best option would be to let it rest for a whole night.
Step 2: Removing the Paint
The next day, gently scrape the paint off using a soft cloth. If the soft cloth seems to not work properly, you can use a nylon scrubber and a plastic scraper.
Method 3: Using Lacquer Thinner
This one is another easy way for removing paint from chrome. To get started with this method, here are the things you will need:
- Lacquer thinner
- Plastic scraper
- Soft cloth
- Plastic wrap
- Nylon scrubber
Step 1: Using the Lacquer Thinner
Apply the lacquer thinner on the object or the surface. You can simply take a large soft cloth depending on the size of the object, soak it in thinner, and let it sit on the object or the painted area to loosen the paint.
After a while, like 15 minutes or so, the paint should start to get loosened from the surface. You can check it using a soft cloth. If you see the paint is wearing off with minimal effort, consider it’s ready to be removed entirely. But if you see the paint is still hard to remove, give the lacquer some more time to do its job. After a while, check again.
Step 2: Removing the Paint
Use a soft cloth to remove the paint from the surface. If the soft cloth seems to not work properly, you can use a nylon scrubber and a plastic scraper.
Finally, after trying any of the methods to remove the paint residue from the surface, you need to clean it properly. You can use a damp cloth for this. And if possible, you can rinse the item thoroughly and let it dry before moving to any further processes.
How to Remove Automotive Paint from Chrome?
If we are talking about automotive paint like paint that is used to cover the chrome ribs of a car tire, you can remove it safely in the following manner. But first, you need to collect these things:
- A pressure washer
- Oven cleaner
Step 1: Rinsing the Surface
To remove the loose paint, grime, and dirt, use pressurized water. Thoroughly rinse the surface. This will make the paint removal process easier.
Step 2: Applying the Oven Cleaner
Now, you need to apply a thick coat of oven cleaner spray and let it sit on the painted surface for about five minutes. When it’s about halfway through, add another coat of oven cleaner. Depending on the thickness of the paint coat, you may need to apply more coats of oven cleaner. Make sure to cover the area evenly.
Step 3: Rinsing With Pressured Water
Now, after 5 minutes or a little bit more, rinse the area using pressurized water. The paint may not get removed as expected. Don’t worry; you need to repeat the process of applying oven cleaner, waiting, and using the pressure washer multiple times. So, repeat the process until the paint is completely removed and the shiny chrome is exposed.
How to Remove Paint from Chrome Door Handles?
Removing paint from chrome door handles is not a troublesome job. You can remove the paint easily using the three methods we discussed earlier.
First, you need to remove the door handle from the door. Next, you need to remove the loose paint, grime, and dirt, using pressurized water. Finally, you should remove the excess water using a soft cloth and let it dry.
Finally, apply any of the three methods to remove paint from chrome that we discussed earlier. Experiment and check which one works best for you.
Will Paint Remover Damage Chrome?
Generally speaking, commercial paint removers are most likely to cause no harm to chrome. Usually, chrome is put on the surface using an electrical charge. It can only be removed by sandblasting or sanding. That’s why you don’t need to worry about chrome while using a paint remover product. So, using commercial paint removers is a safe and easy way to remove paint from chrome.
Final Thoughts
If you have a car or bike, painting a chromed area, regretting afterward, and wanting to go back to chrome can be a very common incident. In this article, we taught you how to remove paint from chrome. So, if you previously painted a chromed surface, and now you want to go back to chrome, you can go back to it easily by following the instructions of our guide.
Maybe you’ve bought a shoe or you have been using a shoe for many days, but somehow its design is not of your choice or it is not looking good to you anymore. So, you decide to paint on it to give it a new look, your personal touch! But can you use acrylic paint on shoes?
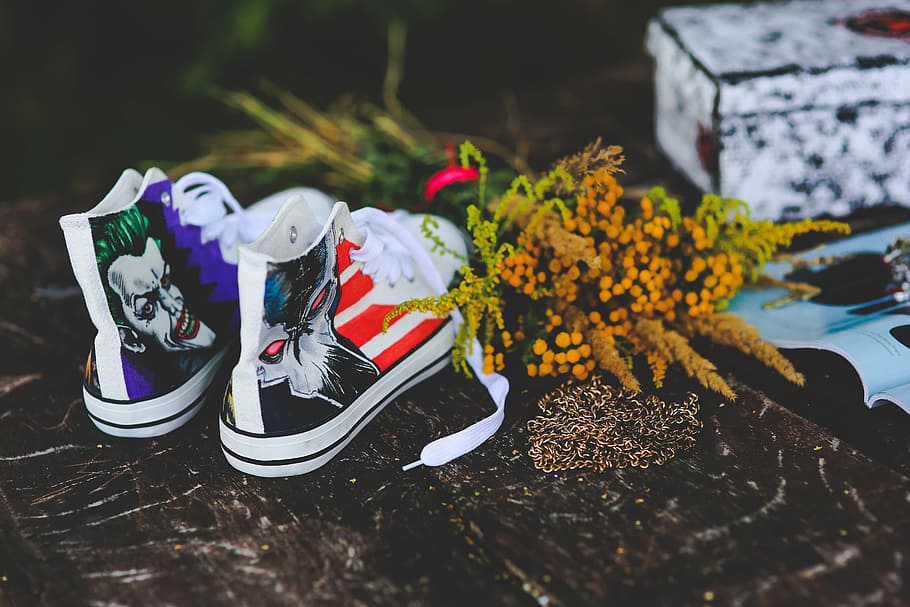
You can use acrylic paint on shoes. It has a wide range of colors and it is very good to paint on a synthetic leather shoe. It dries quickly and is water-soluble. But it becomes water-resistant when it dries up.
What Paint to Use on Shoes?
There are a few different types of paints that will work for shoes. Among them, which paint will suit the shoe depends on the material used to craft the shoe.
For leather or vinyl shoes, you should select spray paint. Spray paints generally will dry better on leather and vinyl because those materials usually have a lustrous finish. Additionally, you could use leather paint on leather and vinyl shoes, too. Leather paints are flexible with a good range of colors. Simultaneously, it is cheap!
Again, use fabric paint for cloth shoes. It works best on cloth shoes because the paint meshes well with that distinctive material. Fabric paint is designed to be flexible. As a result, this kind of paint will prevent shoes from cracking. But you need to be careful about not letting the color go wet with soapy water immediately so that the color may not fade.
Acrylic paint has comparatively the largest variety of colors available as well as is the least expensive. Acrylic paints are designed to adhere to leather products, including shoes.
You can get them at your nearby craft store. These paints easily go on with a brush and give a smooth and lasting finish. Also, you can spray paint bought from a hardware store. To minimize over-spraying, choose a ‘spray can’ with the smallest nozzle possible.
Can You Use Acrylic Paint on Shoes?
In order to paint your shoes, you can definitely use acrylic paint as it is one of the best paints. It will be more beneficial than most other paints.
But keep one thing in mind, if acrylic paint is not made with thin layers, the shoe may crack soon after painting. To get rid of this problem, use acrylic paint thinner, a same material used with airbrushing, as thin layers are the key to prevent cracking and getting a good outcome.
Try to use paint of a single brand to apply to the shoe instead of mixing multiple brands. While drying, avoid heat and take care of the angle at which you are applying paint.
If you make a careful use of acrylic paint, you will get a good finishing with your shoe painting!
Can You Use Acrylic Paint on Leather Shoes?
Spray paint and leather paint are the most suitable paints to use on leather shoes, but you can obviously use acrylic paint on such surfaces. Hence, most leather paints are acrylic-based. But you must water down the paint before using it as acrylic paints are thicker than leather paint. Otherwise, it may cause cracking to the shoe after just a few days.
Can You Use Acrylic Paint on Fabric Shoes?
I have already said that for painting on fabric shoes you should select fabric paint. But acrylic paint can be used for painting fabric shoes. Actually, fabric paint is a type of acrylic paint made specifically for painting on fabric materials.
You can opt to create a fabric paint using a textile medium. Select acrylic paint colors that you like and add the textile medium to them. The ratio for mixing should be 1 part acrylic paint to 2 parts textile medium. The resulting paint is very thin and good to paint with!
Can You Use Acrylic Paint on Air Force 1?
Yes, acrylic paint can be used to paint on Air Force 1.
Air Force 1 is a basketball shoe of the worldwide renowned company Nike. It was designed by Bruce Kilgore. Since its introduction in 1982, it has gained fame as a fashion staple.
This shoe has an all-leather upper. It is treated with a waxy protective coating and must be removed for painting. Otherwise, the paint is not going to penetrate the leather. To remove that part, you can use acetone or isopropyl alcohol.
After preparing the shoe for painting, start painting with acrylic leather paint. Do the work of painting algorithmically. In each step, paint only one layer and let it dry first before moving on to the next layer. This way, completing the work may take time but it will touch the perfection!
If there is a part you are not painting now or you want to make a straight line, you can use painters’ tape to tape off that part.
When the painting is finished, wait at least a day and apply acrylic sealant according to the manufacturer’s instructions.
Can You Use Acrylic Paint on Vans?
Vans shoe is a very popular product of an American skateboarding shoe manufacturing company, Vans. This kind of shoe is a favorite to many non-skaters for its stylish look.
Vans shoes’ signature ingredient is vulcanized rubber construction. This feature is lauded by skaters for its superior grip and support while skating.
Since these shoes are vulcanized, they can be easily painted on. You can use acrylic leather paint mixed with fabric additive (liquid, paint-like material that helps your primers and paints better adhere to Vans) in order to make a primer.
How to Paint Shoes with Acrylic Paint?
Painting shoes with acrylic paint is an awesome way to give your shoes a new life. To have a good result, you should follow the following steps.
Ingredients needed are:
- A pair of shoes,
- Paint,
- Paintbrushes,
- Acetone.
Step 01: At first, remove the laces from the shoes to avoid them getting painted on.
Step 02: Use acetone to clean up the shoes and prepare for painting. Handily soak a cotton ball with acetone and rub it all over the shoe surface.
Step 03: Now, decide the design for the painting. If you want to make an elaborate painting, then sketch out your ideas on paper. You can use computer programs such as Adobe Photoshop to create a 3D design in advance.
Step 04: Sketch your design on the shoes’ surface in pencil.
Step 05: Try to find a flat, steady table and cover your workspace with newspaper or craft paper.
Step 06: Tape off the unnecessary places where you are not going to paint.
Step 07: Make use of marking pens to outline your designs. You can also add details like- fan art, quotes, graffiti, poetry, or anything you like.
Step 08: As you are using acrylic paint, dip your brush into the paint. Try with short strokes and keep refilling your brush until you no longer see any part of the shoes’ original surface.
Step 09: As soon as you are finished with the painting, let the shoe dry before moving on to further steps. A hair dryer or heated drying tool is usually recommended for drying. Generally, you may need to dry it for almost 24 hours.
Step 10: Grab the ends of each piece of tape you put before painting. To do so, gently pressurize as long as it does not pull away from the shoe. Continue until you have removed all the pieces of tapes. You may use metal tweezers to carefully remove the small pieces if you are not capable of safely removing them.
How to Seal Acrylic Paint on Shoes?
When you are done with painting and drying, you are eligible to wear your shoes. But it is recommended that you should apply a protective finish. If you do not seal the paint, the color may not stick to the shoe and get spoilt even by gentle scratches. It will prevent your design from getting damaged by water.
The following steps will illustrate how you can seal acrylic paint on shoes.
Step 01: Get Angelus Matte Acrylic Finisher, the best ingredient for this work. Alternately, you may try Mod Podge Outdoor, Polyurethane, and other durable outdoor sealants which are suitable for painted surfaces.
It can be used also for removing the mistakes you made while painting. But be cautious about not spoiling the good part while doing this. So, use tape to cover the good surrounding areas.
Step 02: Mix finisher with duller (a material that makes the matte finisher less shiny). The amount of duller should not be excessive because too much of it will prevent the matte from protecting your shoes.
Step 03: Dab the mixture on the painted area with a clean piece of paper towel.
Step 04: Dry it. It should take about 30 seconds.
Step 05: Apply the same process thrice to complete sealing your paint.
Final Thoughts
Painting is always a thing of joy. Painting on a shoe makes a shoe more good-looking and attractive as well as depicts your creative identity.
But for painting, acrylic paints are very versatile. It can be used for painting different kinds of shoes and it offers a wide range of colors and one becomes able to make a colorful work.
Acrylic paint and its usage on different materials is not a secret for sure. With the right procedure, acrylic paints are used both on the personal ground and professional ground. There are several options for using acrylic paint as it can be applied to materials like metal, wood, or concrete. But a specific question lurks in the mind of most people – can you put acrylic paint on your face.

Since painting on the skin is an aesthetic art for most people, this question surely deserves a solid answer. However, it is not easy to answer that fast as acrylic paint comes with chemicals that might not suit your skin. Besides, a lot of toxicity can create fatal skin diseases. But still, we have got some chances to avoid this chemical part of acrylic paint and use it on our faces following some precautions. And how this is possible? – Let’s discuss it in-depth.
Can You Put Acrylic Paint on Your Face?
If you don’t want your skin to be itchy or have severe rashes and breakouts, then you don’t even think of applying acrylic paint on your face. Acrylic paints can turn an object into a very rewarding material. In the case of a face of a human being, it is also so efficient to turn the paint into a very beautiful art piece. But the fact is if the acrylic paint is legit usable for face paint or not.
Well, the answer might confuse you because in all the containers of acrylic paint it carries saying that this paint is non-toxic. Then why it is toxic for your face? It is because the chemicals that acrylic paint carries are safe when you tend to apply them to other materials. As long as you are not intending to apply it to your sensitive skin, the chemicals will not react.
But if you apply it on your face and don’t wipe it before it gets fully cured, then the reaction of chemicals will happen severely. And redness and acne of the skin are some obvious incidents that will happen to your face. Also, because acrylic paint is not FDA certified, it would not be wise to let acrylic paint cure your face and worsen your health and skin inside out.
Can You Put Acrylic Paint on Your Hands?
Acrylic paints carry chemicals like turpentine, methyl ethyl ketone, xylene, and other things not fit for the skin at all. These chemicals when inhaled cause serious problems to people those who have an asthmatic problem. However, not only because of these chemicals but also because some acrylic paints are oil-based or solvent-based, it reacts to the skin more severely.
Therefore, using acrylic paints on your hands is as much prohibited as using them on your face. For children, their immature epidermic construction cannot stand the reaction and as a result, a long-term skin disease can ruin their right development. For crafting or even for fun, you should not just take the chance of coloring your hands or your child’s hand.
But it is obvious that when you take a step to paint some material with acrylic paints, some of it will accidentally stick to your hands. In such a situation, try to wipe the paint out of your hands using clean water as soon as possible.
Don’t let it dry on your hands. Otherwise, you might face some terrible itching due to the penetration of the chemicals in the skin and later you will have to deal with patchy skin for a long time.
Is It Safe to Use Acrylic Paint on Skin?
Acrylic paint is not at all suitable for your skin. It doesn’t provide the texture that you need while painting someone’s skin. Painting on the skin is not a new theme. It has been a ritual and tradition to many tribes and aborigines. Also, painting on the skin is a rewarding form of art as well. Many artists actually live on this idea of body painting.
But the professionals know that acrylic is not the paint that is perfect for painting a body. Besides, it is not safe at all. A large amount of acrylic paint on the body can decrease the epidemic efficiency of your skin. Besides, if you stay a whole day with acrylic paint on your skin, it gets cured and penetrates deep into your skin and causes skin cancer.
However, to get a refined result, don’t use acrylic paint because it does not offer a seamless finish. Rather it gets cracked with time and does not provide a great service. On top of that, you will have to face a lot of trouble removing the paint from your skin.
Can You Use Folkart Acrylic Paint on Skin?
In a general view, it is wise to not use acrylic paint on your skin. Acrylic paints that come with solvent or oil-based formula offer long time performance with rigid durability and vivid color. But these qualities fit only for solid materials like wood, metal, iron, and concretes.
On the other hand, a body is not made with tight molecules. It has pores, it is vulnerable, and moreover, it carries uneven tones. For all these things, the skin reacts against acrylic paints. But in the case of Folkart acrylic paint, things are a little tolerant and passive. It is because Folkart acrylic paints are mostly water-based. And it contains and emits fewer VOCs.
Therefore, your skin can tolerate this paint to some extent. But Folkart acrylic paint is not that suitable as it dries easily without setting on the skin properly. Still, that does not mean the danger becomes vanished. The chances of danger are just reduced to some extent but using acrylic paint no matter if it is water-based still requires special consideration.
What Happens If You Put Acrylic Paint on Your Face?
A lot of unwanted things might happen if you put acrylic paint on your face. We have already mentioned that acrylic paints are not for playing on your body. You can touch the paint, check its texture with your hands, and try on your body for a little time, but letting acrylic paint cure on your face for a long period of time can make the following troubles.
- Intolerable itching
- Horrible redness and irritation
- Damage of the epidermal
- Severe allergic reaction
- Ineffable breakouts
- Uneven skin tone
- Unnecessary striping of facial hair
- Inflammation and burning of the skin
- Signs of skin cancer
How to Make Acrylic Paint Safe for Skin?
Step 1: Collect the following materials at first to get your job done quickly. You can get them from any nearer shop store and hardware store.
- A quality water-based acrylic paint
- Body lotion of any type
- A medium-sized bowl
- A paintbrush
Step 2: In this step, you need to mix the two primal ingredients. First, take the bowl and then pour one part of both body lotion and acrylic paint. After that, take a paintbrush and mix them properly.
Step 3: Here you need to check if you get a smooth color yet or not. Sometimes more lotions need to be added to get the soothing color. Therefore, add some if necessary, and then Voila! You are done with the whole procedure of making acrylic paint safe for the skin.
What Paints Are Safe for Skin?
As paints are greatly used on the skin for greater purposes, there are many options for safe paints. These paints are suitable for skin and your skin will not react harshly if you haven’t possessed too much sensitive body skin. The following paints are recommended largely for the skin.
Metallic Paint:
You must have watched on roads of New York City man painted with metallic paint all over his body. This paint gives a very metallic and matte shiny look. But before applying this paint, you need to take some precautions. If you use a barrier spray before applying metallic paint on your body, it will create an invisible barrier and won’t let paint touch your real skin underneath.
Alcohol-based Paint:
Then there is this alcohol-based paint perfect for body painting. It provides an alluring look when exposed to the sun. Besides, it is waterproof and won’t get cracked if you start to sweat. But it rubs off due to too much sweating. However, removing alcohol-based paint is toxic and painful as it cannot come off without using rubbing alcohol.
Marker for Body Paint:
Besides many commercial body paints, some companies determinedly produce markers for body painting. They are also non-toxic. Besides, you can experiment with them on both adults and children. On top of that, you can draw easily with those markers on a body, as they come in convenient shape and size.
Latex Body Paint:
Another famous and most recognized paint for the body is latex body paint. It is the most used paint for cosplayers and costume designers. As this paint easily comes off the body, you will not face trouble removing it. But the paint can be allergic to the skin if you are allergic to Latex.
Water-based Paint:
Water-based paints carry less toxic chemicals and therefore they last less time than oil-based paints. But you should not doubt the capability of water-based paint. However, your skin can stand this paint but due to its low viscosity, it does not remain on the skin for long. Also, don’t forget to use barrier spray before applying this paint.
Henna:
Though in Western cities, the use of henna is recent, in Asia and Africa, this natural paint is leading for years. This natural paint is the safest option for painting the body of a child or adult. However, the color of it rotates in between the shades of red to dark brown or dark. Therefore, you can get limited variation from this paint.
How to Wash Acrylic Paint off Skin?
Acrylic paint is more or less tough to remove from your body unless it is water-based. Actually, any type of paint is harder to wipe and requires patience and time to be removed fully. If you want to remove acrylic paints, remove them following the stated ways below.
1. First, take soapy water, apply it to your skin, and rub properly. Then use fresh water to clean the skin.
2. For the remainder, use a body scrubber and scrub the area where paint is still lingering.
3. You can use your finger and thoroughly scrape the paint off your skin.
4. Then rinse with fresh water.
5. If there is still some residue, use canola oil or olive oil on that spot. Give it some time to loosen the bondage of the residue and then clean it with soapy water properly. It will work for sure.
See What Happens After Using Acrylic Paint on Her Face:
Final Thoughts
At this point, you have learned that acrylic paint is not ideal for any part of your body. Better keep acrylic paint far from your reach and forbid your child to be near it also. Acrylic paint is not made as per the condition of your body. It should be applied to inanimate materials and not to human beings or animals.
But as the face or body painting is becoming an aesthetic profession or fun thing, you can use alternative paints and can save your face from irritation and severe skin diseases.
Acrylic paint is one of the most used paints for versatile projects because of its outstanding qualities. This paint is water-based and ideal for different environments. You can use acrylic paint for your DIY projects, car, interior, and exterior projects.
When using this paint, you can normally think and ask yourself – is acrylic paint flammable?
Acrylic paint is mostly water-based. It is not flammable when wet. It can be flammable when dry. And some solvents or thinners can make acrylic paint flammable.
Varnish and polyurethane are oil-based and are flammable. However, in this guide, we’ll especially explain all relevant things about flammability and acrylic paint. Let’s read until you get the right answer.
Next: Learn Hydro Dipping with Acrylic Paint
What Does Flammable Mean?
Flammable and combustible are two different things. Before knowing what flammable means, we should know about flash points.
The flash point is the minimum temperature when a material ignites if that is exposed to any of the ignition sources. This temperature can make the difference between flammable and combustible. The flammable materials come with a lower flash point and it’s lower than 100°F.
Remember that acrylic acid has a flashpoint of 124°F. Its autoignition point is 820°F. Acrylic acid helps acrylic paint to give it a liquid form.
To sum up the discussion, flammable elements can ignite at regular working temperatures. They have a very lower flash point. Some examples of flammable materials are grass, paper, rubber, etc.
What Does Combustible Mean?
The combustible material has a higher flash point. This flash point is generally above 100°F. It means combustible materials do not burn at regular working temperatures. To burn them, you’ll need higher than regular temperatures. Some combustible items are paints, coal, and aluminum.
What Are the Characteristics of Acrylic Paint?
Water-based paints have some unique features than oil-based paints. Acrylic paint is water-based and it comes with the following features.
- Acrylic paint provides water soluble color when it is wet.
- The painted surface remains free of chips and cracks. When it’s dry, it’s permanent and offers flexible colors.
- This paint is softer when the weather is warm and it’s not enough flexible when the weather is cold.
- It dries with natural air. Thinner paint films within 10 to 20 minutes and thicker paint films within 1 to 72 hours.
- It comes with little odor. It’s not flammable and it’s also non-toxic. To maintain its quality, use it with non-toxic and nonflammable mediums.
- Avoid mixing it with oils and turpentine. Mixing it with acrylic mediums gives better results.
- The paint is easy to clean. Only soap and water can do the cleaning job properly.
Is Acrylic Paint Flammable?
First of all, check how acrylic paint is made. There are two main types of paints; oil-based and water-based. Oil-based paints are generally flammable. On the other hand, water-based paints are not flammable.
Acrylic paint is water-based and that’s why this paint is not flammable and combustible. However, some relevant situations and elements can make acrylic flammable.
Spray paints are flammable in aerosol type. All other oil-based paints are also highly flammable and combustible. So, you should take extra care when using them.
You can use acrylic paint for different projects in different weather conditions. This paint can be exposed to flames and heat to create versatile effects. You will be always safe if you use this paint in its normal wet form.
Is Acrylic Paint Combustible?
Acrylic and latex paints are water-based. Therefore, they’re not flammable. As combustible materials have higher flash points than flammable materials, acrylic paints are not combustible too. Due to thinner and solvents, these paints can be flammable. However, oil-based and spray paints can be flammable and combustible with higher temperatures.
Can Acrylic Paint Catch Fire?
It’s really great to use water-based paints. They’re safe to use. When they’re in liquid form, they will not catch fire. As acrylic paint is made of a water-based formula, it can’t catch fire.
Solvent-based paints are generally flammable and can easily catch fire. Some of the paints that can catch fire are alkyd, enamel, and lacquer paints.
Is Acrylic Paint Okay with Heat?
Nothing is okay with infinite heat. But to a certain level, you can heat acrylic paint. For some particular projects, people need to increase the heat to a specific level. After completing the project, they make sure the paint is dried using a heat gun or blow dryer. However, you should do it in a well-ventilated area.
Dry paint can be heated but you should be more careful about wet paint. It’s not a good idea to heat the paint over 90°F if the paint is wet.
In most cases, increasing the heat of acrylic paint to an extreme level is not recommended. This paint can release chemical elements while increasing heat. If your workplace doesn’t have enough ventilation system, this can be very dangerous for your health. The fast-drying technique can accelerate the chemical omit process. Make sure the blow dryer is set on lower heat, which will prevent the paint to become too hot.
Note that dried acrylic paint can easily withstand temperatures maximum of 300°F. The paint will not melt below this level of temperature. Acrylic paint has stronger heat tolerance but above 300°F, this paint can be melted. However, acrylic latex paint can withstand a bit higher temperature like 320°F.
Can I Put Acrylic Paint in the Oven?
After painting something, you may want to heat cure and in that case, you’re confused about putting acrylic paint in the oven.
Don’t worry; you can put acrylic paint in the oven. But you can do this only for two items; glass and ceramic. These items are oven safe and will not emit any toxic elements like plastic. It’s always recommended to check paint’s specifications and that item’s specifications that you’re going to heat cure in the oven after painting.
Not that baking acrylic paint will reduce the time to complete a painting job. You can apply this method to ceramic mugs and plates. A normal oven can do the job. You can use a toaster oven for curing. However, make sure you’re not taking an oven that is mostly used for preparing food. Take an oven that is previously used for the painting project and will be used for the same type of other projects.
After painting your ceramic mug, let it dry properly. Put the mug in the oven and preheat the oven for 300°F. When you notice the beeps of preheating timer, bake the paint for about 30 minutes. After 30 minutes, turn off the oven. Wait an hour and finally, bring out the painted mug from the oven.
What Happens if Acrylic Paint Gets Hot?
Keep in mind that 90°F is something that’s very important for acrylic paint. Never think of heating the damp acrylic paint above 90°F. The extreme temperature or the temperature above 90°F will create so many problems in your painting project.
When the paint is wet, the excessive temperature will cause the paint to blister, crack, and bubble. If you have already done some painting projects, possibly you noticed that heat seriously affects the adhesion process of paint. To prevent peeling off of the paint, you should avoid the fast-drying method.
When drying quickly, this paint can also omit chemical fumes. So, to keep the environment safe and prevent health issues, you shouldn’t increase the temperature above 90°F until the paint is dry.
See what happen if you apply heat on acrylic paint:
Is Acrylic Latex Paint Flammable?
We have already known that acrylic paint is water-based. Acrylic latex paint is also made in the same way. As this paint is water-based, it’s not flammable. Sometimes it may contain flammable solvents and in that case, acrylic latex paint can catch fire. It can be flammable when it’s in polymer form (hard).
Remember that acrylic latex paint contains water-soluble base and acrylic resin. It’s ideal for using for interior and exterior.
Is Acrylic Lacquer Flammable?
Acrylic lacquer paint comes with some advantages but this paint is flammable and toxic. It dries quickly and lasts longer. For these qualities, it has many uses. However, you have to be always careful about its flammability.
This paint offers high gloss finish. You will find this paint using on wood furniture and automotive finishes.
Is Acrylic Paint Flammable when Dry?
In general, acrylic paints are not flammable. But after drying, they become a new substance which can be flammable. The new substance is actually plastic polymer. If we say more accurately, the substance is polymer hydrocarbon that can catch fire if exposed to oxygen or air above its flash point.
Keep in mind that acrylic paint can lose its actual color and beauty when exposed to hot air or temperature for a longer time. If you try to dry the paint too quickly or slowly, you will need to be careful in both cases.
To avoid cracks or non-uniform colors, make sure to dry the paint in a medium speed.
Final Thoughts
There are different types of paints; some of them are flammable and some of them are nonflammable. Water-based paints like acrylic paints are nonflammable. But in different conditions, acrylic paints can also be flammable. We have discussed most of the things connected to flammability of acrylic paints in this guide. Keep this guide in your mind and acrylic paint’s flammability will not be an issue while using it.
Only a hairstyle or hair color can bring a huge change to your entire look. But many do not want a hair color since not everyone wants a permanent solution. Yet, if you own a synthetic wig, dyeing it can help you for fulfilling your temporary fascination.
It is the most affordable and simplest way to have a different hairstyle and many choose to do it with acrylic paint. Therefore, people often search for ways on how to dye a synthetic wig with acrylic paint.
Acrylic paint is a great option to dye your synthetic hair. It keeps the hair and its softness protected by not hurting the fibers. Also, giving a vibrant look, acrylic paint can make your hair look new and fresh again.

While applying on the wig, mixing the paint with rubbing alcohol brings the best result ever. We are sure on this point that you want to know in detail. So, let’s discuss in-depth because superficial knowledge can lead you to danger.
Also Read: Ways to Hydro Dip with Acrylic Paint
What Can I Use to Dye a Synthetic Wig?
Synthetic wigs come with hair strands of artificial materials. They are made of different kinds of fiber materials including acrylic, polyvinyl, polyester, and all. That is why regular hair colors do not work on them. In fact, the components of the usual dye color only damage the strands of synthetic wigs. Nonetheless, there are many materials that you can use to dye your synthetic wig. Some of them are given below.
- Ink
If you can maintain the required carefulness, you can use ink for dyeing a synthetic wig. There are many risks in using inks for dyeing wigs. Ink tends to fade often and once it leaves a stain on anything it is hard to get them off.
Also, if you bring the dyed wig with ink close to the water you cannot even imagine the disaster it will cause. So, be extra careful and slowly move forward while dealing with ink to dye your wig.
- Marker
A marker that is resistant to water and comes with your desired color tone is also a countable material for dyeing synthetic wig. It is also a convenient material with easy applying facilities especially when you want to make the highlighting only. Though it takes some time yet the result is pretty good. You can apply it on some curly strands of your wig. After applying the marker, let the strands dry and then comb the wig.
- Colors Made for Synthetics
There are different colors available in the market in both liquid and powdery forms for dyeing synthetics, fur, plastics, and related materials. They come with a wider range of color options to offer your desired shade. Applying them to the synthetic wig is also easy. But make sure you are following the instructions before getting started.
- Fabric Paint
Fabric paints are often suggested by professionals in the case you want to dye your favorite synthetic wig. These paints are also the best option when you want to get your desired shade. You can also mix the paints to bring your required color. Nonetheless, you need to dip the wig in the paint and water solution for about three days to dye it properly.
Can You Use Acrylic Paint to Dye Synthetic Hair?
We have already mentioned that fabric paints are best suited for coloring synthetic hair wigs. And acrylic paint is so far the best and fair solution to this issue. If you want to keep your wig from being damaged, you can dye it with acrylic paint without any second thought. It is also a great idea to give a new look to your pesky wig.
To dye your wig with acrylic paint, you won’t have to bleach the wig. Bleaching wigs might destroy the fiber materials especially when it is synthetic. Additionally, acrylic paint works great if your synthetic wig is light-colored. So, yes, you can certainly use acrylic paint to dye synthetic hair.
How to Dye a Synthetic Wig with Acrylic Paint?
Dyeing synthetic wig with acrylic paint is the easiest thing on earth. Anyone can do this if he or she knows the process. So, let’s get to the process step by step. But before that, you will need some materials near your hand for the completion of the process.
Materials Required:
- A light-colored wig
- Wig head
- A stand
- Required acrylic paint
- A bowl
- Plastic bags or newspaper
- Hand gloves
- Tinting brush
- Comb
- Clips
- Hairdryer
Now that you have got everything near your hand, it is time to start with the steps one by one.
Step – 1: Make a Setup
To be done with the entire process, first of all, you need to set things up to create a better working environment. Wherever you are working, make sure the place is well-ventilated.
Moreover, since this task is a bit messy, wrap the floor with plastic bags or cardboard pieces to protect your place. You can also use newspapers for covering up the workstation. After covering the area, set the wig head on a stand along with the synthetic wig on the head.
Step – 2: Make a Solution
Method 1: Take rubbing alcohol in a bowl and then mix the paint. Well, here you need to do some calculations. If you take excess rubbing alcohol and add only a little amount of acrylic paint, it will provide a light tint on the wig.
On the other hand, if you add excess paint to the little amount of rubbing alcohol, it will give a darker color to the wig. Now, it is up to your need and requirement. So, making a solution to maintain a balanced ratio is a bit tough.
However, if you mistakenly make it darker and already apply it, making it lighter is a bit tough. Still, you can slightly make it lighter if you dust the wig with corn starch. Baby powder also helps a bit in this purpose.
Method 2: You can also make the solution in a small spray bottle. Pour about 3 tablespoons of the rubbing alcohol in the sprayer bottle. Add acrylic paint about 1.23 ml in the bottle and shake it well.
Depending on the amount of using rubbing alcohol you can make your solution more or less opaque. If you would like to have a lively color, then add less amount of the compound. Increase the amount if you desire for a lighter and translucent color.
Step – 3: Section off the Wig
It is an optional step but it will make the process easier. Dyeing the wig according to the sections of the wig makes sure an even distribution of color. So, start sectioning the strands from one side of the wig.
When you section off some portion of the strands, make sure to clip them up. The clips will hold up the sections properly and separately so that you do not feel trouble while dyeing them. This way, keep sectioning off the entire hairs of the synthetic wig.
Step – 4: Start Dyeing
At this point when you are done with separating the wig strands in sections by sections, it is time you start to dye. But before that, put on the hand gloves. Now start dyeing using a tinting brush. Do not worry about messing up. You have covered your working area and you are dyeing the entire synthetic wig using the same acrylic paint solution.
If you are going to spray the paint, then make sure you spray each section keeping a distance of about 6-inches. Spray all the sections properly leaving no strand uncolored. Let all the strands be saturated with the paint.
Step – 5: Air Dry the Wig
After applying the paint to the wig, let it air dry for up to two hours. Be aware of the fact that during air drying, the applied paint might drip off the hair. So, do not move the stand from the covered area. Now, to check if the wig is dry properly, run your fingers through the strands. If your fingers catch paint, then let the wig dry for one more hour.
Step – 6: Rinse the Wig and Dry Again
When the wig dries completely, rinse it with water. Make sure the water is cold. You will notice some paint is coming off as well while rinsing. That is normal since only the additional paint is coming off the wig. So, keep rinsing.
After rinsing properly, dry the wig again. Use a hairdryer this time. When you are done, comb the synthetic wig and see the result. I am sure your first attempt has come out to be a great one.
How Long Does Acrylic Paint Hair Dye Last?
Generally, acrylic paints come with highly durable components. Once you apply the paint on a synthetic wig, it is going to last for about six weeks and more. If you wash your wig frequently then it might last for about four weeks.
Conclusion
So, now you know the process to dye an old synthetic wig with acrylic paint. It is easy but requires some patience. Even though there are various options and materials to dye synthetic hair yet acrylic paint does it way better. This paint is capable of giving a desired long-lasting color to your favorite wig without even tangling the strands.
Moreover, the process might seem a bit messy and time-consuming yet it is a cheap way to fulfill your desire. So, grab your desired color from the acrylic paint and get started with your wig. Happy dyeing!
Thinking of adding some artsy touches to your leather biker jacket? Let me help with ideas: how about framing a “burning wheel” on the back with acrylics? Aah, just imagine that cool and classy leather jacket!
People might say that you can’t use acrylics on leather. But that’s not true. The thing is that you need to seal the paint to protect your precious artwork from chipping. But do you know how to seal acrylic paint on leather?
No worries, I got your back. From this article, you will get to know pretty much everything about sealing acrylics on leather. Keep reading to gather some interesting and useful info to brush up on your creative skills.
Also Read: Sealing Acrylic Paint on Glass
Why Do We Need to Seal Acrylics on Leather?
Before we get started with sealing acrylics on leather, let’s find out why we are using acrylics for leather and why we need to seal it.
As I said before some people might say ‘it won’t be a good idea to use regular acrylic paint on leather’. They might also add ‘why not leather paints’? ‘Aren’t they the best paint for leather?’
The answer for both statements would be: firstly, acrylics are not that expensive, so you can save money on paints. Secondly, acrylic contains a wide range of vibrant color shades. Thirdly, they are very popular and you can easily find them in art and craft stores near you.
Sometimes paints tend to chip or flake off due to various reasons such as bad preparation, weather conditions, improper surfaces, and so on. And this might happen to your acrylic paints on your favorite leather surfaces too. So, to protect your precious and timeless artwork from peeling off you need to seal the paint.
Another thing is: nothing lasts forever and your acrylic artwork is no exception. But you can make it last comparatively longer if you can protect it from the things that might cause harm to it. So, to protect your painting from those risk factors, you need to create a barrier between them and the paint by applying a sealant over the paints.
And lastly to protect your artwork from fading or discolorations, sealant helps a lot. So, to turn dusty old leather surfaces into masterpieces that stay young and vibrant for a long time, all you need is some acrylics and proper sealing techniques.
How to Seal Acrylic Paint on Leather?
Now you know why we need to seal acrylic on leather, it’s time to learn how you can seal the paint on leather. Let’s begin with the basic steps to seal acrylic painted leather surfaces.
Step 1: Preparing the Surface
This is one of the most important steps for sealing acrylic paints on leather. A bad prep can easily ruin your beautiful artwork.
First, make sure the leather surface is completely dry. If you have just finished painting the surface, don’t rush to apply the sealant. Give it some time to dry properly. Do not use sealant over wet paints.
After you make sure the surface has dried properly, it’s time to wipe off all the dust, debris, dirt, and the likes. Never seal your paint without cleaning it properly. If you skip this step you will end up getting dust and dirt trapped inside the sealant.
And trust me you don’t want to see your beautiful masterpiece look like the neighborhood of Oscar the Grouch from Sesame Street! So, to achieve a museum-quality masterpiece, be serious while preparing the leather surface.
Step 2: Sealing the Acrylic
When it comes to sealing acrylic paints with sealants, you have 2 options in hand; spray or liquid sealant.
Sealing with Spray Sealant:
If you are a busy person and you want everything to be as quick as possible then I would suggest you go with spray sealants. Coating the surface becomes comparatively quicker with spray sealants. They are clear and allow you to choose from a range of satin, matte, or just regular glaze.
Now, let’s check how you can seal the acrylic paint with a spray sealant.
- First, choose a spray sealant that works on leather.
- Before starting to apply, read the packaging carefully. Follow all the instructions provided by the manufacturer.
- While working with spray sealant, it’s best to work in an open area. If you don’t have any open areas in your place, make sure you apply them in a well-ventilated room.
- Now you are ready to apply the sealant. Spray it while keeping a little distance from the artwork. Cover every detail of paint using a back and forth spraying style. To evenly spray the sealant, don’t spray in a particular spot for a long time.
- It’s time to give some time so that the first coat of your sealant sits properly. The drying time may vary from brand to brand. So, it’s necessary to read the instructions from the back of the sealant’s packaging. Apply the second coat after the manufacturer’s recommended waiting period is over.
- If your art piece needs more coats, apply the sealant in the same manner.
- After you are happy with the final coat, keep it in a safe place and let the item rest for a long time.
Sealing with Liquid Paint Finisher:
If you are not always in a hurry, rather you take your time and reach your goal like a pro, plus you like to keep things “old school”, then this one is for you. Let’s begin.
First, take a look at the things you will need:
- A bowl
- Water
- Wool dauber
- Liquid paint finisher
Now, here are the things you need to do:
- Take the paint finisher and mix it with water. Always follow the instructions provided by the manufacturer.
- Use the wool dauber to apply the mixture to the leather surface. Make sure you keep the coat light and don’t soak the leather surface.
- Wait for some time to ensure the first coat sits properly. Follow the waiting time provided by the manufacturer.
- If it requires more coats, apply it in the same manner.
- Finally, let the seal rest for a proper amount of time.
Step 3: Finishing Off With Waterproofing Spray
Applying a waterproofing spray makes the acrylic sealant complete its work. This is for further durability and protection against moisture and other substances that might damage the paint.
The waterproofing products come in two forms; sprays and brush-on liquid. Both of them work well but make sure you choose the right type of product that goes with acrylics. Follow the manufacturer’s instructions and apply the product over the painted area. After you are happy with the final application, let it rest for 24 hours or a bit more.
Okay, now we are done with the basics of sealing acrylics on general leather surfaces. Now it’s time to check the sealing procedures of some specific leather products. First, let’s take a look at how to seal acrylic paint on shoes?
How to Seal Acrylic Paint on Leather Shoes?
The sealing process of a leather shoe is almost the same as the basic leather surfaces. But in the case of leather shoes, you need to ensure a little extra protection for the paint because it will have to withstand the damages due to excessive usage and harsh weather conditions. Though it won’t be that much close to waterproofing sprays it’s worth using.
Depending on your arts on the shoes, you can pick a variety of finishes from satin to matte. But no matter which one you pick, never forget to check if it is compatible with leather or not.
Now for the application, do this:
- Take a sponge brush and the sealant.
- Start applying the sealant with the help of the sponge brush. Make sure you are applying it in thin coats.
- Cover the seams properly to achieve a nice and polished leather surface.
- Let the sealant rest for at least 24 hours.
How to Seal Acrylic Paint on Leather Jackets?
Ever wondered where to find those cool custom biker jackets? Chances are: you might never find one exactly as you saw on the road! This is probably because that was a one-of-a-kind hand-painted jacket! But don’t worry, you can paint your leather jacket and make it a masterpiece that catches people’s eyes too.
Here is what you need to do:
- After you finish painting your design let it rest for a while, make sure the paint sits properly.
- After the paint is dried properly, remove all the dust and debris.
- Now apply the finisher with a brush. The techniques are quite the same except for the workpiece you are working with. So, apply it with confidence.
- Finally, after you are done with the application, let the sealant rest for roughly 24 hours or more.
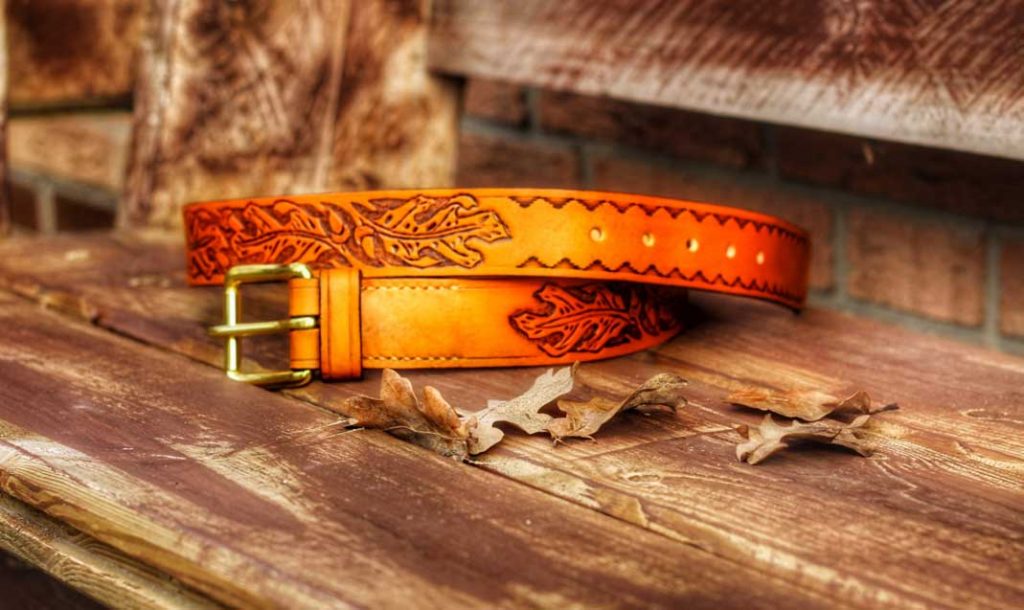
After you gain a little confidence, you are ready to complete your total outfit. You can paint and seal acrylic on your leather wallets, leather laptop bags, hats, and even belts.
So, instead of falling into an infinite loop of watching cat videos compilation for hours and hours, you can spend some time on your creativity and turn old leather surfaces into masterpieces.
Learn How to Seal Leather With Acrylics:
Final Thoughts
For implementing and displaying your creative ideas I can’t think of a better duo than leather and acrylics right now. The problem with acrylics on leather is that your artwork may lose its beauty with time.
To preserve the beauty of your timeless artwork and make it look new even after a long time, sealing the paint is a must. Keeping this guide in mind, you can easily seal your painting ideas on general leather surfaces.
So, what are you waiting for, grab your leather jacket and start preparing it for the next bike trip to surprise your biker bros.
Sandpaper, one of the most useful things in your toolkit; can be used for making a surface smoother, removing a layer of old paints, or making a surface rougher.
You might also want to put it on the toilet paper holder just to check how Newton’s first law of motion (‘an object will not change its motion unless a force acts on it’) works on your family member who spends too much time on the toilet! That’s highly not recommended though.
But we are not going to that discussion. Our topic at hand is can you sand acrylic paint? So, let’s stick to our topic and go through some other relevant questions to give you a clear overview of the topic. Let’s begin.
Important Read: Can You Wash Acrylic Paint?
Can You Sand Acrylic Paint?
To answer the question in a pretty straight forward way: yes, you can sand and can sand acrylic paint. In fact, you can use sandpaper on acrylic paints for different reasons such as cleaning up some areas, adding some effects and textures, or just fixing some mistakes here and there.
Are you determined that you are going to sand acrylic paint? Always remember the following three pieces of advice from the “wise old man” so that your work-piece doesn’t get messed up entirely.
- Always use sandpaper with the right grit.
- Check the quality of the paint you are working with.
- Never try sanding before you master the right technique.
That’s pretty much everything from the “wise old man”. Now let’s move on and check out if sanding acrylic paint is safe or not.
Also Read: Water Dipping Painting with Acrylic Paint
Is It Safe to Sand Acrylic Paint?
Yes, it is safe to sand acrylic paints as long as you are using the sandpaper with the right grit and you apply the proper sanding techniques, just like I said before.
If you start to sand your art piece without choosing the sandpaper with the right grit your art piece could end up getting completely ruined.
Another thing is you should always be careful about your fingers when sanding, it doesn’t matter if you are an amateur or a professional. You may get badly injured. So, take precautions, better safe than sorry.
What Sandpaper Do You Use for Acrylic?
There are tons of sandpapers out there in the market. Different sandpapers come with different grits. And for your information: grit is basically the size of the particles of abrading materials used on the sandpaper. Sandpapers with higher grit make smooth finishes and lower grits make the scraping of material easier.
So, which sandpaper is ideal for sanding on acrylic paints? Which one should I buy?
Well, in our case we are sanding on acrylic paint to create some effect or something like that. So, we don’t need sandpapers with higher grits, they might damage your work if you vigorously use it. So, you need to go for sandpapers with low grit, like 100 to 120. But don’t go higher than that.
Which Surfaces Are Ideal for Sanding?
Before we answer this question, let’s check out which surfaces are good for acrylic paints. The answer would be glass, metal, or wood. So, if you choose any of these materials for painting acrylic, sometimes it’s better to make the surface smooth first. It helps to achieve a nice and even paint finish.
Now, to answer which surfaces are ideal for sanding would be the same; glass, metal, and wood. You can sand the surface first if you are working with any of these materials. And after your artwork dries, this time you can sand on the paint itself for adding textures and effects if you want.
Next Read: Does Acrylic Paint Create Flame?
Can You Sand Down Paint on Canvas?
Ever thought of sanding the paint down directly from the canvas? Some people might. And this section is dedicated to them.
Definitely you can sand down the paint on canvas if you find the paint too bumpy after it is completely dried. You should pick sandpaper with a fine grit and sand it carefully on the paint. But be careful, don’t apply too much pressure or don’t overdo it. Trust me; you don’t want to ruin your artwork by sanding the canvas itself.
Can You Sand Acrylic Paint on Wood?
Yes, you can sand acrylic paint on wood. In fact, wood goes perfectly with acrylic paints. To achieve the best results when working with wood and acrylic paints, you need to prepare it first.
How to prepare wood for painting? Well, it’s easy just sand the areas gently that you want to paint. Sanding the wood will make it much easier for the paint to adhere to your painting surface and give a dazzling look after it is completely dried.
Is It Vital to Dry Acrylic Paint before Sanding?
It is necessary to give some time to make sure that your artwork is completely dried. You must give the artwork enough time to dry all the layers, not just the surface layer. Because if you sand down the artwork without ensuring that all layers are perfectly dried, you might end up messing up all that hard work.
So, if you want to add some effects, textures, or just cover up some mistakes you should always give the art piece enough time to dry. After you feel it’s dried, you may use any fine sandpaper and sand down the desired areas of your artwork.
How to Sand an Acrylic Paint?
Okay, it’s time to sand an acrylic paint practically. But before we get started you need to collect some materials to start sanding the acrylic paint. So, here are the things that you need to collect:
- Acrylic paints
- Sandpaper
- Canvas
- Wood
After collecting the materials we are ready to go. Now, let’s check out the steps that you should follow.
Step 1: Sanding the Surface
The first step to sand acrylic paint is sanding the surface. You may also call it as a prerequisite for sanding an acrylic paint.
If you are working on surfaces like wood, metal or some substances like the acrylic gesso primer, you should sand these surfaces first.
For your information: acrylic gesso primer is a substance similar to paint and it is used in the canvas for preventing acrylic paints and oils from getting soaked through the canvas fabric.
Okay, back to our topic. If you have applied the gesso primer, you will notice that it not only sealed the canvas but also changed the texture of it. So, to make it smooth and ready for applying coats, use sandpaper with a good grit.
Step 2: Sanding the Acrylic Paint
Ever heard of impasto technique? Yeah, just like Van Gogh’s “The starry night”. If you use impasto technique there is a possibility of creating some rough textures. So, the second step will be removing those unwanted rough textures using sandpaper with a fine grit.
Wet the acrylic first because sanding acrylic causes dust and the dust might cause health problems if you inhale it. You can also do it the other way by soaking the sandpaper itself, this will work the same.
And finally, use the sandpaper in a gentle motion and even out those rough, unwanted textures.
Step 3: Sanding for Final Decorations
It’s like the opposite of step 2. In this step you can add rough texture to your artwork. If you want to give your finished artwork a satin like appearance you can sand down the paint gently. This will remove the shine and give you a nice rough acrylic paint.
The other benefit of sanding is that it allows you to make some special effects on your artwork. You can easily make an artwork that looks like an aged masterpiece by sanding on it.
To make your artwork look time-worn and rusty, first you need to drip or spray multiple layers of paint on the canvas. And then after the last layer is completely dried, sand down your desired coats of that paint using fine sandpaper. This will reveal the color beneath and give you a nice distressed look.
Conclusion
Sanding down acrylic paints can be very useful in various ways, from fixing some spots here and there to adding mind blowing effects and textures.
Perfect sanding requires patience and proper techniques. You may not have the skills now and you can’t develop skills in just a day or two. That’s why keep experimenting on your artworks to master the techniques to achieve your desired finish.
But don’t experiment on Newton’s first law of motion using sandpapers; this might make someone say ‘you guys sit, standing is fine for me for a couple of days’!
Acrylic, a water-soluble, extremely versatile, and fast-drying paint.
With some unique characteristics, this paint makes a heavenly combination with glass. From DIY glass ornaments to decorative glass bottles, this nontoxic paint takes the color combinations to a whole new level.
However, the bond between glass and acrylic is not that strong. Once you start using any acrylic painted glass items, you will notice the paint is gradually chipping off. So, if you were thinking of painting glass items with acrylic, you should think about how to seal acrylic paint on glass first.
If you don’t want to watch your masterpiece getting completely vanished after a couple of uses, this tiny guide is here to help. Follow this quick guide to learn the secrets of sealing acrylic paint on glass.
Also Read: How to Hydro Dip with Acrylic Paint?
Things to Do before Sealing Acrylic Paint on Glass
There are a number of things that you need to do before sealing the paint. Take a quick look at these before you start sealing acrylic paint on your glass ornaments.
1. Choosing the Right Type of Acrylic Paints
The first step to achieve a long-lasting color on your favorite ornament or artwork is choosing the right type of acrylic paint. What do you mean by that? After all, acrylics are acrylics, aren’t they all the same? Well yes, but actually no!
Different types of acrylic paints work well on different surfaces. Acrylic enamel paint is one that works great on smooth surfaces like glass. Also, the good quality of the paint makes a significant change in looks and ensures long-lasting. High-quality paints are easier to work with and they produce comparatively brighter colors. So, don’t skimp on this.
Another important thing is the opacity of the paint. And this actually depends on your artwork, if you are going for artworks like a decorative glass bottle, use translucent paint to make it light to pass through. But if you are thinking of long-lasting solid color, go for paints with more opacity.
2. Cleaning the Glass Surface
Glass is not an ideal surface that goes well with paints and decorations. It has a nonporous and slick surface that makes it difficult for other materials to grip and stick to it. So, to make paints last long on glassware, we need to use a sealer. But before we use the sealer, cleaning the surface is necessary.
So, how do I clean my glass surface? First, wash the glass thoroughly in warm soapy water. Now, rinse and leave it for drying. After that, pour some rubbing alcohol into a cotton ball and clean the surface with it. Now, your glass surface is clean and quite ready for painting and sealing.
3. Drying the Artwork
Sealing the paint just after finishing the brush strokes is not a good idea. If you want long-lasting paint on your artwork, give it some time to dry properly. Though acrylic is a quick-drying paint, wait for an hour to make the paint dry properly.
Okay, we have completed all the prerequisites. Now it’s time to apply the paint and seal it. You can seal your artwork in two ways. You may use sealant to spray it with or you can bake it to get the job done. Let’s check them out in detailed steps.
How to Seal Acrylic Paint on Glass (The Sealant Methods)
There is always a lock to protect treasures inside the treasure chest. And when it comes to sealing acrylics on your favorite artworks, the sealant method is the lock of your artworks. Sealing acrylic paint prevents your artwork from wearing off, chipping, or even fading. All in one! Sounds nice, right?
Also, you can choose to perform this ‘all in one’ method in two different ways. Let’s check out the step-by-step process to seal your paint and find out which one is best for you.
Important Read: How to Sand Acrylic Paint Without Hassle?
Spray-on Sealant (Sealant Spray)
- Choosing the Sealant: For spray-on sealant, you should go with a glossy sealant. But you can also go with clear coatings like polyurethane coating.
- Read the Instructions: Reading the instructions are always helpful. You will find them on the back of the bottle.
- Mixing: For mixing the sealant, shake well for a few seconds.
- Spray the Sealant: Open the sealant can, and spray gently at least 12 inches away from your artwork. Cover the area by sweeping the sealant in a back and forth motion to achieve uniformity. To achieve an evenly sprayed layer, do not linger in the same spot for too long.
- The Second Coat: After 15 minutes of applying the first coat, your artwork is ready for the second coat. Apply the sealant in the same manner as the first one. Applying the sealant lightly is completely fine.
- The Third Coat: If you feel like your artwork needs another coat, wait for another 15 minutes and follow the same process.
- Let It Dry: Now, it’s time to keep the artwork isolated for at least 24 hours to let it dry. Make sure no one accidentally touches it before drying properly.
Brush On Sealant
Not comfortable with spraying? You can always go with the old-fashioned way, perhaps a paintbrush and varnish! What type of varnish should I use? Go for polyurethane varnish to achieve a rich glossy finish. Before you start applying the varnish, check out the steps for this method.
- Applying Varnish: Start applying the varnish gently with your brush. To save some varnish and protect your floor, make sure you put your glass item in a place just a little bit higher than the varnish container so that extra varnish can drip into it.
- Let It Dry: Leave it for drying for an hour.
- The Second Coat: After drying, follow the previous method to apply the second coat if required. You don’t need to go into details, just apply a light coat this time.
- The Third Coat: If you are thinking of further coats, give an interval of an hour after every coat and repeat the processes.
- Isolation: Once you are happy with your final coat, keep the glass item isolated in a safe place for at least 24 hours.
Alright, the paint sealing is done and the artwork is ready for some compliments. Now, which technique is better? To be honest with you, we suggest you go with the spray-on type as it gives advantages over brush-on type sealants.
There is one more method that can be used for sealing your acrylic paints. Let’s move on to the key steps of our next sealing method.
The Baking Method
It’s a fun method. It might remind you of Granny’s freshly baked cookies. But before having one more cookie and getting cavities, take a look at the steps of the baking method.
- Read the Instructions: Some acrylic paint brands provide their own baking instructions and suggest the ideal temperature for obtaining the best results. You will find it very helpful, so, definitely check that out. You will find it on the packaging of the paint.
- Baking: Put your glass artwork on a piece of parchment paper on a cookie sheet and place it inside the oven. Preheat is not required. Now, set the oven somewhere between 300 to 350 degrees and bake for 30 minutes. But make sure your artwork heats up and cools down gently. Otherwise, you may end up getting broken artwork.
- Let It Cool: Leave the glass item inside the oven for about 30 minutes. After the waiting period is over, carefully take out your masterpiece from the oven. If the glass item is intended for regular use like serving food or drink, wait for at least 72 hours before you take the first sip from it.
Voila! Your paints are now sealed and your artwork is ready to be displayed.
Things to Keep in Mind while Sealing Acrylic Paint
You have learned the secrets of sealing acrylic paint on glass. But just before you go, consider taking some useful tips with you.
- Do not use a matte finish for your artwork or jewelry. Always use a varnish or glossy polyurethane sealant.
- Before you begin any process, don’t forget to read the instructions on the packaging.
- Paint fumes can be harmful to health. So, always seal acrylic paint on the glass outside the house or in a room that has well ventilation.
- To protect the paint, use only hand washing, always avoid the dishwashers.
The Bottom Line
Seeing your paints last for ages is a type of joy that might never be expressed in words. Keeping this tiny guide in mind, you can easily seal acrylic paint on any of your artwork.
So, what are you waiting for? Make preparations, try any of these methods to seal acrylic paints on your artwork to make it last for generations.
Acrylic paint is the most convenient paint for its fast-drying characteristics and easy painting formula. As acrylic paint is water-based paint, it also creates less mess than oil-based paint. Besides all these advantages, acrylic paint comes with pigmentation that is best for different kinds of decorations.
However, because this paint is immensely versatile, the query ‘is acrylic paint washable’ arises so often. Therefore, we thought of providing you with the right ideas for acrylic paint and its characteristics.
As acrylic paint comes in different types, you’ll figure that not all kinds of acrylic paints are washable and this also depends largely on the material you are using for acrylic paint.
Even though some conditions of acrylic paint are washable, you need to gain the right knowledge to wash the acrylic paint without affecting the material. Let’s talk in-depth.
What Is Acrylic Paint?
To painters and hobbyists, acrylic paint is a renowned item for its significant features. Many artists and DIYers have found the paint beneficial for its various kinds. For immense pigmentation, this paint is filled with ingredients like silicone oils, stabilizers, synthetic resin, and so on. Though acrylic paint can be diluted with water, it is water-resistant after the paint is dry.
However, most of the acrylic paints are water-soluble emulsion. And this advantages the paint to dry super fast. Besides, washing off acrylic paint might be easier than oil-based paint, but still it’s a hard task when the acrylic paint is dried.
Is Acrylic Paint Washable on Skin?
First of all, acrylic paint is not for skin use. It is only usable on materials that require long-lasting decoration with a nice painting. However, several attempts can be taken if any parts of your body get attached to acrylic paint accidentally. The next few points will help you to get rid of acrylic paint to some extent.
Use Warm Water and Soap: If the paint is wet and has not dried yet, rinse the place with clear water. If the clear water doesn’t work properly, then using warm water with a mild soap might help in loosening the bond of the molecules of acrylic paint.
A continuous process of cleaning that body part affected with acrylic paint with warm water and a bar of mild soap with abrasive ingredients.
Use Baby Oil: Baby oil can bring good riddance if there is still some acrylic paint on your skin. You can use baby oil in a little bit tough situation.
Before applying baby oil, make sure the space is dry and then put the baby oil in the particular space.You can use a cotton pad to do the job of rubbing in case you don’t want your nails to get dirty. This oil helps to break down the oil ingredients of the paint and pulls out the paint eventually.
Use Rubbing Alcohol: Rubbing alcohol can be used if the stubborn acrylic paint doesn’t put off of your skin. Take a limited amount as rubbing alcohol is for other kinds of surfaces mainly. Don’t mind rubbing it gently on the spot and it will make the acrylic paint come out from the spot.
Use Acetone: For a rough and tough situation like if the acrylic paint is cured for many days, then acetone can help in washing off it. Because acetone comes with harsh chemicals and toxicity, it’s naturally not suitable for skin.
Therefore, to get a proper result you need to learn the proper use of the substitute. Soak a little piece of soft cloth with acetone and place it on the spot and let it penetrate through the paint for some seconds. This will work effectively and remove acrylic paints.
Is Acrylic Paint Washable on Fabric?
There is washable acrylic paint available in the market if you want. But mostly, acrylic paints will be set forever in your fabric if you add any textile medium or ingredient to it. Because the textile medium adds permanency, the acrylic paint doesn’t get cracked. Also, as long as it is wet, you can clean off acrylic paint from fabric.
But if the fabric is painted and heated to dry afterward, then there is less chance that you can get rid of the painting from your fabric. Using the right solution, you can wash the acrylic stain off your fabric. And denatured alcohol is the best solution for washing off the stain of acrylic.
You just need to pour a perfect amount of denatured alcohol on a cotton ball and rub it on the fabric. Let the fabric soak the alcohol for a minute because it will penetrate deeply into the stain and loosen its strength. After that, wash out the alcohol using a soft washcloth.
So, if you go asking ‘does acrylic paint wash off fabric’, then the answer is ‘fair yes’ in some pretty ways.
Is Acrylic Paint Washable on Clothes?
As clothes are almost like fabrics or a piece of fabric except they are mostly woven, acrylic paint reacts almost the same way it does to fabrics.
When there is an acrylic stain in your cloth, wash it off as soon as possible. But if the stain is cured already then apply the same procedure that we’ve discussed for fabrics above.
Besides using denatured alcohol or isopropyl alcohol, you can make a remedy using ammonia and white vinegar. Take an equal proportionate of white vinegar and ammonia in a cup. Then add some salt to it and mix the substances properly together. Moist the cloth and rub the stained space with the remedy using a sponge.
Apart from that, you can use dish detergent with warm water. Apply the same process as we have used for the remedy. You’ll get enough benefitted by adopting the solutions for sure.
Is Acrylic Paint Washable on Concrete?
As concrete provides a strong base, it can get rid of anything. According to that, it is also possible that acrylic paint can also be washed off of the concrete. As the paint is water-soluble, it will not take much time as well.
But it sure requires some labor. If it were an oil-based paint, then it would take a longer time and more labor. Besides, it would be a bad idea if you use acrylic paint on concrete.
However, there are several types of acrylic paint in the market for instance the latex-based acrylic paint that can be used on concrete. But for outdoor concrete, it’s still a bad idea.
To take off the acrylic stain from the concrete, you will need to first apply a sandpaper water solution to the concrete. Then rub the concrete with a sponge. The stain should be got off from the concrete already.
Is Acrylic Paint Washable on Wood?
Wood can naturally take the pigmentation of acrylic paint easily. Therefore, most artists take the material wood for staining or painting. Also, many people use the wooden floor to enhance the beauty of their house or basement. However, it’s not hard to clean a wooden piece if it gets attached to acrylic paint accidentally.
If the paint seems wet, wipe the place with a lint-free damp cloth immediately. As wood provides a strong surface, using some harsh chemicals will not affect the material.
Therefore, if the acrylic paint gets cured over time, use warm water and mild detergent or soap and wash the space properly. For severe cases, you can adopt acetone and pour it on the spot where requires. Then wait for seconds and let the paint come out from the wood easily.
Learn How to Remove Acrylic Paint:
Frequently Asked Questions
1. Can acrylic paint be washed off?
The answer is simply ‘Yes’. If you want your acrylic painting to wash off from a place you didn’t mean to paint earlier, then you can wash the place and remove the acrylic paint. Wet acrylic paint provides an immense chance to be washed off accurately and properly.
But if the painting gets cured, then you need to apply several softeners like mild soap or dish detergent to get rid of the painting.
2. Is acrylic paint permanent?
Talking of acrylic paint, it never is permanent paint. But you can make the paint last for many days or even years. The reason for its not being able to be permanent is because of its water solubility. Where oil-based paints last for many years, acrylic paint does not last that many days and get faded or dull.
However, by taking the great care of the acrylic paint, you can make it live as many days as you want. Sealing affects greatly to keep your acrylic painting alive and vivid for many days.
3. Is acrylic paint permanent on clothes?
If you want your acrylic paint to be permanent on your clothes then it can be possible. Then again, if it is unintentional that your clothes are affected with acrylic paints then they can also be removed at the same time.
Acrylic paint is permanent on clothes only when you draw a fancy design on it and set it using a hairdryer to dry the painting. After the painting is dry, it will last as many days as you want.
4. Is acrylic paint waterproof after it dries?
Being water-based paint, acrylic paint becomes water-resistant after it dries. It never becomes waterproof because the paint is easily soluble in water. Therefore, a lot of water can wash off acrylic paint from the surface eventually.
The only way you can keep your painting safe is to keep it away from water. Once it comes attached to water, the paint starts to lose its bond and you can see the acrylic paint coming off of the surface.
5. Will rain wash off acrylic paint?
For the outside surface, acrylic paint is not convenient to speak the real truth. It cannot stand harsh weather like terrible rainfall.
People mostly choose oil-based paint for outdoor surfaces because after it dries, it withstands any hard weather including heavy rainfall. Even though acrylic paint behaves well after it dries properly, it starts to fade away or peel when the painting is exposed to rain or moisture.
6. What do you use to seal acrylic paint?
Acrylic paint looks more vivid and alive after it is sealed properly. It also saves the painting from attaching dirt or debris to it. To seal acrylic paint a lot of varnishes are available in the market.
Varnishes come with different finishes. You can choose the matte finish, glossy or semi-glossy, or stain-finish varnish to seal the acrylic paint. You can also choose sealer spray to seal acrylic paint without any hassle.