You know that acrylic paint comes with so many benefits. It’s opaque, easy to use and clean, and it can be used in numerous projects including indoor and outdoor. So, you have planned to paint something with acrylic paint and some questions in your mind make you really confused.
One of the questions can be like ‘do you wet the brush before using acrylic paint’. Well, we’re here to give you in-depth idea about using paintbrush for acrylic paint. Do you need to wet it or not?
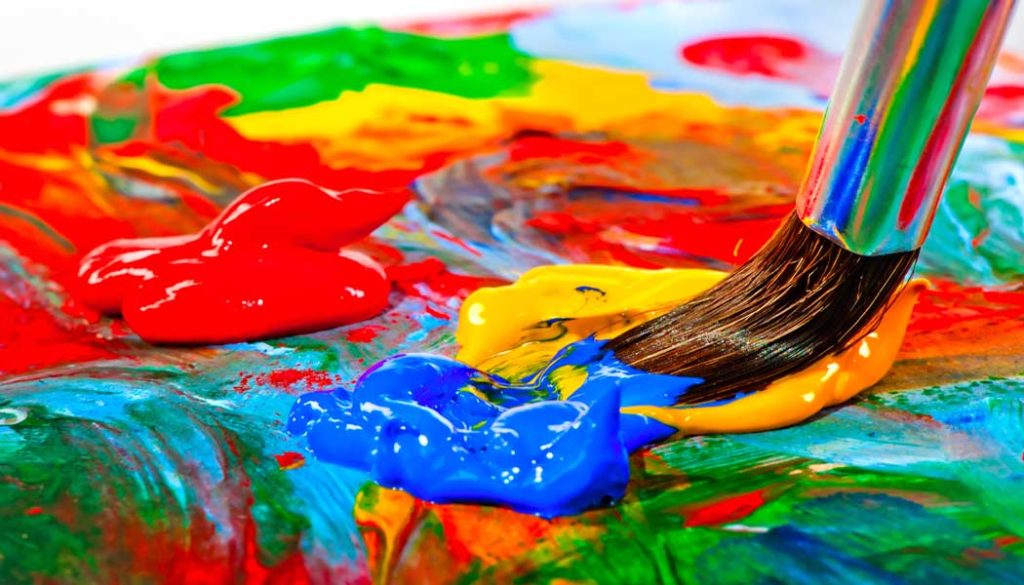
Normally, you don’t need to wet your paintbrush to paint with acrylic paint. To ensure smooth flow on the surface, you can use a little bit of water to wet the brush. Sometimes, a damp paintbrush helps to get your planned style on the surface.
To know more, keep reading the following guide.
Do You Wet the Brush before Using Acrylic Paint?
There are several types of paints available. Thus, not all types require the brush to be wet before applying the paint. However, acrylic paint to some extent does require the brush to be damp beforehand.
Now there is a bit of difference between being wet and damp. When you soak the paint brush in water it gets wet. But you have to remove the excess water first. Thus, when you remove the excess water, the brush becomes damp.
Nonetheless, there are several degrees of wetness of paint brush. Hence, you need to know first how wet the brush should be for applying acrylic paint.
However, acrylic paint requires its brushes to be damp with no excess water. Now you might ask how this damp paint brush works for painting. The answer is very direct and simple! A damp paint brush works better for transferring the paint from the brush to the project.
Moreover, it makes the application a lot easier. Also, it offers a smooth finish after painting. You can still, however, use acrylic paint with a dry brush. But you will see there is a drastic difference between the two applications.
Problems You Might Face for Using Dry Brush for Acrylic Paint
No doubt, you can use dry brush to paint with acrylic paint. But you should be careful about some unexpected problems as well.
- Unsatisfied Finishing
Using a dry brush does not allow a smooth stroke. Rather, making a decent stroke might seem difficult to you. Moreover, a dry brush creates lumps in the paint after applying it. Thus, getting an even paint job is tough with a dry brush.
- Requires Effort
It might take a lot of effort to finally finish the project with acrylic paint using a dry brush. Unlike a wet brush, dry brush requires a bit more pressure while making a stroke.
- Trouble while Blending
Again, a dry brush will not allow you to blend several colors together. So, you have to work with only one specific paint color which limits the implementation of your idea.
- Dries too Fast
Also, after applying paint using a dry brush, the paint dries too fast even before creating a strong bond with the project surface. Thus, you do not get a finish that will likely last long.
It is true that most of us want a paint job that will dry fast but of course, after the paint gets incorporated with the surface properly.
Also Read: Flammability of Acrylic Paint
Advantages of Wet Brush for Applying Acrylic Paint
- Makes the painting process a lot quicker and easier.
- Delivers a smooth, even, and perfect finish.
- There will not be any lumps in the paint.
- Can blend different acrylic paint colors altogether for application.
- Does not let the paint dry too fast after applying.
- No wastage of acrylic paint.
- The paintbrush remains in good condition.
Disadvantages of Wet Brush for Applying Acrylic Paint
- If the brush is too wet, then it will ruin the painting.
- The process of wetting the brush might seem a bit difficult at first.
When Not to Wet Your Brush for Acrylic Paints?
It is always better to wet or make the paint brush damp before using acrylic paint. It is almost like a requirement or sometimes more like a demand.
However, again there are times when you should not wet your brush for using acrylic paints. It depends on the art mostly. Only your subject of drawing can decide if you should wet the paint brush or not.
For example, you might want to draw grasses or other textured elements in your project. In such cases, a damp brush cannot bring you the right texture. Whereas, a dry brush can bring the right texture making the art look beautiful.
However, for using a dry brush, there are some tricks that you should follow. Otherwise, your artwork might come out as a failure.
- First of all, you have to use the right type of brush for this purpose. Dry fan paint brushes are considered best suited for such a task.
- You should not dip the entire brush into the paint. Just dip the tip portion of the brush in the paint and take just a minimal amount.
- Take a minimal amount of paint; apply it over your project surface. This way you will get brushy strokes that will look textured. If you make the brush wet in this case, you will not get the same quality and distinctness.
Is Using Water with Acrylic – Good or Bad?
Any professional painters out there will say that using water with acrylic is never a bad idea. In fact, in some cases, it is highly important. But again, in some cases, using water is not wise at all!
Thus, it is very important to know first when to use water and when not. If you remain unacknowledged of this fact, you will not be able to achieve the right effect you want.
So, to make yourself acknowledge the fact, you have to know the ingredients of acrylic paint. Basically, acrylic paint has two basic components such as pigment and binder. Pigment defines the paint color and the binder fixes the paint to the surface.
Also, there is another element that is required to break down the paint before applying and that is solvent. Different medium requires different solvent. However, acrylic paint requires water as a solvent.
Now let’s know how the paint works with and without water.
Without Water
Without water acrylic paint will create a glossy and juicy film layer over a surface. It will create the same substantial layer over the surface no matter whether the surface is non-absorbent or absorbent. Even on colored surfaces, acrylic without water will create the same kind of layer.
It is simply because the components of acrylic remain undiluted because of not using water. However, if you add 20% water to it, you will still get the same kind of glossy film. But this time it will be a bit thinner.
With Water
As you keep adding water, the paint film on the surface also gets thinner. But if you add excess water then it becomes a disaster. Even if you take the same ratio of paint and water, the result will not be satisfying.
Again, if you take only 20% acrylic but 80% water, the paint will be over-diluted and you cannot use it. However, a properly diluted paint will react differently on different surface types. It will offer a soft, even, muted, and matter layer over a surface that is absorbent.
Whereas, on a non-absorbent surface, the same paint will offer a puddled layer with a terrible appearance.
Thus, depending on your painting requirements, you can use water from 20% to 80% with acrylic paint and that would be totally okay.
Do You Need Special Paint Brushes for Acrylic Paint?
There are generally two types of brushes used for different paint types. One is natural and the other is synthetic. These two types offer different properties and using efficiency.
Natural brushes have bristles made of natural fibers. These natural-hair brushes are best suited for oil painting. Hence, applying acrylic paint using this brush can be destructive.
Instead, professionals suggest using synthetic nylon brushes for applying acrylic paint. These brushes are ideal for acrylic paint. They are affordable and more importantly, you can get both stiffer and softer versions of the brushes.
Moreover, acrylic brushes are highly wear and tear-resistant. Compared to natural bristles, these are water springier and tougher. However, the only disadvantage of the brushes is that they cannot hold a lot of acrylic paint at a time.
Continue Reading: Hydro Dipping Techniques with Acrylic Paint
How Do You Prepare Brushes for Acrylic Paint?
Preparing brushes is important for using any paint including acrylic ones. If the brush is new then it is more important to prepare. So, let’s get to know how you will prepare them.
- Removing Starch or Solution
This is the first thing to do. New brushes contain starch and mostly gum Arabic solution in their bristles. That is why they feel stiffer. Hence, you first need to remove the starch from the brushes. Nonetheless, removing is easy. Just swirl the brush in cool and fresh water.
- Take out Loose Bristles
It can happen to some brushes that come with some loose bristles. It is a common fact, not a production defect. Hence you need to remove them first; otherwise they will interrupt in the middle of the painting.
To remove the loose bristles, wet the brush and then squeeze the bristles gently using your thumb and index finger. This way the loose bristles will pop up and you can remove them. Be careful with the process or you will end up loosening all bristles.
- Wet Paint Brushes
Now before using acrylic paint, wetting the brush is important. Dip the brush in some water and then remove the excess water. Squeeze the brush by pressing it on a surface. Make sure the bristles are no more soaking wet but damp entirely.
- Now, Dip the Brush in Paint
When the brush is damp, it is ready for using acrylic paint. Dip the brush into the acrylic paint and apply to the surface. When you are done clean the brush instantly and you are done!
Learn The Basic Techniques to Handle a Paintbrush Whenever Using Acrylic Paint:
How Do You Keep Acrylic Paint from Drying Out the Brush?
You can keep the acrylic paint from drying out the brush by using an atomizer or mister. You can also fill a spray bottle with water and keep misting the palette with your acrylic paint. It keeps the paint moist and prevents it from drying out.
However, to get the best result, professionals suggest using distilled water. Nonetheless, normal tap water will also do well.
Final Thoughts
Now that you know the answer to the question ‘do you need to wet the brush before using acrylic paint’, the concept is clear to you now.
An artist will know what are the elements of his art subject and he will take decisions likewise. So, according to the need of your artwork, decide if you should wet your paint brush or not.
Have you ever heard of the color “burgundy” and wondered what colors make burgundy? Burgundy is a color that not everyone is familiar with, but because of its reddish-brown hue and purple undertone, artists like to use it in their paintings.
However, the color itself sometimes does not come in a tube. So people have to create a burgundy color by mixing other paints. And if you are one of those who don’t know how to make burgundy color, we got you. So what colors create burgundy?
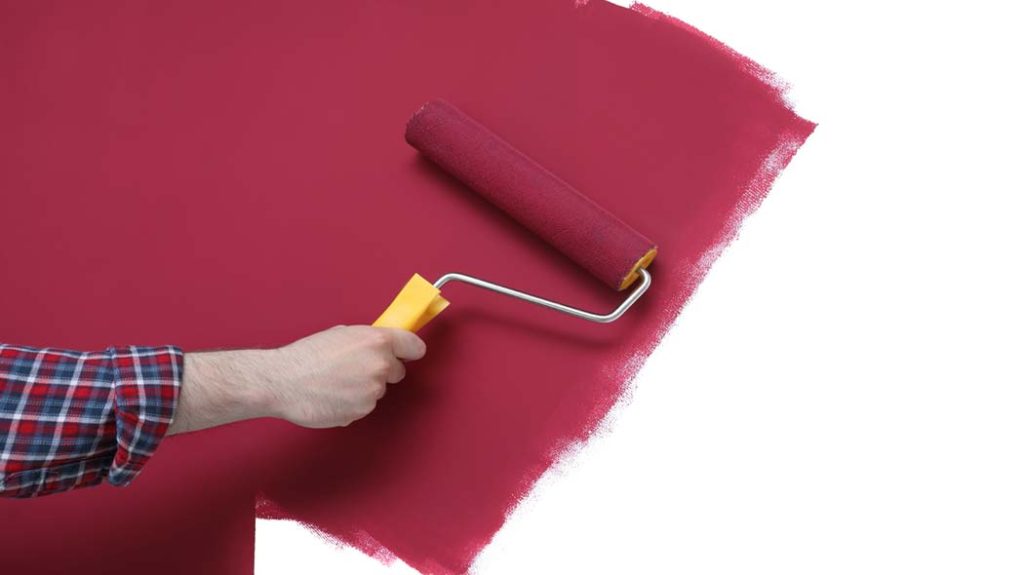
In simple words, mixing red with blue and brown will give you a burgundy color. But it is not the only way to get the shade burgundy; mixing red with green also gives a burgundy color. The tone of the burgundy color will depend on the proportion of colors you are mixing with.
To know the burgundy color guide, let’s dig into this article.
Burgundy Color Meaning (Basics)
The color burgundy means sophisticated, bold, and classy status. Burgundy symbolizes money, power, wealth, and ambition. People of high-class society use burgundy because it is also the color of a luxurious French wine.
Many people think burgundy is an ordinary name for a color, just like red or white. However, the name Burgundy has a history behind it. The name Burgundy came from a Germanic tribe, “Burgundians.”
After that, a French wine company named its product Burgundy for its distinctive red shade of color. Additionally, the name of the wine company could be derived from the French region named Burgundy. However, it wasn’t until 1881 that burgundy was officially recognized as a color in English.
Vibrant burgundy and old burgundy are the two types of burgundy colors available today.
Also Read: Cost of Painting a Light Pole
What Shade of Color Is Burgundy?
If you look closely, the burgundy shade is deep red with a brown and purple tint. You can also call it deep reddish brown. However, the shade of burgundy depends on the color you are mixing to make burgundy and the proportion of those colors.
According to color psychology, burgundy is a lighter shade of maroon color. However, calling burgundy shade maroon color can be wrong because burgundy has a purple hue. Moreover, burgundy has a cool tone because of its blue and purple hue. On the other hand, maroon has a warmer tone for its yellow and red mixture.
So, what shade of color is burgundy? The actual answer is not specific because burgundy is the middle shade of red and brown. You can also refer to burgundy as a deep red wine color.
What Colors Make Burgundy?
Primary colors (red, blue, and a little brown) make burgundy, and the shade depends on the ratio of those colors. If you add more red, you will get a brighter burgundy color. Adding more blue and brown will give a deep burgundy color. You can also use a little bit of purple color to give the burgundy color a purple hue.
You can also get a burgundy color by mixing red with a bit of green. So, primary colors are the main colors that make the burgundy color. Here’s how you identify what colors make burgundy:
Keep red and brown in your palette because they are the main colors for burgundy. Then slowly mix the blue color with the red color. You will get a slightly purple color by mixing red and blue. Then add the brown color little by little until you get the perfect shade of burgundy.
Another way is to mix two parts of red and one part of green to get dark burgundy color. This color is also known as vivid burgundy, which is used in hair color.
You can make burgundy color by RGB color space with 50.2% red, 0% green, and 12.5% blue (hex #800020). In the CMYK color space, burgundy or hex #800020 comprises 75% yellow, 50% black, 0% cyan, and 100% magenta. (Source: Canva)
In HTML code, burgundy color is known as #8C001A ( RGB: 140, 0, 26 – HSL: 0.97, 1.00, 0.27). You can use HTML color codes to get burgundy. For example,<p style=”color:#8C001A”>Your text here</p> .
Learn How Easily Make Burgundy:
What Colors Make Burgundy Icing?
Making burgundy icing can be difficult because of the consistency of icing and other paint is different. You might need to add more red or blue to get the perfect burgundy icing. Here is how you can make burgundy icing:
To make custom burgundy icing, you will need ready-made red, blue, brown, or purple icing. Another process is taking white icing and mixing red, blue, and purple food colors to get the perfect burgundy icing.
First, take red icing and slowly mix blue icing until you see a slightly burgundy shade forming. Then add brown-colored icing to get the perfect burgundy icing. However, do not over-mix those colors because icing colors can intensify after drying. You can also do the same method for food coloring with white icing.
What Colors Make Burgundy Chocolate?
Burgundy chocolate has a reddish brown color and a bit of the taste of wine. For those who don’t know what colors make burgundy chocolate, you will need only red and dark blue food coloring.
If you are using dark chocolate, you will need light blue for burgundy chocolate. Do not add brown because dark chocolate will be the brown shade for burgundy.
However, if you use white chocolate, you will need red, dark blue, and brown food colors to get burgundy chocolate. 3 drops of red food coloring, 2 drops of dark blue, and 1 drop of brown will give you the ultimate burgundy color. You can add more red or brown according to your desired shade of burgundy.
How to Make Burgundy with Different Materials?
If you are thinking what colors I mix to get burgundy, and then read this. Knowing the basic method of making burgundy color will let you make burgundy out of any material such as acrylic, watercolor, etc. Let’s check out how you can create a burgundy color with different materials:
How Do You Make Burgundy with Acrylic Paint?
For acrylic paint, it is easier to make a burgundy color. Here is a step-by-step method:
Step One
Squeeze a shade of red such as cadmium red, ultramarine blue, and black paint into your color palette. Take a palettte knife to mix them later. You need to squeeze ⅘ parts red, 2 parts blue, and one part black.
Step Two
Take your palette knife and mix ¼ of blue into the whole red color. You will see a purple tone is forming.
Step Three
To intensify the burgundy color, slowly mix the black paint with the previous mixture. Mix until you get your desired burgundy acrylic paint.
How to Make Burgundy with Watercolor?
The consistency of watercolor is watery; thus, you will need different proportions of burgundy.
Step One
Since watercolor has too much water, you will need dark red and dark green for this method. You will also need brown watercolor to make this paint.
Step Two
Mix two parts of dark red with one part of green watercolor. Make sure to check if you are getting the desired burgundy color.
Step Three
If you think your burgundy color is still lighter, add a little bit of brown watercolor to get the best burgundy shade.
How to Make Burgundy Paint?
Painting your home with burgundy colors will give you a sophisticated, classy look. It is also easy to make burgundy paint to paint your office, house, or a specific room. We will show you a specific method to make burgundy paint. You will need –
- Orange paint
- Blue paint
Step One
If you don’t have red color paint, you can easily choose orange to make burgundy paint. Take two parts of orange paint and one part of the blue paint box.
Step Two
Mix the blue paint with orange until you reach the desired burgundy paint. You can also add a bit of brown paint to the mixture to darken the burgundy color.
Step Three
Do a patch test before painting the whole house. It is because burgundy can be intensified after the paint has dried down. If you see the color is too dark, use a little bit of light red to make the burgundy lighter.
What Colors Go with Burgundy?
Now that you know how to make burgundy, it is also crucial to know what colors go with burgundy. The best color that goes with burgundy is a dark teal color. If you use burgundy as your home’s wall color, use a dark teal sofa to go with it.
Another color that goes well with burgundy is beige. The combination of burgundy and beige brings a minimalistic and aesthetic look to your house. You can combine burgundy with charcoal gray, purple, brown, and white.
Is Burgundy More Red or Purple?
Burgundy is between red and purple and is more of a reddish-brown color. Burgundy also has a faint hint of purple rather than being pure purple. Sometimes people mix burgundy with maroon, but maroon does not have any purple tinge. Maroon is a warm-toned color, burgundy is a cool-toned color in the color wheel.
You will understand the color burgundy if you see the French wine named burgundy. It has red and brownish color, and in the glass, you will see a slightly purple tint.
Is Wine Red and Burgundy the Same Color?
Not every color of wine is the same as burgundy color. The red color in the wine is from the grape’s skin. However, burgundy has a more intense color than red wine.
Red wine has more of a red color to it, and the color is lighter. It is because the consistency of the wine is watery. On the other hand, burgundy is a dark reddish brown color, which is darker than red wine. In other words, burgundy and wine red are nearly the same color, but not exactly.
How Is Maroon Different from Burgundy?
You’ll find burgundy and maroon in the same list of various red color shades. But maroon and burgundy are different colors.
Maroon color does not have any purple hints because it is made of red combined with brown. On the other hand, red, blue, and brown colors make burgundy. Burgundy gets its purple hue from the blue color in the burgundy, which makes it different from maroon.
How to Turn Pink into Burgundy?
It is easy to turn pink into burgundy. However, make sure to use the right proportion of pink to turn it into burgundy. Mixing too much pink will give you a light burgundy color.
You can turn pink into burgundy by mixing blue and red color. Mixing blue color with pink will give you purple. Then mix that purple with red color to get your ultimate burgundy color.
Final Thoughts
If you know what colors make burgundy, you can make burgundy color at home easily. Our burgundy color mixing guide will ensure you are getting the perfect burgundy color using different methods.
A sophisticated and classy person prioritizes the burgundy. Burgundy color has a rich history and gives a luxurious vibe. You can match any cool-toned color with burgundy.
Burgundy is a great color choice, whether mixing it to make hair color, home paint, or makeup. It is a versatile color that goes well with anything and gives a luxurious look.
We have all seen paint peeling off a plastic bumper. Whether the paint is just starting to get loose, or all of the paint has come loose and is hanging down, it’s a bad situation. The paint will begin to chip as soon as you begin driving around.
Initially, this small issue may not seem quite a big deal, but if you don’t take proper measures soon, it could result in a huge repair bill.

But how to stop paint from peeling off plastic bumper? In this guide, we will point out different reasons for this problem and how to solve it.
What Causes Paint to Peel on a Bumper?
When paint begins to peel on a bumper, it is usually the result of one of three things: poor adhesion, poor quality paint, or environmental factors.
Poor Adhesion
One of the most common reasons for the paint to peel on a bumper is poor adhesion. This can be caused by several things, including improper surface preparation, using the wrong type of primer, or applying the paint in humid or dusty conditions.
Poor Quality Paint
Another common reason for the paint to peel on a bumper is poor quality paint. This can be the result of using cheap paint, not allowing the paint to properly cure, or using paint that is not designed for use on a bumper.
Environmental Factors
Finally, environmental factors can also cause paint to peel on a bumper. This is most often seen in areas with high humidity or extreme temperatures, as these can cause the paint to expand and contract, leading to cracks and peeling. Also, UV rays can break down the protective barrier of your paint, causing it to fade and eventually peel away.
Also Read: Removing Paint from Chrome
How to Stop Paint from Peeling Off Plastic Bumper?
One very common issue with plastic bumpers is that the paint tends to peel off. Most car paint problems, including peeling, can be traced to improper preparation or painting techniques. When your painting starts to peel, it’s usually because the paint didn’t adhere properly to the metal surface.
To prevent your car’s paint from peeling, it’s important to regularly wash and wax the exterior. Avoid harsh chemicals on the surface of your car while washing, as these can strip away the protective layer of wax. This can lead to premature fading and peeling.
If your car was recently painted and the paint is already peeling, likely, the body shop didn’t follow proper procedure when they prepped and painted your car.
If you are determined to take this matter into your own hand and do the painting by yourself, follow our instructions for a better painting job.
What you need to collect before starting:
- Protective Goggles & Mask
- Safety Gloves
- Sanding Block or Sandpaper
- Paint Brush
- Primer for Plastic Surfaces
- Paint for Plastic Surfaces
- Spray Can or, Spray Gun
Now, let’s get into the job. Wear your protective goggles and mask to save your skin and eyes from paint fumes. They can be pretty irritating. So, take these necessary precautions before starting. Also, take your work in a ventilated area.
- First, use a sanding block or sandpaper to sand the surface of the bumper.
- Clean the desired surface. Use soapy water.
- Also, you can use denatured alcohol to remove any dust or debris.
- Next, apply a primer specifically designed for plastic surfaces using a paint brush. It helps the paint to cling and help it last longer.
- Let it completely dry before painting with your desired color of paint.
- As the primer is dry now, it is time to start painting.
- Choose a color that closely matches the original and apply it in thin coats until you’ve got full coverage.
- Use a spray can or spray gun to ensure an even coat of paint and avoid any drips.
- Allow the paint to completely dry.
- To safeguard the paintwork, apply a clear coat.
- Let the clear coat dry at least for 6 hours before driving your car.
Once you are done painting the bumper and ready to drive around, try to keep the bumper out of direct sunlight as much as possible. Also, try to avoid extra cold weather conditions. Doing these will help the paint stick with the bumper for a long time and not peel off.
Learn How to Fix Problems of a Plastic Bumper Cover:
Can You Repaint Plastic Bumpers?
If your car has plastic bumpers, you may be wondering if you can repaint them. The answer is, yes.
What kind of paint you use is important. You’ll need to use a plastic-specific paint that is made for automotive use. You can find this type of paint at most auto parts stores.
You’ll also need to sand the bumper before you paint it. Doing this, helps the new paint adjust with the surface better. Use sandpaper to sand the surface. Once you’ve sanded the bumper, you’re ready to paint. Follow our previously mentioned instructions.
With a little bit of effort and time, you can easily repaint your car’s plastic bumpers. Don’t forget to use the right type of paint.
Can You Repaint Part of a Bumper?
You can repaint a certain part of a bumper. But experts won’t recommend it. The reason for this is that it can be difficult to match the paint on the bumper. If you do decide to repaint part of the bumper, make sure to sand the area first and then use a primer before painting.
You can use spray paint if you want to get started quickly. You have to be careful, though. You have to make sure that the paint you use is compatible with the bumper and that you don’t go over the entire bumper in the process.
Continue Reading: Painting Flat Over Semi Gloss- Things You Need to Know
Can You Paint the Bumper without Removing It?
Of course, without taking the bumper off, you can paint it. But removing the bumper is the best way to paint it. Only in an emergency, without taking the bumper off, you can paint it.
Although painting the bumper attached will not get you the best job done, you can achieve a minimal painting solution. This is because if you remove the bumper from the car, your painting job will be more attractive and even.
If you are in a situation where you don’t have enough technical knowledge on how to remove the bumper, you can paint without removing it. Also, if there is only a small place that needs to be painted, you can ignore the removing hassle.
Just make sure to cover up the surroundings of the bumper and other open parts near the bumper like indicator lights or headlights. Otherwise, the spray can sit on them or you may end up spraying somewhere else.
Do You Need to Use Primer on Plastic Bumper?
When painting plastic bumpers, it is always best to use primer on them before painting. The reason for this is that primer provides a barrier between the paint and the plastic, which can help to prevent the paint from peeling or chipping over time.
In addition, primer can help to fill in any imperfections in the surface of the bumper, which will give you a smoother finish. If you are going to paint your bumper yourself, we recommend using a high-quality primer specifically designed for plastic surfaces.
How Much Does It Cost to Get a Plastic Bumper Painted?
Whether you are looking to touch up your car’s paint job or give it a complete makeover, the cost of painting a bumper can vary depending on several factors. The type of paint, the condition of the bumper, and whether you do it yourself or hire a professional; all play a role in how much money you will ultimately spend.
If you are planning to do it yourself, you can expect to spend around $80-$100 for supplies and equipment. However, if your bumper is in poor condition or you want a high-quality finish, it is best to hire a professional.
When considering the cost of painting your bumper, be sure about the time and effort required to achieve desired results. If you hire a professional, it could be more expensive. But this will save your time. For a low-end job with any professional, it may cost you around $200-$300.
For a high-end and premium painting, on average, it may cost you $50 to above $100. Remember that, these numbers are variable. Paint quality, painting space, and proper painting job vary in different professional paint shops.
What Paint Do You Use on Plastic Bumpers?
When it comes to painting plastic, it is important what paint you should use. Some paints will not stick to plastic, while others will adhere just fine. Acrylic paint works great for painting plastic. It’s available in both spray and brush-on varieties, and it adheres well to most types of plastic.
Another option is enamel paint, which also works well on plastic. It’s more durable than acrylic paint once it dries, so it’s a good choice for outdoor projects or items that will see a lot of wear and tear.
You can use a urethane-based paint, specifically a two-part urethane. A two-part urethane will give you the best durable finish that will resist fading and chipping. No matter what kind of paint you choose, make sure they are going to work for plastic surfaces.
Final Thoughts
If your paint is peeling off your plastic bumper, it could be a serious headache to tackle with. Many car owners face this problem. No matter what the cause, it is important to repair the problem as soon as possible to prevent further damage to the bumper.
Try to follow our instructions and advice to prevent this misery. If the situation gets out of hand, the best thing would be to contact a professional service.
Has your fender been scratched or dented while driving? No worries, we all make mistakes. However, scratches on the fender are just scratches, and a big dent is just a ding until your wife finds out! If the fender is scratched, there isn’t much you can do, so let’s talk man-to-man: how much does it cost to paint a fender?
In terms of cost, there is no one-size-fits-all solution. If there are only a few light scratches on one fender, the cost should not exceed $100. If the scratches are worse than that, the cost will increase. But if there is deep damage, you may need to spend more than $500.
Nevertheless, these estimates are just that—assumptions; the costs may decrease as well. Keep reading to find out why.
Should You Paint a Car Fender?
Generally speaking, yes, you need to paint your car’s fenders. If it has scratches, scuff marks, or other imperfections, you need to paint it to make it spotless. If the fender is severely damaged, you need to change the fender. Even if you replace the fender, the color of the fender may not match the color of your car.
So, you would eventually need to paint the fender. If you want to experiment with the color, you can paint yourself as a DIY project. But if you don’t want to risk your car, you can leave it to professionals.
Should You Paint Fender Flares?
When you buy a new car, you get factory-made wheels that are usually well-fitted inside the wheel walls. But you can’t just drive your car on factory wheels forever. So, when you think of switching to large tires, fender flares come in handy.
You can think of fender flares as extensions of your fenders that protect the fenders from dirt and debris thrown up by oversized tires. Flares give the car a stylish look as well. There are different types of fender flares; some flares have smooth surfaces, some have indented pockets, and so on.
Though you can paint any type of fender, the amount of work, amount of paint, and cost will vary. It is important to consider your tire size and the pattern on them as well, because some big tires with specific patterns tend to grab and kick up more dirt off the ground. So, this will surely test the durability of the paint.
That’s why we say that it’s okay to paint any fender flares, but make sure you understand what you are doing before you actually start painting the flares. If you don’t want to go through the hassle of painting, you can simply leave the flares as they are.
Professional Painting or Do It Yourself for Car Fenders?
You can use spray paint to paint your car’s fenders. Spray painting is quite fun and easy. You don’t need a lot of previous experience. So, if you don’t want to spend some bucks on getting it painted by a professional, you can do it yourself.
However, if you don’t want to risk the fender, thinking that you will be unable to match the color, you can get it painted by a professional. Furthermore, a professional will be able to complete the project more efficiently than an amateur. But you need to keep in mind that it will cost you a pretty penny.
So, both professional painting and DIY painting have advantages and disadvantages. You can go for any of the options, considering all the pros and cons.
How Much Does It Cost to Paint a Fender?
Scratches and dents are all unique, and so are their repair and painting costs! The cost can also depend on the size of the fender, the time taken to paint the fender, and labor cost according to the location where you live. Plus, there are ever-changing market prices, so it’s hard to estimate a number that will be suitable for every scenario, regardless of the time.
That’s why we recommend checking the cost of repair at your local body shop first. You can check multiple shops so that you can get a rough idea about the average cost, and then you can select a shop that will provide quality work at a comparatively lower price.
If rushing to a local auto body shop is not possible at the moment, or you want to check the price online before going to a body shop, we recommend first you estimate how much work is required, roughly.
Inspect the scratches and dents on the fender. If there are only a few scratches on one fender, and they are not very deep, the cost of painting should not exceed $100. But if the scratches are deep, you’ll need to spend more to get the fender repaired and painted.
In the worst case, your car fender can have some large dents and scratches. So, you need to get them fixed first, then get the fenders painted. This will surely increase the cost. Things are even worse when you need to install a new fender and then get it painted. So, if your car’s fender is severely damaged, you can expect the cost to be more than $500.
However, if your car’s fender is fine, but you want to give it a trendy touch, then the cost will be the total of paint and labor. By painting the fender yourself, you can further reduce the cost. But we don’t recommend this if there are large dents or scratches that need to be repaired before painting.
Continue Reading: Painting a Gamecube Controller with Spray Paint
How Much to Paint Fender Flares?
Like we said earlier, there is no one-size-fits-all solution in terms of painting a fender. This is exactly the same for fender flares. We also said earlier that there are different types of fender flares. Some flares will require more time to prep and more paint.
So, the price can only be determined depending on the flare size, type, labor cost, and some other conditions. After you get all the information, you can calculate the cost easily.
How Much Does It Cost to Paint a Car Front Fender?
This is the same as painting fender flares. If you want to paint the whole fender, you need to consider the size of the front fender first because this will determine how much paint it will need and how much time it will take. The cost will now be determined according to the price of the paint and labor costs.
On the other hand, if there are some scuff marks or small chips on the fender, and you want to paint just those specific areas, the cost will be determined according to the total work required.
How Much Does It Cost to Paint Match Fenders?
If you want the fenders to match the color of the car, you need to buy matching paint. And to match the color, we would recommend leaving it to a professional. So, the total cost would be the cost of the paint plus the labor cost. Nevertheless, if you are confident enough, you can paint yourself and save on labor costs.
How Much Does It Cost to Repaint a Fender?
It depends. If you want to repaint yourself, you just need to pay for the paint. A professional finish, however, requires the cost of both paint and labor. And as you might already know that labor costs will vary from place to place.
So, our suggestion would be to ask some local auto body shops to get some rough ideas about their labor cost. This will help you calculate the total cost of repainting a fender.
Learn How to Paint a Vehicle Fender with Spray Paint:
How Much Does It Cost to Replace a Car Fender?
Both the fender and the installation cost will determine this. The price for purchasing a new fender will surely be different from an old one. Plus, you need to consider the installation cost, as it may vary from place to place. So, if you calculate both, you will get the cost of replacing a car fender.
Final Thoughts
Fenders make a car look complete and trendy. If your car’s fender has scratches, small chips, or scuff marks on it, and you want to paint it, this article will give you some rough ideas about the cost. Our recommendation would be to calculate the cost according to what we discussed in the article, and get the fender repainted before your wife finds out!
Did you ever find yourself falling in love with a hat from the display, but the price tag made you leave it behind? What came to mind first after seeing the price tag: why in the world do hats have to be so pricey, or can you spray paint a felt hat!

If you want to experiment with the color of your old felt hat and give it a look similar to the hat you saw on display, you may try spray painting. But we recommend traditional brush-on painting instead of spraying, as spray paints may not suit all types of fabric.
However, painting a felt hat in the old-fashioned way might be a lot easier and more fun than you think! Keep reading to find out more interesting facts about painting felt hats.
Can You Change the Color of a Felt Hat?
Yes, you can change the color of a felt hat. Changing the color of a felt hat is quite fun. There are different methods to change the color of a hat, but you can go with acrylic paints to paint your felt hat easily. And while applying the color, we recommend the traditional brush-on painting style.
Since you need to use paint and brushes, it will be quite easy and fun to paint the hat. Plus, you don’t need to worry about toxic fumes that are common in some spray paints. To change the color of your felt hat, all you need is some paint, primer, brushes, and two crafty hands!
Also Read: Can You Paint Your Gamecube Controller?
Can You Paint over Felt Fabric?
You can paint over a felt fabric. Felt can be commonly seen in fashion, crafts, home décor, DIY projects, etc. Felt is quite absorbent, so applying any ordinary paints might not be effective. Using fabric paints is a good option for this material.
Some may suggest using acrylic paints. This is a good option as well. But using fabric paints in the felt fabric is a better option compared to acrylic paints because fabric paints are thinner and runnier. Acrylics can make the fabric stiff. In contrast to acrylic paints, fabric paints will not stiffen felt fabric very much.
Next Read: Painting Flat over Semi Gloss
Can You Spray Paint a Felt Hat?
Spray painting is a very popular method to paint different stuff because it’s easy, doesn’t require too much practice, and spray paints are widely available.
There are spray paints dedicated to use on fabric; these are known as fabric spray paints. However, spray paints may not be suitable for all types of fabrics, especially when we are talking about hats made of a specific type of fabric.
If you want to change the color of your woven cowboy hat, straw cap, or other hats with an airy mesh style, spray painting is an ideal choice. However, if you want to paint your felt hat, we recommend painting using paint brushes.
Nevertheless, brush-on painting isn’t the only way to paint, and we don’t want you to take it for granted. You are always encouraged to experiment with spray paints. So, if you have any spare hats, you can try painting with spray paints instead of a brush-on style.
Does Spray Paint Work on Felt?
You can try spray paint on felt. If spray paint is applied to felt, it can produce beautiful results. However, there is always a risk of stiffening the felt. This is one of the reasons why we don’t recommend using spray paints on your felt hat.
But if you are working with a felt craft piece, you shouldn’t worry about it too much because it is more likely to limber up after a few uses. If you want to accelerate the process, you can shake the felt, but be careful not to damage the materials.
Can You Spray Paint a Fabric Hat?
Spray paints can be a great option to color some fabric hats, especially the hats with an airy mesh style. So, considering this you can spray paint your straw caps, trucker caps, etc. Not only can you paint a hat using spray paint, but also make cool designs or patterns on the hat in the same method.
What Is the Best Type of Paint for Felt Hat?
It depends on your preferences. There are two best paints available to paint felt; fabric paint and acrylic paint. Both have some advantages, and you may notice some disadvantages as well.
Fabric paints are usually thinner and runnier than acrylic paints, so it will be fun to apply this paint on felt. You can try this one out first. However, don’t underestimate acrylic paints! These paints are a great choice to paint a felt hat.
Plus, if you don’t want to pay for some fabric paints, you can make your own fabric paint by mixing acrylic craft paint with textile medium. With this mixture, you will be able to paint a piece of felt better and save some bucks.
So, our recommendation would be to try out both paint types and see which one works best for your felt hat. You can note down the advantages, disadvantages, drying time, etc. so that you can apply the right paint for the right project.
Can You Paint Felt with Acrylic Paint?
Dyed felt looks great when painted with acrylic paint. It’s a cost-friendly way to paint a piece of felt as well. Since acrylic paints are water-based, they don’t contain toxic materials. So, you can enjoy coloring felt projects with your kids as well.
And with acrylic paints, you are not just limited to painting a piece of felt in a single color only. Mixing multiple acrylic colors will give you custom shades that you can apply to the felt piece according to your design ideas.
Does Acrylic Paint Dry on Felt?
Are you thinking of painting your felt hat with acrylic paint and wondering if it will dry? Don’t worry; acrylic paint will dry if you follow the right procedure for painting. You can follow the procedure below to paint your felt hat with acrylic paint so that it dries properly and lasts long:
- First, you need to use a sealant as a base, Mod Podge, for example. This will help achieve an overall good finish.
- Then you can add multiple coats of acrylic paints, giving each coat enough time to dry in between.
- Finally, you need to use another coat of Mod Podge to seal your work.
You might love to know how to make felt hat:
Can You Dye a Felt Hat?
Yes, you can dye a felt hat. However, dyeing a felt hat and achieving a good result can be a tiresome job! If the hat is not dyed properly, the felt can get shrunk. To dye your hat properly so that the color won’t fade away quickly, you need a large bowl and a lot of dye.
And if you want to try it the old-fashioned way, it will be a lot of hard work and very time-consuming as well. So, dyeing a felt hat is only recommended when you know what you are doing.
Final Thoughts
Hats have been a part of our clothing items since ancient times. Hats not only give shade but take fashion to a new level. In this guide, we talked about painting felt hats using different techniques. So, follow our guide to give your old felt hat a touch of your artsy taste, instead of purchasing a new one.
Ever wondered why fiberglass spoilers are used in cars? Besides giving the car a freaking cool look, it plays with air in a bit “sciency” way so that your car gets enough grips when driving at high speeds. A scratched or chipped fiberglass spoiler might give you the grip, but not the cool look!

Wait, before you leave your car at the nearest auto paint shop, take a look at our alternative that can save you a pretty penny! In this article, we are going to talk about how to paint fiberglass spoiler so that you can paint the spoiler yourself and save a lot of money. So, let’s crack the knuckles and get the creative hands ready!
Also Read: Acrylic Paint and Hydro Dipping
What Is Fiberglass Spoiler?
Before we start painting the spoiler, let’s understand what kind of stuff we are really dealing with. If you get some clear ideas about the spoiler material, i.e., fiberglass, it will help you understand which type of paint will be suitable for the job or how paints will behave if applied to it, and so on.
Spoilers can be made of different types of materials. Generally, they are made of ABS plastic, fiberglass, silicon, or carbon fiber. Different materials have different advantages. For example, fiberglass spoilers will be durable, carbon fiber spoilers will be lightweight, etc.
Today, our focus is on fiberglass spoilers only. Fiberglass spoilers are made with a combination of fiberglass cloth and thermosetting resins. Since a fiberglass spoiler is made of fiberglass cloth, you need to select the right type of paint so that it adheres to the surface well and lasts long.
How Do You Prepare Fibreglass Spoiler for Paint?
Fiberglass is a nonporous surface, so painting it is quite difficult here. Not all types of paint will adhere to this sleek surface. Spray painting is a better option compared to others. However, you need to make a good preparation so that the surface becomes suitable to hold the paint.
If the preparation is not good, the finish can peel shortly after applying the paint. So, you need to do the following to prepare your fiberglass spoiler for paint.
Sanding
First, sand the spoiler well with 200-grit sandpaper. To make sanding easy, you can use a little sanding block so that you can reach the crevices. However, the block may not fit into all of them, so you have to rely on your hands here. Sand those areas using sandpaper while keeping your hand level and flat to the best of your ability.
Cleaning the Surface
After you are done sanding, first remove the dust and sanding residue. No need to use water yet. After the dry cleaning is done, you need to use a grease and wax remover to clean the surface deeply. If there are any traces of grease or wax left on the surface, the paint will not adhere to the surface properly.
To make the surface ready for paint, take a lint-free clean rag, apply some grease remover and wipe the spoiler. You should focus on this step because if there are any spots left, you may not notice them until you have completed painting the spoiler.
Next Read: Is Sanding Acrylic Paint a Good Decision?
What Kind of Paint Will Stick Well to Fiberglass?
Fiberglass is a smooth surface, so not all types of paint will work well on it. One of the main obstacles to painting fiberglass is to make the paint adhere to the surface. That’s why, from the wide range of paint types, you can apply only a few to this material.
To paint a fiberglass surface, you can use urethane, acrylic latex, or a blend of urethane resin and acrylic paint. Let’s look at the paints in a bit of detail.
Urethane
You can use urethane for outdoor projects like painting boats. Urethane is durable and that’s what makes it suitable for outdoor works. So, the paint will not chip or tear easily.
However, to work with urethane, you need to use a chemical solvent and that can be hazardous to health. That’s why if you want to work with urethane, make sure to wear a protective mask.
Acrylic Latex
This type of paint will adhere to the fiberglass surface quite well. Acrylic latex can be easily applied and, unlike harmful paints, it does not have the risk of containing very harsh chemicals. So, you can use this paint on your fiberglass project without worrying about safety issues.
Urethane Resin and Acrylic Blend
This is another great option to paint a fiberglass surface. You will get the goodness of both polyurethane and acrylic paint from this blend. Since water-based polyurethane is used here, you don’t need to worry about hazardous chemicals anymore.
This blend adheres to the surface so well that you don’t even need to clean the old paint because it is capable of adhering to a dirty, old paint surface.
For your fiberglass spoilers, we recommend using spray paint. However, simply spray-painting is not enough. You need to follow a set of steps to make the paint adhere to the surface properly. And that’s the method we are going to teach you next.
How to Paint Fiberglass Spoiler?
After the material and the suitable paint for it is understood, and the surface is prepared well, we can move on to the heart of our article, which is painting the fiberglass spoiler. But before you start, here are the things you need:
- Sandpaper
- Paint Adhesion Promoter
- Tack Cloth
- Primer
- Desired Spray Paint
Step 1: Preparing the Surface
We explained it earlier, but let’s give it a quick recap. First, sand the spoiler with 200-grit sandpaper. Make sure you don’t miss any spots. After sanding, remove all the dust and debris. Finally, clean the area with a wax and grease remover.
Step 2: Applying the Paint Adhesion Promoter
Since a fiberglass spoiler has a sleek surface, let’s begin with applying the paint adhesion promoter. It will help the paint stick to the surface well. Spray the adhesion promoter and let it sit on the spoiler properly.
You can follow the drying time stated by the manufacturer of the adhesion promoter. After the promoter is set, use a tack cloth to tack the spoiler off.
Step 3: Applying the Primer
You need to apply 3 coats of primer. Spray the primer in thin coats and try to apply the coats as evenly as possible. Cover the surface well. Make sure you give each coat enough time to dry before applying the next coat.
Step 4: Sanding Again
Once the top coat of primer is dried properly, you need to sand the surface again, but this time with 1200-grit sandpaper. Gently sand the spoiler. This sanding is just to make the surface better for applying the paint, so you don’t need to sand very roughly.
After sanding, you need to use the grease and wax remover again. Use a lint-free cloth to wipe the surface.
Step 5: Painting the Spoiler
After all the preparation and priming, now comes the good stuff! First, shake the spray can well. Now, start painting the underside surface of the spoiler with thin, even coats. You will finish the coats by reaching the topside. In other words, each coat will start from the underside and finish at the topside.
You need to apply four coats of paint. Make sure you keep the coats as even as possible and give each coat enough time to dry before going to the next coat. For drying time, follow the manufacturer’s information.
Step 6: Applying Clear Coat
Finally, after all that hard work, it’s time to preserve the paint. You need to apply an automotive clear coat. It will protect the paint underneath from harmful UV rays and mild scratches. You need to apply 3 to 4 coats of the clear. Make sure you give each coat enough time before applying the next coat.
Here is a guide for you:
What Kind of Paint Do You Use on Fiberglass?
As we said earlier, a fiberglass surface is smooth. So, you need to pick the paint wisely. You can use polyurethane, acrylic latex, or urethane resin and acrylic blend. These paints are capable of adhering to a sleek fiberglass surface. Plus, you can use other paints whose manufacturers clearly state that the paint is suitable for fiberglass.
Can You Paint Directly on Fiberglass?
If you want a color that will last long on fiberglass, you need to make good preparation before painting. This is more suitable for sleek surfaces because paint adhesion is a challenge here. So, if you want the paint to last long, we recommend you prepare the surface well first then apply the paint.
Final Thoughts
A fiberglass spoiler makes a car look cool as well as gives the car more stability while driving at a high speed. If you have a chipped fiberglass spoiler, you don’t need to ask professionals for help and spend a lot of money on it. You can follow our guide and repaint the fiberglass spoiler in your own style.
Not all cars have side skirts but some car enthusiasts must own them for several reasons. These are one of the most sought auto body kits that also require maintenance and most importantly, painting.

So, if you are recently thinking of painting the side skirts of your car then you must be also wondering how much to paint side skirts!
Well, the cost of painting side skirts on both sides of a car may vary. However, the painting cost ranges from $100 to $350. Sometimes, you may have to pay more than this.
Nonetheless, to enlighten you with detailed information regarding the topic, bear with us till the end.
Also Read: How to Paint Flat over Semi Gloss?
How Much to Paint Side Skirts?
As we already mentioned, different people might answer a different number if you ask them how much they had to pay while painting their side skirts. But the amount remains in a specific range that is mostly $100 to $350.
However, some might also have to count almost 500 dollars to paint their side skirts. Yes, that is not surprising if you want quality paint and are willing to pay for that.
Moreover, some car owners want to paint both their side skirts and rear bumper. Thus, if you want to have both paintings done then it will cost around $400 to $500.
Again, the price range varies depending on the painter as well. Many people would simply go to a body shop for having the task done. However, most body shop painters will spray a cheaper paint over your pricey side skirts. Thus, they will also cost $100 to $200 for the task.
Then again, some shops charge around $150 to $200 for each side. However, the best deal you may find is $250 for both sides. It will not hurt your purse.
On the other hand, the custom modifiers use the best paint for spraying over the side skirt surface. Hence, they will also charge $350 to $500 or sometimes, more than that. In this case, the job includes priming, adhesion, painting, clear coating, and everything else.
How Much Does It Cost to Repaint Side Skirts?
If you need to repaint your car side skirts that means they are not new and must have rust in them. Thus, it will take more time to first prepare the surface of the side skirts and then repaint.
So, it is obvious that repainting side skirts would cost more than the first time painting them. It is simply because the labor of scratching off the paint and cleaning the rust will cost extra.
Nonetheless, the amount should not cross $900. Still, it might seem like a lot. But some body shops will do it charging around 600 dollars. Then again, custom modifiers would charge a lot more than this as they ensure quality and offers the best possible paint materials.
Important Read: Tips on Removing Paint from Rubber
How Do You Paint a Side Skirt?
You can consider painting a side skirt as a DIY task since you can actually do it by following the methods properly. Let’s know how to do it step by step.
Step – 1: Remove the Side Skirt
This is the first thing to do before you get started with the process. First, remove the bolt that is about 10mm in diameter and screwed it near the front.
After unscrewing the bolt, it is time to remove the plastic holding plugs from the car bottom. When you are done removing the plug, pull the side skirt firmly giving a slight pressure, it will come off from the car frame.
Step – 2: Clean Off the Side Skirt
After removing the side skirt, it is time to wash it thoroughly. To clean it off properly, you can also use a degreaser. It will remove all dirt and road tar off the side skirt.
Step – 3: Prepare the Surface
After cleaning off the side skirt from dust and tar, prepping is important. For this purpose, you will need sandpaper of around 400-grit.
Rub the sandpaper over the side skirt surface slightly so that it scratches off old paint along with the rust.
Step – 4: Apply Primer
Before applying the paint, it is important to apply the primer first. Professionals suggest applying plastic primer. It holds the paint very well and protects it from bumps and rock scratches.
About two light coats of primer would do the job perfectly. Let the primer coating dry before applying another layer or a layer of paint.
Step – 5: Apply Color Paint
After applying primer, select quality paint and start applying. You can apply several coats of paint over the surface of the side skirt. To make the paint job smooth, applying more than three coats of paint is necessary.
However, you have to make sure that each paint coat dries first before applying another paint layer. Generally, one day is enough to dry the paint coat properly.
Step – 6: Apply Clear Coat
The final task is to apply a clear coat. To have a perfect, seamless, and smooth paint job, applying a clear coat is a must. You should also apply several numbers of clear coats to make it long-lasting and look professional.
Applying coats after coats over a week period will do it just fine. You should not hurry the entire process. Let each coating dry completely. After finishing the job let the side skirt rest for one or two weeks.
By this time, the paint will stick to the surface properly creating a strong bond. When the wait is over, fix the side skirt to your car again.
About Painting Side Skirts:
Do Side Skirts Improve Performance?
Yes, to some extent side skirts are beneficial. These are basically the trim panels of a car that are attached beneath the side doors. They protect the lower portion of the cars from several bumps on the road.
Moreover, side skirts help to improve the aerodynamic performance of the car. They can prevent the air from interrupting the low-pressure front of the car that comes in from the sides.
That is why professionals suggest attaching the side skirts lower to the ground. This way they work better.
Final Thoughts
Now that you know how much you need to spend to paint side skirts, you should get the job done. You can do it from any body shops or custom modifiers depending on your budget.
Also, since we have provided you with a DIY guideline about how to paint a side skirt, you can give the process a try. Just select the best quality paints and you will see the magic!
Cement board, also known as backer board, is a material used to create a smooth, level surface for tiling. It is a low-maintenance material that is often used as an exterior sheathing or as a base for tile in high-moisture areas, such as bathrooms.
While cement board is not typically painted, there are certain situations where painting cement board may be necessary. But can you paint cement board?
Cement board is available in a variety of thicknesses and sizes, making it a versatile material for a variety of projects. They are durable and moisture-resistant for any tiling project. And, if you want to add a splash of color to your place, you can easily paint cement boards.
Can You Paint Cement Board?
Yes, a cement board can be painted, but it is important to choose the right type of paint for the job. Acrylic latex-based paints are one of the best type of paints for cement boards. Also, you can use a primer designed for use on cement board.
It is important to prepare the cement board before painting. You should clean the surface and make it free of any dirt or dust. Specially be careful with the grease. If there is any cracks or holes, fill them with spackling compound and sanded smooth.
After you are done with the surface, you can start painting. It is important to use even strokes and to paint in one direction. You can add multiple coats to achieve desired coverage.
A painted cement board is a more durable than the unpainted one. They can withstand enough wear and tear. With proper preparation and painting, a cement board can be a beautiful addition to any home.
Can You Paint Cement Board Like Drywall?
If you are planning to tile your bathroom or kitchen, you may be wondering if you can paint cement boards like drywall. The answer is yes! You can paint cement boards with any type of paint, as long as it is meant for use on surfaces.
Cement board is often used in place of drywall because it is more durable and moisture-resistant. It is also easy to install and can be cut with a utility knife.
In recent years, however, it has become increasingly popular to use cement board as a drywall alternative in a variety of settings, including bathrooms, kitchens, and even garages.
While cement board shares many similarities with drywall, there are some key differences that you should be aware of before beginning a project. For one, cement board is much heavier than drywall, so it requires stronger fasteners and more support.
Do You Need to Prime Cement Board before Painting?
If you are going to paint cement board, you probably are wondering whether you should prime it first. The answer is both yes and no. If the cement board is already primed, you don’t need to prime it again.
Experts recommend that you should always prime the cement board before painting for the first time. Because priming helps the paint to adhere properly and the final finish becomes smooth.
There are different types of primer to use on cement boards. One option is an acrylic primer, which will provide good adhesion and a smooth finish. Another option is a bonding primer, which is designed to help with adhesion on tough surfaces. Whichever primer you choose, make sure to follow the manufacturer’s instructions.
After the primer is dry, it is time to start painting your cement board. Painting cement board can be a bit tricky, but if you take the time to prime it properly, you’ll end up with a beautiful, smooth finish.
What Kind of Paint Do You Use on Cement Board?
It’s crucial to choose a paint that is made especially for use on cement boards when picking a paint for those kinds of surfaces. Different types of paints serve different purposes, so it’s important to choose the right paint for the job at hand.
Here are a few kinds of paints to use on cement board:
Acrylic Latex Paints: Acrylic latex paints are versatile and can efficiently be used for a variety of projects. They are high-quality paint and specially designed for exterior use. These paints will adhere well to the cement board surface and provide long-lasting protection against the elements. Acrylic latex paint is also resistant to mold and mildew, which is important in areas where there is a lot of moisture.
Oil-based Paints: Oil-based paints are another great choice. This type of paint is not as common as acrylic latex paint but they are a good choice for high-traffic areas or areas that are subject to wear and tear.
Epoxy Paints: Epoxy paint can also be applied on cement boards. This paint is very good at durability and has a high level of adhesion. It provides a good resistance to mold and mildew. However, it is not as flexible as acrylic latex paint, so it may crack if the cement board expands or contracts.
Masonry Paints: Masonry paints are designed to shield the surfaces from deterioration. They’re a good choice for painting cement boards that will be exposed to the elements, like those in an outdoor kitchen. They are specially formulated to protect and decorate cement boards, concrete, and other masonry surfaces.
No matter what type of paint you choose to use on your cement board, it is important to follow the instructions of manufacturer first. This will ensure that the paint is suitable for your surface and will not peel or flake off.
Can You Paint Cement Board behind a Wood Stove?
If you have a wood stove and need to paint it, you may be thinking if you can paint the cement board behind it. The answer is yes, you can! A cement board is a great material to use as a backing for a wood stove. It is durable and fire resistant, so it will protect your wall from heat and flames.
Here are a few tips for you before you start painting cement board behind a wood stove:
- Choose high-quality paint. This is the time to think about quality. Use high heat-resistant paint that can withstand the intense heat of a wood stove.
- Make sure the surface is clean. Before you start painting, make sure the cement board is clean and free of any dirt or debris.
- Use a primer. Applying a primer helps the paint stick and spread to the surface better. It also provides an extra layer of protection.
- Paint in thin coats. It is better to paint with several thin coats than one thick coat. This will help the paint last longer and will prevent it from peeling or flaking off.
- Let the paint dry completely. Give the paint enough time to dry before using the wood stove.
With these tips in mind, painting cement board behind a wood stove is a simple and easy project that can help to improve the look of your home.
Can You Paint Cement Board in Shower?
If you’re like most people, the thought of painting cement boards in your shower probably never crossed your mind. But if you’re looking for a way to add a little bit of personality to your space, or if you’re simply tired of the boring white tile, painting your cement board can be a great way to do it!
Keep in mind a few matters when painting cement board in your shower:
- Make sure the surface is clean and free of any soap scum, dirt, or grease.
- Use a primer before painting. This will ensure the paint color to really pop and will also extend the life of your paint job.
- Choose a high-quality paint designed for bathrooms. This type of paint will stand up to the humidity and moisture in your bathroom, and it will also resist mold and mildew.
- If you’re not confident in your painting skills, consider hiring a professional. They’ll be able to get the job done quickly and efficiently, and they’ll also be able to advise you on the best type of paint and primer to use.
Painting cement board in your shower is a creative way to add a personal touch. With a little bit of effort, you can achieve a beautiful, long-lasting finish.
How Often Should You Paint Cement Board?
Generally speaking, you should only need to repaint the cement board every 10-15 years, depending on the amount of wear and tear it receives.
If you live in an area where the weather conditions are severe, you may need to paint your cement board more often to protect it from the elements. Likewise, if your home is in a sunny location, the color may fade more quickly and you may need to repaint more often.
When painting, be sure to apply a good-quality exterior paint that is designed for use on cement boards. And you can stay stress-free for at least 10-15 years if you paint the cement board with proper instructions.
How to Paint Cement Board?
Cement board is a type of protective case that is used as an underlayment for tile and other finishes. It is very durable and you can work with it easily, making it a good choice for do-it-yourself projects.
If you are planning to paint cement boards, there are a few steps you need to follow to get the best result. Here is a step-by-step guide:
Step 1 – Clean the Surface
First, you need to clean the cement board with water and a cleaning agent. This helps to remove dirt or grease from the cement board’s surface. Be sure to rinse the surface wholly so that no residue is visible.
Step 2 – Dry the Surface
After cleaning with water, it is very important to dry the surface of the cement board. If the surface is wet or not dry completely, the paint won’t adhere well. It will be best if you let the surface dry out normally. Also, blowing hot air may affect the board badly.
Step 3 – Use a Primer
When the base is prepared, you can start priming. When priming, it is best to use a primer designed for use on cementitious surfaces. They help the paint to adjust on the cement board properly. This provides a good base and start for the topcoat of paint. Even, you can follow the product manual for the satisfactory results.
Step 4 – Apply the Paint
Once the primer is dry, at this stage, you can apply the paint over the cement board. When choosing a paint color, it is important to keep in mind that darker colors will absorb more heat than lighter colors. This can be an important consideration when painting cement boards that will be exposed to direct sunlight.
It is also important to note that cement board is a porous material. This means that it can absorb water and moisture from the air. For this reason, it is important to choose a paint that is designed for use in high-moisture areas like bathrooms and kitchens.
After you decide on the best color option for you, now use a paint roller or a paintbrush that you feel comfortable with. Apply multiple layers of paint for better results. Make sure the layers are thin. With thin and multiple layers, the paint will last longer.
Step 5 – Let the Paint Dry
Finally, Allow the paint enough time to dry completely. Once the paint is dry, the cement board can be installed using screws or nails. It is important to make sure that the screws or nails are long enough to penetrate through the thickness of the cement board.
All right, there you go. Now, the cement board you have painted following our instructions will provide a durable surface.
It might be helpful:
Tips for Successful Cement Board Painting
If you’re ready to follow some rules, cement board painting will be really an easy task. We have added some tips for you.
- Remove any loose paint from the surface of the cement board with a wire brush or sandpaper.
- If the cement board is new, apply a primer before painting.
- Use a paintbrush or roller designed for use with oil-based or latex paints.
- Start painting from the top of the cement board.
- Use even strokes and avoid painting over wet paint.
- Allow the paint to dry completely between coats.
- Add a second or third paint coating if necessary.
Final Thoughts
Painting is the best way to have a long-lasting surface on your cement board. This will not only protect them but also make it easier to clean the boards.
Painting cement board is a great way to add some color and attraction to a place. It is important to properly prepare the surface before painting and to use a paint that is designed for use on cement boards. With a little time and effort, you can transform a room with a fresh coat of paint.
Are you going to paint or repaint your house and worried about the health issues that may cause due to the paint? You have also a question that how long are paint fumes harmful.
Paint fumes are not completely safe for our health. To ensure the environment is safe for your health, you should wait for at least 72 hours because paint fumes are harmful for almost 3-4 days.
Paint fume is the evaporated thing as the paint dries. It contains harmful VOCs (Volatile Organic Compound) that can cause many issues as it gets into our body while breathing.
Many are concerned about the health problems caused by paint fumes as it is too detrimental. A number of grievous diseases are likely to attack a person who stays in a newly painted room or is exposed to paint fumes as it contains a few toxic chemical elements.
So, you are supposed to take some required steps to avoid these consequences of paint fumes by leaving the room or house for at least 3 days and having a proper ventilation system in the room as well.
Also Read: Chrome Paint Removing Guide
What Causes Paint Fumes?
Paint fume initially causes breathing irritation, headache, irritation in the eyes, throat, and nose, dizziness, nausea, etc. and could result in greater problems related to the nervous or circulatory system, ear, kidney, and liver.
Some research even shows that women who get exposed to fresh paint fumes for a long time have a higher possibility of an autistic child accouchement. Though some specialists do not fully agree with this statement, a clear consensus is paint fumes are very harmful to pregnant women. So, if you have a pregnant woman in your family, you should not paint your house. Should you?
The allergy patients may suffer due to paint fumes too. Their allergic problem gets triggered as they get into a freshly painted room.
Children are also at higher risk of getting affected by its impact. Higher levels of paint fume in their room may cause rhinitis, asthma, and eczema.
Next Read: Rubber Paint Removing Guide
Symptoms of Inhaling Paint Fumes
If you somehow get in touch with paint fumes, you may feel some problems and it is a sign that the fume is causing harm to your body. To identify the presence of it in your body, learn the symptoms you will have after you inhale paint fumes.
- You may be feeling upset in your stomach.
- You may feel like vomiting also.
- Irritation on your skin, eyes, nose, or throat may start.
- Dire headache.
- Feeling lightheadedness or dizziness.
- Nausea.
- Breathing problem.
These symptoms may arise as soon as you inhale paint fume or it may take a few hours to start. But as soon as any of these happens, take rational steps to avoid worse consequences.
As paint fumes contain poisonous substances, worse situations could arise. In that case, you should immediately go to the hospital.
What to Do after Inhaling Paint Fumes?
So, if you inhale paint fume and you are having problems due to it, then follow the following steps to prevent any short or long-term effects.
- If you are the painter, quit painting immediately.
- Quickly go to an open area and exhale in the open air. Otherwise, lie down under a ceiling fan.
- Loosen your clothes to breathe easily.
- Have some milk or pure water.
- Call your nearby poison control center if its toxic substances affect you.
Take rest until you feel okay.
Important Read: Learn about Painting Brick Pavers
How Long Are Paint Fumes Harmful?
Scientists have seen that it takes almost a year for paint fumes to get completely faded away, but it is harmful mostly for the first 2-3 days.
After painting your house, you are normally so keen to enter into your newly painted rooms, but considering the bad effects of paint fumes, you should resist your enthusiasm.
Paints can enter your body when you touch them. After that, it gets absorbed in your blood and accumulates in your brain or any other organs and may cause an organ damage. Researchers say that normal VOCs can stay in your body for more than 3 months!
Especially, children, pregnant women, and old members of your house should get more concerned regarding the harms of paint fume because they are the most vulnerable in this case.
How Long Should I Ventilate a Room after Painting?
As the United States Environmental Protection Agency (EPA) states,it is safe to ventilate a room after painting for 3 days. After 3 days, no more ventilation is necessary.
For ventilation, you can use handy ventilating tools and equipment. You can use box fans for it if you have no window in that room. Face the fan towards the door so that it could filter out the stagnant air of the room.
While painting the kitchen, use ducted rangehood fans that will filter the room’s air.
What Happens If You Sleep in a Freshly Painted Room?
If you sleep in a freshly painted room within first 3 days, you may feel problems in breathing when you wake up. Because, while sleeping, you are inhaling air that contains paint fumes.
But if it is more than 3 days since you have painted the room, then it is okay to sleep in the room. But still, to avoid health hazards, make sure the room is properly ventilated and turn the fan on for more safety because toxic elements are released from fresh paint for up to 2 weeks.
Before that, you should avoid the room even for staying.
What Happens If You Inhale Paint Fumes for too Long?
You may get affected by long-lasting diseases if you inhale paint fumes for too long.
Certain types of cancers are probably to originate as a consequence of it. Asthma, allergies, and respiratory diseases are likely to get intensified due to that.
As I have previously said, children may be suffering from autism if their mother inhales paint fumes for too long during pregnancy.
Inhaling paint fume for too long can lead to organ damage also!
How Long Do the Effects of Paint Fumes Last?
The effect of paint fume lasts for almost a year but it does not stay as intense as it is during the first 72 hours after painting. Moreover, compounds of paint fumes that have entered into a human body can stay for up to 3 months!
Paint fume vaporizes as the paint dries and accommodates very harmful organic compounds.
Will an Air Purifier Help with Paint Fumes?
No, an air purifier is not great equipment for removing paint fume from a newly painted room as it will not eliminate VOCs in the air. It removes only the dust and larger particles in the air but not the chemical compounds which are too small to be removed by it.
A highly powerful air purifier can put out the contaminated air from the room to a certain extent and make it safer for staying into.
But it does not solve the problem completely. It is equally as useful as just opening the window and letting the breeze go through the room to lessen the concentration of VOCs.
However, it will cost some electricity bills additionally. It is not applicable if you do not have electricity.
This video can help you:
Safety Tips against Paint Fumes
Paint fumes are dangerous for our health. So, we need to deal with it in such a way that it may not cause any harm to us. In order to do that, follow these tips:
- Do not keep paint in your house because it may vaporize its fume. So, if you have a bucket of old or new paint in your house, then put it outside and close it tightly.
- Try to paint your house in dry seasons.
- Never paint a room that is not well-ventilated. Make sure that the room has enough space for air movement.
- Read the warnings written on the label of the paint thoroughly and follow all the instructions.
- While painting, open the windows and turn on the fan. The more the air circulation is, the more the paint fume will fade away.
- Most importantly, use paint that contains fewer VOC substances. Paint manufacturing companies are now producing Low-VOC and No-VOC paints. Buy them as they are not more costly than traditional paints.
- Take breaks oftentimes while painting.
Safety measurements always eliminate unwholesome possibilities!
Final Thoughts
Painting makes your house colorful, but paint fume may turn that color into dismay!
So, you should be aware of the health hazards it causes and try to avoid staying in the room for no less than 3 days after painting.
Painting an object brings a warm look and significant change for sure. Otherwise, why would you think of painting a light pole, right? It is evident that a light pole is not just a simple object and definitely requires more if you attempt to paint it.
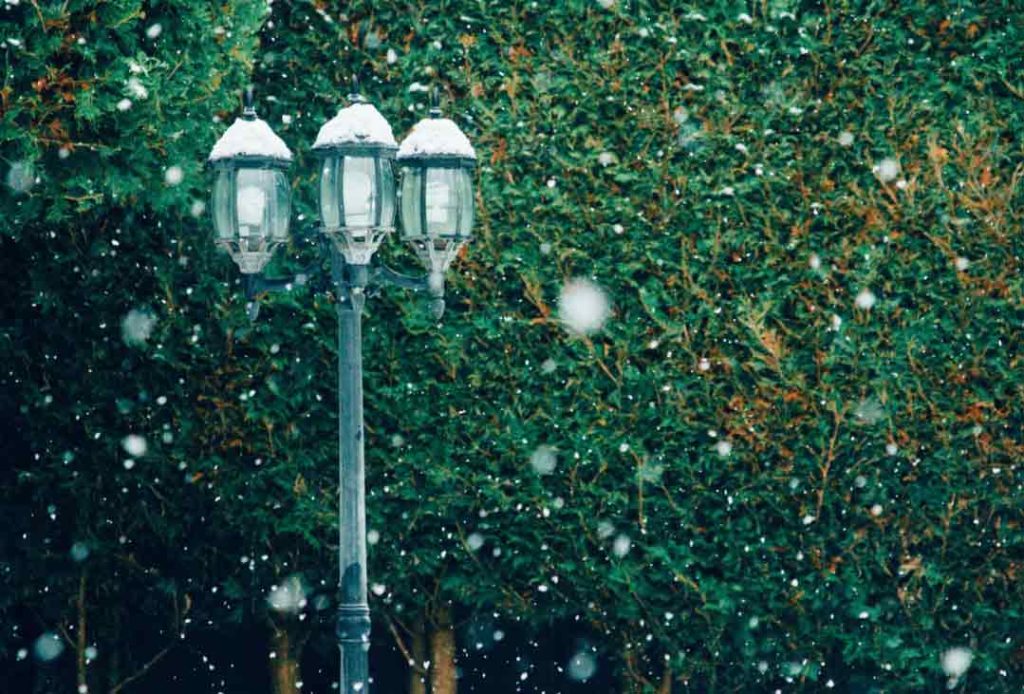
Mostly, people ask a frequent question that is how much does it cost to paint a light pole?
Well, the cost of painting a light pole depends on several circumstances. Installing a new light pole after removing the old one and then painting it would cost you more. But an individual light pole would ask not more than 100$ for painting. However, things don’t end here. For different purposes, the cost can go up or down.
Also Read: Tips on Removing Paint from Chrome
What Are the Materials of a Light Pole?
Light poles are not just supposed to lighten up the space; they are also a means of decorating and beautifying the surroundings too. You will see light poles of different materials. According to the budget, you can adopt the material you want for your space.
A light pole can be made of concrete, metal, aluminum, or wood. Also, they can be made of copper. People select materials regarding the weather and climate situation of the area. The metal and concrete-made light poles have the best energy to stand all situations.
And then comes wood and then aluminum. Because aluminum or copper-made light poles tend to get rusty and lose their lifespan easily, painting them saves the light poles from rust and corrosion and provides them a great lifespan.
Next Read: Can You Remove Paint from Rubber
How Much Does It Cost to Paint a Light Pole?
Mostly the amount it requires to paint a light pole depends if you want to remove the old light pole and bring about a new one or not. Also, this fact depends on if you are having a top-notch material-based light pole or simple material-based ones.
For a high quality materials-made light pole, it will cost you around $2000 to buy. But the installation might cost you an extra one thousand dollars if it is in a renowned area. And for painting, each pole might cover $100 to $200. So, overall, the approximate estimation crosses $3000 at best.
This approximate result can vary regarding material condition, area supremacy, and weather demands. Besides, the cost can also vary from contractor to contractor. But it should not cost more than $2100$ to $3000.
What Kind of Paint Do You Use on a Light Pole?
You can adopt several types of paints to apply them to your light pole. According to your desire, you can choose high-gloss outdoor paint, semi-gloss paint, or satin finish paint. But these paints have their own advantages and disadvantages.
The paint with a high-gloss finish on the metal-based light pole stands out but the problem is the defects and mistakes can be seen prominently. That’s why avoiding the paint for outside use is the best way to deal. Then again, the semi-gloss finish also stands out and the defects and damages do not pop out like the former one.
Therefore, you can easily adopt the semi-gloss finish paint. However, the best way to deal with your light poles regarding painting is to give them a satin finish. It gives off a little bit of reflective yet a matt-styled finish and the result stays for a long time.
How Do You Paint a Metal Light Pole?
There is a certain way to paint a metal light pole. You need to follow the steps of the way to get a satisfactory result.
First, check if the metal light pole is all new. Then you don’t need to fix it or remove any rust. Just rinse the metal with fresh water to remove every speck of dust.
Second, when the metal light pole is all dry, apply a single or double coat of primer thinly. Make sure every time you apply the primer the previous one gets enough time to dry.
Third, after the thin application of primer, when it is dried fully, you can apply an oil-based metal paint or acrylic latex paint. Oil-based paints stay longer and can stand outside atmosphere for a pretty long time and the latter carries the agent of rust inhibitors.
Fourth, you need to apply several thin coats of paint. Make sure you give enough time to each coat to dry perfectly. And that’s how you paint a metal light pole.
Important Read: Painting Gamecube Controller: A Definitive Guide
How Do You Paint an Outdoor Light Pole?
Outdoor light poles have to endure a lot of dangerous and crucial situations. That’s why the paint you are choosing for your light pole should be the accurate one. The steps you should follow are –
Step 1: Remove the delicate parts of the light pole if they are detachable. If not, then mask those areas including the sensor area of the lamp using tape.
Step 2: Remove the old paint and rust using a wire and good cleaning agent, fix the crevices with caulk, and give a nice and thorough clean to the light pole.
Step 3: While the light pole is all dry and fit, apply primer to increase the adhesion of the paint. Apply two or three coats of it thinly.
Step 4: Take the right paintbrush and then apply the paint properly. Apply the topcoat two times and make the paint pop out.
Step 5: Clean those detachable fixtures and reattach them to the light pole after the paint is all dried up. Then unmask the delicate areas including the sensor of the light and you are done with painting the outdoor light pole.
How Do You Paint Aluminum Light Pole?
You can easily paint an aluminum light pole. You can adopt spray paint for this. In this way, you will have more time saved too.
Firstly, clean the aluminum light pole with a normal cleaning agent. Make sure you avoid the sensor area and lamp of the light too.
Secondly, apply primer on the contaminant-free dry aluminum pole. It will be better if you apply etch primer to the surface. Then let the primer dry. Application of two or three coats of primer is pretty acceptable.
Thirdly, apply spray paint over the aluminum light pole. But make sure the primer is fully dried. Spray the pole from top to bottom thoroughly.
Fourthly, when the first coat dries, apply the spray paint again in the same manner. When the second application dries, it will give off a beautiful texture of the paint.
A helpful guide for you:
How Much Is a Light Pole Worth?
A light pole is a significant part of the road, houses, and many more. Their price depends on what material-based they are. Also, it depends on the design and quality of fixtures, sensor capability, and many more.
However, a solid light pole can cost you $2000 and in special cases, $2500 to $3000. And for the installation process, the cost exceeds to some extent as well.
Final Thoughts
It is important to look after the decoration of outdoor materials too. A light pole is a part of the good and aesthetic decoration. On top of that, painting can increase the durability of the light pole to a great extent.
That’s why it is important to learn the cost of painting these light poles so they can serve you for a long time.
Painting anything surely is a fun job but what is more fun when you try different experiments with several paints. As we all know there are several types of amazing paints, and there is an immense scope for you to try paints over another particular paint.
Flat paint is a kind of paint that comes with great charms. But can you paint flat over semi gloss? Will this experiment will fail you or amaze you? A lot of people want solid answers to these questions too. Remember that some paints are legit forgiving and flat paint is one of them.
So, the answer is “Yes”. You can definitely paint flat on semi gloss. But you also need to fulfill some requirements at the same time to get a satisfying result. Once you consider all the measures and steps, only then you can save yourself from an unpleasant finish.
Also Read: Is It Okay to Use Acrylic Paint on Shoes?
Can You Paint Flat over Semi Gloss?
If you are a DIYer and love to play with paints, you would definitely know what flat paint seems like. People also recognize it as “matte paint”. This paint carries highly advantageous pigmentation. It does not give you a much reflective finish except in some cases.
The perfect additive of this paint helps to hide imperfect areas, patches, unevenness of the surface, and other many textural issues with professionalism. And that is the very advantageous reason that you can paint flat on shinny semi gloss. Its pigmentation will hide everything.
Because semi-gloss paint is not as glossy as high gloss paint, the reflective glossy finish and sheen of the former one is easy to remove. And before applying flat paint, make sure that you efface the sheen of semi-gloss adopting the proper step.
Next Read: Painting Brick Pavers – A Complete Guide
What Happens if You Paint over Semi Gloss?
A lot of incidents might occur if you make attempt to paint directly over the semi-gloss painting. Semi gloss paints are very convenient. They are washable and more importantly, they have great adhesion and stick to the wall pretty strongly.
Besides enhancing the beauty of the wall, semi-gloss finish can stand heavy traffic and natural disaster like heavy rainfall too. But painting over the shiny reflection of the paint will not bring you a good result. Instead, you will face these problems later –
- Adhesion Problem
When you try to apply any kind of paint over glossy paint without removing the shiny texture of the paint, then the paint will not adhere to the surface. The sheen of the semi glossy finish lowers the adhesion power of the surface.
And that’s why it cannot embody the adhesion of the paint that is intended to apply over semi-gloss. As a result, the paint does not stick to the glossy surface properly.
- Spreads Unevenness
A surface with semi-gloss finishing is cool but with time it can get uneven texture. In this circumstance, if you apply any paint over it, then the finishing will not be even. The imperfections, little gauges, and crevices of the surface might pop up immediately after the surface once dries.
- Strip off Easily
Even though you manage to paint over your semi-gloss color without any preparations, you will not have a long-term result. The paint will start to strip off soon after it gets dried from different spots on the surface. And that will surely make the surface look disgusting and ugly.
- Dries Slowly
Painting directly on semi-gloss finish is a very bad idea. Because the surface loses its adhesive power, the paint takes a hell of a time to dry. On top of that, if you apply an oil-based paint over water-based semi-gloss paint, then a lot of things might go wrong including the slow-drying problem.
Important Read: Chalk Paint and Thermofoil Cabinets
How Do You Prepare Semi Gloss Walls for Flat Paint?
We have already mentioned above the negative results that happen if you paint directly over gloss paint. To avoid these unwanted results, you need to adopt the right ways of painting over semi-gloss. And for that, you require to start by preparing the semi gloss wall at first. Follow the steps below to prepare the wall perfectly.
Step 1: Remove the Stuff
First thing first, remove or replace stuff like photo frames, hangers, paintings, or mirrors hanging on the wall. Place them in a safe space and then pull out the nails, and curtain hardware. That might create little gauges or holes on the wall but we will take care of it later.
Step 2: Clean the Wall with Warm Water
Now is the time to wash the wall. To do it, bring a rag and a bucket of warm water. Add a little bit of mild dish detergent to it and mix them properly. After that, dip the rag into the water and squish away the excess water. Then with the dampened rag, wipe the wall and clean it from dust and debris.
Step 3: Prepare Yourself
After the wall is dried, be prepared for the next step. Put your safety suit on and wear the goggles too. Don’t forget to wear hand gloves too. As the next step is sanding the wall, it is going to affect your eyes and lungs if you don’t wear a safety suit.
Step 4: Sand the Wall
To fulfill this job, make sure to bring sandpaper. Buy 80-150 grit coarse sandpaper. Then start sanding from the top of the wall but make sure the wall has dried off by now. And then make the sanding happen till the bottom of the wall. Make sure you don’t affect the bottom surface of the wall.
Do the sanding with a back and forth motion and don’t press hard or overdo the sanding. It should remove the sheen of semi-gloss to a great extent.
Step 5: Sand again and Wash the Wall
The first round of sanding might not be enough. So go for the second or third round and sand out all the shiny and reflective texture of the semi-gloss paint. After that, wash the wall again in the same manner as we described before.
Clean the floor with a vacuum cleaner too so no speck of dust is there to make the dirty wall again. And that’s how your semi-gloss wall is all ready for flat painting.
How Do You Paint Flat over Semi Gloss Paint?
We have already described how you should prepare the wall to paint flat over any semi-gloss finish. Now we will describe how you should paint flat on a semi-gloss surface step by step. So, if you are keen, make sure you have all the equipment ready for the job.
Step 1: Get Your Materials
Before jumping into the primal job of painting, you should gather all the materials that you’re going to need for the job. It will save you from unnecessary trouble later on. Materials we will need for the job are –
- Quality primer
- Rolling brush
- Paintbrushes
- Sandpaper
- Painter’s tape
- Vacuum cleaner
- Paint tray
- Improved air passage
Step 2: Fill the Gauges and Sand the Wall
This step is not necessary if you don’t have gauges or nail holes on the wall. If you have any, then fill those holes with caulk or spackling paste. Let the holes dry and then sand the areas with sandpaper to make them even. Also, wipe out the extra dirt from the wall.
Step 3: Tape the Trims and Apply Primer
Now, to protect your baseboard trim and other attached hanging stuff on your wall, you require taping them. Use painter’s blue tape and tape all the delicate and sensitive areas properly. Then, apply the good primer using a rolling brush. Give it 24 hours to dry properly.
One coat of primer is not going to hide the surface properly. So, a second or third application is a must. This will ensure the sticking together of the surface as well. Ensure it gets air and the 24-hour time gap between each coat.
Step 4: Sand the Wall and Apply Flat Paint
After the final coat of primer is dried, you can sand the wall with fine-grit sandpaper. It will enhance the bond of the primer too. You can also skip this part if you don’t want that much perfection. And then apply flat paint with a paintbrush or paint roller.
A single coat will not make the real color pop of the paint. So, after the first coat dries in a day or two, apply a second or third coat of paint on the wall in the same manner. And then the flat color will pop and your job ends here.
Here is a helpful guide:
How to Paint Flat over Semi Gloss without Sanding?
You can follow the same process of painting flat over the semi gloss that we have described above just avoiding the sanding part. But you require considering some things about painting too.
1. Instead of sanding, think of etching the wall with a bristled brush. This will make the edges even of the wall.
2. Use satin flat paint. If the semi glossy finishing was oil-based then use oil-based satin flat paint. And if it was water-based, use water-based satin flat paint.
3. Also, be careful with the color you are choosing. To hide the shiny texture, adopt a deeper or darker color than the color of semi-gloss paint.
4. As you are avoiding sanding, you need a lot of coats of paint to hide the reflective texture of the semi-gloss paint. And as a result, the whole process will take a long time to be done perfectly.
Final Thoughts
Semi gloss paints are amazing; no paint can perfectly hide the imperfection as these paints are shiny and stronger. On the other hand, flat paints are not so pro at hiding imperfections. Yet these paints can be overlapped with other types of paints and the whole process is legit artistic.
Thermofoil cabinets are mostly known for versatility, stain-resistance, affordability, and easy to clean and maintain quality. It’s difficult to damage them easily.
Unfortunately, sometimes they are affected by sunlight, appliance heat, food residue, and splattered cooking oil. They can spoil the actual beauty of cabinets. But it may be common that due to budget or any other reason, you don’t want to replace the cabinet. No worries, update the color of your old Thermofoil cabinets with paints.
One common question can come to your mind, can you use chalk paint on thermofoil cabinets? The answer is, yes! There are some tips to follow to achieve an incredible result by applying chalk paint.
Let’s have a look!
Can Thermofoil Cabinets Be Painted Over?
Yes, you can. But firstly check whether the thermofoil does peel or not. If you find nothing is peeling off, you can paint over it. You should choose the correct primer to get a good finish. Consult with any local paint store for the appropriate primer. Then apply the finish paint according to your choice. Most of the users like to apply semi-gloss sheen on thermofoil cabinets.
Also Read: A Guide on Using Acrylic Paint on shoes
Can You Paint over Thermofoil Cabinet Doors?
Yes, your cabinet doors can be painted. Just make sure that the thermofoil of your door is not peeling off. Use a paintbrush to paint. Some of users prefer paint sprayers also. Take your time and do your paintwork carefully to get a good result.
If your cabinet doors are in really rough situation, I suggest you not to paint. It can waste your time and money. Consider making a new door.
Next Read: Learn the Easy Steps to Remove Paint from Rubber
What Kind of Paint Do You Use on Thermofoil Cabinets?
There are different options or different types of paints available on the market to apply on thermofoil cabinets. But recently water-based latex, enamel, and satin finish latex paint are the most used paint.
Water-based latex paint: Water-based latex paint is the most popular type of paint for its materials and quality. It is less toxic, durable, and easy to apply and clean. It doesn’t take more time to dry. It’s budget-friendly also. But sometimes it typically doesn’t stick well to high gloss finishes.
Enamel paint: If you want very glossy, durable, and long-lasting finish, enamel paints will be a great option for you. They’re strongly scratch-resistant. But they’re more expensive than other paints. If you want a matte design, they’re not ideal for that.
Satin finish latex paint: If you don’t like high gloss finish, consider applying satin finish latex paint. It’s not as full glossy as enamel paint. But it has a great quality of light reflection. It dries quickly and is less expensive.
Continue Reading: Tips for Removing Paint from Chrome
Can You Use Chalk Paint on Thermofoil Cabinets?
Yes. You can paint a thermofoil cabinet with chalk paint with a little effort. It doesn’t take much time and you can do it without spending huge money. Let’s know the application process.
Clean the whole cabinets very well: Before starting painting, the most important step is to clean the cabinets properly.
- Take warm water and a clean sponge or pad that must be non-scratch.
- Use a dish shop or degreasing detergent to clean it.
- Mix the detergent or soap with warm water and soak the sponge into it.
- Gently scrub the surface with it. Make sure there is no unnecessary stain and dirt on your cabinets.
Remove the cabinet’s drawer: Remove the drawers of the cabinets and keep them apart. It will help you to reach the cabinet framework and you can paint easily.
Remove any hardware if possible: If possible, remove the hardware from the drawer and door of the cabinets.
Fill the holes: If you remove the hardware, find out the hole like door knobs and drawer pulls. Then fill them.
Sand the surface gently: Sand the surface smoothly. You can use sandpaper to clean the surface. Don’t press so roughly. It can spoil the thermofoil layer.
Clean again: After completing the sanding process, clean every corner thoroughly. Allow them to dry naturally.
Check if any of the thermofoil lifting off or not: After sanding and cleaning, check the parts of the cabinet. If there is any part of thermofoil lifting off, fix them again. You can use glue to do the task.
Cover the unwanted areas: Cover the areas where you don’t want to paint.
Mix the paint properly: Before applying chalk paint, mix them well. Pour it into a paint tray. Take a paintbrush or roller for paintwork. Consider to use a high quality paintbrush to get a smooth finish.
If you have breathing problems, make sure to choose a non-toxic paint for the cabinets.
First coat: Dip the paintbrush in the paint tray. Then start painting. Move the paintbrush in every direction and cover all the project area. Avoid applying thick coats.
To avoid paint overpowering, choose a well-ventilated areas. Open the windows and allow the air blowing.
Second coat: After applying the first coat, let it dry. Surprisingly chalk paint dries quickly. Once it dries, it’s time to apply a second coat of the paint.
Consider a third coat: Wait until the second coat dries properly. If you think that it’s necessary, consider applying a third coat.
Apply varnish finish: Make sure you paint the whole project area and dry it thoroughly. Then apply the varnish finish. Though it’s not essential, it will offer you a long-lasting glossy finish.
Here is a guide:
How Do You Paint Peeling Thermofoil Cabinets?
Thermofoil cabinets are prone to peeling off for their materials. It’s common to start peeling off after using a few years. However, you can paint it without much hassle.
- Before painting, you have to remove peeling thermofoils. You can use a heat gun or hair dryer to remove them easily.
- Apply heat to the surface with a hair dryer or heat gun, scrub slowly and carefully to peel them off.
- You can use a razor blade, knife, or scraper to remove the adhesive edges.
- Before applying the paint, sand it lightly. Without properly sanding the surface, the paint will not stick well. You can use sandpaper to sand it.
- Avoid over sanding. It can create a cause to disintegrate the surface.
- After peeling off and sanding carefully, apply the paint according to your choice.
- Remember to wear hand gloves and safety glasses for your protection.
How Do You Ensure Proper Finishing on Thermofoil Cabinets?
Use a MDF (Medium Density Fiberboard) liquid primer to refinish the cabinets. Spray over the clean cabinet surfaces with this primer. A protective layer will be creating by using it. The primer also helps to stick well every coat of paints to the surface.
Before applying any primer, check the manufacturer’s instructions that they permit to apply it in thermofoil cabinets or not. Once the primer applies thoroughly, allow them to dry. Consider not to applying oil-based paint because of its strong smell, not so adhesive on thermofoil, and hard to apply.
Final Thoughts
So, what do you think about painting your thermofoil cabinets? Just clean the whole cabinet, and choose paint with the correct base and color that will offer you a perfect finish.
Take a paintbrush or a roller and start painting. Apply paint coats according to your need. The most important thing is, before applying another coat, let it dry properly.