If you are thinking of painting your high ceiling or interior walls and want to apply dry fall paint, it’s normal to ask a simple question before getting started – can you roll dry fall paint?
To answer the question, we would say yes, you can. But we would also suggest you not do it at first. You can give it a try by spraying first, then use rollers if you wish.
This article will answer different questions about this paint, plus walk you through how to use dry fall paint, step by step. So, buckle up, and keep reading.
What Is Dry Fall Paint Used For?
Before we go any further, let’s talk about what dry fall paint is.
Dry fall paint is a special type of industrial product or paint that is designed for spray application. By the way, it is also well-known as drop-dry paint.
This paint comes with some additives that help the paint dry fast. That’s why this versatile paint overspray dries very fast and thus reduces the damage due to overspray. And not only that but since it dries fast, the excess paint remaining on the surface can simply be swept away which makes it a great choice for industrial and commercial usage.
In commercial and industrial settings, this paint is most commonly used because these places require a professional touch. Apart from that, this paint can also be applied in residential settings. So, you may opt for this special paint for painting your ceilings, stores, basement walls, warehouse, garage floors, etc.
Plus, dry fall coatings come in different formulations like alkyd, epoxy, acrylic, etc. You can use it on a wide range of surfaces; like steel, wood, aluminum, gypsum, etc. So, if you think that your chosen surface is a bit uncommon to paint, don’t worry!
But you need to pick the right type of coating depending on the surface material, the environment, and the final look. And you can use this paint on an existing surface or a new one if you wish to do so.
Is Dryfall Paint Water Based?
Yes, dryfall paint can be water-based.It can come in a wide range of formulations like alkyd, epoxy, acrylic, and more. So, it’s no wonder that you will find water-based dry-fall paint. In fact, you can find many water-based interior dry fall paints in the market.
Can You Roll Dry Fall Paint?
You can, but we would suggest you not do it at first. As we said earlier, this paint is specially designed for spray application, so you can try spraying first.
It’s very common to overspray during paint application. It’s even more common for beginners. But that’s where you get to see the advantage of dry-fall paint.
Since dry fall paint comes with some additives that help the coat dry fast, you don’t need to worry about damage due to over-spraying. You can simply sweep away the excess paint. So, it’s less messy and less hassle.
However, we don’t want to limit your creative hands to simply spraying the paint. You may try painting with a traditional roller. And it would be a smart choice if you are thinking of covering a large area without making the surface too runny and messy. If you want to paint high walls, you can take an extension pole.
This will assist you reach further areas and achieve better coverage. You should try to make each stroke as even as possible, focus on making strokes with the same amount of paint you took for the previous stroke.
However, we think you already know that in some cases the pros of spraying outweigh the pros of rolling. So, it’s clear that spraying can cover areas where it’s harder to reach with a roller.
And you will be able to cover better with sprays than a traditional roller. That’s why we say, it’s okay to roll dryfall paint, but you should give it a try by spraying first.
Learn How to Rolling Walls (DIY) Like a Pro:
Can You Brush Dryfall Paint?
Since dry fall paint is specially designed to be sprayed on, it’s better to stick with paint sprayers to apply it. Spray paint will give you way more advantages than traditional rolling and brushing applications.
However, similar to what we said earlier, we don’t want to confine the application method to spraying only. You are encouraged to try different ways as well. So, you may give it a try with brushes and see how it goes.
Can You Use Dry fall Paint on Walls?
Yes, you can use dryfall paint on walls. Because it comes in different formulations, it works well on a wide variety of surfaces. That’s why you can use this paint on a variety of surfaces, but you may find it applied mostly on ceilings.
However, apart from ceilings, you can use this paint on warehouses, walls of condominiums, garage floors, and so on. So, we say yes, dry fall paint is applicable on walls.
How to Apply the Dry Fall Paint?
Dry fall paint is most commonly used on ceilings; we are going to discuss how you can spray this paint on the ceiling. Using the same procedures for applying on the ceiling, you can apply on other surfaces as well.
It may be necessary to make slight adjustments to the procedures depending on the surface and the location. So, let’s take a look at the step-by-step procedure.
Step 1: Lay Plastic Drop Cloth
While using dry fall paint, paint drippings may not be a thing of concern, but the excess paint will turn into powder, so it’s better to cover the furniture, floor, and other nearby objects with a plastic drop cloth. As a result, your furniture will not become dusty, and it will make the cleaning process easier once you are done painting.
Step 2: Remove the Dust from the Surface
Before we start painting, we need to make sure the surface is clean. There can be dust, dirt, grime, oil, etc. on the surface which can act as a barrier between the surface and the paint and thus reduce the durability of adhesion.
It’s better to use a pressure washer to clean the surface. A pressure washer allows you to clean spots that are hard to reach manually. However, a pressure washer may not be available every time.
That’s why an alternative would be to use a grinder to sand the surface well and brush off all the dust and debris manually. Sanding will help better paint adhesion.
Step 3: Repairing the Surface
If the surface you are intending to paint has some cracks, dents, or splits, you should repair the surface first. This is more applicable if you are doing a restoration project.
Step 4: Priming
If the surface you are planning to paint is a wooden surface, you should not proceed without a primer. Apply a high-quality primer before you move ahead. If the surface you are going to paint is made of iron, some spots on the surface may require priming. So, make sure to apply a good primer.
Step 5: Applying the Paint
Spray the paint from the paint sprayer, maintaining a proper distance. Try to make the coats as even as possible. Keep moving the sprayer nozzle as you cover the areas, and don’t hold the sprayer in the same spot for too long. Thus, you will be able to reduce dripping and achieve a better finish.
If you need to apply multiple coats, wait for the previous coat to dry before applying a new one. If it needs retouches on some spots, do it very carefully so that the retouches blend in with the surrounding paints.
Step 6: Cleaning
After you are satisfied with the paint, you can clean the powdered overspray and remove the drop cloth. If you wish to use a coat using a roller, you may go ahead, but make sure the previous coat is properly dried. In this case, you should do the cleanup after rolling.
See How to Paint using dry fall paint:
Painting Galvanized Metal with Dry Fall Paint
If you are thinking of painting galvanized metal with dry fall paint, there is a disclaimer. When it comes to painting a galvanized metal surface, you should be a bit more careful. You should avoid using alkyd dryfall on this surface.
If you apply alkyd paint, a chemical effect will take place is which called “saponification” or “zinc soap”. This reaction will result in detaching the paint from the exterior. All your hard work will be wasted, and you will need to start over.
To overcome this problem, you can apply 100% acrylic paint instead of using alkyd type paint. Another useful option to solve this issue would be to use a two-component epoxy solution.
Final Thoughts
When over-spraying causes issues, dry fall paint is the ideal solution. This paint overspray dries very fast and thus reduces the damage due to overspray. The excess paint remaining on the surface can simply be swept away, making your work easier and less messy. In this article, we talked about applying dryfall paint using different instruments. So, if you wish to apply the paint the traditional way instead of spraying, remember the answers we gave in the article.
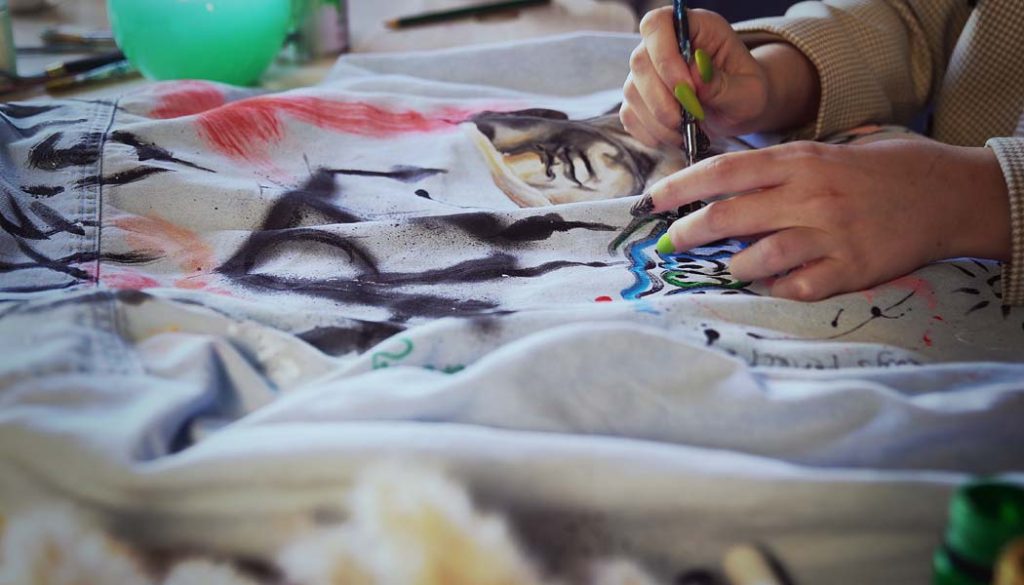
If you have a painted denim jacket, it’s normal to think twice before throwing it in the washing machine with other clothes. It’s even more challenging to decide when you’ve painted the jacket yourself!
Photo by Cojanu Alexandru
No worries, this article will show you how to wash a painted denim jacket step-by-step, without losing those lovely colors. But to give you a bit of an overview, you can wash your painted denim jacket by hand, in a washing machine, or simply spot clean if there are any stained spots.
In this guide, I will walk you through the procedures in detail. So, keep reading to learn the easy steps to wash a painted denim jacket.
Painted Denim Jacket: What You Need to Know before Washing
It doesn’t matter how much we care for our clothes, they will inevitably get dirty, and it’s completely okay. But when it comes to painted clothes, you spent hours making them perfect, it’s a different scenario. You simply can’t toss them in the washing machine, relax, and sip some warm coffee!
In the case of washing painted clothes, the first thing of concern is the color, I understand. That’s why I feel like sharing some useful information that you must check before washing your painted denim jacket. Have a close look:
Use High-quality Paints
Jackets painted with low-quality paints may end up fading colors, cracking, or flaking. So, make sure to use high-quality paints if you intend to wash the item in the future.
Don’t Wash the Jacket Right Away
You should not wash the jacket right away after the paint has dried. You should give it some time to let the paint sit in the fabric properly. If you choose a dirty, old jacket for painting, wash it before painting instead. Once it’s completely dry and suitable for paint, add your artsy touches.
Do Not Wash It Frequently
You should try to wash your painted denim jacket as little as possible. The more you wash the higher chances of rubbing off or fading paint. That’s why try to protect it from dirt and stubborn stains as much as possible.
Use Cold Water
Putting the painted jacket in boiling water may seem like a good idea for removing stubborn stains, but is it really effective? Perhaps, you should think twice!
You should opt for cold water so that high temperatures of boiling hot water don’t affect the paint. Plus, you should carefully check how much temperature the paint can withstand. For this, you should check the packaging or label of the paint bottle. Make sure the water temperature never exceeds that limit.
Select a Gentle Detergent
Make sure the detergent you select is not too harsh. Generally speaking, for normal painted clothes, you should use water-based laundry detergent. And the amount should not be more than just a few drops. Also, you should avoid bleach and alcohol-based detergents. Alcohol can damage the paint.
You may try the same ruling for your painted denim jacket. But always choose the detergent carefully. And don’t use any fabric softener.
It is possible to wash a denim jacket in multiple ways, depending on the stain and how dirty it is. So, let’s take a look at the step-by-step methods.
Hand Washing
I know it may sound tiresome, but according to me, this is one of the most effective ways to wash a painted denim jacket. This is because you can simply clean the dirty areas without disturbing the paint too much. Anyway, here is how to get started:
Step 1: Fill the Bucket Halfway with Water
Like I said earlier, use cold water to wash your garment. Take enough cold water in a bucket to submerge the jacket completely. You may use your clean kitchen sink or bathtub as well.
Step 2: Use Some Mild Detergent and Wait
You should add mild detergent to the water. Just a few drops are enough. Gently agitating will help achieve good foam. Submerge the jacket properly and wait for a while to let the detergent do its work.
Avoid using fabric softeners and alcohol-based detergent. Alcohol-based detergent can damage the paint on your precious jacket.
Step 3: Scrub the Remaining Stains
Take the jacket out of the bucket. Your jacket should be clean by now. If you still notice stains or traces of dirt after washing, gently apply some soap on that spot and rub off the marks.
If there are some stains on the painted area, be more careful because the more you touch the painted area, the higher the risk of damaging the paint.
Step 4: Rinse the Jacket
Now, it’s time to take the jacket to the sink and rinse it in cold water. Keep rinsing, and don’t stop until you notice the water running clear.
Step 5: Let the Jacket Dry
After rinsing, gently wring out the excess water. Try avoiding wringing the painted area. Gently wring out the areas close to the painted area.
Air-drying the jacket will be a safer option than putting it inside a drier. That’s why I recommend you place the jacket on a hanger and let it stay there until it’s completely dry.
However, leaving the jacket in the hot sun may fade the color, so leave it in a place where it won’t see the sun directly but is warm enough to dry properly.
Machine Washing
Machine washing can damage the paint, so before proceeding with this method, make sure the paint on your jacket is properly set in. After you think everything is okay, follow the steps below.
Step 1: Prepare the Jacket for Washing
To protect the paint from getting damaged inside the washer, first, turn it inside out. In order to reduce the impact as much as possible, you should keep the painted side inside.
In case the jacket starts bleeding colors, I recommend washing it alone to prevent it from affecting other garments. If your jacket has some delicate designs and stones along with paints, try hand-washing instead.
Step 2: Setting the Washing Machine
Set the washing machine to a delicate cycle and make sure you use cold water. However, sometimes you may need to use warm water to remove stubborn stains, but make sure the temperature doesn’t exceed the limit the paint can withstand.
Step 3: Add Detergent
Use a mild detergent. The amount should not be too much. Let the washing machine complete its cycle.
Step 4: Allow the Jacket to Dry
Air dry the jacket in a place where it won’t see the sun directly but is warm enough to dry properly. Let it stay there until it’s completely dry.
Learn How to Wash Painted Denim Jacket in Washing Machine:
Spot Cleaning
Compared to other options, this is the safest. This is a convenient option if you have some stains on your denim jacket. Because you don’t need to wash the whole jacket, just the stained areas.
You can simply remove the stains with detergent. Take a look at the steps:
If acrylic paint doesn’t set in properly, it can wash off denim. Plus, if you use some harsh chemical-based products for washing, it may damage the paint.
However, the paint will last long once it sets in properly. And after that, you can wash your denim outfit without worrying too much about the paint.
Does Paint Stay on Denim?
Yes, paints stays on denim. Custom painting on denim outfits is a great way to express your creativity and stand out in the crowd! If you select a good paint, the art will not be temporary that will disappear after a wash. However, denim painted with low-quality paints may end up cracking over time.
The amount of paint you use on the denim outfit is another factor that determines whether the paint will last on the garment or not. So, make sure you use the paint in the right amount. Plus, use fabric medium.
And it’s not enough to select a good paint and use the right amount; you must give the paint enough time to dry and do due diligence to make the paint adhere to denim. By due diligence, I mean, heat setting the artwork after finishing. This will result in longer-lasting artwork on denim.
Denim jackets are an excellent choice for everyday wear. They are comfortable, stylish, and durable. And when you paint your regular denim jackets, it takes the style to a whole new level. But wearing them regularly makes them dirty over time.
So, when the confusing moment comes, and you can’t decide how to wash your precious denim jacket, remember the methods I talked about in this blog and wash with confidence.
Painting windows white has always been proven classic and goes well with any home décor. But now painting window black is in trend and you must be also thinking of it. But the question arises does painted black window block light?
Image by Tom from Pixabay
Well, the question is legit since there are people who want to block the sunlight from entering their room. And the window that has black paint on it can block the light successfully. In fact, painting the windows more black than any other color is also a reasonable option. However, the blockage depends on the wavelength of the sunlight as well.
So, to get more information, keep up with us till the end and know everything.
Does Black Paint Block any Light?
Undoubtedly, black paint on windows can block light. But there are lights of different wavelengths. Hence, the answer mostly depends on the wavelength of light that is going to pass through it.
Nonetheless, visible light comes with a range of wavelengths from 750 nm to 350 nm. Black paint has a resisting strength towards the light of a certain wavelength. There is a certain way of working this out. When the light comes, the coating of paint stops it from penetrating. And then reflect off the substrate later escaping.
Then again, it also depends on the thickness of the paint. If you paint the window with a thick coating of several layers then it can also resist the gamma radiation entering the room.
Moreover, black color can absorb light. So, you need to put less effort when you intend to paint it black, whereas to paint other colors you may have to apply coatings that are twice the thickness of any hiding film.
Therefore, using black paint to block any light is considered a great idea.
What Does Black Paint Do to Sunlight?
There is something strange that happens between black paint and sunlight. Black paint can absorb it all, unlike other paint colors. The paint also absorbs the heat from the light.
Moreover, it is shown in studies that a black object when kept under sunlight, it maintains a cooler temperature of about 16 degrees Celsius.
Then again, studies have also proven that black paint can conserve energy by cutting carbon dioxide emissions to a great percentage.
Does Painted Black Window Block Light?
Consider black painted window is a good treatment to block light and nowadays, it has become a popular option.
But the question is how does it work?
Well, you may think the color can block all light. But the truth is it might absorb more light compared to an unpainted window but it will not block it all. In fact, even the paint with the darkest color cannot prevent the light entirely to pass through.
The amount mostly depends on the paint type and the thickness of the coatings. There are some paints that allow the light to scatter and glow around the window edges.
Amount of Light a Painted Black Window Block:
Compared to other paint colors, a black window can block out a remarkable amount of light. However, black color also has several levels of darkness. Thus, the amount depends on the level of darkness of the black paint.
Moreover, it also depends on the coating thickness. If not all, a black-painted window will block most of the light. Again, for your information, the amount also depends on the window thickness.
Affecting the Transmission of Light:
Speaking of light transmission, black paint can do it better compared to other light-color paints because darker colors absorb more light.
This indicates that when you paint black on your window surface, it reduces the amount of light that can pass through it. It is effective especially when you really do not want your room to be fully dark at day time. Also, it is suitable for a room if you want to make it a movie viewing.
Advantages of Painted Black Window
Blocks Light
First thing first, black windows can block a great deal of light from passing through them. Anyone who has a problem with direct or indirect sunlight or wants his room to be dark almost 24/7, must paint the windows black.
Cost-effective
Painting black is always cost-effective compared to other color paints. The color is easy to select and easy to buy and also, easy to apply. There is no chance the window will look bad once you apply black paint to it. In the case of applying other paint, you may not find it eye-pleasing and want to repaint with some darker color.
No Warping
Many people remain worried about the warping. Warping refers to the distortion of the surface shape due to several environmental facts like moisture or heat exposure. Nonetheless, with black paint, there is no chance of warping. Many windows are painted white since it has light reflective value.
However, black paint can offer more if you manage to select the paint with the right formulation.
Low Maintenance
It is another great reason why you should paint your windows black. Light colors always attract more dirt compared to darker ones. Black windows remain clean for a long time and do not require cleaning frequently.
However, there are some drawbacks to having black windows as well. That is black windows make the room smaller and a bit closed off whereas the white ones make it feel spacious. Moreover, it gives a dim vibe making it difficult to have an outside view.
Also, cleaning black windows is a bit tough since they show fingerprints and smudges more easily than other paint colors.
Can You Paint Windows Black to Block Sun?
Painting windows black to block the sun is arguably the best yet most stylish decision. So, yes, you can definitely paint your window black to block the sun. Especially, if you have vinyl or aluminum windows, then painting them black will make them look super cool.
Moreover, there are several advantages of painting windows black to block the sun. You may choose from any bold color but black is always a slayer. It will never look old or out of style.
Why to Paint Window Frames Black?
If you have good taste, you will notice a black window frame is all you want for your home. It makes your home look modern. Moreover, if the walls or siding of your home is painted light color, then painting the window frames black will give a striking contrast.
The black frame makes the window more defined and matches almost every design. Also, painting the window frames black is the easiest task on earth. Again, ancient castles also used to have black window frames. So, this style was around for a long time. Yet, black window frames are never out of trend.
How to Paint a Glass Window Black – Step by Step
Painting a glass window black is an easy task when you select the right paint and know the right method. A step-by-step guide to blackening glass windows is given below.
Step – 1: Prepare the Window
This is the very first thing to do before starting the paint job. You need to clean the glass surface and its edges properly with a microfiber towel. You can also use any window cleaner for this purpose.
However, while cleaning with paper towels, make sure there is no paper particles left on the surface. Otherwise, the particles will not allow the paint to adhere to the glass properly. Thus, use them sparingly to get rid of this problem.
Step – 2: Mask with Painter’s Tape
When you are done cleaning the windows, it is time to cover the areas where you do not want to spill the paint. Hence, it is suggested to cover the wooden outline of the windows by using painter’s tape.
You do not need to put excessive tape over the line. Otherwise, removing them will be tough. Rather make it easy by covering the lines with the right amount of tape only. Also, to make the right alignment while covering with painter’s tape, use a ruler or thin object to guide yourself right.
Step – 3: Apply the Paint
When you are done masking the outline, it is time to do the main task. Apply the paint using a bristled brush or you can also spray the paint. With the selection of the right black paint, spraying one coat over the glass window is enough. However, you can apply another coat of black paint to achieve thick color.
Step – 4: Unmask the Lines
When the paint dries to touch and cures properly, uncover the lines where you had applied the painter’s tape. After uncovering, voila, your job is done! Yes, it is that simple.
Final Thoughts
Now that you know if a painted black window blocks light or not, you can take your decision. Blackening window glasses offer many advantages for sure, but this is surely not the thing you want for your every room. Moreover, there are other many ways to block the light to pass through your windows. And most of them are also as effective as painting the windows black.
Are you looking for a way to add glamour to your home décor? The solution lies in gloss. How many coats of gloss are needed on skirting? Let’s figure out how many coats of gloss on skirting that you need to apply for better result.
A good rule of thumb is to apply two coats of gloss to primed skirting. One coat may be a bit too sheer. The two coats will give you a glossy finish that will last longer and resist wear and tear.
A two-coat application minimizes the appearance of drips and irregularities along the nail lines on the stock fabric. This will ensure that you achieve the desired level of shine and protection.
Factors to Determine How Many Coats of Gloss on Skirting
When determining how many coats of gloss you need to apply to skirting, there are a few factors to consider. It depends on the type of wood, the climate, and the humidity level of your home. Let’s get into more details.
The Type of Materials
Material for skirting can fade and wear more quickly than others. Many types of wood skirting may require two coats of gloss, while other materials, such as PVC, may only require one coat. Each type of wood requires a different amount of gloss. Generally, skirting made from pine would need two coats of gloss, while skirting made from hardwood might only require one.
The Climate where Your Home Is Located
For skirting to stay glossy for an extended period, apply two coats of gloss in humid climates. Humidity levels can affect the longevity and wear of gloss paint.
Level of Finish
If the skirting has a lower level of finish, gloss coats will need to be reapplied more frequently than if it has a higher level of finish. As a result of the amount of daily wear and tear put on skirting in typical home use, lower gloss coats may not last for a long time.
Type of Skirting
Gloss coats may be required for some skirting types. It is generally necessary to apply two coats of gloss to skirting made from pine, whereas one coat may be sufficient for skirting made from hardwood.
How Many Coats of Gloss on Skirting?
Generally, two coats of gloss are sufficient to achieve a professional finish on skirting. Using two gloss coats of paint will prevent dirt and dust from adhering to the finish, making it last longer. In addition, gloss coats of paint on skirting will also reflect light and provide a degree of sheen.
Applying three coats of gloss in areas with high humidity is recommended. Gloss coats of paint ensure that the skirt will remain glossy for a long time. Most of the time, one or two coats of gloss on skirting should be sufficient in dried areas.
Does Gloss Paint Need 2 Coats on Skirting Boards?
Gloss paint needs two coats to ensure long-lasting gloss on skirting boards. A two-coat gloss application on skirting boards exposed to dust and full paint will repel dirt, dust, and contaminants from the outside environment. By doing this, you can ensure that your skirting stays looking clean for a more extended period.
Additionally, if skirting boards will be used in a highly humid environment, three coats of gloss may be necessary. As long as the area is not overly dry, a glossy coat of paint will keep the skirt looking glossy for a long time. In most cases, one or two coats of gloss should suffice on skirting boards that will only see occasional dust and dirt accumulation.
However, two coats of gloss may be necessary for skirting boards that will be in direct contact with the ground. This is because dirt, dust, and other contaminants can quickly accumulate on gloss-painted skirting boards.
How Long Does Gloss Take to Dry on Skirting?
It can take up to two hours for the gloss on the skirting to dry so you can touch it. However, the material can take up to 24 hours to dry completely. Water and other moist substances can also cause gloss paint coats to peel. Before applying additional gloss coats, ensure the skirting boards are completely dry.
Nonetheless, the paint cures over some time, usually within two to four weeks. On average, gloss coats of skirting paint takes 4-6 weeks to cure and become fully endurable. Weather conditions can affect this time frame, however.
How Long Should You Wait between Coats of Gloss?
You should wait at least two hours between coats of gloss on skirting. It will prevent any peeling or other problems with gloss coatings by allowing the paint to dry completely. To fully cure the paint on skirting boards, experts recommend waiting at least three hours between coats of gloss.
Also, you should wait four hours before applying a second gloss coat if the skirting coat will be in direct contact with the ground. Taking this extra time allows the gloss coats to fully cure and provide more protection against dirt, dust, and other contaminants.
Learn How to Paint A Skirting Board:
Final Thoughts
To conclude, it is recommended to have at least two coats of gloss on the skirting to achieve the desired level of shine and protection. However, the type of skirting and weather conditions might differ in the coat number. The gloss coat needs at least 24 hours to dry completely. And ready to recoat within two hours.
For all the crafters out there, acrylic paint is a universal term. It’s super easy to use and can be found in any household. Moreover, it is pretty cheap to get. It is so flexible and resilient that it can be used on all types of surfaces including wood, paper, leather, and many other surfaces. But what about fabric – can you use acrylic paint on fabric?
Acrylic paint works on fabric and stays on it permanently. But there is an issue. You just can’t make acrylic paint stay on fabrics all by itself. I mean, you need a medium to make it stay on fabrics. Otherwise, it won’t last forever.
“Now, what’s a medium”, some might wonder. Don’t worry and just read along as I am going to explain everything that you need to know about acrylic paint in detail and also give you a step-by-step guide to show you how you can use acrylic on fabric.
Can You Use Acrylic Paint on Fabric?
As already mentioned above, you can use acrylic paint on your favorite fabric very easily and quite cheaply as well. It is so versatile and flexible that people use acrylic paintson many different fabric surfaces such as:
Shirts
Window curtains
Pillow covers
Shoes
Bed sheets etc
But there is an important thing to consider. You just can’t grab some acrylic paints and start painting on your fabric surface. No sir, it won’t work that way at all. You need to use the proper medium to ensure your acrylic paint stick to your desired fabric and make it water-resistant as well.
So, what is a fabric medium? To put it simply, a fabric medium is a solution that helps your acrylic paint sticks to the fabric surface easily. It is a formula that people use to mix with their acrylic paints before painting on fabrics.
There are many benefits of using a fabric medium. One benefit is that it makes acrylic paint stick to your fabric surface better and the paint will not wash away or fade after washing and using over time. Moreover, it makes the paint softer and makes it last longer.
Another benefit of using a fabric medium is that it lets you explore various blending techniques and also enables you to add watercolor effects as well.
Can You Use Acrylic Paint on Fabric Shoes?
Acrylic paint is such a versatile color that it sticks to fabric shoes quite easily. Not only fabric shoes but also leather shoes, vinyl shoes, vans shoes, and other shoe materials as well.
Clean your shoe properly and make sure there are not any traces of dust left.
Use masking tape or newspaper to mask off nearby areas where you don’t wish to paint.
Use fine-grit sandpaper to give a light sanding to your fabric shoe so that the paint adheres to the surface better.
Shake the can of paint properly and apply a thin layer of paint using a brush or airbrush sprayer.
Let the paint dry.
Apply the second coat of paint and let it dry again for 24 hours.
Apply an acrylic sealant to protect the paint from any kind of wear and tear.
Let it dry for one final time and then wear your shoe and show it off to others.
What Happens if You Paint Acrylic on Fabric?
Acrylic is such a versatile paint that it can be used on a wide range of surfaces without any trouble. But it creates some issues when applied to fabrics.
The surface of the fabric is very smooth that’s why when you apply acrylic paints on fabric walls, it loses flexibility. Moreover, after painting, the paint may peel off or wash away completely.
Again, if it doesn’t peel off completely, the surface area may feel stiff and you may face discomfort while wearing your favorite fabric. So, is there any solution to this problem?
Of course, there is one solution to this issue. And the solution is to add proper fabric medium with your acrylic paint to turn it into fabric paint. In this way, the paint will not come off from the fabric surface and the fabric will feel softer and smoother as well.
What Are Mediums for Acrylic Paint on Fabric?
If you use acrylic paint on your desired fabric directly, you will not get a smoother finish. Moreover, your fabric will feel itchy and rough to wear. Again, the paint will peel off and bleed from the fabric after washing.
So, in order to prevent this from happening a medium is applied to acrylic paints. A fabric medium is a thick liquid substance that turns acrylic paints into fabric paints. The benefits of using medium to acrylic paints are many.
Firstly, it dilutes acrylic paints without changing the color. Secondly, it lengthens drying time and makes the fabric feel soft. Thirdly, it reduces color bleeding from the fabric. And finally, it helps the paint to cover the fabric surface evenly.
There are basically two types of mediums that you can use on fabric. The first one is called fabric medium which is perhaps the best one and the second one is called gel medium which is quite similar to the fabric medium.
Fabric mediums come in two different forms. One is known as a store-bought medium which you can buy from different craft shops near you or online. And the second one is known as a homemade medium which you can prepare at home.
Can You Use Acrylic Paint on Fabric without a Medium?
Yes, it’s possible but not advisable. You see, if you paint your fabric without the help of any medium then your fabric will lose its smoothness and flexibility. Moreover, the paint will peel off and may wash away completely after one or two washings.
So, the best thing is to always use a medium. “But what if I don’t want to use a medium? Is there any other way?” – Some of you may ask.
Fortunately, there is one other way to do this. Instead of adding a fabric medium, you can use glycerol. There are some other substances that you can use with acrylic but using glycerol is the best option among them.
But you need to dilute the glycerol with water first before mixing it with acrylic paint. A ratio of 1 part of glycerol to 5 parts of water is considered ideal for this.
How to Prepare Acrylic Paint for Fabric?
You just can’t use acrylic paint on your fabric without any pre-preparation. You have to prepare your acrylic paint first to make it ready for your fabric. For this, you need to mix fabric medium with acrylic first.
To do this, you have to simply mix 1 part acrylic paint, 1 part fabric medium, and 7 parts water. If you want a more washed-out look then you can add extra water.
After that, you should let the paint soak for two hours. Remove excess water from the fabric and let the fabric dry out completely.
How to Prepare Fabric before Acrylic Painting?
You just can’t pick a piece of fabric and start painting on it with acrylic paint instantly. You need to take some time out and prepare the fabric first before you go on with your painting job.
Firstly, you should wash the fabric properly with clean water and make sure that there is not a single speck of dust or dirt remaining on the fabric. Once the washing is done, dry out the fabric completely.
After that, you should prepare the paint using the proper fabric medium. Take your fabric medium and mix it with your acrylic paint to turn it into fabric paint.
Once all the processes mentioned above are done, then you are all set to go for painting your fabric using acrylic paint.
How to Paint Fabric with Acrylic Paint?
Painting your fabric with acrylic is an easily doable process and anyone even you can do it if you follow these simple steps.
Here is the step-by-step process of painting your fabric with acrylic:
Wash Your Fabric before Painting
Wash the fabric that you want to paint with acrylic very carefully. Make sure that there is not a single piece of dirt left on the fabric surface. After cleaning, dry out the fabric completely.
Prepare the Paint Using Medium
Take your fabric medium and mix it with your acrylic paint to turn it into fabric paint. Make sure to follow the instructions properly while mixing the medium with the acrylic paint. Always follow the manufacturer’s guidelines and instructions.
Prepare the Fabric and the Workplace
To get an even surface, stretch your clothes or fabric with cardboard. But make sure not to overstretch it because when the paint is dried up it may cause wrinkles to your fabric.
Paint Away
After all the formalities are done, you may start painting your fabric with newly prepared acrylic paint. You may use brushes, sponges, and stamps to let loose your creative ideas. Sewing chalks can come in handy if you want to make any sketches.
Dry the Fabric
After you finish your painting, you need to leave it to air to dry for at least 24 hours max.
Seal the Paint
After the paint is dried up completely, you need to seal it properly. The best way to seal the acrylic paint on the fabric is to iron it for 5 minutes. This will make the paint washable and permanent.
Wash the Newly Painted Fabric
Don’t attempt to wash your fabric instantly after painting it with acrylic. You must wait for 5-7 days before you take steps to wash it. While washing, make sure that you are washing it separately so that it doesn’t get contaminated with other clothes.
How to Seal Acrylic Paint on Fabric?
After painting your desired fabric using acrylic paint, it becomes very important for you to seal the paint properly to make it permanent and washable. “But how to do it?” people frequently ask.
Well, there are 3 proven ways to seal acrylic on fabric:
Heat-setting
You need your iron to apply this method. Take your iron and heat it up. Be sure not to overheat your iron. Keep the heating level from medium to low. Now iron the opposite side of your fabric to seal the paint and make it become permanent.
Make sure to dry the fabric first properly (24hrs) before ironing, for the best possible result.
Indirect Ironing
Indirect ironing is done by not ironing the fabric directly. Sounds weird right? You can achieve this result by heating up your iron and then holding it on the part of the paint. The heat coming from the iron will seal the paint perfectly.
Applying Medium
The last process involves applying another coat of medium on the fabric surface that has already been painted.
Take another coat of medium and apply it carefully on the surface of the painting to seal the paint. This unique process will help you seal the acrylic paint and make the fabric both washable and permanent.
How to Make Acrylic Paint Stay on Fabric?
By now, you have already learned that you can paint your desired fabric with acrylic paint very efficiently. Now the main big issue is how you can make the paint stay on the fabric permanently as acrylic paint doesn’t adhere to the fabric surface that easily.
Well, this result can be achieved by following two simple methods:
Method #1
You can make your acrylic paint stay on the fabric surface by adding a suitable fabric medium or textile medium with it. You see, adding a proper medium with your acrylic paint will turn the acrylic paint into fabric paint.
This will make the paint stay on the fabric surface easily and make it washable and permanent as well.
Method #2
The second method involves the process of sealing. If you can properly seal the paint using the processes mentioned above, you can make your acrylic paint stay on your fabric.
Can Acrylic Painted Fabric Be Washed?
Of course, you can wash acrylic painted fabric. You can also remove the paint by washing when the paint is still wet and has not dried up completely.
You see, acrylic paint is water soluble while wet, so it makes it washable. You can wash it off very easily using water only when the paint is still wet and not sealed. Sealing makes the paint permanent and it makes it quite impossible to wash off the paint from the fabric.
You can use dish soap, isopropyl alcohol, hair spray, nail polish remover, ammonia, and vinegar to make the paint wash off from the fabric while the paint is wet.
“So, does it mean we can’t wash the paint off when it’s dry?” No, it’s not impossible but really very difficult to do as dry acrylic paint becomes almost permanent on fabrics. After completely dry, we can wash the fabric to clean not to remove paints.
Is Acrylic Paint Permanent on Fabric?
No, acrylic paint by nature is not 100% suitable for painting on fabric. If you paint your fabric with acrylic, it will not stay on your fabric for a long time. So, does it mean that you can’t make it permanent?
Yes, of course, you can make it permanent for sure. First, you need to use a proper fabric medium with acrylic paint to turn it into fabric paint. In this way, the paint will gain permanency.
Secondly, you should seal the paint properly. After painting your desired fabric with acrylic, it becomes very important for you to seal the paint properly to make it permanent and washable.
By following the two processes mentioned above, you can make acrylic paint permanent on your fabric.
Learn How to Paint on Fabric Using Acrylic:
How to Care Acrylic Painted Fabric?
Once you are done painting your fabric with acrylic, you need to take extra care of your newly painted fabric for making the paint smooth and permanent. You can follow the following instruction for the best result:
Wait for at least 4 days before you wash your newly painted fabric.
Always try to wash the fabric with your own hands.
While washing with your washing machine, you should try to select a gentle press wash and low heat setting.
Avoid using a dry cleaning machine. But if you do, make sure to dry the fabric at room temperature.
While ironing the fabric, always iron the opposite side of the fabric. Otherwise, the heat of the iron may damage the paint.
Final Thoughts
By following all the instructions mentioned above, you can very easily paint your fabric with acrylic paint. Always use the proper medium and seal the paint properly for making the paint permanent and washable. Do not wash your fabric too frequently as it may damage the paint.
Did you notice your car paint’s shine is fading away? It might be because of fading away your car’s single stage metallic paint. When facing this problem, you might have considered buffing the paint. So, this question might arise can you buff single stage metallic paint?
Image Via Youtube
You can buff single stage metallic paint. Buffing and then polishing the single stage metallic paint will renovate the surface. But buffing the single stage metallic paint is not easy. You have to follow a step-by-step process of multiple buffing on the surface.
Whenever it comes to buffing or polishing single stage metallic paint, you need to follow an appropriate procedure. Moreover, knowing about single stage metallic paint is essential. So, let’s see the details about it.
Can You Buff Single Stage Metallic Paint?
You might have seen buffing over a car or vehicle’s paint. But single stage metallic paint is a bit different than other paints. Generally, single stage metallic paint is the kind of metallic paint that doesn’t need to add additional chemicals.
That’s why the name is single stage. Since the paint is a single stage, you might think that buffing might remove the paint from the surface. But you can buff the single stage metallic paint following some procedures.
For buffing single stage metallic paint, you have to use sandpaper and buffer. However, if you want to use sandpaper, you can use sandpaper made of aluminum oxide or silicon carbide. But you must ensure the sandpaper is not too dry to scratch out materials from the surface.
When you buff a metallic surface, it will remove scratches from the surface. So, the surface becomes smoother, glossier, and shinier. People like to buff metallic paint with a glazing compound. This makes the surface look new.
Sometimes, buffing too much or doing it for extra time might cause the removal of paint materials. Then you have to paint the surface again, and the whole outlook will not be good. So, you must ensure to buff the single stage metallic paint for a sufficient time in a proper way.
Generally, other paints need a clear coat for finishing, and this clear coat can be removed while buffing. Since single stage metallic paint doesn’t need any additional clear coat, there is no chance of removing the clear coat. So, you can buff single stage metallic paint.
Can You Wet Sand and Buff Single Stage Paint?
You can wet sand and buff single stage paint. But you have to be careful about some factors. However, wet sanding is far better than dry sanding. Water is used when wet sanding a surface. So, the water works like a lubricant. With lubricant, the sanding doesn’t create any scratches on the surface.
But while wet sanding, you still should be careful. Whether the sanding is wet or dry, it can remove some of the paint materials sometimes. So, you can wet sand on the places that are affected or need to be sanded.
Then you can buff the single stage paint to smooth and polish the surface. You know that buffing the surface provides an additional glossy effect. The single stage paint doesn’t have an excess coating on it. The chance of particle removal is pretty low. So, you can wet sand and buff the single stage paint following the right procedure.
Can You Cut and Buff Single Stage Paint?
Yes, you can cut and buff single stage paint. Single stage paint might be of different types. So, whether you can cut and buff single stage paint or not depends on the type. Most single stage paints are suitable for cutting and buffing.
Sometimes people cut and buff the single stage paint when the paint is old or faded. People also cut and buff single stage paint when the surface is new. So, if you are painting on a surface and planning to cut and buff the paint, you have to wait sufficient time.
If you cut and buff single stage paint just after applying the paint, the paint will be removed. Moreover, the paint will not be durable. So, you must let the single stage paint dry for enough time. For example, you can wait for 24 hours to let the paint dry completely. Then you can start cutting and buffing the surface.
The single stage paint will be easy to cut and buff if the paint is single stage urethane. However, cutting is preferable when the paint is covered with a clear coat. But single stage paint doesn’t need a clear coat necessarily. You can still cut and buff single stage paint.
How to Fix Runs in Single Stage Metallic Paint?
Runs on a painted surface are pretty common. Especially when you apply spray paint on a surface, you will see little drops or runs of paint on the surface. These drops or runs make the surface unsmooth and unattractive.
Now that you know you can fix single stage metallic paint in different ways, you might want to know about fixing runs in this paint. So, let’s see how you can fix runs in single stage metallic paint.
Step-1: Make the surface ready
Before starting to fix runs in the paint, you should make the surface ready. When you paint on a surface, the surface needs to dry completely. If the paint is wet, the paint might remove while fixing runs. That’s why you should let the paint dry completely for 24 hours.
Step-2: Wet sanding
Wet sanding is an efficient way to remove unsmooth residue from a painted surface. You should use water to follow this process. You can take some water in a bowl. Then take 1000-grit sandpaper. After that, soak the sandpaper in the water for a while.
While sanding on the runs, you must spray water on the runs first. Water will act like a lubricant. You must dip the sandpaper into the water while sanding the runs. Thus you will see the runs are falling from the surface.
Step-3: Make the surface smoother
Now you have to follow the same process with 1500-grit sandpaper. In a similar way, the sandpaper must be wet, and you should spray water on the runs. Follow steps 2 and 3 until you see a smoother surface.
Finally, you have to take a small amount of glazing material on a sponge. Then rub the surface gently with the sponge. This will give a shiny and new look to the painted surface. Dry the painted surface for a sufficient time before using the painted material.
Learn to Do Buff Single Stage Paint:
Final Thoughts
Single stage metallic paint is a common paint for car surfaces. Sometimes, we need to polish the paint after painting the old or new car. So, many people buff the car paint for a smoother finish.
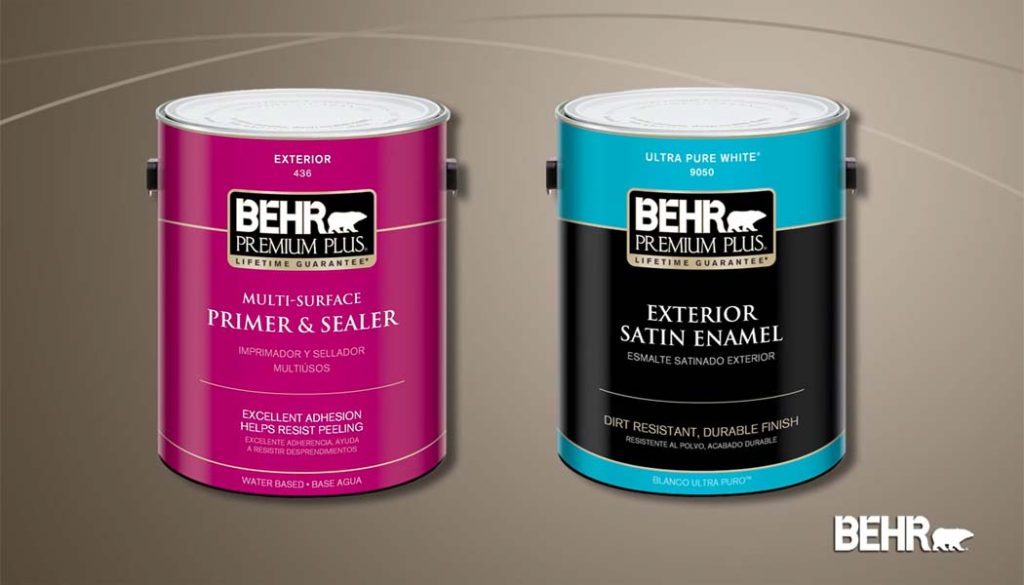
Are you having a contractor paint your home? Are you concerned that the paint will damage your floor? The primer ensures that the paint adheres to the wall or objects and prevents cracking or peeling. But do you need primer with Behr paint?
Image Via Youtube
For porous surface, use primer with Behr paint. Ultra type Behr paint doesn’t require primer. It looks better while using primer. It is better to use primer for damaged surface. Remember, primer will ensure long-lasting and ultimate finish on the surface.
Do You Need Primer with Behr Paint?
It is recommended to use a primer with Behr paint. A primer helps the paint adhere to the surface, prevents cracking, and protects wood surfaces. However, primer is only sometimes necessary. Primers are usually used with oil-based paint, but Behr is acrylic-based.
If your surface is porous, you should use Behr primer. As Behr paint has a low evaporation rate, primer can help it adhere better and prevent water spots. Behr’s official website claims that ultra doesn’t require primer. It may look better than it did when it was new without primer. Paint will ‘lift’ or ‘erode’ without primer.
You don’t need a primer if you don’t have any damage and only plan to paint the walls with Behr paint. Primer will help ensure a good finish if something needs to be repaired or replaced after painting with Behr paint.
When to Use
When Not to Use
1. Patched or repaired walls 2. A damaged wall due to water 3. Porous surface 4. The exterior wall 5. Interior wall with wood trim
1. Wall that was previously painted 2. Surfaces that provide insulation 3. Surface that is non-porous 4. Surfaces that are clean, dry, and solid 5. Fiberglass and MDF
Does Behr Ultra Paint Need Primer?
To adhere correctly to surfaces, ultra paint needs primer. A primer prevents the flaking and peeling of Behr ultra paint and helps it stick firmly. Behr ultra paint also has a low evaporation rate, so primer helps prevent water stains and spots. A primer is also helpful for adhering the tint to the walls.
According to the Behr paint website, there is no requirement for primer when using Behr ultra or duration paints. However, experts recommend priming Behr ultra paint with Behr primer to ensure a long-lasting finish. Additionally, by distributing it evenly, primer prevents drips and disruptions during the application of paint.
For this reason, it is recommended to use primer when painting newly installed walls with Behr ultra paint. However, primer isn’t necessary if the walls have already been painted with another type of paint and you want to update the color.
Is It Okay to Use Behr Paint without Primer?
It is okay to use Behr paint without primer if the surface is not highly porous. Surfaces that are clean, dry, and of good quality may not require primer. These are the walls in living rooms, bedrooms, dining rooms, and hallways. Repainting a color usually requires only one or two coats of Behr paint.
There is no problem with using Behr paint without primer. Since Behr paints have a low evaporation rate, using primer can help Behr paint adhere to surfaces and prevent water spots and stains. If you’re painting a previously painted wall with Behr ultra paint designed for use without primer, it’s usually safe not to use one.
Behr paint does not require priming, but it can improve adhesion to surfaces if you do. Using primers often increases paints’ durability and longevity, but this is only sometimes true with Behr paints. Priming may sometimes decrease their performance since it can make them more challenging to apply and remove.
What Kind of Primer Should You Use with Behr Paint?
There are several types of primers that you can use with Behr paint. Primers such as stain-blocking and latex help increase your paint job’s longevity and durability. Listed below are some primers you can use with Behr paint.
Latex Primer
The latex prime is made from natural rubber latex. Filling in cracks and imperfections on your walls will prevent Behr paint from seeping into these spaces.
Stain-blocking Primer
Stain-blocking primers contain a blend of chemicals that prevent oil, dirt, and other stains from bonding with the surface of your wall. Over time, this will prevent your newly painted walls from staining and fading.
Water Repellent Primer
Water-repellent primers prevent water and other liquids from penetrating the paint. Behr paint perfectly matches water-repellent primer. This primer protects your walls from moisture, insects, and other pests.
Paint Primer
Paint primers aim to help the paint adhere better to the wall surface. In general, it is less effective than other types of primers.
Is Behr’s Paint-primer (all in one) a Good Choice?
Behr’s paint primer (all in one) is a good choice because it is a primer, paint sealer, and water repellent. Paint-primer helps paint adhere better to your walls, which can prevent peeling or fading. Water repellents keep liquids away from painted surfaces, while paint sealants protect your walls against moisture damage.
Primer may improve adhesion, but it is not always the best choice for your walls. Primers with Behr paint may offer better adhesion, but they are not always the best choice.
Behr’s paint-primer might be a good choice if you want an all-inclusive solution that will treat exterior and interior surfaces. In addition to being safe to use, it has been proven to repel water and prevent fading. It also contains UV inhibitors that prevent painted surfaces from yellowing or drying out over time.
Final Thoughts
It is recommended to use a primer with Behr paint, but it is not always necessary. It is essential to use a primer with Behr paint when painting porous surfaces, repairing water damage, or patching. It is best to use a latex or water-repellent primer with Behr. However, a clean, dry, solid, and non-porous surface does not require primer.
If your solar panels are covered in paint, there’s a good chance you can remove them. But before scrubbing, you must understand which chemicals and equipment you’ll need. How to remove paint from solar panels?
Image by schropferoval from Pixabay
To remove paint from solar panels, identify the type of paint used. Next, select a cleaning solution, such as water and vinegar, for removing water-based paint. After that, wet the solar panel with the cleaning solution. Scrub the paint off with a stiff brush.
How to Remove Paint from Solar Panels?
If your solar panel is covered in a protective coating, try to remove it with an acetone-based cleaner. The painter’s glaze or lacquer will flake off, revealing the raw metal underneath. A water-vinegar solution and glass cleaner will work if there is no coating.
Use a non-flammable cleaner when scrubbing, and avoid cutting the panel. There are a few simple steps that you can take to remove any paint from solar panels.
1. Identify What Kind of Pain Is on the Solar Panels
The first step is identifying the type of paint on the solar panels. You must choose the correct cleaning method based on the type of paint. You may have some of these basic paints in your solar panels.
Protective coating
Hydrogen-producing solar paint
Perovskite solar paint
Photovoltaic Paint
Water-based paint
2. Choose the Cleaner Type
Now that you have identified the type of paint on solar panels, it is time to choose the cleaner based on its ability to remove stain.
Water and Vinegar Solution: If the paint is water-based or contains a low oil level, you can clean solar panels with white vinegar and water solution. Furthermore, this solution also removes dirt, moss, and other contaminants from the panels.
Acetone-based Cleaner: Acetone is a typical household cleaner to remove paint from surfaces. You can use acetone-based cleaners if your solar panel has a protective coating. Acetone is not recommended to remove ordinary paint.
Glass Cleaner: A glass cleaner is designed to remove paint from a glass surface. Solar panels are made of glass on the upper surface. Thus, glass cleaners can remove paint from surfaces by breaking down their cleaning solution.
Paint Remover Spray: Paint remover sprays can easily remove paint from solar panels without causing any damage to them. Cleaner of this type contains powerful solvents for removing photovoltaic and perovskite from solar panels.
Hydrogen-producing solar paint, however, is used to generate electricity from water vapor. Therefore, this paint is necessary for producing electricity. There is no way to remove that.
Remove Paint from Solar Panels Using Water and Vinegar
Before applying any cleaning agent to solar panels, wet them with water. You can remove the dried paint residue from solar panels by doing this. Dilute 1-part white vinegar with 2 parts water before cleaning solar panels with this solution.
Use a scrubber such as a brush or sponge if the paint on your solar panel is stubborn or hardened. Gently scrubs the paint away from the panel until all traces are gone. If you clean the solar panels this way, ensure you rinse them thoroughly afterward.
Remove Paint from Solar Panels Using Acetone-Based Cleaners
If your solar panels have any protective coating, you should remove it with acetone. To remove the solar panels from the frame, remove the screws or bolts.
Wear gloves and eye protection when doing this. Acetone can irritate the skin and eyes. Apply acetone to a cloth and wipe off the paint from both sides of each panel. Ensure that the boards are completely dry before reinstalling them.
Remove Paint from Solar Panels with Glass Cleaner
With a glass cleaner, you can remove paint from solar panels without damaging the surface. Spray the glass cleaner on a cloth and wipe off all the paint from both sides of the solar panel. Reinstall them on the frame after they have dried completely.
Remove Paint from Solar Panels Using a Pressure Washer
A pressure washer may be your best option if all other methods fail to remove paint from solar panels. If you use this method, be careful not to damage the surface with a powerful stream of water.
Let the solution soak into the paint for a few minutes after spraying it on a heavily soiled area. You can quickly and easily remove all of the paint with your pressure washer.
Remove Paint from Solar Panels Using a Wire Brush
If all other methods don’t work, you can try cleaning the solar panels with a wire brush. Clean the panel very well with acetone or glass cleaner. Next, use an electric drill to scrub the paint with the wire brush. Wear eye protection and gloves when doing this.
Remove Paint from Solar Panels with a Paint Scrubber
After spraying down a heavily soiled area, wait until the white vinegar and water solution soaks into the paint. Start rubbing away at the panel with your hands after placing the scrubber over its surface. Don’t damage any wiring or delicate solar panels.
Can You Use Vinegar to Clean Solar Panels?
It is possible to clean solar panels with vinegar. Due to vinegar’s powerful acidity, it is a good choice for cleaning solar panels. Acids are effective at breaking down organic materials, which include paint and other types of residues left on solar panels from years of use.
Vinegar is also a natural cleaner that can remove paint from surface without causing damage. Be sure to follow all safety guidelines before using this method. Mix 1 cup of vinegar with 10 cups of water in a spray bottle and use it to clean solar panels. Reinstall the panel on the frame after thoroughly rinsing it off.
How Do You Clean Solar Panels without Damaging Them?
The best way to clean solar panels without damaging them is to avoid using harsh chemicals or scrubbing them. You can clean the surface with a wet vacuum. You can avoid damaging your solar panel by following these tips.
Use a Soft Rag
The first step in cleaning your solar panels is to wet a soft cloth and wring it out. To gently clean the panel’s surface, use this to remove any accumulated dirt or dust.
Do Not Use Acidic Cleaner
Clean your solar panels with gentle, non-acidic cleaners. Using these chemicals can damage your board irreparably and damage the underlying electronics.
Use a Gentle, Non-Abrasive Cleaner
Instead of using a scrubbing cleanser, choose one that is gentle but effective. This method can clean dirt, paint, and other residues from solar panels without causing damage.
Use Plain Water and a Soft Brush
You can also use water and a soft brush to remove paint from solar panels without making any damage. Wet the cloth and apply it to the solar panel’s surface. If dirt or paint remains, gently buff it away in a circular pattern.
Learn How to Remove Paint From Your Solar Panels:
Final Thoughts
To conclude, use a wet vacuum to suck up water and particles from the surface of solar paint, or use a gentle cleaner and brush. Before reinstalling the panel on the frame, thoroughly rinse it off. Make sure you use a soft rag to prevent damage to your solar panel.
Alloy sports bars are undoubtedly a great addition to your vehicle for their effectiveness and extra functionality. However, for its better appearance, you might give a thought to painting it. So, you find yourself asking how to paint alloy sports bar.
Image Via Youtube
Well, its painting is easy but also a bit tricky and sometimes time-consuming as well. You have to ensure proper preparation before starting this DIY project. Also, make sure to apply right primer and metal paint for better result.
Thus, to know in detail read the article till the end and then paint your own alloy sports bar.
Can You Paint Alloy Sports Bar?
Yes, you can certainly paint an alloy sports bar. In fact, the painting will provide it more shininess and a smooth appearance. However, painting the alloy bar might leave you off guard. It takes time and patience once you start with the process.
Moreover, if you are unaware of the fact that your alloy sports bar may require welding or repair then painting before will go in vain.
So, you have to make sure that the sports bar is ready to paint. Again, you also have to ensure that when the painting process starts you apply the right product in the right way.
How to Paint Alloy Sports Bar?
As we already mentioned the task will bring success only when you maintain the right method step by step. Therefore, let’s focus on the materials required and the steps.
Required Materials
Degreasing agent
Warm water
Paint stripper
After wash
Sandpaper
Primer
Paint
Enamel
Firstly, Prepare the Project Surface
Step – 1: Clean the Alloy Sports Bar
This is the first and foremost thing to do when you are up to paint the alloy bar of your vehicle. Proper cleaning of the surface is the key to a successful painting job.
However, to clean the bar, take a bowl and fill it with warm water. Then add a small amount of degreasing cleaner to the water. Now take a cloth or rag and dip it in the solution.
Then wipe the bar with the rag and remove all dust and debris. After wiping, rinse it with water to decline the remaining residue.
After rinsing, wipe the alloy bar again with a clean and dry rag and let it dry properly. Again, since the alloy sports bar is made of metal, there are chances that it may have rust as well. So, to remove the rust, use a wire brush to scrub over the rusty place after pouring the solution.
When the rust entirely comes off, rinse the surface. Make sure you do not leave even a small dot of rust. It will not allow the paint to adhere to the bar surface.
Step – 2: Remove Old Paint
Now, this step is only applicable when your alloy sports bar has old paint on it. In this case, you do not have to apply the previous step.
Nonetheless, to remove old paint, you can simply use a paint stripper. The product comes with an instruction. In most cases, however, you have to pour the product solution over the bar surface and wait.
After a few minutes, scrape off the paint with a scrapper. To deal with the remaining residue, get an after-wash as well. When you are done rinse the alloy sports bar surface with water and let it dry.
Step – 3: Sand the Bar Surface
When you are done cleaning, sanding is needed. You might need both coarse-grit and fine-grit sandpaper for this purpose. Sandpaper with 80 or 120-grit is good for buffing initially. Later, buff with a sandpaper of about 400-grit.
However, sandpaper grit may vary while adopting the process. You can also take 200 or 300-grit sandpaper to avoid deep gouges. Sanding in this step is necessary. It will allow the primer to adhere to the alloy sports bar properly.
Step – 4: Again, Rinse the Surface
After sanding, rinsing the surface is necessary. Again, it is better to clean with a degreaser. First use the solution to rinse the surface and then again, rinse with clean water. Then let the alloy sports bar air-dry.
Secondly, Priming the Bar Surface
Step – 1: Apply Self-etching Paint Primer
Self-etching primer or any other oxidizing primer is considered best for this purpose. These are manufactured especially for painting on metals. The components in the primer resist rust growth and let the paint stick to the surface properly.
However, before priming cover the areas where you do not want to paint with masking tape. Now, to apply the primer make sure you have placed the vehicle in a well-ventilated place. Then start spraying the primer on the surface evenly.
Do not take the spray too close to the surface. Make a distance of at least 20cm while spraying. Also, make an up-and-down or side-to-side movement. Apply about 2 to 3 layers of even coats of the primer.
Make sure each coat dries properly before applying another coat. Also, after spraying the primer make sure it cures completely.
Lastly, Apply the Paint
Step – 1: Apply Metal Paint
Since you have already sprayed primer, now you can apply any type of paint. However, metal paint is undoubtedly a great option to paint the alloy sports bar of your vehicle.
You can both spray paint or brush on. Just select your favorite color. Whatever method you apply make sure to apply an even coat. For brushing the paint, you can take a paintbrush with synthetic fiber bristles.
Step – 2: Let the Paint Dry
Let the paint dry to touch in between each coat. Generally, 2 to 3 coats of paint are enough. It might take 10 to 15 minutes to achieve dry to touch. When you are done, let the paint cure as well. However, curing might take one to three days.
Step – 3: Apply Enamel
Enamel comes in wider range of finishes including glossy, matte, satin, and others. So, according to your choice, you can select any finish you want. However, a glossy finish makes the defects look more clearly. Yet, if your alloy sports bar does not have any defects then the glossy finish will make it look nice.
Just spray or brush on over the bar surface the way you did while applying primer and paint. Then let the enamel cure as well. When it cures, voila! Your job is done.
How Do You Spray Paint Alloy Sports Bar?
You can spray paint the alloy sports bar. In fact, it is easier this way. If you apply this method, make sure to shake the spray can first for about one minute. It will allow the components of the paint to incorporate with each other properly.
After shaking the can, it is ready for application. While spraying, always maintain a distance of about 8 inches or 20 cm. Also, try to maintain a certain direction while doing it.
What Kind of Paint Do You Use on an Alloy Bar?
You can use different types of paint to paint an alloy bar. Acrylic or latex paint offers a great finish in such cases. However, professionals suggest using metallic paint to bring the best appearance to the sports bar.
Tips for Successful Alloy Sports Bar Painting
Put on goggles, dust mask, and gloves first.
Perform the job in a well-ventilated place.
Do not hurry the process.
Let the paint dry to touch and cure properly.
When you are done with the job, remove the masking tapes.
Final Thoughts
Now that you know the process to paint the alloy sports bar, you can apply the method. The key is that you have to be a bit careful.
Since painting the bar is easy, anyone can do this with their desired color. So, by choosing the right paint and process, make your alloy bar look amazing!
Air cooled engines are surely one of the best inventions to avoid coolant leakage problems. With fewer parts, the machine is lightweight and comes with several advantages. Hence, for having a metal part, you might ask, can you paint an air cooled engine?
Image by Paul Brennan from Pixabay
Well, painting an air cooled engine to some extent helps improve the cooling efficiency of the engine. However, you need to be selective while choosing the color. The wrong selection of paint and painting method might lead you to a failed situation.
Thus, to know everything regarding the topic, bear with us till the end and enlighten yourself.
Can You Paint an Air Cooled Engine?
As we have already mentioned, painting air-cooled engine is okay. In fact, in some cases, it is proven beneficial for engine efficiency as well. However, professionals suggest using white paint on the air-cooled engine or its mounts, or any other parts.
Nonetheless, you might also think of painting black. But it is the least desirable color to paint your air-cooled engine since it has some other effects.
It is theoretically proved that black paint can emit infrared energy in a better way. Moreover, black paint can absorb energy in a better way. Therefore, good absorbers are also considered good emitters.
When you paint the engine black, it will emit more radiant energy per unit of time compared to other paint colors like white or golden.
Hence, by increasing the amount of total emitted radiant energy through the hot engine, a black painted engine can retain its coolness more than other non-black ones.
However, the color of the paint hardly affects the heat emission of the engine. Rather it is the paint material and its components that are involved in the process of increasing radiant.
Again, there may be some other effects on the engine of the paint. Since the paint is a diffuser when the air-cooled engine fins are painted with it, they are not uncovered to radiation. Therefore, when both the paint and metal are heated, there occurs an economic loss.
Yet, apart from all these, paint is still a better option than air to transfer heat from the engine. So, when it is to this competition, surely, paint wins. So, yes, you can paint an air-cooled engine.
Painting an air cooled engine is easy when you know the right ways and the right required materials. For your convenience, we are describing the process step by step.
Step – 1: Remove the Air-cooled Engine
Painting becomes easier when you remove the engine part first. You can get enough space to do the task. But make it apart only when you know how to put it back as well.
Nonetheless, painting is also possible without really removing the air-cooled engine. You just have to be extra careful with that process. Thus, if you are not a mechanic expert then do not think of removing it.
Step – 2: Set Your Engine Outside
If you have already removed the air-cooled engine then keep it on a stool outside. Or if you haven’t separated the part away, then move the vehicle outside. You must have to ensure proper ventilation since the paints and primers can be toxic at times.
Moreover, they will need proper air to dry to touch, and cure. Again, if you are not removing the engine then you might not have to paint the bottom part of the engine. Since nobody is going to see it, so it is okay.
Step – 3: Clean the Air-cooled Engine
The next task is to clean the engine properly. There must be built-up oil and surface grime on the engine that you need to clean first. You can use a cloth or brush for cleaning purposes. Better you go for a stiff-bristled brush to scrub off the grease and oil from the engine surface properly.
Wipe the engine around with a thick and clean cloth so that no exposed portion remains grubby. You may need to wipe the engine 4 to 5 times until the surface really gets smooth enough for the paint to adhere.
However, to deep clean the engine, you can also use a degreaser. Do not leave any nuts, bolts, knobs, or valves to clean up as well.
Nonetheless, after using the degreaser make sure to clean up the residue as well by rinsing it properly. Then wipe the excess water using a dry rag. Also, leave the engine for one hour to let it dry.
Step – 4: Mask the Important Parts
Since you are not removing the engine, you need to cover other parts and components of the vehicle like ports, nuts, and all. You can use masking tape or painter’s tape for this purpose.
However, to cover larger individuals you can use trash bags or plastic drop cloths. Covering stuff may take some time. But the step is necessary since you do not want to spill paint on unwanted parts of your vehicle.
Step – 5: Prime the Air-cooled Engine
Now it is time to prime the engine. You must use a vehicle primer that is heat-resistant. It will not allow the paint to melt down while overheating.
Just spray the primer making back-and-forth strokes on the engine surface. Obviously, keep a distance of about 20 to 30 cm while spraying. Otherwise, there will be chances of dripping the primer.
However, priming is important if you are up to painting a sheet metal. Also, it allows the paint components to adhere to the engine surface.
Step – 6: Let the Primer Dry
When you are done applying the primer, let it dry. It may take a few hours like 1 to 2 hours to dry. Without letting the primer cure properly, you cannot apply the paint.
Again, you can apply additional coats of primer if you find an uneven surface.
Step – 7: Paint the Air-cooled Engine
When the primer cures, it is time to apply the paint. Use engine enamel for painting. These are good and heat-resistant. Hold the spray nozzle and apply the same way you did for applying primer.
Keep a certain distance and apply an even layer. After covering the parts uniformly, let the paint rest for one day before applying additional coats.
Nonetheless, this way you can apply 2 to 3 coats of paint. Just let the paint dry to touch and then let it cure.
Step – 8: Remove All Masking Tapes
When you are done painting, consider your task completed. Now, uncover all the parts you have covered before.
Again, if you have separated the air-cooled engine from your vehicle then reassemble it to the vehicle properly. Now, you are done!
Well, painting an engine hardly brings such differences. It is barely responsible to change the radiant frost of your engine. Rather this fact is more likely to be dependent on the fact that the vehicle is simple or advanced.
For your information, less than about 5 percent of energy is absorbed by the air that is generated from engine radiation.
Is Painting an Air Cooled Engine Good?
Yes, and to some extent, it is beneficial as well. But you have to select the right paint. Typically, a glossy and solid finish is suggested to make the painting last longer. The paint has to be heat-resistant. Hence, professionals suggest enamel. Moreover, it comes with extreme air-conditioning properties.
Learn How to Paint an Air Cooled Engine:
Final Thoughts
Now that you know you can paint an air-cooled engine, get started with yours. Painting the engine is easy. It also offers some facilities and looks good as well.
However, make sure to use a spray gun rather than a brush to paint the engine. So, paint your air-cooled engine to get better performance and a better look.
Puffy paints can undoubtedly add a great artistic vibe to your projects. You can create any texture or figures using the paint. Moreover, you can use the paint on any surface until the question clicks in your mind that is, can you use puffy paint on your face?
Well, puffy paints are surely a creative medium but certainly not usable on your face. Though the paint is non-toxic yet not suitable for use on the face.
However, puffy paint is versatile and you need to learn more about this. So, keep up with us till the end to know more about it.
Basics of Puffy Paint
When the topic is puffy paint, you can already imagine how fun it is to use it in arts and crafts. The paint is especially famous among kids and can easily be made at home.
The DIY of this paint is simple and only requires two ingredients of equal ratio that are shaving cream and glue. However, to bring your desired color you can add food color to it.
Nonetheless, you can also buy the paint in the market. It comes with round, inflated, small plastic balls. They are more like acrylic paint especially when you squirt it out of the tube or bottle.
But when the puffy paint dries you will notice differences. It will puff up creating a cloud-like structure when it dries. Featuring with a thin tip, the paint is great for making outlines and even writing words.
Surprisingly, the paint is suitable for working on any surface such as glass, wood, fabric, paper, canvas, and what not! Adding details to any kind of painting like abstract, matte, or portrait, puff paints offer different textures.
The paint is also likely to stay for about 5 days to a week. So, puffy paints are convincingly durable.
Can You Use Puffy Paint on Your Face?
As we have already said, you can use puffy paint on almost any surfaces you like. Even on fabric. On fabric, the paint will act permanent. But it is never suggested to use puffy paint on your face.
This paint works better on a flat surface. If you apply the paint to your face, it will create a make-up effect. Eventually, it will make your face puffier. But there are some side effects that are given below.
Irritation in Face
We have mentioned earlier that puffy paints are similar to acrylic paints. Most of the time they are made of acrylic resin. Thus, you just cannot apply them directly on your face. Any kind of paint contains several chemical components in them.
Thus, when you directly apply them on the skin, it might cause irritation. Again, if your skin is sensitive then the irritation might get severe.
Allergies and Other Health Issues
Generally, it is considered that water-based paints are non-toxic. It is to some extent true only when you are not applying them on the surface of your skin. For skin contact, puffy paints are not safe at all.
Also, the paint can cause allergies to your face. You might also feel a burning sensation. Again, if accidentally the paint goes into your eyes, the pain will be boundless.
Contains Formaldehyde
Commercial puffy paint might also include formaldehyde in it. This component is very common and found in almost any type of paint.
Still, they are labeled as non-toxic since they are never meant for application on the face. So, once you apply the paint to your face, the skin will absorb and inhale the formaldehyde. Consequently, it will cause serious problems to your health.
Gets Harden
Once you apply puffy paint on your face it becomes hardened with time. Eventually, it affects the elasticity of your face skin, creating a conflict. Sometimes, the paint might clog the pores in your face causing irritation or a burning sensation.
Later, you might also face problems cleaning the paint properly. Though, unlike other acrylic or latex paint, puffy paint is not stubborn. Yet, the ones that you get from the market can be stubborn at times.
So, even if you have applied it on your face make sure that you are removing it when it is still wet. Do not let the paint dry on your face completely. However, even if it gets dry, you can help yourself by using the washer and then dryer cycles.
Therefore, be it any type of paint, you should not apply them on your face. For being the paint of children, puffy paint might seem non-toxic. Yet, due to its lower toxicity, no one suggests them apply on the face.
Moreover, do not even think of applying oil-based paint on your face. Otherwise, removing it will be way tougher and the side effect will be beyond endurance.
Safe Paint to Use on Face
Rather than using other kinds of paints, it is always better to use the paint on your face that is specifically made for painting your face. These paints are water-based and best for face painting. Moreover, they are easy to remove after applying compared to any other type of paint.
Also, you will not feel any irritation after using these face paintings.
Can You Put Puffy Paint on Skin?
Well, you can put puffy paint on your skin but not on your face. However, a direct application might not be very wise to adopt. But puffy paints are less toxic. Then again, the initial reason you should not use any paint on your skin is its toxicity.
Puffy paint also contains toxic ingredients. Moreover, its acrylic-based thick coating will make our skin feel heavy. Also, your movement will be limited. However, the ingredients and the level of toxicity actually vary from brand to brand.
Again, in most cases, puffy paints are water-based. But some brands also offer versions of oil and even alcohol-based.
So, if you apply oil or alcohol-based puffy paint, then it will take longer to dry. But once it dries, your removing becomes tougher from the skin. Hence, no one suggests applying oil or alcohol-based paint on the skin directly.
Can You Get Puffy Paint in Your Eyes?
Yes, only when it is an accidental case. Otherwise, no one will ever want to get puffy paint in their eyes.
Nonetheless, for being less toxic, primarily the paint will not be that hurtful. But if you allow the paint to stay for some time and then surely you will not feel good especially when it gets in your eyes.
Again, for most people, it will not cause that much harm. But people with sensitive organs and skin will feel the pain.
Is Puffy Paint Safe for Babies?
As we said, puffy paints can be elements of makeup products. But that too within a certain age. Of course, not any type of paint is good for babies be it even the puffy paint that is less toxic.
However, puffy paints are best for adults aged 18 or more. They can be creative with using the paint. However, 7- or 8-years old children can also be creative with the paint.
Again, some puffy paint comes with a label saying what age for it is to use. Hence, you can choose according to your age and choice.
What Can You Use Puffy Paint On?
You can use puffy paint on any plain surface. Be it a woody or metal surface. You can also apply it on glass, plastic or of course, canvas.
On anything, the paint will offer an abstract shape and nice texture. However, you should not apply the paint on fruit or vegetable surface. A flat surface is the best for this paint.
Learn How to Make Puffy Paint at Home:
Final Thoughts
So now that you know if you can use puffy paint on your face or not, you know your decision. Your face is undoubtedly a sensitive and delicate area. Moreover, you cannot risk your eyes. Hence, you better not use puffy paint on your face when it is not meant for face painting.
Thus, to make it more effective you can use paints specially manufactured for face painting. So, use your puffy paint on something that will be more creative!
DIY paint jobs on your car are fun until you find yourself spilling the paint on the vinyl seats. Yes, there are such potentials. And when it occurs the next moment, you might ask yourself how to remove paint from vinyl seats!
Image by Mikes-Photography from Pixabay
Well, accidental drops of paint are a common occurrence. But if you do not take prompt action then the paint might never come off. However, there are some proper ways to undo this incident. You can adapt the methods according to the paint type. Normally you can use warm water or any solution to remove the paint. But you have to ensure the proper methods.
Thus, to know in detail, bear with us till the end and enlighten yourself.
Well, it is needless to mention that there are several types of paints available in the market. And each type has its own properties and drying formulas. Hence, while working with the paint, if you spill any paint drops, some paint will dry fast and you will not be able to peel them properly.
Nonetheless, yet, there is a general method for removing all paint types be it even the stubborn ones from your vinyl seats.
Steps to Take when the Paint Is Wet
Sometimes the paint on the vinyl seat can be wet, in that case, follow the below method.
Step – 1: Surround the Paint Splash
This is the first and foremost thing to do before you get started with the process. Since the paint is wet there are chances that while wiping it will spread on the entire seat. Again, if it is a large spillage or paint drops then the chance becomes double.
Hence, it is important to surround the spills or drops of paint with a rag so that while wiping they do not spread.
Step – 2: Take a Dry Paper Towel and Wipe
When the paint is still wet, taking up the stain is easier. Hence, a normal dry paper towel can do the job simply.
Take the towel and wipe over the splash of paint or spillage. Keep wiping until the paint comes off. But also make sure that you are wiping gently over the vinyl seat.
However, people also use a soft cloth instead of paper towels for this purpose.
Step – 3: Deal with the Rest of the Paint
After wiping with a dry paper towel, you will notice there are still some stains of the paint. Now, it is time to deal with them.
So, for this purpose, you will need a damp paper towel instead of a dry one. Wipe the rest of the stain until it entirely comes out.
Step – 4: Clean the Vinyl Seat
When you are done removing paint from vinyl seats, you have to clean the entire seat as well. Take a damp rag or cloth and wipe away the entire seat.
You can also take a little amounts of dish soap to clean the seat properly. Paint penetration is normal in such cases. So, dish soap in little amount will clean off the penetrated stain as well. After using dish soap, rinse with clean water.
Step – 5: Dry the Vinyl Seat
When you are done cleaning the seats with a damp rag and rinsing water, dry the vinyl seat as soon as possible too. Take a dry and clean cloth and wipe the water from the seats.
Leave the seats air conditioned and eventually they will dry soon.
Steps to Take when the Paint is Stubborn
You should also learn the technique to remove stubborn paint from vinyl seat.
Step – 1: Place a Soggy Rag
If the paint is fast-drying then the paint blobs on vinyl seats might dry faster and become stubborn. Hence, removing the blobs becomes a tough job. However, still, the spill is removable.
So, to remove the stain, place a soggy rag or soaked cloth over the stain. Leave the rag for about 15 to 20 minutes. It allows the water of the soaked rag to penetrate into the edges of the dry and stubborn stain and react with it.
Eventually, the water will loosen the bonding between the paint and the vinyl seat.
Step – 2: Scrape with a Plastic Spatula
Take a plastic spatula and insert it under the paint edge. Be careful while doing this process otherwise, you may end up hurting the vinyl seat of your vehicle.
Now, start scrapping gently over the dry paint. If necessary, add some water from time to time to make the process more effective. It will eventually loosen the paint components and the stain will come off.
Step – 3: Deal with Residue
After removing the stain, you also have to remove the remaining residue. To deal with it, take a small amount of dish soap and also a plastic scouring pad and start rubbing. Be gentle with the process.
However, if nothing works, then you can also use a vinyl eraser available in the market. It will do the job smoothly and easily.
Step – 4: Clean and Dry the Vinyl Seats
When you see the stain has come off, rinse the seats with water or wipe with a damp cloth first. Then wipe the water with a dry cloth. After some time, the seats will dry properly.
You have to consider two facts while getting paint off vinyl leather seats. One is of course the type of paint that has fallen over the vinyl seat and the other is the grade of the leather of the seat. Since paint has chemicals in it so it can degrade the leather quality.
Sometimes even using water on leather can cause damage. Thus, removing paint in such cases has to be a careful process. So, keep up with the points below to deal with this.
In the case of wet paint, you have to act as soon as possible. Once the paint gets dry, removing the paint will be considerably tougher. So, wipe the paint with a damp kitchen towel. When the paint comes off, use a dry towel to remove the water by patting the surface.
Again, you can also use a flat tool like a knife palette or a razor blade. But you must be careful with these tools since these are sharp objects and might cut through the leather. However, you can also use the edge of a credit card to scrape the paint. Just lift the paint using the edge of the tools and then wipe with a kitchen towel.
However, if the paint is water-based then you can simply remove it by rubbing a wet rag. Nonetheless, remove the excess water from the rag before rubbing it since dripping water damages the leather.
To deal with the oil-based or way stubborn stains on the leather seat, you can also use olive oil, rubbing alcohol, leather conditioner, or even nail polish remover.
How Can I Get Paint Off My Vinyl Car Seat?
Well, the process is almost similar to what we have already mentioned above. Just make sure you take immediate action when the paint is still wet.
Wet paint, be it oil-based or water-based is easily removable compared to dry paint. So, wipe the stain with a damp rag quickly. Nonetheless, if the paint on your vinyl car seat becomes dry then scrape it with a spatula or with the other side of a sharp spatula.
How to Remove Latex Paint from Vinyl Seats?
Latex paint is water-based. Hence, unlike oil-based ones, removing its stain is easy. However, you might have to adopt several methods of removing the paint depending on the period of staying in the seat and the spillage length.
First of all, scrape off the extra paint using any blunt or metal objects.
Then wipe the stain with a damp rag.
Again, soak a rag or sponge in a solution of cold water and dish soap. Then twist the sponge to remove extra water.
Then rub the sponge over the stain until the latex paint comes off. Lastly, clean with a dry rag.
However, for stubborn latex stains, you can apply hairspray first and let it sit for about 20 minutes. Then rub it with a rag and the stain will come off.
You can also use a polish remover in the same way. Polish remover contains acetone in it. Acetone removes latex stains very well.
Moreover, you can also use a spray lubricant available in the market to get rid of the stain.
Also, a solution of water and white vinegar can do it properly.
How to Remove Acrylic Paint from Vinyl Seats?
Acrylic paints are also water-based. Hence, you can simply follow the previous process. Acrylic paints will easily come off the vinyl seats.
Even for stubborn acrylic stains, it is easy to wipe off the stain. You can use vegetable oil or denatured alcohol with a cotton ball.
How to Remove Water-based Paints from Vinyl Seat?
As we already said, the process is very simple. However, there are several methods.
First of all, wipe the spilled spot with a dry towel. Wet paint will come off easily. If not then wipe with a damp towel. In the case of a larger spill, you might have to wipe for several times with a damp paper towel.
Again, soak a cloth with rubbing alcohol or a solution of soap and water. Then rub the cloth over the stain. If necessary, repeat the process until the stain comes off properly.
When you are done, pat the place of the vinyl seat with a clean cloth and let it dry.
How to Remove Oil-based Paints from Vinyl Seat?
Removing oil-based paints from vinyl seats takes a little bit more effort. Wiping with rubbing alcohol helps a bit to remove the paint. But still, there might be some stains to deal with. In such a situation, you can use steel wool and liquid wax. Liquid wax is available in any nearby car shops or supermarkets.
However, make sure you buy superfine steel wool from grocery stores. When you get the tool, dip it into the liquid wax and start scrubbing gently. And when the stain is gone, clean the area the way we have mentioned earlier.
Again, if the oil stain is utterly stubborn, you can also use a commercial solvent named PEC-12. This solvent is a bit toxic yet highly effective. So, you have to ensure protective gear before applying it. However, the application is the same. You just have to be careful. Make sure you apply it only to the stained area.
Learn How to Remove Paint from Your Car Vinyl Seats:
Final Thoughts
Now that you know how to remove paint from vinyl seats, you should know the paint type first. Since there are several ways of removing the stain, you should first check the intensity of the stain. Do not go for extreme methods at first.
Also, try to remove the stain as soon as possible before it dries. So, using your common sense is also necessary for this task.